voicefixer
fix bugs
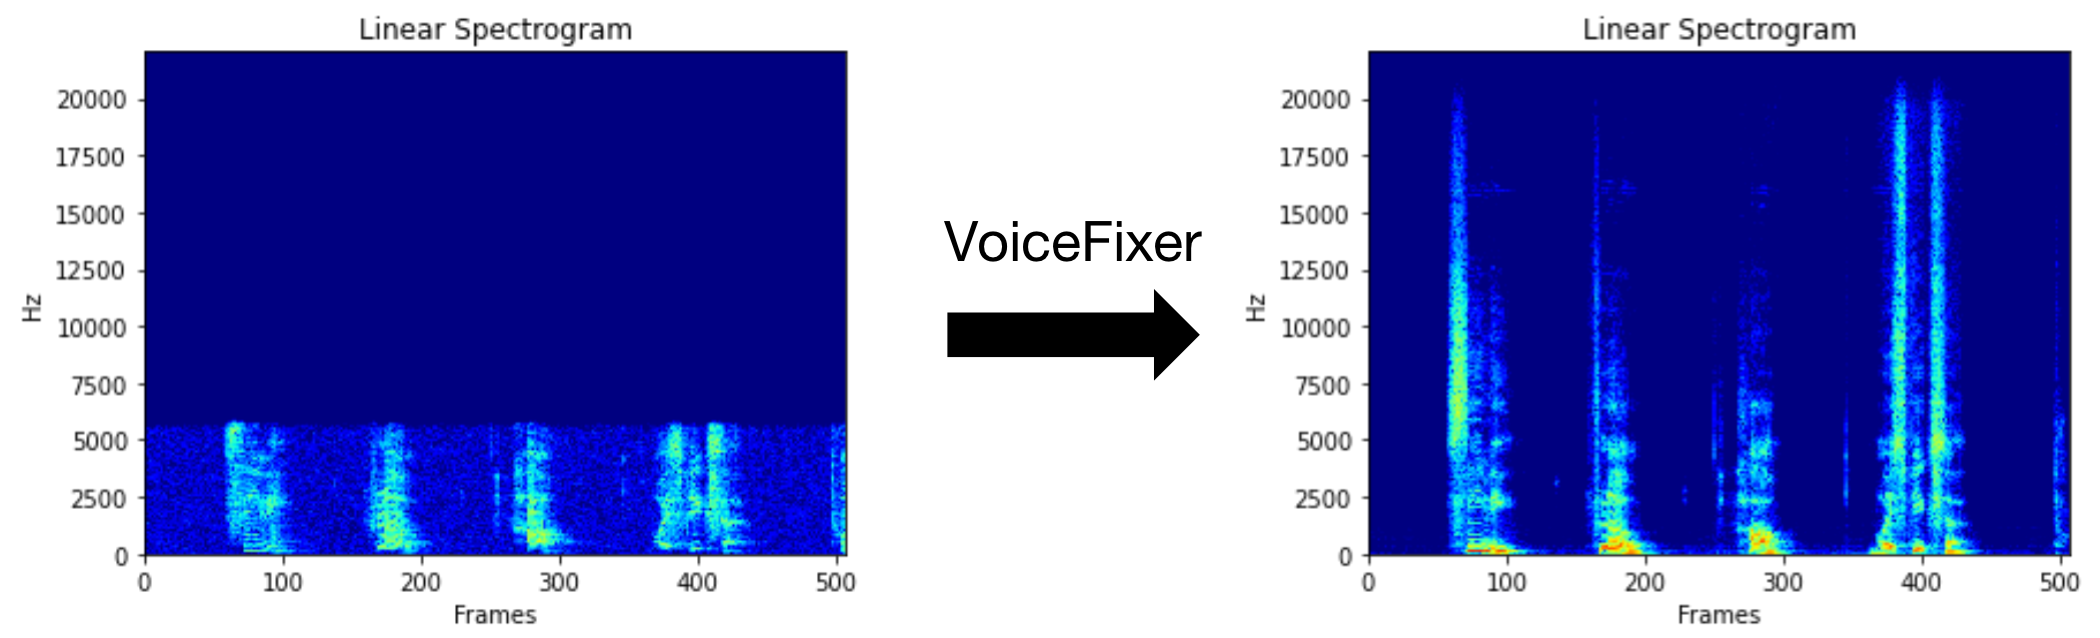
VoiceFixer的目标是恢复人类言论,无论其降级多么严重。它可以在一个模型中处理噪声,重生,低分辨率(2kHz〜44.1kHz)和剪辑(0.1-1.0阈值)效果。
此软件包提供:
 @misc { liu2021voicefixer ,
     title = { VoiceFixer: Toward General Speech Restoration With Neural Vocoder } ,
     author = { Haohe Liu and Qiuqiang Kong and Qiao Tian and Yan Zhao and DeLiang Wang and Chuanzeng Huang and Yuxuan Wang } ,
     year = { 2021 } ,
     eprint = { 2109.13731 } ,
     archivePrefix = { arXiv } ,
     primaryClass = { cs.SD }
}请访问演示页面以查看VoiceFixer可以做什么。
| 模式 | 描述 |
|---|---|
0 | 原始型号(默认建议) |
1 | 添加预处理模块(删除较高的频率) |
2 | 火车模式(有时可能在严重退化的真实语音上起作用) |
all | 运行所有模式 - 将为每个支持模式输出1 WAV文件。 |
首先,通过pip安装语音装置:
pip install git+https://github.com/haoheliu/voicefixer.git处理文件:
 # Specify the input .wav file. Output file is outfile.wav.
voicefixer --infile test/utterance/original/original.wav
# Or specify a output path
voicefixer --infile test/utterance/original/original.wav --outfile test/utterance/original/original_processed.wav
文件夹中的处理文件:
voicefixer --infolder /path/to/input --outfolder /path/to/output更改模式(默认模式为0):
voicefixer --infile /path/to/input.wav --outfile /path/to/output.wav --mode 1运行所有模式:
 # output file saved to `/path/to/output-modeX.wav`.
voicefixer --infile /path/to/input.wav --outfile /path/to/output.wav --mode all
仅在没有任何实际处理的情况下预加载权重:
voicefixer --weight_prepare有关更多助手信息,请运行:
voicefixer -hYouTube上的演示(感谢@justin John)
通过PIP安装VoiceFixer:
pip install voicefixer您可以通过运行网站在桌面上测试音频样本(由简化提供动力)
git clone https://github.com/haoheliu/voicefixer.git
cd voicefixer # Run streamlit
streamlit run test/streamlit.py如果您第一次运行:网页可能会留空几分钟以下载模型。您可以检查终端以下载进展。
您可以将我们提供的低质量语音文件用于测试运行。处理后的页面看起来如下。

首先,通过pip安装语音装置:
pip install voicefixer然后运行以下脚本进行测试运行:
git clone https://github.com/haoheliu/voicefixer.git ; cd voicefixer
python3 test/test.py # test script
我们希望它将为您提供以下输出:
Initializing VoiceFixer...
Test voicefixer mode 0, Pass
Test voicefixer mode 1, Pass
Test voicefixer mode 2, Pass
Initializing 44.1kHz speech vocoder...
Test vocoder using groundtruth mel spectrogram...
Passtest/test.py主要包含以下两个API的测试:
...

# TEST VOICEFIXER
## Initialize a voicefixer
print ( "Initializing VoiceFixer..." )
voicefixer = VoiceFixer ()
# Mode 0: Original Model (suggested by default)
# Mode 1: Add preprocessing module (remove higher frequency)
# Mode 2: Train mode (might work sometimes on seriously degraded real speech)
for mode in [ 0 , 1 , 2 ]:
    print ( "Testing mode" , mode )
    voicefixer . restore ( input = os . path . join ( git_root , "test/utterance/original/original.flac" ), # low quality .wav/.flac file
                       output = os . path . join ( git_root , "test/utterance/output/output_mode_" + str ( mode ) + ".flac" ), # save file path
                       cuda = False , # GPU acceleration
                       mode = mode )
    if ( mode != 2 ):
        check ( "output_mode_" + str ( mode ) + ".flac" )
    print ( "Pass" )

# TEST VOCODER
## Initialize a vocoder
print ( "Initializing 44.1kHz speech vocoder..." )
vocoder = Vocoder ( sample_rate = 44100 )

### read wave (fpath) -> mel spectrogram -> vocoder -> wave -> save wave (out_path)
print ( "Test vocoder using groundtruth mel spectrogram..." )
vocoder . oracle ( fpath = os . path . join ( git_root , "test/utterance/original/p360_001_mic1.flac" ),
               out_path = os . path . join ( git_root , "test/utterance/output/oracle.flac" ),
               cuda = False ) # GPU acceleration

...您可以克隆此仓库,并尝试在测试文件夹中运行test.py。
目前,尚未发布Docker映像,需要在本地构建,但是这样您就可以确保使用所有预期的配置运行它。生成的图像大小约为10GB,这主要是由于独立消耗9.8GB的依赖项。
但是,包含
voicefixer的层是最后一个添加的层,如果您更改源相对较小(一次〜200MB,随着重量在图像构建中得到刷新),则进行任何重建。
可以在此处查看Dockerfile 。
克隆仓库后:
 # To build the image
cd voicefixer
docker build -t voicefixer:cpu .

# To run the image
docker run --rm -v " $( pwd ) /data:/opt/voicefixer/data " voicefixer:cpu < all_other_cli_args_here >

# # Example: docker run --rm -v "$(pwd)/data:/opt/voicefixer/data" voicefixer:cpu --infile data/my-input.wav --outfile data/my-output.mode-all.wav --mode all # To build the image
cd voicefixer
./docker-build-local.sh
# To run the image
./run.sh < all_other_cli_args_here >
# # Example: ./run.sh --infile data/my-input.wav --outfile data/my-output.mode-all.wav --mode all首先,您需要使用模型编写以下助手功能。类似于此仓库中的助手功能:https://github.com/haoheliu/voicefixer/blob/main/main/voicefixer/vocoder/vocoder/base.py#l35
    def convert_mel_to_wav(mel):
        " " "
        :param non normalized mel spectrogram: [batchsize, 1, t-steps, n_mel]
        :return: [batchsize, 1, samples]
        " " "
return wav然后将此函数传递给VoiceFixer.restore ,例如:
 voicefixer.restore(input="", # input wav file path
                   output="", # output wav file path
                   cuda=False, # whether to use gpu acceleration
                   mode = 0,
                   your_vocoder_func = convert_mel_to_wav)
笔记:
请参阅ChangElog.md。


