RTL to GDSII
1.0.0
OpenRoad는 반도체 디지털 디자인을위한 주요 오픈 소스, 기초 응용 프로그램입니다. OpenRoad Flow는 빠른 설계 탐사 및 물리적 설계 구현을 위해 RTL-GDSII에서 24 시간의 전환 할 자율적이고 인간이없는 루프 (NHIL) 흐름을 제공합니다.
  Title:
  RTL-GDSII flow Using OpenROAD
   ____________________________________________________
  |  ->Synthesis                                       |
  |      : Inputs  [RTL, SDC, .lib, .lef]              |
  |      : Logic Synthesis  (Yosys)                    |
  |      : Output files  [Netlist, SDC]                |
  |  ->Floorplan                                       |
  |      : Floorplan Initialization                    |
  |      : IO placement  (random)                      |
  |      : Timing-driven mixed-size placement          |
  |      : Macro placement                             |
  |      : Tapcell and welltie insertion               |
  |      : PDN generation                              |
  |  ->Placement                                       |
  |      : Global placement without placed IOs         |
  |      : IO placement  (optimized)                   |
  |      : Global placement with placed IOs            |
  |      : Resizing and buffering                      |
  |      : Detailed placement                          |
  |  ->CTS : Clock Tree Synthesis                      |
  |      : Timing optimization                         |
  |      : Filler cell insertion                       |
  |  ->Routing                                         |
  |      : Global Routing                              |
  |      : Detailed Routing                            |
  |  ->Finishing                                       |
  |      : Metal Fill insertion                        |
  |      : Signoff timing report                       |
  |      : Generate GDSII  (KLayout)                   |
  |      : DRC/LVS check (KLayout)                     |
  |____________________________________________________|
 sudo apt-get update
sudo apt - get update
sudo apt - get install gperf
sudo apt - get install autoconf
sudo apt - get install gcc g ++
sudo apt - get install flex
sudo apt - get install bison
 wget https://github.com/steveicarus/iverilog/archive/refs/tags/v12_0.tar.gz

tar -xvzf v12_0.tar.gz

cd iverilog-12_0
sh autoconf.sh
./configure

sudo make
sudo make install
설치 테스트 : 터미널에 'IVERILOG'를 쓰고 Enter Enter Enter를 누르십시오. 성공적인 설치 가이 출력을 표시해야합니다. Iverilog : 소스 파일이없고 -c, -y 등을 제안합니다.
sudo apt install gtkwave
GTKWave의 예제를 사용하여 신호가 어떻게 표시되는지 볼 것입니다.
 sudo apt update
sudo apt-get install zlib1g-dev
git clone https://git.savannah.gnu.org/git/libiconv.git

sudo apt-get install tcl8.6
sudo apt-get install tcl8.6-dev
sudo apt-get install tk8.6
sudo apt-get install tk8.6-dev
sudo apt-get install doxygen

git clone https://github.com/chiphackers/covered
cd covered
./configure
sudo make
sudo make install
'tcl interp'가 'result'오류라는 멤버가없는 경우 :
 cd covered
cd src
gedit report.c
report.c 파일에는 #include 명령 목록이 표시됩니다. #include <tcl.h>를 찾은 다음 #include <tcl.h> 전에 다음 명령 '#define use_interp_result 1'을 추가하십시오.
귀하의 보고서는 다음과 같습니다.
 #ifdef HAVE TCLTK
#define USE_INTERP_RESULT 1
#include <tcl.h>
report.c 파일을 저장합니다. MAKE 명령을 다시 실행하고 위와 같이 설치 프로세스를 진행하십시오.
소스 Verilog 코드 :
// 4 bit synchronous counter
module Mycounter (CLK, RST , OUT );
 input CLK, RST;
 output [3:0] OUT ;
 reg [3:0] OUT;

 always @( posedge CLK )
 begin
 if (RST == 1'b1 )
    OUT <= 4'b0000 ;
 else
    OUT <=OUT+1;
 end
endmodule
Testbench Verilog 코드 :
// Testbench for a 4 bit synchronous counter
module Testbench ();
reg Clock , Reset ;
wire [3:0] Count ;

// instantiate the DUV and make connections
Mycounter I1(.CLK ( Clock ),. RST ( Reset ),.OUT( Count ) );

// initialize the Testbench
initial begin
$display (" Starting simulation ...");
Clock = 1'b0 ;
Reset = 1'b1 ; // reset the counter at t=0
# 100 Reset = 1'b0 ; // remove reset at t=100
# 2000 Reset = 1'b1 ; // remove reset at t= 2100
# 400 $finish ; // end the simulation after t= 2500
end

// generate stimulus (in this case clock signal )
always #50 Clock =∼Clock ;// clock period =100

// monitor the response and save it in a file

initial begin
$dumpfile ("count.vcd"); // specifies the VCD file
$dumpvars ; // dump all the variables
$monitor ("%d ,%b ,%b ,%d", $time , Clock , Reset , Count );
 end
endmodule
• Linux 배포를 시작하고 디렉토리를 만들어 $ mkdir icarus_codes
여기서 Icarus 코드는 디렉토리의 이름입니다.
• 디렉토리를 Icarus 코드로 변경합니다. 시뮬레이션의 경우 구현 된 기능에 대한 Verilog 코드와 .V 형식의 테스트 벤치가 필요합니다. 작업 디렉토리에 포함하십시오. 내 Verilog 코드가 Mycounter.v 라고했고 TestBench가 Testbench.v 라고 가정 해 봅시다. 시뮬레이션하려면 :
 $ iverilog -o Mycounter Mycounter.v Testbench.v
$ vvp Mycounter
테스트 벤치에서 count.vcd로 명명 된 덤프 파일이 생성되었으며 터미널의 출력도 볼 수 있습니다. GTKWave에서 출력을 볼 수도 있습니다
$ gtkwave count.vcd 이 명령은 gtkwave 분석기 응용 프로그램을 시작합니다. 왼쪽 패널에서 TestBench를 확장하고 하위 폴더를 클릭하십시오. 입력 클록 표시, 재설정 및 출력 파형 [3 : 0]을 표시하도록 확장됩니다. 신호 패널로 드래그하고 결과를 분석하십시오.
테스트 벤치에서 테스트 한 RTL 설계의 백분율을 추정하려면 커버링 베리 노그 코드 커버리지 분석기 도구가 사용됩니다. • 다음 명령을 실행하여 동일한 디렉토리, 즉 ICARUS 코드에서 코드 적용 범위 보고서를 생성합니다.
$ covered score -t Testbench -v Testbench.v -v Mycounter.v -vcd count.vcd -o Mycounter.cdd
• 적용 범위 보고서를 보려면 실행하십시오
$ covered report -d v Mycounter.cdd
커버리지 보고서는 터미널에 표시됩니다.
"Segmentation Fault"라는 오류가 발생하면 다음을 시도하십시오.
sudo apt-get install gedit
생성 된 VCD 파일을 GEDIT에서 열고 "$ 댓글"을 찾으십시오. 매개 변수 값을 표시하고 삭제하십시오.
VCD 파일을 저장 한 다음 Agin이 흐름을 실행하면 지금 작동해야합니다.
sudo apt-get install -y build-essential clang bison flex libreadline-dev gawk tcl-dev libffi-dev git graphviz xdot pkg-config python3 libboost-system-dev libboost-python-dev libboost-filesystem-dev zlib1g-dev
 git clone https://github.com/YosysHQ/yosys.git
git submodule update --init
cd yosys
sudo make
sudo make install
설치 후 : ./yosys 도구가 시작되고 명령 프롬프트가 yosys>
여기에서는 Nangate45_typ.lib 라는 라이브러리 파일을 제공했습니다
Yosys를 사용하여 Verilog 소스 파일을 종합하려면이 라이브러리 파일은 TCL Automation 스크립트에 포함되어야합니다.
yosys_commands.tcl 이라는 파일을 만들고이 줄을 파일에 넣고 저장하십시오.
 #Read modules from verilog
read_verilog counter.v

#Elaborate design hierarchy
hierarchy −check −top Mycounter

#Translate Processes to netlist
proc

#mapping to the internal cell library
techmap

#mapping flip-flops to Nangate45_typ.lib
dfflibmap −liberty Nangate45_typ.lib

#mapping logic to Nangate45_typ.lib
abc -liberty Nangate45_typ.lib

#remove unused cells
clean

#write the synthesized design in a verilog file
write_verilog −noattr synth_Mycounter.v
Yosys가 호출 된 후이 TCL 스크립트를 실행해야합니다. 합성 프로세스를 자동화하고 소스 Verilog 파일에서 합성 된 넷리스트를 작성합니다.
Yosys 도구 $ yosys 시작합니다. yosys_commands.tcl 파일을 사용하고 있습니다. yosys> script yosys_commands.tcl
마찬가지로 not_opt.tcl 및 opt.tcl 스크립트를 실행하여 최적화되지 않은 블록 다이어그램 및 최적화 된 블록 다이어그램을 GraphViz (XDOT) 창에서 볼 수 있습니다.
 sudo apt-get update
sudo apt-get install build-essential tcl-dev tk-dev cmake git

git clone https://github.com/The-OpenROAD-Project/OpenSTA.git
cd OpenSTA
mkdir build
cd build
cmake ..
오류가 Cmake error at CMakelists.txt 처럼 오류가 발생하면 "cd"명령 및 설치를 사용하여 홈 디렉토리로 이동하십시오.
sudo apt-get install libeigen3-dev
OpenSta의 빌드 디렉토리로 다시 이동하고 다음 명령을 실행하여 빌드를 구성하십시오.
cmake ..
CMAKE 오류가 다시 있으면 다시 홈 디렉토리로 이동하여 CUDD를 설치하십시오.
 git clone https://github.com/ivmai/cudd.git
sudo apt-get install automake
sudo apt-get install autoconf m4 perl

cd cudd
autoreconf -i
mkdir build
cd build
../configure --prefix=$HOME/cudd
sudo make
sudo make install
이제 CUDD가 성공적으로 설치되었습니다. 이제 OpenSTA 디렉토리로 이동하십시오
 cd OpenSTA
cd build
cmake .. -DUSE_CUDD=ON -DCUDD_DIR=$HOME/cudd
sudo make
sudo make install
이제 단순히 "sta"를 입력하여 터미널에서 OpenSta를 호출하고 Enter를 누르십시오. 프롬프트를 변경했습니다.
 sta [~/working_directory]

or,
it will be shown like

%
OpenSta를 성공적으로 설치 한 후 time.tcl 실행하여 입력 및 출력의 타이밍을 분석하고, 그 power.tcl 후에 설계된 회로에 의한 전력 소실을 분석합니다.
OpenSTA를 사용한 시간 분석
% source time.tcl
OpenSTA를 사용한 전력 분석 용
% source power.tcl
OpenRoad 저장소를 다운로드하십시오
 git clone --recursive https://github.com/The-OpenROAD-Project/OpenROAD.git
cd OpenROAD
종속성을 설치하십시오
sudo ./etc/DependencyInstaller.sh
OpenRoad를 구축하십시오
 mkdir build
cd build
cmake ..
sudo make
sudo make install
"cmake"를 실행 한 후에는 다음과 같은 오류가 표시됩니다. CMake Error: Could not find CMAKE_ROOT !!! 그런 다음 export PATH=/usr/local/bin/cmake:$PATH and run echo $CMAKE_ROOT 실행하면 경로를 반영한 다음 "cmake"및 agin run "make & make install"을 다시 반영해야합니다.
여전히 오류가 발생한 경우 :
 sudo apt install swig
sudo apt update
터미널에서 OpenRoad 도구를 호출하면 openroad>
활동을 실행하는 데 사용되는 스크립트 :
design_nangate45.tcl
 1. RTL Netlist: gcd_nangate45.v
(Location: OpenROAD/test/gcd_nangate45.v)
2. SDC file: gcd_nangate45.sdc
(Location: OpenROAD/test/gcd_nangate45.sdc)
3. Library file: Nangate45_typ.lib
(Location: OpenROAD/test/Nangate45/Nangate45_typ.lib)
4. LEF file
A. Technology Lef: Nangate45_tech.lef
(Location: OpenROAD/test/Nangate45/Nangate45_tech.lef)
B. Standard Cell Lef: Nangate45_stdcell.lef
(Location: OpenROAD/test/Nangate45/Nangate45_stdcell.lef)
design_nangate45.tcl 파일을 쓰십시오
 source "helpers.tcl"
source "flow_helpers.tcl"
source "Nangate45/Nangate45.vars"
set design "<design name>"
set top_module "<design main module>"
set synth_verilog "synth_design.v"
set sdc_file "top.sdc"
set die_area {0 0 100.13 100.8}
set core_area {10.07 11.2 90.25 91}
source -echo "flow.tcl”
이제 모든 파일이 준비되었으며 일부 특정 파일은 "OpenRoad/Test"폴더로 복사해야합니다. 이는 다음과 같습니다.
 design.v
synth_design.v
top.sdc
design_nangate45.tcl
이 파일을 OpenROAD/test 폴더에 복사 한 후 한 디렉토리에서 다른 디렉토리로 파일을 복사하려면 동일한 디렉토리로 이동하여 OpenRoad를 호출하십시오.
sudo cp -i /path/of/your/directory/<filename> /path/to/directory/to/copy/
그 다음에
openroad> sudo openroad -gui -log design_logfile.log design_nangate45.tcl
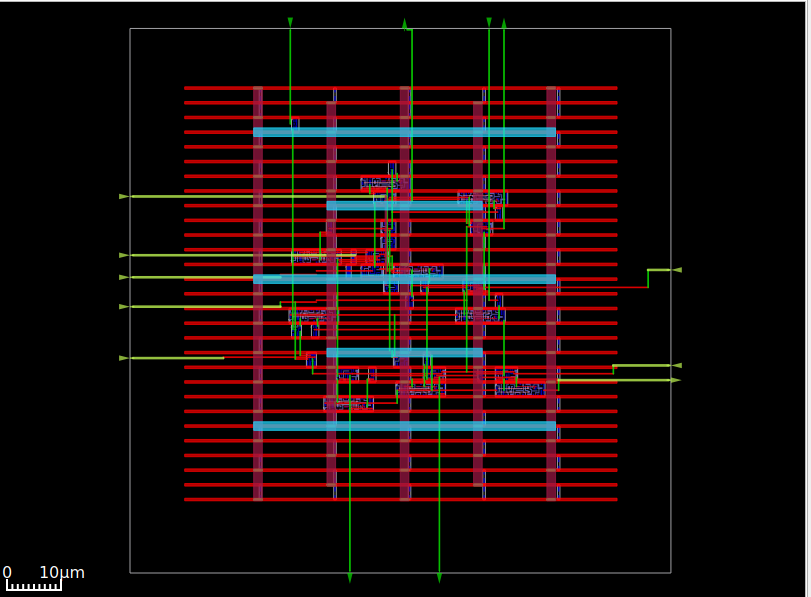
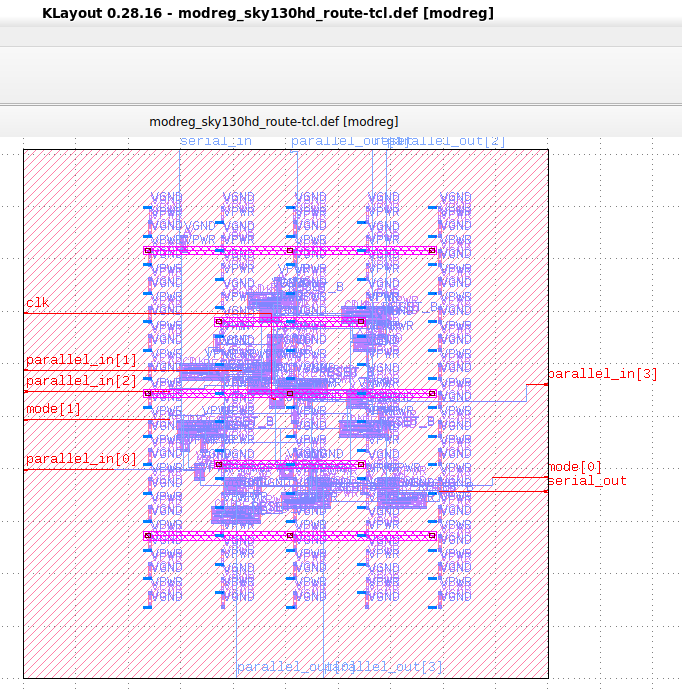
이 명령을 실행하면 OpenRoad GUI에서 볼 수있는 ASIC 레이아웃이 생성되어 GDSII로 저장해야합니다.
sudo apt install klayout
이 명령을 사용하여 Klayout을 엽니 다
klayout &
이제 파일 버튼을 클릭하고 독자 옵션을 선택한 다음 "lef/def"탭을 클릭하고 "nangate45.lef"파일을 넣고 확인란을 선택 해제하거나 "nangate45.lef"의 동일한 위치를 유지하십시오.
/OpenROAD/test/Nangate45/Nangate45.lef
그런 다음 확인을 클릭하십시오. 그 후 다시 파일을 클릭하고 열기를 선택하면 이제 대화 상자가 열리고
/OpenROAD/test/result
거기 design.def 파일이 위치하고 DEF 파일을 클릭하고 확인을 클릭하십시오. 이제 GDSII 모드로 열리고 GDSII로 저장할 수 있습니다.
이제 디자인은 제작을 위해 Foundry로 보낼 준비가되었습니다.
 [1] Installation steps for The ICARUS Verilog Compilation System. [Online]. Available:
https://github.com/steveicarus/iverilog

[2] Installation steps for Covered - Verilog Code Coverage Analyzer. [Online]. Available:
https://github.com/chiphackers/covered/blob/master/INSTALL

[3] S. Saurabh, Introduction to VLSI Design Flow. Cambridge: Cambridge University Press,
2023.

[4] Installation steps for Yosys Open SYnthesis Suite. [Online]. Available: https:
//github.com/YosysHQ/yosys

[5] S. Saurabh, Introduction to VLSI Design Flow. Cambridge: Cambridge University Press,
2023.

[6] Yosys: Example Usage. [Online]. Available: https://yosyshq.net/yosys/

[7] Documentation for Yosys Open SYnthesis Suite commands. [Online]. Available:
https://yosyshq.readthedocs.io/projects/yosys/en/manual-rewrite/cmd ref.html

[8] Ajayi, Tutu, Vidya A. Chhabria, Mateus Fogaça, Soheil Hashemi, Abdelrahman Hosny,
Andrew B. Kahng, Minsoo Kim et al. "Toward an open-source digital flow: First learnings
from the openroad project." In Proceedings of the 56th Annual Design Automation
Conference 2019, pp. 1-4. 2019.

[9] Ajayi, Tutu, and David Blaauw. "OpenROAD: Toward a self-driving, open-source digital
layout implementation tool chain." In Proceedings of Government Microcircuit
Applications and Critical Technology Conference. 2019.


