linux_power_opt
1.0.0
優化Linux/Unix系統的功耗不是一件容易的任務。我們對此主題的內容很少,很少有人可以討論這一點。本教程適用於NVIDIA/UBUNTU的筆記本電腦的用戶。
POWERTOP -POWERTOP是由Intel設計的監視工具,列出了具有功率操作模式並調整它們的所有設備。我們可以使用命令行Bolow安裝POWERTOP:
sudo apt install powertop
使用POWERTOP的第一步是用命令校準電池電源上的讀數:
sudo powertop -c
運行呼叫啟動大約需要10分鐘。該系統將在某些情況下打開和關閉顯示,並且在此過程中不可能做其他任何事情。 PowerTop可以自己使用,以查看系統上使用資源的原因。需要將其開放一點時間來收集統計數據,並保持準確。
powertop
我們還可以使用PowerTop生成報告
sudo powertop --html=report.html
很有用,請查看哪些運行過程或應用程序正在掌握更多的功率。您可以卸載它們或更改某些設置以減少功率使用情況。
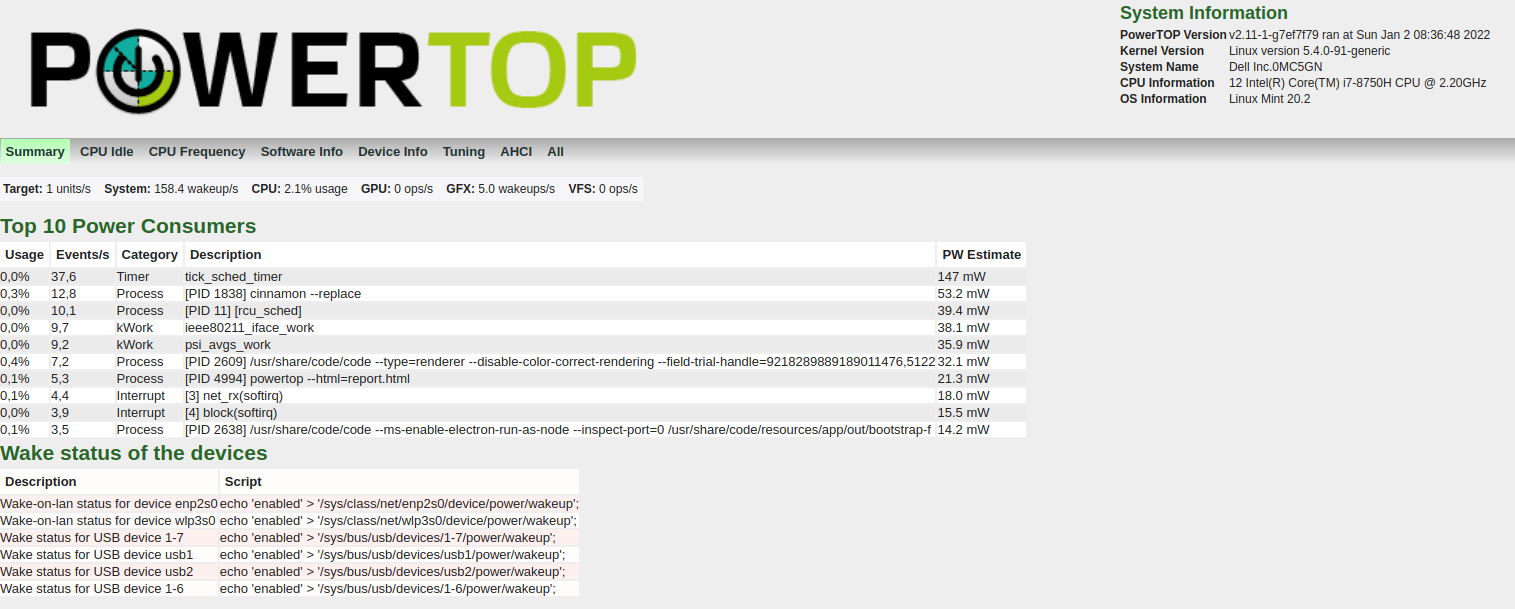
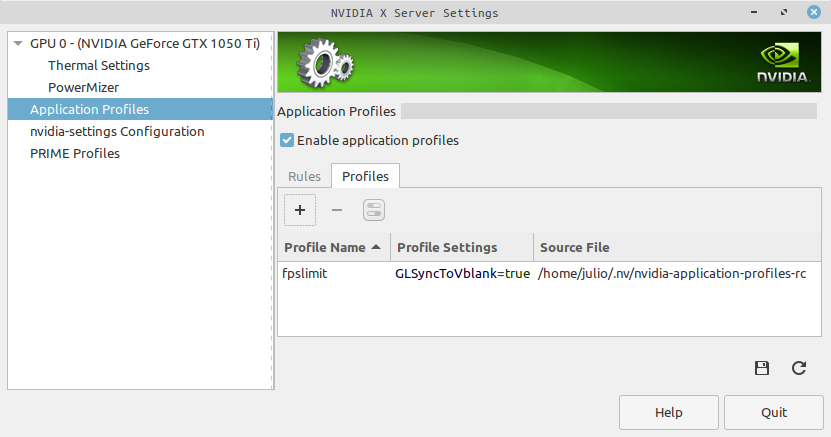
我們還可以調整設備以節省電源模式。在報告中,有一個標籤調整。您會發現許多建議以增加電池壽命。

在下面的圖像中,在截面調諧物中,我們可以看到所有設備具有可用於調整的電源模式。不良標籤向我們展示了哪些設備在性能模式下運行。我們需要將其中的大多數設置為良好的標籤,以獲取節能模式。
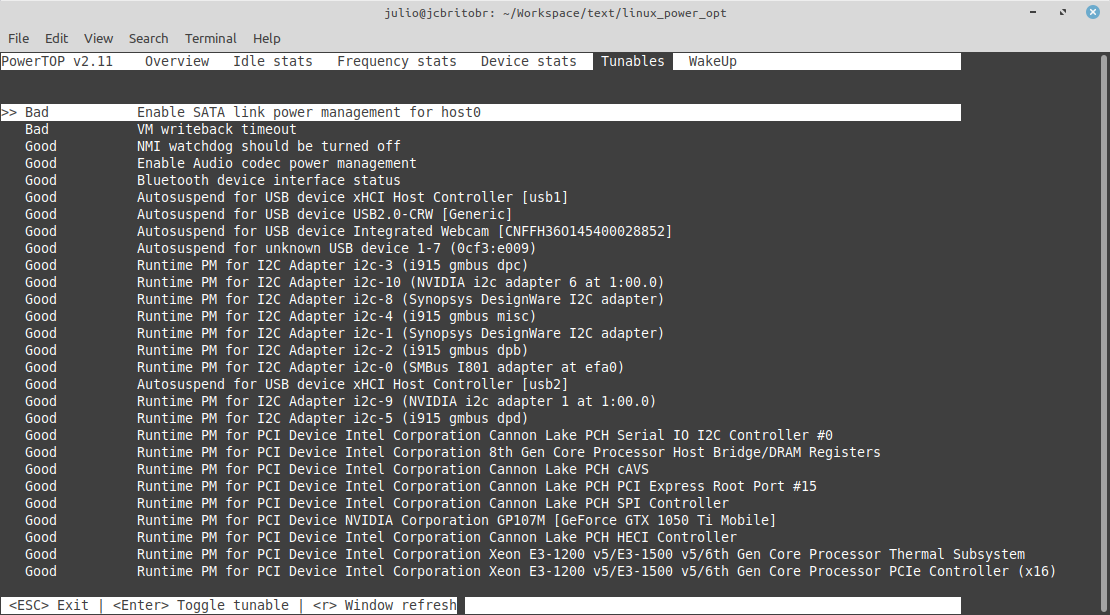
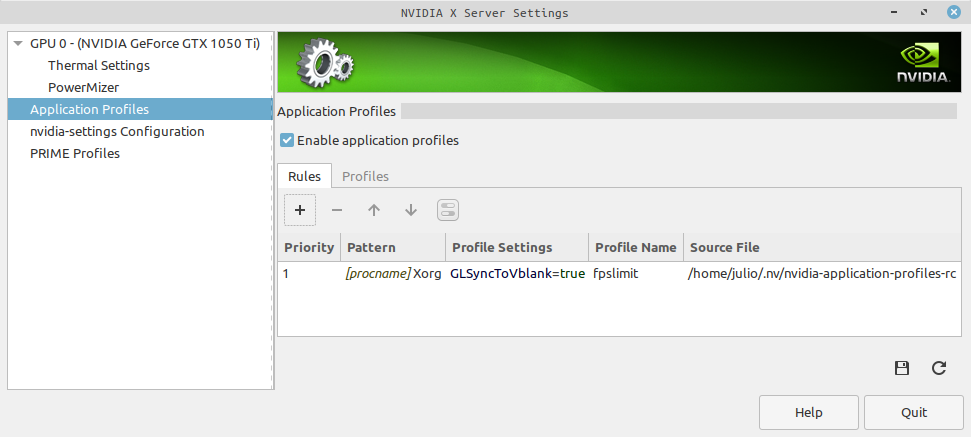
一些設備(例如USB控制器的慕斯控制器)不需要將功率模式放置,或者我們可以體驗一些行為,例如鼠標停止工作一段時間。我們可以啟用或禁用電源保存模式,而僅列出空格鍵。
我們可以啟用運行命令行的所有建議的調諧:
sudo powertop --auto-tune
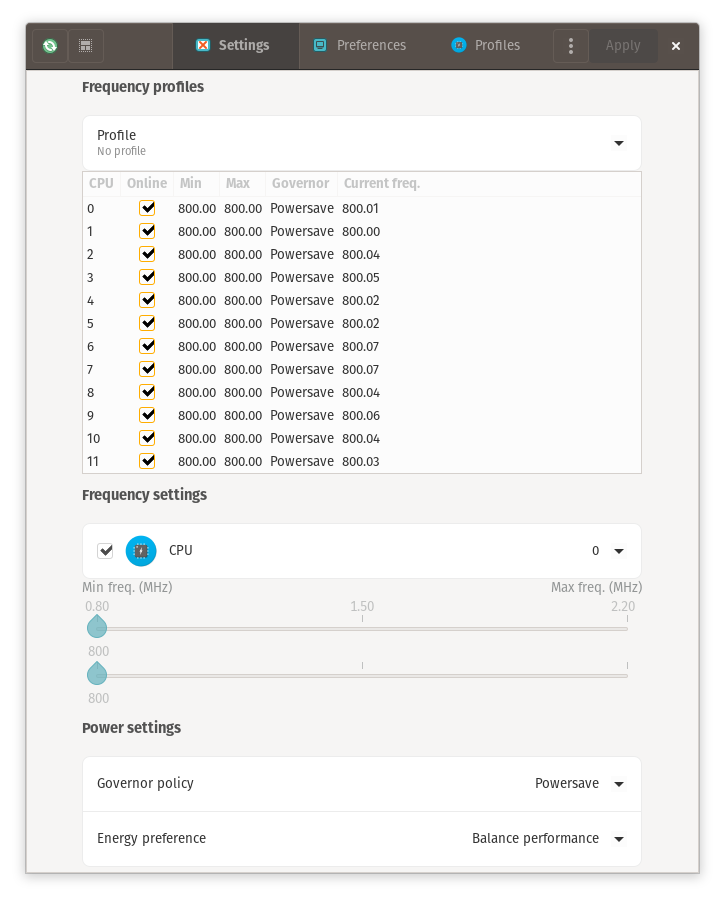
 $ grep . /sys/devices/system/cpu/cpu0/cpufreq/*
/sys/devices/system/cpu/cpu0/cpufreq/affected_cpus:0
/sys/devices/system/cpu/cpu0/cpufreq/base_frequency:2200000
/sys/devices/system/cpu/cpu0/cpufreq/cpuinfo_max_freq:2200000
/sys/devices/system/cpu/cpu0/cpufreq/cpuinfo_min_freq:800000
/sys/devices/system/cpu/cpu0/cpufreq/cpuinfo_transition_latency:0
/sys/devices/system/cpu/cpu0/cpufreq/energy_performance_available_preferences:default performance balance_performance balance_power power
/sys/devices/system/cpu/cpu0/cpufreq/energy_performance_preference:balance_performance
/sys/devices/system/cpu/cpu0/cpufreq/related_cpus:0
/sys/devices/system/cpu/cpu0/cpufreq/scaling_available_governors:performance powersave
/sys/devices/system/cpu/cpu0/cpufreq/scaling_cur_freq:800083
/sys/devices/system/cpu/cpu0/cpufreq/scaling_driver:intel_pstate
/sys/devices/system/cpu/cpu0/cpufreq/scaling_governor:powersave
/sys/devices/system/cpu/cpu0/cpufreq/scaling_max_freq:800000
/sys/devices/system/cpu/cpu0/cpufreq/scaling_min_freq:800000
/sys/devices/system/cpu/cpu0/cpufreq/scaling_setspeed:<unsupported>
 echo powersave | sudo tee /sys/devices/system/cpu/cpu*/cpufreq/scaling_governor

grep . /sys/devices/system/cpu/cpu*/cpufreq/scaling_governor
/sys/devices/system/cpu/cpu0/cpufreq/scaling_governor:powersave
/sys/devices/system/cpu/cpu10/cpufreq/scaling_governor:powersave
/sys/devices/system/cpu/cpu11/cpufreq/scaling_governor:powersave
/sys/devices/system/cpu/cpu1/cpufreq/scaling_governor:powersave
/sys/devices/system/cpu/cpu2/cpufreq/scaling_governor:powersave
/sys/devices/system/cpu/cpu3/cpufreq/scaling_governor:powersave
/sys/devices/system/cpu/cpu4/cpufreq/scaling_governor:powersave
/sys/devices/system/cpu/cpu5/cpufreq/scaling_governor:powersave
/sys/devices/system/cpu/cpu6/cpufreq/scaling_governor:powersave
/sys/devices/system/cpu/cpu7/cpufreq/scaling_governor:powersave
/sys/devices/system/cpu/cpu8/cpufreq/scaling_governor:powersave
/sys/devices/system/cpu/cpu9/cpufreq/scaling_governor:powersave
 echo 800000 | sudo tee /sys/devices/system/cpu/cpu*/cpufreq/scaling_max_freq
800000

/sys/devices/system/cpu/cpu0/cpufreq/scaling_max_freq:800000
/sys/devices/system/cpu/cpu10/cpufreq/scaling_max_freq:800000
/sys/devices/system/cpu/cpu11/cpufreq/scaling_max_freq:800000
/sys/devices/system/cpu/cpu1/cpufreq/scaling_max_freq:800000
/sys/devices/system/cpu/cpu2/cpufreq/scaling_max_freq:800000
/sys/devices/system/cpu/cpu3/cpufreq/scaling_max_freq:800000
/sys/devices/system/cpu/cpu4/cpufreq/scaling_max_freq:800000
/sys/devices/system/cpu/cpu5/cpufreq/scaling_max_freq:800000
/sys/devices/system/cpu/cpu6/cpufreq/scaling_max_freq:800000
/sys/devices/system/cpu/cpu7/cpufreq/scaling_max_freq:800000
/sys/devices/system/cpu/cpu8/cpufreq/scaling_max_freq:800000
/sys/devices/system/cpu/cpu9/cpufreq/scaling_max_freq:800000
 grep . /sys/devices/system/cpu/cpu*/cpufreq/scaling_cur_freq

/sys/devices/system/cpu/cpu0/cpufreq/scaling_cur_freq:800778
/sys/devices/system/cpu/cpu10/cpufreq/scaling_cur_freq:800047
/sys/devices/system/cpu/cpu11/cpufreq/scaling_cur_freq:800099
/sys/devices/system/cpu/cpu1/cpufreq/scaling_cur_freq:800109
/sys/devices/system/cpu/cpu2/cpufreq/scaling_cur_freq:800064
/sys/devices/system/cpu/cpu3/cpufreq/scaling_cur_freq:801266
/sys/devices/system/cpu/cpu4/cpufreq/scaling_cur_freq:800118
/sys/devices/system/cpu/cpu5/cpufreq/scaling_cur_freq:800160
/sys/devices/system/cpu/cpu6/cpufreq/scaling_cur_freq:799999
/sys/devices/system/cpu/cpu7/cpufreq/scaling_cur_freq:800112
/sys/devices/system/cpu/cpu8/cpufreq/scaling_cur_freq:800117
/sys/devices/system/cpu/cpu9/cpufreq/scaling_cur_freq:800004
sudo apt install lm-sensors
 $ sensors
coretemp-isa-0000
Adapter: ISA adapter
Package id 0:  +47.0°C  (high = +100.0°C, crit = +100.0°C)
Core 0:        +45.0°C  (high = +100.0°C, crit = +100.0°C)
Core 1:        +46.0°C  (high = +100.0°C, crit = +100.0°C)
Core 2:        +47.0°C  (high = +100.0°C, crit = +100.0°C)
Core 3:        +44.0°C  (high = +100.0°C, crit = +100.0°C)
Core 4:        +45.0°C  (high = +100.0°C, crit = +100.0°C)
Core 5:        +44.0°C  (high = +100.0°C, crit = +100.0°C)

BAT0-acpi-0
Adapter: ACPI interface
in0:          17.28 V
curr1:       1000.00 uA

pch_cannonlake-virtual-0
Adapter: Virtual device
temp1:        +44.0°C

acpitz-acpi-0
Adapter: ACPI interface
temp1:        +25.0°C  (crit = +107.0°C)
軟件包ID 0是CPU溫度平均值。
PSENERS是使用傳感器工作的工具。它是帶有圖表的GUI:
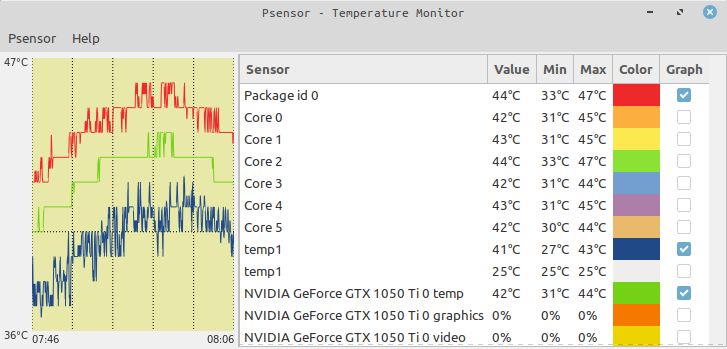
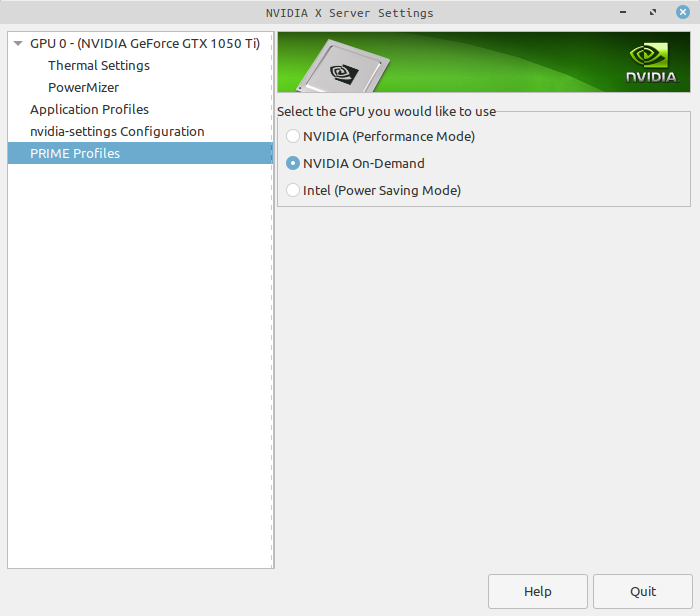
GPU/CPU的溫度高於85C,導致硬件損壞,多年來,我一直在尋找一種減少GPU工作的方法,但由於缺乏文檔而沒有成功。我們的眼睛沒有註意到框架過渡的速度高於24fps。直到60fps,我們可以感覺到Vídeo的質量平穩變化。超過60fps的質量總體上沒有感知。對於NVIDIA用戶,我們可以配置該卡以按需模式使用,並設置Xorg與Monitor(60Hz)同步。
對於Ubuntu基本發行版,我們可以使用Mangohud PPA安裝
 sudo add-apt-repository ppa:flexiondotorg/mangohud
sudo apt update
sudo apt install mangohud
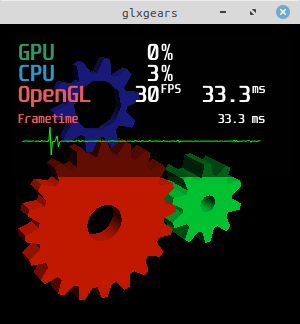
我們可以使用命令行限制FPS
MANGOHUD_CONFIG=fps,fps_limit=30 mangohud --dlsym glxgears
我們也可以在Steam上使用它。為此,只需將配置放在Steam Game Launcher上
__NV_PRIME_RENDER_OFFLOAD=1 __GLX_VENDOR_LIBRARY_NAME=nvidia mangohud --dlsym %command%
我是一個漫長的Linux/Unix系統用戶,並且總是嘗試找到一個配置,以優化可互補的系統的系統,並在Windows中使用類似的內容。很難找到用於電力使用和專有設備的文檔。最後一個找到並能夠撰寫本教程的作品是Mangohud。使用所有這些配置,我們可以在MS Windows系統中具有非常接近或幾乎相同的體驗,CPU負載較低,並且可接受的GPU/CPU溫度。


