XcodesApp
v2.4.1 - Now with 101% more login

Xcodesapp現在是XcodesOrg的一部分 - 在此處閱讀更多
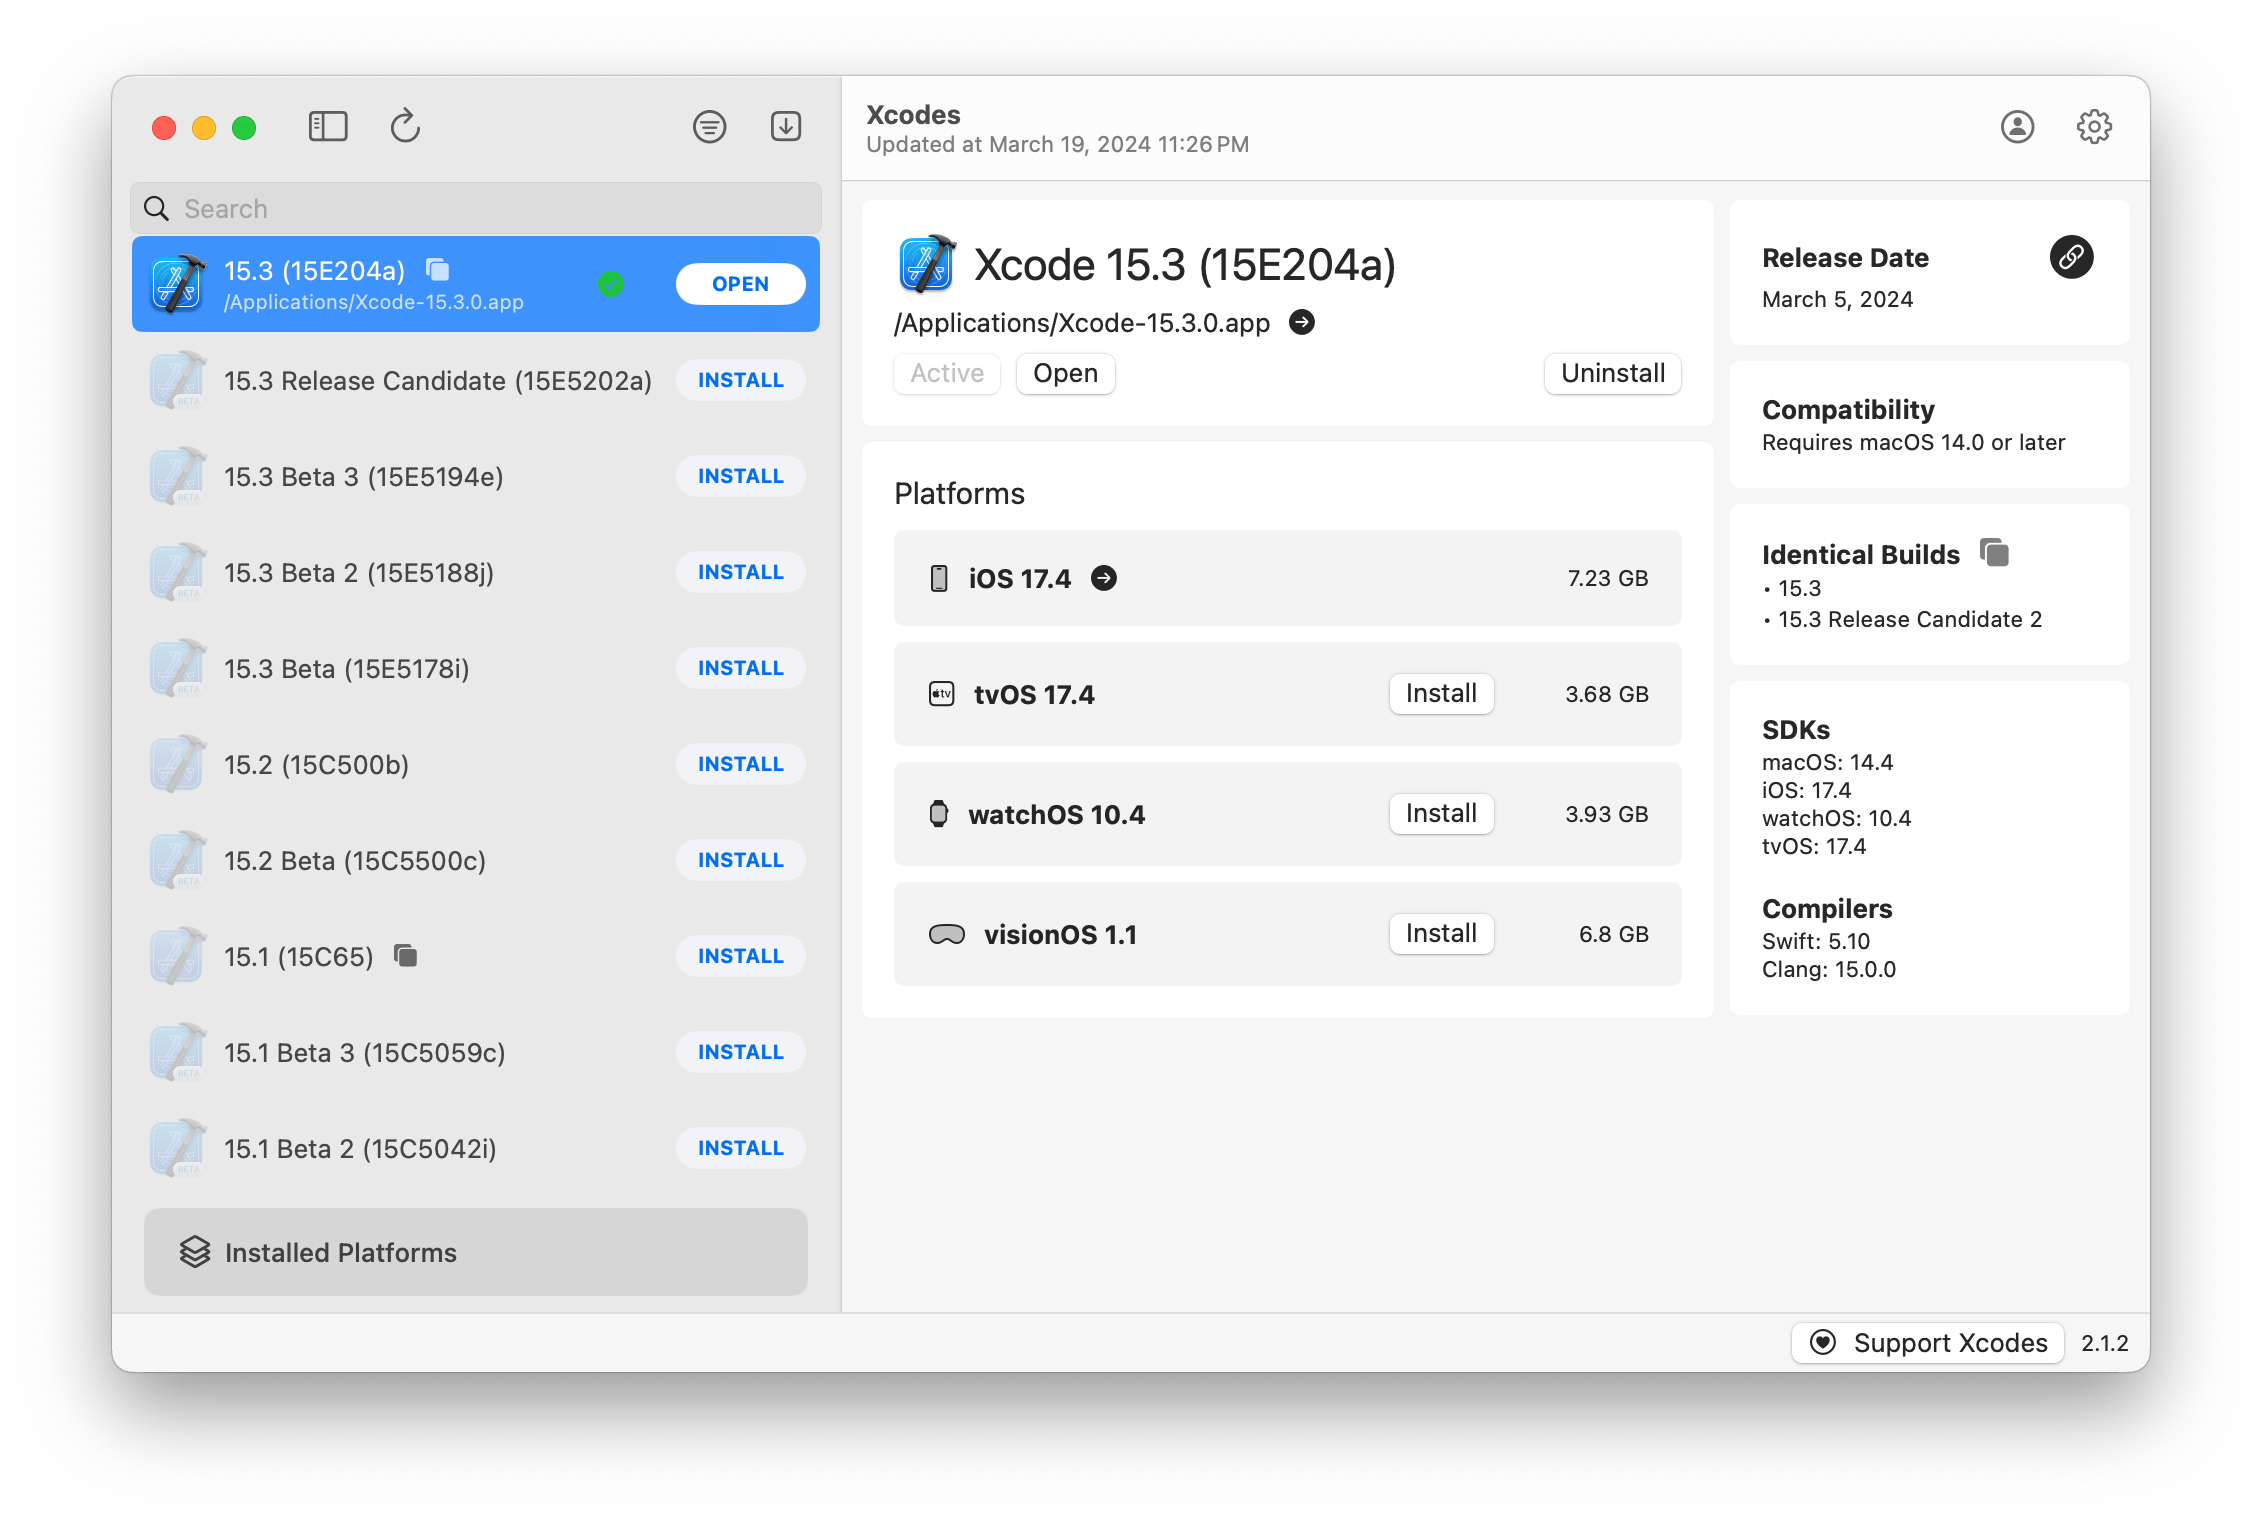
aria2 ,它最多使用16個連接來下載比Urlsession快3-5倍。xcode-select活動使版本活動。注意:iOS 18+,TVOS 18+,WatchOS 11+,Visionos 2+要求安裝Xcode 16.1 Beta 3+活躍。
Xcodes支持幾種語言的本地化。
由於以下社區用戶,支持以下語言!
| 法語 ? ? | @dompepin | 意大利語?? | Gualtierofrigerio |
| 西班牙語 ? ? ? | @cesartru88 | 韓國人 ? ? | @Ryan-Son |
| 俄語? | @Alexmazlov | 土耳其語?? | @egesucu |
| 印地語?? | @kgurpreet | 中文模擬? | @megabitsenmzq |
| 芬蘭語?? | @marcusziade | 中文傳統? | @itszero |
| 烏克蘭人?? | @gelosi | 日本人 ? ? | @tatsuz0u |
| 德語?? | @drct | 荷蘭?? | @jfversluis |
| 巴西葡萄牙? | @brunomunizaf | 拋光 ? ? | @jakex7 |
| 加泰羅尼亞 | @ferranabello | 希臘語?? | @Alladinian |
想添加更多語言嗎?只需使用更新的字符串文件創建PR即可。
v1.x-需要macos 11或更新的v2.x-要求macos 13
開發人員ID簽名和公證的發布版本可在Homebrew上提供。這些不需要已經安裝XCode即可使用。
brew install --cask xcodesXcodes.app移動到/Applications目錄Xcodes.App和CLI已更新,並與像您這樣的貢獻者進行維護。甚至開源庫和工具都帶有費用。如果您想支持Xcodes或捐贈該工具的開發和維護,這將不勝感激。絕對沒有義務!
您需要MacOS 13.5 Ventura和Xcode 15才能構建和運行Xcodes.app。
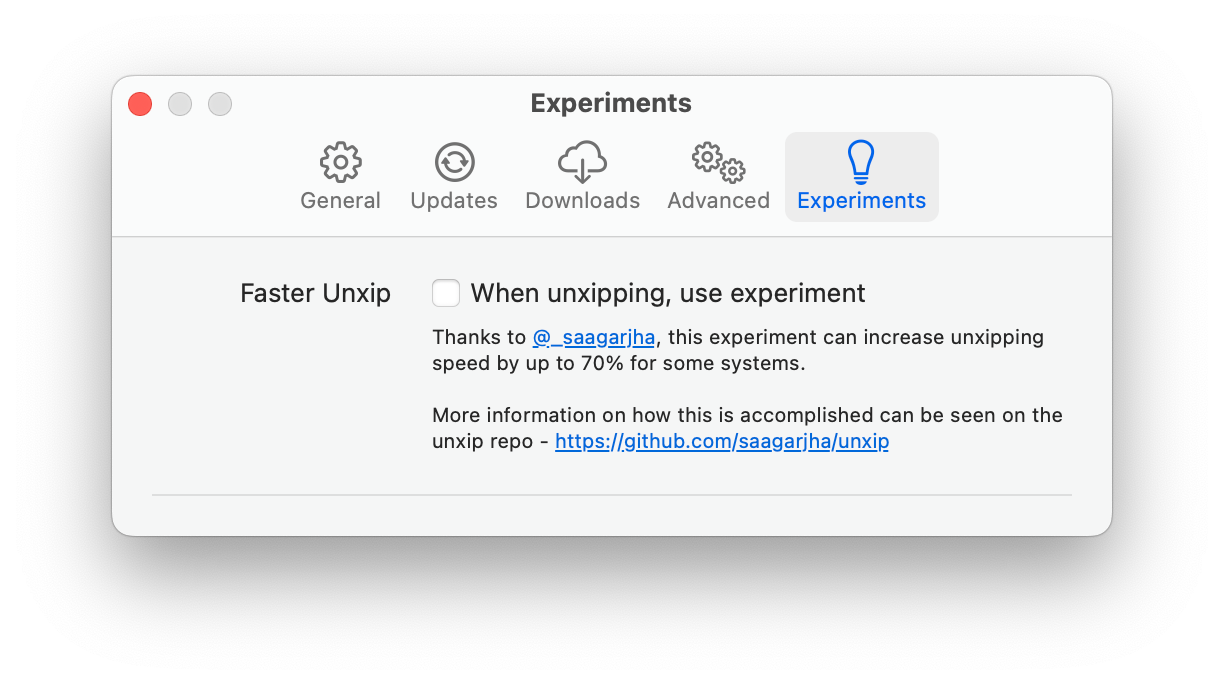
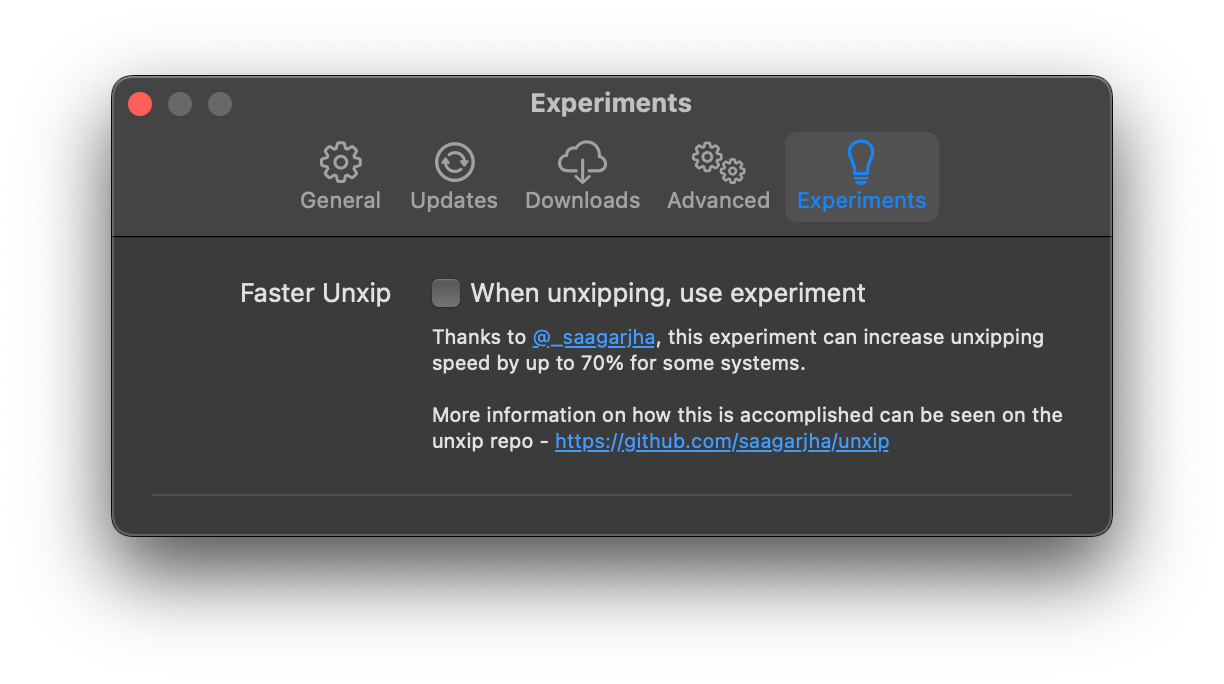
Unxip和aria2必須作為通用二進制編譯
 # compile for Intel
 swiftc -parse-as-library -O -target x86_64-apple-macos11 unxip.swift
# compile for M1
 swiftc -parse-as-library -O -target arm64-apple-macos11 unxip.swift

# combine for universal binary
 lipo -create -output unxip unxip_intel unxip_m1
# check it
 lipo -archs unxip
著名的設計決策記錄在決策中。 Apple身份驗證流在Apple..paw中描述,這將使您可以使用PAW應用程序涉及的API端點。
xcode-install和Fastlane/SpaceShip都值得一提的是,弄清楚這使這是可能的困難部分。
請按照下面的步驟構建並發布新版本的Xcodes.app。對於任何GIT步驟,您可以使用首選工具,但請簽署標籤。
 # Update the version number in Xcode and commit the change, if necessary

# Question: Did anything in XPCHelper change?
# - com.xcodesorg.xcodesapp.Helper folder and HelperXPCShared
# - if so, bump the version number in com.xcodesorg.xcodesapp.Helper target.
# Note: you do not have to bump the version number if nothing has changed.
# Note2: If you do bump the version, the end user, must re-install the XPCHelper and give permission again.

# Increment the build number
scripts/increment_build_number.sh

# Commit the change
git add Xcodes/Resources/Info.plist
git commit -asm " Increment build number "

# Tag the latest commit
# Replace $VERSION and $BUILD below with the latest real values
git tag -asm " v $VERSIONb$BUILD " " v $VERSIONb$BUILD "

# Push to origin
git push --follow-tags

# Build the app
# Make sure you have the Xcode Selected you want to build with
scripts/package_release.sh

# Notarize the app
# Do this from the Product directory so the app is zipped without being nested inside Product
# Create a app specific password on appleid.apple.com if you haven't already
# xcrun notarytool store-credentials "AC_PASSWORD"
#              --apple-id "[email protected]"
#              --team-id "teamid"
#               --password "app specific password"

pushd Product
../scripts/notarize.sh Xcodes.zip < MYORG >

# Sign the .zip for Sparkle, note the signature in the output for later
# If you're warned about the signing key not being found, see the Xcodes 1Password vault for the key and installation instructions.
../scripts/sign_update Xcodes.zip
popd

# Go to https://github.com/XcodesOrg/XcodesApp/releases
# If there are uncategorized PRs, add the appropriate label and run the Release Drafter action manually
# Edit the latest draft release
# Set its tag to the tag you just pushed
# Set its title to a string with the format "$VERSION ($BUILD)"
# Polish the draft release notes, if necessary
# Add the signature to the bottom of the release notes in a comment, like:
< ! -- sparkle:edSignature= $SIGNATURE -- >
# Attach the zip that was created in the Product directory to the release
# Publish the release

shasum -a 256 xcodes.zip
# Update the [Homebrew Cask](https://github.com/XcodesOrg/homebrew-cask/blob/master/Casks/x/xcodes.rb). Matt Kiazyk- Twitter
Twitter | github | Mastadon |


