XcodesApp
v2.4.1 - Now with 101% more login

Xcodesapp agora faz parte do XcodesOrg - Leia mais aqui
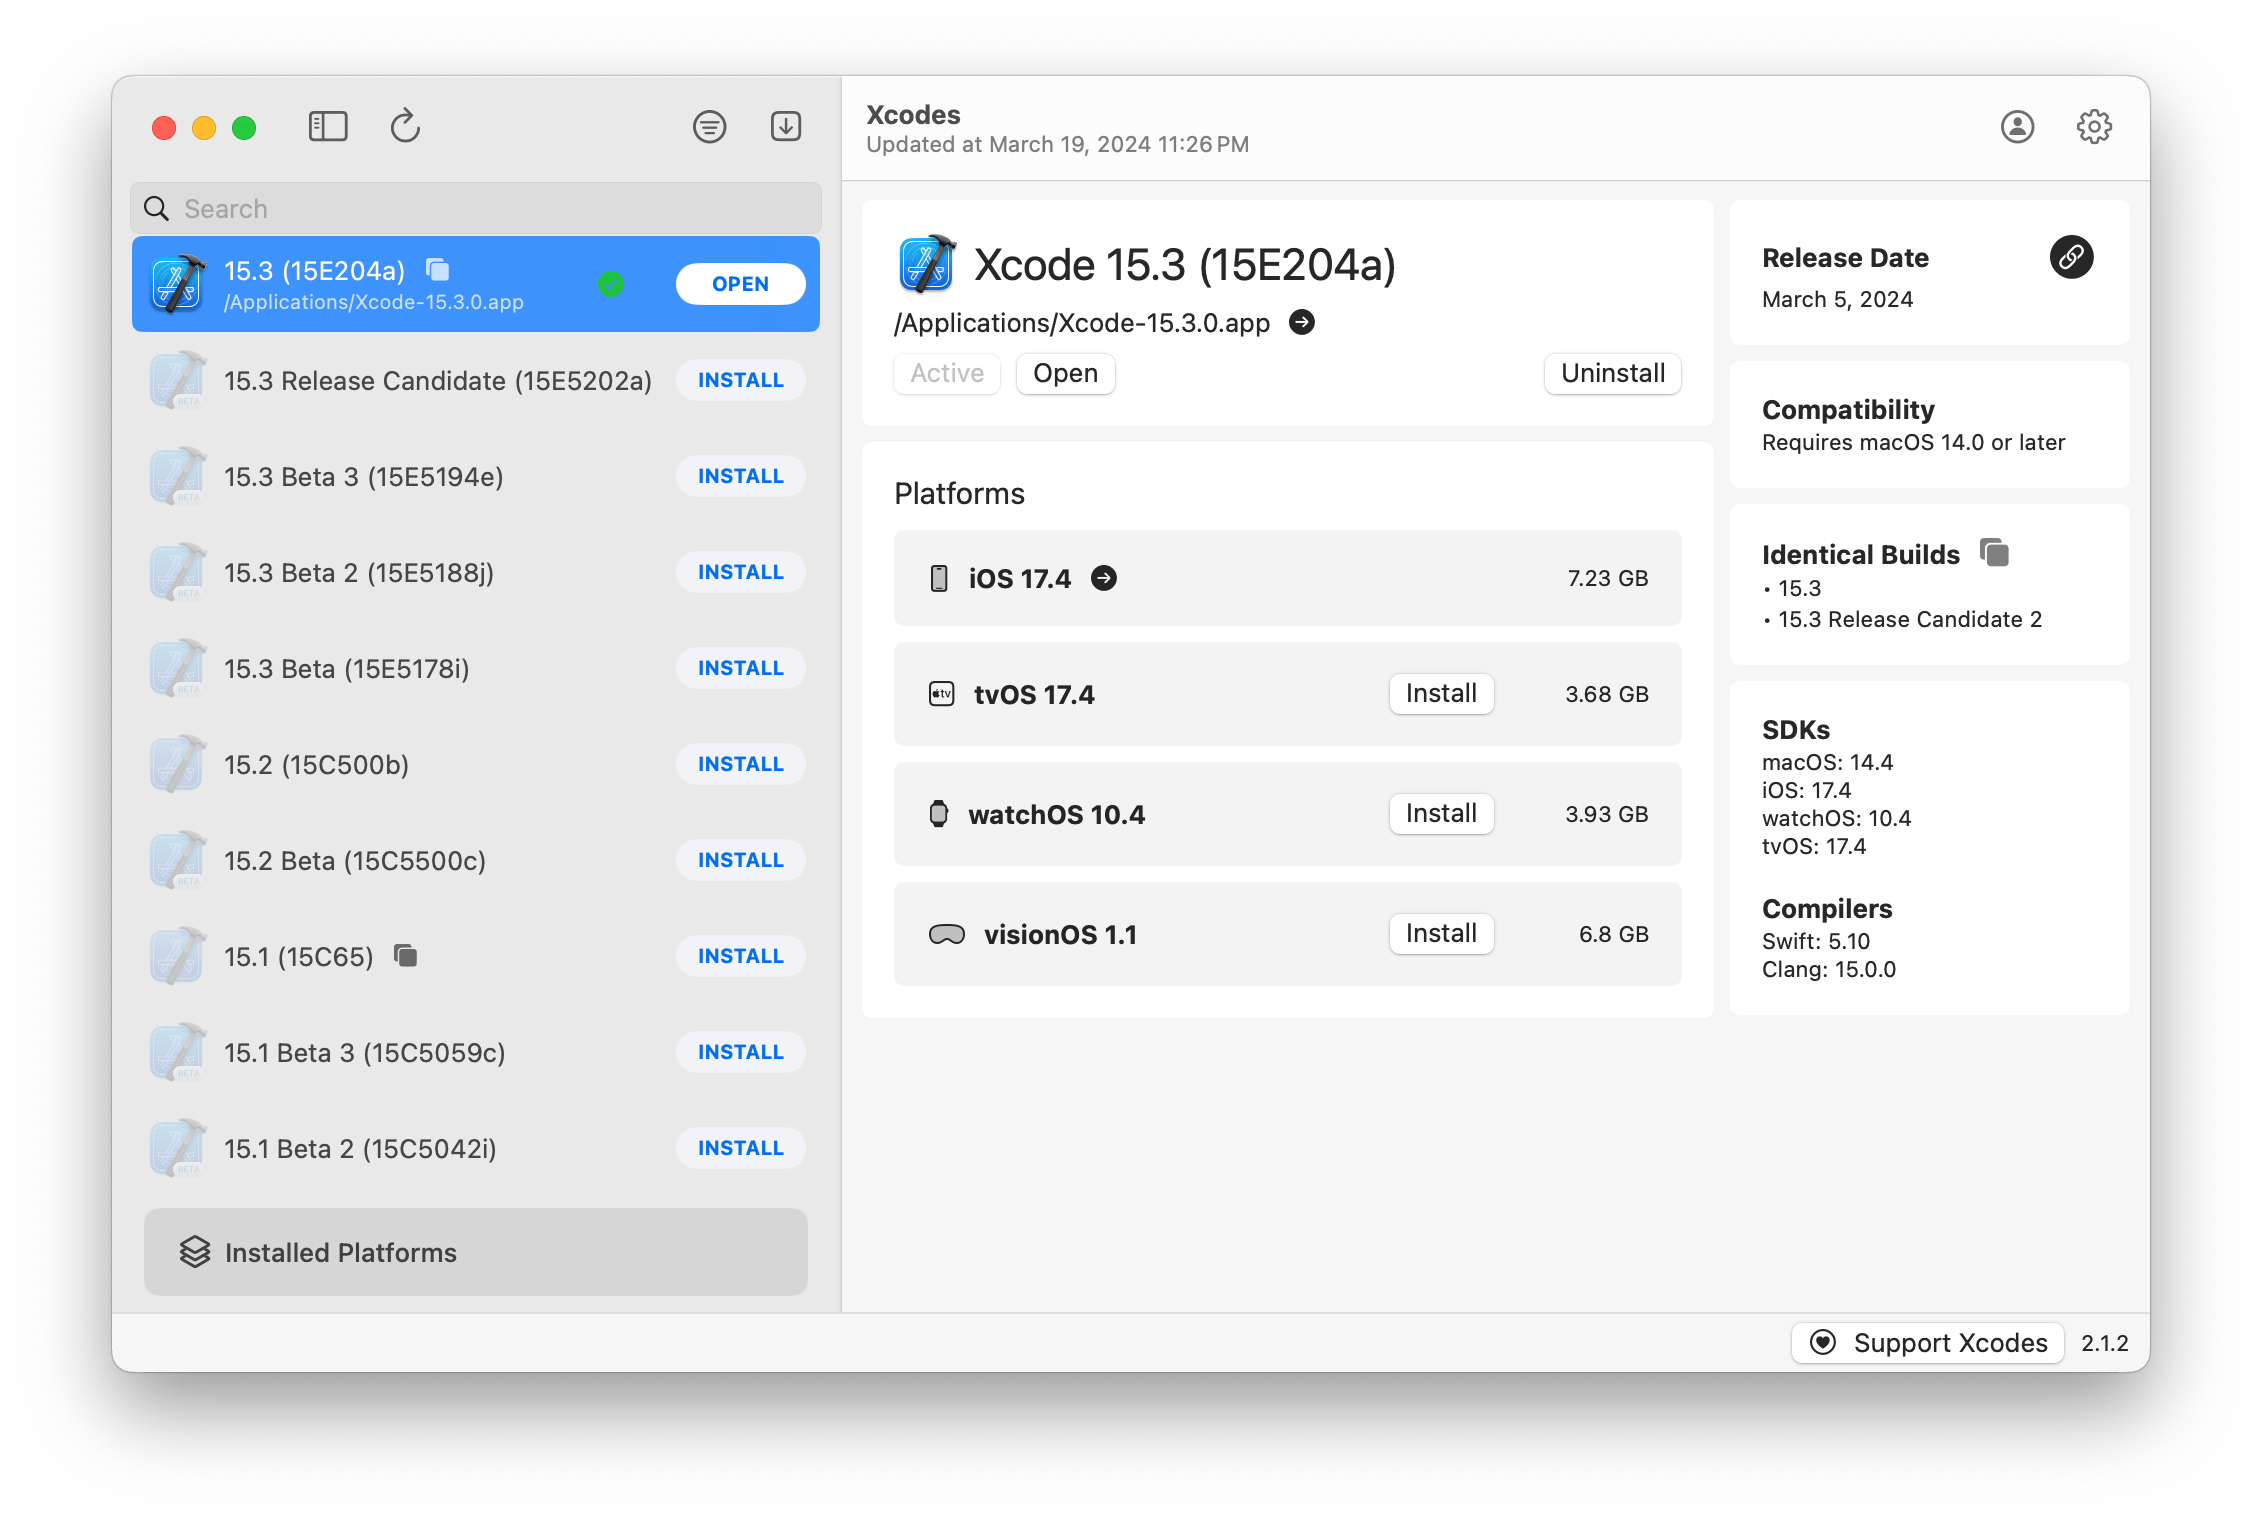
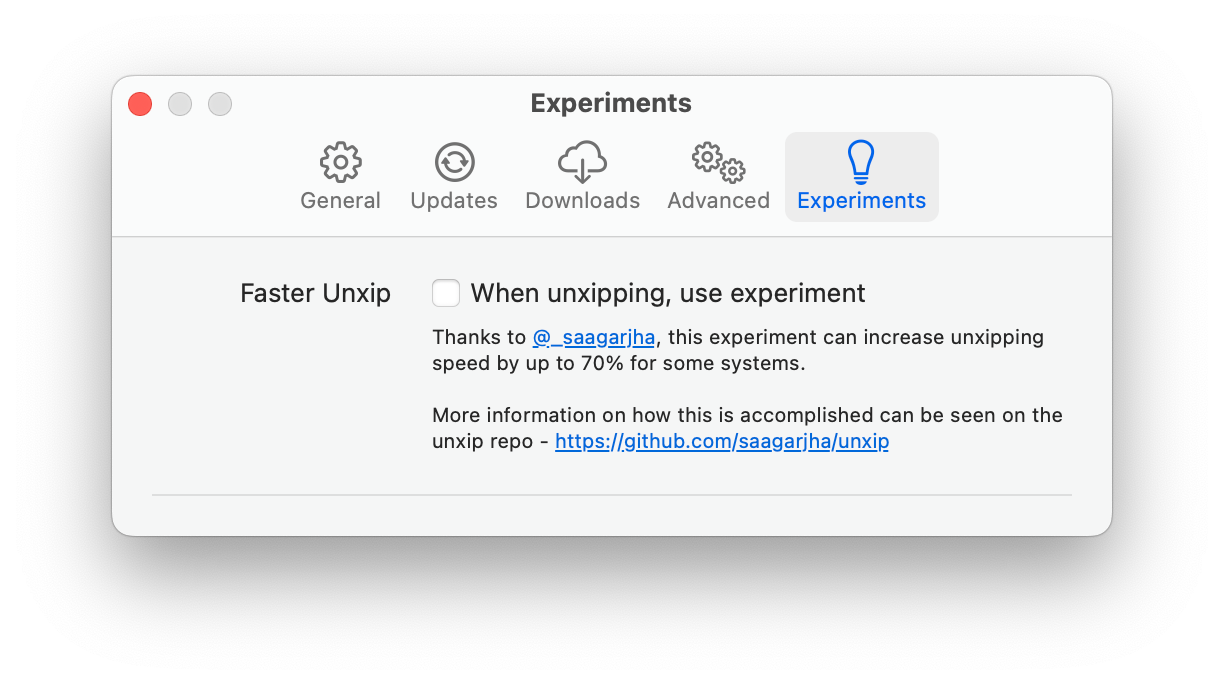
aria2 , que usa até 16 conexões para baixar 3-5x mais rápido que o URLSession.xcode-select .Nota: iOS 18+, TvOS 18+, WatchOS 11+, Visionos 2+ Requer que o Xcode 16.1 beta 3+ seja instalado e ativo.
O Xcodes suporta localização em vários idiomas.
Os seguintes idiomas são suportados por causa dos seguintes usuários da comunidade!
| Francês ?? | @dompepin | Italiano ?? | GualtierofriGrio |
| Espanhol ??? | @cesartru88 | Coreano ?? | @Ryan-Son |
| Russo ?? | @alexmazlov | Turco ?? | @Egesucu |
| Hindi ?? | @Kgurpreet | Chinês simplificado ?? | @megabitsenmzq |
| Finlandês ?? | @Marcusziade | TRADICIONAL CHINESSO ?? | @itsZero |
| Ucraniano ?? | @gelosi | Japonês ?? | @tatsuz0u |
| Alemão ?? | @drct | Holandês ?? | @jfversluis |
| Português brasileiros ?? | @brunomunizaf | Polonês ?? | @jakex7 |
| catalão | @Ferranabello | Grego ?? | @Alladinian |
Quer adicionar mais idiomas? Basta criar um PR com o arquivo de strings atualizado.
v1.x - requer MacOS 11 ou V2.x mais recente - requer macOS 13
As construções de liberação com design de identificação de ID do desenvolvedor estão disponíveis no Homebrew. Eles não exigem que o Xcode já seja instalado para usar.
brew install --cask xcodesXcodes.app descompactado para o seu diretório /Applications Xcodes.app e CLI são atualizados, mantidos com colaboradores como você. Até as bibliotecas e ferramentas de código aberto vêm com despesas. Se você deseja apoiar o Xcodes ou doar para o desenvolvimento e manutenção da ferramenta, ela seria muito apreciada. Não há absolutamente nenhuma obrigação!
Você precisará de MacOS 13.5 Ventura e Xcode 15 para construir e executar o xcodes.app.
Unxip e aria2 devem ser compilados como um binário universal
 # compile for Intel
 swiftc -parse-as-library -O -target x86_64-apple-macos11 unxip.swift
# compile for M1
 swiftc -parse-as-library -O -target arm64-apple-macos11 unxip.swift

# combine for universal binary
 lipo -create -output unxip unxip_intel unxip_m1
# check it
 lipo -archs unxip
As decisões notáveis de design são registradas nas decisões. O fluxo de autenticação da Apple é descrito no Apple.Paw, que permitirá que você jogue com os pontos de extremidade da API que estão envolvidos usando o aplicativo PAW.
xcode-install e Fastlane/Spaceship merecem crédito por descobrir as partes difíceis do que torna isso possível.
Siga as etapas abaixo para criar e lançar uma nova versão do Xcodes.app. Para qualquer uma das etapas do Git, você pode usar sua ferramenta preferida, mas assine a tag.
 # Update the version number in Xcode and commit the change, if necessary

# Question: Did anything in XPCHelper change?
# - com.xcodesorg.xcodesapp.Helper folder and HelperXPCShared
# - if so, bump the version number in com.xcodesorg.xcodesapp.Helper target.
# Note: you do not have to bump the version number if nothing has changed.
# Note2: If you do bump the version, the end user, must re-install the XPCHelper and give permission again.

# Increment the build number
scripts/increment_build_number.sh

# Commit the change
git add Xcodes/Resources/Info.plist
git commit -asm " Increment build number "

# Tag the latest commit
# Replace $VERSION and $BUILD below with the latest real values
git tag -asm " v $VERSIONb$BUILD " " v $VERSIONb$BUILD "

# Push to origin
git push --follow-tags

# Build the app
# Make sure you have the Xcode Selected you want to build with
scripts/package_release.sh

# Notarize the app
# Do this from the Product directory so the app is zipped without being nested inside Product
# Create a app specific password on appleid.apple.com if you haven't already
# xcrun notarytool store-credentials "AC_PASSWORD"
#              --apple-id "[email protected]"
#              --team-id "teamid"
#               --password "app specific password"

pushd Product
../scripts/notarize.sh Xcodes.zip < MYORG >

# Sign the .zip for Sparkle, note the signature in the output for later
# If you're warned about the signing key not being found, see the Xcodes 1Password vault for the key and installation instructions.
../scripts/sign_update Xcodes.zip
popd

# Go to https://github.com/XcodesOrg/XcodesApp/releases
# If there are uncategorized PRs, add the appropriate label and run the Release Drafter action manually
# Edit the latest draft release
# Set its tag to the tag you just pushed
# Set its title to a string with the format "$VERSION ($BUILD)"
# Polish the draft release notes, if necessary
# Add the signature to the bottom of the release notes in a comment, like:
< ! -- sparkle:edSignature= $SIGNATURE -- >
# Attach the zip that was created in the Product directory to the release
# Publish the release

shasum -a 256 xcodes.zip
# Update the [Homebrew Cask](https://github.com/XcodesOrg/homebrew-cask/blob/master/Casks/x/xcodes.rb). Matt Kiazyk - Twitter
Twitter | Github | Mastadon |


