XcodesApp
v2.4.1 - Now with 101% more login

XcodesAppはXcodesOrgの一部です - こちらをご覧ください
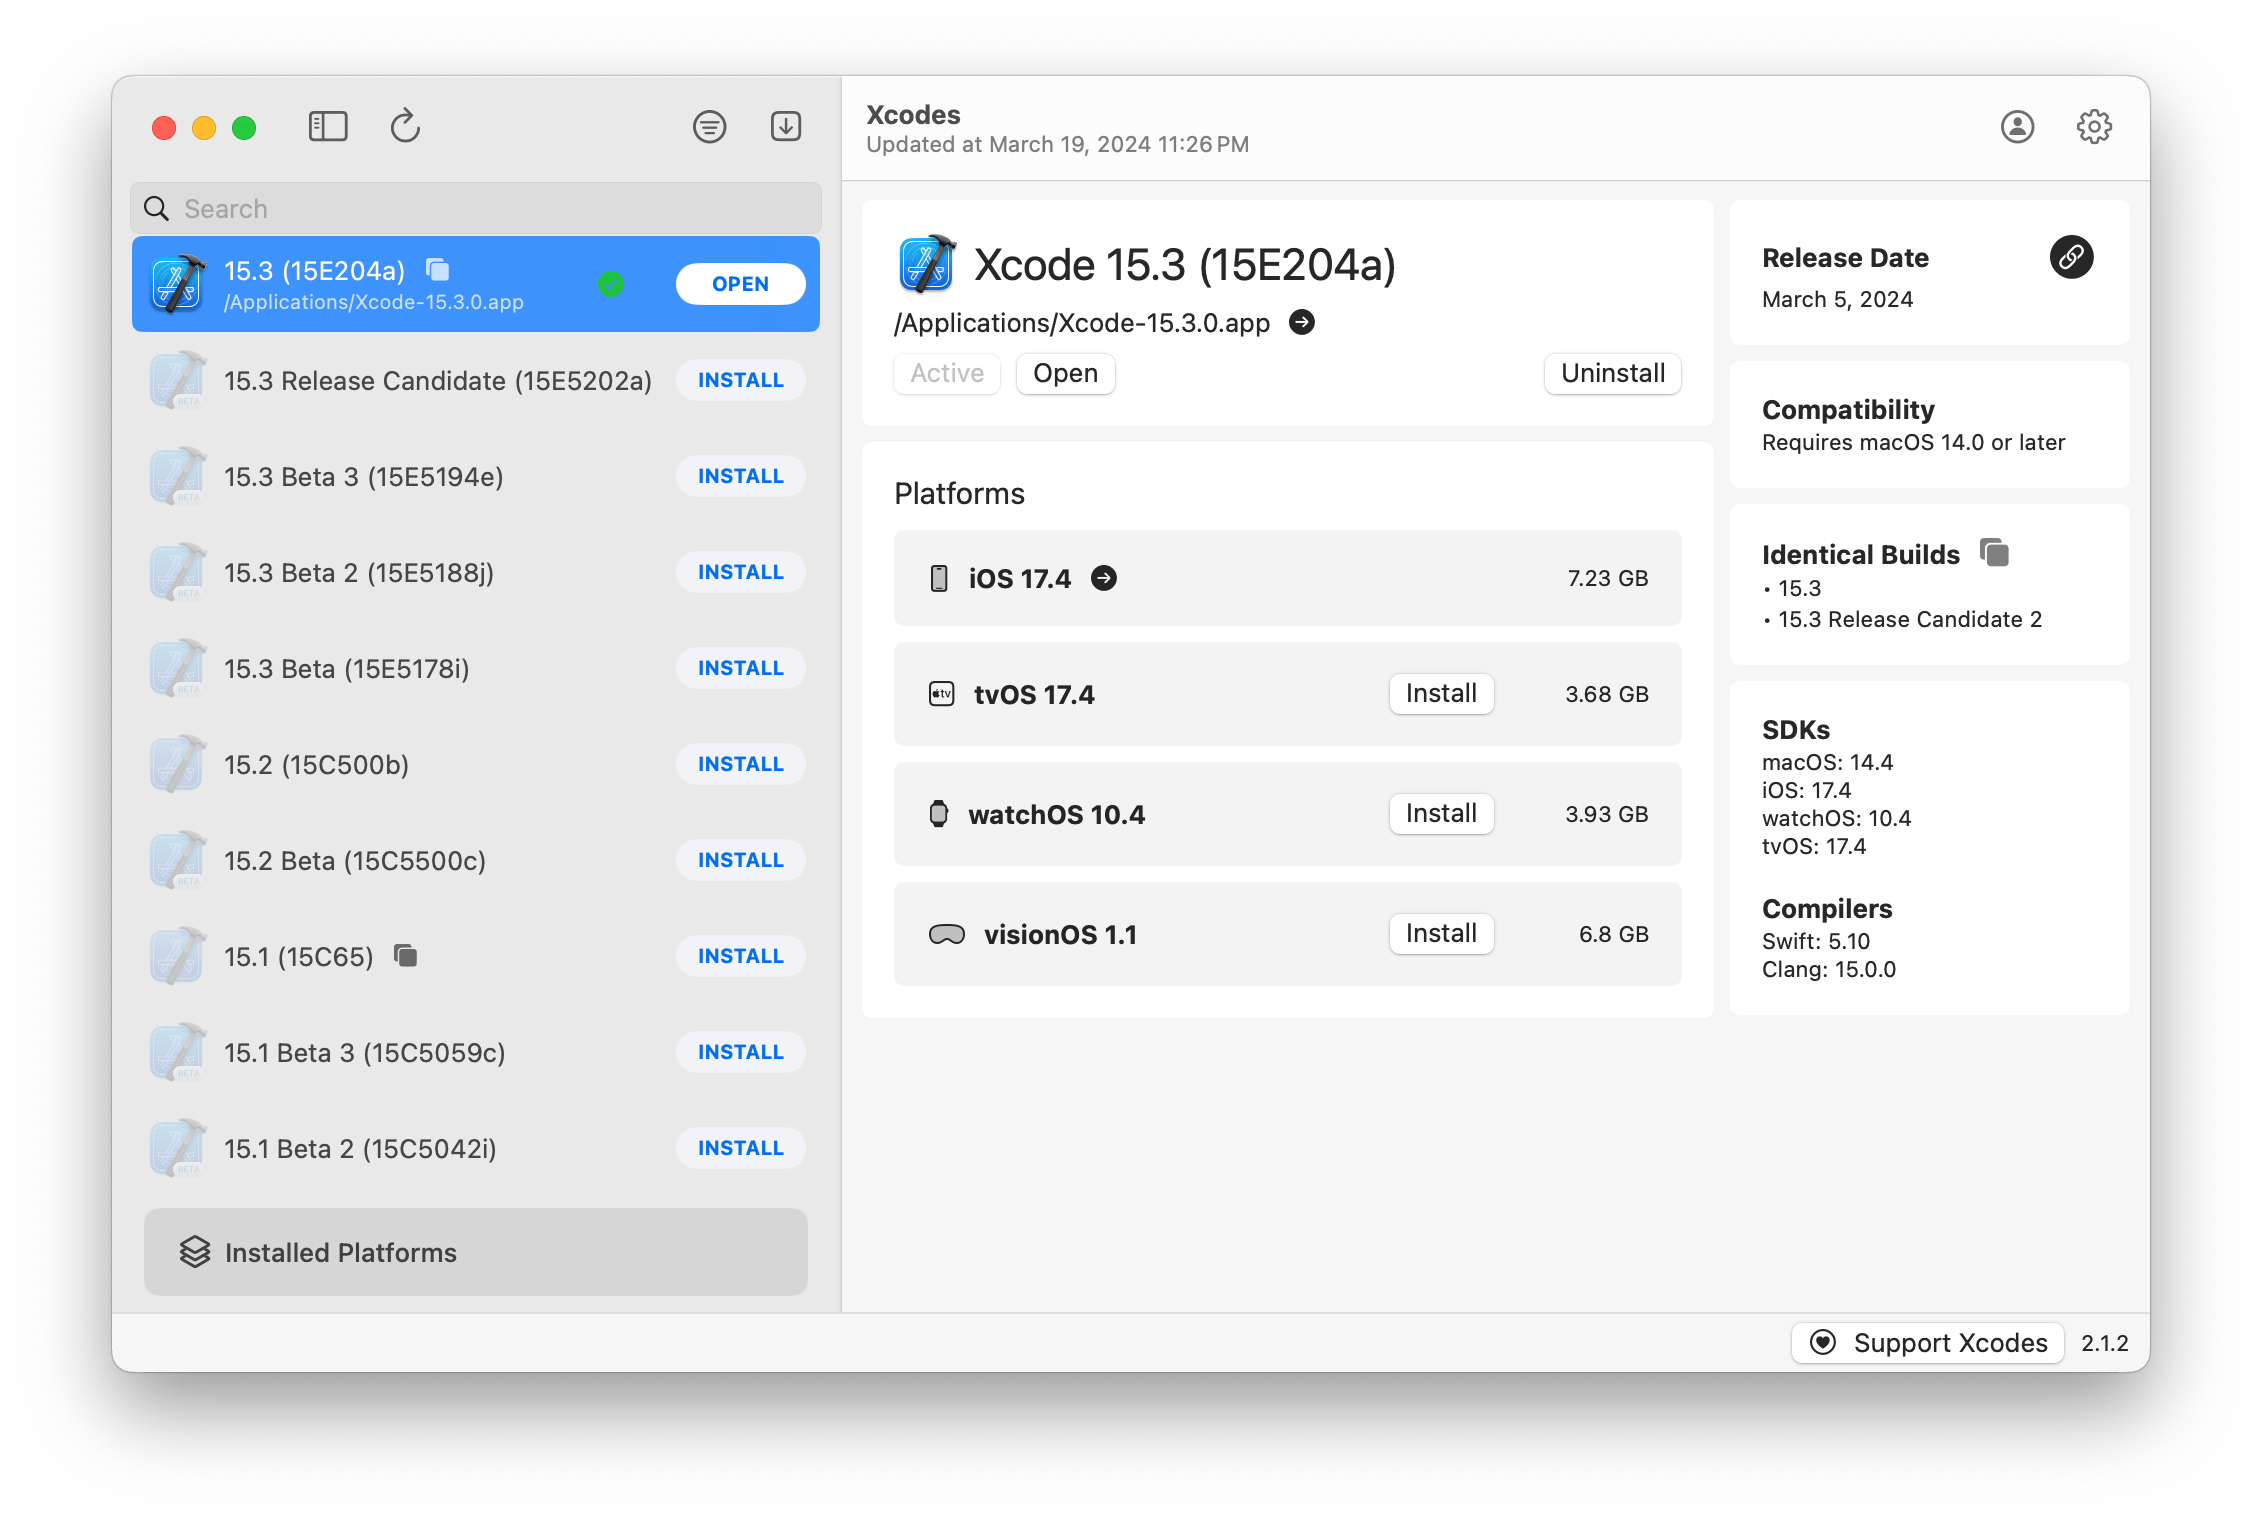
aria2を使用します。ARIA2は、最大16の接続を使用して、URLSESSIONよりも3〜5倍速くダウンロードします。xcode-selectを使用してバージョンをアクティブにします。注:iOS 18+、TVOS 18+、WatchOS 11+、Visionos 2+では、Xcode 16.1ベータ3+をインストールしてアクティブにする必要があります。
Xcodesは、いくつかの言語でのローカリゼーションをサポートしています。
次のコミュニティユーザーのために、次の言語がサポートされています!
| フランス語? | @dompepin | イタリア語?? | Gualtierofrigerio |
| スペイン語??? | @cesartru88 | 韓国?? | @Ryan-Son |
| ロシア人?? | @Alexmazlov | トルコ語?? | @egesucu |
| ヒンディー語?? | @kgurpreet | 中国語版の?? | @megabitsenmzq |
| フィンランド?? | @marcusziade | 中国語の伝統的な?? | @itszero |
| ウクライナ人?? | @gelosi | 日本語 ?? | @tatsuz0u |
| ドイツ語?? | @drct | オランダ?? | @jfversluis |
| ブラジルのポルトガル人?? | @brunomunizaf | ポーランド? | @jakex7 |
| カタロニア | @Ferranabello | ギリシャ語?? | @Alladinian |
言語を追加したいですか?更新された文字列ファイルを使用してPRを作成するだけです。
v1.x -macos 11または新しいv2.xが必要です-macos13が必要です
開発者IDに署名した公証されたリリースビルドは、HomeBrewで利用できます。これらは、使用するためにXcodeを既にインストールする必要はありません。
brew install --cask xcodesXcodes.appを/Applicationsディレクトリに移動しますXcodes.appとCLIは更新され、あなた自身のような貢献者で維持されます。オープンソースライブラリやツールにも費用がかかります。 Xcodesをサポートしたり、ツールの開発とメンテナンスに寄付したい場合は、大歓迎です。義務はまったくありません!
Xcodes.appを構築および実行するには、MacOS 13.5 VenturaとXcode 15が必要です。
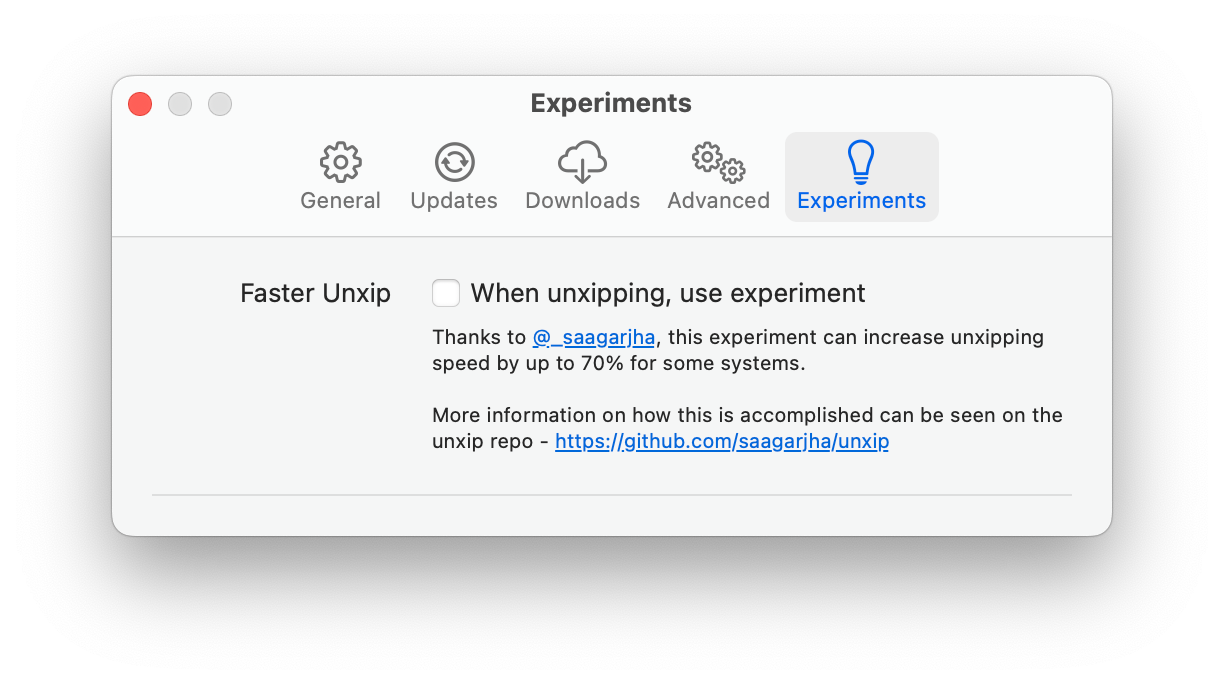
Unxipとaria2ユニバーサルバイナリとしてコンパイルする必要があります
 # compile for Intel
 swiftc -parse-as-library -O -target x86_64-apple-macos11 unxip.swift
# compile for M1
 swiftc -parse-as-library -O -target arm64-apple-macos11 unxip.swift

# combine for universal binary
 lipo -create -output unxip unxip_intel unxip_m1
# check it
 lipo -archs unxip
顕著な設計上の決定は、決定に記録されています。 Apple認証フローはApple.pawで説明されています。これにより、PAWアプリを使用して関与するAPIエンドポイントで再生できます。
xcode-installとFastLane/Spaceshipは、これを可能にすることの難しい部分を把握したことで功績に値します。
以下の手順に従って、xcodes.appの新しいバージョンを構築およびリリースします。 GIT手順のいずれかについては、優先ツールを使用できますが、タグに署名してください。
 # Update the version number in Xcode and commit the change, if necessary

# Question: Did anything in XPCHelper change?
# - com.xcodesorg.xcodesapp.Helper folder and HelperXPCShared
# - if so, bump the version number in com.xcodesorg.xcodesapp.Helper target.
# Note: you do not have to bump the version number if nothing has changed.
# Note2: If you do bump the version, the end user, must re-install the XPCHelper and give permission again.

# Increment the build number
scripts/increment_build_number.sh

# Commit the change
git add Xcodes/Resources/Info.plist
git commit -asm " Increment build number "

# Tag the latest commit
# Replace $VERSION and $BUILD below with the latest real values
git tag -asm " v $VERSIONb$BUILD " " v $VERSIONb$BUILD "

# Push to origin
git push --follow-tags

# Build the app
# Make sure you have the Xcode Selected you want to build with
scripts/package_release.sh

# Notarize the app
# Do this from the Product directory so the app is zipped without being nested inside Product
# Create a app specific password on appleid.apple.com if you haven't already
# xcrun notarytool store-credentials "AC_PASSWORD"
#              --apple-id "[email protected]"
#              --team-id "teamid"
#               --password "app specific password"

pushd Product
../scripts/notarize.sh Xcodes.zip < MYORG >

# Sign the .zip for Sparkle, note the signature in the output for later
# If you're warned about the signing key not being found, see the Xcodes 1Password vault for the key and installation instructions.
../scripts/sign_update Xcodes.zip
popd

# Go to https://github.com/XcodesOrg/XcodesApp/releases
# If there are uncategorized PRs, add the appropriate label and run the Release Drafter action manually
# Edit the latest draft release
# Set its tag to the tag you just pushed
# Set its title to a string with the format "$VERSION ($BUILD)"
# Polish the draft release notes, if necessary
# Add the signature to the bottom of the release notes in a comment, like:
< ! -- sparkle:edSignature= $SIGNATURE -- >
# Attach the zip that was created in the Product directory to the release
# Publish the release

shasum -a 256 xcodes.zip
# Update the [Homebrew Cask](https://github.com/XcodesOrg/homebrew-cask/blob/master/Casks/x/xcodes.rb). Matt Kiazyk -Twitter
Twitter | github |マスタドン|


