XcodesApp
v2.4.1 - Now with 101% more login

XcodesApp fait désormais partie du XcodesOrg - en savoir plus ici
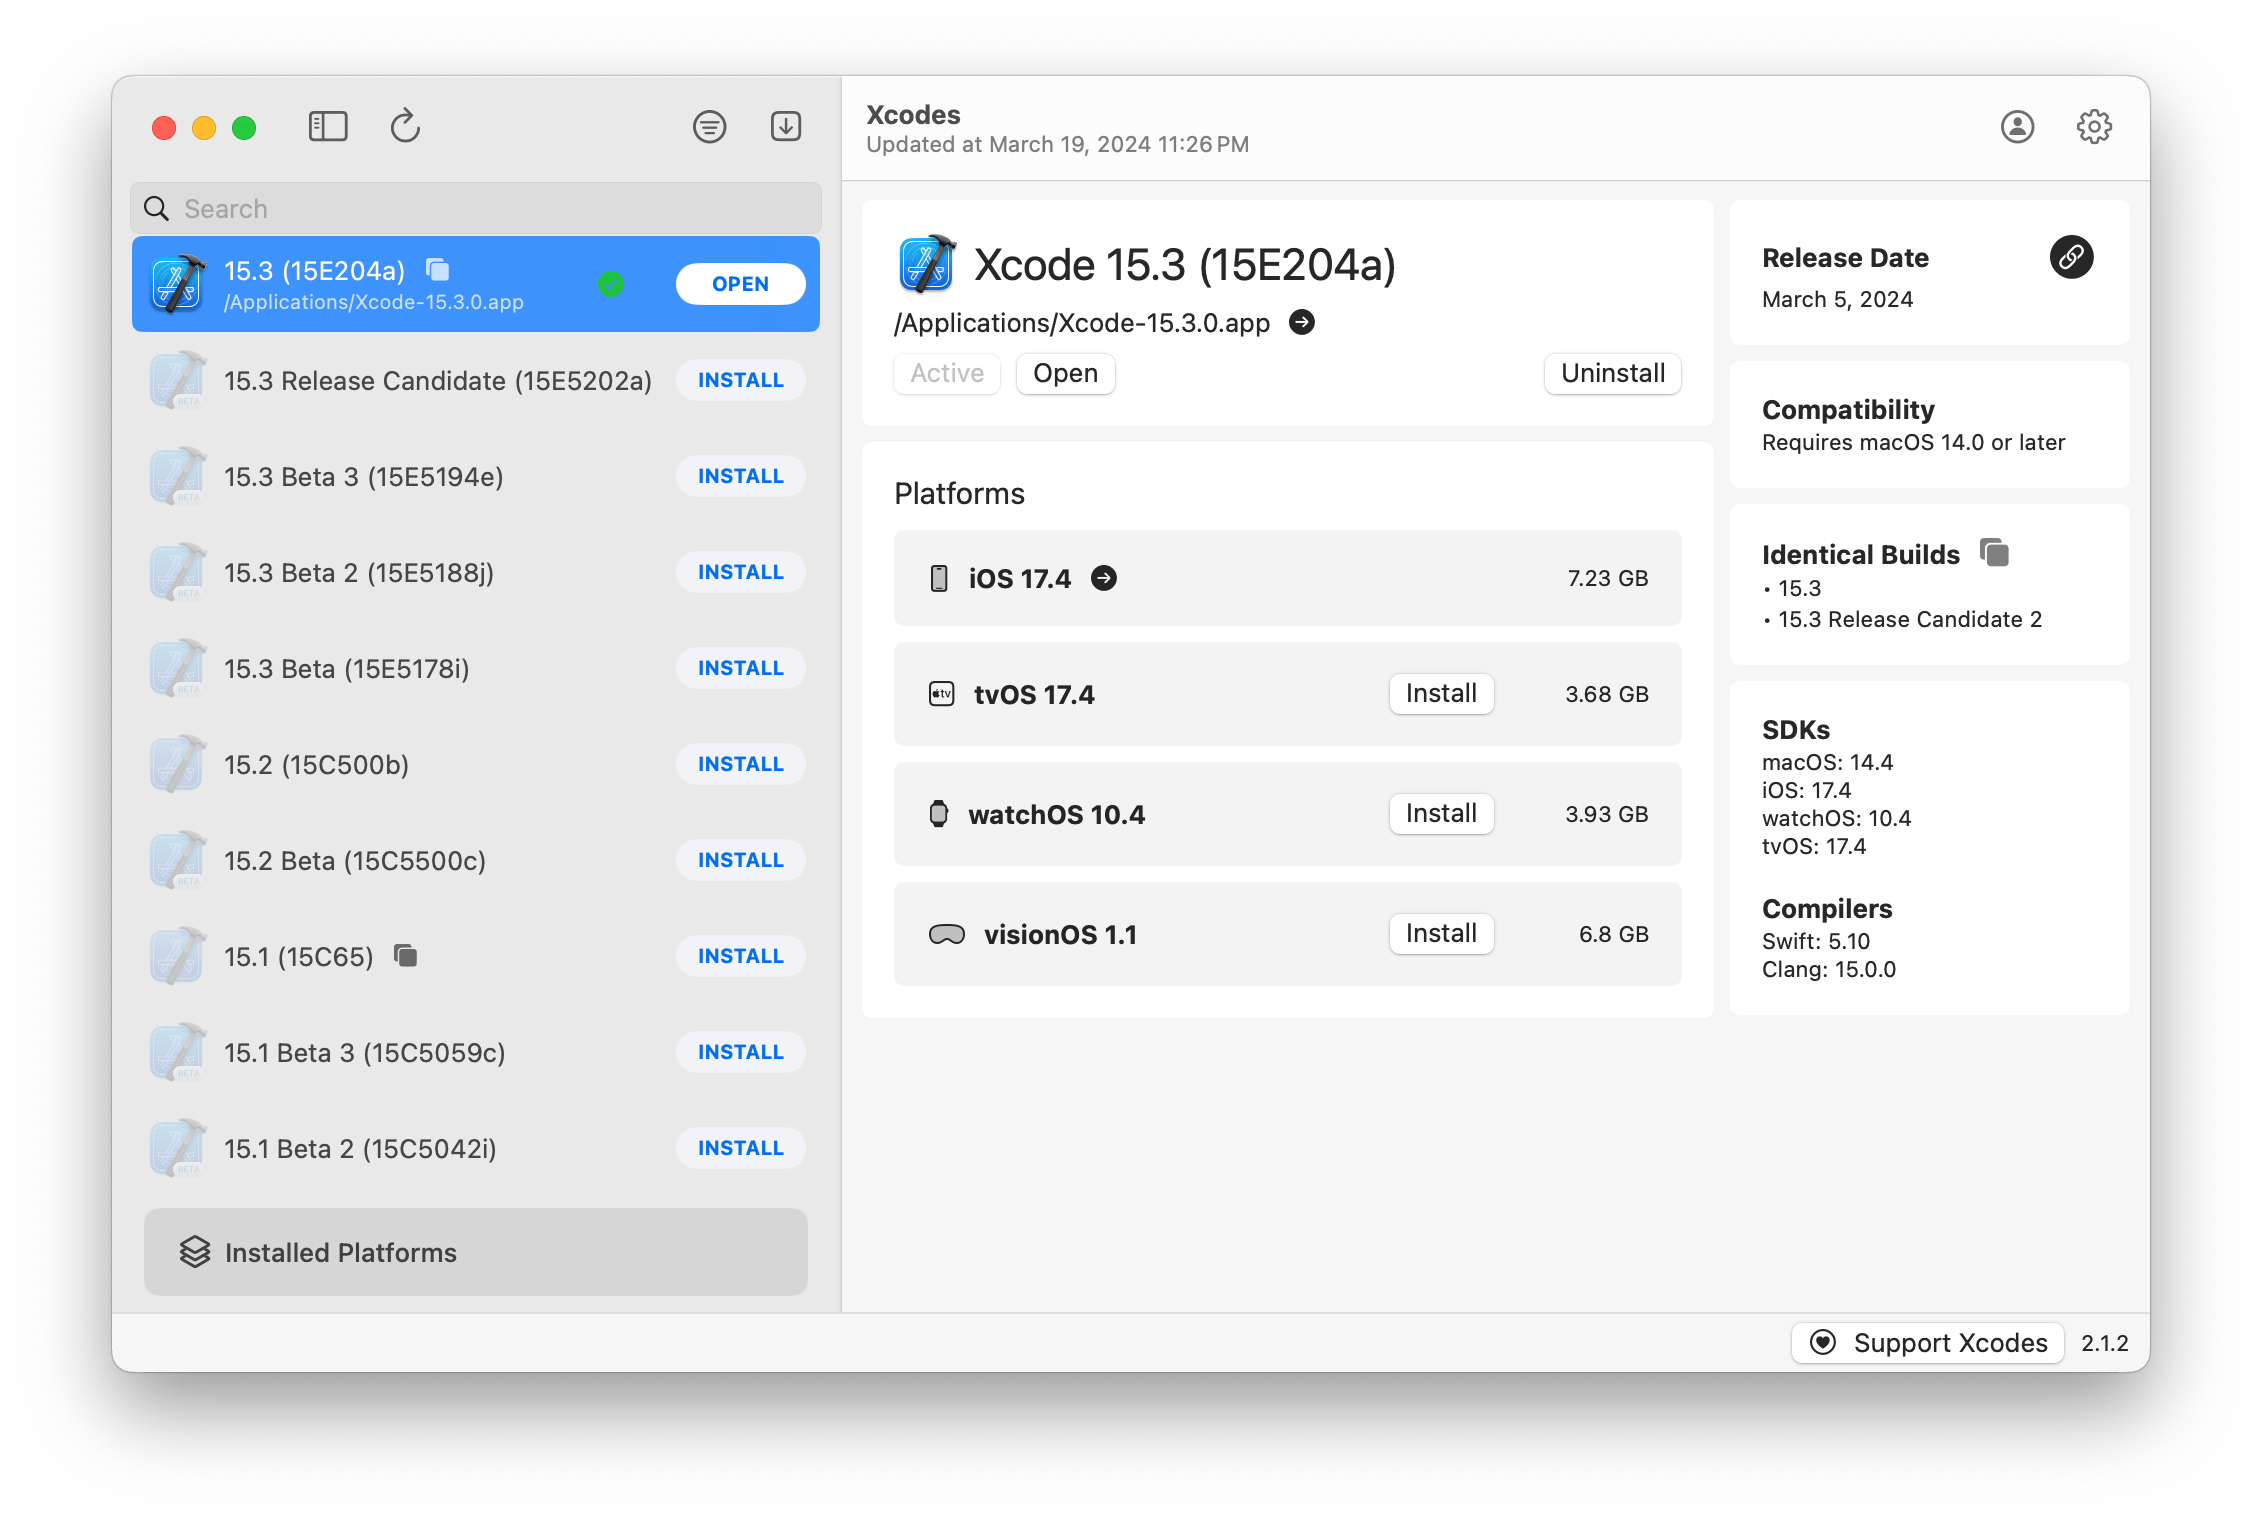
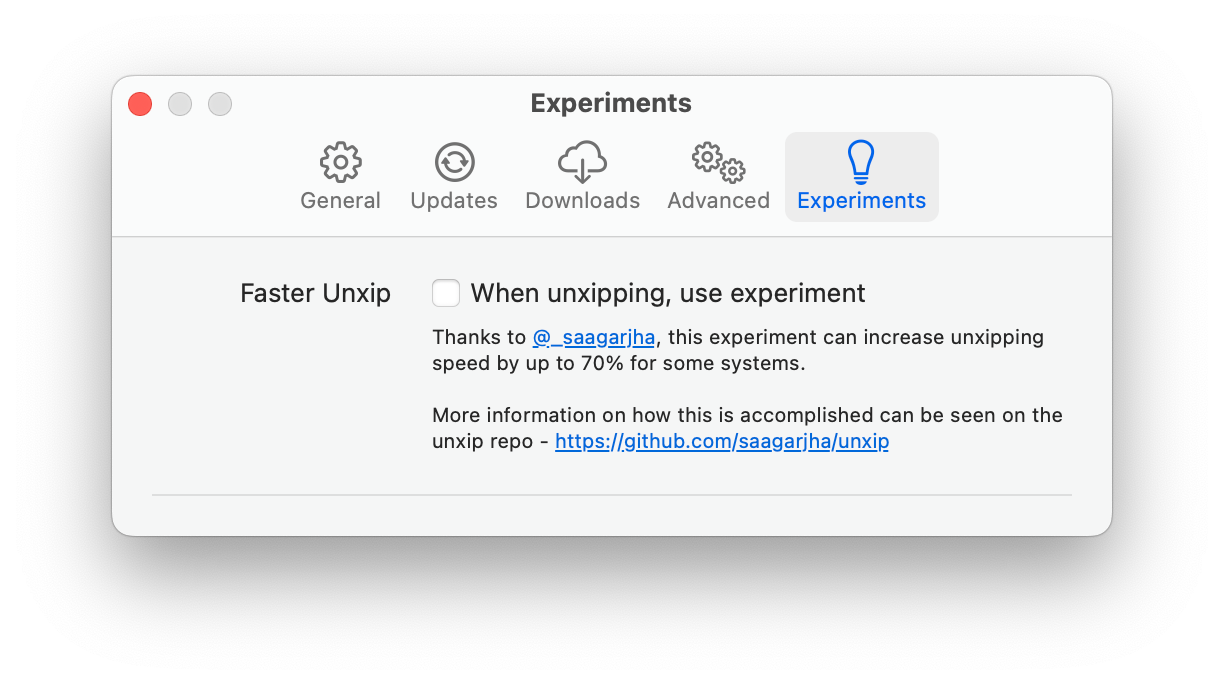
aria2 , qui utilise jusqu'à 16 connexions pour télécharger 3-5x plus rapidement que URLSession.xcode-select .Remarque: IOS 18+, TVOS 18+, WatchOS 11+, VisionOS 2+ nécessite que Xcode 16.1 Beta 3+ soit installé et actif.
Xcodes prend en charge la localisation dans plusieurs langues.
Les langues suivantes sont prises en charge en raison des utilisateurs de la communauté suivants!
| Français ?? | @Dompepin | Italien ?? | Gualtierofrigerio |
| Espagnol ??? | @ CesArtru88 | Coréen ?? | @ Ryan-son |
| Russe ?? | @alexmazlov | Turc ?? | @egeSucu |
| Hindi ?? | @Kgurpreet | Simplifié chinois ?? | @megabitssenmzq |
| Finlandais ?? | @Marcusziade | Chinois-traditionnel ?? | @itszero |
| Ukranien ?? | @gelosi | Japonais ?? | @ tatsuz0u |
| Allemand ?? | @drct | Néerlandais ?? | @jfversluis |
| Portugais brésilien ?? | @brunomunizaf | Polonais ?? | @ jakex7 |
| catalan | @Ferranabello | Grec ?? | @alladinien |
Vous voulez ajouter plus de langues? Créez simplement un PR avec le fichier Strings mis à jour.
v1.x - nécessite macOS 11 ou plus récent V2.x - nécessite un macOS 13
Les versions de versions signées et notariées du développeur sont disponibles sur Homebrew. Ceux-ci ne nécessitent pas que Xcode soit déjà installé pour l'utiliser.
brew install --cask xcodesXcodes.app /Applications Xcodes.app et CLI sont mis à jour, entretenus avec des contributeurs comme vous. Même les bibliothèques et les outils open source sont livrés avec des dépenses. Si vous souhaitez soutenir Xcodes ou faire un don au développement et à la maintenance de l'outil, il serait grandement apprécié. Il n'y a absolument aucune obligation!
Vous aurez besoin de macOS 13.5 Ventura et Xcode 15 afin de construire et d'exécuter xcodes.app.
Unxip et aria2 doivent être compilés comme un binaire universel
 # compile for Intel
 swiftc -parse-as-library -O -target x86_64-apple-macos11 unxip.swift
# compile for M1
 swiftc -parse-as-library -O -target arm64-apple-macos11 unxip.swift

# combine for universal binary
 lipo -create -output unxip unxip_intel unxip_m1
# check it
 lipo -archs unxip
Les décisions de conception notables sont enregistrées dans les décisions.md. Le flux d'authentification Apple est décrit dans Apple.PAW, qui vous permettra de jouer avec les points de terminaison API impliqués à l'aide de l'application PAW.
xcode-install et Fastlane / Spaceship méritent tous deux le mérite d'avoir déterminé les parties dures de ce qui rend cela possible.
Suivez les étapes ci-dessous pour créer et publier une nouvelle version de xcodes.app. Pour l'une des étapes GIT, vous pouvez utiliser votre outil préféré, mais veuillez signer la balise.
 # Update the version number in Xcode and commit the change, if necessary

# Question: Did anything in XPCHelper change?
# - com.xcodesorg.xcodesapp.Helper folder and HelperXPCShared
# - if so, bump the version number in com.xcodesorg.xcodesapp.Helper target.
# Note: you do not have to bump the version number if nothing has changed.
# Note2: If you do bump the version, the end user, must re-install the XPCHelper and give permission again.

# Increment the build number
scripts/increment_build_number.sh

# Commit the change
git add Xcodes/Resources/Info.plist
git commit -asm " Increment build number "

# Tag the latest commit
# Replace $VERSION and $BUILD below with the latest real values
git tag -asm " v $VERSIONb$BUILD " " v $VERSIONb$BUILD "

# Push to origin
git push --follow-tags

# Build the app
# Make sure you have the Xcode Selected you want to build with
scripts/package_release.sh

# Notarize the app
# Do this from the Product directory so the app is zipped without being nested inside Product
# Create a app specific password on appleid.apple.com if you haven't already
# xcrun notarytool store-credentials "AC_PASSWORD"
#              --apple-id "[email protected]"
#              --team-id "teamid"
#               --password "app specific password"

pushd Product
../scripts/notarize.sh Xcodes.zip < MYORG >

# Sign the .zip for Sparkle, note the signature in the output for later
# If you're warned about the signing key not being found, see the Xcodes 1Password vault for the key and installation instructions.
../scripts/sign_update Xcodes.zip
popd

# Go to https://github.com/XcodesOrg/XcodesApp/releases
# If there are uncategorized PRs, add the appropriate label and run the Release Drafter action manually
# Edit the latest draft release
# Set its tag to the tag you just pushed
# Set its title to a string with the format "$VERSION ($BUILD)"
# Polish the draft release notes, if necessary
# Add the signature to the bottom of the release notes in a comment, like:
< ! -- sparkle:edSignature= $SIGNATURE -- >
# Attach the zip that was created in the Product directory to the release
# Publish the release

shasum -a 256 xcodes.zip
# Update the [Homebrew Cask](https://github.com/XcodesOrg/homebrew-cask/blob/master/Casks/x/xcodes.rb). Matt Kiazyk - Twitter
Twitter | Github | Mastadon |


