XcodesApp
v2.4.1 - Now with 101% more login

Xcodesapp은 이제 XcodesOrg 의 일부입니다. 자세히 알아보십시오.
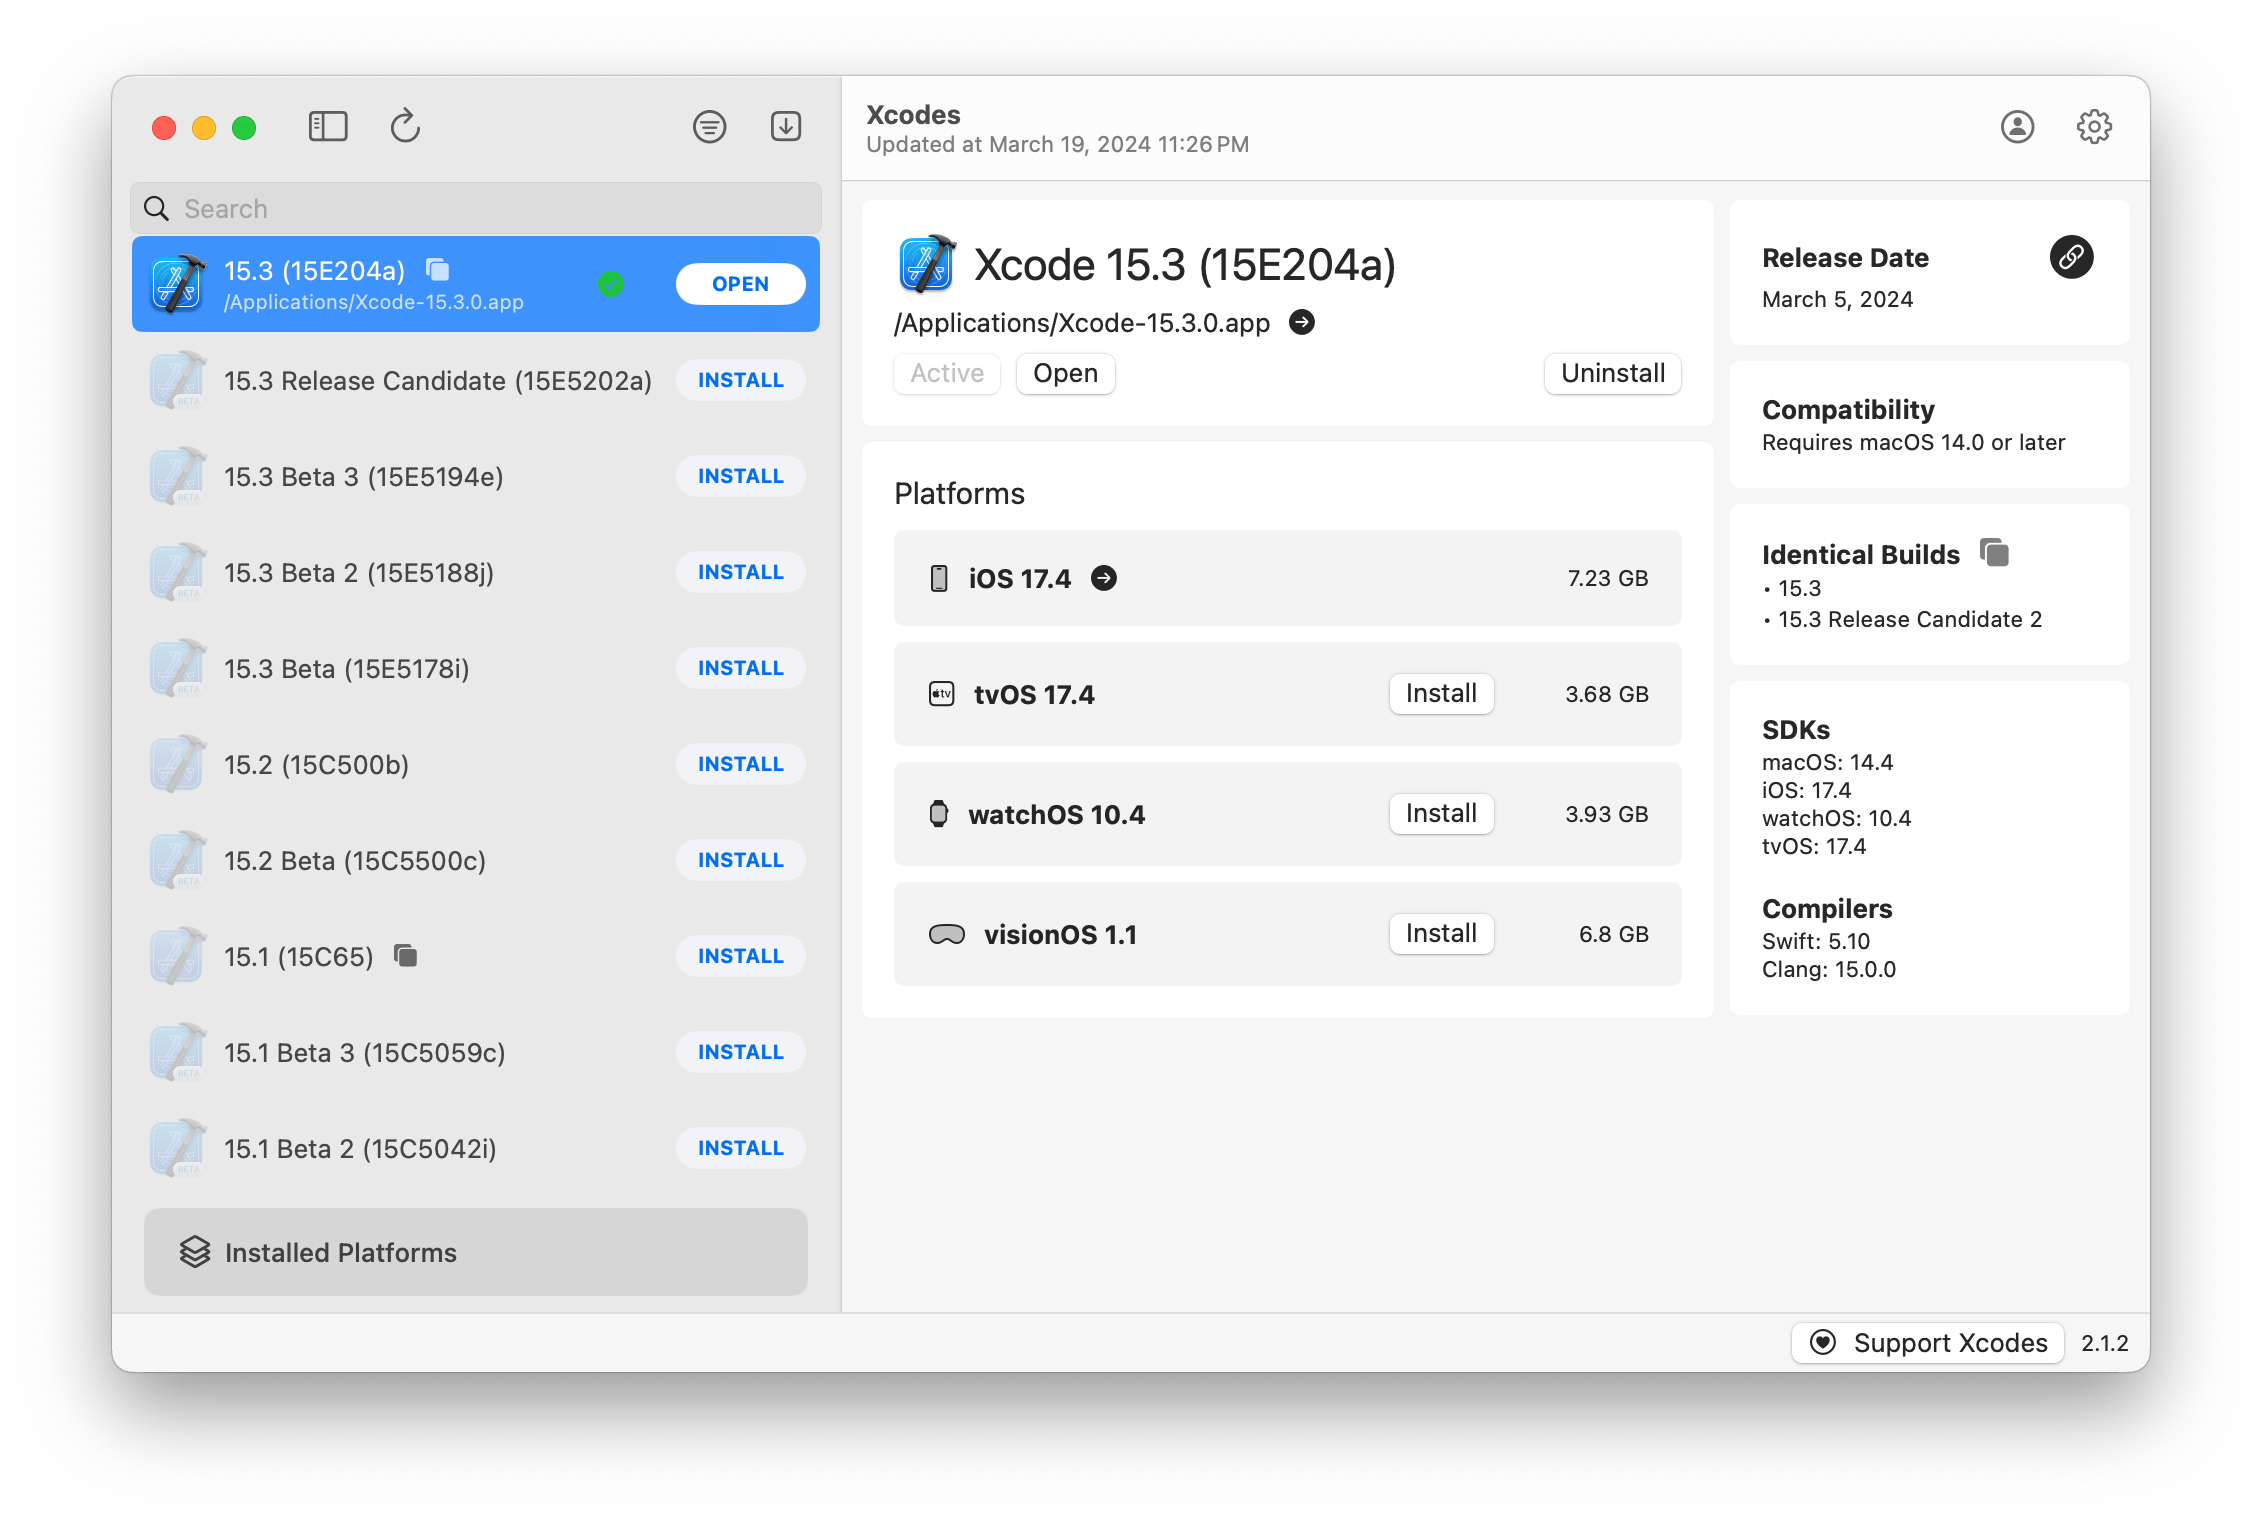
aria2 사용하여 최대 16 개의 연결을 사용하여 URLSESSION보다 3-5 배 빠르게 다운로드합니다.xcode-select 로 버전을 활성화하려면 버튼을 클릭하면됩니다.참고 : iOS 18+, TVOS 18+, WatchOS 11+, VisionOS 2+는 Xcode 16.1 베타 3+를 설치하고 활성화해야합니다.
Xcodes는 여러 언어로 현지화를 지원합니다.
다음 언어는 다음 커뮤니티 사용자로 인해 지원됩니다!
| 프랑스어 ?? | @dompepin | 이탈리아어 ?? | Gualtierofrigerio |
| 스페인어? | @cesartru88 | 한국인 ?? | @Ryan-Son |
| 러시아어 ?? | @alexmazlov | 터키 ?? | @egesucu |
| 힌디어 ?? | @kgurpreet | 중국적 단순화 ?? | @megabitsenmzq |
| 핀란드 ?? | @marcusziade | 중국어 전통 ?? | @itszero |
| 우크라이나 ?? | @gelosi | 일본어 ?? | @tatsuz0u |
| 독일어 ?? | @Drct | 네덜란드 ?? | @jfversluis |
| 브라질 포르투갈어 ?? | @BrunomUnizaf | 광택 ?? | @jakex7 |
| 카탈로니아 사람 | @ferranabello | 그리스어 ?? | @alladinian |
더 많은 언어를 추가하고 싶습니까? 업데이트 된 문자열 파일로 PR을 만듭니다.
v1.x- MACOS 11 또는 최신 v2.x가 필요합니다 - MACOS 13이 필요합니다.
개발자 ID 서명 및 공증 릴리스 빌드는 홈브류에서 제공됩니다. 사용하려면 Xcode를 이미 설치할 필요가 없습니다.
brew install --cask xcodesXcodes.app 귀하의 /Applications 디렉토리로 이동하십시오 Xcodes.app 및 CLI는 업데이트되어 자신과 같은 기고자로 유지됩니다. 오픈 소스 라이브러리와 도구조차도 비용이 제공됩니다. Xcodes를 지원하거나 도구의 개발 및 유지 보수에 기부하려면 대단히 감사하겠습니다. 의무는 전혀 없습니다!
Xcodes.App을 구축하고 실행하려면 MacOS 13.5 Ventura 및 Xcode 15가 필요합니다.
Unxip 및 aria2 범용 바이너리로 컴파일해야합니다.
 # compile for Intel
 swiftc -parse-as-library -O -target x86_64-apple-macos11 unxip.swift
# compile for M1
 swiftc -parse-as-library -O -target arm64-apple-macos11 unxip.swift

# combine for universal binary
 lipo -create -output unxip unxip_intel unxip_m1
# check it
 lipo -archs unxip
주목할만한 디자인 결정은 결정에 기록됩니다 .md. Apple Authentication Flow는 Apple.paw에 설명되어 있으며 PAW 앱을 사용하는 API 엔드 포인트를 사용하여 플레이 할 수 있습니다.
xcode-install 과 Fastlane/Spaceship은 이것을 가능하게하는 이유의 어려운 부분을 파악하는 데 큰 도움이됩니다.
아래 단계를 따라 새 버전의 Xcodes.app을 구축하고 해제하십시오. GIT 단계의 경우 선호하는 도구를 사용할 수 있지만 태그에 서명하십시오.
 # Update the version number in Xcode and commit the change, if necessary

# Question: Did anything in XPCHelper change?
# - com.xcodesorg.xcodesapp.Helper folder and HelperXPCShared
# - if so, bump the version number in com.xcodesorg.xcodesapp.Helper target.
# Note: you do not have to bump the version number if nothing has changed.
# Note2: If you do bump the version, the end user, must re-install the XPCHelper and give permission again.

# Increment the build number
scripts/increment_build_number.sh

# Commit the change
git add Xcodes/Resources/Info.plist
git commit -asm " Increment build number "

# Tag the latest commit
# Replace $VERSION and $BUILD below with the latest real values
git tag -asm " v $VERSIONb$BUILD " " v $VERSIONb$BUILD "

# Push to origin
git push --follow-tags

# Build the app
# Make sure you have the Xcode Selected you want to build with
scripts/package_release.sh

# Notarize the app
# Do this from the Product directory so the app is zipped without being nested inside Product
# Create a app specific password on appleid.apple.com if you haven't already
# xcrun notarytool store-credentials "AC_PASSWORD"
#              --apple-id "[email protected]"
#              --team-id "teamid"
#               --password "app specific password"

pushd Product
../scripts/notarize.sh Xcodes.zip < MYORG >

# Sign the .zip for Sparkle, note the signature in the output for later
# If you're warned about the signing key not being found, see the Xcodes 1Password vault for the key and installation instructions.
../scripts/sign_update Xcodes.zip
popd

# Go to https://github.com/XcodesOrg/XcodesApp/releases
# If there are uncategorized PRs, add the appropriate label and run the Release Drafter action manually
# Edit the latest draft release
# Set its tag to the tag you just pushed
# Set its title to a string with the format "$VERSION ($BUILD)"
# Polish the draft release notes, if necessary
# Add the signature to the bottom of the release notes in a comment, like:
< ! -- sparkle:edSignature= $SIGNATURE -- >
# Attach the zip that was created in the Product directory to the release
# Publish the release

shasum -a 256 xcodes.zip
# Update the [Homebrew Cask](https://github.com/XcodesOrg/homebrew-cask/blob/master/Casks/x/xcodes.rb). Matt Kiazyk- 트위터
트위터 | github | 마스타돈 |


