XcodesApp
v2.4.1 - Now with 101% more login

Xcodesapp теперь является частью XcodesOrg - Подробнее здесь
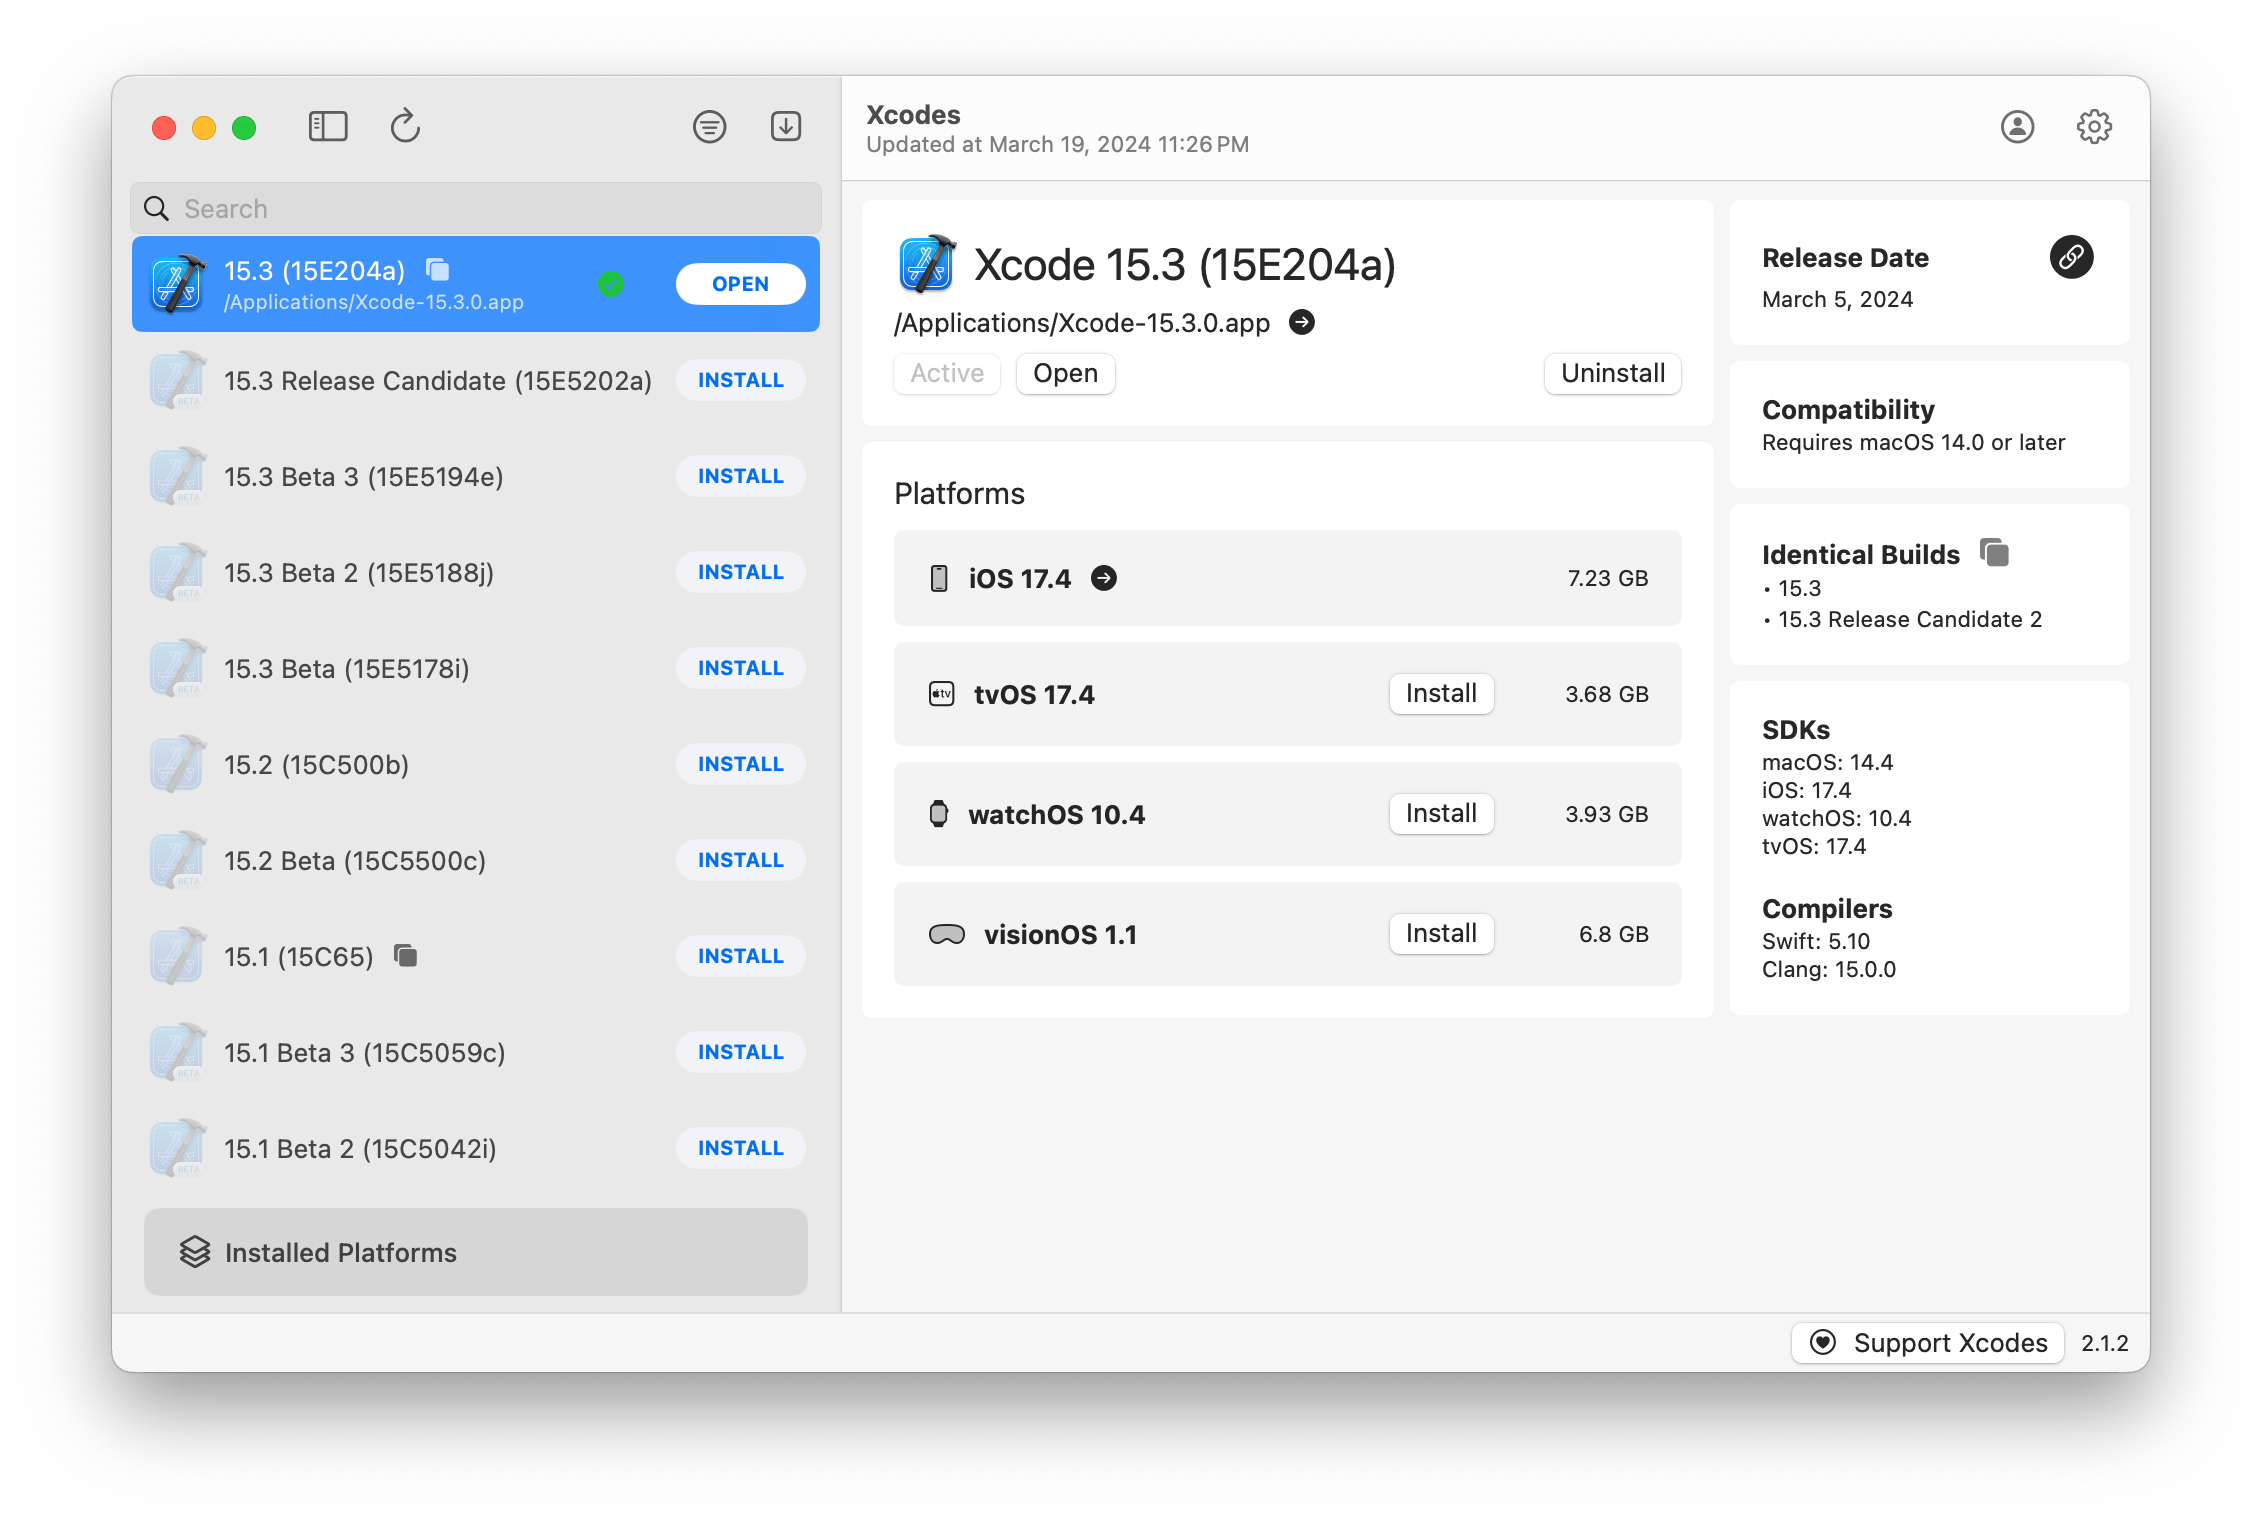
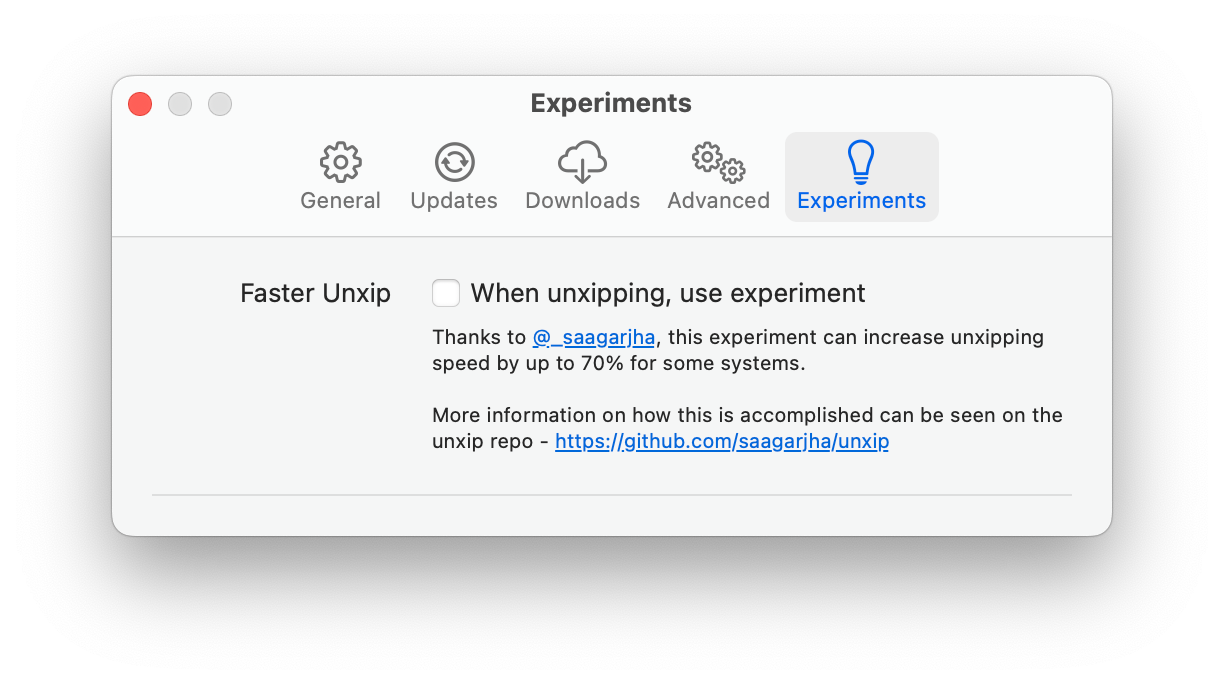
aria2 , который использует до 16 соединений для загрузки в 3-5x быстрее, чем URLSession.xcode-select .Примечание: iOS 18+, TVOS 18+, WatchOS 11+, Visionos 2+ требует, чтобы XCODE 16.1 Beta 3+ была установлена и активна.
Xcodes поддерживает локализацию на нескольких языках.
Следующие языки поддерживаются из -за следующих пользователей сообщества!
| Французский ?? | @dompepin | Итальянский? | Gualtierofrigerio |
| Испанский ??? | @cesartru88 | Корейский | @Райан-Сон |
| Русский ?? | @alexmazlov | Турецкий? | @egesucu |
| Хинди ?? | @Kgurpreet | Китайский-замороженный ?? | @megabitsenmzq |
| Финский ?? | @marcusziade | Китайский традиционный | @itszero |
| Укранян ?? | @gelosi | Японский? | @tatsuz0u |
| Немецкий | @drct | Голландский ?? | @jfversluis |
| Бразильский португальский ?? | @brunomunizaf | Лак ?? | @Jakex7 |
| Каталонский | @ferranabello | Греческий | @Alladinian |
Хотите добавить больше языков? Просто создайте PR с обновленным файлом строк.
v1.x - Требуется macOS 11 или более новая V2.x - требует MacOS 13
На Homebrew доступны сборки идентификационных идентификаторов разработчика и нотариально нотариально. Это не требует, чтобы XCODE уже был установлен для использования.
brew install --cask xcodesXcodes.app в свой каталог /Applications Xcodes.App и CLI обновляются, поддерживаются такими участниками, как вы. Даже библиотеки и инструменты с открытым исходным кодом поставляются с расходами. Если вы хотите поддержать Xcodes или пожертвовать на разработку и обслуживание инструмента, это было бы очень оценено. Там нет абсолютно никаких обязательств!
Вам понадобится MacOS 13.5 Ventura и Xcode 15, чтобы построить и запустить xcodes.app.
Unxip и aria2 должны быть составлены как универсальный бинарный
 # compile for Intel
 swiftc -parse-as-library -O -target x86_64-apple-macos11 unxip.swift
# compile for M1
 swiftc -parse-as-library -O -target arm64-apple-macos11 unxip.swift

# combine for universal binary
 lipo -create -output unxip unxip_intel unxip_m1
# check it
 lipo -archs unxip
Примечательные дизайнерские решения записаны в решениях. MD. Поток аутентификации Apple описан в Apple.PAW, который позволит вам играть с конечными точками API, которые участвуют с использованием приложения PAW.
xcode-install и Fastlane/Spaceship заслуживают похвалы за выяснение сложных частей того, что делает это возможным.
Следуйте приведенным ниже шагам, чтобы создать и выпустить новую версию Xcodes.App. Для любого из шагов GIT вы можете использовать свой предпочтительный инструмент, но, пожалуйста, подпишите тег.
 # Update the version number in Xcode and commit the change, if necessary

# Question: Did anything in XPCHelper change?
# - com.xcodesorg.xcodesapp.Helper folder and HelperXPCShared
# - if so, bump the version number in com.xcodesorg.xcodesapp.Helper target.
# Note: you do not have to bump the version number if nothing has changed.
# Note2: If you do bump the version, the end user, must re-install the XPCHelper and give permission again.

# Increment the build number
scripts/increment_build_number.sh

# Commit the change
git add Xcodes/Resources/Info.plist
git commit -asm " Increment build number "

# Tag the latest commit
# Replace $VERSION and $BUILD below with the latest real values
git tag -asm " v $VERSIONb$BUILD " " v $VERSIONb$BUILD "

# Push to origin
git push --follow-tags

# Build the app
# Make sure you have the Xcode Selected you want to build with
scripts/package_release.sh

# Notarize the app
# Do this from the Product directory so the app is zipped without being nested inside Product
# Create a app specific password on appleid.apple.com if you haven't already
# xcrun notarytool store-credentials "AC_PASSWORD"
#              --apple-id "[email protected]"
#              --team-id "teamid"
#               --password "app specific password"

pushd Product
../scripts/notarize.sh Xcodes.zip < MYORG >

# Sign the .zip for Sparkle, note the signature in the output for later
# If you're warned about the signing key not being found, see the Xcodes 1Password vault for the key and installation instructions.
../scripts/sign_update Xcodes.zip
popd

# Go to https://github.com/XcodesOrg/XcodesApp/releases
# If there are uncategorized PRs, add the appropriate label and run the Release Drafter action manually
# Edit the latest draft release
# Set its tag to the tag you just pushed
# Set its title to a string with the format "$VERSION ($BUILD)"
# Polish the draft release notes, if necessary
# Add the signature to the bottom of the release notes in a comment, like:
< ! -- sparkle:edSignature= $SIGNATURE -- >
# Attach the zip that was created in the Product directory to the release
# Publish the release

shasum -a 256 xcodes.zip
# Update the [Homebrew Cask](https://github.com/XcodesOrg/homebrew-cask/blob/master/Casks/x/xcodes.rb). Мэтт Киазик - Твиттер
Twitter | GitHub | Мастадон |


