XcodesApp
v2.4.1 - Now with 101% more login

XCODESAPP ist jetzt Teil des XcodesOrg - Lesen Sie hier mehr
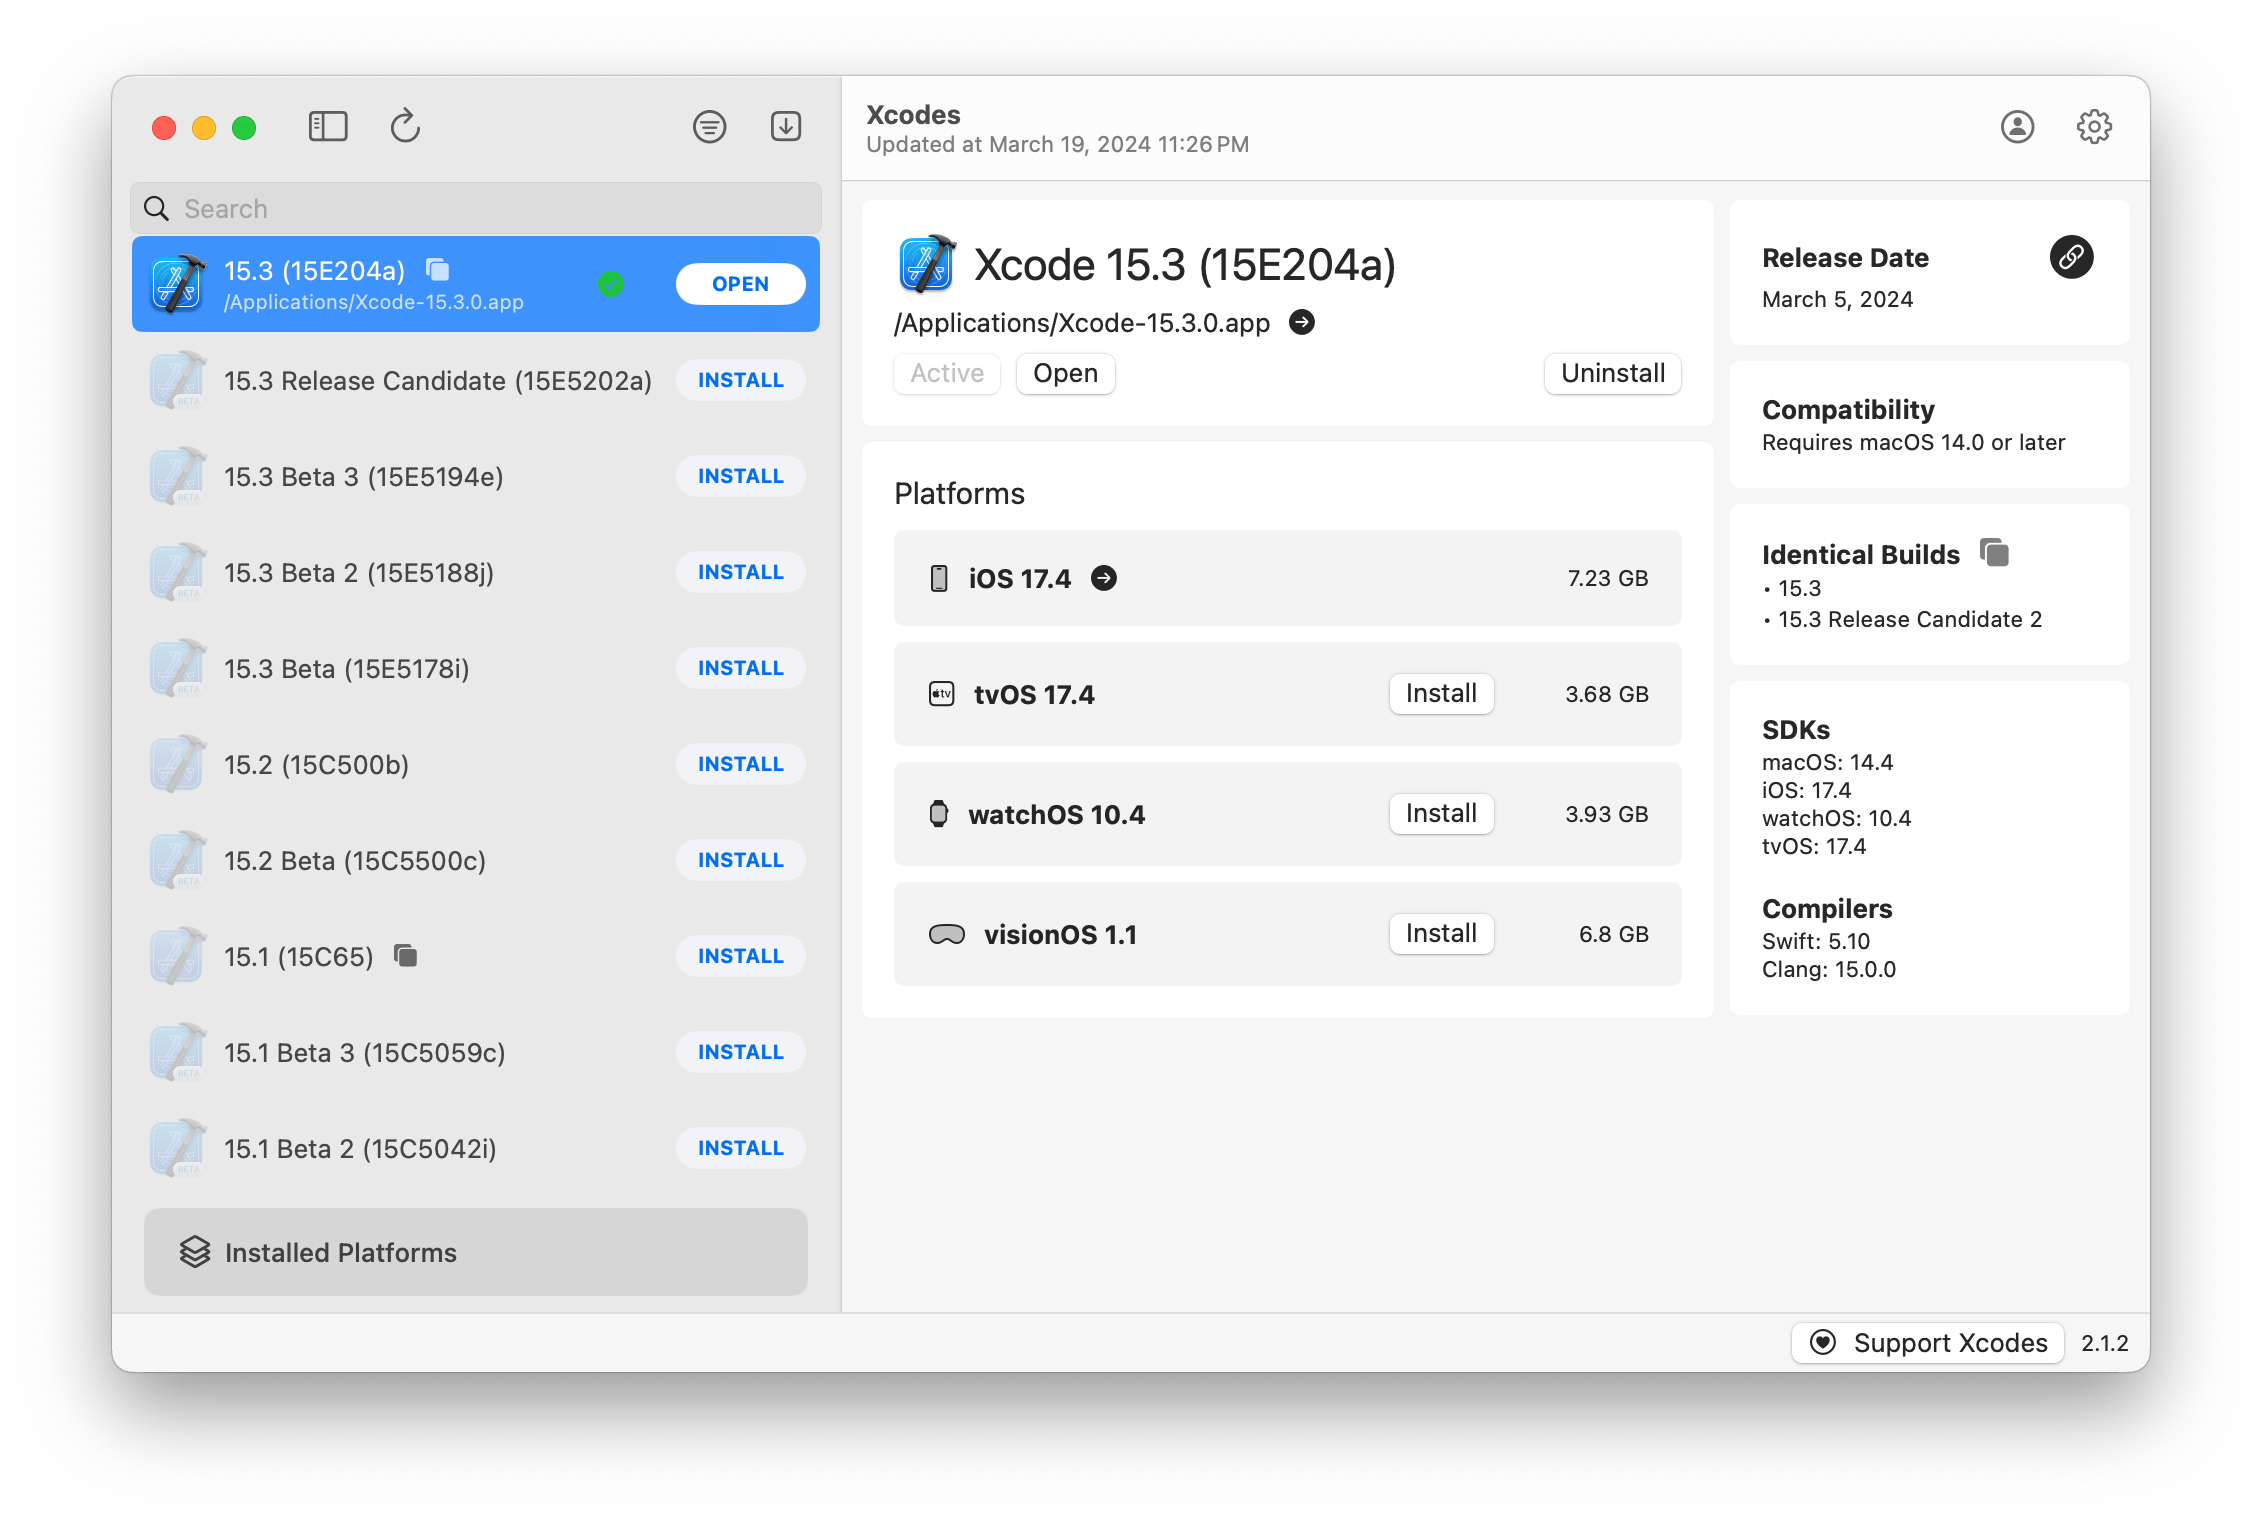
aria2 , das bis zu 16 Verbindungen verwendet, um 3-5x schneller herunterzuladen als die UrlSession.xcode-select aktiv zu machen.Hinweis: IOS 18+, TVOS 18+, WatchOS 11+, VisionOS 2+ erfordert, dass Xcode 16.1 Beta 3+ installiert und aktiv ist.
XCODES unterstützt die Lokalisierung in mehreren Sprachen.
Die folgenden Sprachen werden aufgrund der folgenden Community -Nutzer unterstützt!
| Französisch ?? | @dompepin | Italienisch ?? | Gualtierofrigerio |
| Spanisch ??? | @CesArtru88 | Koreanisch? | @Ryan-son |
| Russisch? | @alexmazlov | Türkisch? | @egesucu |
| Hindi ?? | @Kgurpreet | Chinesische Simplifizierung? | @Megabitsenmzq |
| Finnisch? | @Marcusziade | Chinesisch-traditionell? | @itszero |
| Ukranisch? | @gelosi | Japanisch? | @Tatsuz0u |
| Deutsch ?? | @Drct | Niederländisch ?? | @jfversluis |
| Brasilianischer Portugiesisch? | @brunomunizaf | Politur ?? | @Jakex7 |
| katalanisch | @Ferranabello | Griechisch? | @alladinian |
Möchten Sie weitere Sprachen hinzufügen? Erstellen Sie einfach eine PR mit der aktualisierten Strings -Datei.
v1.x - Benötigt MacOS 11 oder neuer v2.x - Benötigt MacOS 13
Entwickler-ID-Signed- und Notariz-Release-Builds sind auf Homebrew verfügbar. Für diese müssen Xcode nicht bereits installiert werden, um sie zu verwenden.
brew install --cask xcodesXcodes.app /Applications XCODES.App und CLI werden aktualisiert und mit Mitwirkenden wie Ihnen gepflegt. Sogar Open Source -Bibliotheken und -Tools sind mit Ausgaben ausgestattet. Wenn Sie XCodes unterstützen oder für die Entwicklung und Wartung des Tools spenden möchten, wäre dies sehr geschätzt. Es gibt absolut keine Verpflichtung!
Sie benötigen macOS 13.5 Ventura und Xcode 15, um xcodes.app zu erstellen und auszuführen.
Unxip und aria2 müssen als universelle Binärdatum zusammengestellt werden
 # compile for Intel
 swiftc -parse-as-library -O -target x86_64-apple-macos11 unxip.swift
# compile for M1
 swiftc -parse-as-library -O -target arm64-apple-macos11 unxip.swift

# combine for universal binary
 lipo -create -output unxip unxip_intel unxip_m1
# check it
 lipo -archs unxip
Bemerkenswerte Entwurfsentscheidungen werden in Entscheidungen erfasst. Der Apple -Authentifizierungsfluss wird in Apple.paw beschrieben, mit dem Sie mit den API -Endpunkten spielen können, die mit der PAW -App beteiligt sind.
xcode-install und Fastlane/Spaceship verdienen beide Anerkennung dafür, die harten Teile dessen herauszufinden, was dies möglich macht.
Befolgen Sie die folgenden Schritte, um eine neue Version von xcodes.app zu erstellen und zu veröffentlichen. Für einen der Git -Schritte können Sie Ihr bevorzugter Tool verwenden, bitte unterschreiben Sie das Tag.
 # Update the version number in Xcode and commit the change, if necessary

# Question: Did anything in XPCHelper change?
# - com.xcodesorg.xcodesapp.Helper folder and HelperXPCShared
# - if so, bump the version number in com.xcodesorg.xcodesapp.Helper target.
# Note: you do not have to bump the version number if nothing has changed.
# Note2: If you do bump the version, the end user, must re-install the XPCHelper and give permission again.

# Increment the build number
scripts/increment_build_number.sh

# Commit the change
git add Xcodes/Resources/Info.plist
git commit -asm " Increment build number "

# Tag the latest commit
# Replace $VERSION and $BUILD below with the latest real values
git tag -asm " v $VERSIONb$BUILD " " v $VERSIONb$BUILD "

# Push to origin
git push --follow-tags

# Build the app
# Make sure you have the Xcode Selected you want to build with
scripts/package_release.sh

# Notarize the app
# Do this from the Product directory so the app is zipped without being nested inside Product
# Create a app specific password on appleid.apple.com if you haven't already
# xcrun notarytool store-credentials "AC_PASSWORD"
#              --apple-id "[email protected]"
#              --team-id "teamid"
#               --password "app specific password"

pushd Product
../scripts/notarize.sh Xcodes.zip < MYORG >

# Sign the .zip for Sparkle, note the signature in the output for later
# If you're warned about the signing key not being found, see the Xcodes 1Password vault for the key and installation instructions.
../scripts/sign_update Xcodes.zip
popd

# Go to https://github.com/XcodesOrg/XcodesApp/releases
# If there are uncategorized PRs, add the appropriate label and run the Release Drafter action manually
# Edit the latest draft release
# Set its tag to the tag you just pushed
# Set its title to a string with the format "$VERSION ($BUILD)"
# Polish the draft release notes, if necessary
# Add the signature to the bottom of the release notes in a comment, like:
< ! -- sparkle:edSignature= $SIGNATURE -- >
# Attach the zip that was created in the Product directory to the release
# Publish the release

shasum -a 256 xcodes.zip
# Update the [Homebrew Cask](https://github.com/XcodesOrg/homebrew-cask/blob/master/Casks/x/xcodes.rb). Matt Kiazyk - Twitter
Twitter | Github | Mastadon |


