XcodesApp
v2.4.1 - Now with 101% more login

XcodesApp ahora es parte de XcodesOrg - Leer más aquí
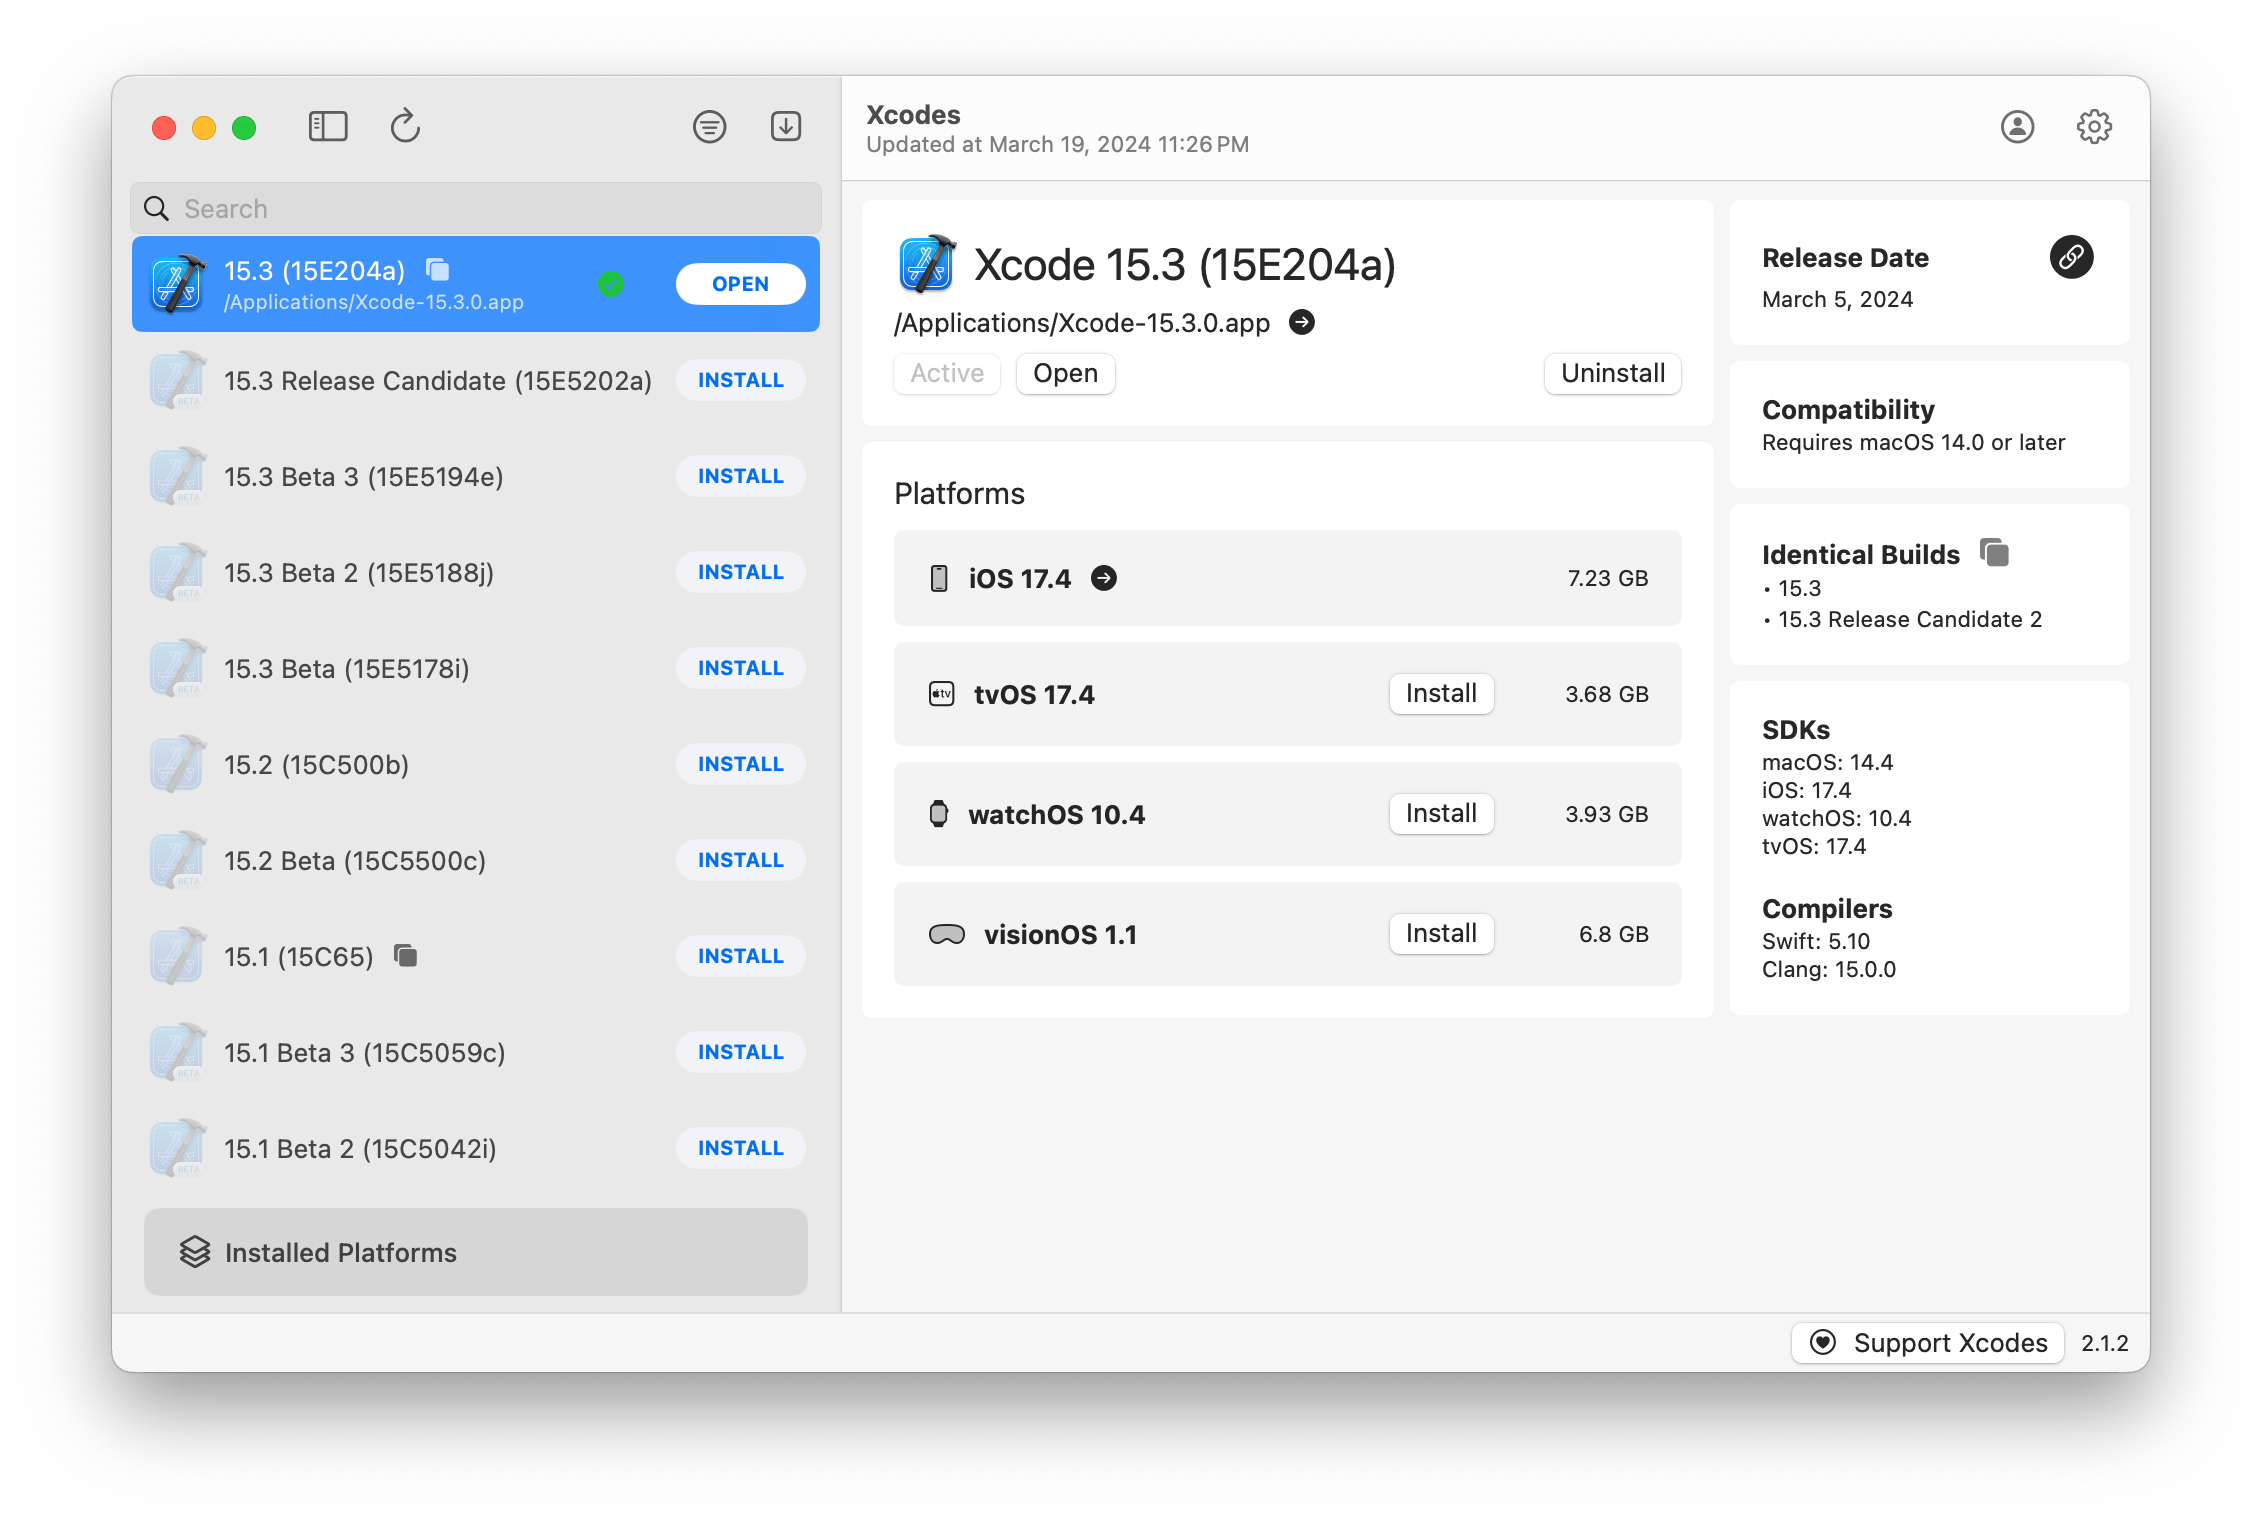
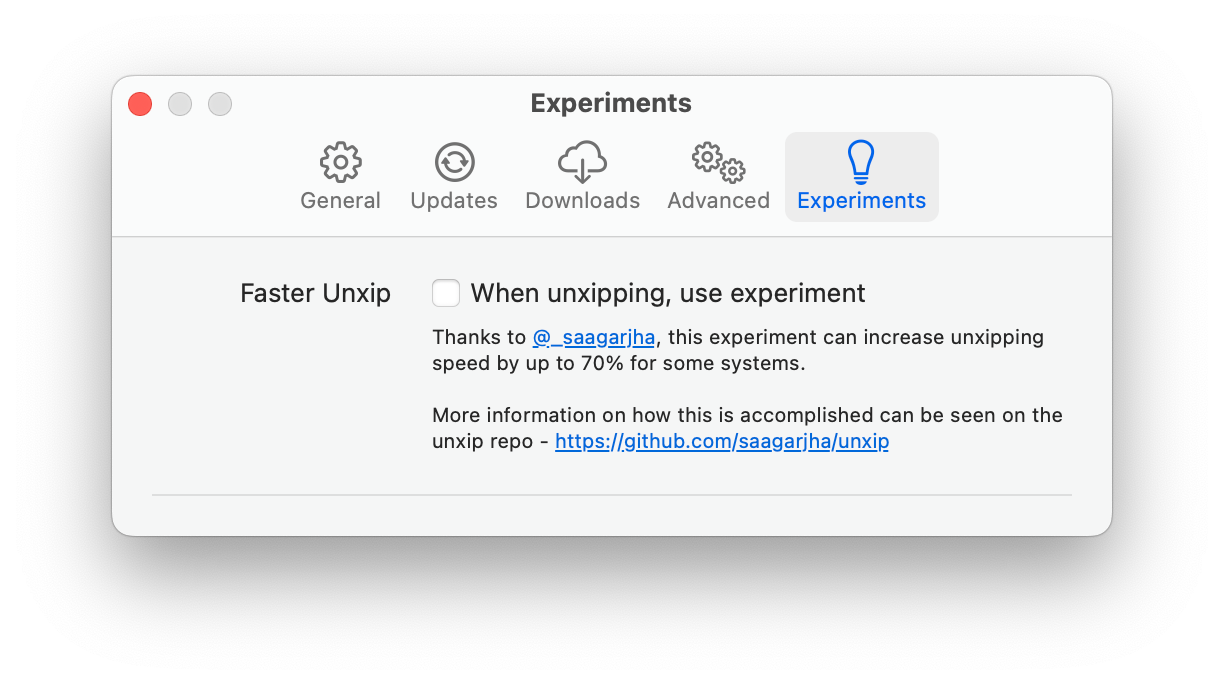
aria2 , que utiliza hasta 16 conexiones para descargar 3-5x más rápido que URLSession.xcode-select .Nota: iOS 18+, TVOS 18+, WatchOS 11+, VisionOS 2+ requiere que Xcode 16.1 beta 3+ esté instalado y activo.
Xcodes admite la localización en varios idiomas.
¡Los siguientes idiomas son compatibles con los siguientes usuarios de la comunidad!
| Francés ?? | @Dompepin | Italiano ?? | Gualtierofrigigerio |
| Español ??? | @cesartru88 | Coreano ?? | @ryan-eon |
| ¿Ruso ?? | @alexmazlov | Turco ?? | @egesucu |
| Hindi ?? | @Kgurpreet | Simplificado chino ?? | @megabitsenmzq |
| Finlandés ?? | @Marcusziade | China-tradición ?? | @itszero |
| Ucraniano ?? | @Gelosi | Japonés ?? | @tatsuz0u |
| Alemán ?? | @DRCT | Holandés ?? | @jfversluis |
| Brasileño portugués ?? | @brunomunizaf | Polaco ?? | @jakex7 |
| catalán | @Ferranabello | Griego ?? | @Aladiniano |
¿Quieres agregar más idiomas? Simplemente cree un PR con el archivo Strings actualizado.
v1.x - requiere macOS 11 o más nuevo v2.x - requiere macOS 13
Las compilaciones de lanzamiento de ID de desarrollador están disponibles en Homebrew. Estos no requieren que Xcode ya esté instalado para usar.
brew install --cask xcodesXcodes.app COMENTES DE LIMPIEDO a su directorio /Applications Xcodes.App y CLI se actualizan, se mantienen con contribuyentes como usted. Incluso las bibliotecas y herramientas de código abierto vienen con gastos. Si desea admitir Xcodes o donar al desarrollo y mantenimiento de la herramienta, sería muy apreciado. ¡No hay absolutamente ninguna obligación!
Necesitará MacOS 13.5 Ventura y Xcode 15 para construir y ejecutar Xcodes.App.
Unxip y aria2 deben ser compilados como un binario universal
 # compile for Intel
 swiftc -parse-as-library -O -target x86_64-apple-macos11 unxip.swift
# compile for M1
 swiftc -parse-as-library -O -target arm64-apple-macos11 unxip.swift

# combine for universal binary
 lipo -create -output unxip unxip_intel unxip_m1
# check it
 lipo -archs unxip
Las decisiones de diseño notables se registran en las decisiones. El flujo de autenticación de Apple se describe en Apple.PAW, que le permitirá jugar con los puntos finales de la API que están involucrados utilizando la aplicación PAW.
xcode-install y Fastlane/Spaceship merecen crédito por descubrir las partes duras de lo que hace que esto sea posible.
Siga los pasos a continuación para construir y lanzar una nueva versión de Xcodes.App. Para cualquiera de los pasos de Git, puede usar su herramienta preferida, pero firme la etiqueta.
 # Update the version number in Xcode and commit the change, if necessary

# Question: Did anything in XPCHelper change?
# - com.xcodesorg.xcodesapp.Helper folder and HelperXPCShared
# - if so, bump the version number in com.xcodesorg.xcodesapp.Helper target.
# Note: you do not have to bump the version number if nothing has changed.
# Note2: If you do bump the version, the end user, must re-install the XPCHelper and give permission again.

# Increment the build number
scripts/increment_build_number.sh

# Commit the change
git add Xcodes/Resources/Info.plist
git commit -asm " Increment build number "

# Tag the latest commit
# Replace $VERSION and $BUILD below with the latest real values
git tag -asm " v $VERSIONb$BUILD " " v $VERSIONb$BUILD "

# Push to origin
git push --follow-tags

# Build the app
# Make sure you have the Xcode Selected you want to build with
scripts/package_release.sh

# Notarize the app
# Do this from the Product directory so the app is zipped without being nested inside Product
# Create a app specific password on appleid.apple.com if you haven't already
# xcrun notarytool store-credentials "AC_PASSWORD"
#              --apple-id "[email protected]"
#              --team-id "teamid"
#               --password "app specific password"

pushd Product
../scripts/notarize.sh Xcodes.zip < MYORG >

# Sign the .zip for Sparkle, note the signature in the output for later
# If you're warned about the signing key not being found, see the Xcodes 1Password vault for the key and installation instructions.
../scripts/sign_update Xcodes.zip
popd

# Go to https://github.com/XcodesOrg/XcodesApp/releases
# If there are uncategorized PRs, add the appropriate label and run the Release Drafter action manually
# Edit the latest draft release
# Set its tag to the tag you just pushed
# Set its title to a string with the format "$VERSION ($BUILD)"
# Polish the draft release notes, if necessary
# Add the signature to the bottom of the release notes in a comment, like:
< ! -- sparkle:edSignature= $SIGNATURE -- >
# Attach the zip that was created in the Product directory to the release
# Publish the release

shasum -a 256 xcodes.zip
# Update the [Homebrew Cask](https://github.com/XcodesOrg/homebrew-cask/blob/master/Casks/x/xcodes.rb). Matt Kiazyk - Twitter
Twitter | GitHub | Mastadon |


