Arch Linux
1.0.0

Arch Linux Linux Linux Linux is a free and open Source operating system. This is constantly updated distributor, i.e. it is constantly updated and users get the latest software updates and safety corrections. Arch Linux is designed for its simplicity, flexibility, and experienced Linux users who want to fully control their system.
The purpose of the guide is to provide a complete and step-by-step guide to the installation of Arch Linux. This guide is designed to help Arch Linux and want to test it, as well as experienced Linux users who want to set the Arch Linux in their systems.
The target audience for the manuals: The target audience of this guide is everyone who is interested in learning how to install Arch Linux. The manual is responsible for arch Linux for beginners and new beginners and experienced Linux users, who are looking for a simple and understandable method of setting up their systems.
Minimum device requirements: Your system must meet the requirements of the following minimum device to set the Arch Linux successfully:
Recommended hardware specification: To have the best experience with Arch Linux it is recommended to have the following specifications:
The existing memory space: The memory area required for Arch Linux depends on the software to use the system to be used and installed. As the general rule, it is recommended that main installation is at least 20 GB of free space. If you want to install additional programs or plan to save large amounts of files, you may need more memory.
To write the Arch Linux Jesus into the USB disc: Before installing the Arch Linux, you must create a USB drive that is loaded with Jesus Arch Linux. To do this, you can use tools such as Rufus or Ethcher and or through the Linux terminal. Download the latest version of Arch Linux Jesus on the formal arch Linux website and then use this tool to write Jesus on the USB drive.
Download the .iso Format (3 chi from top)
Write Arch Linux to USB via Linux terminal
dd bs=4M if=/home/ismoilovdev/Documents/archlinux-x86_64.iso of=/dev/sdb conv=fsync oflag=direct status=progress Here you will guide Jesus file for example, for example, /home/ismoilovdev/Document/archlinux-x86_64.iso document/so.iso
of=/dev/sdb here my USB Dr. Format is different to find out to know it with the root and enter the following command. The USB drive should be connected to the computer.
sudo su
fdisk -l
The above information is written on the USB drive Types /dev/sda, /dev/sdb, /dev/sdx
Once you create a Ubb drive, you need to upload your computer with USB. Insert the USB drive to your computer and restart it to do this. Depending on your computer's bios or UFI configuration, you will need to click the Boot menu and select the USB drive as a boot device (e.g. F12 or Esc) to select the USB drive.
In the picture, the Boot Menu of the Computer Bradns to Boot Menu
Log in to Boot Menu and select ENTER by selecting USB
Depending on your settings, you will need to connect to the Internet to complete the setup of Arch Linux. This is especially important if you need to download updates or packages during the installation process. If you do not have a wired internet or wired Internet, you can enable USB Model and connect to a Wi-Fi network with a USB cable.
Network connection
ip -c a
iwctl.
device list
station wlan0 get-networks
station wlan0 connect SSID
ip -ca This command shows the brief and easy reading of IP addresses assigned to all network interfaces. -c option indicates the command to release the command in compact format.
iwctl command line to set and manage wireless network interfaces in this Linux. This allows you to perform various operations such as scanned nearby wireless networks, connecting and management of wireless regimes.
device list This command displays a list of all available wireless network devices in the system when using iwctl .
station wlan0 get-networks When this command is used with iwctl , wlan0 will display a list of all available wireless networks in the wireless network device.
station wlan0 connect SSID When this command is used with IWCTL, WLANN will connect the wireless network device to a wireless network with the SSID name. Replace the wireless network to connect SSID. After connecting, if it is a safe network, you will need to enter the security password for the network.
Explaning division (Partition): To divide the department is the process of dividing a hard drive to several divisions, each can be used to store different types of data or install different operating systems. Sections are an important step in the installation process of Arch Linux, as it allows you to separate a certain amount of storage on different parts of the system.
Two main sections scheme is used in modern systems: MBR (Master Boot Regord) and GPT (GUID PARITION TABLE). The MBR is the number of two, supports four main or three main sections and extended parts. On the other hand, GPP supports almost unlimited number of sections and is required for UEFI-based systems.
You can use tool as a CFDisk or FDISK to create sections on your hard drive. These toels allow you to create, delete and change the disk sections. It is recommended to create at least two sections in the creation of departments: for one for root (root) / file system, and the other for SWAP. The root department must be at least 20 GB, while the SWAP section must be equal to or slightly larger than the amount of the system. You must be careful when using CFDisk or FDISK because the incorrect sections are removed or modified, it may constantly damage your data.
Formatting - The process of preparing the department to use by the file system. During the formatting, a file system is created in the section how to store and organize the information.
Arch Linux has a few file systems that can be used, including an Ext4, BTRFS and XFS. The most widely used file system for root section is Ext4, and BRTFS and XFS are a popular choice for advanced users. To create a file system in the section you can use the following command:
We see sections using lsblk command
$ lsblkNow, via CFDISK program, we will be divided.
Note: If you have NVME2 SSD, you will have /dev/nvme0n1 HDD or SATA will have /dev/sda
$ cfdisk --zero /dev/sda We will open GPT in the section where you get out of here will open a new section of this we will open a new section 512M , we give 512m to type EFI sytem . The epi system department /boot/efi Director is installed and the volume should be 512 Mb.
The Linux Swap section is used to provide the system with additional virtual memory, which is especially important if your RAM is limited. The SWAP section is used in the system with the end of physical memory and activates automatically when the system starts. The SwAP section will open the computer with a computer or half equal to half. For example, when dividing 4GB RAM 4GB SWAP or 2GB SWAP discs, GB is written GB packaging G wrapping Typega Linux Swap .
The Ext4 Linux file system section is used to store the root Directory, including all files required for the operation of the operating system. The root department is usually the largest section in the system, where most of your data and files are stored. We Memory in ext4 format to share the Linux file system section Let's shoot Linux file system . enter pressing yes by pressing Write to save the changes We will then click on Quit quit.
We will check the departments.
$ lsblk Lsblk LSBLK LsBLK must be in our /dev/sda /dev/sda1 , /dev/sda2 and /dev/sda3 .
NAME    MAJ:MIN RM   SIZE RO TYPE  MOUNTPOINTS
sda       8:0    1 476.9G  0 disk
├─sda1    8:1    1   512M  0 part /mnt/boot/EFI
├─sda2    8:2    1     4G  0 part [SWAP]
└─sda3    8:3    1 459.9G  0 part /mnt
sr0 11:0 1 779.3M 0 rom /run/archiso/bootmnt This is the section on the first memory device in this system (characterized by sda) and it is usually used as the EFI system department. The EFH System Department is a section that contains the Boot Loader and System Assistance programs required to download the system. This section is usually formed as FAT32 file system and is usually located at the beginning of the memory device.
This is used as a section on the first memory device in this system (represented by s) and it is used as Linux SWAP section. Used as a virtual memory for Linux SWAP Partyion system and is used with the end of the physical memory (RAM) in the system. This section is usually located at the end of the memory device, which is formatted as swap file system.
This is a department of the first memory device (represented by sda) in this system, which is used as a root section. The root department is the main department of the system, which includes all files necessary for the operation of the operating system. This section is usually formatted as an ext4 file system and is usually the largest section in the system. The root department is set to / of the file system.
The Formatting of sections includes creating a file system in the section, which is necessary for the operating field to enter and use the operating field. The file system is a way to organize the data on the memory device, providing the structure to access and manage files and directors for the operating system.
Without formatting sections, you cannot access the operating field, and the information in the section is not organized in a manner that does the operating system.
In addition, formatting the section allows you to choose the type of file system you want to use. Different file systems have different features such as supporting large files, supporting intelligence, or supporting the data. You can optimize the operation and functionality of your system by selecting a file system to your needs.
To format as the ET1 section of the Dev / SDA page, you can use the following command:
mkfs.fat -F32 /dev/sda1Note: -F32 option is used to set the file system as FAT32.
You can use the following command to format as Linux swap section of the Dev / SDAAB:
mkswap /dev/sda2You can use the following command to format as the Ext4 Linux file system section of / SDA3 part:
mkfs.ext4 /dev/sda3The hard disk should be able to access the operating system to read and write data on the disk. When part is divided into hard disk parts, it is divided into separate sections that can be used for different purposes. Each section is considered as a separate disk and is needed to make directory in the file system to access it.
The main section marked as usually / the main section is the root of the file system and includes all the necessary system files, programs and information. The operating system to set the operating system to the hard drive should be formatted sections and then the relevant directory in the file system should be installed.
For example, in Arch Linux / Dev / S3, the section of the new file system where you are said is Mountolved / MNG Directory. The EFI system department is modified to / Dev / SDA1 section / MNN / Boot / EFI Directory, which is a place where the efi boot files are stored. The SWAP Department / DEV / SDA 2 section is copied in the Swap file system used to temporarily store data when there is a sufficient RAM.
/ Open the Boot / EFI folder inside:
mkdir -p /mnt/boot/EFI This command creates Directory for the EFI System Department required to store the operating system to download the operating system. -p option is also used to create key Directors if they are not already available.
mount /dev/sda1 /mnt/boot/EFIThe command is used to instill the EFI System to the newly created Directory. This allows you to access and use the storage space in the ETI system, during the operating system installation.
The following command is used to view the Linux SWAP section:
swapon /dev/sda2Linux swap section is used by the operating system as a virtual memory. When the system completes the physical memory (RAM), it can use the SWAP section for temporary storage data from the SWAP section.
mount /dev/sda3 /mntThe Mount / dev / SDA3 / MNN command is used for coping of the root part, which is the main section of the operating system. The root branch includes all other Directors, including / HOME, / USR, / VAR and others.
When you have finished the model is complete, l need to reverse with sblk command.
root@archiso ~ # lsblk
NAME    MAJ:MIN RM   SIZE RO TYPE  MOUNTPOINTS
sda       8:0    1 476.9G  0 disk
├─sda1    8:1    1   512M  0 part /mnt/boot/EFI
├─sda2    8:2    1     4G  0 part [SWAP]
└─sda3    8:3    1 459.9G  0 part /mnt
sr0 11:0 1 779.3M 0 rom /run/archiso/bootmntThe main system in Arch Linux means the minimum set of minimum components necessary to have a functional operating system. This includes Linux kernel, system libraries, basic utilities and tools and Boot Loader.
We can install the Archlinux-Keyiring program to prevent problems in installing the main system.
sudo pacman -Sy archlinux-keyring sudo pacman -Sy archlinux-keyring - command installing the Arch Linux key package.
Arch Linux key is a set of open keys used to verify the integrity and authenticity of packages mounted from Arch Linux. The keys are used to ensure that packages are not broken or not changed during transit.
The pacstrap command is launched to install the main system. This command downloads and installs the necessary packages and components from Arch Linux Febres. It is done as follows:
pacstrap /mnt base base-devel linux linux-firmware nano openssh networkmanager netctl The pacstrap command in the above line is used to install the main system and necessary packages in the installed file system in /mnt . / MNN Director is used as a target director to install the main system.
The packages shown after MNG are components of the main system, which includes:
base: The main packages needed for a functional system.base-devel: Development packages necessary to create other packages other than the source.linux: Linux Kerneli.linux-firmware: The MicroDusturur (Firmware) files required for Linux kernel.nano: A simple text editor.openssh: The implementation of the Secure Shell (SSIR, which is used for safe communication through the network.networkmanager: A network connection manager that allows you to configure and manage network connections.netctl: CLI tool to set up network connections in Arch Linux. Dedicated packages are downloaded from arch linux packet repository and / MNN is set to the file system. Once the installation of the main system is completed, it is necessary to create a fstab file. The FSTAB file or file system table is used to determine which file systems should be installed while booting by the operating system and where they need to be installed. The FSTAB file is created using the following command:
genfstab -U /mnt >> /mnt/etc/fstab This command creates a file system chart and adds it to the newly installed operating system /mnt/etc/fstab file. It is important to make sure that the FSTAB file is correct, as the wrong ftab file can interfere with the proper load of the operating system.
Finally, by running the Arch-Chroot command, change the Root Director to your new installed system:
arch-chroot /mnt arch-chroot /mnt is a command to change the newly installed arch linux system installed in your current system / MGI to Root Director.
In short, Arch-Chroot / MNN is an important command in installing the Arch Linux, as it allows you to continue setting your system from the new installed environment.
Once the main system is set, it is time to set up the system. In this section, you will learn how to set the time zone, keyboard layout, root password, and create a new user account.
Installation of the time zone is important to ensure that time and date is installed correctly. You can use timedatectl command to set the time zone.
hwclock --systohc --utc The hwclock Command is used to set the device watch on your system. --systohc option Used to set the device watch to the current system time. --utc The Control says to the command to use the universal time coordinated instead of local time.
ln -sf /usr/share/zoneinfo/Asia/Tashkent /etc/localtime ln -sf command is used to create a symbolic connection between the time zone file /usr/share/zoneinfo/Asia/Tashkent and the system to identify local time /etc/localtime file. By doing this, you install the time zone to the time of time for your system to Asia / Tashkent.
By using these commands together, you install the clock of the device at the USTC to the current system time and set the time zone for your system / Tashkent for your system.
You need to edit /etc/vconsole.conf to set the keyboard layout in Arch Linux. For example, to install keyboard mode to en_US.UTF-8 you will do the following:
echo " KEYMAP=en_US.UTF-8 " > /etc/vconsole.confThe installation of the operating system language is a localization process to display text and messages in the desired language.
To set a new language, you need to install language support packages using the package manager. For example, on Arch Linux, you can use the Pacman package manager to set the necessary language support packages. We adjust local language settings with the command in the King Coding characters
nano /ect/locale.conf nano Menng Open the /etc/locale.conf file from the editor and add the following configuration.
LANG=en_US.UTF-8 The Locale.conf file is used to determine the coding of local settings of the system, including the codification of language and symbols. In this case, LANG=en_US.UTF-8 installs the standard language of the system UTF-8 (EN__US) by encoding the symbols of the system.
Finally, in /etc/locale.gen file you can set the system language by setting the environmental variable. To do this, you need # issue the desired language from /etc/locale.conf file via nano Text Murahull.
nano /etc/locale.gen After you get the selected language from # comments, we will press ctrl+o and click on ctrl+x , to save enter . Then you can complete the following command to create a local language:
sudo locale-genThe Root password and the creation of a new user is an important step in the installation of the Linux system. Root account is a superused superused superuseder privilege in the Linux system. This account can perform any action in the system, including software installation, setting up system settings, system settings.
However, in terms of security reasons, the use of a root account for daily tasks is usually not recommended. It is therefore a good idea to create a new user with limited benefits. Thus, you can perform daily tasks without serving root accounts, in this system reduces the risk of breaking something by accident.
We enter the hostom for Arch Linux
echo " kompyuternomi " > /etc/hostname echo "kompyuternomi" > /etc/hostname - A command name of your computer in the Arch Linux operating system command. COMPOME INDIDE THIS SUBMISSION This is the name of the Linux programmer or computer brand name you can do anywhere you want.
/ ETC / hostname file is a configuration file that keeps hosting the host name. By launching the ECHO command and forwarding the output to this file, you install your host name to "Computer".
You must use the Passwd command to create a root password in Arch Linux. This root asks you to enter a new password for the user.
passwd To create a new user in Arch Linux, you can use useradd and passwd commands. Syntax for USERADD:
For example, to create a user named Asilbek, you do the following:
useradd -m -G wheel asilbekThen set Password for a new user using the Passwd command:
passwd asilbek -m useradd command creates a home directora for a new user and -G wheel add the user to the Wheelular group, which allows the user to perform the user. passwd command sets a password for a new user.
EDITOR=nano visudoAfter I launch this order, you will open the Supoops Configiation codes in the Nano text editor. You will find the code lines below from these codes.
root ALL=(ALL) ALL
# #Uncomment to allow members of group wheel to execute any command
# %whell ALL=(ALL) ALL
This code will change the line to the code below, ie okay #%whell ALL=(ALL) ALL from a comment
root ALL=(ALL) ALL
# #Uncomment to allow members of group wheel to execute any command
%whell ALL=(ALL) ALL
EDITOR=nano visudo is a command to open the SatelyS file to edit using Nano Text Editor.
%wheel ALL=(ALL) ALL is a series that can be added to the Sudo File to give SUSO Preferences to WEEL GROUP. Wheel Groupi is often a special group used to provide certain users to provide administrative benefits.
The SudoDers file is a configuration file, which determines which users are allowed to perform preferential commands with sudo and what commands are allowed to perform. The Sauders file can only be edited by ROOT User.
visudo command is used to edit the SudoRers file. This command provides only one user edit the file at the same time and checks its syntax to errors before storing the file. It helps prevent mistakes and ensure that the file is real and functional.
Add %wheel ALL=(ALL) ALL gives the members of Wheel Groupy provides SUSO privileges. Both of these moves are necessary for the system control functions that require high privileges, but it is very dangerous for each system.
Bootloader is a program that loads the operating system to memory and assigns the management. This is the first software that works when the computer works, which is responsible for launching the operating system and transferring control to it.
Arch Linux is among the famous bootloader programs (Grand Unified Bootloader) and Syswinux. The grub is a standard bootloader for many Linux distributions, offers a menu-based interface to select Uploaded Operating System. Syslinux is a light bootloader, which is usually used to load Linux distributions from the environment being taken, such as USB drives.
In Arch Linux, the following steps must be performed to install and configure Bootload:
Use the Bootloader with the following command using the PACMAN package manager:
pacman -S grub efibootmgr dosfstools mtools os-prober intel-ucodeThis command is used to install multiple packages related to Bootloader in the Arch Linux system. Mounted packages are:
grub (Grand Unified Bootload): This is the loader bootloader that allows the operating system to download from the list of built-in operating systems.
efibootmgr systems on the basis of this UEFI (Unified Extensible Firmware Interface) is a tool used to manage boot rescription in the system partition.
dosfstools This package usually provides assistant programs to create and verify MS-DOS FAT file systems used for sections loaded in UEFI systems.
mtools This package provides a set of utilities to work with DOS discs and disk images.
os-prober is used to identify other operating systems and bootloaders installed in the same car.
intel-ucode or amd-ucode This package includes microcode updates for Intel processors and AMD processors that help improve the system stability and safety.
pacman command packages are used to install packages in the Arch Linux system. -S option defines packages that need to be installed in packages and the package names shown after.
mkinitcpio -p linux mkinitcpio -p linux is a command used to restore the first RAMDIS image for Linux kernel. The first Ramdisk image is a temporary file system, which is loaded to memory during the download process before installing the real root file system. It contains basic drivers and other components required to download the system.
When mkinitcpio -p linux is included in Linux kernel, it is necessary to restore the first RAMDIS. This ensures that the necessary drivers and components are available to successfully load the system.
$ grub-install --target=x86_64-efi --bootloader-id=GRUB --recheck The grub-install The group is used to install the Bootloader. --target=x86_64-efi option indicates that the target architecture x86_64 and Bootloader should be installed in UEFI mode.
This command is used to install Grub as a bootloader for the Arch Linux system using UEFI firmware. GRUB is a popular bootloader, which supports the loading systems and is widely used in Linux systems. The options provided by the group of grub-install are used to set the Bootloader name in the manager of target architecture, efi bootloader files, etci Boot manager.
grub-mkconfig -o /boot/grub/grub.cfg The grub-mkconfig command creates a Bootloader Configuration file. This file defines the system's system upload settings, including the standard operating system and the standard booty time time in Timeout to download the standard operating system.
-o option defines the output (Output) file, in which case it is /boot/grub/grub.cfg . It is based on settings in other configuration files in the file /etc/default/grub /etc/grub.d Directory.
bootctl updateThese steps are in the Arch Linux system install and configures the Bootloader in your Linux system. Murladder / Boot / EFI Directory is installed and uses /boot/grub.cfg configuration file. The Bootct Update command will ensure the update and proper operation of Bootloader.
For Arch Linux, we install driver and utilities.
pacman -S neofetch python firefox unzip xarchiver git htop net-tools e2fsprogs xfsprogs iproute2 pacman -S command and then the list of package names are used to install these packages to Arch Linux. Below are the brief explanations of each package listed:
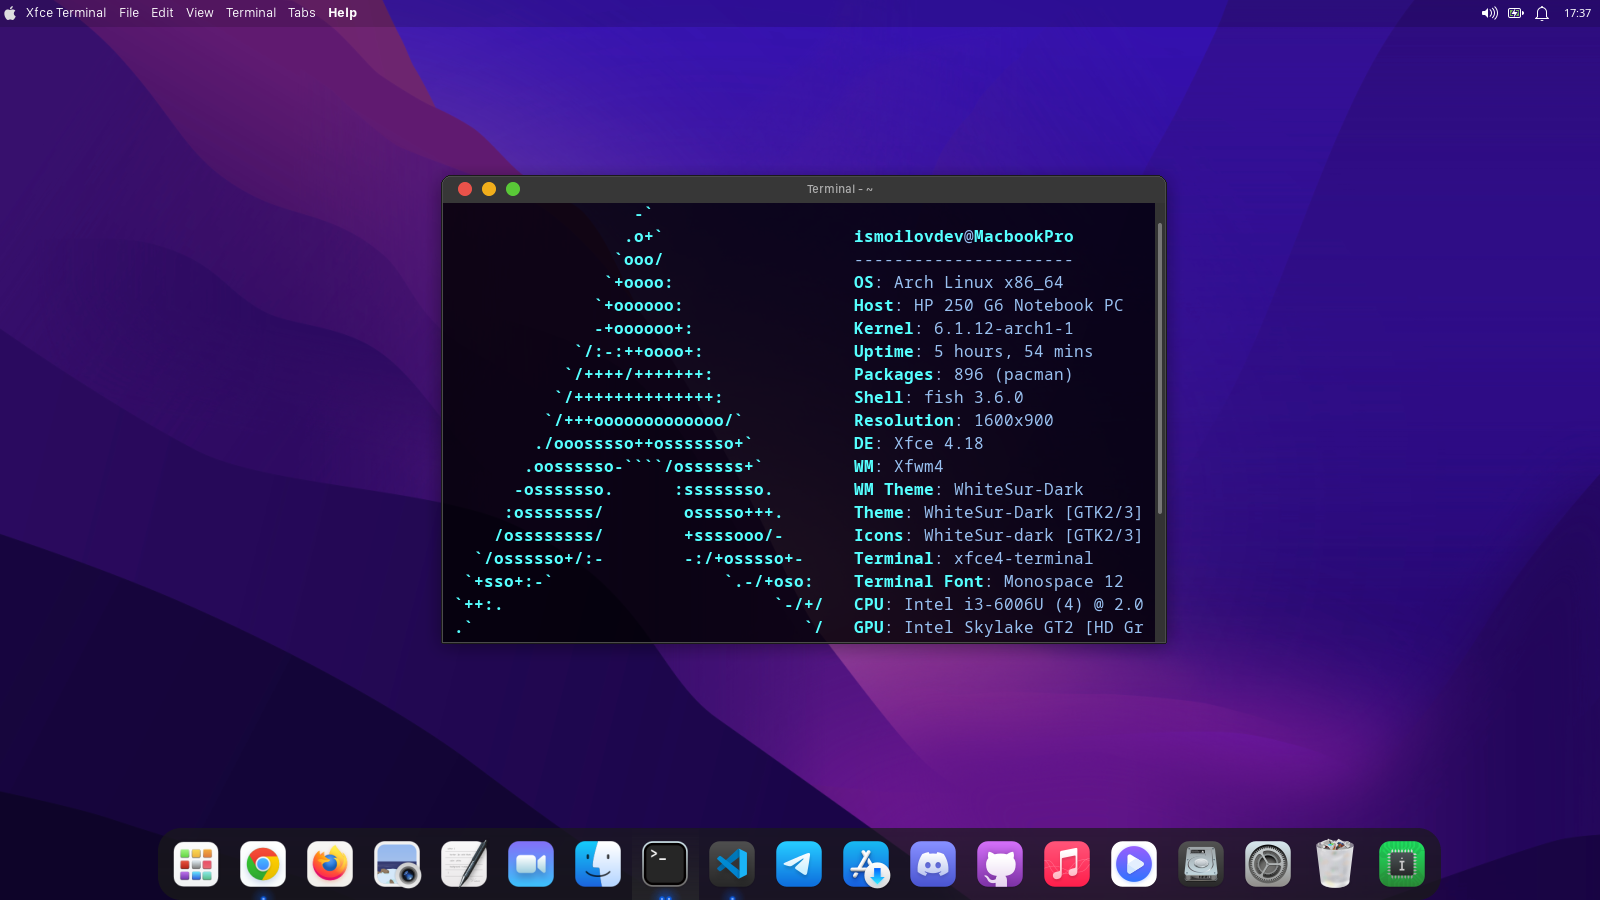
The command is a command line used to display system data and device details on neofetch Terminal.
python script creation, web development, information analysis, and more popular programming language.
Famous Open-Source Web Browser developed by firefox Mozilla.
The command is a command line used to produce files from unzip ZIP archive.
A graphic archive manager, which supports various archive formats such as xarchiver Zip, Rar and TAIN.
git is a popular version control system used to cooperate in managing source code and programming projects.
A support program used to track system resources such as htop CPU and memory.
net-tools network interfaces, including the control programs of command, used to manage ifconfig, arp and netstate.
e2fsprogs EXT2, EXT3 and EXT4 set of utilities used to manage file systems.
xfsprogs XFS is a set of utilities used to manage the file system.
iproute2 Network interfaces, route tables and a set of utilities used for traffic management management.
This command sets these packages in the Arch Linux system.
It is very important to set graphic drives because they allow the system of graphics hardware to communicate effectively and software. If the relevant graphic drives are not installed, the graphic performance of your system may be violated, resulting in a low personnel rate, graphical artifacts and other visual problems. In addition, some software may not work properly or at all without the relevant graphic drivers. Therefore, the installation of the necessary graphs is very important to achieve optimal performance and functionality of your system.
You need to select this graphic driver.
pacman -S xf86-video-intelpacman -S xf86-video-amdgpu pacman -S nvidia nvidia-utilspacman -S virtualbox-gues-utilssudo systemctl enable sshd.service && systemctl enable NetworkManagersudo systemctl enable sshd.serviceI like the SSH service in the system. SSHD is a program for the Secure Shell (SSH) protocol, which allows a secure remote access to the network. By activating the SSHD service, you allow users to connect to a system using SSH client.
systemctl enable NetworkManagerI like the NetworkManager service in the system. NetworkManner is a service that manages network connections in Linux systems, including Ethernet, Wi-Fi and mobile networks. By enabling NetworkManager, you allow you to automatically manage and customize network connections to the system.
These two commands together allows you to access the SSC and manage the network in the system, which makes it easier to remotely connect and manage. Ushbu xizmatlarni yoqish yoki yoqmaslik tizimning o'ziga xos foydalanish holati va ehtiyojlariga bog'liq. Biroq, ko'pchilik foydalanuvchilar uchun ushbu xizmatlarni yoqish odatiy va tavsiya etilgan amaliyotdir.
exit Oddiy Arch Linux o'rnatilishi kontekstida siz asosiy tizimni o'rnatish va sozlashdan so'ng chroot muhitidan chiqish uchun exit buyrug'idan foydalanasiz. Bu zarur, chunki chroot muhiti o'rnatish jarayonida foydalaniladigan vaqtinchalik ildiz fayl tizimi bo'lib, u tizimning doimiy qismi bo'lish uchun mo'ljallanmagan.
Chroot muhitidan chiqish va jonli tizimga qaytish o'rnatish jarayonini yakunlashda muhim qadamdir, chunki u har qanday o'rnatilgan bo'limlarni o'chirish va yangi Arch Linux o'rnatilishidan foydalanishni boshlash uchun tizimni qayta ishga tushirish imkonini beradi.
Shuning uchun, exit buyrug'i o'rnatish jarayonini yakunlash uchun zarur va o'rnatish jarayonida tegishli vaqtda ishlatilishi kerak.
umount -a umount -a buyrug'i tizimdagi barcha o'rnatilgan fayl tizimlarini o'chirish uchun ishlatiladi. -a opsiyasi tizimning ishlashi uchun muhim deb belgilanganlaridan tashqari barcha fayl tizimlarini o'chirib qo'yish kerakligini bildiradi.
Oddiy Arch Linux o'rnatilishi kontekstida siz chroot muhitidan chiqqaningizdan so'ng va tizimni qayta ishga tushirishdan oldin umount -a buyrug'idan foydalanasiz. Bu barcha o'rnatilgan fayl tizimlari to'g'ri o'chirilganligini va ma'lumotlarning buzilishi yoki boshqa muammolarga olib kelishi mumkin bo'lgan uzluksiz fayl tizimi operatsiyalari yo'qligini ta'minlash uchun zarur.
Barcha fayl tizimlarini o'chirish orqali umount -a buyrug'i o'rnatish jarayonida kiritilgan har qanday o'zgarishlar diskda to'g'ri saqlanishini va tizimni qayta ishga tushirishdan oldin toza holatda bo'lishini ta'minlaydi.
Shuning uchun umount -a buyrug'i Arch Linuxni o'rnatish jarayonining muhim qismidir va o'rnatish jarayonida tegishli vaqtda ishlatilishi kerak.
sudo rebootArch Linuxni o'rnatish jarayonida diskni qismlarga ajratish, asosiy tizimni o'rnatish yoki boot loaderni sozlash kabi muayyan vazifalarni bajarganingizdan so'ng tizimni qayta ishga tushirishingiz kerak bo'ladi. O'rnatish muvaffaqiyatli yakunlanishi uchun o'rnatish yo'riqnomasini diqqat bilan kuzatib borish va tizimni tegishli vaqtlarda qayta ishga tushirish muhimdir.
sudo reboot -dan foydalanib, tizim barcha ishlaydigan jarayonlar va xizmatlarni ehtiyotkorlik bilan o'chiradi, o'rnatilgan fayl tizimlarini o'chiradi va tizimni qayta ishga tushiradi. Bu tizimning toza holatda bo'lishini va o'rnatish jarayonida kiritilgan har qanday o'zgarishlarning to'g'ri qo'llanilishini ta'minlaydi.
Shunday qilib, ha, tizimni to'g'ri qayta ishga tushirish va o'rnatish jarayonida kiritilgan har qanday o'zgarishlar to'g'ri qo'llanilishini ta'minlash uchun Arch Linuxni o'rnatish jarayonida sudo reboot buyrug'idan foydalanish zarur.
Arch Linux o'rnatilgandan va tizim qayta ishga tushirilgandan so'ng, kompyuter Arch Linux operatsion tizimi bilan ishga tushadi. Foydalanuvchiga tizimga kirish uchun foydalanuvchi nomi va parolni kiritishi mumkin bo'lgan tizimga kirish so'rovi taqdim etiladi.
Tizimga kirgandan so'ng, foydalanuvchi standart bo'yicha buyruq qatori interfeysiga kirish huquqiga ega bo'ladi. Ushbu minimal o'rnatish foydalanuvchi o'z ehtiyojlariga moslashtirilgan to'liq ishlaydigan tizimni yaratish uchun ish desktop environment yoki window managerni va boshqa dasturlarni qo'lda o'rnatishi kerakligini anglatadi.
Grafik ish stoli muhitini o'rnatish uchun foydalanuvchi kerakli paketlarni o'rnatish uchun pacman paket menejeridan foydalanadi.
Arch Linux-ni o'rnatgandan so'ng, tizim ishlaydi, lekin foydalanuvchi grafik interfeysi (GUI) yoki ish stoli muhiti (DE) bilan birga kelmaydi. Tizimdan grafik interfeys bilan foydalanish uchun DE o'rnatilishi kerak.
DE - bu operatsion tizim bilan o'zaro aloqada bo'lish uchun yaxlit va integratsiyalangan foydalanuvchi interfeysini ta'minlovchi dasturiy ta'minot to'plami. Bunga fayl boshqaruvchisi, grafik ilovalarni ishga tushirish moslamasi va tizim sozlamalari kabi xususiyatlar kiradi. Arch Linux uchun bir nechta DE mavjud, jumladan GNOME, KDE, Xfce, Cinnamon, Deepin, LXDE va boshqalar.
DE ni o'rnatish uchun bir nechta paketlarni o'rnatish kerak, jumladan DE ning o'zi, displey drayverlari va displey menejeri. Displey drayverlari grafik uskuna bilan bog'lanish uchun zarurdir va displey menejeri foydalanuvchilarning tizimga kirishi uchun kirish ekranini taqdim etadi.
Xfce4 - bu Arch Linux-ga o'rnatilishi mumkin bo'lgan yengil va mashhur ish stoli muhiti. Xfce4 ni o'rnatish uchun terminalda quyidagi buyruqdan foydalanishingiz mumkin:
sudo pacman -Syyu xfce4 xfce4-goodies lightdm lightdm-gtk-greeter xorg mesa xf86-video-intelsudo systemctl enable lightdm.service
sudo reboot Ushbu kod XFCE4 ish stoli muhitini va XFCE4 uchun qo'shimcha plaginlar va yordamchi dasturlarni taqdim etadigan xfce4-goodies kabi ba'zi qo'shimcha paketlarni o'rnatadi. Shuningdek, u grafik login screenni taqdim qiluvchi displey menejeri lightdm va GTK+ toolkitdan foydalanadigan LightDM displey menejeri uchun greeter lightdm-gtk-greeterni o'rnatadi.
Bundan tashqari, u grafik foydalanuvchi interfeyslari uchun asos bo'lgan dasturiy ta'minot frameworki bo'lgan X Window System bo'lgan xorg ni o'rnatadi. Shuningdek, u Xorg uchun 3D grafiklarni qo'llab-quvvatlaydigan OpenGL specificationning open-source ilovasi bo'lgan mesa -ni o'rnatadi.
Kodning ikkinchi qatori LightDM displey menejerini boshqarish uchun masul bo'lgan tizim xizmati bo'lgan lightdm.service -ni ishga tushiradi. Bu LightDM displey menejerining yuklash vaqtida avtomatik ravishda ishga tushishini ta'minlaydi va foydalanuvchiga grafik interfeys orqali tizimga kirish imkonini beradi.
Agar sizga xfce4ni o'zini standart dizayni ko'rishini yoqmasa uni didingizga qarab xoxlagancha bezab olishingiz mumkin. Quyida havolada Arch linuxga o'rnatilgan xfce4ni dizayni o'zgartirish qo'llanmasi va konfiguratsiya fayllar, kodlari bor.
Agar siz boshqa DE larni o'rnatmoqchi bo'lsagiz quyidagi havola orqai o'zongizga yoqqan De larni o'rnatib olishingiz mumkin
Xulosa qilib aytganda, biz foydalanuvchilarga yengil va soddalashtirilgan hisoblash muhitini taqdim etuvchi kuchli va sozlanishi mumkin bo'lgan Arch Linux operatsion tizimini o'rnatishni yakunladik. O'rnatish jarayonida biz diskni qismlarga ajratdik, asosiy tizimni o'rnatdik, boot loaderni sozladik, qo'shimcha dasturiy ta'minotni o'rnatdik va tarmoq va foydalanuvchi hisoblari kabi asosiy tizim konfiguratsiyalarini o'rnatdik.
Tizimni qayta ishga tushirgandan so'ng, bizga Arch Linux buyruq qatori interfeysi taqdim etildi, u bizning ehtiyojlarimizga moslashtirilgan va moslashtirilgan. Bu yerdan foydalanuvchilar qo'shimcha dasturlarni o'rnatishlari, tizim sozlamalarini sozlashlari va Arch Linux muhitini o'z xohishlariga ko'ra nozik sozlashlari mumkin. Keyin biz Desktop Environment o'rnatdik.
O'rnatish jarayoni boshqa Linux distributivlariga qaraganda ancha murakkab bo'lishi mumkin bo'lsa-da, Arch Linux-ning afzalliklari uning moslashuvchanligi, minimalizmi va sozlanishidadir. Bu ularning o'ziga xos ehtiyojlariga moslashtirilishi mumkin bo'lgan yengil va samarali operatsion tizimni xohlaydigan foydalanuvchilar uchun ideal tanlovdir. Ushbu repositoryda qo'llanmaning .docx varianti ham mavjud.


