torch ngp
1.0.0
該存儲庫包含:
新聞:重點是靜態場景的靜態內部重建的干淨而改進的版本已分為nerf_template,因為該存儲庫很難維護。
Instant-NGP互動培訓/渲染樂高:
也是第一個交互式可變形-NERF的實現:
NGP_PL:Pytorch+CUDA接受了pytorch-lightning訓練。
JNERF:基於Jittor的NERF基準。
Hashnerf-Pytorch:純Pytorch實現。
Dreamfields-Torch:Pytorch+CUDA實現了基於此存儲庫的夢想字段的零擊文本引導對像生成。
git clone --recursive https://github.com/ashawkey/torch-ngp.git
cd torch-ngppip install -r requirements.txt
# (optional) install the tcnn backbone
pip install git+https://github.com/NVlabs/tiny-cuda-nn/ # subdirectory=bindings/torchconda env create -f environment.yml
conda activate torch-ngp默認情況下,我們使用load在運行時構建擴展名。但是,這有時可能會帶來不便。因此,我們還提供了setup.py來構建每個擴展:
 # install all extension modules
bash scripts/install_ext.sh

# if you want to install manually, here is an example:
cd raymarching
python setup.py build_ext --inplace # build ext only, do not install (only can be used in the parent directory)
pip install . # install to python path (you still need the raymarching/ folder, since this only install the built extension.)當前, --ff僅支持使用CUDA架構>= 70 GPU。對於具有較低體系結構的GPU,仍然可以使用--tcnn ,但是與最近的GPU相比,速度將較慢。
我們使用與Instant-NGP,EG,Armadillo和Fox相同的數據格式。請下載並將它們放在./data下。
我們還支持自捕獲的數據集並將其他格式(例如LLFF,坦克和寺廟,MIP-NERF 360)轉換為NERF兼容格式,並在以下代碼塊中提供詳細信息。
nerf_synthetic
坦克和神廟:[轉換腳本]
llff:[轉換腳本]
MIP-NERF 360:[轉換腳本]
(動態)d-nerf
(動態)Hyper-nerf:[轉換腳本]
首次運行將需要一些時間來編譯CUDA擴展。
 # ## Instant-ngp NeRF
# train with different backbones (with slower pytorch ray marching)
# for the colmap dataset, the default dataset setting `--bound 2 --scale 0.33` is used.
python main_nerf.py data/fox --workspace trial_nerf # fp32 mode
python main_nerf.py data/fox --workspace trial_nerf --fp16 # fp16 mode (pytorch amp)
python main_nerf.py data/fox --workspace trial_nerf --fp16 --ff # fp16 mode + FFMLP (this repo's implementation)
python main_nerf.py data/fox --workspace trial_nerf --fp16 --tcnn # fp16 mode + official tinycudann's encoder & MLP

# use CUDA to accelerate ray marching (much more faster!)
python main_nerf.py data/fox --workspace trial_nerf --fp16 --cuda_ray # fp16 mode + cuda raymarching

# preload data into GPU, accelerate training but use more GPU memory.
python main_nerf.py data/fox --workspace trial_nerf --fp16 --preload

# one for all: -O means --fp16 --cuda_ray --preload, which usually gives the best results balanced on speed & performance.
python main_nerf.py data/fox --workspace trial_nerf -O

# test mode
python main_nerf.py data/fox --workspace trial_nerf -O --test

# construct an error_map for each image, and sample rays based on the training error (slow down training but get better performance with the same number of training steps)
python main_nerf.py data/fox --workspace trial_nerf -O --error_map

# use a background model (e.g., a sphere with radius = 32), can supress noises for real-world 360 dataset
python main_nerf.py data/firekeeper --workspace trial_nerf -O --bg_radius 32

# start a GUI for NeRF training & visualization
# always use with `--fp16 --cuda_ray` for an acceptable framerate!
python main_nerf.py data/fox --workspace trial_nerf -O --gui

# test mode for GUI
python main_nerf.py data/fox --workspace trial_nerf -O --gui --test

# for the blender dataset, you should add `--bound 1.0 --scale 0.8 --dt_gamma 0`
# --bound means the scene is assumed to be inside box[-bound, bound]
# --scale adjusts the camera locaction to make sure it falls inside the above bounding box.
# --dt_gamma controls the adaptive ray marching speed, set to 0 turns it off.
python main_nerf.py data/nerf_synthetic/lego --workspace trial_nerf -O --bound 1.0 --scale 0.8 --dt_gamma 0
python main_nerf.py data/nerf_synthetic/lego --workspace trial_nerf -O --bound 1.0 --scale 0.8 --dt_gamma 0 --gui

# for the LLFF dataset, you should first convert it to nerf-compatible format:
python scripts/llff2nerf.py data/nerf_llff_data/fern # by default it use full-resolution images, and write `transforms.json` to the folder
python scripts/llff2nerf.py data/nerf_llff_data/fern --images images_4 --downscale 4 # if you prefer to use the low-resolution images
# then you can train as a colmap dataset (you'll need to tune the scale & bound if necessary):
python main_nerf.py data/nerf_llff_data/fern --workspace trial_nerf -O
python main_nerf.py data/nerf_llff_data/fern --workspace trial_nerf -O --gui

# for the Tanks&Temples dataset, you should first convert it to nerf-compatible format:
python scripts/tanks2nerf.py data/TanksAndTemple/Family # write `trainsforms_{split}.json` for [train, val, test]
# then you can train as a blender dataset (you'll need to tune the scale & bound if necessary)
python main_nerf.py data/TanksAndTemple/Family --workspace trial_nerf_family -O --bound 1.0 --scale 0.33 --dt_gamma 0
python main_nerf.py data/TanksAndTemple/Family --workspace trial_nerf_family -O --bound 1.0 --scale 0.33 --dt_gamma 0 --gui

# for custom dataset, you should:
# 1. take a video / many photos from different views
# 2. put the video under a path like ./data/custom/video.mp4 or the images under ./data/custom/images/*.jpg.
# 3. call the preprocess code: (should install ffmpeg and colmap first! refer to the file for more options)
python scripts/colmap2nerf.py --video ./data/custom/video.mp4 --run_colmap # if use video
python scripts/colmap2nerf.py --images ./data/custom/images/ --run_colmap # if use images
python scripts/colmap2nerf.py --video ./data/custom/video.mp4 --run_colmap --dynamic # if the scene is dynamic (for D-NeRF settings), add the time for each frame.
# 4. it should create the transform.json, and you can train with: (you'll need to try with different scale & bound & dt_gamma to make the object correctly located in the bounding box and render fluently.)
python main_nerf.py data/custom --workspace trial_nerf_custom -O --gui --scale 2.0 --bound 1.0 --dt_gamma 0.02

# ## Instant-ngp SDF
python main_sdf.py data/armadillo.obj --workspace trial_sdf
python main_sdf.py data/armadillo.obj --workspace trial_sdf --fp16
python main_sdf.py data/armadillo.obj --workspace trial_sdf --fp16 --ff
python main_sdf.py data/armadillo.obj --workspace trial_sdf --fp16 --tcnn

python main_sdf.py data/armadillo.obj --workspace trial_sdf --fp16 --test

# ## TensoRF
# almost the same as Instant-ngp NeRF, just replace the main script.
python main_tensoRF.py data/fox --workspace trial_tensoRF -O
python main_tensoRF.py data/nerf_synthetic/lego --workspace trial_tensoRF -O --bound 1.0 --scale 0.8 --dt_gamma 0

# ## CCNeRF
# training on single objects, turn on --error_map for better quality.
python main_CCNeRF.py data/nerf_synthetic/chair --workspace trial_cc_chair -O --bound 1.0 --scale 0.67 --dt_gamma 0 --error_map
python main_CCNeRF.py data/nerf_synthetic/ficus --workspace trial_cc_ficus -O --bound 1.0 --scale 0.67 --dt_gamma 0 --error_map
python main_CCNeRF.py data/nerf_synthetic/hotdog --workspace trial_cc_hotdog -O --bound 1.0 --scale 0.67 --dt_gamma 0 --error_map
# compose, use a larger bound and more samples per ray for better quality.
python main_CCNeRF.py data/nerf_synthetic/hotdog --workspace trial_cc_hotdog -O --bound 2.0 --scale 0.67 --dt_gamma 0 --max_steps 2048 --test --compose
# compose + gui, only about 1 FPS without dynamic resolution... just for quick verification of composition results.
python main_CCNeRF.py data/nerf_synthetic/hotdog --workspace trial_cc_hotdog -O --bound 2.0 --scale 0.67 --dt_gamma 0 --test --compose --gui

# ## D-NeRF
# almost the same as Instant-ngp NeRF, just replace the main script.
# use deformation to model dynamic scene
python main_dnerf.py data/dnerf/jumpingjacks --workspace trial_dnerf_jumpingjacks -O --bound 1.0 --scale 0.8 --dt_gamma 0
python main_dnerf.py data/dnerf/jumpingjacks --workspace trial_dnerf_jumpingjacks -O --bound 1.0 --scale 0.8 --dt_gamma 0 --gui
# use temporal basis to model dynamic scene
python main_dnerf.py data/dnerf/jumpingjacks --workspace trial_dnerf_basis_jumpingjacks -O --bound 1.0 --scale 0.8 --dt_gamma 0 --basis
python main_dnerf.py data/dnerf/jumpingjacks --workspace trial_dnerf_basis_jumpingjacks -O --bound 1.0 --scale 0.8 --dt_gamma 0 --basis --gui
# for the hypernerf dataset, first convert it into nerf-compatible format:
python scripts/hyper2nerf.py data/split-cookie --downscale 2 # will generate transforms*.json
python main_dnerf.py data/split-cookie/ --workspace trial_dnerf_cookies -O --bound 1 --scale 0.3 --dt_gamma 0檢查scripts目錄以獲取更多提供的示例。
使用樂高數據集上的默認設置進行了測試。在這裡,速度是指V100上的iterations per second 。
| 模型 | 分裂 | psnr | 火車速度 | 測試速度 |
|---|---|---|---|---|
| Instant-NGP(紙) | trainval? | 36.39 | - | - |
instant -ngp( -O ) | 火車(30k步驟) | 34.15 | 97 | 7.8 |
instant -ngp( -O --error_map ) | 火車(30k步驟) | 34.88 | 50 | 7.8 |
instant -ngp( -O ) | Trainval(40k步驟) | 35.22 | 97 | 7.8 |
instant -ngp( -O --error_map ) | Trainval(40k步驟) | 36.00 | 50 | 7.8 |
| tensorf(紙) | 火車(30k步驟) | 36.46 | - | - |
tensorf( -O ) | 火車(30k步驟) | 35.05 | 51 | 2.8 |
tensorf( -O --error_map ) | 火車(30k步驟) | 35.84 | 14 | 2.8 |
問:如何選擇網絡骨幹?
答:使用Pytorch的本機混合精度的-O標誌適用於大多數情況。我沒有發現--tcnn和--ff的明顯改進,它們需要額外的建築物。另外,某些新功能可能僅適用於默認-O模式。
問:我的數據集中的CUDA不記憶。
答:您可以嘗試關閉--preload將所有圖像加載到GPU中以進行加速(如果使用-O ,將其更改為--fp16 --cuda_ray )。另一個解決方案是在NeRFDataset中手動設置downscale ,以降低圖像分辨率。
問:如何調整bound和scale ?
答:您可以從較大的bound (例如16)或小scale (例如0.3)開始,以確保對象落入邊界框中。 GUI模式可用於互動縮小bound以找到合適的值。刪除這條線將可視化相機的姿勢,並且在本期中可以找到一些好的示例。
問:現實數據集的嘈雜的新穎觀點。
答:您可以嘗試將bg_radius設置為一個大價值,例如32。它訓練額外的環境圖,以對現實照片中的背景進行建模。更大的bound也將有所幫助。 firekeperer數據集中bg_radius的一個示例: 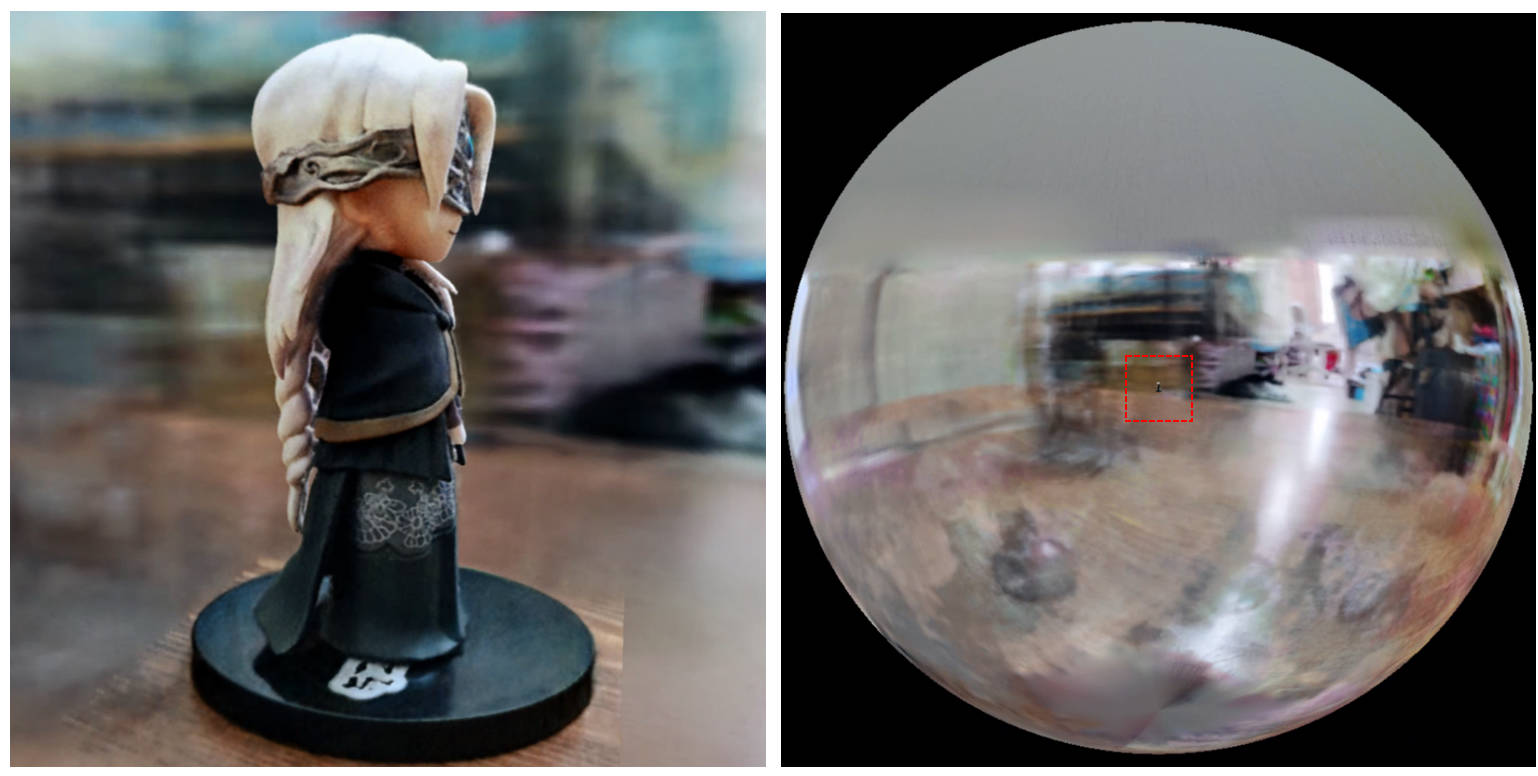
[0, 1]中界定並以(0.5, 0.5, 0.5)為中心,而是假設場景在框中[-bound, bound] ,並以(0, 0, 0)為中心。因此, aabb_scale的功能被此處的bound替換。trunc_exp作為密度激活而不是softplus 。 Alpha蒙版修剪被Instant-NGP的密度網格採樣器取代,該密度抽樣器具有相同的加速邏輯。如果您覺得這項工作有用,將通過以下方式讚賞引用:
 @misc{torch-ngp,
    Author = {Jiaxiang Tang},
    Year = {2022},
    Note = {https://github.com/ashawkey/torch-ngp},
    Title = {Torch-ngp: a PyTorch implementation of instant-ngp}
}

@article{tang2022compressible,
    title = {Compressible-composable NeRF via Rank-residual Decomposition},
    author = {Tang, Jiaxiang and Chen, Xiaokang and Wang, Jingbo and Zeng, Gang},
    journal = {arXiv preprint arXiv:2205.14870},
    year = {2022}
}
信用托馬斯·穆勒(ThomasMüller
 @misc{tiny-cuda-nn,
    Author = {Thomas M"uller},
    Year = {2021},
    Note = {https://github.com/nvlabs/tiny-cuda-nn},
    Title = {Tiny {CUDA} Neural Network Framework}
}

@article{mueller2022instant,
    title = {Instant Neural Graphics Primitives with a Multiresolution Hash Encoding},
    author = {Thomas M"uller and Alex Evans and Christoph Schied and Alexander Keller},
    journal = {arXiv:2201.05989},
    year = {2022},
    month = jan
}
NERF的框架從nerf_pl:
 @misc{queianchen_nerf,
    author = {Quei-An, Chen},
    title = {Nerf_pl: a pytorch-lightning implementation of NeRF},
    url = {https://github.com/kwea123/nerf_pl/},
    year = {2020},
}
官方的Tensorf實施:
 @article{TensoRF,
  title={TensoRF: Tensorial Radiance Fields},
  author={Chen, Anpei and Xu, Zexiang and Geiger, Andreas and Yu, Jingyi and Su, Hao},
  journal={arXiv preprint arXiv:2203.09517},
  year={2022}
}
Nerf Gui是由Dearpygui開發的。


