torch ngp
1.0.0
Repositori ini berisi:
Berita : Versi yang bersih dan lebih baik yang berfokus pada rekonstruksi nerf statis adegan realistis telah dipisahkan menjadi NERF_Template, karena repositori ini sulit dipertahankan.
Pelatihan/rendering interaktif Instan-NGP di LEGO:
Juga implementasi interaktif yang dapat dideformasi-nerf:
NGP_PL: Pytorch+Cuda dilatih dengan Pytorch-Lightning.
Jnerf: Benchmark nerf berdasarkan Jittor.
Hashnerf-Pytorch: Implementasi Pytorch murni.
DreamFields-Torch: Pytorch+CUDA Implementasi generasi objek yang dipandu teks tanpa tembakan dengan bidang mimpi berdasarkan repositori ini.
git clone --recursive https://github.com/ashawkey/torch-ngp.git
cd torch-ngppip install -r requirements.txt
# (optional) install the tcnn backbone
pip install git+https://github.com/NVlabs/tiny-cuda-nn/ # subdirectory=bindings/torchconda env create -f environment.yml
conda activate torch-ngp Secara default, kami menggunakan load untuk membangun ekstensi saat runtime. Namun, ini kadang -kadang mungkin tidak nyaman. Oleh karena itu, kami juga menyediakan setup.py untuk membangun setiap ekstensi:
 # install all extension modules
bash scripts/install_ext.sh

# if you want to install manually, here is an example:
cd raymarching
python setup.py build_ext --inplace # build ext only, do not install (only can be used in the parent directory)
pip install . # install to python path (you still need the raymarching/ folder, since this only install the built extension.) Saat ini, --ff hanya mendukung GPU dengan arsitektur CUDA >= 70 . Untuk GPU dengan arsitektur yang lebih rendah, --tcnn masih dapat digunakan, tetapi kecepatannya akan lebih lambat dibandingkan dengan GPU yang lebih baru.
Kami menggunakan format data yang sama dengan instan-NGP, misalnya, Armadillo dan Fox. Silakan unduh dan letakkan di bawah ./data .
Kami juga mendukung dataset diri dan mengonversi format lain (misalnya, LLFF, Tanks & Kuil, MIP-Nerf 360) ke format yang kompatibel dengan NERF, dengan detail di blok kode berikut.
nerf_synthetic
Tank & Kuil: [Skrip Konversi]
LLFF: [skrip konversi]
MIP-BERF 360: [Skrip Konversi]
(Dinamis) D-Nerf
(Dinamis) Hyper-nerf: [skrip konversi]
Pertama kali berlari akan membutuhkan waktu untuk menyusun ekstensi CUDA.
 # ## Instant-ngp NeRF
# train with different backbones (with slower pytorch ray marching)
# for the colmap dataset, the default dataset setting `--bound 2 --scale 0.33` is used.
python main_nerf.py data/fox --workspace trial_nerf # fp32 mode
python main_nerf.py data/fox --workspace trial_nerf --fp16 # fp16 mode (pytorch amp)
python main_nerf.py data/fox --workspace trial_nerf --fp16 --ff # fp16 mode + FFMLP (this repo's implementation)
python main_nerf.py data/fox --workspace trial_nerf --fp16 --tcnn # fp16 mode + official tinycudann's encoder & MLP

# use CUDA to accelerate ray marching (much more faster!)
python main_nerf.py data/fox --workspace trial_nerf --fp16 --cuda_ray # fp16 mode + cuda raymarching

# preload data into GPU, accelerate training but use more GPU memory.
python main_nerf.py data/fox --workspace trial_nerf --fp16 --preload

# one for all: -O means --fp16 --cuda_ray --preload, which usually gives the best results balanced on speed & performance.
python main_nerf.py data/fox --workspace trial_nerf -O

# test mode
python main_nerf.py data/fox --workspace trial_nerf -O --test

# construct an error_map for each image, and sample rays based on the training error (slow down training but get better performance with the same number of training steps)
python main_nerf.py data/fox --workspace trial_nerf -O --error_map

# use a background model (e.g., a sphere with radius = 32), can supress noises for real-world 360 dataset
python main_nerf.py data/firekeeper --workspace trial_nerf -O --bg_radius 32

# start a GUI for NeRF training & visualization
# always use with `--fp16 --cuda_ray` for an acceptable framerate!
python main_nerf.py data/fox --workspace trial_nerf -O --gui

# test mode for GUI
python main_nerf.py data/fox --workspace trial_nerf -O --gui --test

# for the blender dataset, you should add `--bound 1.0 --scale 0.8 --dt_gamma 0`
# --bound means the scene is assumed to be inside box[-bound, bound]
# --scale adjusts the camera locaction to make sure it falls inside the above bounding box.
# --dt_gamma controls the adaptive ray marching speed, set to 0 turns it off.
python main_nerf.py data/nerf_synthetic/lego --workspace trial_nerf -O --bound 1.0 --scale 0.8 --dt_gamma 0
python main_nerf.py data/nerf_synthetic/lego --workspace trial_nerf -O --bound 1.0 --scale 0.8 --dt_gamma 0 --gui

# for the LLFF dataset, you should first convert it to nerf-compatible format:
python scripts/llff2nerf.py data/nerf_llff_data/fern # by default it use full-resolution images, and write `transforms.json` to the folder
python scripts/llff2nerf.py data/nerf_llff_data/fern --images images_4 --downscale 4 # if you prefer to use the low-resolution images
# then you can train as a colmap dataset (you'll need to tune the scale & bound if necessary):
python main_nerf.py data/nerf_llff_data/fern --workspace trial_nerf -O
python main_nerf.py data/nerf_llff_data/fern --workspace trial_nerf -O --gui

# for the Tanks&Temples dataset, you should first convert it to nerf-compatible format:
python scripts/tanks2nerf.py data/TanksAndTemple/Family # write `trainsforms_{split}.json` for [train, val, test]
# then you can train as a blender dataset (you'll need to tune the scale & bound if necessary)
python main_nerf.py data/TanksAndTemple/Family --workspace trial_nerf_family -O --bound 1.0 --scale 0.33 --dt_gamma 0
python main_nerf.py data/TanksAndTemple/Family --workspace trial_nerf_family -O --bound 1.0 --scale 0.33 --dt_gamma 0 --gui

# for custom dataset, you should:
# 1. take a video / many photos from different views
# 2. put the video under a path like ./data/custom/video.mp4 or the images under ./data/custom/images/*.jpg.
# 3. call the preprocess code: (should install ffmpeg and colmap first! refer to the file for more options)
python scripts/colmap2nerf.py --video ./data/custom/video.mp4 --run_colmap # if use video
python scripts/colmap2nerf.py --images ./data/custom/images/ --run_colmap # if use images
python scripts/colmap2nerf.py --video ./data/custom/video.mp4 --run_colmap --dynamic # if the scene is dynamic (for D-NeRF settings), add the time for each frame.
# 4. it should create the transform.json, and you can train with: (you'll need to try with different scale & bound & dt_gamma to make the object correctly located in the bounding box and render fluently.)
python main_nerf.py data/custom --workspace trial_nerf_custom -O --gui --scale 2.0 --bound 1.0 --dt_gamma 0.02

# ## Instant-ngp SDF
python main_sdf.py data/armadillo.obj --workspace trial_sdf
python main_sdf.py data/armadillo.obj --workspace trial_sdf --fp16
python main_sdf.py data/armadillo.obj --workspace trial_sdf --fp16 --ff
python main_sdf.py data/armadillo.obj --workspace trial_sdf --fp16 --tcnn

python main_sdf.py data/armadillo.obj --workspace trial_sdf --fp16 --test

# ## TensoRF
# almost the same as Instant-ngp NeRF, just replace the main script.
python main_tensoRF.py data/fox --workspace trial_tensoRF -O
python main_tensoRF.py data/nerf_synthetic/lego --workspace trial_tensoRF -O --bound 1.0 --scale 0.8 --dt_gamma 0

# ## CCNeRF
# training on single objects, turn on --error_map for better quality.
python main_CCNeRF.py data/nerf_synthetic/chair --workspace trial_cc_chair -O --bound 1.0 --scale 0.67 --dt_gamma 0 --error_map
python main_CCNeRF.py data/nerf_synthetic/ficus --workspace trial_cc_ficus -O --bound 1.0 --scale 0.67 --dt_gamma 0 --error_map
python main_CCNeRF.py data/nerf_synthetic/hotdog --workspace trial_cc_hotdog -O --bound 1.0 --scale 0.67 --dt_gamma 0 --error_map
# compose, use a larger bound and more samples per ray for better quality.
python main_CCNeRF.py data/nerf_synthetic/hotdog --workspace trial_cc_hotdog -O --bound 2.0 --scale 0.67 --dt_gamma 0 --max_steps 2048 --test --compose
# compose + gui, only about 1 FPS without dynamic resolution... just for quick verification of composition results.
python main_CCNeRF.py data/nerf_synthetic/hotdog --workspace trial_cc_hotdog -O --bound 2.0 --scale 0.67 --dt_gamma 0 --test --compose --gui

# ## D-NeRF
# almost the same as Instant-ngp NeRF, just replace the main script.
# use deformation to model dynamic scene
python main_dnerf.py data/dnerf/jumpingjacks --workspace trial_dnerf_jumpingjacks -O --bound 1.0 --scale 0.8 --dt_gamma 0
python main_dnerf.py data/dnerf/jumpingjacks --workspace trial_dnerf_jumpingjacks -O --bound 1.0 --scale 0.8 --dt_gamma 0 --gui
# use temporal basis to model dynamic scene
python main_dnerf.py data/dnerf/jumpingjacks --workspace trial_dnerf_basis_jumpingjacks -O --bound 1.0 --scale 0.8 --dt_gamma 0 --basis
python main_dnerf.py data/dnerf/jumpingjacks --workspace trial_dnerf_basis_jumpingjacks -O --bound 1.0 --scale 0.8 --dt_gamma 0 --basis --gui
# for the hypernerf dataset, first convert it into nerf-compatible format:
python scripts/hyper2nerf.py data/split-cookie --downscale 2 # will generate transforms*.json
python main_dnerf.py data/split-cookie/ --workspace trial_dnerf_cookies -O --bound 1 --scale 0.3 --dt_gamma 0
Periksa direktori scripts untuk lebih banyak contoh yang disediakan.
Diuji dengan pengaturan default pada dataset LEGO. Di sini kecepatan mengacu pada iterations per second pada V100.
| Model | Membelah | Psnr | Kecepatan kereta api | Kecepatan tes |
|---|---|---|---|---|
| instan-NGP (kertas) | Trainval? | 36.39 | - | - |
instan -ngp ( -O ) | kereta (30 ribu langkah) | 34.15 | 97 | 7.8 |
instan -ngp ( -O --error_map ) | kereta (30 ribu langkah) | 34.88 | 50 | 7.8 |
instan -ngp ( -O ) | Trainval (40k Langkah) | 35.22 | 97 | 7.8 |
instan -ngp ( -O --error_map ) | Trainval (40k Langkah) | 36.00 | 50 | 7.8 |
| Tensorf (kertas) | kereta (30 ribu langkah) | 36.46 | - | - |
Tensorf ( -O ) | kereta (30 ribu langkah) | 35.05 | 51 | 2.8 |
Tensorf ( -O --error_map ) | kereta (30 ribu langkah) | 35.84 | 14 | 2.8 |
T : Bagaimana cara memilih tulang punggung jaringan?
A : Bendera -O yang menggunakan presisi campuran asli Pytorch cocok untuk kebanyakan kasus. Saya tidak menemukan peningkatan yang sangat signifikan untuk --tcnn dan --ff , dan mereka membutuhkan pembangunan tambahan. Juga, beberapa fitur baru mungkin hanya tersedia untuk mode -O default.
T : Cuda di luar memori untuk dataset saya.
A : Anda dapat mencoba mematikan --preload yang memuat semua gambar ke GPU untuk akselerasi (jika gunakan -O , ubah menjadi --fp16 --cuda_ray ). Solusi lain adalah secara manual mengatur downscale di NeRFDataset untuk menurunkan resolusi gambar.
T : Bagaimana cara menyesuaikan bound dan scale ?
A : Anda bisa mulai dengan bound besar (misalnya, 16) atau scale kecil (misalnya, 0,3) untuk memastikan objek jatuh ke dalam kotak pembatas. Mode GUI dapat digunakan untuk secara interaktif mengecilkan bound untuk menemukan nilai yang sesuai. Menghentikan garis ini akan memvisualisasikan pose kamera, dan beberapa contoh yang baik dapat ditemukan dalam masalah ini.
T : Tampilan novel yang bising untuk kumpulan data yang realistis.
A : Anda dapat mencoba mengatur bg_radius ke nilai besar, misalnya, 32. Ini melatih peta lingkungan tambahan untuk memodelkan latar belakang dalam foto yang realistis. bound yang lebih besar juga akan membantu. Contoh untuk bg_radius dalam dataset pemadam kebakaran: 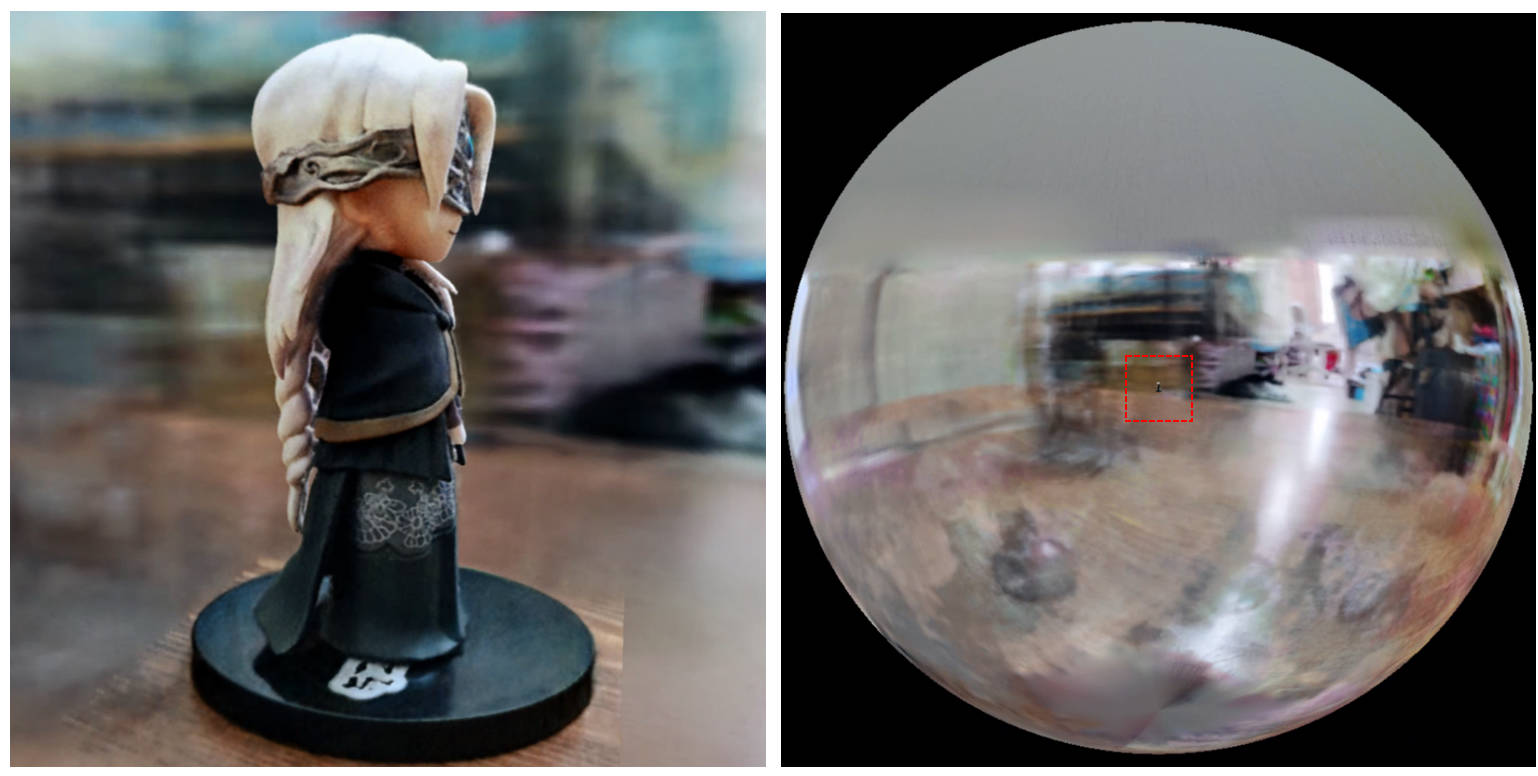
[0, 1] dan berpusat pada (0.5, 0.5, 0.5) , repo ini mengasumsikan adegan itu dibatasi dalam kotak [-bound, bound] , dan berpusat pada (0, 0, 0) . Oleh karena itu, fungsionalitas aabb_scale digantikan oleh bound di sini.trunc_exp sebagai aktivasi kepadatan alih -alih softplus . Pemangkasan topeng alfa digantikan oleh sampler grid kepadatan dari instan-NGP, yang berbagi logika yang sama untuk akselerasi.Jika Anda menganggap pekerjaan ini bermanfaat, kutipan akan dihargai melalui:
 @misc{torch-ngp,
    Author = {Jiaxiang Tang},
    Year = {2022},
    Note = {https://github.com/ashawkey/torch-ngp},
    Title = {Torch-ngp: a PyTorch implementation of instant-ngp}
}

@article{tang2022compressible,
    title = {Compressible-composable NeRF via Rank-residual Decomposition},
    author = {Tang, Jiaxiang and Chen, Xiaokang and Wang, Jingbo and Zeng, Gang},
    journal = {arXiv preprint arXiv:2205.14870},
    year = {2022}
}
Kredit untuk Thomas Müller untuk Tiny-Cuda-NN dan Instant-NGP yang menakjubkan:
 @misc{tiny-cuda-nn,
    Author = {Thomas M"uller},
    Year = {2021},
    Note = {https://github.com/nvlabs/tiny-cuda-nn},
    Title = {Tiny {CUDA} Neural Network Framework}
}

@article{mueller2022instant,
    title = {Instant Neural Graphics Primitives with a Multiresolution Hash Encoding},
    author = {Thomas M"uller and Alex Evans and Christoph Schied and Alexander Keller},
    journal = {arXiv:2201.05989},
    year = {2022},
    month = jan
}
Kerangka kerja NERF diadaptasi dari NERF_PL:
 @misc{queianchen_nerf,
    author = {Quei-An, Chen},
    title = {Nerf_pl: a pytorch-lightning implementation of NeRF},
    url = {https://github.com/kwea123/nerf_pl/},
    year = {2020},
}
Implementasi Tensorf Resmi:
 @article{TensoRF,
  title={TensoRF: Tensorial Radiance Fields},
  author={Chen, Anpei and Xu, Zexiang and Geiger, Andreas and Yu, Jingyi and Su, Hao},
  journal={arXiv preprint arXiv:2203.09517},
  year={2022}
}
Nerf GUI dikembangkan dengan Dearpygui.


