torch ngp
1.0.0
Dieses Repository enthält:
Nachrichten : Eine saubere und verbesserte Version, die sich auf die statische NERF -Rekonstruktion realistischer Szenen konzentriert, wurde in Nerf_Template unterteilt, da dieses Repository schwer zu pflegen war.
Instant-NGP Interactive Training/Rendering auf LEGO:
Auch die erste interaktive deformierbare Implementierung von NERF:
NGP_PL: Pytorch+CUDA mit Pytorch-Lightning trainiert.
JNERF: Ein NERF -Benchmark, das auf Jittor basiert.
Hashnerf-Pytorch: Eine reine Pytorch-Implementierung.
Dreamfields-Torch: Pytorch+CUDA-Implementierung von nullschiff-textgesteuerter Objektgenerierung mit Traumfeldern basierend auf diesem Repository.
git clone --recursive https://github.com/ashawkey/torch-ngp.git
cd torch-ngppip install -r requirements.txt
# (optional) install the tcnn backbone
pip install git+https://github.com/NVlabs/tiny-cuda-nn/ # subdirectory=bindings/torchconda env create -f environment.yml
conda activate torch-ngp Standardmäßig verwenden wir load , um die Erweiterung zur Laufzeit zu erstellen. Dies kann jedoch manchmal unpraktisch sein. Daher stellen wir auch das setup.py zur Verfügung, um jede Erweiterung zu erstellen:
 # install all extension modules
bash scripts/install_ext.sh

# if you want to install manually, here is an example:
cd raymarching
python setup.py build_ext --inplace # build ext only, do not install (only can be used in the parent directory)
pip install . # install to python path (you still need the raymarching/ folder, since this only install the built extension.) Derzeit unterstützt --ff nur GPUs mit CUDA -Architektur >= 70 . Für GPUs mit niedrigerer Architektur kann --tcnn weiterhin verwendet werden, aber die Geschwindigkeit wird im Vergleich zu neueren GPUs langsamer sein.
Wir verwenden das gleiche Datenformat wie Instant-NGP, EG, Armadillo und Fox. Bitte laden Sie sie herunter und setzen Sie sie unter ./data .
Wir unterstützen auch selbst erfasste Datensatz und konvertieren andere Formate (z.
nerf_synthese
Panzer & Tempel: [Konvertierungsskript]
LLFF: [Konvertierungsskript]
MIP-NERF 360: [Konvertierungsskript]
(dynamisch) d-nerf
(dynamisch) Hyper-nernf: [Conversionskript]
Das Erstlauf wird einige Zeit dauern, um die CUDA -Erweiterungen zu erstellen.
 # ## Instant-ngp NeRF
# train with different backbones (with slower pytorch ray marching)
# for the colmap dataset, the default dataset setting `--bound 2 --scale 0.33` is used.
python main_nerf.py data/fox --workspace trial_nerf # fp32 mode
python main_nerf.py data/fox --workspace trial_nerf --fp16 # fp16 mode (pytorch amp)
python main_nerf.py data/fox --workspace trial_nerf --fp16 --ff # fp16 mode + FFMLP (this repo's implementation)
python main_nerf.py data/fox --workspace trial_nerf --fp16 --tcnn # fp16 mode + official tinycudann's encoder & MLP

# use CUDA to accelerate ray marching (much more faster!)
python main_nerf.py data/fox --workspace trial_nerf --fp16 --cuda_ray # fp16 mode + cuda raymarching

# preload data into GPU, accelerate training but use more GPU memory.
python main_nerf.py data/fox --workspace trial_nerf --fp16 --preload

# one for all: -O means --fp16 --cuda_ray --preload, which usually gives the best results balanced on speed & performance.
python main_nerf.py data/fox --workspace trial_nerf -O

# test mode
python main_nerf.py data/fox --workspace trial_nerf -O --test

# construct an error_map for each image, and sample rays based on the training error (slow down training but get better performance with the same number of training steps)
python main_nerf.py data/fox --workspace trial_nerf -O --error_map

# use a background model (e.g., a sphere with radius = 32), can supress noises for real-world 360 dataset
python main_nerf.py data/firekeeper --workspace trial_nerf -O --bg_radius 32

# start a GUI for NeRF training & visualization
# always use with `--fp16 --cuda_ray` for an acceptable framerate!
python main_nerf.py data/fox --workspace trial_nerf -O --gui

# test mode for GUI
python main_nerf.py data/fox --workspace trial_nerf -O --gui --test

# for the blender dataset, you should add `--bound 1.0 --scale 0.8 --dt_gamma 0`
# --bound means the scene is assumed to be inside box[-bound, bound]
# --scale adjusts the camera locaction to make sure it falls inside the above bounding box.
# --dt_gamma controls the adaptive ray marching speed, set to 0 turns it off.
python main_nerf.py data/nerf_synthetic/lego --workspace trial_nerf -O --bound 1.0 --scale 0.8 --dt_gamma 0
python main_nerf.py data/nerf_synthetic/lego --workspace trial_nerf -O --bound 1.0 --scale 0.8 --dt_gamma 0 --gui

# for the LLFF dataset, you should first convert it to nerf-compatible format:
python scripts/llff2nerf.py data/nerf_llff_data/fern # by default it use full-resolution images, and write `transforms.json` to the folder
python scripts/llff2nerf.py data/nerf_llff_data/fern --images images_4 --downscale 4 # if you prefer to use the low-resolution images
# then you can train as a colmap dataset (you'll need to tune the scale & bound if necessary):
python main_nerf.py data/nerf_llff_data/fern --workspace trial_nerf -O
python main_nerf.py data/nerf_llff_data/fern --workspace trial_nerf -O --gui

# for the Tanks&Temples dataset, you should first convert it to nerf-compatible format:
python scripts/tanks2nerf.py data/TanksAndTemple/Family # write `trainsforms_{split}.json` for [train, val, test]
# then you can train as a blender dataset (you'll need to tune the scale & bound if necessary)
python main_nerf.py data/TanksAndTemple/Family --workspace trial_nerf_family -O --bound 1.0 --scale 0.33 --dt_gamma 0
python main_nerf.py data/TanksAndTemple/Family --workspace trial_nerf_family -O --bound 1.0 --scale 0.33 --dt_gamma 0 --gui

# for custom dataset, you should:
# 1. take a video / many photos from different views
# 2. put the video under a path like ./data/custom/video.mp4 or the images under ./data/custom/images/*.jpg.
# 3. call the preprocess code: (should install ffmpeg and colmap first! refer to the file for more options)
python scripts/colmap2nerf.py --video ./data/custom/video.mp4 --run_colmap # if use video
python scripts/colmap2nerf.py --images ./data/custom/images/ --run_colmap # if use images
python scripts/colmap2nerf.py --video ./data/custom/video.mp4 --run_colmap --dynamic # if the scene is dynamic (for D-NeRF settings), add the time for each frame.
# 4. it should create the transform.json, and you can train with: (you'll need to try with different scale & bound & dt_gamma to make the object correctly located in the bounding box and render fluently.)
python main_nerf.py data/custom --workspace trial_nerf_custom -O --gui --scale 2.0 --bound 1.0 --dt_gamma 0.02

# ## Instant-ngp SDF
python main_sdf.py data/armadillo.obj --workspace trial_sdf
python main_sdf.py data/armadillo.obj --workspace trial_sdf --fp16
python main_sdf.py data/armadillo.obj --workspace trial_sdf --fp16 --ff
python main_sdf.py data/armadillo.obj --workspace trial_sdf --fp16 --tcnn

python main_sdf.py data/armadillo.obj --workspace trial_sdf --fp16 --test

# ## TensoRF
# almost the same as Instant-ngp NeRF, just replace the main script.
python main_tensoRF.py data/fox --workspace trial_tensoRF -O
python main_tensoRF.py data/nerf_synthetic/lego --workspace trial_tensoRF -O --bound 1.0 --scale 0.8 --dt_gamma 0

# ## CCNeRF
# training on single objects, turn on --error_map for better quality.
python main_CCNeRF.py data/nerf_synthetic/chair --workspace trial_cc_chair -O --bound 1.0 --scale 0.67 --dt_gamma 0 --error_map
python main_CCNeRF.py data/nerf_synthetic/ficus --workspace trial_cc_ficus -O --bound 1.0 --scale 0.67 --dt_gamma 0 --error_map
python main_CCNeRF.py data/nerf_synthetic/hotdog --workspace trial_cc_hotdog -O --bound 1.0 --scale 0.67 --dt_gamma 0 --error_map
# compose, use a larger bound and more samples per ray for better quality.
python main_CCNeRF.py data/nerf_synthetic/hotdog --workspace trial_cc_hotdog -O --bound 2.0 --scale 0.67 --dt_gamma 0 --max_steps 2048 --test --compose
# compose + gui, only about 1 FPS without dynamic resolution... just for quick verification of composition results.
python main_CCNeRF.py data/nerf_synthetic/hotdog --workspace trial_cc_hotdog -O --bound 2.0 --scale 0.67 --dt_gamma 0 --test --compose --gui

# ## D-NeRF
# almost the same as Instant-ngp NeRF, just replace the main script.
# use deformation to model dynamic scene
python main_dnerf.py data/dnerf/jumpingjacks --workspace trial_dnerf_jumpingjacks -O --bound 1.0 --scale 0.8 --dt_gamma 0
python main_dnerf.py data/dnerf/jumpingjacks --workspace trial_dnerf_jumpingjacks -O --bound 1.0 --scale 0.8 --dt_gamma 0 --gui
# use temporal basis to model dynamic scene
python main_dnerf.py data/dnerf/jumpingjacks --workspace trial_dnerf_basis_jumpingjacks -O --bound 1.0 --scale 0.8 --dt_gamma 0 --basis
python main_dnerf.py data/dnerf/jumpingjacks --workspace trial_dnerf_basis_jumpingjacks -O --bound 1.0 --scale 0.8 --dt_gamma 0 --basis --gui
# for the hypernerf dataset, first convert it into nerf-compatible format:
python scripts/hyper2nerf.py data/split-cookie --downscale 2 # will generate transforms*.json
python main_dnerf.py data/split-cookie/ --workspace trial_dnerf_cookies -O --bound 1 --scale 0.3 --dt_gamma 0
Überprüfen Sie das scripts -Verzeichnis, um weitere Beispiele vorzulegen.
Getestet mit den Standardeinstellungen im LEGO -Datensatz. Hier bezieht sich die Geschwindigkeit auf die iterations per second eines V100.
| Modell | Teilt | PSNR | Zuggeschwindigkeit | Testgeschwindigkeit |
|---|---|---|---|---|
| Instant-NGP (Papier) | Trainval? | 36.39 | - - | - - |
Instant -NGP ( -O ) | Zug (30.000 Schritte) | 34.15 | 97 | 7.8 |
Instant -NGP ( -O --error_map ) | Zug (30.000 Schritte) | 34,88 | 50 | 7.8 |
Instant -NGP ( -O ) | trainval (40k Schritte) | 35.22 | 97 | 7.8 |
Instant -NGP ( -O --error_map ) | trainval (40k Schritte) | 36.00 | 50 | 7.8 |
| Tensorf (Papier) | Zug (30.000 Schritte) | 36.46 | - - | - - |
Tensorf ( -O ) | Zug (30.000 Schritte) | 35.05 | 51 | 2.8 |
Tensorf ( -O --error_map ) | Zug (30.000 Schritte) | 35.84 | 14 | 2.8 |
F : Wie wähle ich das Netzwerk -Rückgrat aus?
A : Das -O -Flag, das Pytorchs native gemischte Präzision verwendet, ist in den meisten Fällen geeignet. Ich finde keine sehr signifikante Verbesserung für --tcnn und --ff , und sie benötigen zusätzliches Gebäude. Einige neue Funktionen sind möglicherweise nur für den Standard -O -Modus verfügbar.
F : Cuda aus dem Speicher für meinen Datensatz.
A : Sie können versuchen, auszuschalten --preload , das alle Bilder in die GPU zur Beschleunigung lädt (wenn Sie -O verwenden, ändern Sie es in --fp16 --cuda_ray ). Eine andere Lösung besteht darin, in NeRFDataset manuell downscale zu sein, um die Bildauflösung zu senken.
F : Wie kann man bound und scale ?
A : Sie können mit einer großen bound (z. B. 16) oder einer kleinen scale (z. B. 0,3) beginnen, um sicherzustellen, dass das Objekt in den Begrenzungsbox fällt. Der GUI -Modus kann verwendet werden, um die bound interaktiv zu verkleinern, um den geeigneten Wert zu finden. Durch die Überzeugung dieser Linie werden die Kamera -Posen visualisieren, und einige gute Beispiele finden Sie in diesem Problem.
F : Laute neuartige Ansichten für realistische Datensätze.
A : Sie können versuchen, bg_radius auf einen großen Wert zu setzen, z. B. 32. Sie trainiert eine zusätzliche Umgebungskarte, um den Hintergrund auf realistischen Fotos zu modellieren. Eine größere bound hilft ebenfalls. Ein Beispiel für bg_radius im Feuerwehrdatensatz: 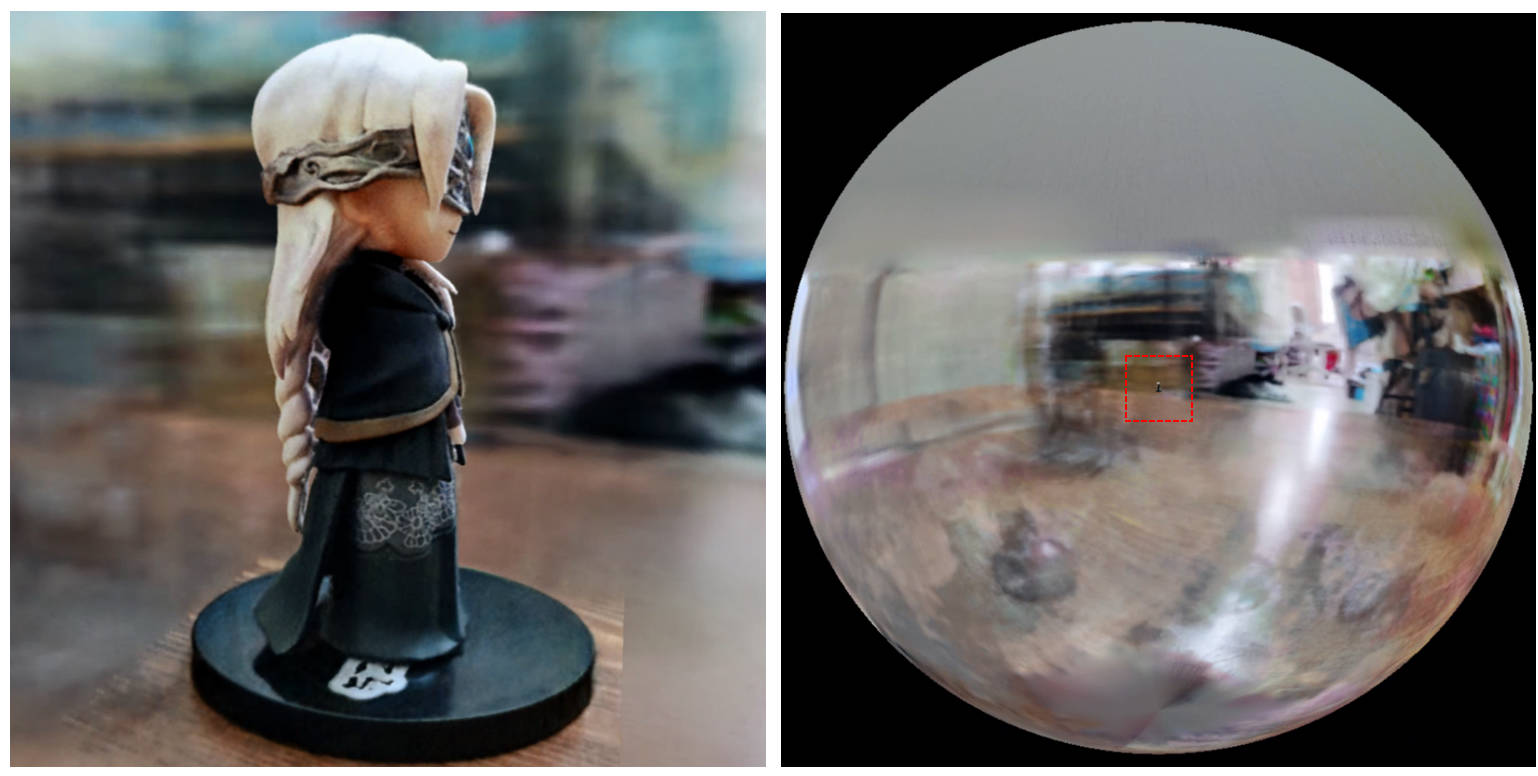
[0, 1] begrenzt und auf (0.5, 0.5, 0.5) zentriert ist, geht dieses Repo davon aus , dass die Szene in Box [-bound, bound] begrenzt und unter (0, 0, 0) zentriert ist . Daher wird die Funktionalität von aabb_scale durch bound hier ersetzt.trunc_exp als Dichteaktivierung anstelle von softplus . Das Alpha-Masken-Beschneidung wird durch den Dichtegitter-Sampler aus Instant-NGP ersetzt, der die gleiche Logik für die Beschleunigung aufweist.Wenn Sie diese Arbeit nützlich finden, wird ein Zitat über:
 @misc{torch-ngp,
    Author = {Jiaxiang Tang},
    Year = {2022},
    Note = {https://github.com/ashawkey/torch-ngp},
    Title = {Torch-ngp: a PyTorch implementation of instant-ngp}
}

@article{tang2022compressible,
    title = {Compressible-composable NeRF via Rank-residual Decomposition},
    author = {Tang, Jiaxiang and Chen, Xiaokang and Wang, Jingbo and Zeng, Gang},
    journal = {arXiv preprint arXiv:2205.14870},
    year = {2022}
}
Credits an Thomas Müller für den erstaunlichen Tiny-Cuda-nn und den Instant-NGP:
 @misc{tiny-cuda-nn,
    Author = {Thomas M"uller},
    Year = {2021},
    Note = {https://github.com/nvlabs/tiny-cuda-nn},
    Title = {Tiny {CUDA} Neural Network Framework}
}

@article{mueller2022instant,
    title = {Instant Neural Graphics Primitives with a Multiresolution Hash Encoding},
    author = {Thomas M"uller and Alex Evans and Christoph Schied and Alexander Keller},
    journal = {arXiv:2201.05989},
    year = {2022},
    month = jan
}
Der Framework von Nerf ist aus Nerf_pl angepasst:
 @misc{queianchen_nerf,
    author = {Quei-An, Chen},
    title = {Nerf_pl: a pytorch-lightning implementation of NeRF},
    url = {https://github.com/kwea123/nerf_pl/},
    year = {2020},
}
Die offizielle Tensorf -Implementierung:
 @article{TensoRF,
  title={TensoRF: Tensorial Radiance Fields},
  author={Chen, Anpei and Xu, Zexiang and Geiger, Andreas and Yu, Jingyi and Su, Hao},
  journal={arXiv preprint arXiv:2203.09517},
  year={2022}
}
Die NERF -GUI wird mit Dearpygui entwickelt.


