torch ngp
1.0.0
Ce référentiel contient:
NOUVELLES : Une version propre et améliorée se concentrant sur la reconstruction statique du nerf de scènes réalistes a été séparée en nerf_template, car ce référentiel a été difficile à entretenir.
Formation / rendu interactif Instant-NGP sur LEGO:
Également la première implémentation interactive déformable-nerf:
NGP_PL: Pytorch + Cuda formé avec Pytorch-Lightning.
Jnerf: une référence Nerf basée sur Jittor.
Hashnerf-Pytorch: une implémentation pure pytorch.
Dreamfields-Torch: Pytorch + CUDA Implémentation de la génération d'objets guidés par texte zéro avec des champs de rêve basés sur ce référentiel.
git clone --recursive https://github.com/ashawkey/torch-ngp.git
cd torch-ngppip install -r requirements.txt
# (optional) install the tcnn backbone
pip install git+https://github.com/NVlabs/tiny-cuda-nn/ # subdirectory=bindings/torchconda env create -f environment.yml
conda activate torch-ngp Par défaut, nous utilisons load pour construire l'extension au moment de l'exécution. Cependant, cela peut parfois être gênant. Par conséquent, nous fournissons également la setup.py pour construire chaque extension:
 # install all extension modules
bash scripts/install_ext.sh

# if you want to install manually, here is an example:
cd raymarching
python setup.py build_ext --inplace # build ext only, do not install (only can be used in the parent directory)
pip install . # install to python path (you still need the raymarching/ folder, since this only install the built extension.) Actuellement, --ff ne prend en charge que les GPU avec CUDA Architecture >= 70 . Pour les GPU avec une architecture inférieure, --tcnn peut toujours être utilisé, mais la vitesse sera plus lente par rapport aux GPU plus récents.
Nous utilisons le même format de données que le NGP instantané, par exemple, Armadillo et Fox. Veuillez les télécharger et les mettre sous ./data .
Nous prenons également en charge l'ensemble de données autocoreux et la conversion d'autres formats (par exemple, LLFF, réservoirs et temples, MIP-nerf 360) au format compatible NERF, avec des détails dans le bloc de code suivant.
nerf_synthetic
Tanks et temples: [script de conversion]
Llff: [script de conversion]
Mip-nerf 360: [script de conversion]
(dynamique) d-nerf
(dynamique) hyper-nerf: [script de conversion]
La première fois que la course prendra un certain temps pour compiler les extensions CUDA.
 # ## Instant-ngp NeRF
# train with different backbones (with slower pytorch ray marching)
# for the colmap dataset, the default dataset setting `--bound 2 --scale 0.33` is used.
python main_nerf.py data/fox --workspace trial_nerf # fp32 mode
python main_nerf.py data/fox --workspace trial_nerf --fp16 # fp16 mode (pytorch amp)
python main_nerf.py data/fox --workspace trial_nerf --fp16 --ff # fp16 mode + FFMLP (this repo's implementation)
python main_nerf.py data/fox --workspace trial_nerf --fp16 --tcnn # fp16 mode + official tinycudann's encoder & MLP

# use CUDA to accelerate ray marching (much more faster!)
python main_nerf.py data/fox --workspace trial_nerf --fp16 --cuda_ray # fp16 mode + cuda raymarching

# preload data into GPU, accelerate training but use more GPU memory.
python main_nerf.py data/fox --workspace trial_nerf --fp16 --preload

# one for all: -O means --fp16 --cuda_ray --preload, which usually gives the best results balanced on speed & performance.
python main_nerf.py data/fox --workspace trial_nerf -O

# test mode
python main_nerf.py data/fox --workspace trial_nerf -O --test

# construct an error_map for each image, and sample rays based on the training error (slow down training but get better performance with the same number of training steps)
python main_nerf.py data/fox --workspace trial_nerf -O --error_map

# use a background model (e.g., a sphere with radius = 32), can supress noises for real-world 360 dataset
python main_nerf.py data/firekeeper --workspace trial_nerf -O --bg_radius 32

# start a GUI for NeRF training & visualization
# always use with `--fp16 --cuda_ray` for an acceptable framerate!
python main_nerf.py data/fox --workspace trial_nerf -O --gui

# test mode for GUI
python main_nerf.py data/fox --workspace trial_nerf -O --gui --test

# for the blender dataset, you should add `--bound 1.0 --scale 0.8 --dt_gamma 0`
# --bound means the scene is assumed to be inside box[-bound, bound]
# --scale adjusts the camera locaction to make sure it falls inside the above bounding box.
# --dt_gamma controls the adaptive ray marching speed, set to 0 turns it off.
python main_nerf.py data/nerf_synthetic/lego --workspace trial_nerf -O --bound 1.0 --scale 0.8 --dt_gamma 0
python main_nerf.py data/nerf_synthetic/lego --workspace trial_nerf -O --bound 1.0 --scale 0.8 --dt_gamma 0 --gui

# for the LLFF dataset, you should first convert it to nerf-compatible format:
python scripts/llff2nerf.py data/nerf_llff_data/fern # by default it use full-resolution images, and write `transforms.json` to the folder
python scripts/llff2nerf.py data/nerf_llff_data/fern --images images_4 --downscale 4 # if you prefer to use the low-resolution images
# then you can train as a colmap dataset (you'll need to tune the scale & bound if necessary):
python main_nerf.py data/nerf_llff_data/fern --workspace trial_nerf -O
python main_nerf.py data/nerf_llff_data/fern --workspace trial_nerf -O --gui

# for the Tanks&Temples dataset, you should first convert it to nerf-compatible format:
python scripts/tanks2nerf.py data/TanksAndTemple/Family # write `trainsforms_{split}.json` for [train, val, test]
# then you can train as a blender dataset (you'll need to tune the scale & bound if necessary)
python main_nerf.py data/TanksAndTemple/Family --workspace trial_nerf_family -O --bound 1.0 --scale 0.33 --dt_gamma 0
python main_nerf.py data/TanksAndTemple/Family --workspace trial_nerf_family -O --bound 1.0 --scale 0.33 --dt_gamma 0 --gui

# for custom dataset, you should:
# 1. take a video / many photos from different views
# 2. put the video under a path like ./data/custom/video.mp4 or the images under ./data/custom/images/*.jpg.
# 3. call the preprocess code: (should install ffmpeg and colmap first! refer to the file for more options)
python scripts/colmap2nerf.py --video ./data/custom/video.mp4 --run_colmap # if use video
python scripts/colmap2nerf.py --images ./data/custom/images/ --run_colmap # if use images
python scripts/colmap2nerf.py --video ./data/custom/video.mp4 --run_colmap --dynamic # if the scene is dynamic (for D-NeRF settings), add the time for each frame.
# 4. it should create the transform.json, and you can train with: (you'll need to try with different scale & bound & dt_gamma to make the object correctly located in the bounding box and render fluently.)
python main_nerf.py data/custom --workspace trial_nerf_custom -O --gui --scale 2.0 --bound 1.0 --dt_gamma 0.02

# ## Instant-ngp SDF
python main_sdf.py data/armadillo.obj --workspace trial_sdf
python main_sdf.py data/armadillo.obj --workspace trial_sdf --fp16
python main_sdf.py data/armadillo.obj --workspace trial_sdf --fp16 --ff
python main_sdf.py data/armadillo.obj --workspace trial_sdf --fp16 --tcnn

python main_sdf.py data/armadillo.obj --workspace trial_sdf --fp16 --test

# ## TensoRF
# almost the same as Instant-ngp NeRF, just replace the main script.
python main_tensoRF.py data/fox --workspace trial_tensoRF -O
python main_tensoRF.py data/nerf_synthetic/lego --workspace trial_tensoRF -O --bound 1.0 --scale 0.8 --dt_gamma 0

# ## CCNeRF
# training on single objects, turn on --error_map for better quality.
python main_CCNeRF.py data/nerf_synthetic/chair --workspace trial_cc_chair -O --bound 1.0 --scale 0.67 --dt_gamma 0 --error_map
python main_CCNeRF.py data/nerf_synthetic/ficus --workspace trial_cc_ficus -O --bound 1.0 --scale 0.67 --dt_gamma 0 --error_map
python main_CCNeRF.py data/nerf_synthetic/hotdog --workspace trial_cc_hotdog -O --bound 1.0 --scale 0.67 --dt_gamma 0 --error_map
# compose, use a larger bound and more samples per ray for better quality.
python main_CCNeRF.py data/nerf_synthetic/hotdog --workspace trial_cc_hotdog -O --bound 2.0 --scale 0.67 --dt_gamma 0 --max_steps 2048 --test --compose
# compose + gui, only about 1 FPS without dynamic resolution... just for quick verification of composition results.
python main_CCNeRF.py data/nerf_synthetic/hotdog --workspace trial_cc_hotdog -O --bound 2.0 --scale 0.67 --dt_gamma 0 --test --compose --gui

# ## D-NeRF
# almost the same as Instant-ngp NeRF, just replace the main script.
# use deformation to model dynamic scene
python main_dnerf.py data/dnerf/jumpingjacks --workspace trial_dnerf_jumpingjacks -O --bound 1.0 --scale 0.8 --dt_gamma 0
python main_dnerf.py data/dnerf/jumpingjacks --workspace trial_dnerf_jumpingjacks -O --bound 1.0 --scale 0.8 --dt_gamma 0 --gui
# use temporal basis to model dynamic scene
python main_dnerf.py data/dnerf/jumpingjacks --workspace trial_dnerf_basis_jumpingjacks -O --bound 1.0 --scale 0.8 --dt_gamma 0 --basis
python main_dnerf.py data/dnerf/jumpingjacks --workspace trial_dnerf_basis_jumpingjacks -O --bound 1.0 --scale 0.8 --dt_gamma 0 --basis --gui
# for the hypernerf dataset, first convert it into nerf-compatible format:
python scripts/hyper2nerf.py data/split-cookie --downscale 2 # will generate transforms*.json
python main_dnerf.py data/split-cookie/ --workspace trial_dnerf_cookies -O --bound 1 --scale 0.3 --dt_gamma 0
Vérifiez le répertoire scripts pour des exemples plus fournis.
Testé avec les paramètres par défaut sur l'ensemble de données LEGO. Ici, la vitesse fait référence aux iterations per second sur un V100.
| Modèle | Diviser | PSNR | Vitesse du train | Vitesse de test |
|---|---|---|---|---|
| Instant-NGP (papier) | Trainval? | 36.39 | - | - |
Instant-ngp ( -O ) | Train (30 000 marches) | 34.15 | 97 | 7.8 |
Instant-ngp ( -O --error_map ) | Train (30 000 marches) | 34.88 | 50 | 7.8 |
Instant-ngp ( -O ) | Trainval (marches 40k) | 35.22 | 97 | 7.8 |
Instant-ngp ( -O --error_map ) | Trainval (marches 40k) | 36.00 | 50 | 7.8 |
| Tensorf (papier) | Train (30 000 marches) | 36.46 | - | - |
Tensorf ( -O ) | Train (30 000 marches) | 35.05 | 51 | 2.8 |
Tensorf ( -O --error_map ) | Train (30 000 marches) | 35.84 | 14 | 2.8 |
Q : Comment choisir l'épine dorsale du réseau?
R : Le drapeau -O qui utilise la précision mixte native de Pytorch convient à la plupart des cas. Je ne trouve pas d'amélioration très significative pour --tcnn et --ff , et ils nécessitent un bâtiment supplémentaire. De plus, certaines nouvelles fonctionnalités ne peuvent être disponibles que pour le mode -O par défaut.
Q : CUDA hors de la mémoire pour mon ensemble de données.
R : Vous pouvez essayer de désactiver --preload qui charge toutes les images dans GPU pour l'accélération (si utilisez -O , changez-le en --fp16 --cuda_ray ). Une autre solution consiste à définir manuellement downscale dans NeRFDataset pour réduire la résolution de l'image.
Q : Comment régler bound et scale ?
R : Vous pouvez commencer avec une grande bound (par exemple, 16) ou une petite scale (par exemple, 0,3) pour vous assurer que l'objet tombe dans la boîte de délimitation. L'interface graphique peut être utilisée pour rétrécir de manière interactive le bound pour trouver la valeur appropriée. L'absencement de cette ligne visualisera les poses de la caméra, et certains bons exemples peuvent être trouvés dans ce numéro.
Q : Vues nouvelles bruyantes pour les ensembles de données réalistes.
R : Vous pouvez essayer de définir bg_radius à une grande valeur, par exemple, 32. Il forme une carte d'environnement supplémentaire pour modéliser l'arrière-plan sur des photos réalistes. Une bound plus grande aidera également. Un exemple pour bg_radius dans l'ensemble de données Firekeeper: 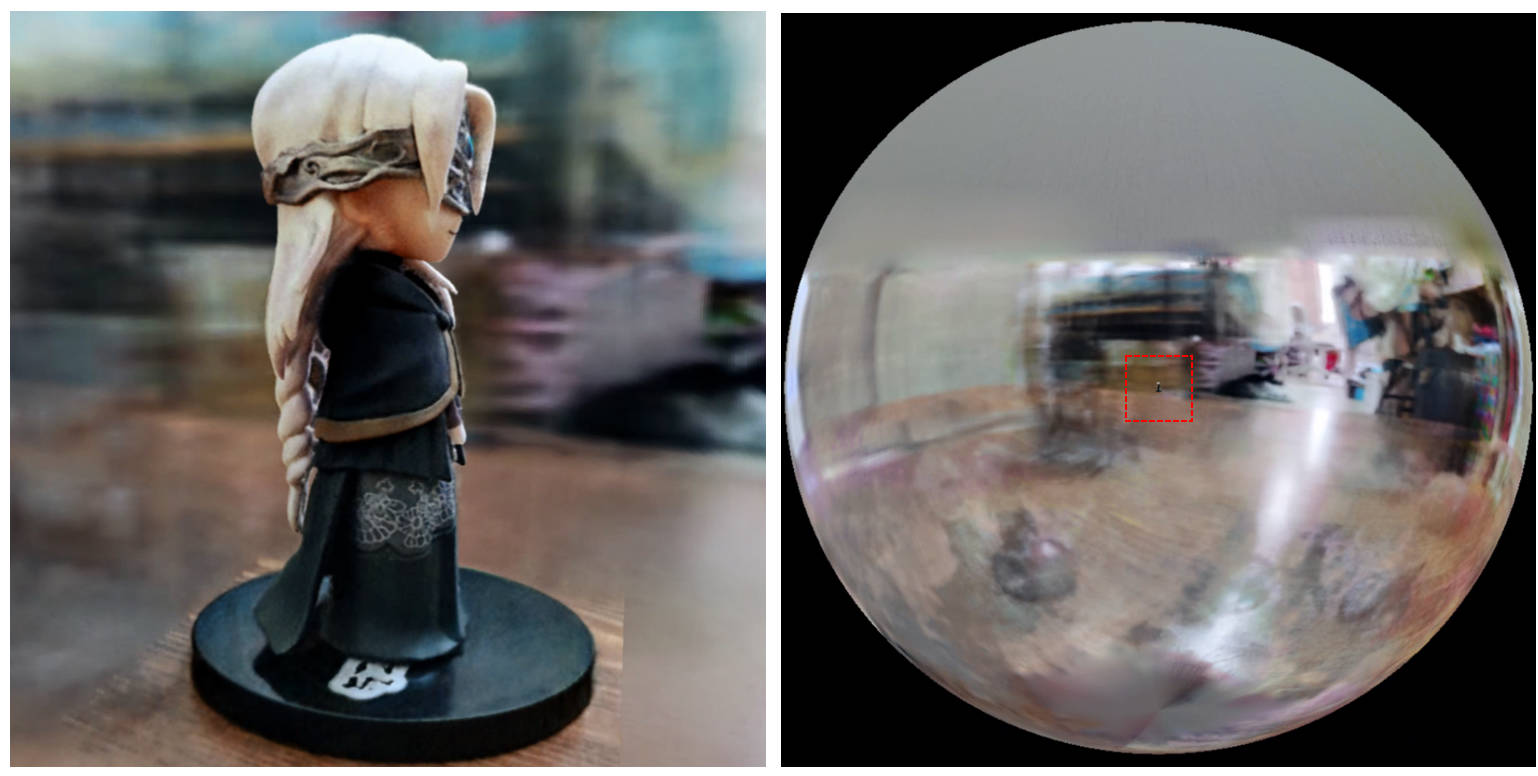
[0, 1] et centrée à (0.5, 0.5, 0.5) , ce repo suppose que la scène est délimitée dans la boîte [-bound, bound] et centrée à (0, 0, 0) . Par conséquent, la fonctionnalité de aabb_scale est remplacée par bound ici.trunc_exp comme activation de densité au lieu de softplus . L'élagage du masque alpha est remplacé par l'échantillonneur de grille de densité d'Instant-NGP, qui partage la même logique pour l'accélération.Si vous trouvez ce travail utile, une citation sera appréciée via:
 @misc{torch-ngp,
    Author = {Jiaxiang Tang},
    Year = {2022},
    Note = {https://github.com/ashawkey/torch-ngp},
    Title = {Torch-ngp: a PyTorch implementation of instant-ngp}
}

@article{tang2022compressible,
    title = {Compressible-composable NeRF via Rank-residual Decomposition},
    author = {Tang, Jiaxiang and Chen, Xiaokang and Wang, Jingbo and Zeng, Gang},
    journal = {arXiv preprint arXiv:2205.14870},
    year = {2022}
}
Crédits à Thomas Müller pour l'incroyable minuscule-cuda-nn et instantané-ngp:
 @misc{tiny-cuda-nn,
    Author = {Thomas M"uller},
    Year = {2021},
    Note = {https://github.com/nvlabs/tiny-cuda-nn},
    Title = {Tiny {CUDA} Neural Network Framework}
}

@article{mueller2022instant,
    title = {Instant Neural Graphics Primitives with a Multiresolution Hash Encoding},
    author = {Thomas M"uller and Alex Evans and Christoph Schied and Alexander Keller},
    journal = {arXiv:2201.05989},
    year = {2022},
    month = jan
}
Le cadre de NERF est adapté de NERF_PL:
 @misc{queianchen_nerf,
    author = {Quei-An, Chen},
    title = {Nerf_pl: a pytorch-lightning implementation of NeRF},
    url = {https://github.com/kwea123/nerf_pl/},
    year = {2020},
}
La mise en œuvre officielle de Tensorf:
 @article{TensoRF,
  title={TensoRF: Tensorial Radiance Fields},
  author={Chen, Anpei and Xu, Zexiang and Geiger, Andreas and Yu, Jingyi and Su, Hao},
  journal={arXiv preprint arXiv:2203.09517},
  year={2022}
}
L'interface graphique Nerf est développée avec Dearpygui.


