torch ngp
1.0.0
このリポジトリには次のものが含まれています。
ニュース:現実的なシーンの静的なNERF再構成に焦点を当てたクリーンで改善されたバージョンは、このリポジトリを維持するのが難しいため、nerf_templateに分けられました。
LEGOでのインスタントNGPインタラクティブトレーニング/レンダリング:
また、最初のインタラクティブな変形可能なNERF実装:
NGP_PL:Pytorch+CudaはPytorch-Lightningで訓練されています。
JNERF:ジッターに基づくナーフベンチマーク。
Hashnerf-Pytorch:純粋なPytorchの実装。
Dreamfields-Torch:Pytorch+CUDAこのリポジトリに基づいたDreamフィールドを使用したゼロショットテキストガイド付きオブジェクト生成の実装。
git clone --recursive https://github.com/ashawkey/torch-ngp.git
cd torch-ngppip install -r requirements.txt
# (optional) install the tcnn backbone
pip install git+https://github.com/NVlabs/tiny-cuda-nn/ # subdirectory=bindings/torchconda env create -f environment.yml
conda activate torch-ngpデフォルトでは、 loadを使用して実行時に拡張機能を構築します。ただし、これは不便な場合があります。したがって、各拡張機能を構築するためのsetup.pyも提供します。
 # install all extension modules
bash scripts/install_ext.sh

# if you want to install manually, here is an example:
cd raymarching
python setup.py build_ext --inplace # build ext only, do not install (only can be used in the parent directory)
pip install . # install to python path (you still need the raymarching/ folder, since this only install the built extension.)現在、 --ffはCUDAアーキテクチャ>= 70でGPUのみをサポートしています。アーキテクチャが低いGPUの場合、 --tcnn引き続き使用できますが、最近のGPUと比較して速度が遅くなります。
Instant-NGP、たとえばArmadilloやFoxと同じデータ形式を使用します。ダウンロードして./dataの下に置いてください。
また、セルフキャプチャされたデータセットをサポートし、他の形式(LLFF、タンク&テンプル、MIP-NERF 360)をNERF互換形式に変換し、次のコードブロックに詳細を示します。
nerf_synthetic
タンクと寺院:[コンバージョンスクリプト]
LLFF:[変換スクリプト]
MIP-NERF 360:[変換スクリプト]
(動的)d-nerf
(ダイナミック)Hyper-nerf:[変換スクリプト]
初めてのランニングは、CUDA拡張機能をコンパイルするのに時間がかかります。
 # ## Instant-ngp NeRF
# train with different backbones (with slower pytorch ray marching)
# for the colmap dataset, the default dataset setting `--bound 2 --scale 0.33` is used.
python main_nerf.py data/fox --workspace trial_nerf # fp32 mode
python main_nerf.py data/fox --workspace trial_nerf --fp16 # fp16 mode (pytorch amp)
python main_nerf.py data/fox --workspace trial_nerf --fp16 --ff # fp16 mode + FFMLP (this repo's implementation)
python main_nerf.py data/fox --workspace trial_nerf --fp16 --tcnn # fp16 mode + official tinycudann's encoder & MLP

# use CUDA to accelerate ray marching (much more faster!)
python main_nerf.py data/fox --workspace trial_nerf --fp16 --cuda_ray # fp16 mode + cuda raymarching

# preload data into GPU, accelerate training but use more GPU memory.
python main_nerf.py data/fox --workspace trial_nerf --fp16 --preload

# one for all: -O means --fp16 --cuda_ray --preload, which usually gives the best results balanced on speed & performance.
python main_nerf.py data/fox --workspace trial_nerf -O

# test mode
python main_nerf.py data/fox --workspace trial_nerf -O --test

# construct an error_map for each image, and sample rays based on the training error (slow down training but get better performance with the same number of training steps)
python main_nerf.py data/fox --workspace trial_nerf -O --error_map

# use a background model (e.g., a sphere with radius = 32), can supress noises for real-world 360 dataset
python main_nerf.py data/firekeeper --workspace trial_nerf -O --bg_radius 32

# start a GUI for NeRF training & visualization
# always use with `--fp16 --cuda_ray` for an acceptable framerate!
python main_nerf.py data/fox --workspace trial_nerf -O --gui

# test mode for GUI
python main_nerf.py data/fox --workspace trial_nerf -O --gui --test

# for the blender dataset, you should add `--bound 1.0 --scale 0.8 --dt_gamma 0`
# --bound means the scene is assumed to be inside box[-bound, bound]
# --scale adjusts the camera locaction to make sure it falls inside the above bounding box.
# --dt_gamma controls the adaptive ray marching speed, set to 0 turns it off.
python main_nerf.py data/nerf_synthetic/lego --workspace trial_nerf -O --bound 1.0 --scale 0.8 --dt_gamma 0
python main_nerf.py data/nerf_synthetic/lego --workspace trial_nerf -O --bound 1.0 --scale 0.8 --dt_gamma 0 --gui

# for the LLFF dataset, you should first convert it to nerf-compatible format:
python scripts/llff2nerf.py data/nerf_llff_data/fern # by default it use full-resolution images, and write `transforms.json` to the folder
python scripts/llff2nerf.py data/nerf_llff_data/fern --images images_4 --downscale 4 # if you prefer to use the low-resolution images
# then you can train as a colmap dataset (you'll need to tune the scale & bound if necessary):
python main_nerf.py data/nerf_llff_data/fern --workspace trial_nerf -O
python main_nerf.py data/nerf_llff_data/fern --workspace trial_nerf -O --gui

# for the Tanks&Temples dataset, you should first convert it to nerf-compatible format:
python scripts/tanks2nerf.py data/TanksAndTemple/Family # write `trainsforms_{split}.json` for [train, val, test]
# then you can train as a blender dataset (you'll need to tune the scale & bound if necessary)
python main_nerf.py data/TanksAndTemple/Family --workspace trial_nerf_family -O --bound 1.0 --scale 0.33 --dt_gamma 0
python main_nerf.py data/TanksAndTemple/Family --workspace trial_nerf_family -O --bound 1.0 --scale 0.33 --dt_gamma 0 --gui

# for custom dataset, you should:
# 1. take a video / many photos from different views
# 2. put the video under a path like ./data/custom/video.mp4 or the images under ./data/custom/images/*.jpg.
# 3. call the preprocess code: (should install ffmpeg and colmap first! refer to the file for more options)
python scripts/colmap2nerf.py --video ./data/custom/video.mp4 --run_colmap # if use video
python scripts/colmap2nerf.py --images ./data/custom/images/ --run_colmap # if use images
python scripts/colmap2nerf.py --video ./data/custom/video.mp4 --run_colmap --dynamic # if the scene is dynamic (for D-NeRF settings), add the time for each frame.
# 4. it should create the transform.json, and you can train with: (you'll need to try with different scale & bound & dt_gamma to make the object correctly located in the bounding box and render fluently.)
python main_nerf.py data/custom --workspace trial_nerf_custom -O --gui --scale 2.0 --bound 1.0 --dt_gamma 0.02

# ## Instant-ngp SDF
python main_sdf.py data/armadillo.obj --workspace trial_sdf
python main_sdf.py data/armadillo.obj --workspace trial_sdf --fp16
python main_sdf.py data/armadillo.obj --workspace trial_sdf --fp16 --ff
python main_sdf.py data/armadillo.obj --workspace trial_sdf --fp16 --tcnn

python main_sdf.py data/armadillo.obj --workspace trial_sdf --fp16 --test

# ## TensoRF
# almost the same as Instant-ngp NeRF, just replace the main script.
python main_tensoRF.py data/fox --workspace trial_tensoRF -O
python main_tensoRF.py data/nerf_synthetic/lego --workspace trial_tensoRF -O --bound 1.0 --scale 0.8 --dt_gamma 0

# ## CCNeRF
# training on single objects, turn on --error_map for better quality.
python main_CCNeRF.py data/nerf_synthetic/chair --workspace trial_cc_chair -O --bound 1.0 --scale 0.67 --dt_gamma 0 --error_map
python main_CCNeRF.py data/nerf_synthetic/ficus --workspace trial_cc_ficus -O --bound 1.0 --scale 0.67 --dt_gamma 0 --error_map
python main_CCNeRF.py data/nerf_synthetic/hotdog --workspace trial_cc_hotdog -O --bound 1.0 --scale 0.67 --dt_gamma 0 --error_map
# compose, use a larger bound and more samples per ray for better quality.
python main_CCNeRF.py data/nerf_synthetic/hotdog --workspace trial_cc_hotdog -O --bound 2.0 --scale 0.67 --dt_gamma 0 --max_steps 2048 --test --compose
# compose + gui, only about 1 FPS without dynamic resolution... just for quick verification of composition results.
python main_CCNeRF.py data/nerf_synthetic/hotdog --workspace trial_cc_hotdog -O --bound 2.0 --scale 0.67 --dt_gamma 0 --test --compose --gui

# ## D-NeRF
# almost the same as Instant-ngp NeRF, just replace the main script.
# use deformation to model dynamic scene
python main_dnerf.py data/dnerf/jumpingjacks --workspace trial_dnerf_jumpingjacks -O --bound 1.0 --scale 0.8 --dt_gamma 0
python main_dnerf.py data/dnerf/jumpingjacks --workspace trial_dnerf_jumpingjacks -O --bound 1.0 --scale 0.8 --dt_gamma 0 --gui
# use temporal basis to model dynamic scene
python main_dnerf.py data/dnerf/jumpingjacks --workspace trial_dnerf_basis_jumpingjacks -O --bound 1.0 --scale 0.8 --dt_gamma 0 --basis
python main_dnerf.py data/dnerf/jumpingjacks --workspace trial_dnerf_basis_jumpingjacks -O --bound 1.0 --scale 0.8 --dt_gamma 0 --basis --gui
# for the hypernerf dataset, first convert it into nerf-compatible format:
python scripts/hyper2nerf.py data/split-cookie --downscale 2 # will generate transforms*.json
python main_dnerf.py data/split-cookie/ --workspace trial_dnerf_cookies -O --bound 1 --scale 0.3 --dt_gamma 0
より提供された例については、 scriptsディレクトリを確認してください。
LEGOデータセットのデフォルト設定でテストされました。ここで、速度はV100のiterations per secondを指します。
| モデル | スプリット | psnr | 列車の速度 | テスト速度 |
|---|---|---|---|---|
| instant-ngp(紙) | Trainval? | 36.39 | - | - |
instant -ngp( -O ) | 電車(30kステップ) | 34.15 | 97 | 7.8 |
instant -ngp( -O --error_map ) | 電車(30kステップ) | 34.88 | 50 | 7.8 |
instant -ngp( -O ) | Trainval(40kステップ) | 35.22 | 97 | 7.8 |
instant -ngp( -O --error_map ) | Trainval(40kステップ) | 36.00 | 50 | 7.8 |
| テンソルフ(紙) | 電車(30kステップ) | 36.46 | - | - |
テンソルフ( -O ) | 電車(30kステップ) | 35.05 | 51 | 2.8 |
Tensorf( -O --error_map ) | 電車(30kステップ) | 35.84 | 14 | 2.8 |
Q :ネットワークバックボーンを選択する方法は?
A :Pytorchのネイティブ混合精度を使用する-Oフラグは、ほとんどの場合に適しています。 --tcnn and --ffについては、それほど大きな改善はありません。追加の建物が必要です。また、一部の新機能は、デフォルト-Oモードでのみ使用できる場合があります。
Q :私のデータセットのメモリのcuda。
A :オフにしてみることができます--preloadは、すべての画像をGPUにロードして加速します( -Oを使用する場合は、 --fp16 --cuda_rayに変更します)。別の解決策は、 NeRFDatasetで手動でdownscaleを設定して画像解像度を下げることです。
Q : boundとscaleを調整する方法は?
A :オブジェクトが境界ボックスに落ちることを確認するために、大きなbound (例えば、16)またはscale (例えば、0.3)から始めます。 GUIモードを使用して、 boundをインタラクティブに収縮させて、適切な値を見つけることができます。このラインを発見すると、カメラのポーズが視覚化され、この問題には良い例がいくつかあります。
Q :リアルなデータセットの騒々しい小説ビュー。
A : bg_radius大きな価値に設定してみることができます。たとえば、32。現実的な写真の背景をモデル化するために、追加の環境マップをトレーニングします。大きなboundも役立ちます。 Firekeeper Datasetのbg_radiusの例: 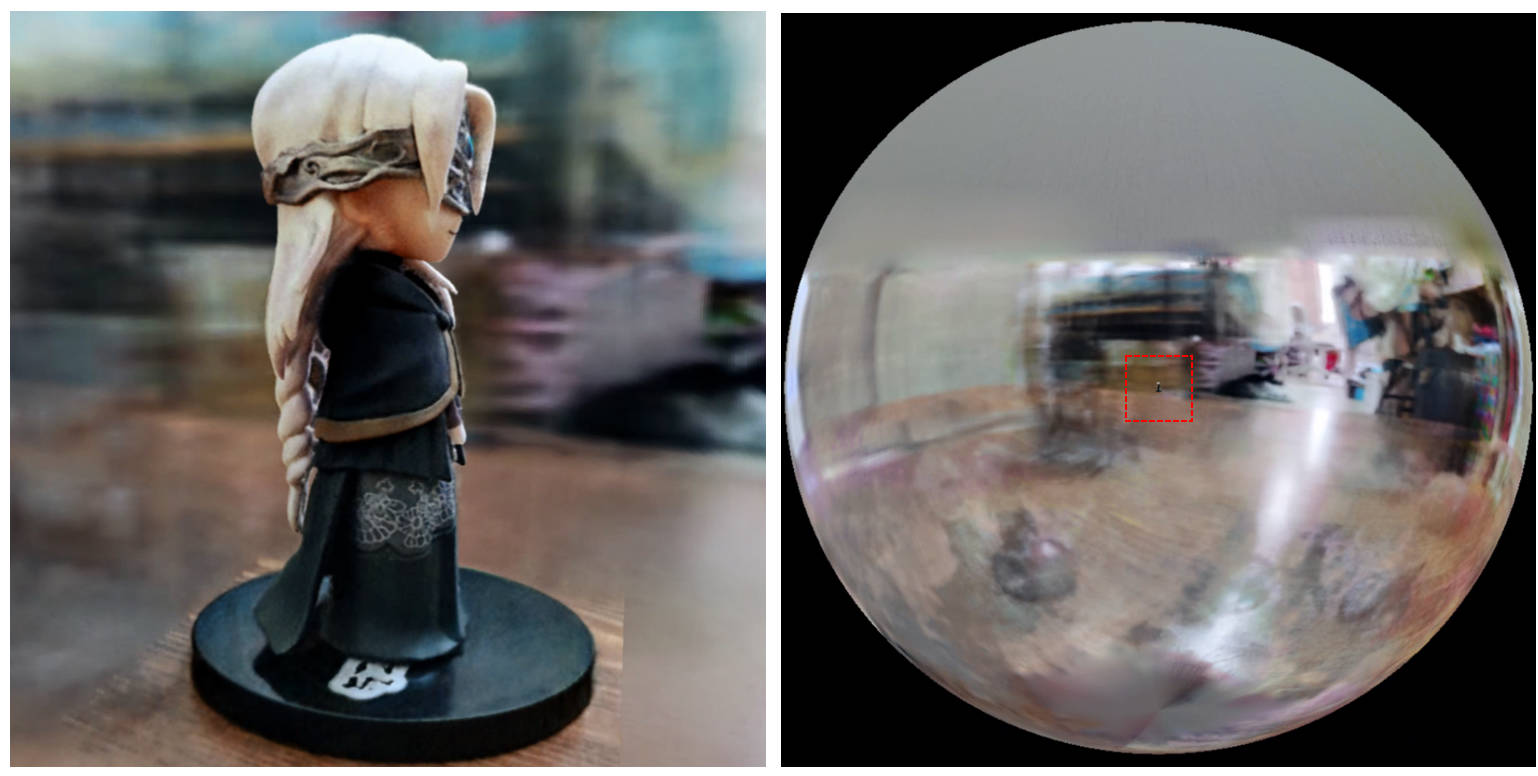
[0, 1]に囲まれ、 (0.5, 0.5, 0.5)を中心とすると仮定する代わりに、このレポはシーンがボックス[-bound, bound]に囲まれ、 (0, 0, 0)を中心としていると想定しています。したがって、 aabb_scaleの機能は、ここでboundものに置き換えられます。softplusの代わりに密度の活性化としてtrunc_expを使用します。 Alpha Mask Pruningは、Instant-NGPの密度グリッドサンプラーに置き換えられます。この作業が役立つと思う場合は、引用が高く評価されます。
 @misc{torch-ngp,
    Author = {Jiaxiang Tang},
    Year = {2022},
    Note = {https://github.com/ashawkey/torch-ngp},
    Title = {Torch-ngp: a PyTorch implementation of instant-ngp}
}

@article{tang2022compressible,
    title = {Compressible-composable NeRF via Rank-residual Decomposition},
    author = {Tang, Jiaxiang and Chen, Xiaokang and Wang, Jingbo and Zeng, Gang},
    journal = {arXiv preprint arXiv:2205.14870},
    year = {2022}
}
驚くべきTiny-Cuda-NNとインスタントNGPのためのThomasMüllerへのクレジット:
 @misc{tiny-cuda-nn,
    Author = {Thomas M"uller},
    Year = {2021},
    Note = {https://github.com/nvlabs/tiny-cuda-nn},
    Title = {Tiny {CUDA} Neural Network Framework}
}

@article{mueller2022instant,
    title = {Instant Neural Graphics Primitives with a Multiresolution Hash Encoding},
    author = {Thomas M"uller and Alex Evans and Christoph Schied and Alexander Keller},
    journal = {arXiv:2201.05989},
    year = {2022},
    month = jan
}
NERFのフレームワークは、nerf_plから採用されています。
 @misc{queianchen_nerf,
    author = {Quei-An, Chen},
    title = {Nerf_pl: a pytorch-lightning implementation of NeRF},
    url = {https://github.com/kwea123/nerf_pl/},
    year = {2020},
}
公式のテンソルフの実装:
 @article{TensoRF,
  title={TensoRF: Tensorial Radiance Fields},
  author={Chen, Anpei and Xu, Zexiang and Geiger, Andreas and Yu, Jingyi and Su, Hao},
  journal={arXiv preprint arXiv:2203.09517},
  year={2022}
}
nerf guiは、dearypyguiで開発されています。


