torch ngp
1.0.0
Este repositorio contiene:
Noticias : Una versión limpia y mejorada que se centra en la reconstrucción estática del nerf de escenas realistas se ha separado en NERF_Template, ya que este repositorio ha sido difícil de mantener.
Entrenamiento/representación interactiva instantánea-NGP en LEGO:
También la primera implementación interactiva deformable-NERF:
NGP_PL: Pytorch+Cuda entrenado con Pytorch-Lightning.
JNERF: Un punto de referencia de Nerf basado en Jittor.
Hashnnerf-Pytorch: una implementación pura de Pytorch.
Dreamfields-Torch: Pytorch+CUDA Implementación de la generación de objetos guiados por texto con cero disparos con campos de sueños basados en este repositorio.
git clone --recursive https://github.com/ashawkey/torch-ngp.git
cd torch-ngppip install -r requirements.txt
# (optional) install the tcnn backbone
pip install git+https://github.com/NVlabs/tiny-cuda-nn/ # subdirectory=bindings/torchconda env create -f environment.yml
conda activate torch-ngp Por defecto, usamos load para construir la extensión en tiempo de ejecución. Sin embargo, esto puede ser inconveniente a veces. Por lo tanto, también proporcionamos el setup.py para construir cada extensión:
 # install all extension modules
bash scripts/install_ext.sh

# if you want to install manually, here is an example:
cd raymarching
python setup.py build_ext --inplace # build ext only, do not install (only can be used in the parent directory)
pip install . # install to python path (you still need the raymarching/ folder, since this only install the built extension.) Actualmente, --ff solo admite GPU con arquitectura CUDA >= 70 . Para las GPU con --tcnn más baja, todavía se puede usar, pero la velocidad será más lenta en comparación con las GPU más recientes.
Utilizamos el mismo formato de datos que Instant-NGP, EG, Armadillo y Fox. Descargue y póngalos en ./data .
También admitimos un conjunto de datos autocapotado y convertir otros formatos (EG, LLFF, Tanks & Temple, MIP-NERF 360) al formato compatible con NERF, con detalles en el siguiente bloque de código.
nerf_synthetic
Tanques y templos: [Script de conversión]
LLFF: [Script de conversión]
MIP-NERF 360: [Script de conversión]
(dinámico) D-NERF
(Dynamic) Hyper-NERF: [Script de conversión]
La ejecución por primera vez tomará algún tiempo para compilar las extensiones CUDA.
 # ## Instant-ngp NeRF
# train with different backbones (with slower pytorch ray marching)
# for the colmap dataset, the default dataset setting `--bound 2 --scale 0.33` is used.
python main_nerf.py data/fox --workspace trial_nerf # fp32 mode
python main_nerf.py data/fox --workspace trial_nerf --fp16 # fp16 mode (pytorch amp)
python main_nerf.py data/fox --workspace trial_nerf --fp16 --ff # fp16 mode + FFMLP (this repo's implementation)
python main_nerf.py data/fox --workspace trial_nerf --fp16 --tcnn # fp16 mode + official tinycudann's encoder & MLP

# use CUDA to accelerate ray marching (much more faster!)
python main_nerf.py data/fox --workspace trial_nerf --fp16 --cuda_ray # fp16 mode + cuda raymarching

# preload data into GPU, accelerate training but use more GPU memory.
python main_nerf.py data/fox --workspace trial_nerf --fp16 --preload

# one for all: -O means --fp16 --cuda_ray --preload, which usually gives the best results balanced on speed & performance.
python main_nerf.py data/fox --workspace trial_nerf -O

# test mode
python main_nerf.py data/fox --workspace trial_nerf -O --test

# construct an error_map for each image, and sample rays based on the training error (slow down training but get better performance with the same number of training steps)
python main_nerf.py data/fox --workspace trial_nerf -O --error_map

# use a background model (e.g., a sphere with radius = 32), can supress noises for real-world 360 dataset
python main_nerf.py data/firekeeper --workspace trial_nerf -O --bg_radius 32

# start a GUI for NeRF training & visualization
# always use with `--fp16 --cuda_ray` for an acceptable framerate!
python main_nerf.py data/fox --workspace trial_nerf -O --gui

# test mode for GUI
python main_nerf.py data/fox --workspace trial_nerf -O --gui --test

# for the blender dataset, you should add `--bound 1.0 --scale 0.8 --dt_gamma 0`
# --bound means the scene is assumed to be inside box[-bound, bound]
# --scale adjusts the camera locaction to make sure it falls inside the above bounding box.
# --dt_gamma controls the adaptive ray marching speed, set to 0 turns it off.
python main_nerf.py data/nerf_synthetic/lego --workspace trial_nerf -O --bound 1.0 --scale 0.8 --dt_gamma 0
python main_nerf.py data/nerf_synthetic/lego --workspace trial_nerf -O --bound 1.0 --scale 0.8 --dt_gamma 0 --gui

# for the LLFF dataset, you should first convert it to nerf-compatible format:
python scripts/llff2nerf.py data/nerf_llff_data/fern # by default it use full-resolution images, and write `transforms.json` to the folder
python scripts/llff2nerf.py data/nerf_llff_data/fern --images images_4 --downscale 4 # if you prefer to use the low-resolution images
# then you can train as a colmap dataset (you'll need to tune the scale & bound if necessary):
python main_nerf.py data/nerf_llff_data/fern --workspace trial_nerf -O
python main_nerf.py data/nerf_llff_data/fern --workspace trial_nerf -O --gui

# for the Tanks&Temples dataset, you should first convert it to nerf-compatible format:
python scripts/tanks2nerf.py data/TanksAndTemple/Family # write `trainsforms_{split}.json` for [train, val, test]
# then you can train as a blender dataset (you'll need to tune the scale & bound if necessary)
python main_nerf.py data/TanksAndTemple/Family --workspace trial_nerf_family -O --bound 1.0 --scale 0.33 --dt_gamma 0
python main_nerf.py data/TanksAndTemple/Family --workspace trial_nerf_family -O --bound 1.0 --scale 0.33 --dt_gamma 0 --gui

# for custom dataset, you should:
# 1. take a video / many photos from different views
# 2. put the video under a path like ./data/custom/video.mp4 or the images under ./data/custom/images/*.jpg.
# 3. call the preprocess code: (should install ffmpeg and colmap first! refer to the file for more options)
python scripts/colmap2nerf.py --video ./data/custom/video.mp4 --run_colmap # if use video
python scripts/colmap2nerf.py --images ./data/custom/images/ --run_colmap # if use images
python scripts/colmap2nerf.py --video ./data/custom/video.mp4 --run_colmap --dynamic # if the scene is dynamic (for D-NeRF settings), add the time for each frame.
# 4. it should create the transform.json, and you can train with: (you'll need to try with different scale & bound & dt_gamma to make the object correctly located in the bounding box and render fluently.)
python main_nerf.py data/custom --workspace trial_nerf_custom -O --gui --scale 2.0 --bound 1.0 --dt_gamma 0.02

# ## Instant-ngp SDF
python main_sdf.py data/armadillo.obj --workspace trial_sdf
python main_sdf.py data/armadillo.obj --workspace trial_sdf --fp16
python main_sdf.py data/armadillo.obj --workspace trial_sdf --fp16 --ff
python main_sdf.py data/armadillo.obj --workspace trial_sdf --fp16 --tcnn

python main_sdf.py data/armadillo.obj --workspace trial_sdf --fp16 --test

# ## TensoRF
# almost the same as Instant-ngp NeRF, just replace the main script.
python main_tensoRF.py data/fox --workspace trial_tensoRF -O
python main_tensoRF.py data/nerf_synthetic/lego --workspace trial_tensoRF -O --bound 1.0 --scale 0.8 --dt_gamma 0

# ## CCNeRF
# training on single objects, turn on --error_map for better quality.
python main_CCNeRF.py data/nerf_synthetic/chair --workspace trial_cc_chair -O --bound 1.0 --scale 0.67 --dt_gamma 0 --error_map
python main_CCNeRF.py data/nerf_synthetic/ficus --workspace trial_cc_ficus -O --bound 1.0 --scale 0.67 --dt_gamma 0 --error_map
python main_CCNeRF.py data/nerf_synthetic/hotdog --workspace trial_cc_hotdog -O --bound 1.0 --scale 0.67 --dt_gamma 0 --error_map
# compose, use a larger bound and more samples per ray for better quality.
python main_CCNeRF.py data/nerf_synthetic/hotdog --workspace trial_cc_hotdog -O --bound 2.0 --scale 0.67 --dt_gamma 0 --max_steps 2048 --test --compose
# compose + gui, only about 1 FPS without dynamic resolution... just for quick verification of composition results.
python main_CCNeRF.py data/nerf_synthetic/hotdog --workspace trial_cc_hotdog -O --bound 2.0 --scale 0.67 --dt_gamma 0 --test --compose --gui

# ## D-NeRF
# almost the same as Instant-ngp NeRF, just replace the main script.
# use deformation to model dynamic scene
python main_dnerf.py data/dnerf/jumpingjacks --workspace trial_dnerf_jumpingjacks -O --bound 1.0 --scale 0.8 --dt_gamma 0
python main_dnerf.py data/dnerf/jumpingjacks --workspace trial_dnerf_jumpingjacks -O --bound 1.0 --scale 0.8 --dt_gamma 0 --gui
# use temporal basis to model dynamic scene
python main_dnerf.py data/dnerf/jumpingjacks --workspace trial_dnerf_basis_jumpingjacks -O --bound 1.0 --scale 0.8 --dt_gamma 0 --basis
python main_dnerf.py data/dnerf/jumpingjacks --workspace trial_dnerf_basis_jumpingjacks -O --bound 1.0 --scale 0.8 --dt_gamma 0 --basis --gui
# for the hypernerf dataset, first convert it into nerf-compatible format:
python scripts/hyper2nerf.py data/split-cookie --downscale 2 # will generate transforms*.json
python main_dnerf.py data/split-cookie/ --workspace trial_dnerf_cookies -O --bound 1 --scale 0.3 --dt_gamma 0
Consulte el directorio scripts para ver más ejemplos proporcionados.
Probado con la configuración predeterminada en el conjunto de datos LEGO. Aquí la velocidad se refiere a las iterations per second en un V100.
| Modelo | Dividir | PSNR | Velocidad del tren | Velocidad de prueba |
|---|---|---|---|---|
| Instant-NGP (papel) | Trainval? | 36.39 | - | - |
Instant -NGP ( -O ) | tren (30k pasos) | 34.15 | 97 | 7.8 |
instant -ngp ( -O --error_map ) | tren (30k pasos) | 34.88 | 50 | 7.8 |
Instant -NGP ( -O ) | Trainval (40k pasos) | 35.22 | 97 | 7.8 |
instant -ngp ( -O --error_map ) | Trainval (40k pasos) | 36.00 | 50 | 7.8 |
| Tensorf (papel) | tren (30k pasos) | 36.46 | - | - |
Tensorf ( -O ) | tren (30k pasos) | 35.05 | 51 | 2.8 |
Tensorf ( -O --error_map ) | tren (30k pasos) | 35.84 | 14 | 2.8 |
P : ¿Cómo elegir la red troncal de la red?
R : La bandera -O que usa la precisión mixta nativa de Pytorch es adecuada para la mayoría de los casos. No encuentro una mejora muy significativa para --tcnn y --ff , y requieren una construcción adicional. Además, algunas características nuevas solo pueden estar disponibles para el modo predeterminado -O .
P : CUDA fuera de memoria para mi conjunto de datos.
R : Puede intentar apagar --preload que carga todas las imágenes en GPU para la aceleración (si se usa -O , cámbielo a --fp16 --cuda_ray ). Otra solución es establecer manualmente downscale en NeRFDataset para reducir la resolución de la imagen.
P : ¿Cómo ajustar bound y scale ?
R : Puede comenzar con un bound grande (por ejemplo, 16) o una pequeña scale (p. Ej., 0.3) para asegurarse de que el objeto caiga en el cuadro delimitador. El modo GUI se puede utilizar para reducir interactivamente el bound para encontrar el valor adecuado. Descompensar esta línea visualizará las posturas de la cámara, y se pueden encontrar algunos buenos ejemplos en este tema.
P : Vistas novedosas ruidosas para conjuntos de datos realistas.
R : Puede intentar configurar bg_radius en un gran valor, por ejemplo, 32. Entrena un mapa de entorno adicional para modelar el fondo en fotos realistas. Un bound más grande también ayudará. Un ejemplo para bg_radius en el conjunto de datos del bombero: 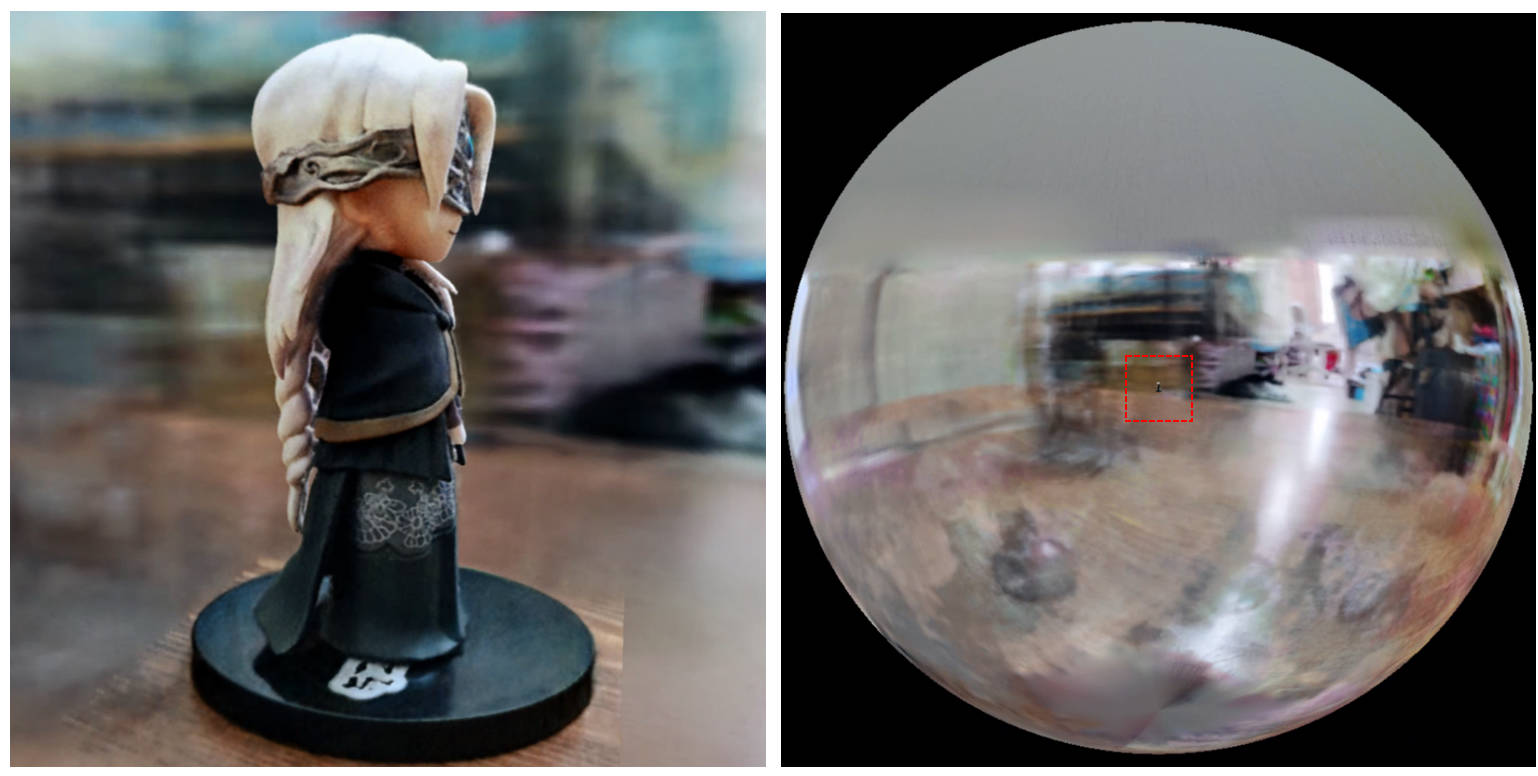
[0, 1] y se centra en (0.5, 0.5, 0.5) , este repositorio supone que la escena está limitada en el cuadro [-bound, bound] y centrado en (0, 0, 0) . Por lo tanto, la funcionalidad de aabb_scale se bound aquí.trunc_exp como la activación de densidad en lugar de softplus . La poda de máscara alfa se reemplaza por el muestreador de cuadrícula de densidad de Instant-NGP, que comparte la misma lógica para la aceleración.Si encuentra útil este trabajo, se agradecerá una cita a través de:
 @misc{torch-ngp,
    Author = {Jiaxiang Tang},
    Year = {2022},
    Note = {https://github.com/ashawkey/torch-ngp},
    Title = {Torch-ngp: a PyTorch implementation of instant-ngp}
}

@article{tang2022compressible,
    title = {Compressible-composable NeRF via Rank-residual Decomposition},
    author = {Tang, Jiaxiang and Chen, Xiaokang and Wang, Jingbo and Zeng, Gang},
    journal = {arXiv preprint arXiv:2205.14870},
    year = {2022}
}
Créditos a Thomas Müller por el increíble Tiny-Cuda-NN e Instant-NGP:
 @misc{tiny-cuda-nn,
    Author = {Thomas M"uller},
    Year = {2021},
    Note = {https://github.com/nvlabs/tiny-cuda-nn},
    Title = {Tiny {CUDA} Neural Network Framework}
}

@article{mueller2022instant,
    title = {Instant Neural Graphics Primitives with a Multiresolution Hash Encoding},
    author = {Thomas M"uller and Alex Evans and Christoph Schied and Alexander Keller},
    journal = {arXiv:2201.05989},
    year = {2022},
    month = jan
}
El marco de NERF se adapta de NERF_PL:
 @misc{queianchen_nerf,
    author = {Quei-An, Chen},
    title = {Nerf_pl: a pytorch-lightning implementation of NeRF},
    url = {https://github.com/kwea123/nerf_pl/},
    year = {2020},
}
La implementación oficial de tensorf:
 @article{TensoRF,
  title={TensoRF: Tensorial Radiance Fields},
  author={Chen, Anpei and Xu, Zexiang and Geiger, Andreas and Yu, Jingyi and Su, Hao},
  journal={arXiv preprint arXiv:2203.09517},
  year={2022}
}
La GUI Nerf se desarrolla con Dearpygui.


