torch ngp
1.0.0
Este repositório contém:
Notícias : Uma versão limpa e aprimorada com foco na reconstrução estática do NERF de cenas realistas foi separada no NERF_Template, pois esse repositório tem sido difícil de manter.
Instant-NGP Interactive Training/Rendering no LEGO:
Além disso, a primeira implementação interativa de deformável-nerf:
NGP_PL: Pytorch+CUDA treinado com pytorch-Lightning.
Jnerf: Um benchmark nerf baseado em Jittor.
Hashnerf-Pytorch: uma implementação pura de pytorch.
Dreamfields-Torch: Pytorch+CUDA Implementação da geração de objetos guiados por texto com tiro zero com campos de sonho com base neste repositório.
git clone --recursive https://github.com/ashawkey/torch-ngp.git
cd torch-ngppip install -r requirements.txt
# (optional) install the tcnn backbone
pip install git+https://github.com/NVlabs/tiny-cuda-nn/ # subdirectory=bindings/torchconda env create -f environment.yml
conda activate torch-ngp Por padrão, usamos load para construir a extensão em tempo de execução. No entanto, isso pode ser inconveniente às vezes. Portanto, também fornecemos o setup.py para construir cada extensão:
 # install all extension modules
bash scripts/install_ext.sh

# if you want to install manually, here is an example:
cd raymarching
python setup.py build_ext --inplace # build ext only, do not install (only can be used in the parent directory)
pip install . # install to python path (you still need the raymarching/ folder, since this only install the built extension.) Atualmente, --ff suporta apenas GPUs com arquitetura CUDA >= 70 . Para GPUs com arquitetura mais baixa, --tcnn ainda pode ser usado, mas a velocidade será mais lenta em comparação com as GPUs mais recentes.
Utilizamos o mesmo formato de dados que Instant-NGP, por exemplo, Armadillo e Fox. Faça o download e coloque -os em ./data .
Também apoiamos o conjunto de dados auto-capturados e a conversão de outros formatos (por exemplo, LLFF, Tanks & Templos, MIP-ERF 360) no formato compatível com NERF, com detalhes no bloco de código a seguir.
Nerf_synthetic
Tanques e templos: [Script de conversão]
LLFF: [Script de conversão]
MIP-ERF 360: [Script de conversão]
(dinâmico) D-Erf
(dinâmico) Hyper -nerf: [Script de conversão]
A primeira vez que a corrida levará algum tempo para compilar as extensões CUDA.
 # ## Instant-ngp NeRF
# train with different backbones (with slower pytorch ray marching)
# for the colmap dataset, the default dataset setting `--bound 2 --scale 0.33` is used.
python main_nerf.py data/fox --workspace trial_nerf # fp32 mode
python main_nerf.py data/fox --workspace trial_nerf --fp16 # fp16 mode (pytorch amp)
python main_nerf.py data/fox --workspace trial_nerf --fp16 --ff # fp16 mode + FFMLP (this repo's implementation)
python main_nerf.py data/fox --workspace trial_nerf --fp16 --tcnn # fp16 mode + official tinycudann's encoder & MLP

# use CUDA to accelerate ray marching (much more faster!)
python main_nerf.py data/fox --workspace trial_nerf --fp16 --cuda_ray # fp16 mode + cuda raymarching

# preload data into GPU, accelerate training but use more GPU memory.
python main_nerf.py data/fox --workspace trial_nerf --fp16 --preload

# one for all: -O means --fp16 --cuda_ray --preload, which usually gives the best results balanced on speed & performance.
python main_nerf.py data/fox --workspace trial_nerf -O

# test mode
python main_nerf.py data/fox --workspace trial_nerf -O --test

# construct an error_map for each image, and sample rays based on the training error (slow down training but get better performance with the same number of training steps)
python main_nerf.py data/fox --workspace trial_nerf -O --error_map

# use a background model (e.g., a sphere with radius = 32), can supress noises for real-world 360 dataset
python main_nerf.py data/firekeeper --workspace trial_nerf -O --bg_radius 32

# start a GUI for NeRF training & visualization
# always use with `--fp16 --cuda_ray` for an acceptable framerate!
python main_nerf.py data/fox --workspace trial_nerf -O --gui

# test mode for GUI
python main_nerf.py data/fox --workspace trial_nerf -O --gui --test

# for the blender dataset, you should add `--bound 1.0 --scale 0.8 --dt_gamma 0`
# --bound means the scene is assumed to be inside box[-bound, bound]
# --scale adjusts the camera locaction to make sure it falls inside the above bounding box.
# --dt_gamma controls the adaptive ray marching speed, set to 0 turns it off.
python main_nerf.py data/nerf_synthetic/lego --workspace trial_nerf -O --bound 1.0 --scale 0.8 --dt_gamma 0
python main_nerf.py data/nerf_synthetic/lego --workspace trial_nerf -O --bound 1.0 --scale 0.8 --dt_gamma 0 --gui

# for the LLFF dataset, you should first convert it to nerf-compatible format:
python scripts/llff2nerf.py data/nerf_llff_data/fern # by default it use full-resolution images, and write `transforms.json` to the folder
python scripts/llff2nerf.py data/nerf_llff_data/fern --images images_4 --downscale 4 # if you prefer to use the low-resolution images
# then you can train as a colmap dataset (you'll need to tune the scale & bound if necessary):
python main_nerf.py data/nerf_llff_data/fern --workspace trial_nerf -O
python main_nerf.py data/nerf_llff_data/fern --workspace trial_nerf -O --gui

# for the Tanks&Temples dataset, you should first convert it to nerf-compatible format:
python scripts/tanks2nerf.py data/TanksAndTemple/Family # write `trainsforms_{split}.json` for [train, val, test]
# then you can train as a blender dataset (you'll need to tune the scale & bound if necessary)
python main_nerf.py data/TanksAndTemple/Family --workspace trial_nerf_family -O --bound 1.0 --scale 0.33 --dt_gamma 0
python main_nerf.py data/TanksAndTemple/Family --workspace trial_nerf_family -O --bound 1.0 --scale 0.33 --dt_gamma 0 --gui

# for custom dataset, you should:
# 1. take a video / many photos from different views
# 2. put the video under a path like ./data/custom/video.mp4 or the images under ./data/custom/images/*.jpg.
# 3. call the preprocess code: (should install ffmpeg and colmap first! refer to the file for more options)
python scripts/colmap2nerf.py --video ./data/custom/video.mp4 --run_colmap # if use video
python scripts/colmap2nerf.py --images ./data/custom/images/ --run_colmap # if use images
python scripts/colmap2nerf.py --video ./data/custom/video.mp4 --run_colmap --dynamic # if the scene is dynamic (for D-NeRF settings), add the time for each frame.
# 4. it should create the transform.json, and you can train with: (you'll need to try with different scale & bound & dt_gamma to make the object correctly located in the bounding box and render fluently.)
python main_nerf.py data/custom --workspace trial_nerf_custom -O --gui --scale 2.0 --bound 1.0 --dt_gamma 0.02

# ## Instant-ngp SDF
python main_sdf.py data/armadillo.obj --workspace trial_sdf
python main_sdf.py data/armadillo.obj --workspace trial_sdf --fp16
python main_sdf.py data/armadillo.obj --workspace trial_sdf --fp16 --ff
python main_sdf.py data/armadillo.obj --workspace trial_sdf --fp16 --tcnn

python main_sdf.py data/armadillo.obj --workspace trial_sdf --fp16 --test

# ## TensoRF
# almost the same as Instant-ngp NeRF, just replace the main script.
python main_tensoRF.py data/fox --workspace trial_tensoRF -O
python main_tensoRF.py data/nerf_synthetic/lego --workspace trial_tensoRF -O --bound 1.0 --scale 0.8 --dt_gamma 0

# ## CCNeRF
# training on single objects, turn on --error_map for better quality.
python main_CCNeRF.py data/nerf_synthetic/chair --workspace trial_cc_chair -O --bound 1.0 --scale 0.67 --dt_gamma 0 --error_map
python main_CCNeRF.py data/nerf_synthetic/ficus --workspace trial_cc_ficus -O --bound 1.0 --scale 0.67 --dt_gamma 0 --error_map
python main_CCNeRF.py data/nerf_synthetic/hotdog --workspace trial_cc_hotdog -O --bound 1.0 --scale 0.67 --dt_gamma 0 --error_map
# compose, use a larger bound and more samples per ray for better quality.
python main_CCNeRF.py data/nerf_synthetic/hotdog --workspace trial_cc_hotdog -O --bound 2.0 --scale 0.67 --dt_gamma 0 --max_steps 2048 --test --compose
# compose + gui, only about 1 FPS without dynamic resolution... just for quick verification of composition results.
python main_CCNeRF.py data/nerf_synthetic/hotdog --workspace trial_cc_hotdog -O --bound 2.0 --scale 0.67 --dt_gamma 0 --test --compose --gui

# ## D-NeRF
# almost the same as Instant-ngp NeRF, just replace the main script.
# use deformation to model dynamic scene
python main_dnerf.py data/dnerf/jumpingjacks --workspace trial_dnerf_jumpingjacks -O --bound 1.0 --scale 0.8 --dt_gamma 0
python main_dnerf.py data/dnerf/jumpingjacks --workspace trial_dnerf_jumpingjacks -O --bound 1.0 --scale 0.8 --dt_gamma 0 --gui
# use temporal basis to model dynamic scene
python main_dnerf.py data/dnerf/jumpingjacks --workspace trial_dnerf_basis_jumpingjacks -O --bound 1.0 --scale 0.8 --dt_gamma 0 --basis
python main_dnerf.py data/dnerf/jumpingjacks --workspace trial_dnerf_basis_jumpingjacks -O --bound 1.0 --scale 0.8 --dt_gamma 0 --basis --gui
# for the hypernerf dataset, first convert it into nerf-compatible format:
python scripts/hyper2nerf.py data/split-cookie --downscale 2 # will generate transforms*.json
python main_dnerf.py data/split-cookie/ --workspace trial_dnerf_cookies -O --bound 1 --scale 0.3 --dt_gamma 0
Verifique o diretório scripts para obter mais exemplos fornecidos.
Testado com as configurações padrão no conjunto de dados LEGO. Aqui a velocidade refere -se às iterations per second em um V100.
| Modelo | Dividir | Psnr | Velocidade do trem | Velocidade de teste |
|---|---|---|---|---|
| Instant-NGP (papel) | trenval? | 36.39 | - | - |
Instant -NGP ( -O ) | Trem (30 mil passos) | 34.15 | 97 | 7.8 |
instant -ngp ( -O --error_map ) | Trem (30k etapas) | 34.88 | 50 | 7.8 |
Instant -NGP ( -O ) | TrainVal (40k etapas) | 35.22 | 97 | 7.8 |
instant -ngp ( -O --error_map ) | TrainVal (40k etapas) | 36.00 | 50 | 7.8 |
| Tensorf (papel) | Trem (30k etapas) | 36.46 | - | - |
Tensorf ( -O ) | Trem (30 mil passos) | 35.05 | 51 | 2.8 |
Tensorf ( -O --error_map ) | Trem (30 mil passos) | 35.84 | 14 | 2.8 |
P : Como escolher o backbone da rede?
R : A bandeira -O que usa a precisão mista nativa de Pytorch é adequada para a maioria dos casos. Não encontro uma melhoria muito significativa para --tcnn e --ff , e eles exigem construção extra. Além disso, alguns novos recursos só podem estar disponíveis para o modo -O padrão.
P : CUDA fora da memória para o meu conjunto de dados.
R : Você pode tentar desligar --preload , que carrega todas as imagens na GPU para aceleração (se usar -O , altere -a para --fp16 --cuda_ray ). Outra solução é definir manualmente downscale no NeRFDataset para diminuir a resolução da imagem.
P : Como ajustar bound e scale ?
R : Você pode começar com um grande bound (por exemplo, 16) ou uma pequena scale (por exemplo, 0,3) para garantir que o objeto caia na caixa delimitadora. O modo GUI pode ser usado para encolher interativamente o bound para encontrar o valor adequado. A descomamento dessa linha visualizará as poses da câmera, e alguns bons exemplos podem ser encontrados neste problema.
P : Visões barulhentas para conjuntos de dados realistas.
R : Você pode tentar definir bg_radius em um grande valor, por exemplo, 32. Ele treina um mapa de ambiente extra para modelar o plano de fundo em fotos realistas. Um bound maior também ajudará. Um exemplo para bg_radius no conjunto de dados de bombeiros: 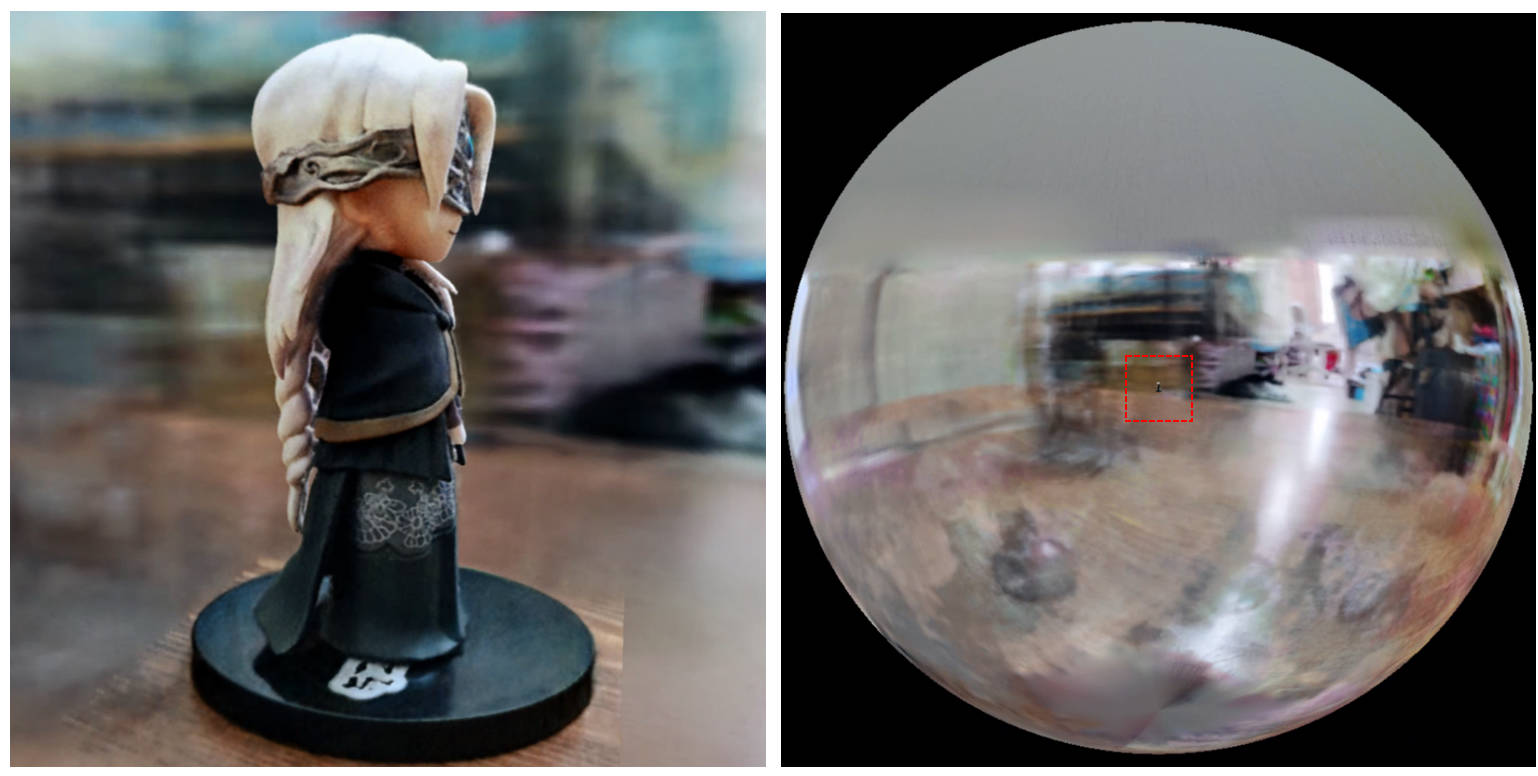
[0, 1] e centralizada em (0.5, 0.5, 0.5) , esse repo pressupõe que a cena seja delimitada na caixa [-bound, bound] e centralizada em (0, 0, 0) . Portanto, a funcionalidade do aabb_scale é substituída por bound aqui.trunc_exp como ativação da densidade em vez de softplus . A poda de máscara alfa é substituída pelo amostrador de grade de densidade do Instant-NGP, que compartilha a mesma lógica para aceleração.Se você achar esse trabalho útil, uma citação será apreciada por meio de:
 @misc{torch-ngp,
    Author = {Jiaxiang Tang},
    Year = {2022},
    Note = {https://github.com/ashawkey/torch-ngp},
    Title = {Torch-ngp: a PyTorch implementation of instant-ngp}
}

@article{tang2022compressible,
    title = {Compressible-composable NeRF via Rank-residual Decomposition},
    author = {Tang, Jiaxiang and Chen, Xiaokang and Wang, Jingbo and Zeng, Gang},
    journal = {arXiv preprint arXiv:2205.14870},
    year = {2022}
}
Créditos para Thomas Müller para o incrível Tiny-Cuda-NN e Instant-NGP:
 @misc{tiny-cuda-nn,
    Author = {Thomas M"uller},
    Year = {2021},
    Note = {https://github.com/nvlabs/tiny-cuda-nn},
    Title = {Tiny {CUDA} Neural Network Framework}
}

@article{mueller2022instant,
    title = {Instant Neural Graphics Primitives with a Multiresolution Hash Encoding},
    author = {Thomas M"uller and Alex Evans and Christoph Schied and Alexander Keller},
    journal = {arXiv:2201.05989},
    year = {2022},
    month = jan
}
A estrutura do NERF é adaptada de Nerf_Pl:
 @misc{queianchen_nerf,
    author = {Quei-An, Chen},
    title = {Nerf_pl: a pytorch-lightning implementation of NeRF},
    url = {https://github.com/kwea123/nerf_pl/},
    year = {2020},
}
A implementação oficial do Tensorf:
 @article{TensoRF,
  title={TensoRF: Tensorial Radiance Fields},
  author={Chen, Anpei and Xu, Zexiang and Geiger, Andreas and Yu, Jingyi and Su, Hao},
  journal={arXiv preprint arXiv:2203.09517},
  year={2022}
}
A GUI NERF é desenvolvida com DearPygui.


