blast_plus_docs
1.0.0
该存储库包含Docker图像中NCBI BLAST+命令行应用程序的文档。我们将使用一个小的基本示例和更高级的生产级示例演示如何在Google Cloud Platform(GCP)和Amazon Web Services(AWS)上运行BLAST分析。 UNIX/Linux命令和BLAST+的一些基本知识可用于完成本教程。
run命令选项run命令结构
国家生物技术信息中心(NCBI)基本的本地对齐搜索工具(BLAST)找到了序列之间局部相似性的区域。该程序将核苷酸或蛋白质序列与序列数据库进行比较,并计算匹配的统计意义。爆炸可用于推断序列之间的功能和进化关系,并帮助识别基因家族的成员。
Blast+于2009年推出,是BLAST命令行应用程序的改进版本。有关BLAST+的功能和功能的完整说明,请参阅Blast命令行应用程序用户手册。
云计算通过使用按需,可扩展和弹性计算资源可节省潜在的成本。尽管此存储库的范围不超出各种云技术和好处的详细描述,但以下各节包含开始运行Blast+ Docker映像(GCP)上运行Blast+ Docker映像所需的信息。
Docker是使用软件容器执行操作系统级别虚拟化的工具。在容器化技术*中,图像是封装应用程序和依赖项的分析环境的快照。从本质上是根据指令列表构建的文件,可以保存并容易共享,以使其他人跨平台和操作系统重新创建确切的分析环境。容器是图像的运行时实例。通过使用容器化,用户可以绕过编译,配置和安装基于UNIX的工具(例如Blast+)的经常复杂的步骤。除可移植性外,容器化是一种轻巧的方法,可以使分析更加可访问,可访问,可互操作,可重复使用(公平),并且最终可重复。
*有许多容器化工具和标准,例如Docker和Singularity。我们将仅专注于Docker,该Docker被许多领域的许多人认为是事实上的标准。
以下各节包括使用Docker Image创建Google Virtual Machine,安装Docker并运行Blast+命令的说明。
本节在Google实例上的Docker环境中提供了快速的爆炸分析。对于那些只想了解解决方案原理的人来说,这旨在作为概述。如果您使用Amazon实例,请转到本文档的Amazon Web服务设置部分。 Google Cloud Shell是一个交互式外壳环境,将用于此示例,这使得可以运行以下小示例而无需执行其他设置,例如创建计费帐户或计算实例。本文档的后面部分涵盖了分析步骤,替代命令和更高级主题的更详细的描述。
要求:Google帐户
任务流: 
输入数据:
首先,在单独的浏览器窗口或选项卡中,在https://console.cloud.google.com/上登录。
单击Google Cloud Platform控制台右上角的激活云外壳按钮。 
现在,您将看到您的云外壳会话窗口: 
下一步是在云外壳会话中复制下面的命令。
请注意:在Github中,您可以使用鼠标复制;但是,在命令外壳中,您必须使用键盘。在Windows或Unix/Linux中,使用快捷键Control+C将其复制和Control+V复制到粘贴。在macOS上,使用Command+C将其复制和Command+V复制到粘贴。
要在云外壳中滚动,请使用扳手图标在Terminal settings中启用滚动条。 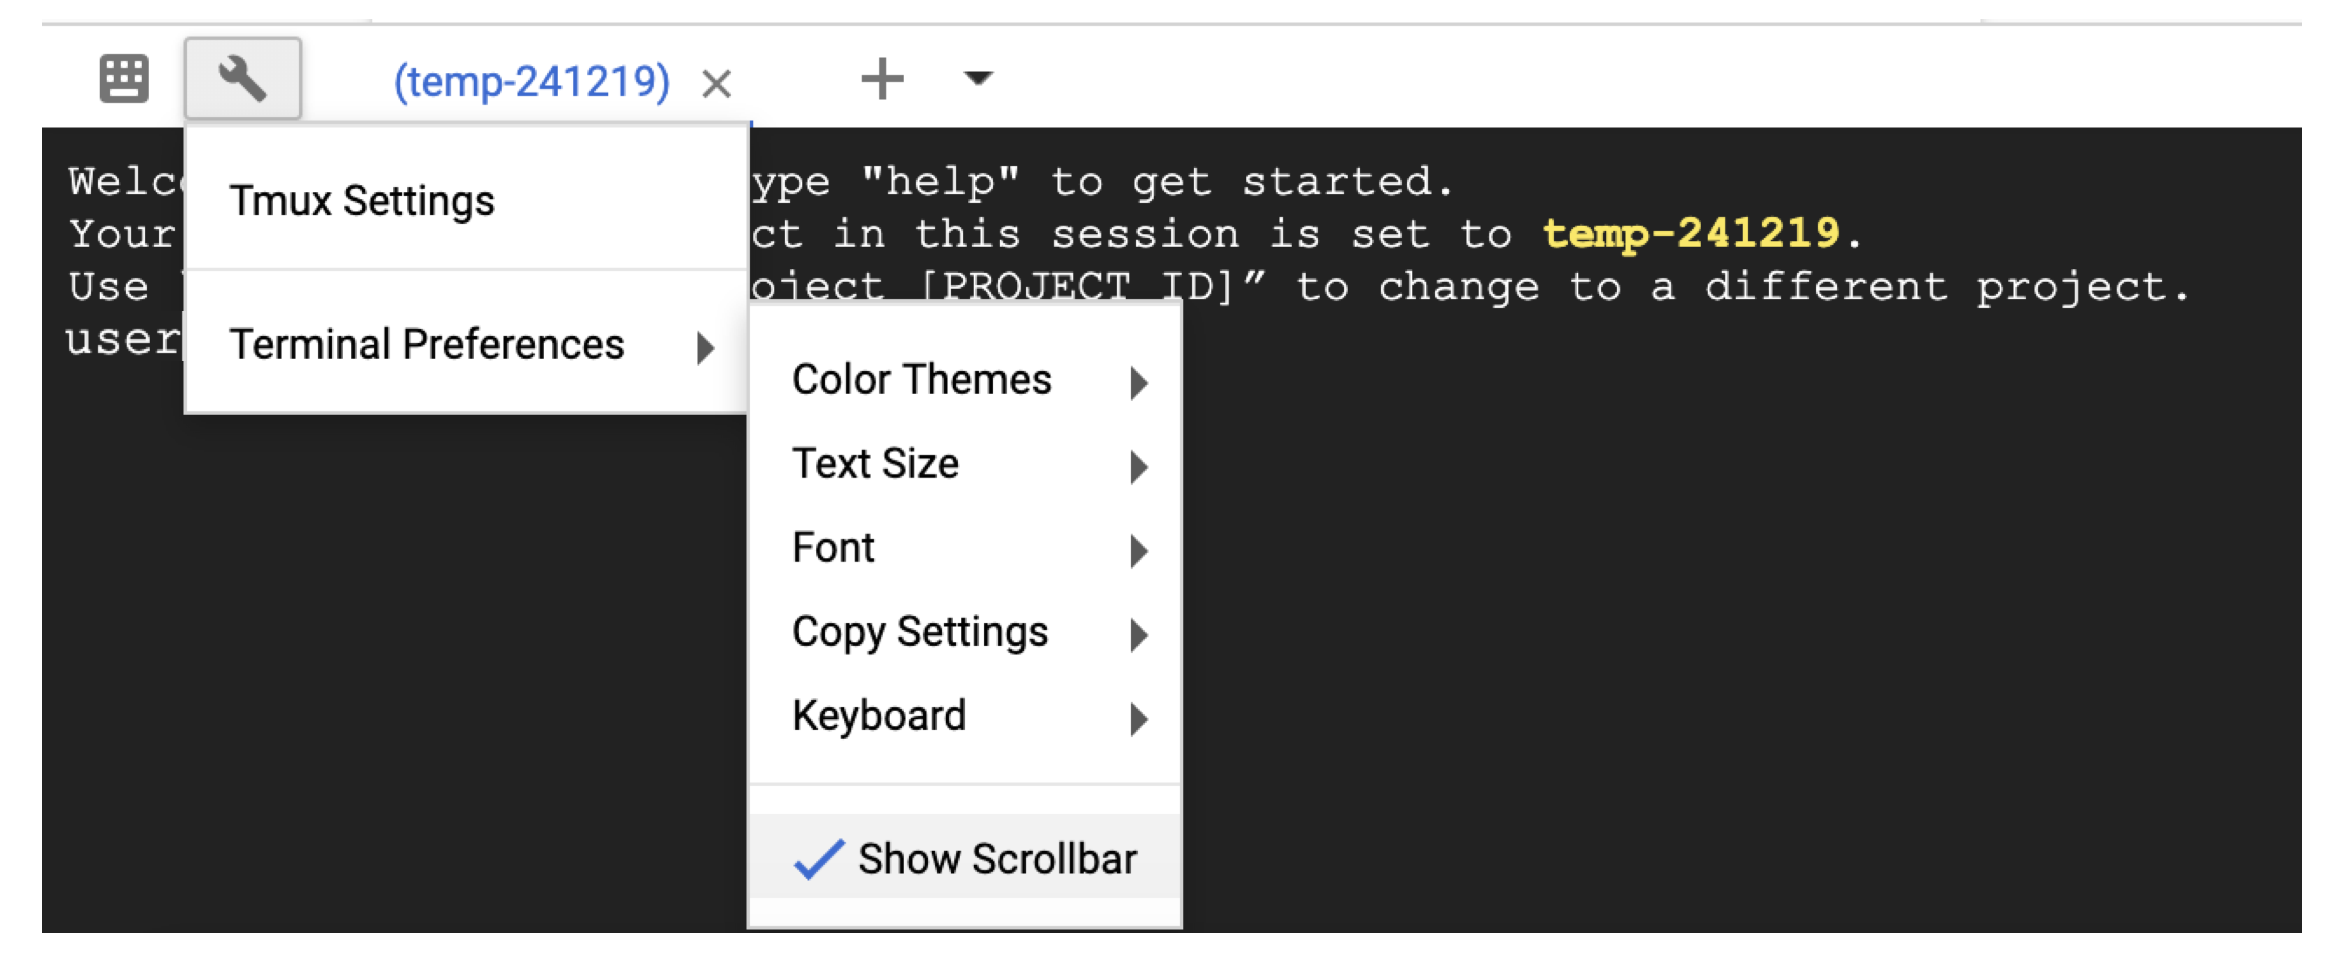
 # Time needed to complete this section: <10 minutes

# Step 1. Retrieve sequences
## Create directories for analysis
cd ; mkdir blastdb queries fasta results blastdb_custom

## Retrieve query sequence
docker run --rm ncbi/blast efetch -db protein -format fasta
    -id P01349 > queries/P01349.fsa

## Retrieve database sequences
docker run --rm ncbi/blast efetch -db protein -format fasta
    -id Q90523,P80049,P83981,P83982,P83983,P83977,P83984,P83985,P27950
    > fasta/nurse-shark-proteins.fsa

## Step 2. Make BLAST database
docker run --rm
    -v $HOME/blastdb_custom:/blast/blastdb_custom:rw
    -v $HOME/fasta:/blast/fasta:ro
    -w /blast/blastdb_custom
    ncbi/blast
    makeblastdb -in /blast/fasta/nurse-shark-proteins.fsa -dbtype prot
    -parse_seqids -out nurse-shark-proteins -title "Nurse shark proteins"
    -taxid 7801 -blastdb_version 5

## Step 3. Run BLAST+
docker run --rm
    -v $HOME/blastdb:/blast/blastdb:ro
    -v $HOME/blastdb_custom:/blast/blastdb_custom:ro
    -v $HOME/queries:/blast/queries:ro
    -v $HOME/results:/blast/results:rw
    ncbi/blast
    blastp -query /blast/queries/P01349.fsa -db nurse-shark-proteins

## Output on screen
## Scroll up to see the entire output
## Type "exit" to leave the Cloud Shell or continue to the next section
此时,您应该在屏幕上看到输出。通过查询,BLAST将蛋白质序列P80049.1识别为分数为14.2,电子价值为0.96的匹配。
为了进行更大的分析,建议使用-out标志将输出保存到文件中。例如,将-out /blast/results/blastp.out blastp.out附加到上面步骤3中的最后一个命令,并使用more $HOME/results/blastp.out查看此输出文件的内容。
您还可以对PDB查询P01349.FSA,如以下代码块所示。
 ## Extend the example to query against the Protein Data Bank
## Time needed to complete this section: <10 minutes

## Confirm query
ls queries/P01349.fsa

## Download Protein Data Bank amino acid database (pdbaa)
docker run --rm
     -v $HOME/blastdb:/blast/blastdb:rw
     -w /blast/blastdb
     ncbi/blast
     update_blastdb.pl --source gcp pdbaa

## Run BLAST+
docker run --rm
     -v $HOME/blastdb:/blast/blastdb:ro
     -v $HOME/blastdb_custom:/blast/blastdb_custom:ro
     -v $HOME/queries:/blast/queries:ro
     -v $HOME/results:/blast/results:rw
     ncbi/blast
     blastp -query /blast/queries/P01349.fsa -db pdbaa

## Output on screen
## Scroll up to see the entire output
## Leave the Cloud Shell

exit
您现在已经完成了一个简单的任务,并看到了docker的blast+如何工作。要了解Docker和Blast+在生产规模上,请继续下一节。
在第2节中 - 使用Blast+ Docker映像的逐步指南,我们将使用上一节中的相同小示例,并讨论替代方法,其他有用的Docker和Blast+命令以及Docker命令选项和结构。在第3节中,我们将演示如何在生产规模上运行Blast+ Docker图像。
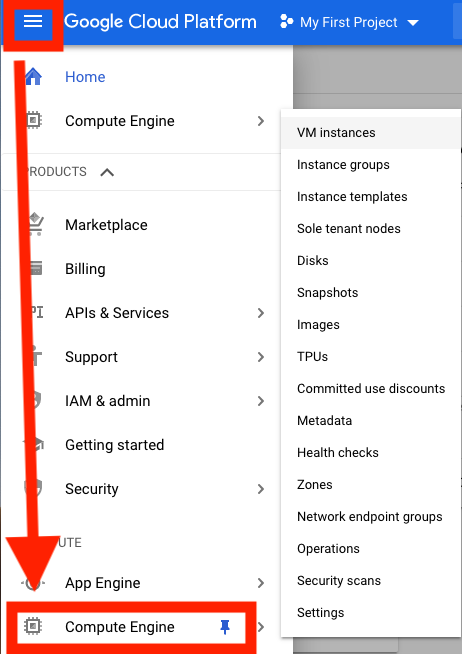
首先,您需要设置Google Cloud平台(GCP)虚拟机(VM)进行分析。
GCP目前提供300美元的信用额,从激活中12个月到期,以激励新的云用户。以下步骤将向您展示如何激活此信用。将要求您获取计费信息,但是一旦审判结束,GCP就不会自动收取您的费用;您必须选择手动升级到付费帐户。
登录后,单击激活以激活300美元的信用。 
例如,输入您的国家,例如美国,并选中该框,指示您已阅读并接受服务条款。
在“帐户类型”下,选择“个人”。 (这可以在您的Google帐户中进行预选)
输入您的姓名和地址。
在“您的付款方式”下,选择“自动付款”。 (这可以在您的Google帐户中预先选择),这表明您使用该服务后需要支付费用,无论您是在达到帐单阈值时还是每30天(以先到者为准)支付费用。
在“付款方式”下,选择“添加信用卡或借记卡”,然后输入您的信用卡信息。试验结束后,您将不会自动收费。您必须选择在收取付款方式之前升级到付费帐户。
单击“开始我的免费试用”以完成注册。此过程完成后,您应该看到GCP欢迎屏幕。
在这一点上,您应该在窗口右侧看到此实例的成本估算。 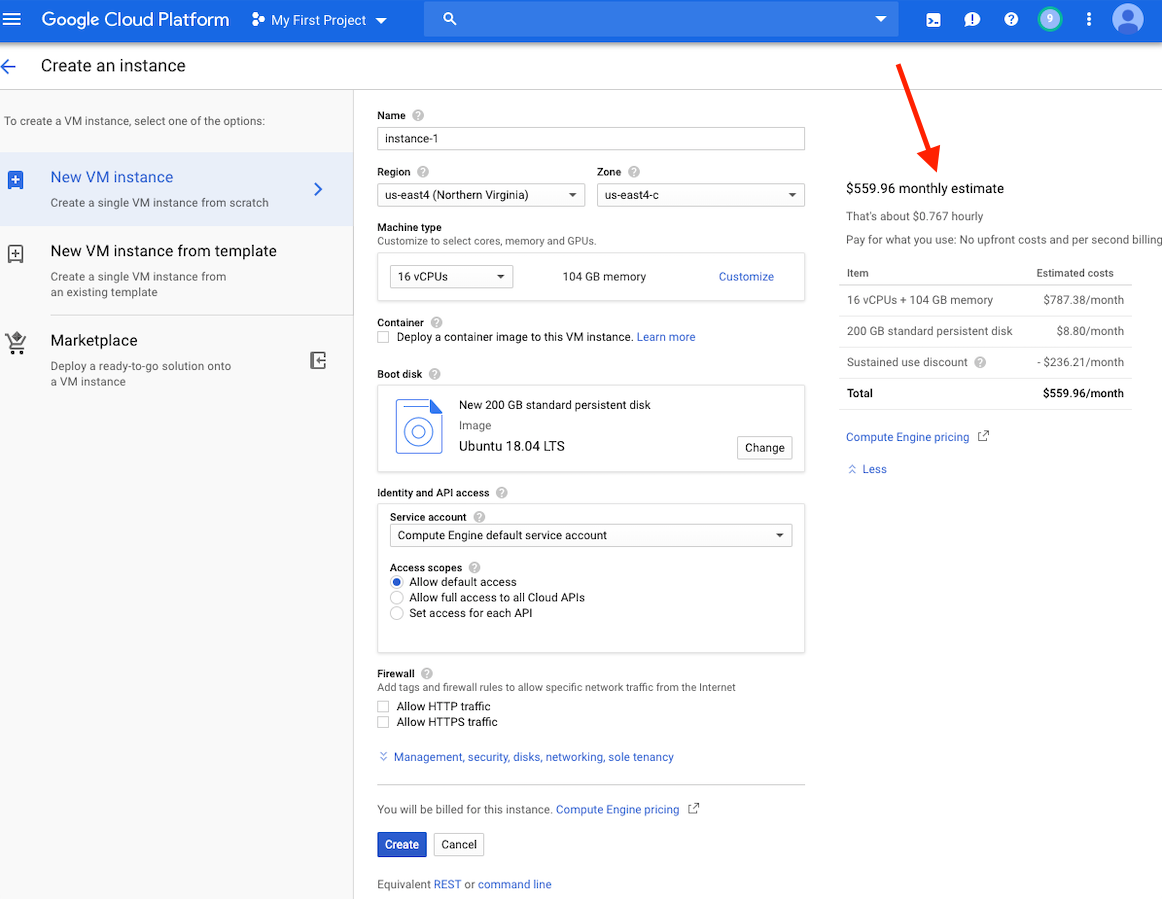
请注意:在同一区域中创建VM,因为存储可以提供更好的性能。我们建议在US-EAST4地区创建VM。如果您的工作将需要几个小时,但不到24小时,则可以利用可享有的VM。
可以在此处找到有关创建GCP帐户和启动VM的详细说明。
创建VM后,必须从本地计算机访问它。根据您想要使用的方式,有许多访问VM的方法。在GCP上,最直接的方法是从浏览器中进行SSH。

现在,您可以运行一个命令壳,并且可以继续进行。
切记停止或删除VM,以防止产生额外费用。
在本节中,我们将介绍Docker安装,讨论各种docker run命令选项,并检查Docker命令的结构。我们将使用第1节中的相同示例,并探索运行Blast+ Docker映像的替代方法。但是,我们使用的是一个真实的VM实例,该实例比Google Cloud Shell提供了更大的性能和功能。
输入数据
在生产系统中,必须将Docker作为应用程序安装。
 ## Run these commands to install Docker and add non-root users to run Docker
sudo snap install docker
sudo apt update
sudo apt install -y docker.io
sudo usermod -aG docker $USER
exit
# exit and SSH back in for changes to take effect
要确认Docker的正确安装,请运行命令docker run hello-world 。如果正确安装,您应该看到“来自Docker的Hello!...”(https://docs.docker.com/samples/library/hello-world/)
本节是可选的。
以下是本教程中使用的docker run命令行选项的列表。
| 姓名,短手(如果有) | 描述 |
|---|---|
--rm | 退出时自动卸下容器 |
--volume , -v | 绑定音量 |
--workdir , -w | 容器内的工作目录 |
本节是可选的。
对于本教程,了解Docker命令的结构将很有用。以下命令包括三个部分。
docker run --rm ncbi/blast
    -v $HOME/blastdb_custom:/blast/blastdb_custom:rw
    -v $HOME/fasta:/blast/fasta:ro
    -w /blast/blastdb_custom
    makeblastdb -in /blast/fasta/nurse-shark-proteins.fsa -dbtype prot
    -parse_seqids -out nurse-shark-proteins -title "Nurse shark proteins"
    -taxid 7801 -blastdb_version 5
命令docker run --rm ncbi/blast是运行Docker Image ncbi/blast并在运行完成后卸下容器的指令。
命令的第二部分使查询序列数据可在容器中访问。 Docker Bind Mounts使用-v将本地目录安装到容器内的目录中,并提供访问权限RW(读写)或RO(仅读取)。例如,假设您的主题序列存储在本地主机上的$ home/fasta目录中,则可以使用以下参数使该目录在/bast/fasta中可访问/bast/fasta作为一个只读目录-v $HOME/fasta:/blast/fasta:ro 。 -w /blast/blastdb_custom标志设置容器内的工作目录。
命令的第三部分是Blast+命令。在这种情况下,它正在执行makeblastDB来创建BLAST数据库文件。
您可以使用docker run -it ncbi/blast /bin/bash启动此图像的交互式BASH会话。对于Blast+ Docker映像,可执行文件位于文件夹 /Blast /bin和 /root /edirect中,并添加到变量$路径中。
有关docker run命令的其他文档,请参阅文档。
本节是可选的。
| Docker命令 | 描述 |
|---|---|
docker ps -a | 显示一个容器列表 |
docker rm $(docker ps -q -f status=exited) | 卸下所有退出的容器,如果您至少有1个退出的容器 |
docker rm <CONTAINER_ID> | 卸下容器 |
docker images | 显示图像列表 |
docker rmi <REPOSITORY (IMAGE_NAME)> | 删除图像 |
本节是可选的。
使用此Docker图像,您可以在孤立的容器中运行BLAST+,从而促进爆炸结果的可重复性。作为此Docker映像的用户,您有望提供BLAST数据库和查询序列以运行BLAST以及容器外部的位置以保存结果。以下是Blast+使用的目录列表。您将在步骤2中创建它们。
| 目录 | 目的 | 笔记 |
|---|---|---|
$HOME/blastdb | 存储NCBI提供的BLAST数据库 | 如果设置为单个绝对路径,则可以使用$BLASTDB环境变量(请参阅通过环境变量配置BLAST。) |
$HOME/queries | 存储用户提供的查询序列 | |
$HOME/fasta | 存储用户提供的FASTA序列以创建BLAST数据库 | |
$HOME/results | 存储爆炸结果 | 带有rw权限安装 |
$HOME/blastdb_custom | 存储用户提供的BLAST数据库 |
本节是可选的。
以下命令显示最新的BLAST版本。
docker run --rm ncbi/blast blastn -version
将标签附加到图像名称( ncbi/blast )允许您使用其他版本的Blast+(有关支持的版本,请参见“支持的标签和相应的发行说明”部分)。
不同版本的Blast+存在于不同的Docker图像中。以下命令将启动BLAST+版本2.9.0 Docker Image的下载。
 docker run --rm ncbi/blast:2.9.0 blastn -version
## Display a list of images
docker images
例如,要使用BLAST+版本2.9.0 Docker Image而不是最新版本,请替换命令的第一部分
docker run --rm ncbi/blast docker run --rm ncbi/blast:2.9.0
本节是可选的。
在此示例中,我们将从获取查询和数据库序列开始,然后创建一个自定义BLAST数据库。
 # Start in a directory where you want to perform the analysis
## Create directories for analysis
cd ; mkdir blastdb queries fasta results blastdb_custom

## Retrieve query sequences
docker run --rm ncbi/blast efetch -db protein -format fasta
    -id P01349 > queries/P01349.fsa

## Retrieve database sequences
docker run --rm ncbi/blast efetch -db protein -format fasta
    -id Q90523,P80049,P83981,P83982,P83983,P83977,P83984,P83985,P27950
    > fasta/nurse-shark-proteins.fsa

## Make BLAST database
docker run --rm
    -v $HOME/blastdb_custom:/blast/blastdb_custom:rw
    -v $HOME/fasta:/blast/fasta:ro
    -w /blast/blastdb_custom
    ncbi/blast
    makeblastdb -in /blast/fasta/nurse-shark-proteins.fsa -dbtype prot
    -parse_seqids -out nurse-shark-proteins -title "Nurse shark proteins"
    -taxid 7801 -blastdb_version 5
要验证上面的新创建的BLAST数据库,您可以运行以下命令以显示数据库中序列的访问,序列长度和通用名称。
 docker run --rm
    -v $HOME/blastdb:/blast/blastdb:ro
    -v $HOME/blastdb_custom:/blast/blastdb_custom:ro
    ncbi/blast
    blastdbcmd -entry all -db nurse-shark-proteins -outfmt "%a %l %T"
作为替代方案,您还可以从NCBI或NCBI Google存储存储桶中下载预制的BLAST数据库。
docker run --rm ncbi/blast update_blastdb.pl --showall pretty --source gcp
有关update_blastdb.pl的详细说明,请参阅文档。默认情况下,如果您不使用支持的云提供商, update_blastdb.pl情况下将从云下载或从NCBI下载。
本节是可选的。
docker run --rm ncbi/blast update_blastdb.pl --showall --source ncbi
本节是可选的。
下面的命令将$HOME/blastdb路径安装在本地机器上的AS /blast/blastdb上,并且blastdbcmd在此位置显示了可用的BLAST数据库。
 ## Download Protein Data Bank amino acid database (pdbaa)
docker run --rm
     -v $HOME/blastdb:/blast/blastdb:rw
     -w /blast/blastdb
     ncbi/blast
     update_blastdb.pl pdbaa

## Display database(s) in $HOME/blastdb
docker run --rm
    -v $HOME/blastdb:/blast/blastdb:ro
    ncbi/blast
    blastdbcmd -list /blast/blastdb -remove_redundant_dbs
您应该看到输出/blast/blastdb/pdbaa Protein 。
 ## For the custom BLAST database used in this example -
docker run --rm
    -v $HOME/blastdb_custom:/blast/blastdb_custom:ro
    ncbi/blast
    blastdbcmd -list /blast/blastdb_custom -remove_redundant_dbs
您应该看到输出/blast/blastdb_custom/nurse-shark-proteins Protein 。
在Docker容器中运行BLAST时,请注意指定到docker run命令的安装座,以使输入和输出可访问。在下面的示例中,前两个安装座提供了对BLAST数据库的访问权限,第三座安装座提供了对查询序列的访问权限,第四座安装座提供了一个目录来保存结果。 (请注意:ro和:rw选项,将目录分别固定为只读和读写。)
 docker run --rm
    -v $HOME/blastdb:/blast/blastdb:ro
    -v $HOME/blastdb_custom:/blast/blastdb_custom:ro
    -v $HOME/queries:/blast/queries:ro
    -v $HOME/results:/blast/results:rw
    ncbi/blast
    blastp -query /blast/queries/P01349.fsa -db nurse-shark-proteins
    -out /blast/results/blastp.out
此时,您应该看到输出文件$HOME/results/blastp.out 。通过查询,BLAST将蛋白质序列P80049.1识别为分数为14.2,电子价值为0.96的匹配。要查看此输出文件的内容,请使用命令more $HOME/results/blastp.out 。
切记停止或删除VM,以防止产生额外费用。您可以在GCP控制台上执行此操作,如下所示。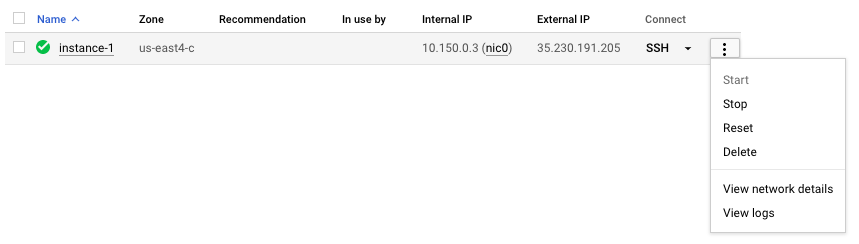
云计算的承诺之一是可扩展性。在本节中,我们将演示如何在Google Cloud Platform上使用Bast+ Docker图像。我们将执行类似于本出版物中描述的方法,以比较从从头对齐的重叠群与细菌16S-23S测序与核苷酸收集(NT)数据库相比。
为了测试可伸缩性,我们将使用不同尺寸的输入来估计下载核苷酸收集数据库并使用最新版本的Blast+ Docker映像的BLAST搜索的时间。以下表中总结了预期结果。
输入文件:28个样本(多-Fasta文件),其中包含从头出版物中的重叠群。
(下载和创建输入文件的说明在下面的代码块中描述。)
数据库:预制的爆炸核苷酸收集数据库,版本5(NT):68.7217 GB(2019年5月)
| 输入文件名 | 文件内容 | 文件大小 | 序列数 | 核苷酸的数量 | 预期输出大小 | |
|---|---|---|---|---|---|---|
| 分析1 | query1.fa | 仅样品1 | 59 kb | 121 | 51,119 | 3.1 GB |
| 分析2 | query5.fa | 只有样品1-5 | 422 kb | 717 | 375,154 | 10.4 GB |
| 分析3 | query.fa | 所有28个样本 | 2.322 MB | 3798 | 2,069,892 | 47.8 GB |
| VM类型/区域 | 中央处理器 | 内存(GB) | 每小时费用* | 下载NT(最小) | 分析1(最小) | 分析2(最小) | 分析3(最小) | 总成本** |
|---|---|---|---|---|---|---|---|---|
| N1-Standard-8 US-EAST4C | 8 | 30 | $ 0.312 | 9 | 22 | - | - | - |
| N1-标准16 US-EAST4C | 16 | 60 | $ 0.611 | 9 | 14 | 53 | 205 | $ 2.86 |
| N1-HighMem-16 US-EAST4C | 16 | 104 | $ 0.767 | 9 | 9 | 30 | 143 | $ 2.44 |
| N1-HighMem-16 US-WEST2A | 16 | 104 | $ 0.809 | 11 | 9 | 30 | 147 | $ 2.60 |
| N1-HighMem-16 US-West1b | 16 | 104 | $ 0.674 | 11 | 9 | 30 | 147 | $ 2.17 |
| Blast网站(BLASTN) | - | - | - | - | 搜索超出了当前对使用的限制 | 搜索超出了当前对使用的限制 | 搜索超出了当前对使用的限制 | - |
所有GCP实例均配置为200 GB的持久标准磁盘。
*创建VM并可能更改时,Google Cloud Platform(2019年5月)提供了小时费用。
**使用小时成本和下载NT和运行分析1,分析2和分析3的总成本进行估算。估计仅用于比较;您的费用可能会有所不同,是您的监控和管理责任。
有关机器类型,区域和区域以及计算成本的更多信息,请参考GCP。
请注意,运行blastn二进制文件而不指定其-task参数调用Megablast算法。
 ## Install Docker if not already done
## This section assumes using recommended hardware requirements below
## 16 CPUs, 104 GB memory and 200 GB persistent hard disk

## Modify the number of CPUs (-num_threads) in Step 3 if another type of VM is used.

## Step 1. Prepare for analysis
## Create directories
cd ; mkdir -p blastdb queries fasta results blastdb_custom

## Import and process input sequences
sudo apt install unzip
wget https://ndownloader.figshare.com/articles/6865397?private_link=729b346eda670e9daba4 -O fa.zip
unzip fa.zip -d fa

### Create three input query files
### All 28 samples
cat fa/*.fa > query.fa

### Sample 1
cat fa/'Sample_1 (paired) trimmed (paired) assembly.fa' > query1.fa

### Sample 1 to Sample 5
cat fa/'Sample_1 (paired) trimmed (paired) assembly.fa'
    fa/'Sample_2 (paired) trimmed (paired) assembly.fa'
    fa/'Sample_3 (paired) trimmed (paired) assembly.fa'
    fa/'Sample_4 (paired) trimmed (paired) assembly.fa'
    fa/'Sample_5 (paired) trimmed (paired) assembly.fa' > query5.fa

### Copy query sequences to $HOME/queries folder
cp query* $HOME/queries/.

## Step 2. Display BLAST databases on the GCP
docker run --rm ncbi/blast update_blastdb.pl --showall pretty --source gcp

## Download nt (nucleotide collection version 5) database
## This step takes approximately 10 min.  The following command runs in the background.
docker run --rm
  -v $HOME/blastdb:/blast/blastdb:rw
  -w /blast/blastdb
  ncbi/blast
  update_blastdb.pl --source gcp nt &

## At this point, confirm query/database have been properly provisioned before proceeding

## Check the size of the directory containing the BLAST database
## nt should be around 68 GB    (this was in May 2019)
du -sk $HOME/blastdb

## Check for queries, there should be three files - query.fa, query1.fa and query5.fa
ls -al $HOME/queries

## From this point forward, it may be easier if you run these steps in a script.
## Simply copy and paste all the commands below into a file named script.sh
## Then run the script in the background `nohup bash script.sh > script.out &`

## Step 3. Run BLAST
## Run BLAST using query1.fa (Sample 1)
## This command will take approximately 9 minutes to complete.
## Expected output size: 3.1 GB
docker run --rm
  -v $HOME/blastdb:/blast/blastdb:ro -v $HOME/blastdb_custom:/blast/blastdb_custom:ro
  -v $HOME/queries:/blast/queries:ro
  -v $HOME/results:/blast/results:rw
  ncbi/blast
  blastn -query /blast/queries/query1.fa -db nt -num_threads 16
  -out /blast/results/blastn.query1.denovo16s.out

## Run BLAST using query5.fa (Samples 1-5)
## This command will take approximately 30 minutes to complete.
## Expected output size: 10.4 GB
docker run --rm
  -v $HOME/blastdb:/blast/blastdb:ro -v $HOME/blastdb_custom:/blast/blastdb_custom:ro
  -v $HOME/queries:/blast/queries:ro
  -v $HOME/results:/blast/results:rw
  ncbi/blast
  blastn -query /blast/queries/query5.fa -db nt -num_threads 16
  -out /blast/results/blastn.query5.denovo16s.out

## Run BLAST using query.fa (All 28 samples)
## This command will take approximately 147 minutes to complete.
## Expected output size: 47.8 GB
docker run --rm
  -v $HOME/blastdb:/blast/blastdb:ro -v $HOME/blastdb_custom:/blast/blastdb_custom:ro
  -v $HOME/queries:/blast/queries:ro
  -v $HOME/results:/blast/results:rw
  ncbi/blast
  blastn -query /blast/queries/query.fa -db nt -num_threads 16
  -out /blast/results/blastn.query.denovo16s.out

## Stdout and stderr will be in script.out
## BLAST output will be in $HOME/results
您已经完成了整个教程。在这一点上,如果您不需要下载的数据进行进一步分析,请删除VM以防止产生额外费用。
要删除实例,请按照部分中的说明停止GCP实例。
有关其他信息,请参阅实例生命周期的Google Cloud平台的文档。
要运行这些示例,您需要一个Amazon Web Services(AWS)帐户。如果您还没有一个,则可以创建一个帐户,该帐户可以免费提供探索和尝试AWS服务的能力,并为每个服务提供指定的限制。首先,访问免费级别网站,这将需要一张有效的信用卡,但是如果您在免费层中计算,则不会收取费用。选择免费层产品时,请确保它在产品类别中。
这些说明创建了基于包括Docker及其依赖关系的Amazon Machine Image(AMI)的EC2 VM。
使用VM创建的VM,您可以使用SSH从本地计算机访问它。您的密钥对 / .pem文件可作为您的凭据。
建立SSH连接有几种方法。从AWS控制台中的EC2实例列表中,选择Connect ,然后按照连接方法的指令a独立的SSH客户端。
可以在此处找到有关连接到Linux VM的详细说明。

将EC2用户指定为用户名,而不是在您的SSH命令行中或提示登录时将EC2用户指定为用户名。
在此示例中,我们将从获取查询和数据库序列开始,然后创建一个自定义BLAST数据库。
 ## Retrieve sequences
## Create directories for analysis
cd $HOME; sudo mkdir bin blastdb queries fasta results blastdb_custom; sudo chown ec2-user:ec2-user *

## Retrieve query sequence
docker run --rm ncbi/blast efetch -db protein -format fasta
    -id P01349 > queries/P01349.fsa

## Retrieve database sequences
docker run --rm ncbi/blast efetch -db protein -format fasta
    -id Q90523,P80049,P83981,P83982,P83983,P83977,P83984,P83985,P27950
    > fasta/nurse-shark-proteins.fsa

## Make BLAST database
docker run --rm
    -v $HOME/blastdb_custom:/blast/blastdb_custom:rw
    -v $HOME/fasta:/blast/fasta:ro
    -w /blast/blastdb_custom
    ncbi/blast
    makeblastdb -in /blast/fasta/nurse-shark-proteins.fsa -dbtype prot
    -parse_seqids -out nurse-shark-proteins -title "Nurse shark proteins"
    -taxid 7801 -blastdb_version 5
要验证上面的新创建的BLAST数据库,您可以运行以下命令以显示数据库中序列的访问,序列长度和通用名称。
 ## Verify BLAST DB
docker run --rm
    -v $HOME/blastdb:/blast/blastdb:ro
    -v $HOME/blastdb_custom:/blast/blastdb_custom:ro
    ncbi/blast
    blastdbcmd -entry all -db nurse-shark-proteins -outfmt "%a %l %T"
在Docker容器中运行BLAST时,请注意指定在docker run命令中指定的安装座( -v选项),以使输入并输出输出。在下面的示例中,前两个安装座提供了对BLAST数据库的访问权限,第三座安装座提供了对查询序列的访问权限,第四座安装座提供了一个目录来保存结果。 (请注意:ro和:rw选项,将目录分别固定为只读和读写。)
 ## Run BLAST+
docker run --rm
    -v $HOME/blastdb:/blast/blastdb:ro
    -v $HOME/blastdb_custom:/blast/blastdb_custom:ro
    -v $HOME/queries:/blast/queries:ro
    -v $HOME/results:/blast/results:rw
    ncbi/blast
    blastp -query /blast/queries/P01349.fsa -db nurse-shark-proteins
	-out /blast/results/blastp.out
此时,您应该看到输出文件$HOME/results/blastp.out 。通过查询,BLAST将蛋白质序列P80049.1识别为分数为14.2,电子价值为0.96的匹配。要查看此输出文件的内容,请使用命令more $HOME/results/blastp.out 。
docker run --rm ncbi/blast update_blastdb.pl --showall pretty --source aws
预期的输出是BLAST DB的列表,包括其名称,描述,大小和最后更新日期。
有关update_blastdb.pl的详细说明,请参阅文档。默认情况下,如果您不使用支持的云提供商, update_blastdb.pl情况下将从云下载或从NCBI下载。
docker run --rm ncbi/blast update_blastdb.pl --showall --source ncbi
预期的输出是BLAST DBS名称的列表。
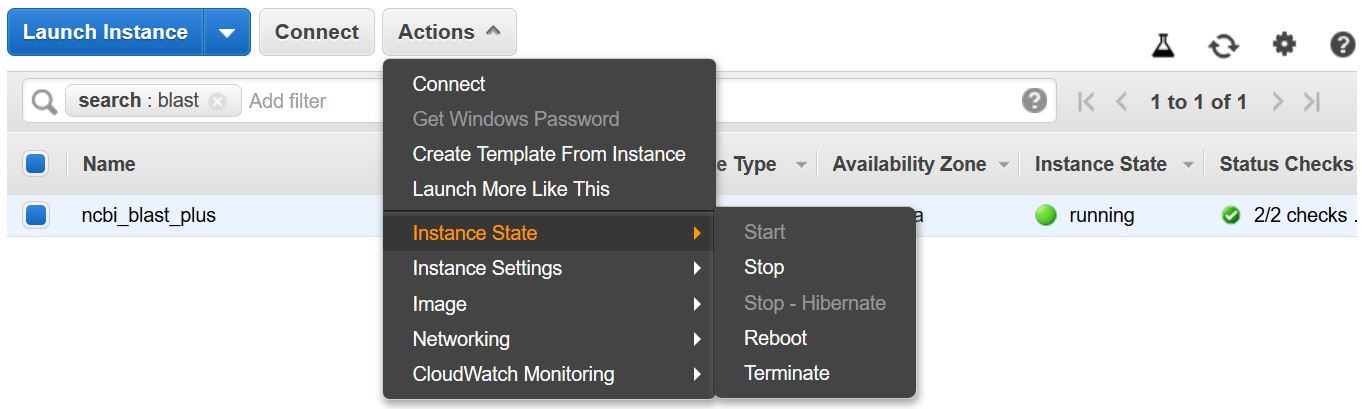
请记住停止或终止VM,以防止产生额外费用。您可以从AWS控制台中的EC2实例列表中执行此操作,如下所示。
此示例需要一个多核主机。因此,通过执行此示例,将实现EC2计算费用。使用的实例类型的当前速率-t2.large-为$ 0.093/hr。
这些说明创建了基于包括Docker及其依赖关系的Amazon Machine Image(AMI)的EC2 VM。
使用VM创建的VM,您可以使用SSH从本地计算机访问它。您的密钥对 / .pem文件可作为您的凭据。
建立SSH连接有几种方法。从AWS控制台中的EC2实例列表中,选择Connect ,然后按照连接方法的指令a独立的SSH客户端。
可以在此处找到有关连接到Linux VM的详细说明。

将EC2用户指定为用户名,而不是在您的SSH命令行中或提示登录时将EC2用户指定为用户名。
 ## Create directories for analysis
cd $HOME; sudo mkdir bin blastdb queries fasta results blastdb_custom; sudo chown ec2-user:ec2-user *

## Retrieve query sequence
docker run --rm ncbi/blast efetch -db protein -format fasta
    -id P01349 > queries/P01349.fsa
下面的命令安装命令(使用-v选项) $HOME/blastdb路径AS /blast/blastdb在容器上, blastdbcmd在此位置显示了可用的BLAST数据库。
 ## Download Protein Data Bank amino acid database (pdbaa)
docker run --rm
     -v $HOME/blastdb:/blast/blastdb:rw
     -w /blast/blastdb
     ncbi/blast
     update_blastdb.pl pdbaa

## Display database(s) in $HOME/blastdb
docker run --rm
    -v $HOME/blastdb:/blast/blastdb:ro
    ncbi/blast
    blastdbcmd -list /blast/blastdb -remove_redundant_dbs
您应该看到输出/blast/blastdb/pdbaa Protein 。
 ## Run BLAST+
docker run --rm
     -v $HOME/blastdb:/blast/blastdb:ro
     -v $HOME/blastdb_custom:/blast/blastdb_custom:ro
     -v $HOME/queries:/blast/queries:ro
     -v $HOME/results:/blast/results:rw
     ncbi/blast
     blastp -query /blast/queries/P01349.fsa -db pdbaa
	 -out /blast/results/blastp_pdbaa.out
此时,您应该看到输出文件$HOME/results/blastp_pdbaa.out 。要查看此输出文件的内容,请使用命令more $HOME/results/blastp_pdbaa.out 。
在本地计算机和Linux实例之间传输文件的一种方法是使用安全复制协议(SCP)。
使用Amazon EC2用户指南的Linux将文件传输到Linux实例的部分为此过程提供了详细的说明。
NCBI在AWS,GCP和NCBI FTP网站上托管相同的数据库。下表具有截至2022年11月的数据库列表。
也可以通过命令获得当前列表:
Docker Run -RM NCBI/BLAST UPDATE_BLASTDB.PL--SHOWALL漂亮
或者
update_blastdb.pl-下载Blast+软件包后,ShowAll漂亮#。
如上所示,update_blastdb.pl也可以用于下载这些数据库。它将自动选择适当的资源(例如,如果您在该提供商中)。
这些数据库也可以在GCP和AWS上使用ElasticBlast搜索。
访问AWS或GCP上的数据库以外的数据库可能会导致您的帐户出口费用。如果您不在云提供商中,则应在NCBI FTP网站上使用数据库。
| 姓名 | 类型 | 标题 |
|---|---|---|
| 16S_RIBOSOMAL_RNA | 脱氧核糖核酸 | 16S核糖体RNA(细菌和古细菌型菌株) |
| 18S_FUNGAL_SECONCES | 脱氧核糖核酸 | 来自真菌类型和参考材料的18S核糖体RNA序列(SSU) |
| 28S_FUNGAL_SECONCES | 脱氧核糖核酸 | 真菌类型和参考材料的28S核糖体RNA序列(LSU) |
| Betacoronavirus | 脱氧核糖核酸 | Betacoronavirus |
| GCF_000001405.38_TOP_LEVEL | 脱氧核糖核酸 | HOMO SAPIENS GRCH38.P12 [GCF_000001405.38]染色体加上未放置的脚手架 |
| gcf_000001635.26_top_level | 脱氧核糖核酸 | mus musculus grcm38.p6 [GCF_000001635.26]染色体加上未放置的脚手架 |
| is_refseq_fungi | 脱氧核糖核酸 | 内部转录的间隔区(ITS)来自真菌类型和参考材料 |
| is_eukaryote_sequences | 脱氧核糖核酸 | 它的真核生物爆炸 |
| lsu_eukaryote_rrna | 脱氧核糖核酸 | 真核生物的大型亚基核糖核酸 |
| lsu_prokaryote_rrna | 脱氧核糖核酸 | 大型亚基核糖体核酸用于原核生物 |
| ssu_eukaryote_rrna | 脱氧核糖核酸 | 小型亚基核糖体核酸,用于真核生物 |
| env_nt | 脱氧核糖核酸 | 环境样品 |
| nt | 脱氧核糖核酸 | 核苷酸收集(NT) |
| 帕特 | 脱氧核糖核酸 | 源自GenBank的专利划分的核苷酸序列 |
| PDBNT | 脱氧核糖核酸 | PDB核苷酸数据库 |
| ref_euk_rep_genomes | 脱氧核糖核酸 | RefSeq真核代表性基因组数据库 |
| ref_prok_rep_genomes | 脱氧核糖核酸 | RefSeq原核生物代表性基因组(包含RefSeq组装) |
| ref_viroids_rep_genomes | 脱氧核糖核酸 | RefSEQ病毒代表性基因组 |
| ref_viruess_rep_genomes | 脱氧核糖核酸 | RefSEQ病毒代表性基因组 |
| refseq_rna | 脱氧核糖核酸 | NCBI成绩单参考序列 |
| refseq_select_rna | 脱氧核糖核酸 | RefSeq选择RNA序列 |
| tsa_nt | 脱氧核糖核酸 | 转录组shot弹枪装配(TSA)序列 |
| env_nr | 蛋白质 | WGS元基因组项目的蛋白质 |
| 地标 | 蛋白质 | 标志性的标志性数据库 |
| nr | 蛋白质 | 所有非冗余GenBank CD翻译+PDB+SwissProt+PIR+PRF不包括WGS项目中的环境样本 |
| pdbaa | 蛋白质 | PDB蛋白数据库 |
| 帕塔 | 蛋白质 | 源自GenBank的专利划分的蛋白质序列 |
| RefSeq_protein | 蛋白质 | NCBI蛋白参考序列 |
| refseq_select_prot | 蛋白质 | RefSeq选择蛋白质 |
| 瑞士语 | 蛋白质 | 非冗余uniprotkb/瑞士语序列 |
| tsa_nr | 蛋白质 | 转录组shot弹枪装配(TSA)序列 |
| CDD | 蛋白质 | 保守的域数据库(CDD)是井被通知的多个序列比对模型的集合,被代表为特定位置的得分矩阵 |
NCBI为AWS,GCP和NCBI FTP站点的可用BLAST数据库提供了元数据。
访问AWS或GCP上的数据库以外的数据库可能会导致您的帐户出口费用。如果您不在云提供商中,则应在NCBI FTP网站上使用数据库。
在AWS和GCP上,该文件与数据库的日期相关子目录。要查找最新有效的子目录,请先读取s3://ncbi-blast-databases/latest-dir (在AWS上)或gs://blast-db/latest-dir (在GCP上)。 latest-dir是一个文本文件,其中包含日期邮票(例如,2020-09-29-01-05-01),指定了最新目录。适当的目录将是BLAST数据库的AWS或GCP基础URI(例如s3://ncbi-blast-databases/ for AWS)以及latest-dir文件中的文本。在AWS中,URI将是s3://ncbi-blast-databases/2020-09-29-01-05-01 。 GCP URI将是相似的。
元数据文件的摘录如下所示。大多数字段具有明显的含义。这些文件包含BLAST数据库。 bytes-total字段表示字节中的总BLAST数据库大小,并旨在指定需要多少磁盘空间。
下面的示例来自AWS,但是GCP上的元数据文件具有相同的格式。 FTP网站上的数据库中有GZPIPPECT TARFILE,每卷BLAST数据库中有一个,因此将其列出而不是单个文件。
 "16S_ribosomal_RNA": {
    "version": "1.2",
    "dbname": "16S_ribosomal_RNA",
    "dbtype": "Nucleotide",
    "db-version": 5,
    "description": "16S ribosomal RNA (Bacteria and Archaea type strains)",
    "number-of-letters": 32435109,
    "number-of-sequences": 22311,
    "last-updated": "2022-03-07T11:23:00",
    "number-of-volumes": 1,
    "bytes-total": 14917073,
    "bytes-to-cache": 8495841,
    "files": [
      "s3://ncbi-blast-databases/2020-09-26-01-05-01/16S_ribosomal_RNA.ndb",
      "s3://ncbi-blast-databases/2020-09-26-01-05-01/16S_ribosomal_RNA.nog",
      "s3://ncbi-blast-databases/2020-09-26-01-05-01/16S_ribosomal_RNA.nni",
      "s3://ncbi-blast-databases/2020-09-26-01-05-01/16S_ribosomal_RNA.nnd",
      "s3://ncbi-blast-databases/2020-09-26-01-05-01/16S_ribosomal_RNA.nsq",
      "s3://ncbi-blast-databases/2020-09-26-01-05-01/16S_ribosomal_RNA.nin",
      "s3://ncbi-blast-databases/2020-09-26-01-05-01/16S_ribosomal_RNA.ntf",
      "s3://ncbi-blast-databases/2020-09-26-01-05-01/16S_ribosomal_RNA.not",
      "s3://ncbi-blast-databases/2020-09-26-01-05-01/16S_ribosomal_RNA.nhr",
      "s3://ncbi-blast-databases/2020-09-26-01-05-01/16S_ribosomal_RNA.nos",
      "s3://ncbi-blast-databases/2020-09-26-01-05-01/16S_ribosomal_RNA.nto",
      "s3://ncbi-blast-databases/2020-09-26-01-05-01/taxdb.btd",
      "s3://ncbi-blast-databases/2020-09-26-01-05-01/taxdb.bti"
    ]
  }
或给我们发送电子邮件。
国家生物技术信息中心(NCBI)
国家医学图书馆(NLM)
国立卫生研究院(NIH)
查看此图像中包含的软件的许可证和版权信息。
与所有Docker映像一样,这些可能还包含其他软件,这些软件可能来自其他许可(例如,从基本分配中,以及所包含的主要软件的任何直接或间接依赖项)。
与任何预构建的图像使用情况一样,图像用户的责任是确保此图像的任何使用都符合其中包含的所有软件的任何相关许可。
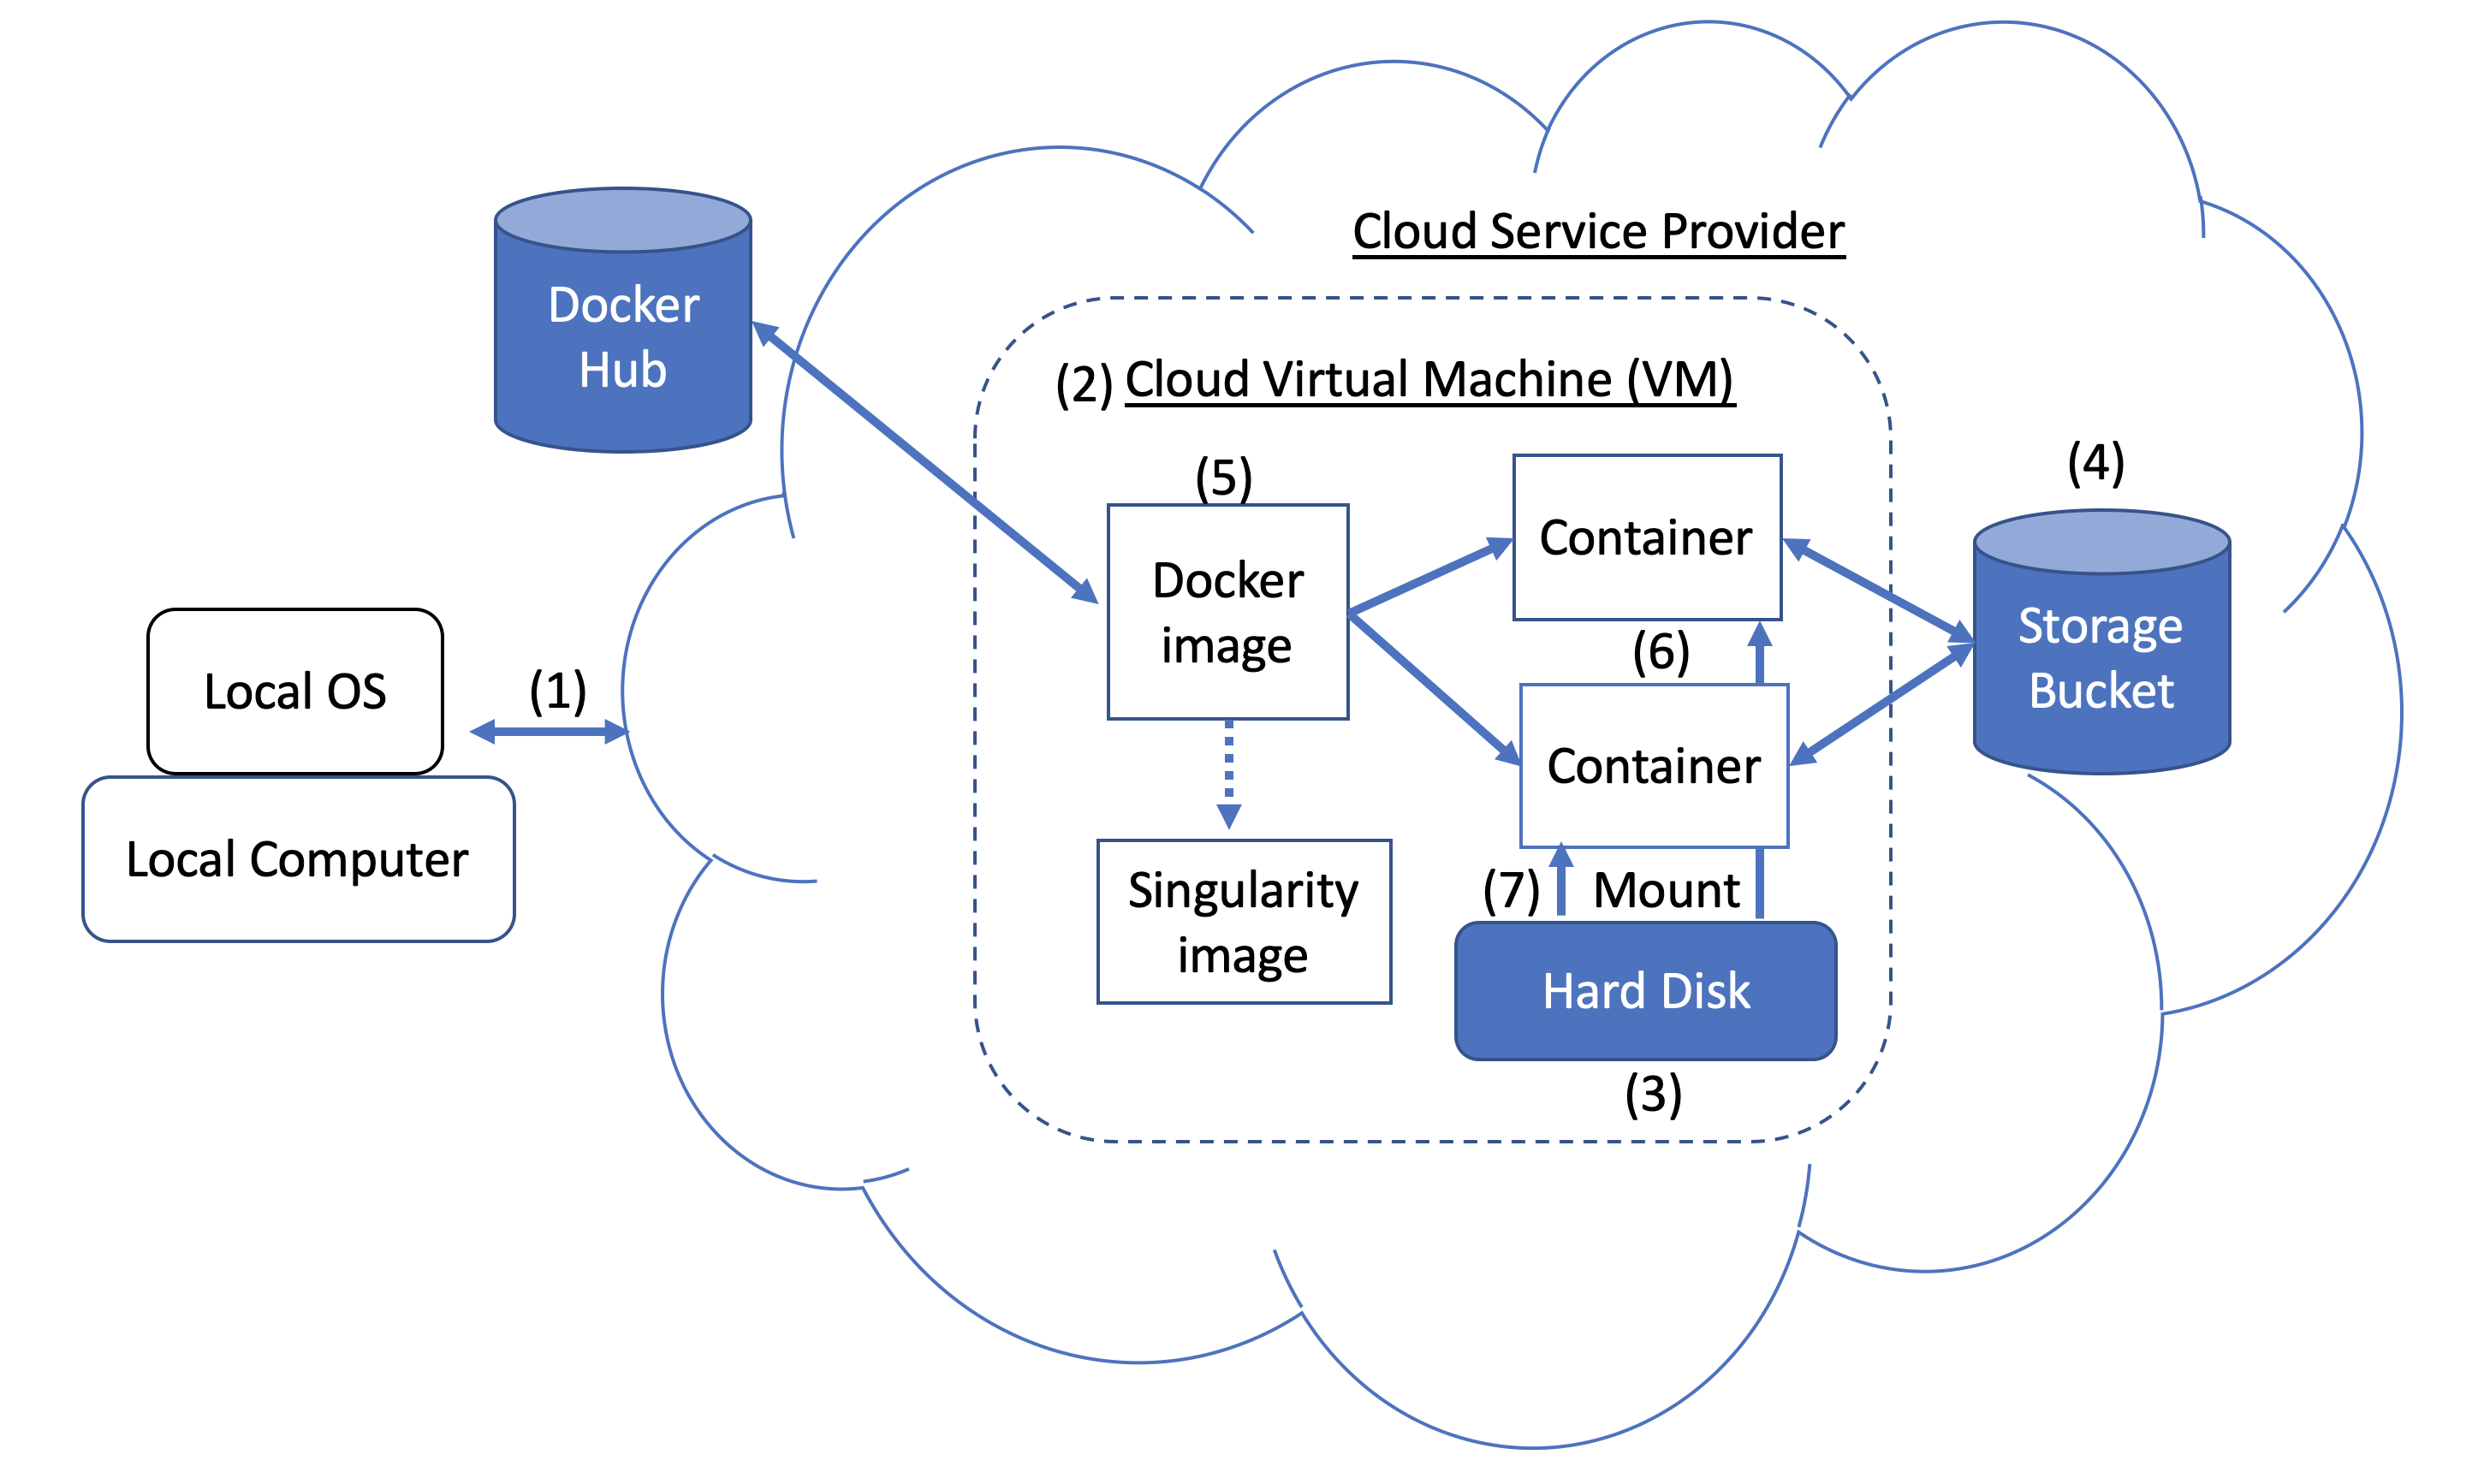 图1。码头和云计算概念。 Users can access compute resources provided by cloud service providers (CSPs), such as the Google Cloud Platform, using SSH tunneling (1). When you create a VM (2), a hard disk (also called a boot/persistent disk) (3) is attached to that VM. With the right permissions, VMs can also access other storage buckets (4) or other data repositories in the public domain. Once inside a VM with Docker installed, you can run a Docker image (5), such as NCBI's BLAST image. An image can be used to create multiple running instances or containers (6). Each container is in an isolated environment. In order to make data accessible inside the container, you need to use Docker bind mounts (7) described in this tutorial.
A Docker image can be used to create a Singularity image. Please refer to Singularity's documentation for more detail.
As an alternative to what is described above, you can also run BLAST interactively inside a container.
When to use : This is useful for running a few (eg, fewer than 5-10) BLAST searches on small BLAST databases where you expect the search to complete in seconds/minutes.
 docker run --rm -it
    -v $HOME/blastdb:/blast/blastdb:ro -v $HOME/blastdb_custom:/blast/blastdb_custom:ro
    -v $HOME/queries:/blast/queries:ro
    -v $HOME/results:/blast/results:rw
    ncbi/blast
    /bin/bash

# Once you are inside the container (note the root prompt), run the following BLAST commands.
blastp -query /blast/queries/P01349.fsa -db nurse-shark-proteins
    -out /blast/results/blastp.out

# To view output, run the following command
more /blast/results/blastp.out

# Leave container
exit
In addition, you can run BLAST in detached mode by running a container in the background.
When to use : This is a more practical approach if you have many (eg, 10 or more) BLAST searches to run or you expect the search to take a long time to execute. In this case it may be better to start the BLAST container in detached mode and execute commands on it.
NOTE : Be sure to mount all required directories, as these need to be specified when the container is started.
 # Start a container named 'blast' in detached mode
docker run --rm -dit --name blast
    -v $HOME/blastdb:/blast/blastdb:ro -v $HOME/blastdb_custom:/blast/blastdb_custom:ro
    -v $HOME/queries:/blast/queries:ro
    -v $HOME/results:/blast/results:rw
    ncbi/blast
    sleep infinity

# Check the container is running in the background
docker ps -a
docker ps --filter "status=running"
Once the container is confirmed to be running in detached mode, run the following BLAST command.
 docker exec blast blastp -query /blast/queries/P01349.fsa
    -db nurse-shark-proteins -out /blast/results/blastp.out

# View output
more $HOME/results/blastp.out

# stop the container
docker stop blast
If you run into issues with docker stop blast command, reset the VM from the GCP Console or restart the SSH session.
To copy the file $HOME/script.out in the home directory on a local machine to the home directory on a GCP VM named instance-1 in project My First Project using GCP Cloud SDK.
GCP documentation
First install GCP Cloud SDK command line tools for your operating system.
 # First, set up gcloud tools
# From local machine's terminal

gcloud init

# Enter a configuration name
# Select the sign-in email account
# Select a project, for example “my-first-project”
# Select a compute engine zone, for example, “us-east4-c”

# To copy the file $HOME/script.out to the home directory of GCP instance-1
# Instance name can be found in your Google Cloud Console -> Compute Engine -> VM instances

gcloud compute scp $HOME/script.out instance-1:~

# Optional - to transfer the file from the GCP instance to a local machine's home directory

gcloud compute scp instance-1:~/script.out $HOME/.


