minigpt4.cpp
v1.0.0
純粋なC/C ++におけるMINIGPT4の推論。
minigpt4.cppの主な目標は、GGMLライブラリを使用して4ビット量子化を使用してMINIGPT4を実行することです。
要件:git
git clone --recursive https://github.com/Maknee/minigpt4.cpp
cd minigpt4.cppリリースに移動して、 minigpt4ライブラリファイルをリポジトリディレクトリに抽出します。
要件:CMake、Visual Studio、Git
 cmake .
cmake --build . --config Release
binReleaseminigpt4.dllを生成する必要があります
要件:cmake(ubuntu: sudo apt install cmake )
cmake .
cmake --build . --config Release minigpt4.soを生成する必要があります
要件:cmake(macos: brew install cmake )
cmake .
cmake --build . --config Release minigpt4.dylibを生成する必要があります
注OpenCV(ライブラリ自体内のロードや前処理画像などの機能を許可する)を使用してビルドする場合は、 MINIGPT4_BUILD_WITH_OPENCV in CMakeLists.txtにONするか、 -DMINIGPT4_BUILD_WITH_OPENCV=ONします。
事前に定量化されたモデルは、Face〜7Bまたは13Bを抱き締める際に利用できます。
信頼できる結果に推奨されますが、推論の速度が遅い:Minigpt4-13B-F16.bin
要件:Python 3.xおよびPytorch。
minigpt-4リポジトリをクローンし、セットアップを実行します
 cd minigpt4
git clone https://github.com/Vision-CAIR/MiniGPT-4.git
cd MiniGPT-4
conda env create -f environment.yml
conda activate minigpt4
Checkpoint Aligned with Vicuna 7Bの下にあるMinigpt-4リポジトリの前提条件のチェックポイントをダウンロードするか、 Checkpoint Aligned with Vicuna 13Bか、7bまたは13bのHuggingfaceリンクからダウンロードします
モデルの重みをGGML形式に変換します
7bモデル
 cd minigpt4
python convert.py C:pretrained_minigpt4_7b.pth --ftype=f16
13Bモデル
 cd minigpt4
python convert.py C:pretrained_minigpt4.pth --ftype=f16
7bモデル
python convert.py ~ /Downloads/pretrained_minigpt4_7b.pth --outtype f1613Bモデル
python convert.py ~ /Downloads/pretrained_minigpt4.pth --outtype f16 minigpt4-7B-f16.binまたはminigpt4-13B-f16.binを生成する必要があります
事前に定量化されたモデルは、顔を抱きしめて利用できます
信頼できる結果と適切な推論速度に推奨:GGML-Vicuna-13B-V0-Q5_K.BIN
要件:Python 3.xおよびPytorch。
Minigpt4のガイドに従って、Vicuna-V0モデルを取得します。
次に、クローンllama.cpp
git clone https://github.com/ggerganov/llama.cpp
cd llama.cpp
cmake .
cmake --build . --config Release
モデルをGGMLに変換します
python convert.py < path-to-model >モデルを定量化します
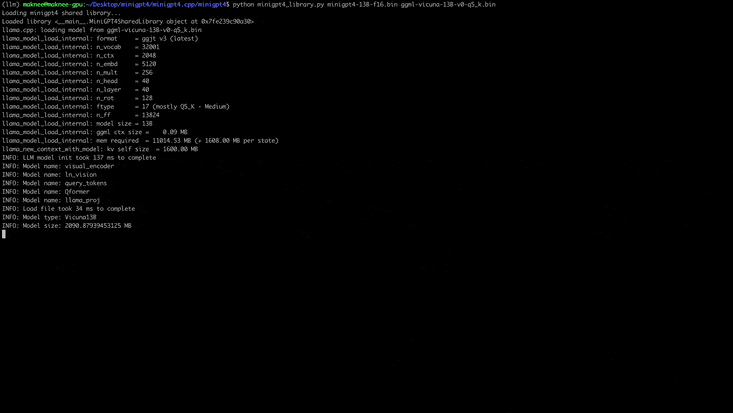
python quanitize < path-to-model > < output-model > Q4_1minigpt4が次のように電話をかけて動作するかどうかをテストし、 minigpt4-13B-f16.binおよびggml-vicuna-13B-v0-q5_k.binそれぞれのモデルに置き換えます
 cd minigpt4
python minigpt4_library.py minigpt4-13B-f16.bin ggml-vicuna-13B-v0-q5_k.binWebUIの要件をインストールします
pip install -r requirements.txt次に、webUIを実行し、 minigpt4-13B-f16.binおよびggml-vicuna-13B-v0-q5_k.binそれぞれのモデルに置き換えます
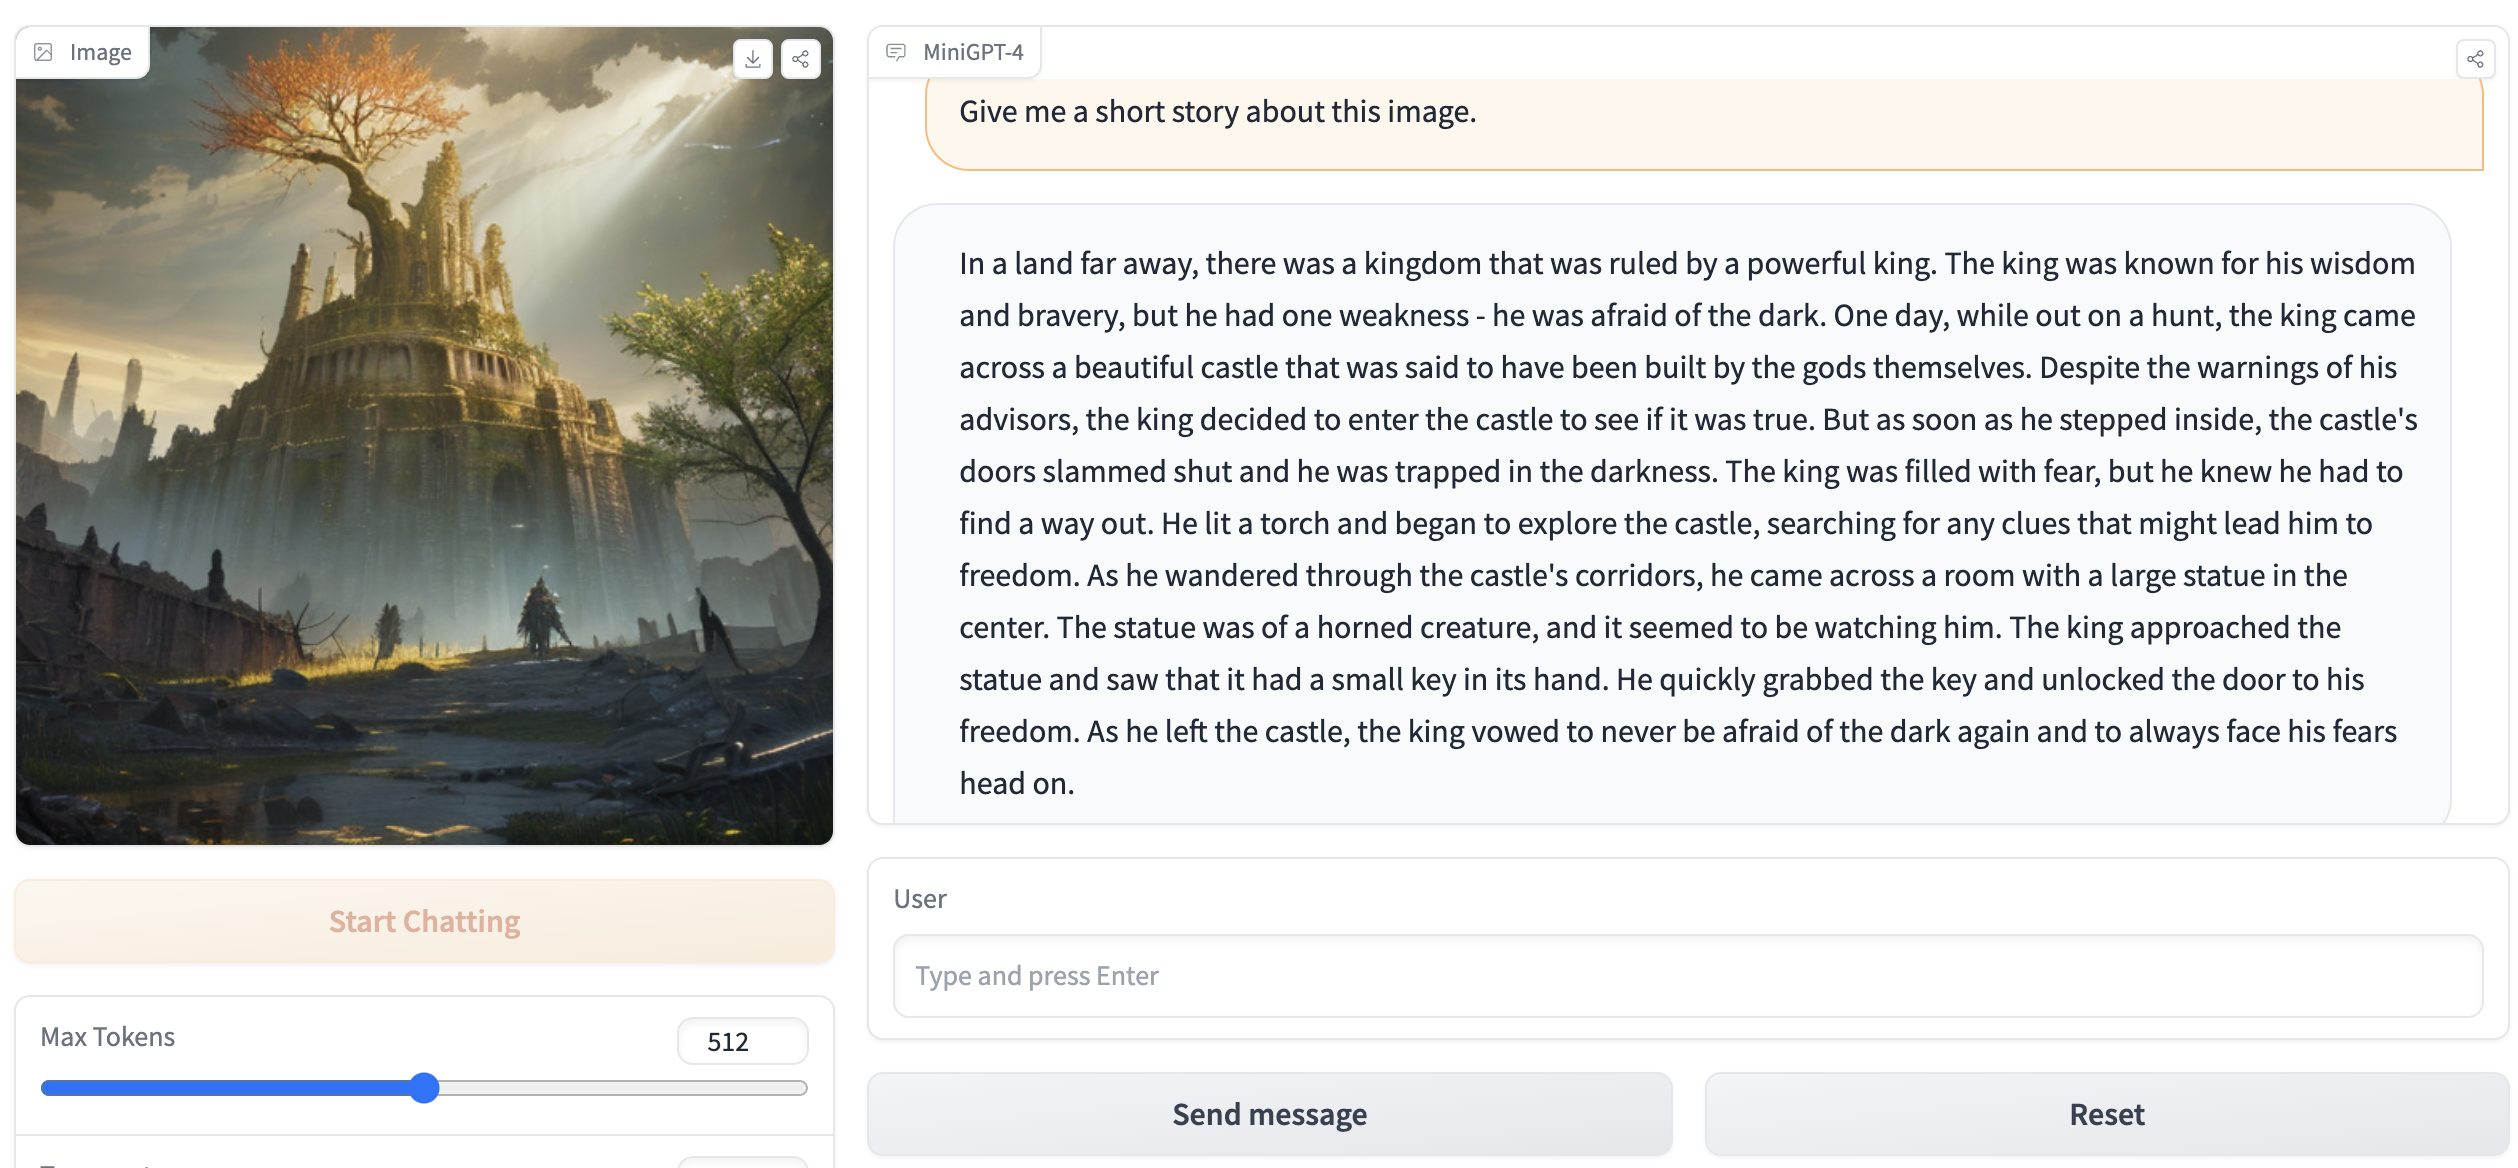
python webui.py minigpt4-13B-f16.bin ggml-vicuna-13B-v0-q5_k.bin出力には、次のようなものが含まれている必要があります。
Running on local URL:  http://127.0.0.1:7860

To create a public link, set ` share=True ` in `launch () ` .ブラウザのhttp://127.0.0.1:7860にアクセスすると、WebUIと対話できるはずです。


