benchmark_VAE
Pythae 0.1.2
文件
該庫在統一實現下實現了一些最常見的(變化)自動編碼器模型。特別是,它通過訓練具有相同自動編碼的神經網絡體系結構的模型來執行基準實驗和比較的可能性。該功能使您自己的自動編碼器使您可以使用自己的數據以及自己的編碼器和解碼器神經網絡培訓這些模型中的任何一個。它集成了實驗監視工具,例如WandB,MLFlow或Comet-ML?並允許從HuggingFace Hub中共享和加載?在幾行代碼中。
消息?
截至v0.1.0, Pythae現在使用Pytorch的DDP支持分佈式培訓。現在,您可以更快地訓練自己喜歡的VAE,並在較大的數據集上使用幾行代碼。請參閱我們的加速基準。
wandb /實驗跟踪的集線器 /實驗跟踪mlflow / comet_ml跟踪要安裝此庫的最新穩定版本,請使用pip運行以下內容
$ pip install pythae要安裝此庫的最新GitHub版本,請使用pip運行以下內容
$ pip install git+https://github.com/clementchadebec/benchmark_VAE.git或者,您可以克隆GitHub存儲庫以訪問測試,教程和腳本。
$ git clone https://github.com/clementchadebec/benchmark_VAE.git並安裝庫
$ cd benchmark_VAE
$ pip install -e . 以下是庫當前實現的模型列表。
| 型號 | 訓練例子 | 紙 | 官方實施 |
|---|---|---|---|
| 自動編碼器(AE) | |||
| 變異自動編碼器(VAE) | 關聯 | ||
| beta變量自動編碼器(betavae) | 關聯 | ||
| 帶有線性歸一化流的VAE(vae_linnf) | 關聯 | ||
| VAE具有反向自迴旋流動(VAE_IAF) | 關聯 | 關聯 | |
| 解開的beta差異自動編碼器(DisentangledBetavae) | 關聯 | ||
| 通過分解(因子Vae)解剖 | 關聯 | ||
| beta-tc-vae(betatcvae) | 關聯 | 關聯 | |
| 重要性加權自動編碼器(IWAE) | 關聯 | 關聯 | |
| 乘以加權自動編碼器(MIWAE) | 關聯 | ||
| 部分重要性加權自動編碼器(PIWAE) | 關聯 | ||
| 組合重要性加權自動編碼器(CIWAE) | 關聯 | ||
| 具有感知度量相似性的VAE(MSSSIM_VAE) | 關聯 | ||
| Wasserstein AutoCoder(WAE) | 關聯 | 關聯 | |
| 信息變性自動編碼器(Infovae_mmd) | 關聯 | ||
| 鞋面自動編碼器(vamp) | 關聯 | 關聯 | |
| 超球VAE(SVAE) | 關聯 | 關聯 | |
| Poincaré磁盤vae(Poincarevae) | 關聯 | 關聯 | |
| 對抗自動編碼器(verversarial_ae) | 關聯 | ||
| 變異自動編碼器gan(vaegan)? | 關聯 | 關聯 | |
| 矢量量化VAE(VQVAE) | 關聯 | 關聯 | |
| 漢密爾頓vae(HVAE) | 關聯 | 關聯 | |
| 使用L2解碼器參數(RAE_L2)正規化AE | 關聯 | 關聯 | |
| 梯度罰款(RAE_GP)正規化AE | 關聯 | 關聯 | |
| Riemannian Hamiltonian Vae(Rhvae) | 關聯 | 關聯 | |
| 分層殘差量化(HRQVAE) | 關聯 | 關聯 |
請參閱所有上述模型的重建和生成結果
以下是庫當前實現的模型列表。
| 採樣器 | 型號 | 紙 | 官方實施 |
|---|---|---|---|
| 正常的先驗(正常攝影器) | 所有模型 | 關聯 | |
| 高斯混合物(GaussianMixturesAmpler) | 所有模型 | 關聯 | 關聯 |
| 兩級VAE採樣器(Twostagevaesampler) | 所有基於VAE的模型 | 關聯 | 關聯 |
| 單位球均勻採樣器(Hyperspherifornsampler) | Svae | 關聯 | 關聯 |
| Poincaré磁盤採樣器(Poincaredisksampler) | Poincarevae | 關聯 | 關聯 |
| 鞋面先驗採樣器(vampsampler) | 鞋面 | 關聯 | 關聯 |
| 歧管採樣器(Rhvaesampler) | Rhvae | 關聯 | 關聯 |
| 掩蓋自迴旋流動採樣器(MAFSAMPLER) | 所有模型 | 關聯 | 關聯 |
| 反向自迴旋流動採樣器(IAFSAMPLER) | 所有模型 | 關聯 | 關聯 |
| Pixelcnn(Pixelcnnsampler) | VQVAE | 關聯 |
我們通過在發布官方代碼時或有關論文的實驗部分的足夠詳細信息時在原始出版物中介紹的一些結果來驗證實現。有關更多詳細信息,請參見可重複性。
要啟動模型培訓,您只需要調用TrainingPipeline實例即可。
 > >> from pythae . pipelines import TrainingPipeline
> >> from pythae . models import VAE , VAEConfig
> >> from pythae . trainers import BaseTrainerConfig

> >> # Set up the training configuration
>> > my_training_config = BaseTrainerConfig (
...	output_dir = 'my_model' ,
...	num_epochs = 50 ,
...	learning_rate = 1e-3 ,
...	per_device_train_batch_size = 200 ,
...	per_device_eval_batch_size = 200 ,
...	train_dataloader_num_workers = 2 ,
...	eval_dataloader_num_workers = 2 ,
...	steps_saving = 20 ,
...	optimizer_cls = "AdamW" ,
...	optimizer_params = { "weight_decay" : 0.05 , "betas" : ( 0.91 , 0.995 )},
...	scheduler_cls = "ReduceLROnPlateau" ,
...	scheduler_params = { "patience" : 5 , "factor" : 0.5 }
... )
> >> # Set up the model configuration
>> > my_vae_config = model_config = VAEConfig (
...	input_dim = ( 1 , 28 , 28 ),
...	latent_dim = 10
... )
> >> # Build the model
>> > my_vae_model = VAE (
...	model_config = my_vae_config
... )
> >> # Build the Pipeline
>> > pipeline = TrainingPipeline (
... 	training_config = my_training_config ,
... 	model = my_vae_model
... )
> >> # Launch the Pipeline
>> > pipeline (
...	train_data = your_train_data , # must be torch.Tensor, np.array or torch datasets
...	eval_data = your_eval_data # must be torch.Tensor, np.array or torch datasets
... )在訓練結束時,最佳模型權重,模型配置和訓練配置存儲在my_model/MODEL_NAME_training_YYYY-MM-DD_hh-mm-ss中的final_model文件夾中( my_model是BaseTrainerConfig的output_dir參數)。如果您進一步將steps_saving參數設置為某個值,則checkpoint_epoch_k包含最佳模型權重,Epoch k的“優化器,調度程序,配置和培訓配置”的文件夾也將出現在my_model/MODEL_NAME_training_YYYY-MM-DD_hh-mm-ss中。
我們還提供了一個培訓腳本示例,可用於在基準數據集(MNIST,CIFAR10,CELEBA ...)上訓練模型。可以使用以下命令行啟動腳本
python training.py --dataset mnist --model_name ae --model_config ' configs/ae_config.json ' --training_config ' configs/base_training_config.json '有關此腳本的更多詳細信息,請參見readme.md
GenerationPipeline從受過訓練的模型中啟動數據生成的最簡單方法是使用Pythae提供的內置GenerationPipeline 。假設您要使用MAFSampler生成100個樣品,您要做的就是1)重新訓練的模型,2)定義採樣器的配置,3)創建並啟動和啟動GenerationPipeline如下
 > >> from pythae . models import AutoModel
> >> from pythae . samplers import MAFSamplerConfig
> >> from pythae . pipelines import GenerationPipeline
> >> # Retrieve the trained model
>> > my_trained_vae = AutoModel . load_from_folder (
...	'path/to/your/trained/model'
... )
> >> my_sampler_config = MAFSamplerConfig (
...	n_made_blocks = 2 ,
...	n_hidden_in_made = 3 ,
...	hidden_size = 128
... )
> >> # Build the pipeline
>> > pipe = GenerationPipeline (
...	model = my_trained_vae ,
...	sampler_config = my_sampler_config
... )
> >> # Launch data generation
>> > generated_samples = pipe (
...	num_samples = args . num_samples ,
...	return_gen = True , # If false returns nothing
...	train_data = train_data , # Needed to fit the sampler
...	eval_data = eval_data , # Needed to fit the sampler
...	training_config = BaseTrainerConfig ( num_epochs = 200 ) # TrainingConfig to use to fit the sampler
... )另外,您可以直接使用採樣器直接從受過訓練的模型啟動數據生成過程。例如,要使用採樣器生成新數據,請運行以下內容。
 > >> from pythae . models import AutoModel
> >> from pythae . samplers import NormalSampler
> >> # Retrieve the trained model
>> > my_trained_vae = AutoModel . load_from_folder (
...	'path/to/your/trained/model'
... )
> >> # Define your sampler
>> > my_samper = NormalSampler (
...	model = my_trained_vae
... )
> >> # Generate samples
>> > gen_data = my_samper . sample (
...	num_samples = 50 ,
...	batch_size = 10 ,
...	output_dir = None ,
...	return_gen = True
... )如果將output_dir設置為特定路徑,則生成的圖像將保存為.png文件,名為00000000.png , 00000001.png ...只要適合任何模型,都可以將採樣器與任何模型一起使用。例如,可以使用GaussianMixtureSampler實例從任何模型中生成,但是VAMPSampler只能使用VAMP模型使用。在此處查看哪些適用於您的模型。請注意,例如,某些採樣器(例如GaussianMixtureSampler mixturesmpler)可能需要通過調用fit方法來擬合。以下是GaussianMixtureSampler的一個示例。
 > >> from pythae . models import AutoModel
> >> from pythae . samplers import GaussianMixtureSampler , GaussianMixtureSamplerConfig
> >> # Retrieve the trained model
>> > my_trained_vae = AutoModel . load_from_folder (
...	'path/to/your/trained/model'
... )
> >> # Define your sampler
... gmm_sampler_config = GaussianMixtureSamplerConfig (
...	n_components = 10
... )
> >> my_samper = GaussianMixtureSampler (
...	sampler_config = gmm_sampler_config ,
...	model = my_trained_vae
... )
> >> # fit the sampler
>> > gmm_sampler . fit ( train_dataset )
> >> # Generate samples
>> > gen_data = my_samper . sample (
...	num_samples = 50 ,
...	batch_size = 10 ,
...	output_dir = None ,
...	return_gen = True
... )Pythae為您提供了在VAE模型中定義自己的神經網絡的可能性。例如,說您想用特定的編碼器和解碼器訓練Wassertstein AE,您可以做以下操作:
 > >> from pythae . models . nn import BaseEncoder , BaseDecoder
> >> from pythae . models . base . base_utils import ModelOutput
> >> class My_Encoder ( BaseEncoder ):
...	def __init__ ( self , args = None ): # Args is a ModelConfig instance
...		BaseEncoder . __init__ ( self )
...		self . layers = my_nn_layers ()
...
...	def forward ( self , x : torch . Tensor ) -> ModelOutput :
...		out = self . layers ( x )
...		output = ModelOutput (
...			embedding = out # Set the output from the encoder in a ModelOutput instance
...		)
...		return output
...
... class My_Decoder ( BaseDecoder ):
...	def __init__ ( self , args = None ):
...		BaseDecoder . __init__ ( self )
...		self . layers = my_nn_layers ()
...
...	def forward ( self , x : torch . Tensor ) -> ModelOutput :
...		out = self . layers ( x )
...		output = ModelOutput (
...			reconstruction = out # Set the output from the decoder in a ModelOutput instance
...		)
...		return output
...
> >> my_encoder = My_Encoder ()
> >> my_decoder = My_Decoder ()
現在建立模型
 > >> from pythae . models import WAE_MMD , WAE_MMD_Config
> >> # Set up the model configuration
>> > my_wae_config = model_config = WAE_MMD_Config (
...	input_dim = ( 1 , 28 , 28 ),
...	latent_dim = 10
... )
...
> >> # Build the model
>> > my_wae_model = WAE_MMD (
...	model_config = my_wae_config ,
...	encoder = my_encoder , # pass your encoder as argument when building the model
...	decoder = my_decoder # pass your decoder as argument when building the model
... )
重要說明1 :對於所有基於AE的模型(AE,WAE,RAE_L2,RAE_GP),編碼器和解碼器都必須返回ModelOutput實例。對於編碼器, ModelOutput實例必須包含密鑰embedding下的嵌入。對於解碼器, ModelOutput實例必須包含關鍵reconstruction下的重建。
重要說明2 :對於所有基於VAE的模型(VAE,Betavae,Iwae,Hvae,Vamp,Rhvae),編碼器和解碼器都必須返回ModelOutput實例。對於編碼器, ModelOutput實例必須在密鑰embedding和log_covariance鍵下分別包含嵌入式和log -covariance矩陣(shape batch_size x latent_space_dim)。對於解碼器, ModelOutput實例必須包含關鍵reconstruction下的重建。
您還可以找到最常見數據集的預定義神經網絡體系結構(即MNIST,CIFAR,CELEBA ...),可以加載如下
 > >> from pythae . models . nn . benchmark . mnist import (
...	Encoder_Conv_AE_MNIST , # For AE based model (only return embeddings)
...	Encoder_Conv_VAE_MNIST , # For VAE based model (return embeddings and log_covariances)
...	Decoder_Conv_AE_MNIST
... )由Cifar或Celeba替換MNIST ,以獲取其他神經網。
Pythae分發培訓截至v0.1.0 ,Pythae現在使用Pytorch的DDP支持分佈式培訓。它使您可以使用多GPU和/或多節點培訓更快地訓練自己喜歡的VAE和較大數據集。
為此,您可以構建一個Python腳本,然後將由啟動器(例如群集上的srun )啟動。腳本中唯一需要的是直接在培訓配置中指定相對於分佈式環境(例如節點/GPU的數量)的某些元素
 > >> training_config = BaseTrainerConfig (
...     num_epochs = 10 ,
...     learning_rate = 1e-3 ,
...     per_device_train_batch_size = 64 ,
...     per_device_eval_batch_size = 64 ,
...     train_dataloader_num_workers = 8 ,
...     eval_dataloader_num_workers = 8 ,
...     dist_backend = "nccl" , # distributed backend
...     world_size = 8 # number of gpus to use (n_nodes x n_gpus_per_node),
...     rank = 5 # global gpu id,
...     local_rank = 1 # gpu id within a node,
...     master_addr = "localhost" # master address,
...     master_port = "12345" # master port,
... )
請參閱此示例腳本,該腳本定義了ImageNet數據集上的多GPU VQVAE培訓。請注意,分佈式環境變量( world_size , rank ...)的恢復方式可能特定於您使用的群集和啟動器。
以下是在V100 16GB GPU上使用Pythae的矢量量化VAE(VQ-VAE)的訓練時間,在FFHQ(1024x1024映像)上進行50個epochs,在V100 32GB GPU上進行50個epochs(1024x1024映像)。
| 火車數據 | 1 GPU | 4 GPU | 2x4 GPU | |
|---|---|---|---|---|
| MNIST(VQ-VAE) | 28x28圖像(50k) | 235.18 s | 62.00 s | 35.86 s |
| FFHQ 1024x1024(VQVAE) | 1024x1024 RGB圖像(60k) | 19h 1分鐘 | 5H 6分鐘 | 2H 37分鐘 |
| Imagenet-1K 128x128(VQVAE) | 128x128 RGB圖像(〜1.2m) | 6H 25分鐘 | 1H 41分鐘 | 51min 26s |
對於每個數據集,我們在此處提供基準測試腳本
Pythae還允許您在HuggingFace Hub上共享模型。為此,您需要:
huggingface_hub 。如果沒有,您可以安裝它 $ python -m pip install huggingface_hub
$ huggingface-cli login
使用方法push_to_hf_hub可以輕鬆地上傳任何Pythae模型
> >> my_vae_model . push_to_hf_hub ( hf_hub_path = "your_hf_username/your_hf_hub_repo" )注意:如果your_hf_hub_repo已經存在並且不是空的,則文件將被覆蓋。如果不存在repo your_hf_hub_repo ,則將創建具有相同名稱的文件夾。
等效地,您可以使用方法load_from_hf_hub直接從集線器下載或重新加載任何Pythae模型
 > >> from pythae . models import AutoModel
> >> my_downloaded_vae = AutoModel . load_from_hf_hub ( hf_hub_path = "path_to_hf_repo" )wandb監視您的實驗?Pythae還集成了實驗跟踪工具WANDB,使用戶可以存儲其配置,監視其培訓並通過圖形接口進行比較。為了使用此功能,您需要:
wandb安裝在您的虛擬env中。如果沒有,您可以安裝它 $ pip install wandb
$ wandb login
WandbCallback使用pythae的wandb啟動實驗監測非常簡單。用戶唯一需要做的就是創建一個WandbCallback實例...
 > >> # Create you callback
>> > from pythae . trainers . training_callbacks import WandbCallback
> >> callbacks = [] # the TrainingPipeline expects a list of callbacks
> >> wandb_cb = WandbCallback () # Build the callback
> >> # SetUp the callback
>> > wandb_cb . setup (
...	training_config = your_training_config , # training config
...	model_config = your_model_config , # model config
...	project_name = "your_wandb_project" , # specify your wandb project
...	entity_name = "your_wandb_entity" , # specify your wandb entity
... )
> >> callbacks . append ( wandb_cb ) # Add it to the callbacks list ...然後將其傳遞到TrainingPipeline 。
 > >> pipeline = TrainingPipeline (
...	training_config = config ,
...	model = model
... )
> >> pipeline (
...	train_data = train_dataset ,
...	eval_data = eval_dataset ,
...	callbacks = callbacks # pass the callbacks to the TrainingPipeline and you are done!
... )
> >> # You can log to https://wandb.ai/your_wandb_entity/your_wandb_project to monitor your training
查看詳細的教程
mlflow監視您的實驗?Pythae還集成了實驗跟踪工具MLFLOW,使用戶可以存儲其配置,監視其培訓並通過圖形接口進行比較。為了使用此功能,您需要:
mlfow安裝在您的虛擬env中。如果沒有,您可以安裝它 $ pip install mlflow
MLFlowCallback在Pythae中使用mlfow啟動實驗監測非常簡單。用戶唯一需要做的就是創建一個MLFlowCallback實例...
 > >> # Create you callback
>> > from pythae . trainers . training_callbacks import MLFlowCallback
> >> callbacks = [] # the TrainingPipeline expects a list of callbacks
> >> mlflow_cb = MLFlowCallback () # Build the callback
> >> # SetUp the callback
>> > mlflow_cb . setup (
...	training_config = your_training_config , # training config
...	model_config = your_model_config , # model config
...	run_name = "mlflow_cb_example" , # specify your mlflow run
... )
> >> callbacks . append ( mlflow_cb ) # Add it to the callbacks list ...然後將其傳遞到TrainingPipeline 。
 > >> pipeline = TrainingPipeline (
...	training_config = config ,
...	model = model
... )
> >> pipeline (
...	train_data = train_dataset ,
...	eval_data = eval_dataset ,
...	callbacks = callbacks # pass the callbacks to the TrainingPipeline and you are done!
... )您可以通過在./mlruns目錄中運行以下內容來可視化度量
$ mlflow ui 查看詳細的教程
comet_ml監視您的實驗?Pythae還集成了實驗跟踪工具comet_ml,允許用戶存儲其配置,監視培訓並通過圖形接口進行比較。為了使用此功能,您需要:
comet_ml 。如果沒有,您可以安裝它 $ pip install comet_ml
CometCallback使用Pythae中的comet_ml啟動實驗監視非常簡單。用戶唯一需要做的就是創建一個CometCallback實例...
 > >> # Create you callback
>> > from pythae . trainers . training_callbacks import CometCallback
> >> callbacks = [] # the TrainingPipeline expects a list of callbacks
> >> comet_cb = CometCallback () # Build the callback
> >> # SetUp the callback
>> > comet_cb . setup (
...	training_config = training_config , # training config
...	model_config = model_config , # model config
...	api_key = "your_comet_api_key" , # specify your comet api-key
...	project_name = "your_comet_project" , # specify your wandb project
...	#offline_run=True, # run in offline mode
...	#offline_directory='my_offline_runs' # set the directory to store the offline runs
... )
> >> callbacks . append ( comet_cb ) # Add it to the callbacks list ...然後將其傳遞到TrainingPipeline 。
 > >> pipeline = TrainingPipeline (
...	training_config = config ,
...	model = model
... )
> >> pipeline (
...	train_data = train_dataset ,
...	eval_data = eval_dataset ,
...	callbacks = callbacks # pass the callbacks to the TrainingPipeline and you are done!
... )
> >> # You can log to https://comet.com/your_comet_username/your_comet_project to monitor your training
查看詳細的教程
為了幫助您了解Pythae的工作方式以及如何通過此圖書館培訓模型,我們還提供教程:
make_your_own_autoencoder.ipynb向您展示瞭如何將自己的網絡傳遞給Pythae中實現的模型
custom_dataset.ipynb向您展示瞭如何與Pythae中實現的任何模型一起使用自定義數據集
HF_HUB_MODELS_SHARING.IPYNB向您展示如何上傳和下載HuggingFace Hub
wandb_experiment_monitoring.ipynb向您展示瞭如何使用wandb監視實驗
mlflow_experiment_monitoring.ipynb向您展示瞭如何使用mlflow監視實驗
comet_experiment_monitoring.ipynb向您展示瞭如何使用comet_ml監視實驗
Models_training文件夾提供筆記本電腦,展示如何使用pythae.samplers訓練每個實現的模型以及如何從中進行採樣。
腳本文件夾特別提供了一個訓練腳本的示例,用於在基準數據集(MNIST,CIFAR10,CELEBA ...)上訓練模型。
如果您在運行代碼時遇到任何問題或請求要實現的新功能/模型,請在Github上打開問題。
您想通過添加模型,採樣器或簡單地修復錯誤來為此庫做出貢獻?太棒了!謝謝你!請參閱貢獻。 md以遵循主要貢獻指南。
首先,讓我們看一下從評估集中獲取的重建樣本。
| 型號 | mnist | Celeba |
|---|---|---|
| 評估數據 | 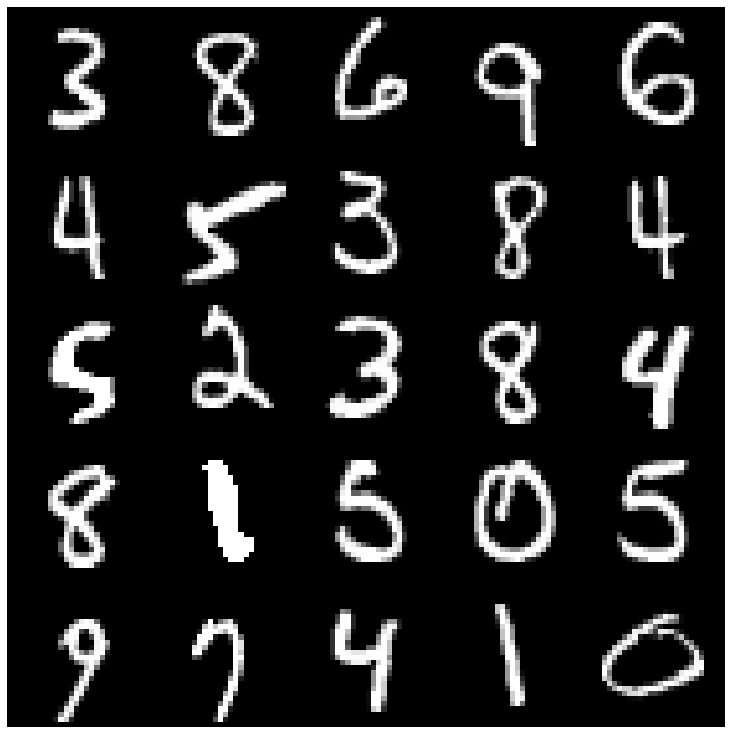 | 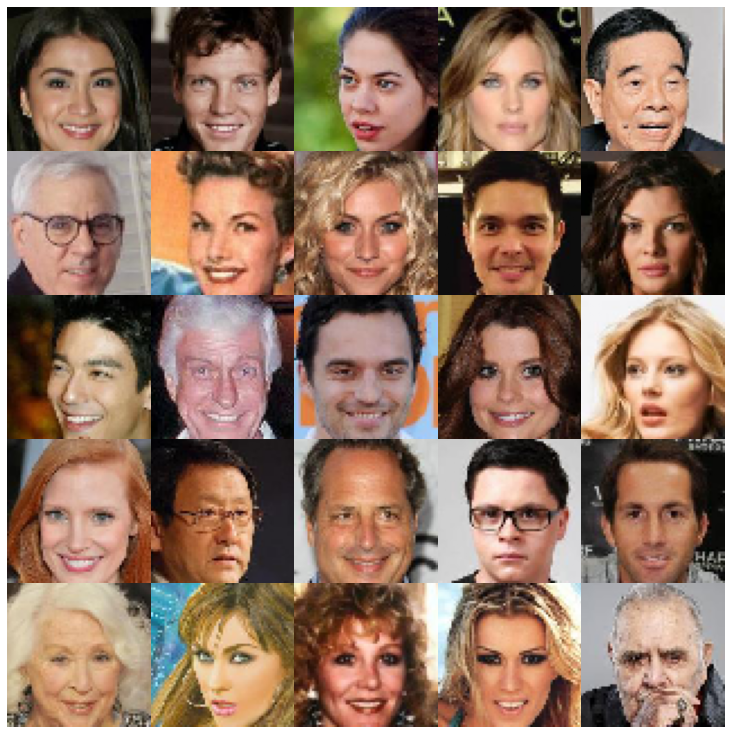 |
| Ae | 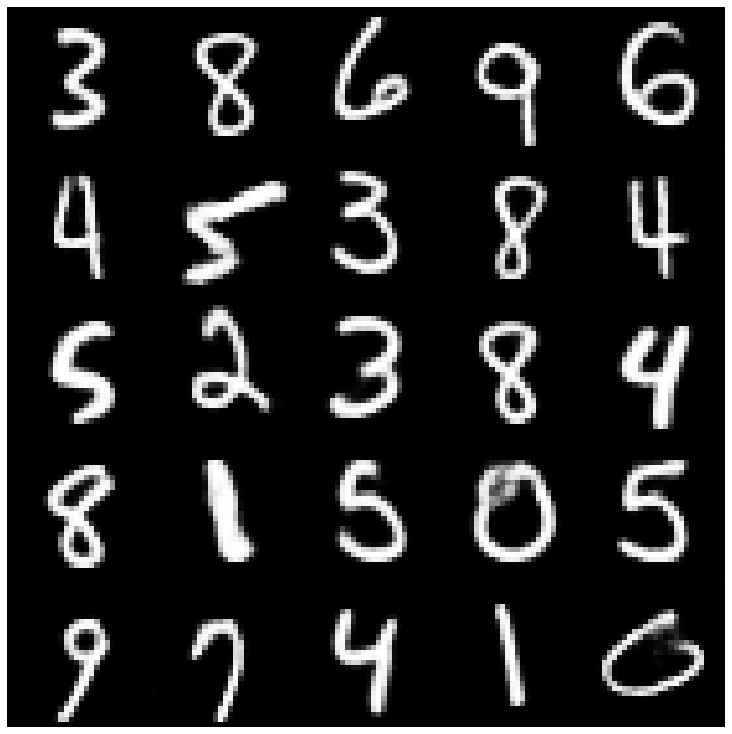 |  |
| vae | 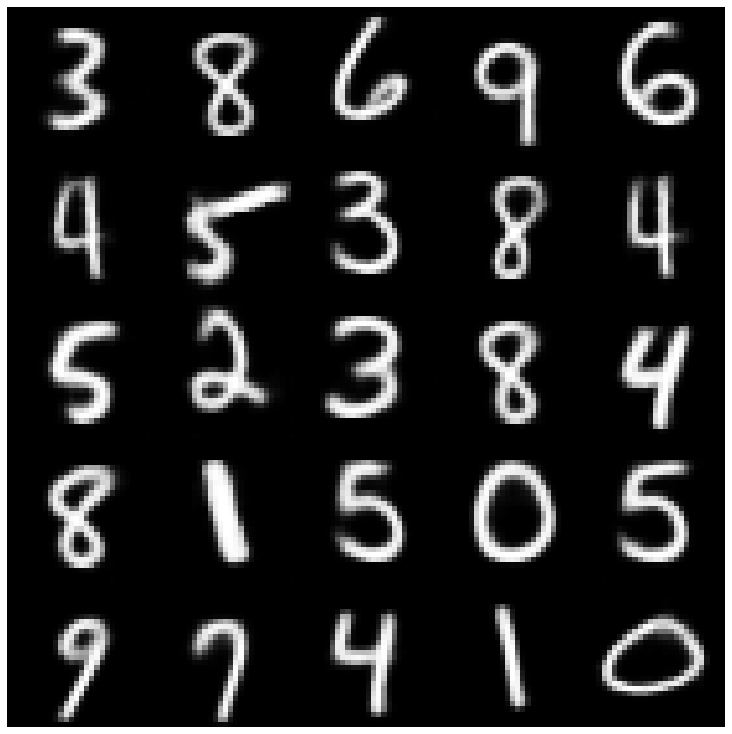 | 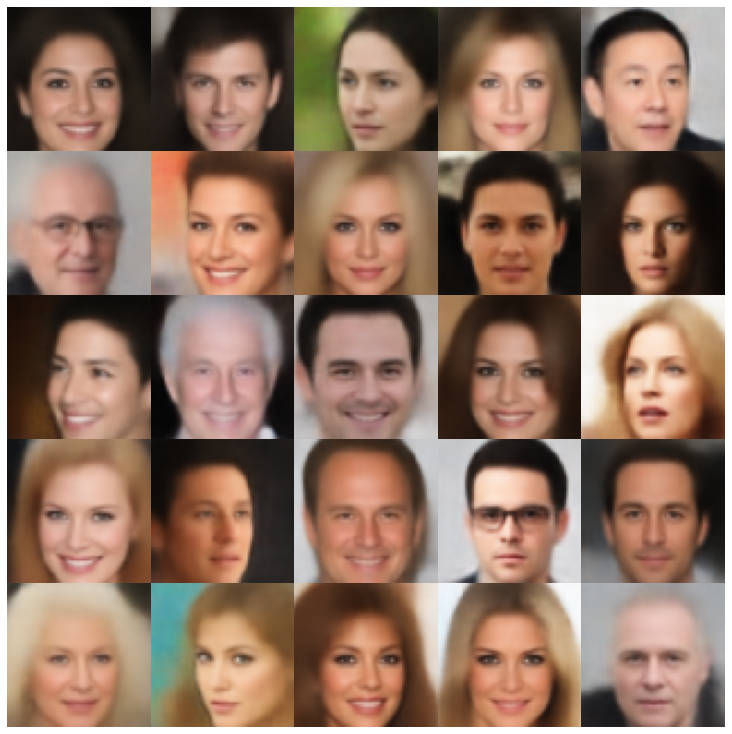 |
| beta-vae | 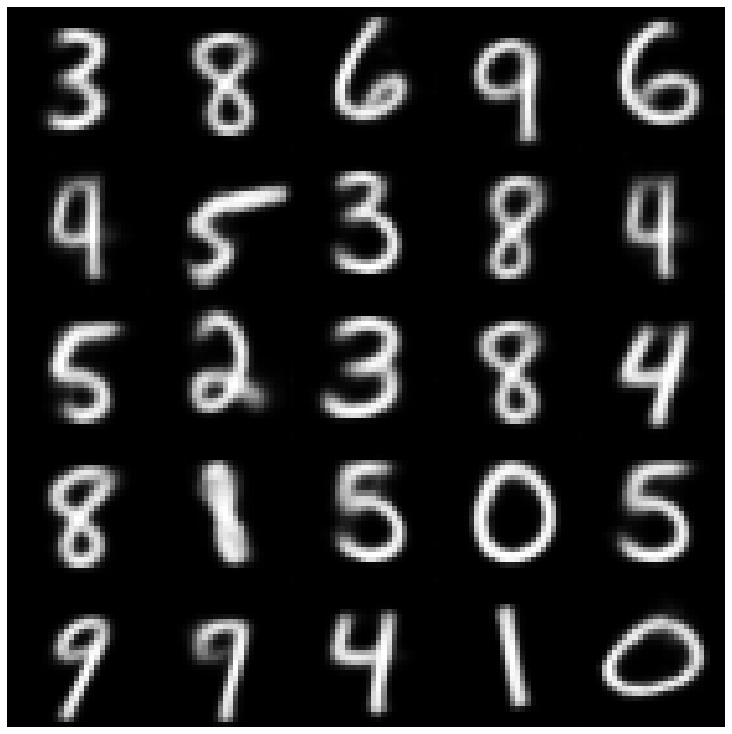 | 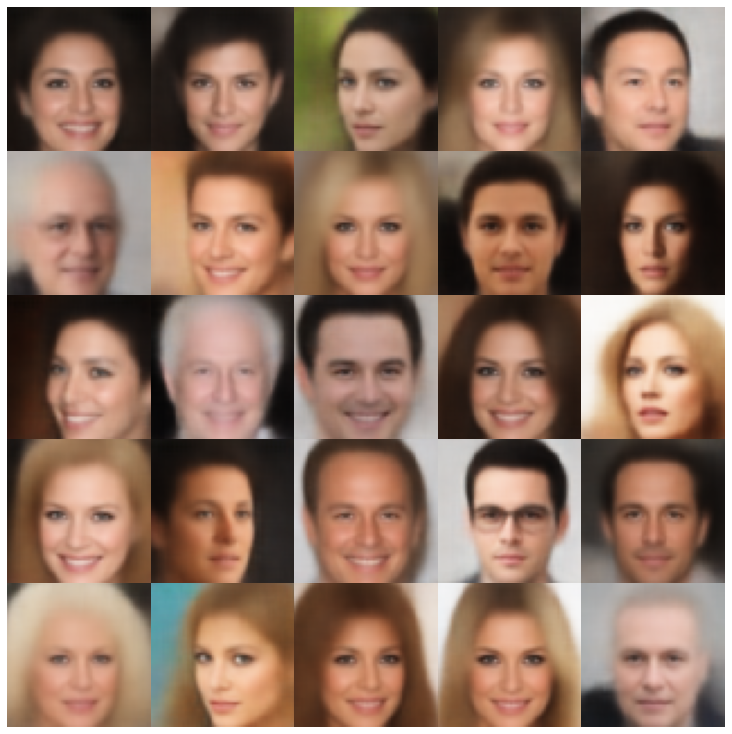 |
| vae lin nf | 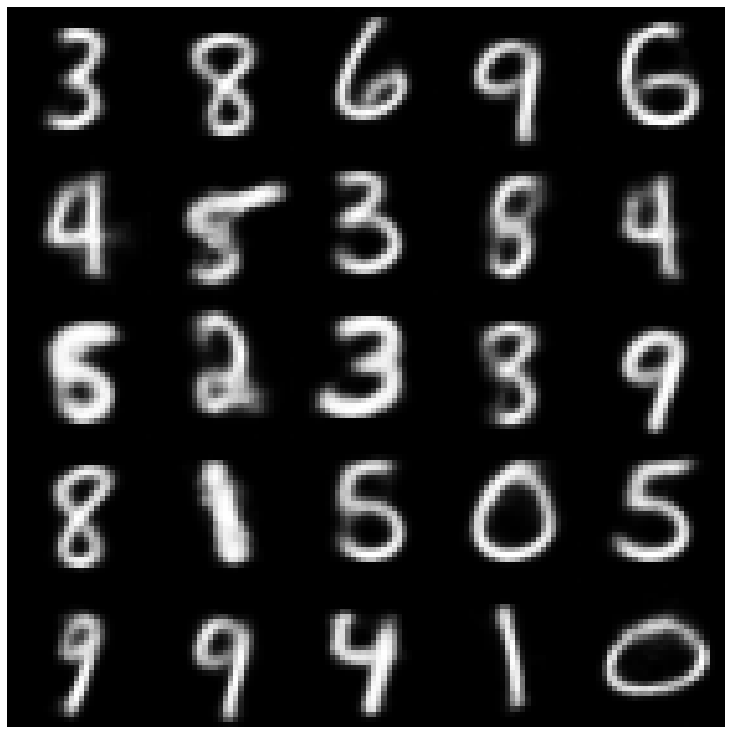 | 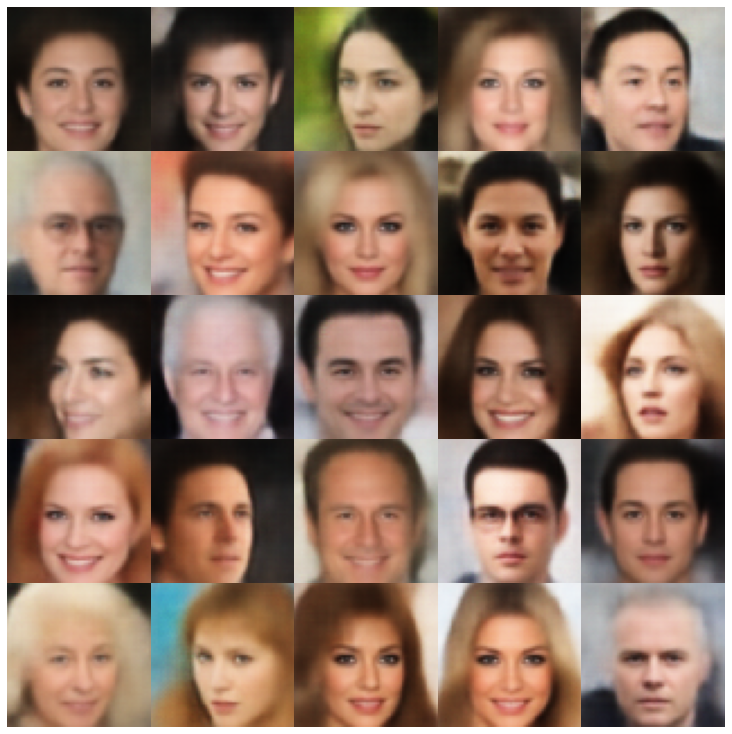 |
| vae iaf | 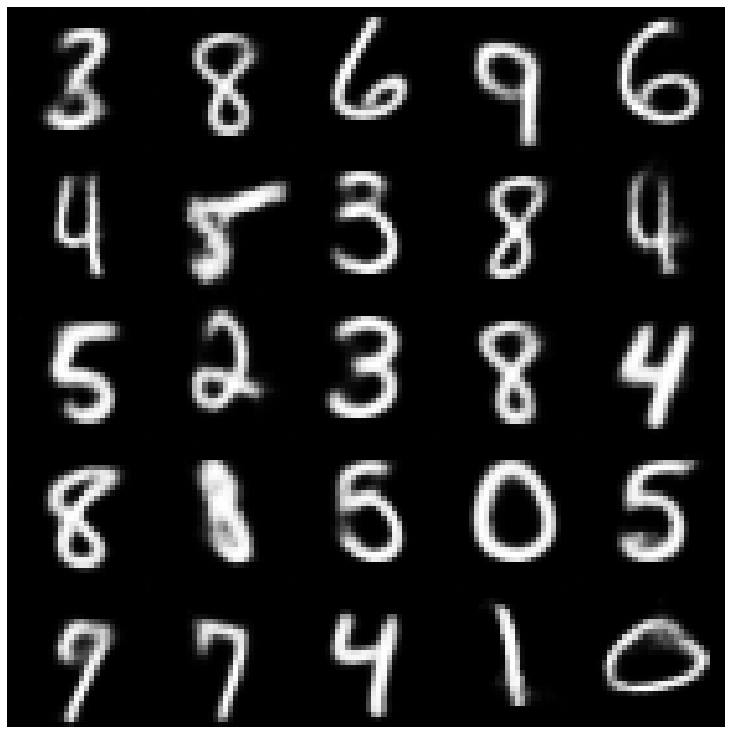 | 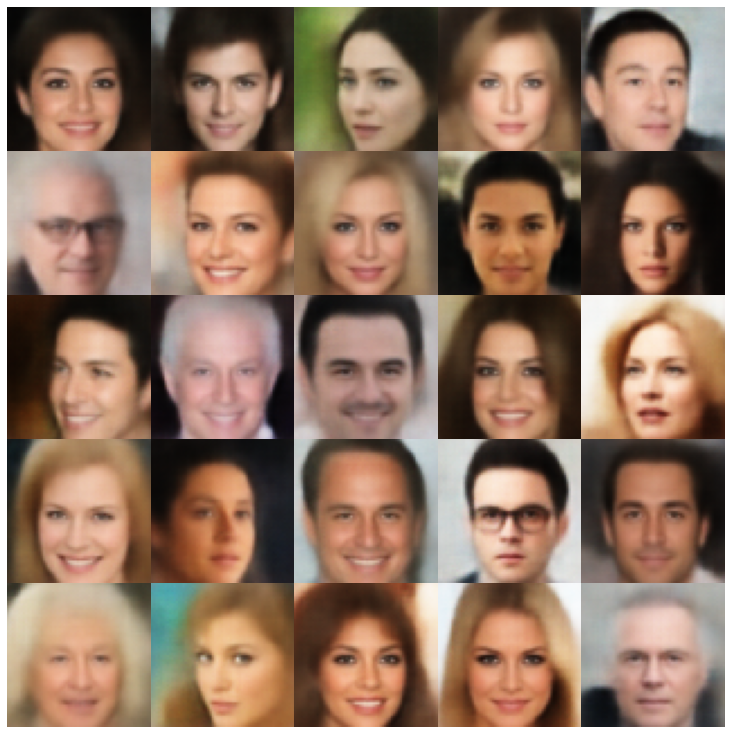 |
| 解開的β-vae | 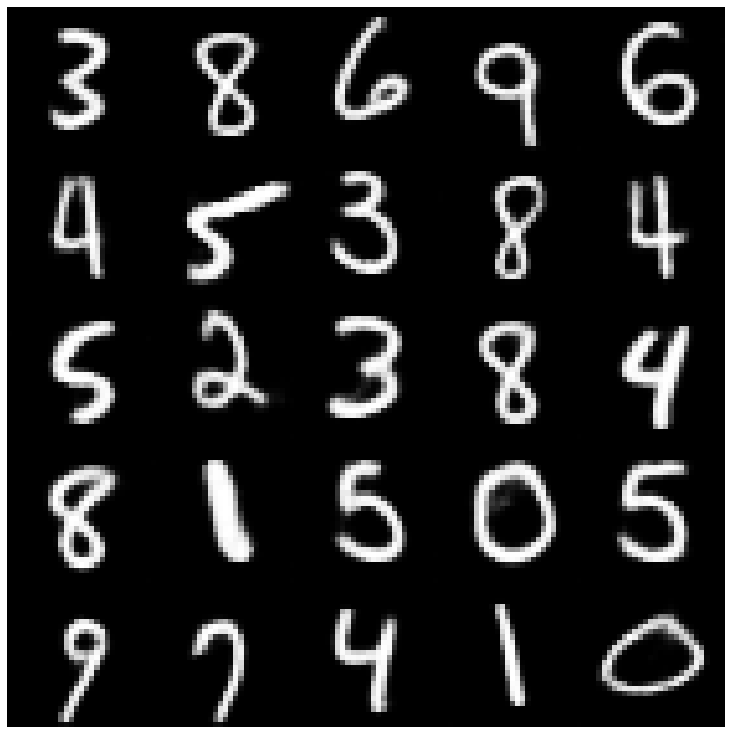 | 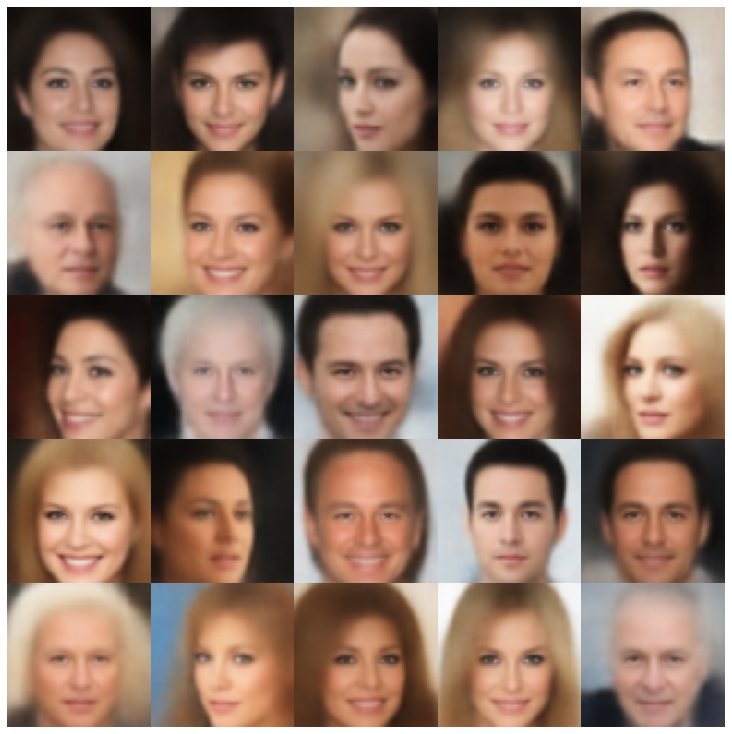 |
| 因子 | 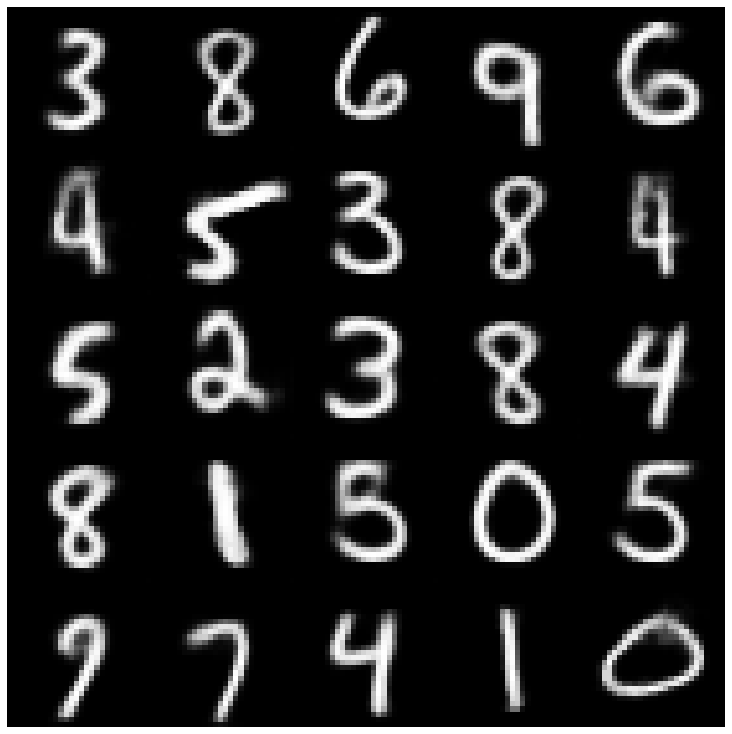 | 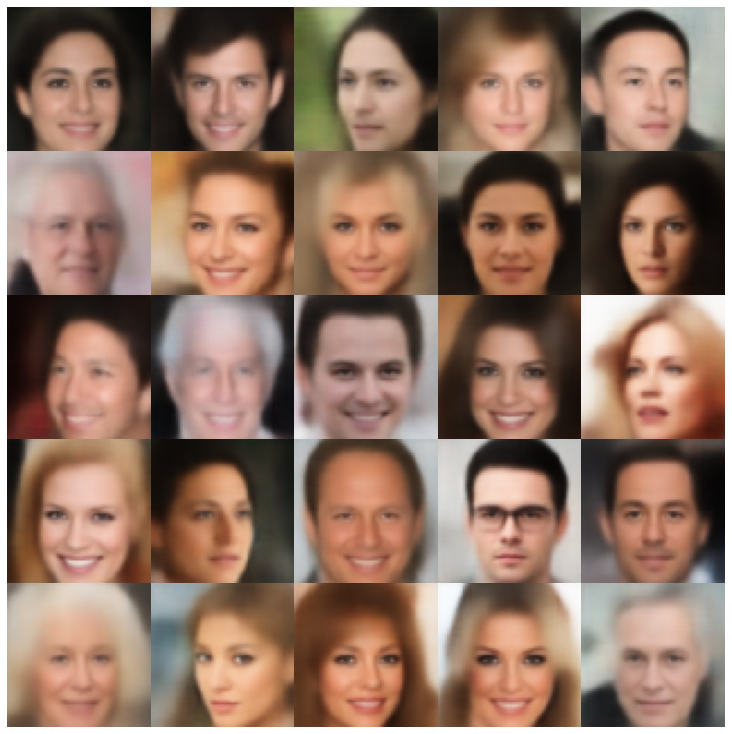 |
| betatcvae | 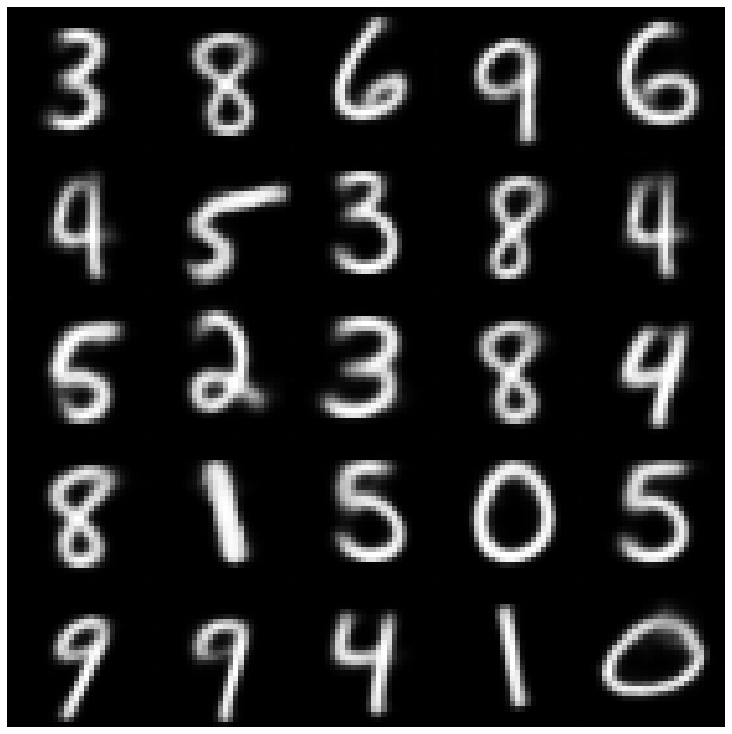 | 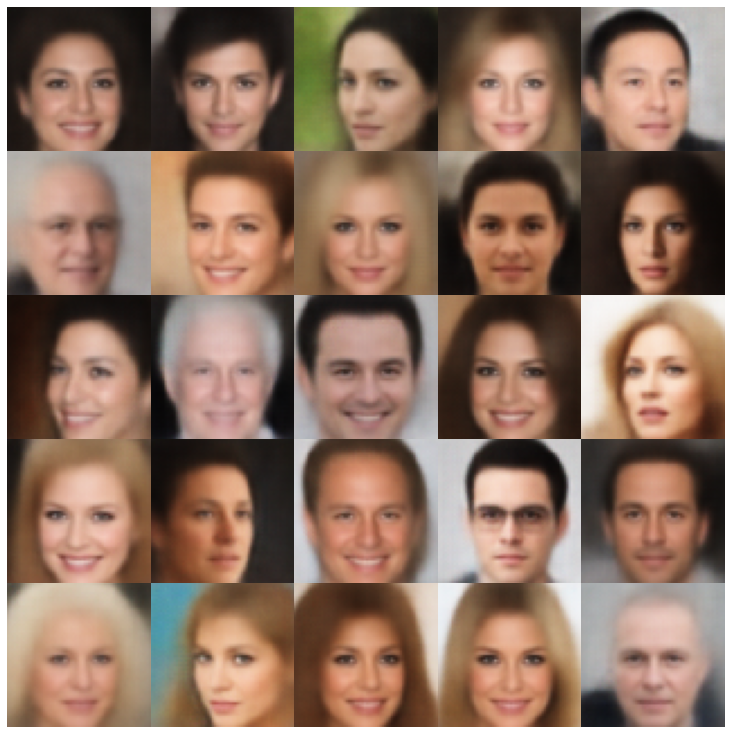 |
| iwae | 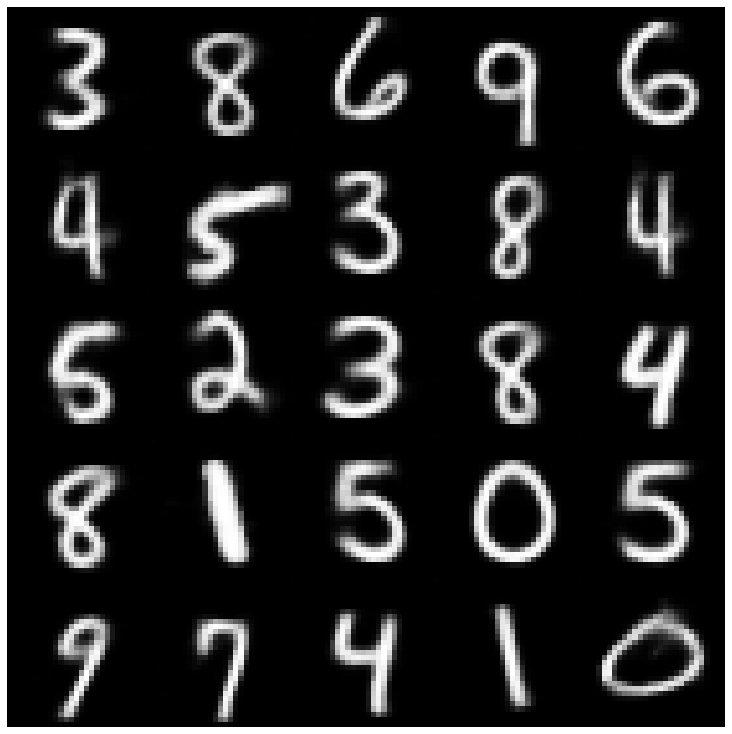 | 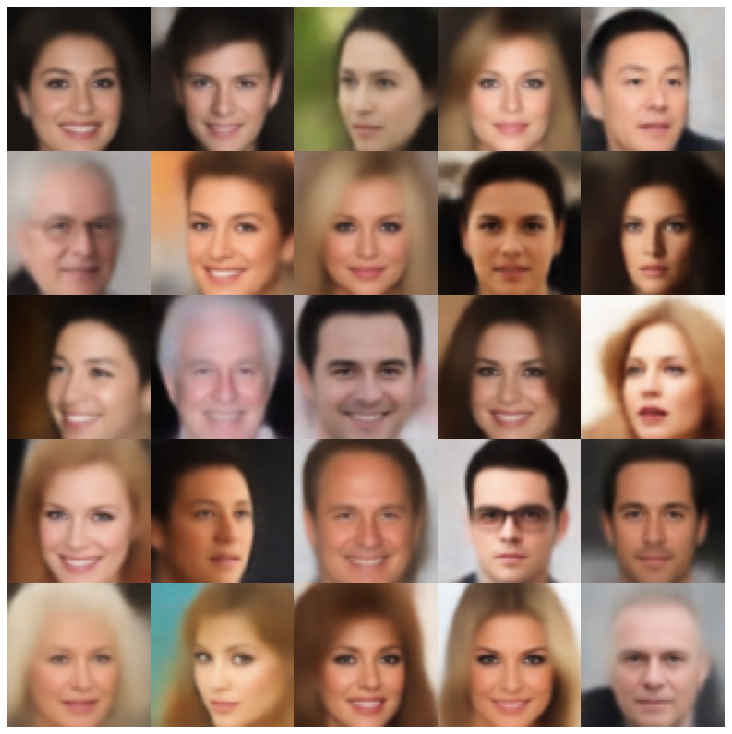 |
| MSSSIM_VAE | 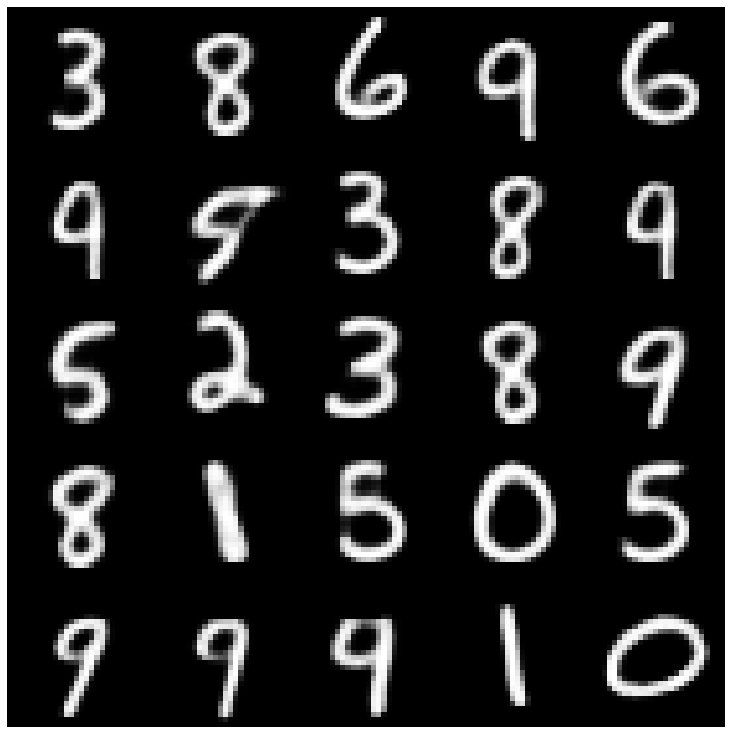 | 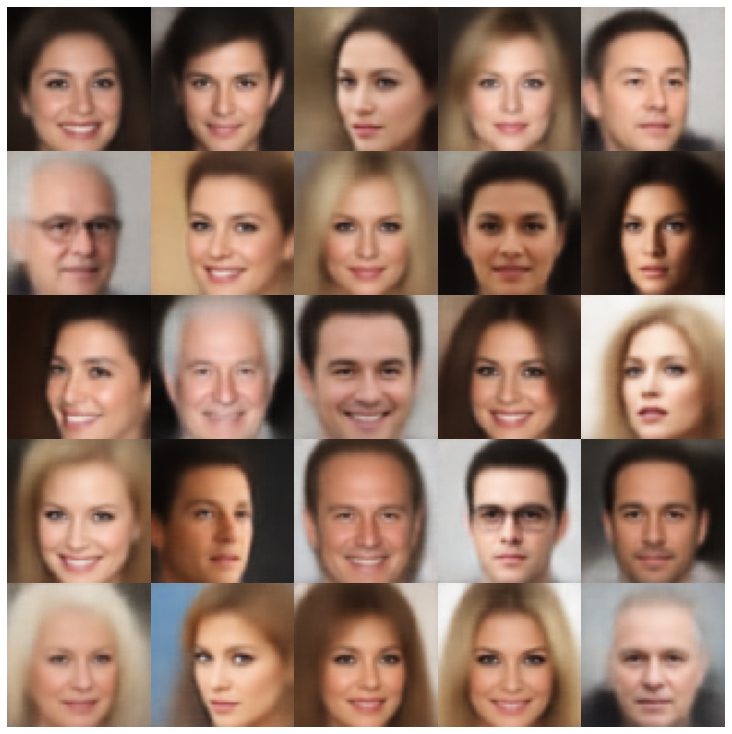 |
| wae | 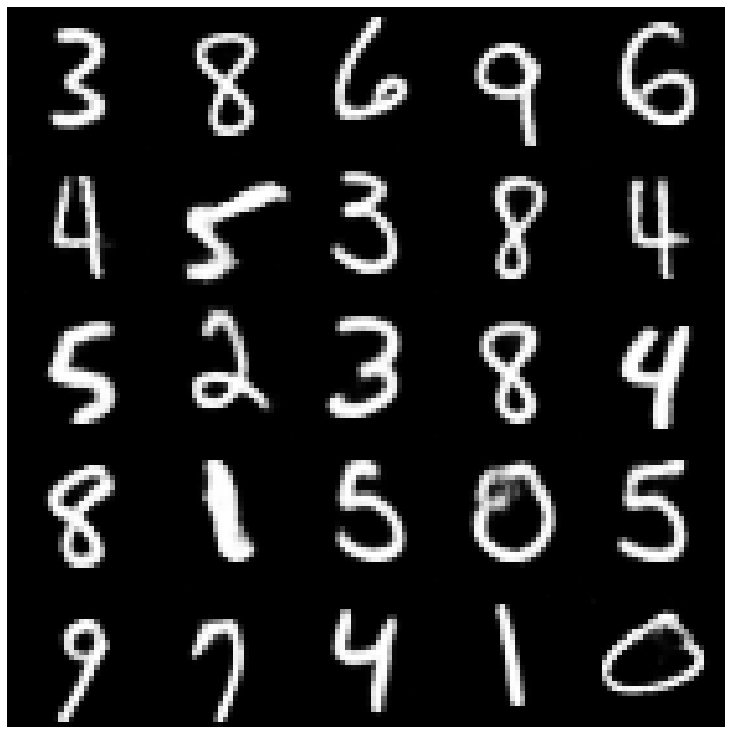 | 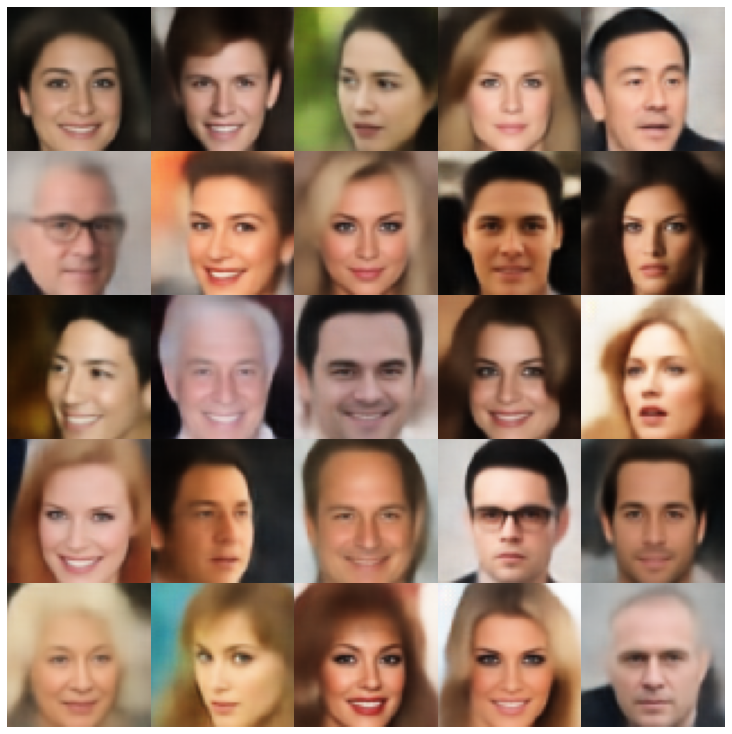 |
| 信息vae | 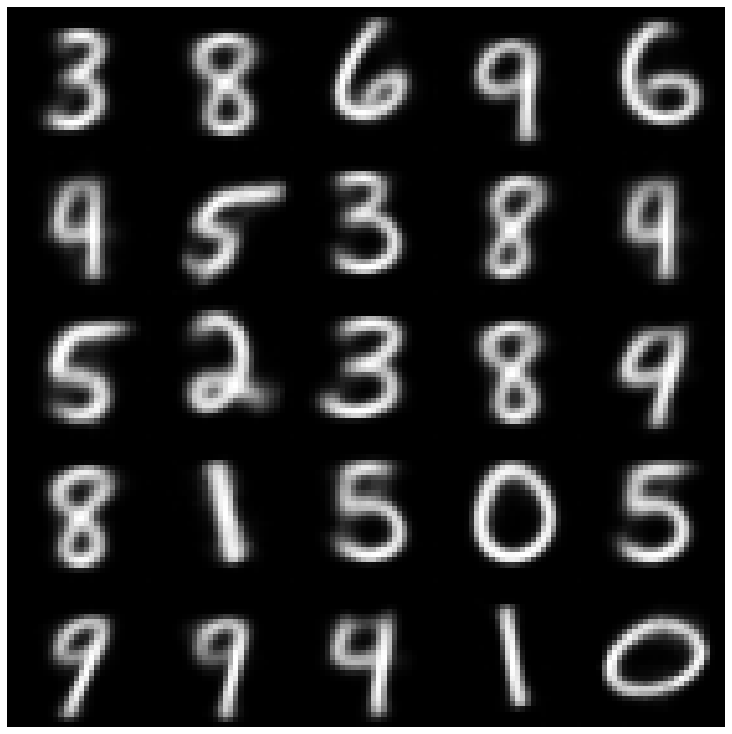 | 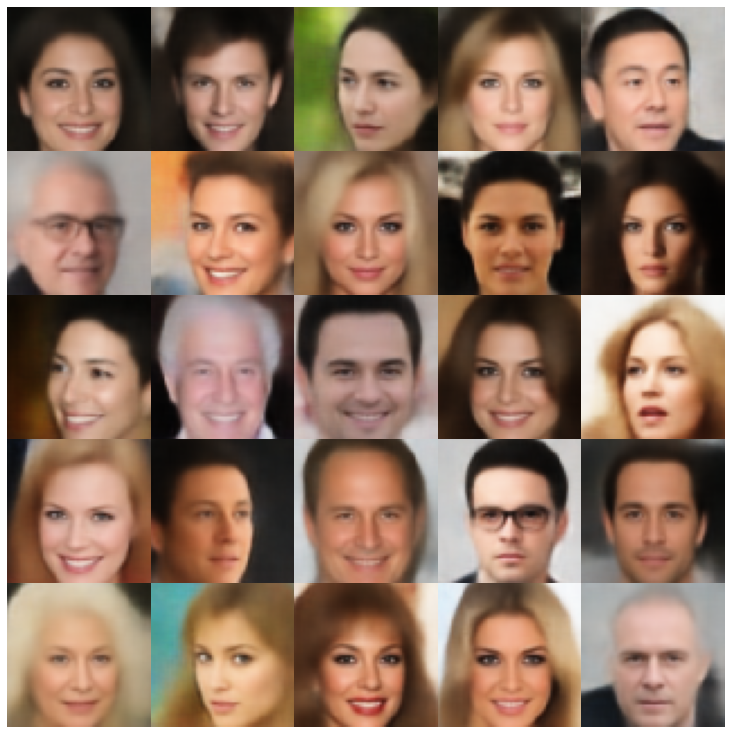 |
| 鞋面 | 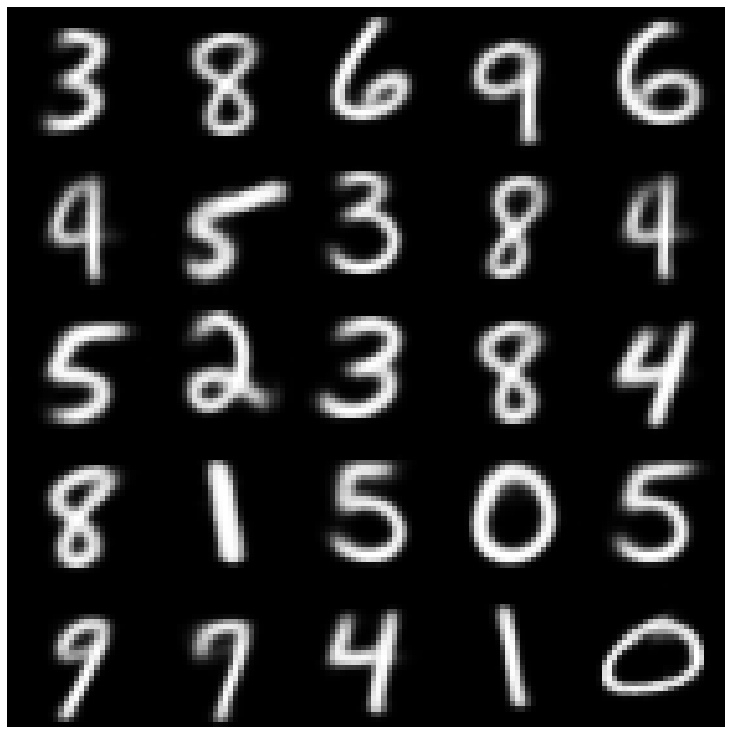 | 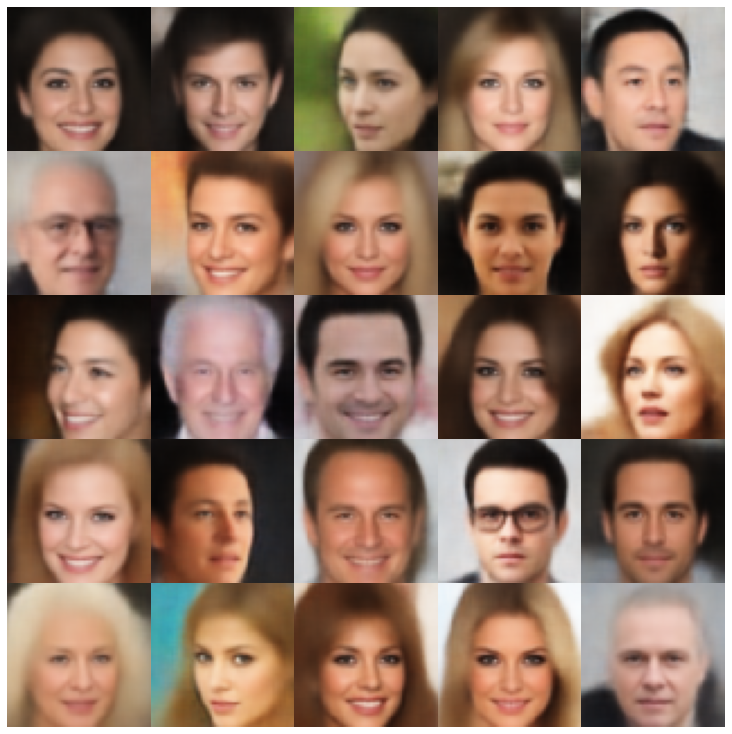 |
| Svae | 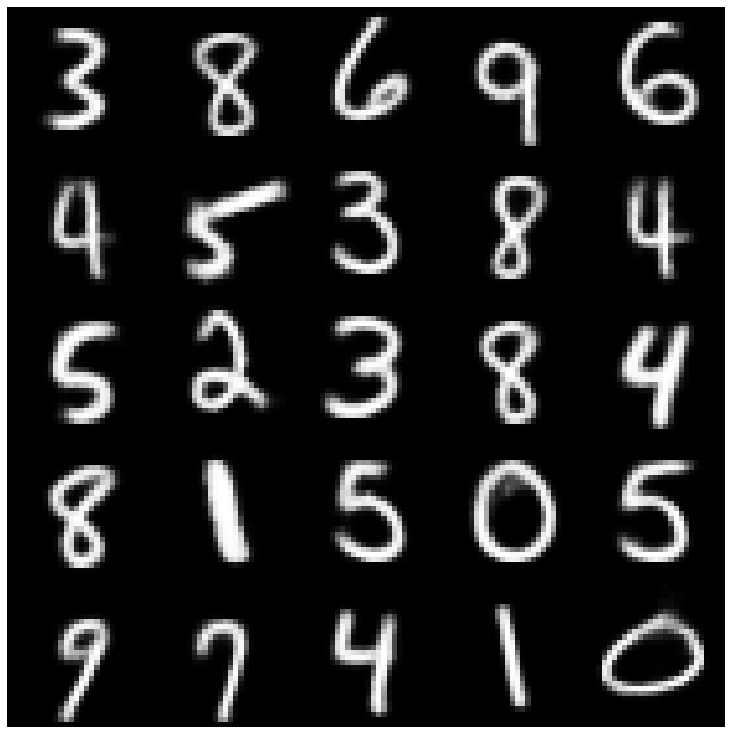 | 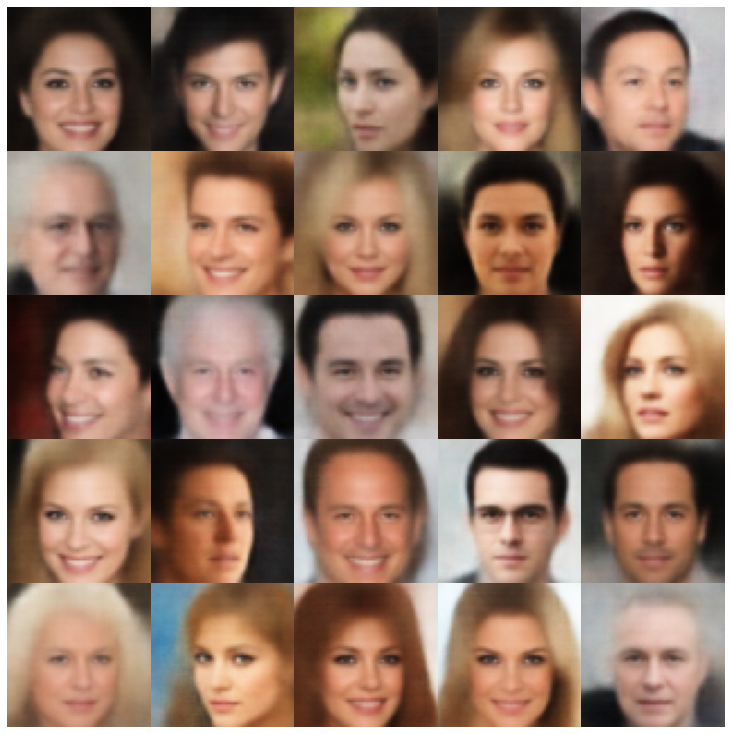 |
| versarial_ae | 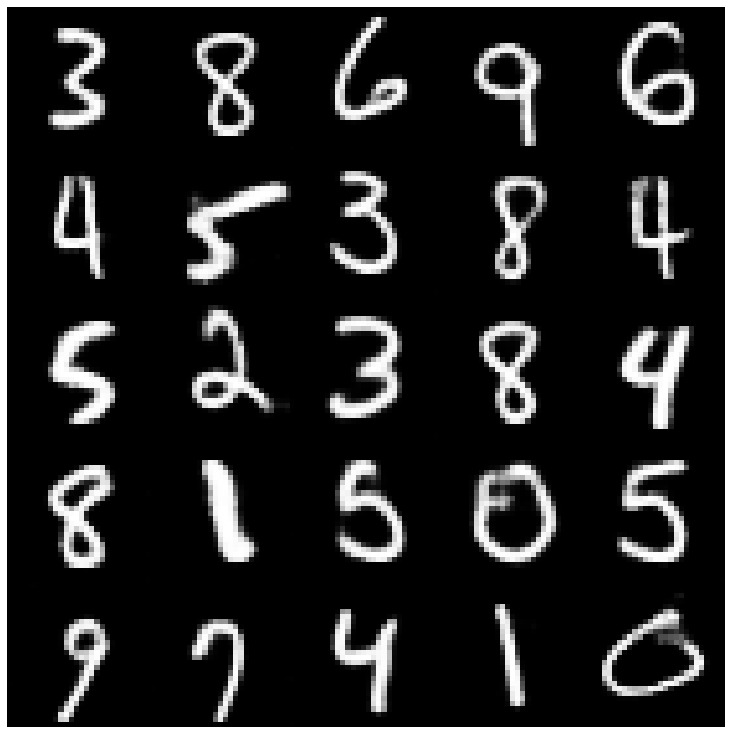 | 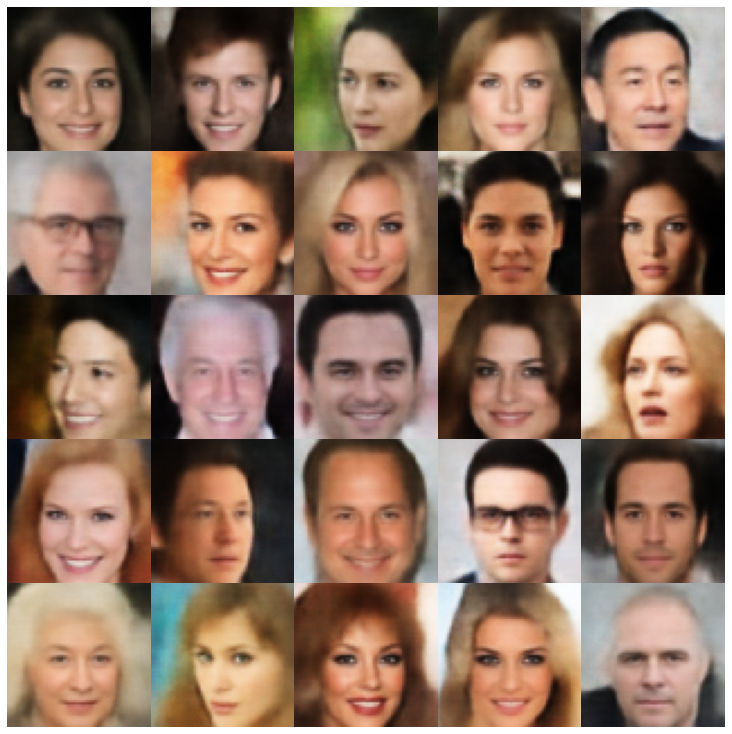 |
| vae_gan | 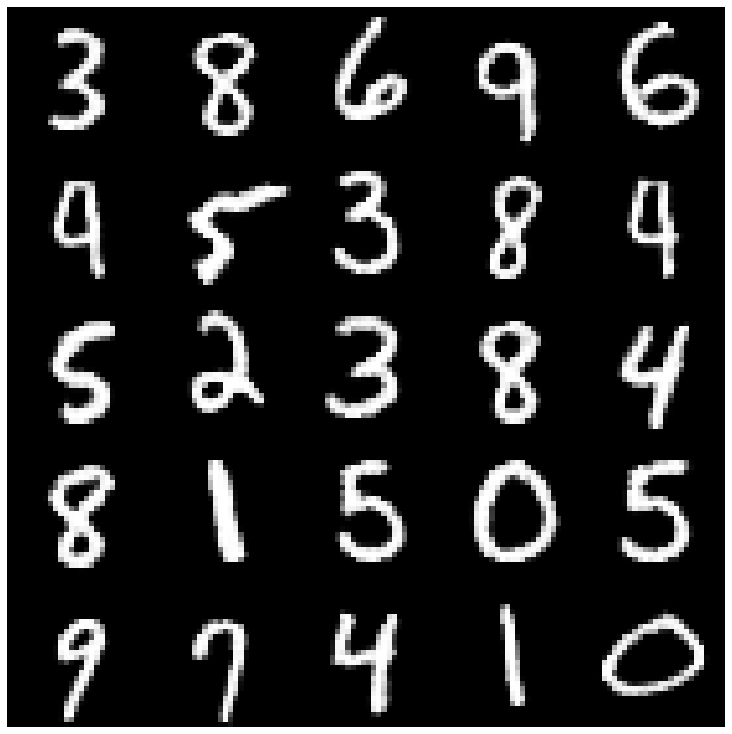 | 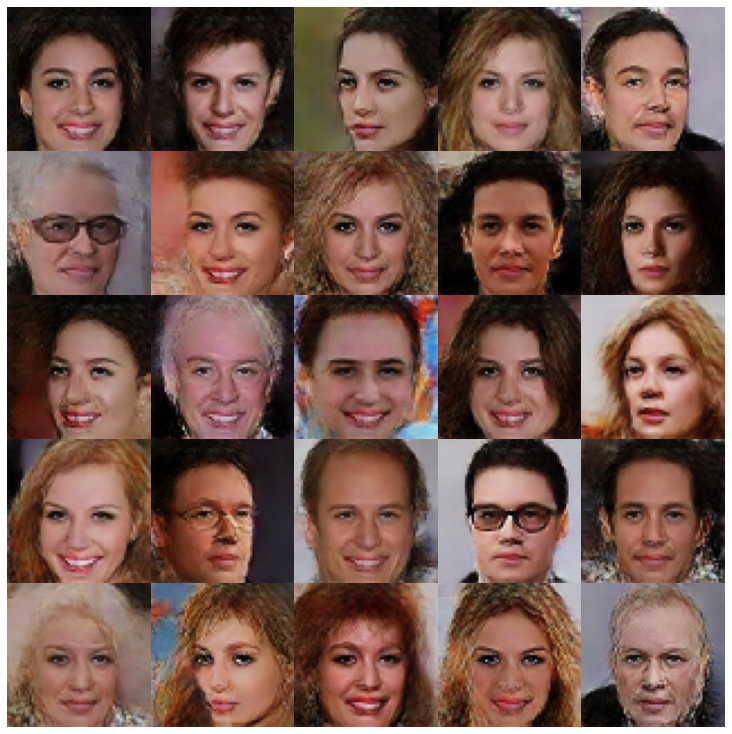 |
| VQVAE | 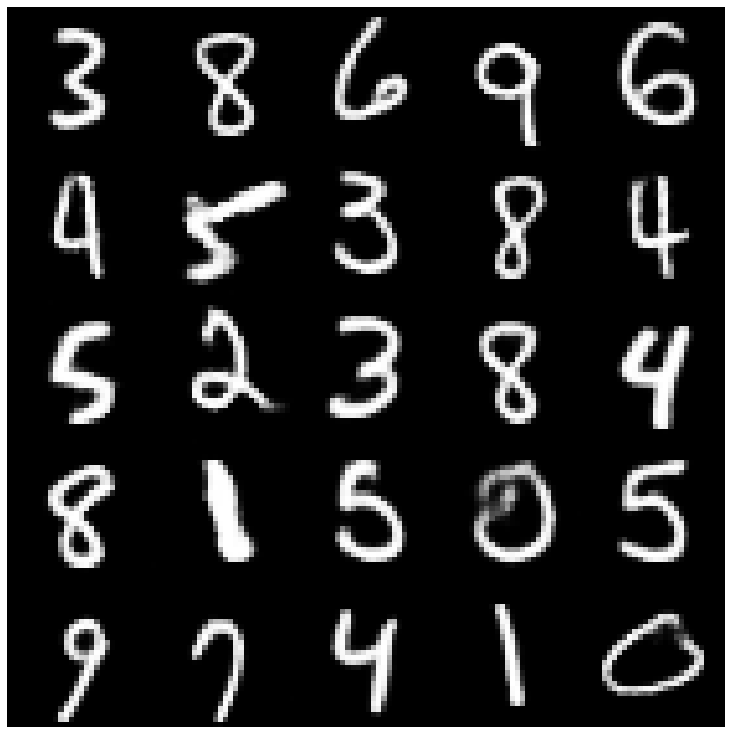 | 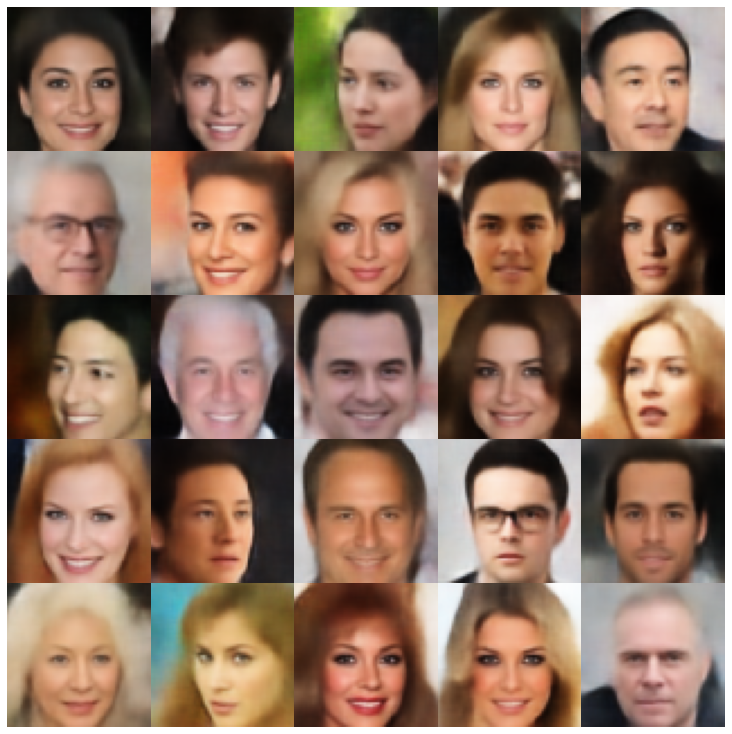 |
| hvae | 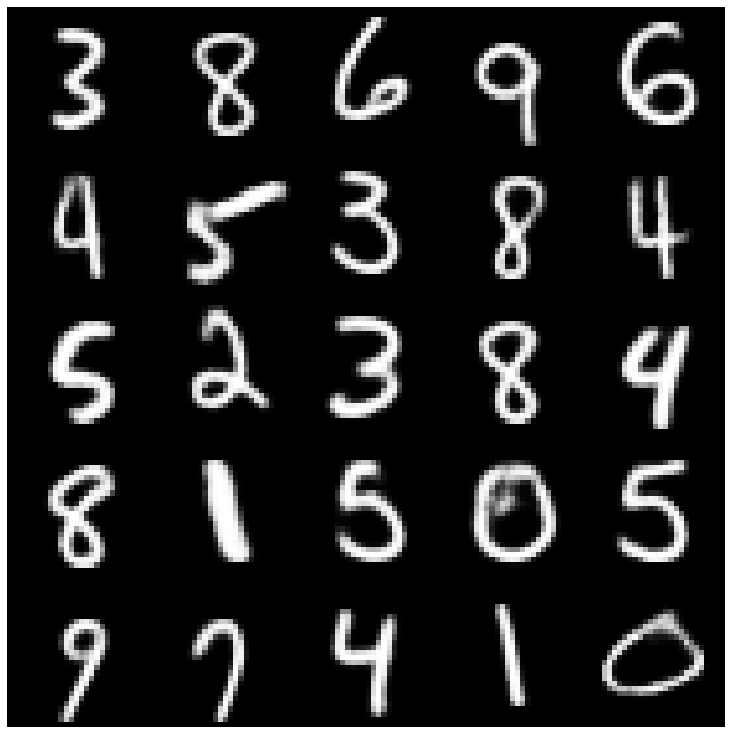 | 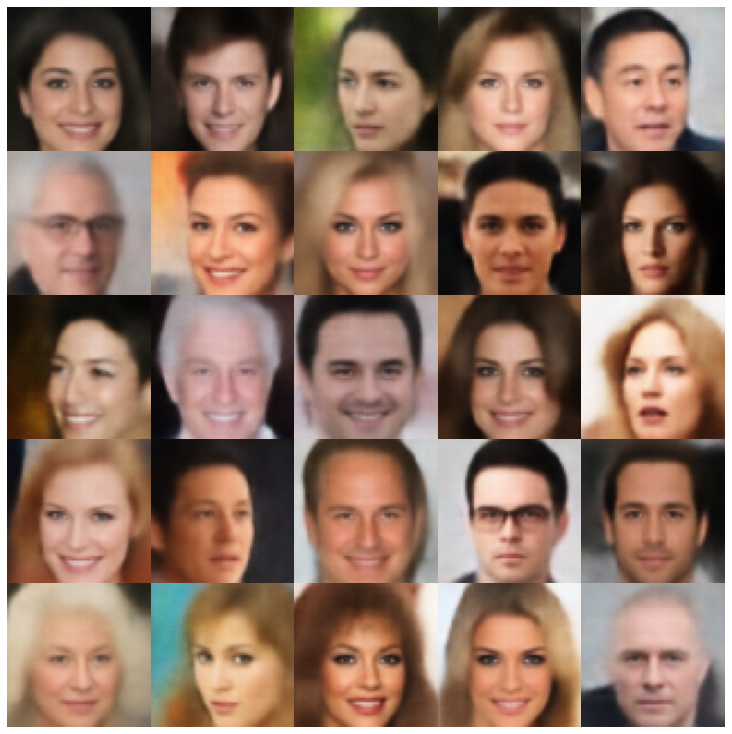 |
| rae_l2 | 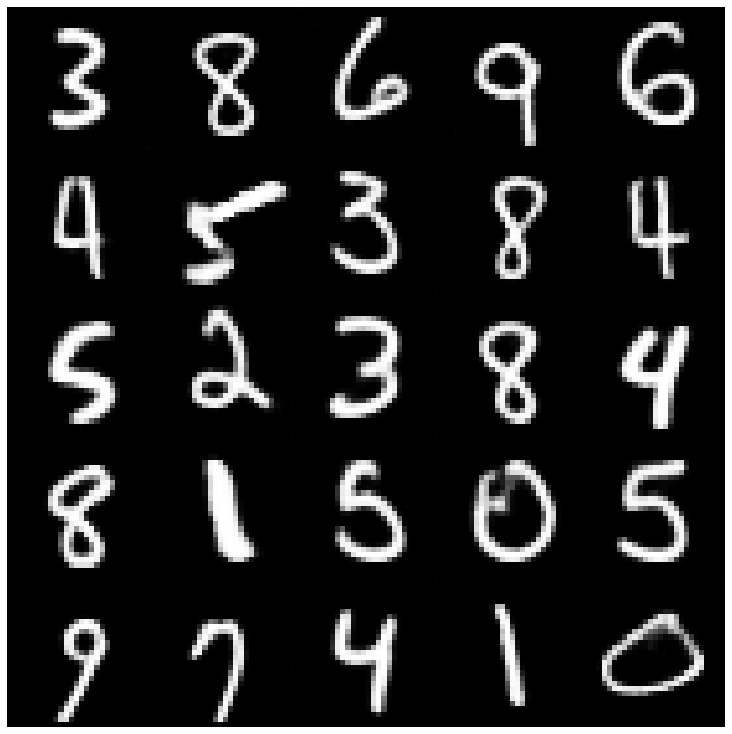 |  |
| rae_gp | 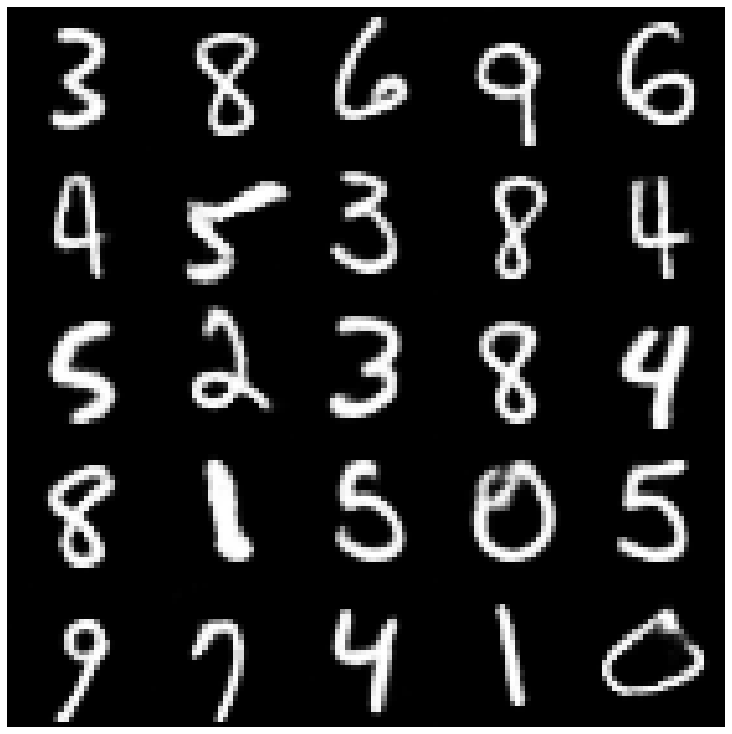 | 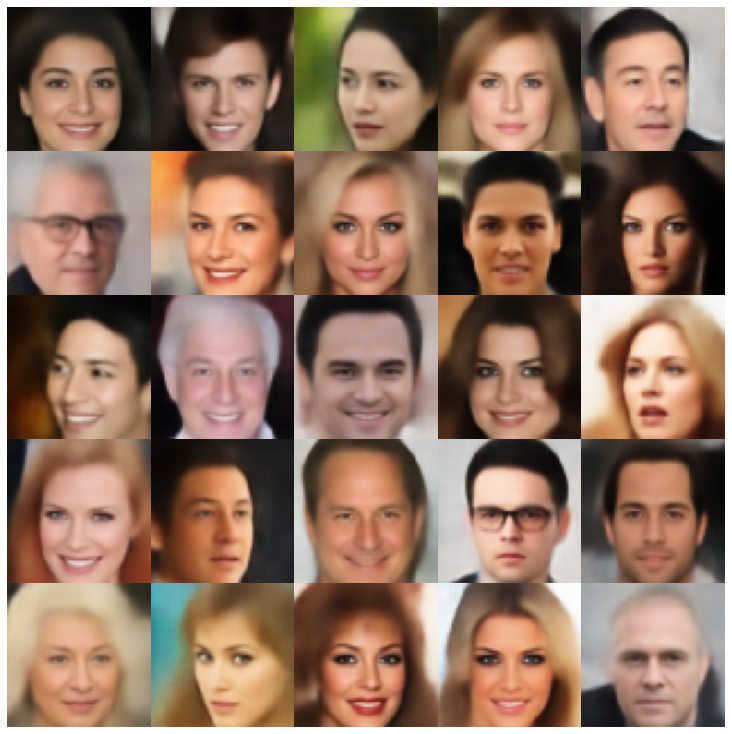 |
| Riemannian Hamiltonian Vae(Rhvae) | 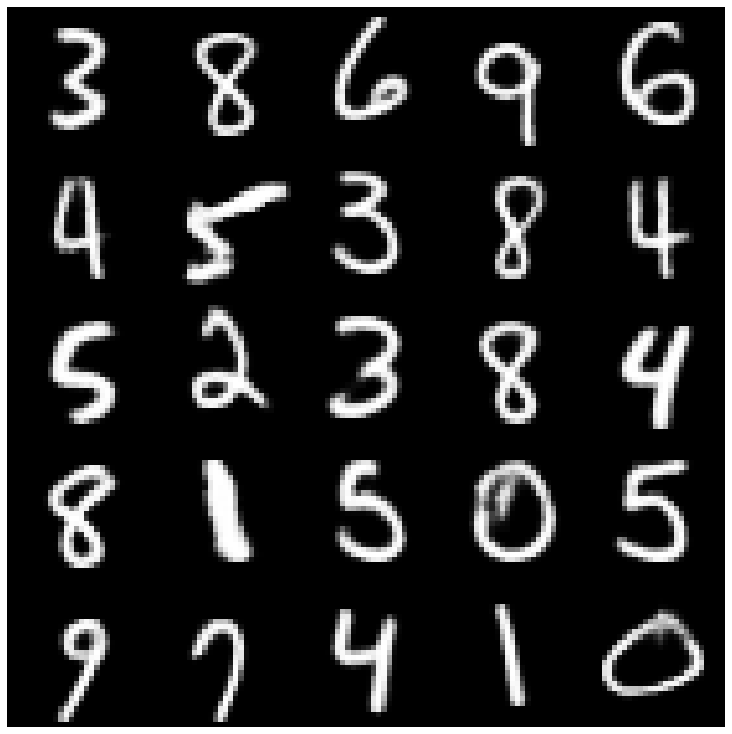 | 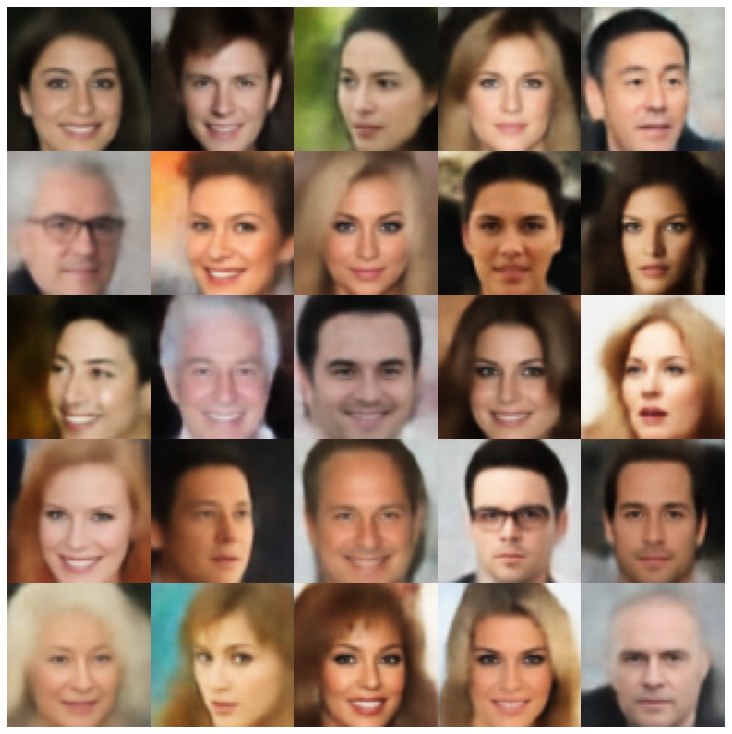 |
在這裡,我們使用庫和不同採樣器中實現的每個模型顯示生成的樣品。
| 型號 | mnist | Celeba |
|---|---|---|
| AE + GaussianMixturesAmpler | 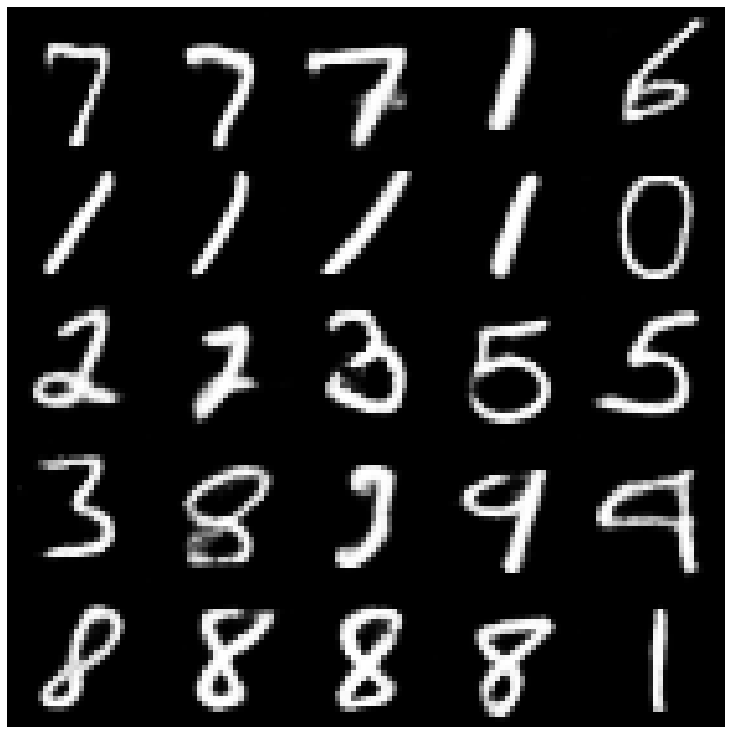 | 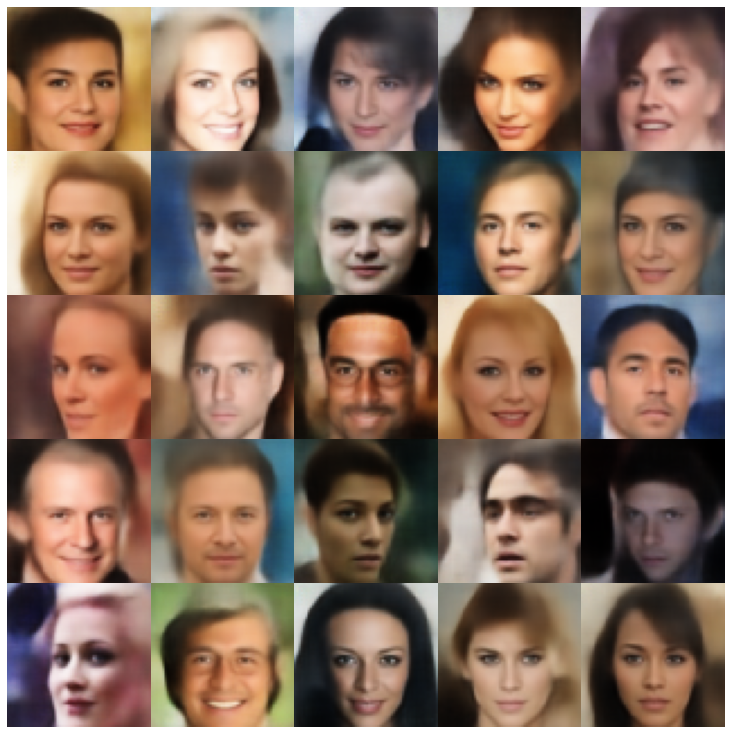 |
| vae + normalalmallpler | 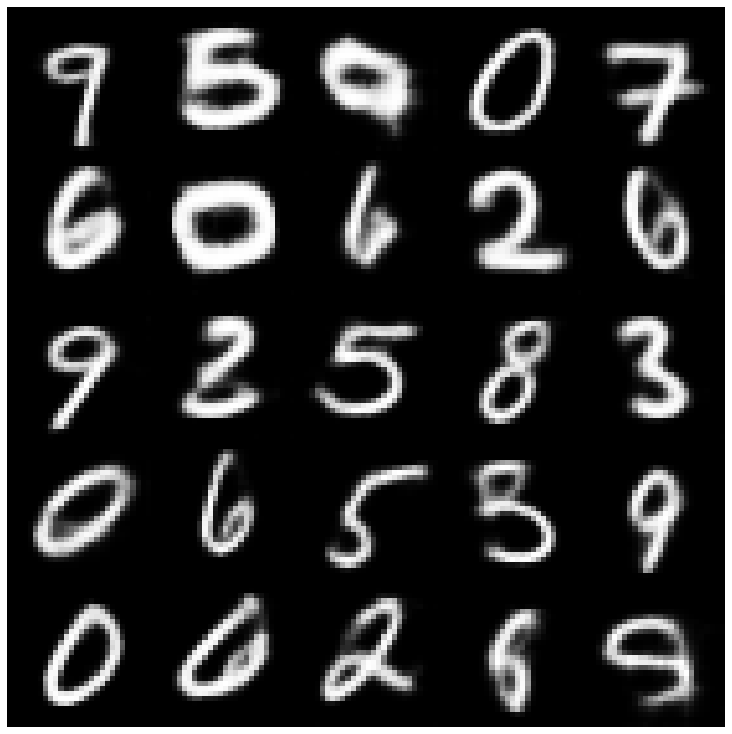 | 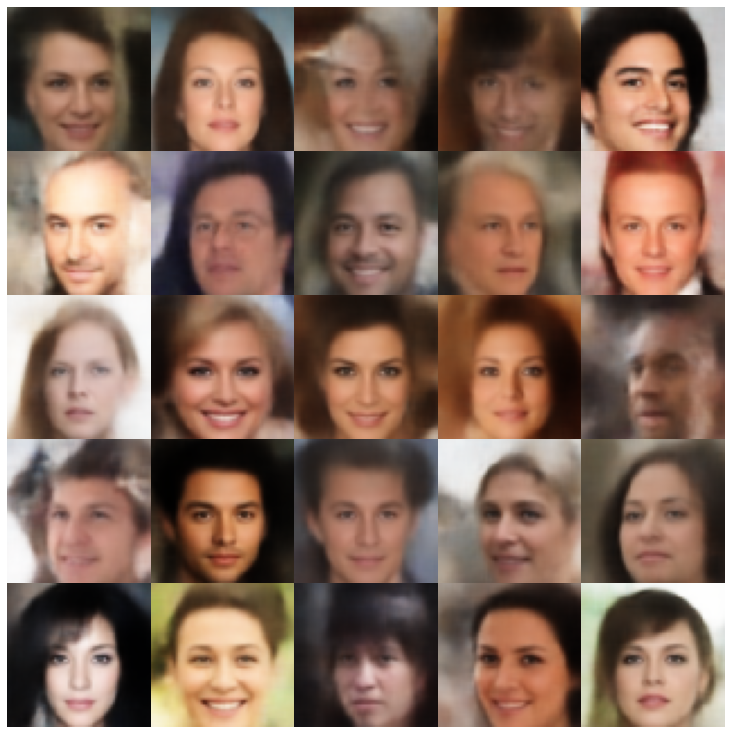 |
| Vae + GaussianMixturesAmpler | 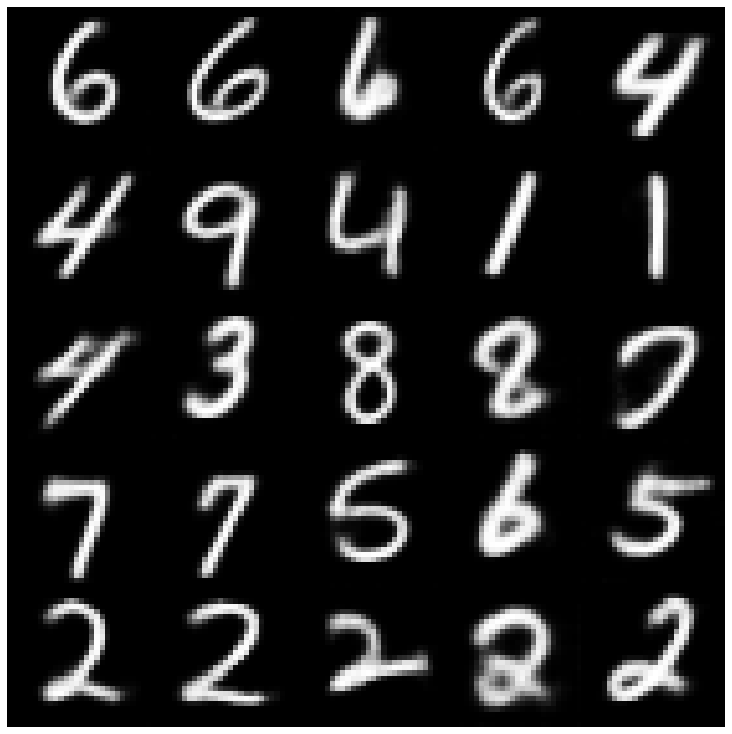 | 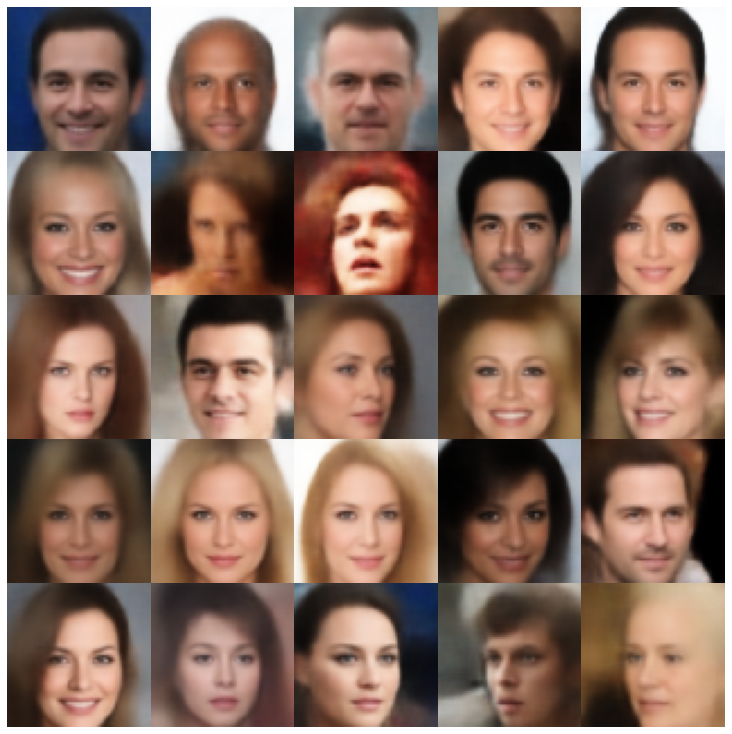 |
| vae + twostagevaesampler | 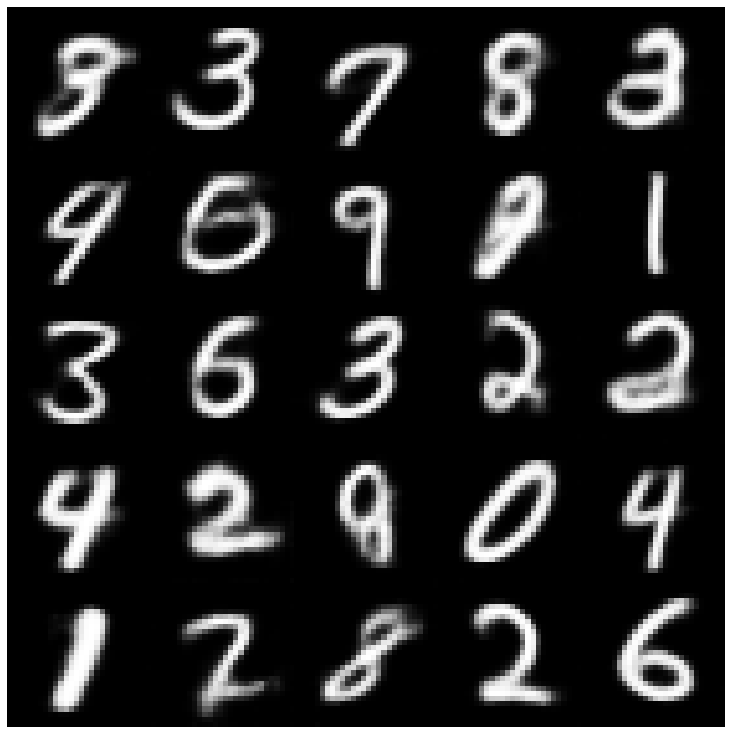 | 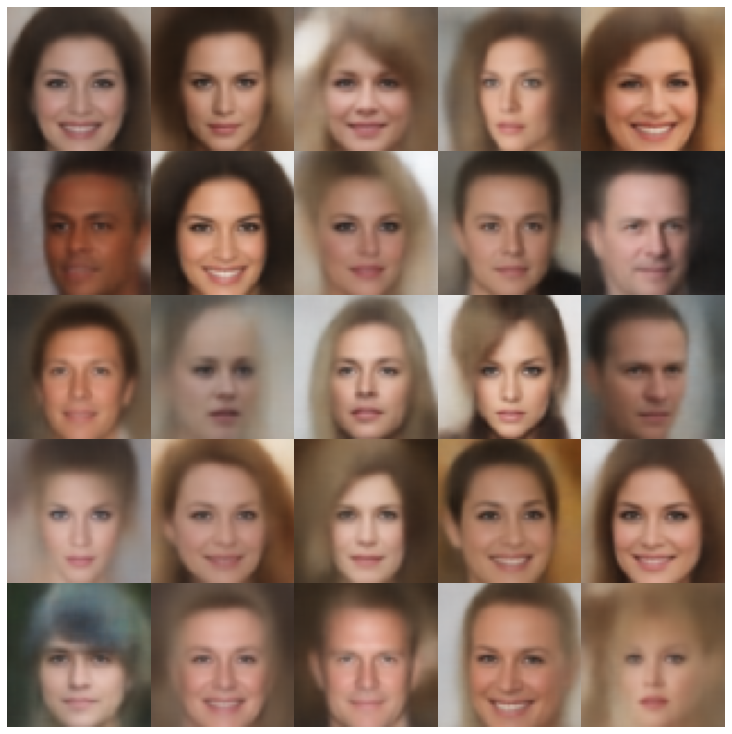 |
| vae + mafsampler | 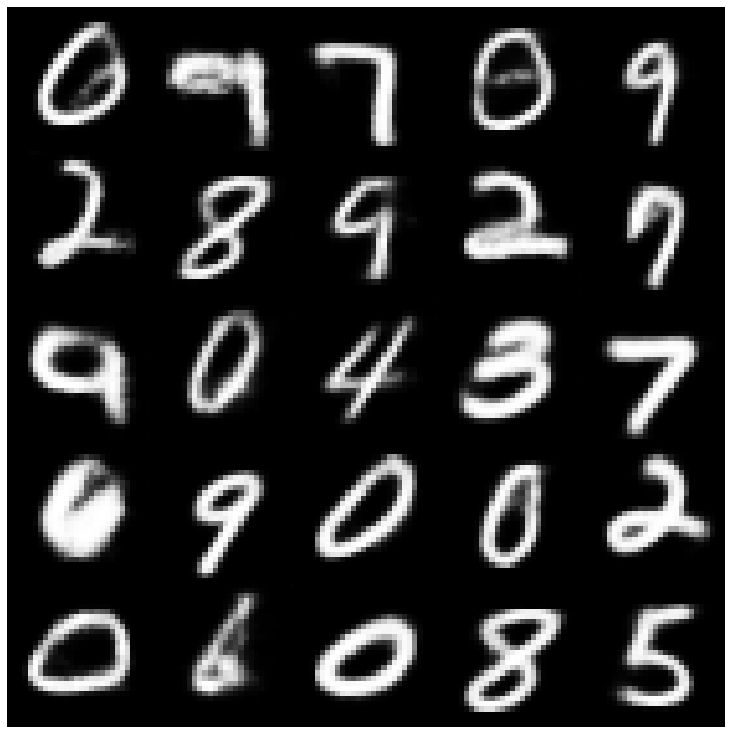 |  |
| beta-vae + normalalSampler | 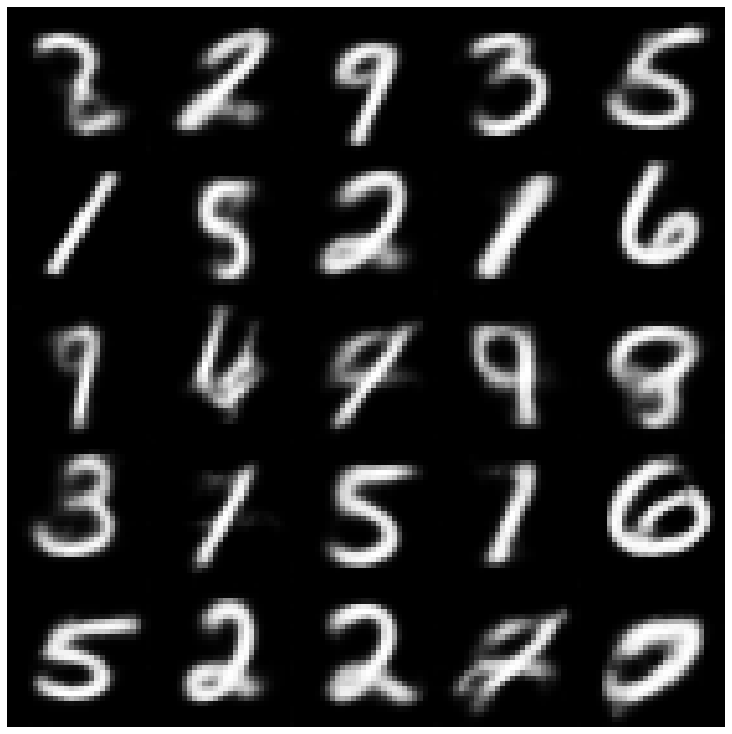 | 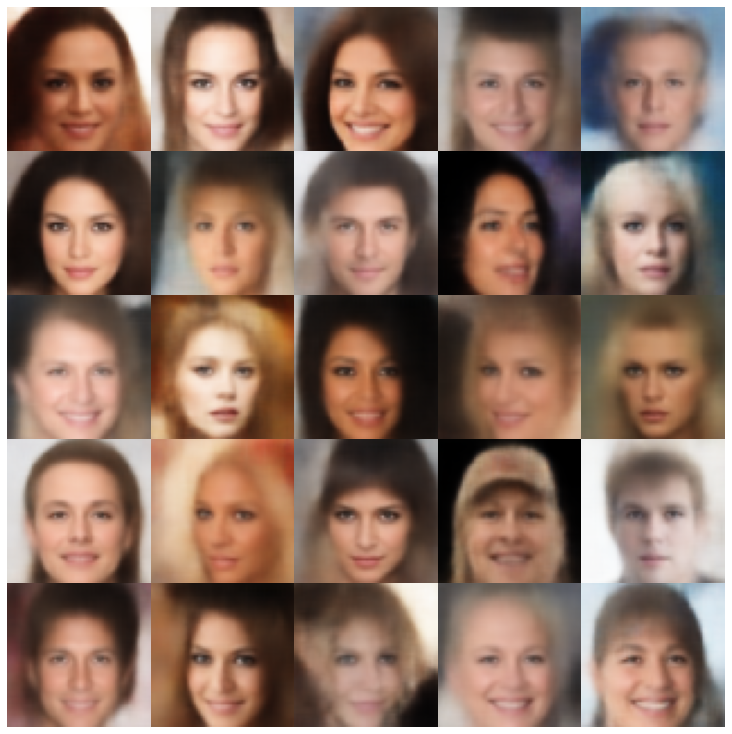 |
| vae lin nf + normalalsampler | 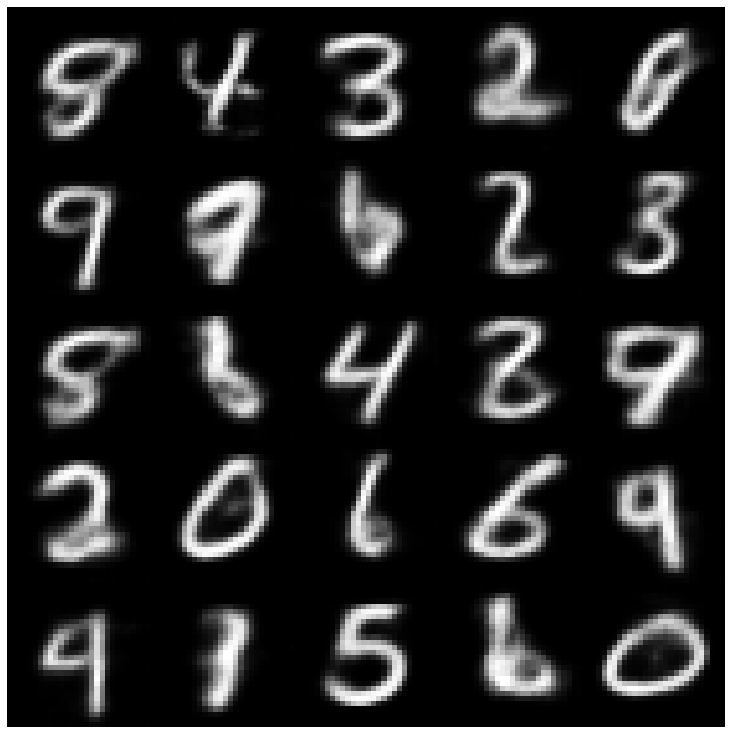 | 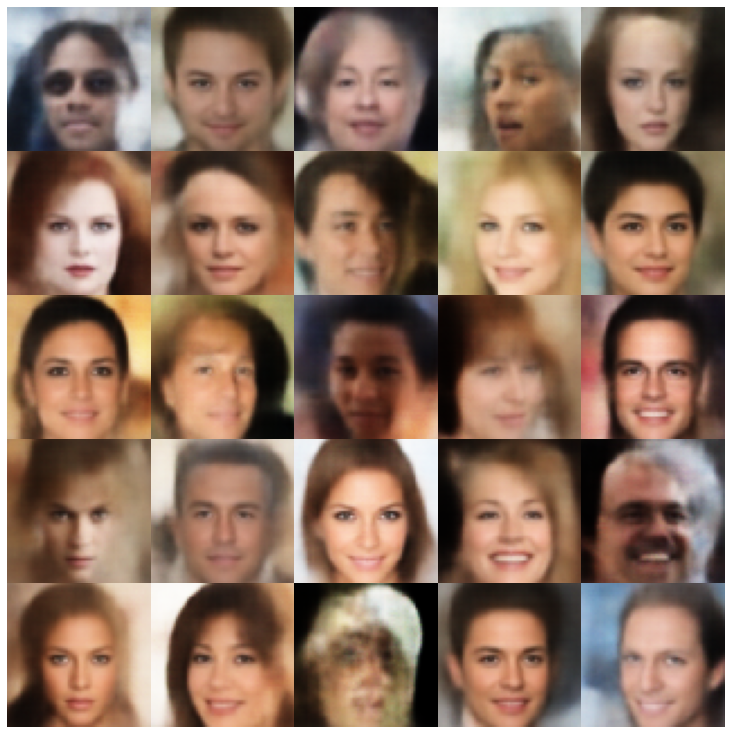 |
| vae iaf + normalalsampler | 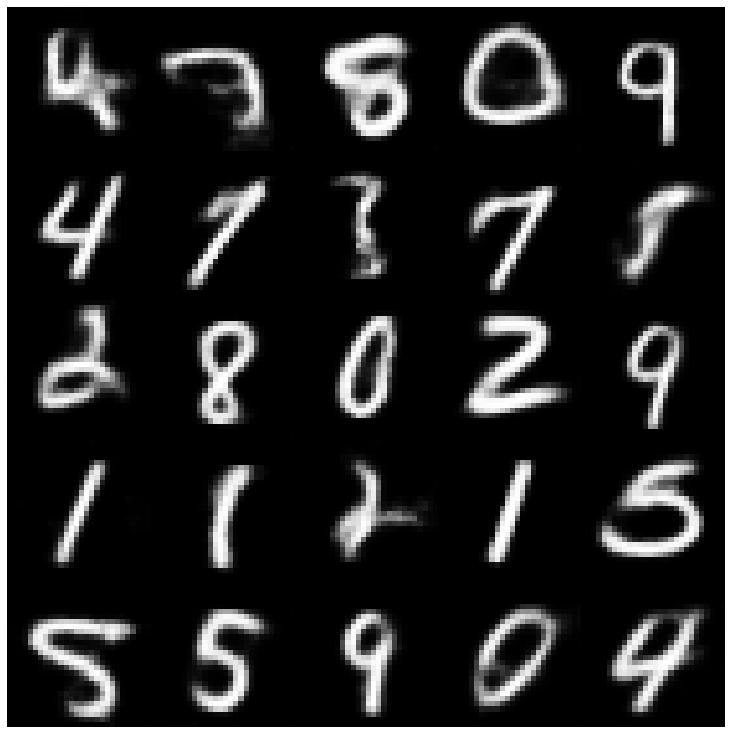 | 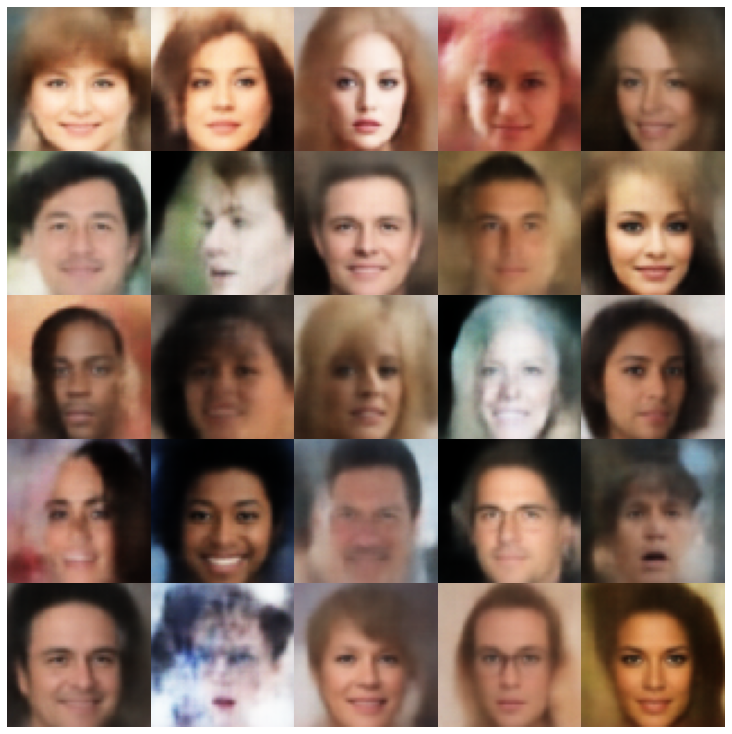 |
| 解開β-VAE + NormalSampler | 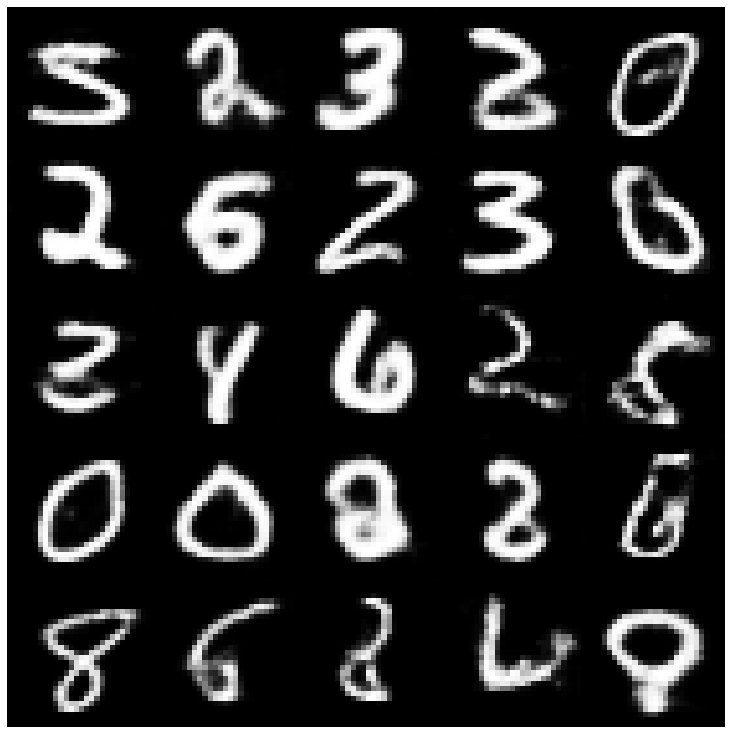 | 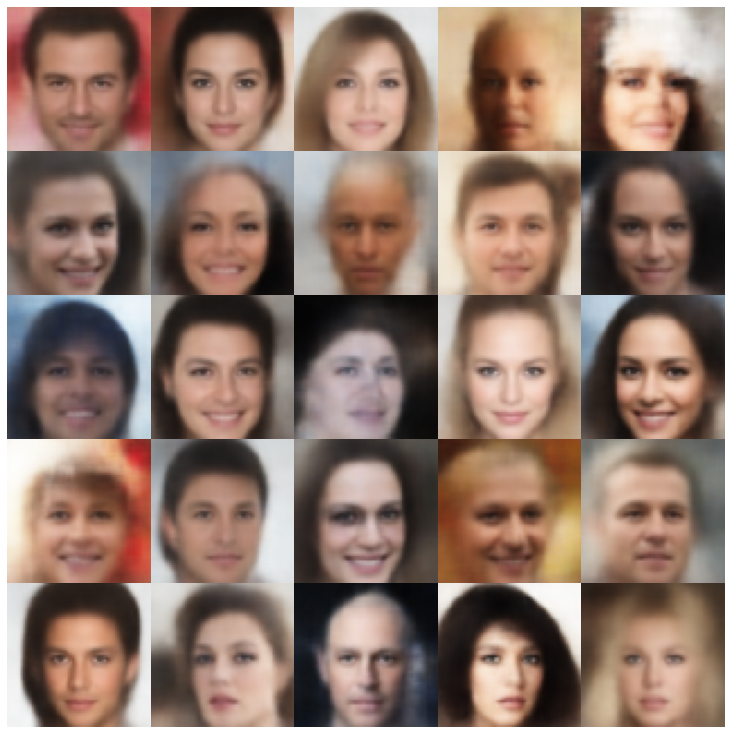 |
| factorvae + normalalsampler | 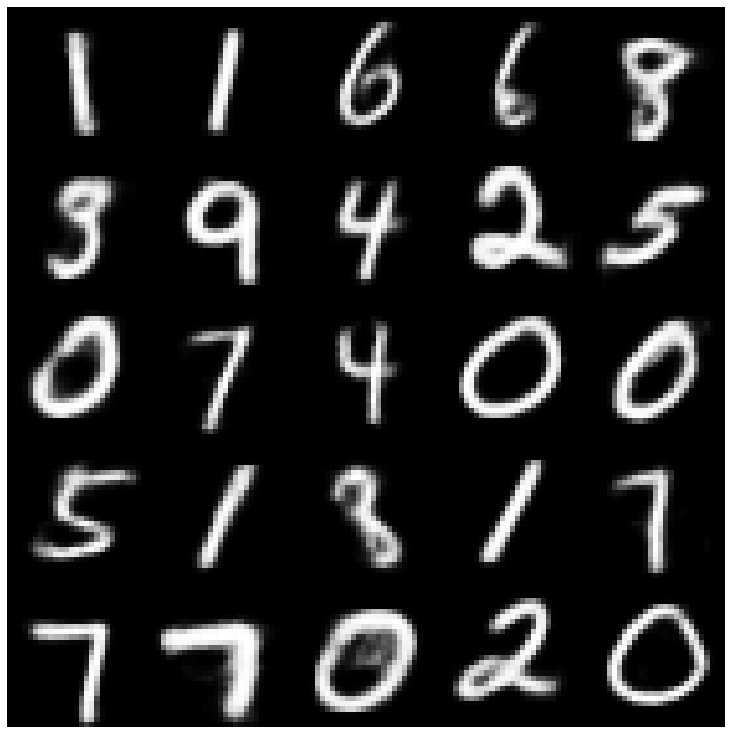 | 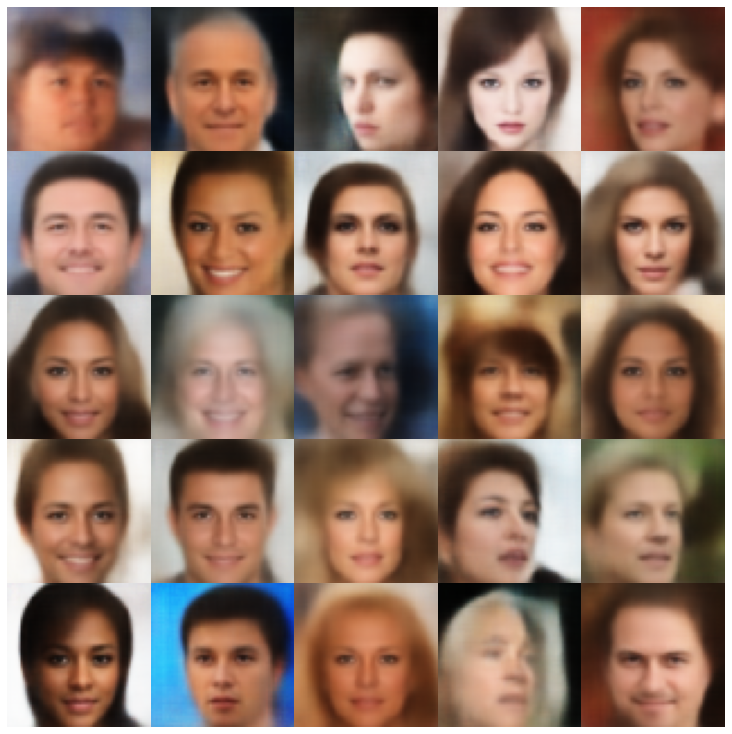 |
| betatcvae + normalalSampler | 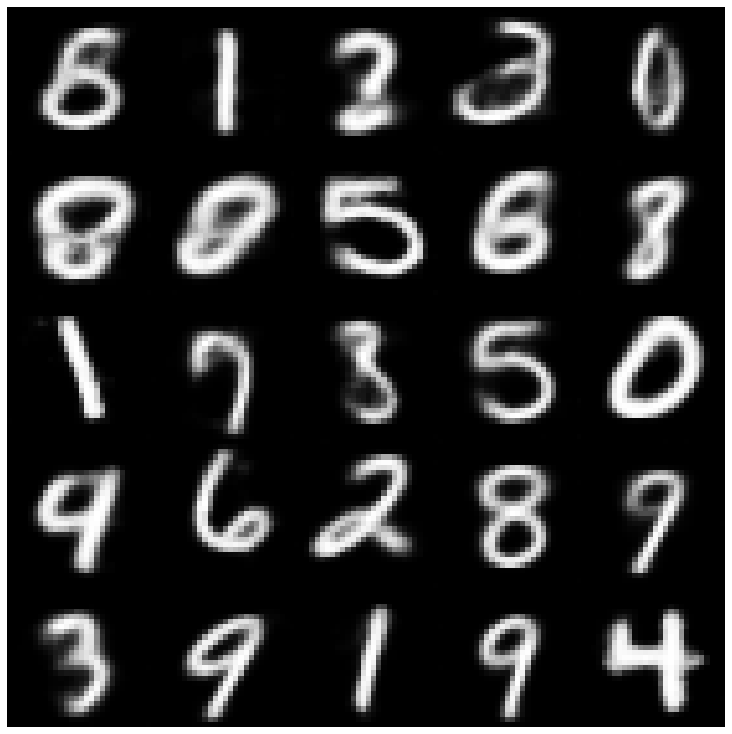 | 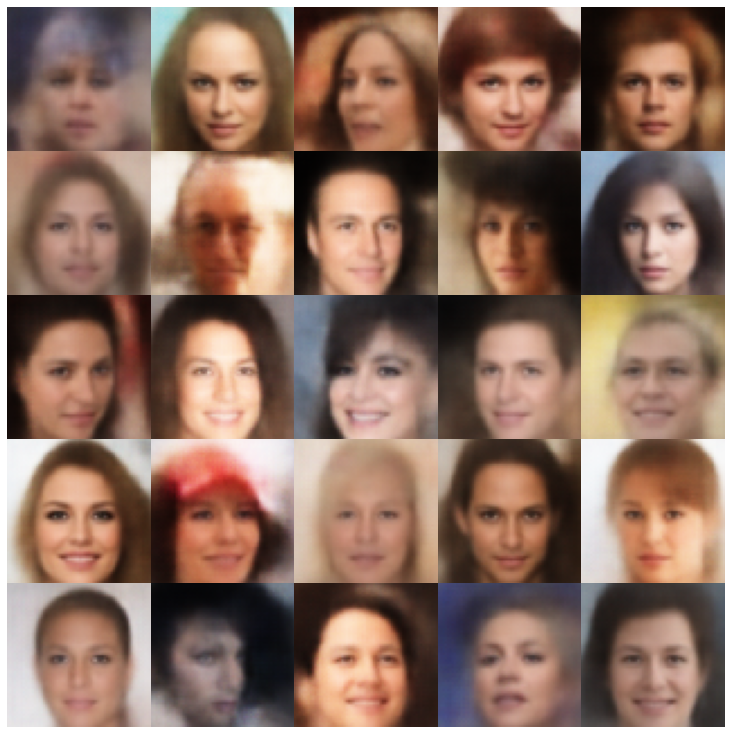 |
| IWAE +普通採樣器 | 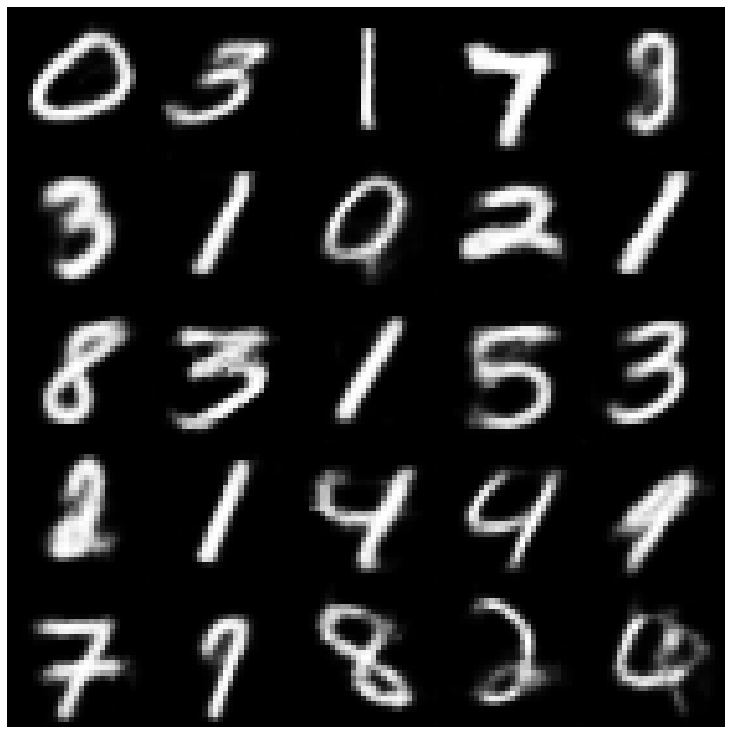 | 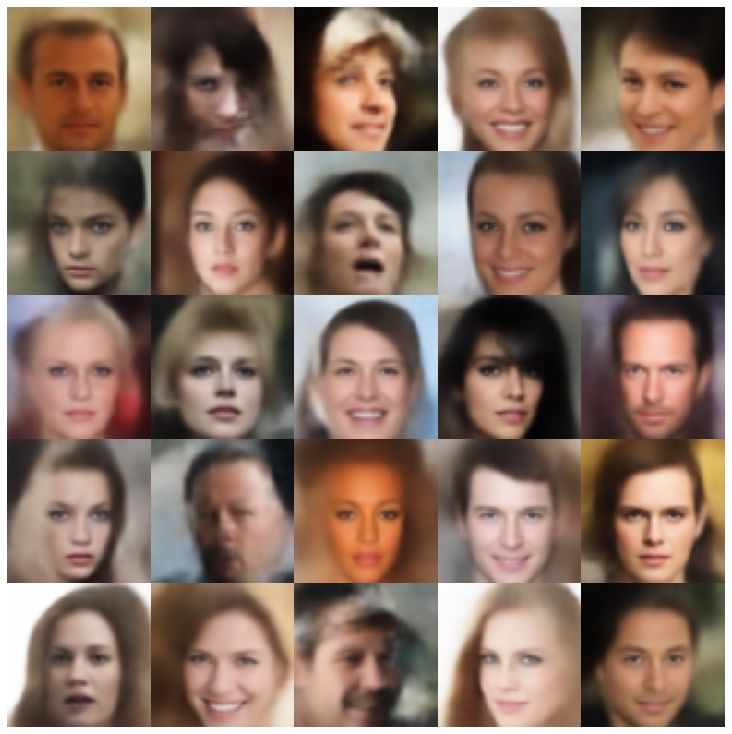 |
| MSSSSIM_VAE + NORMALSAMPLER | 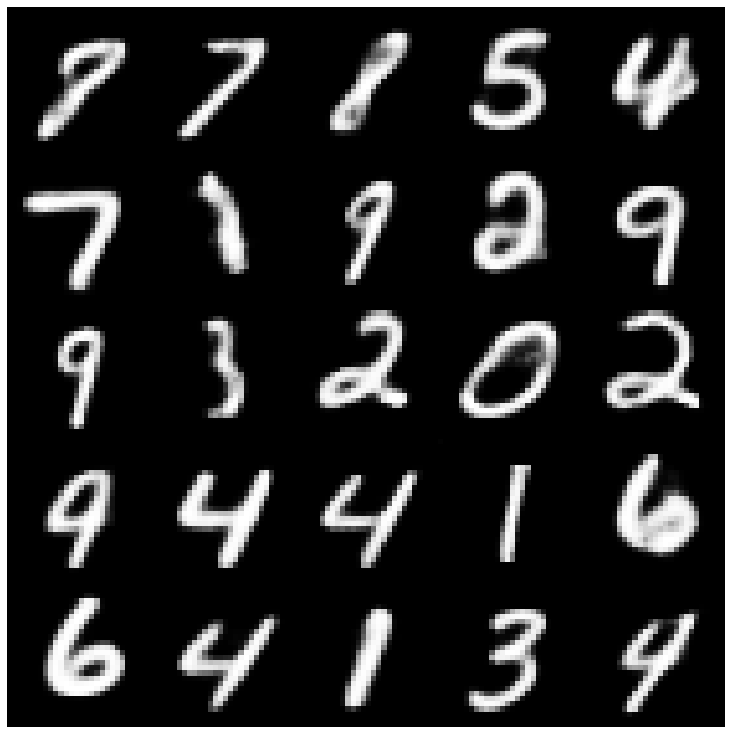 | 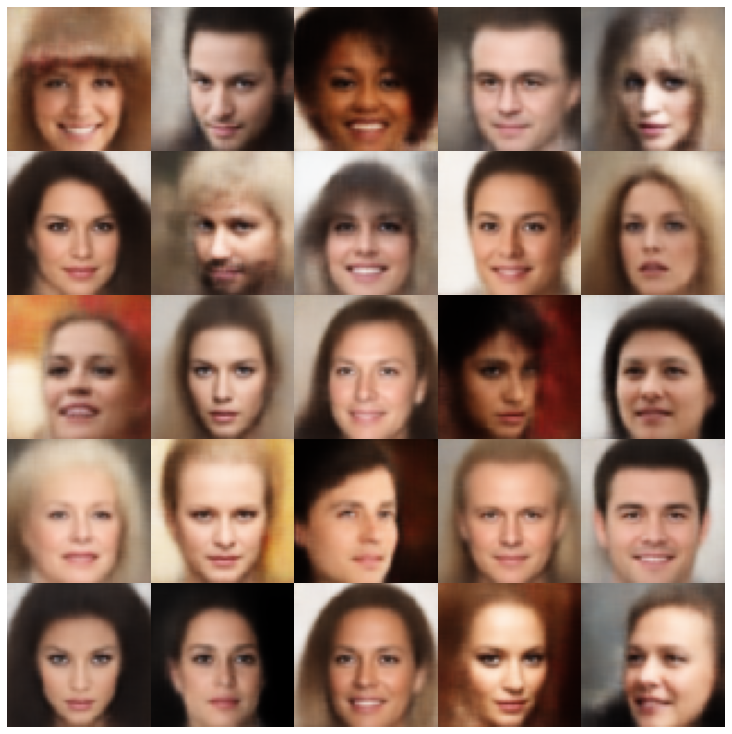 |
| WAE + NORMALSAMPLER | 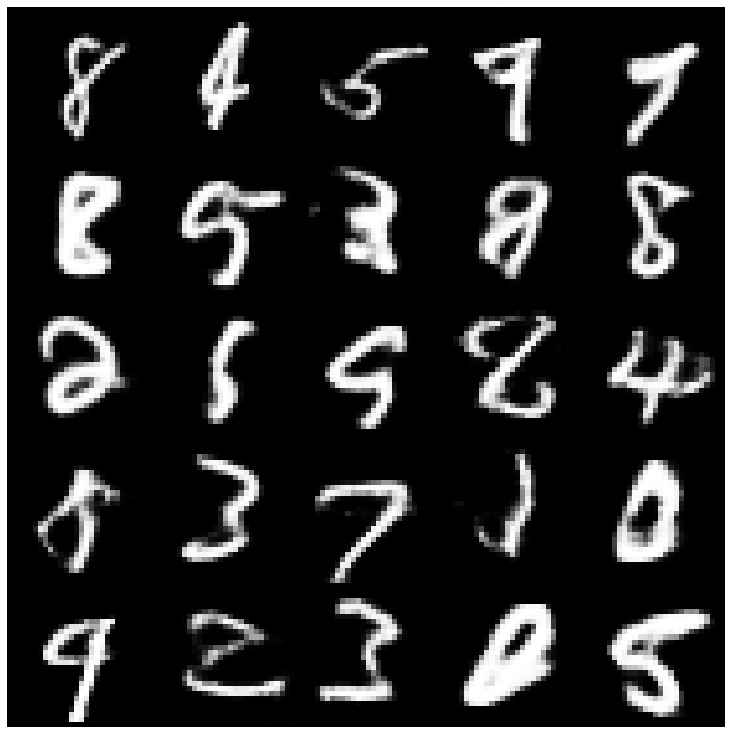 | 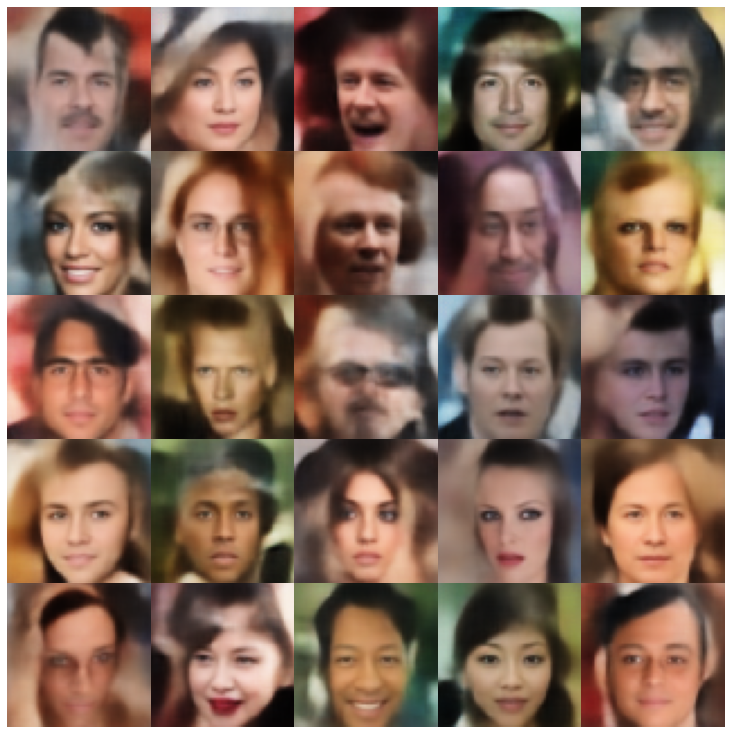 |
| info vae + normalalSampler | 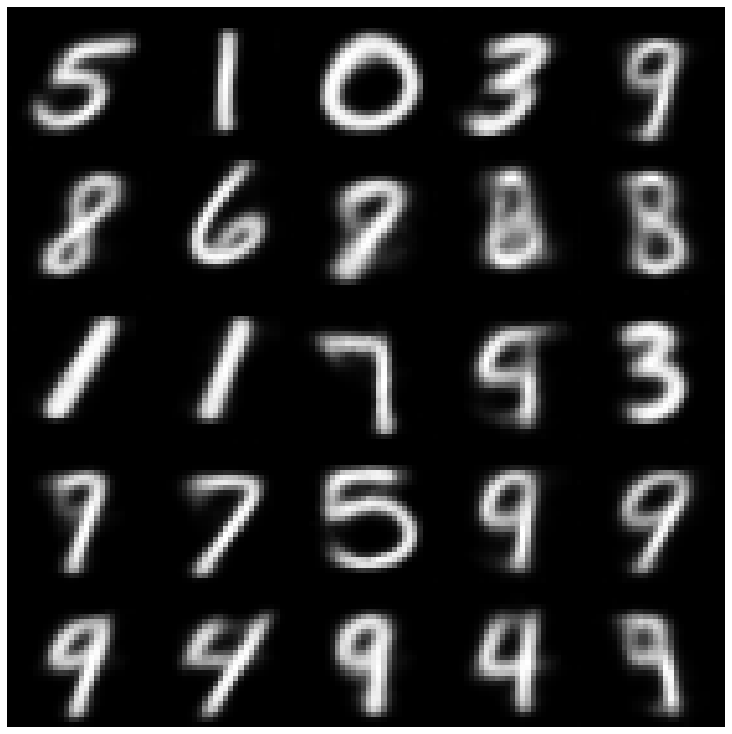 | 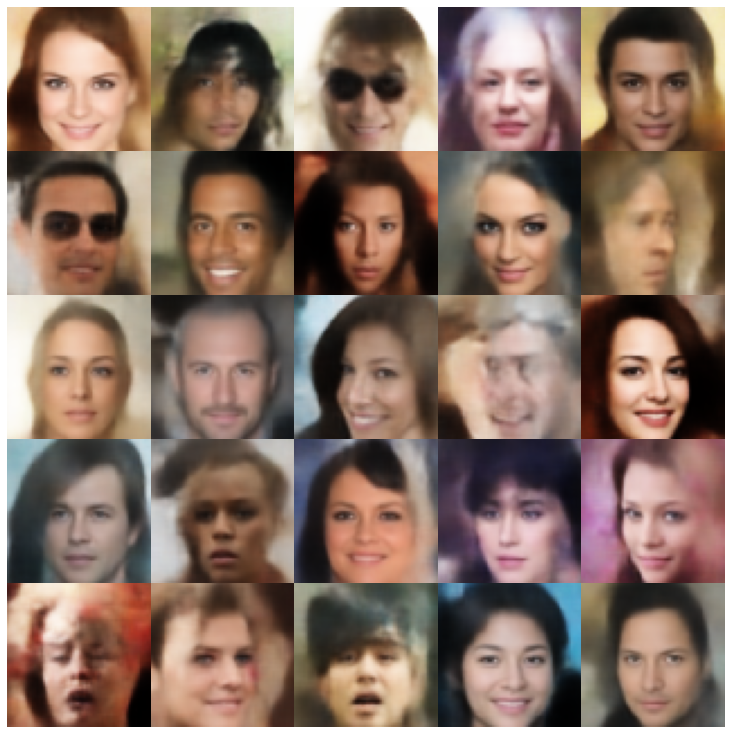 |
| SVAE + HypershiersuniberSampler | 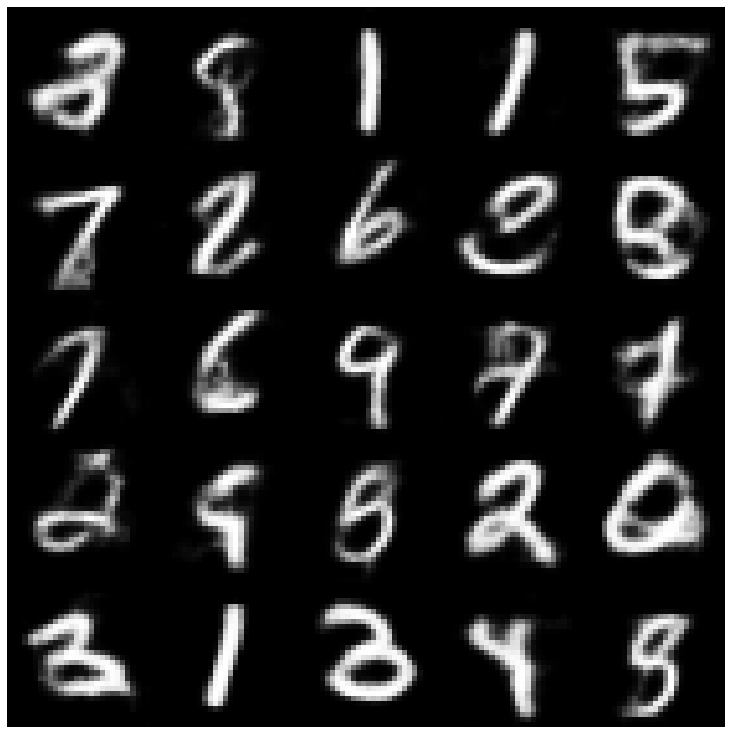 | 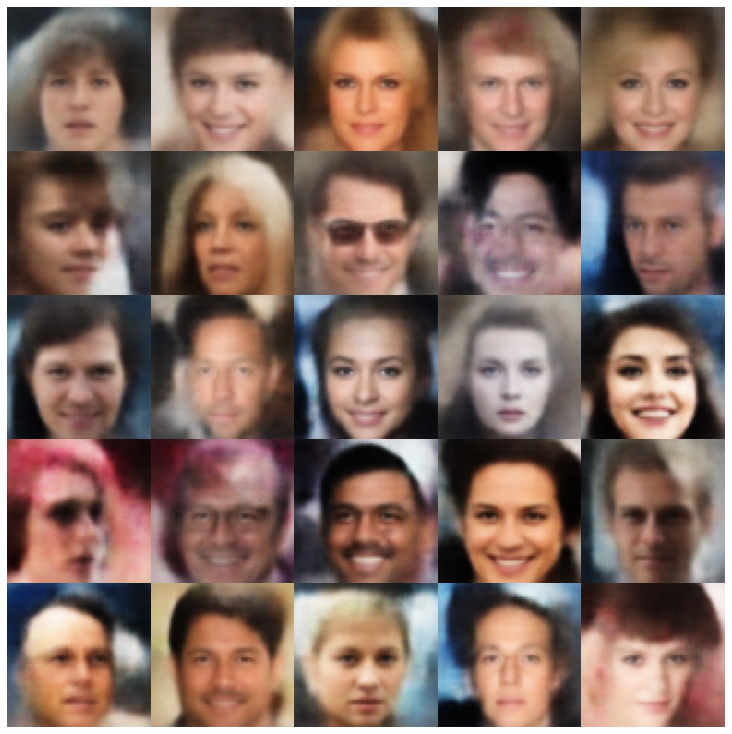 |
| 鞋面 +鞋面採樣器 | 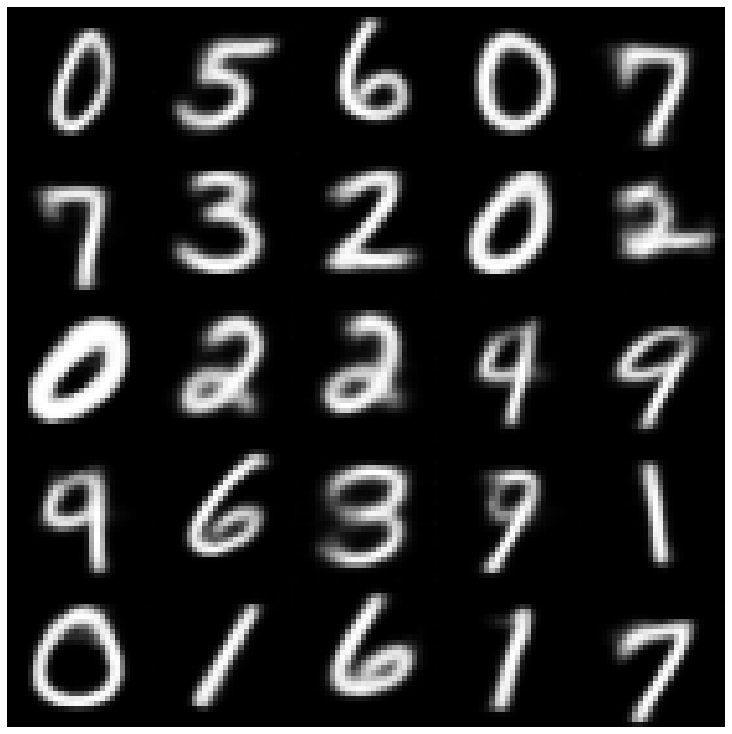 | 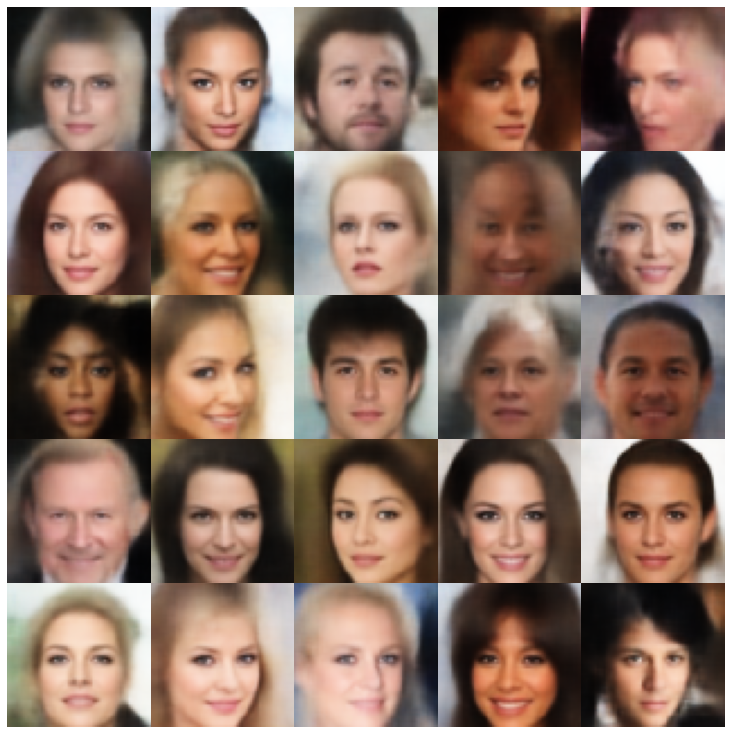 |
| versarial_ae + normalalSampler | 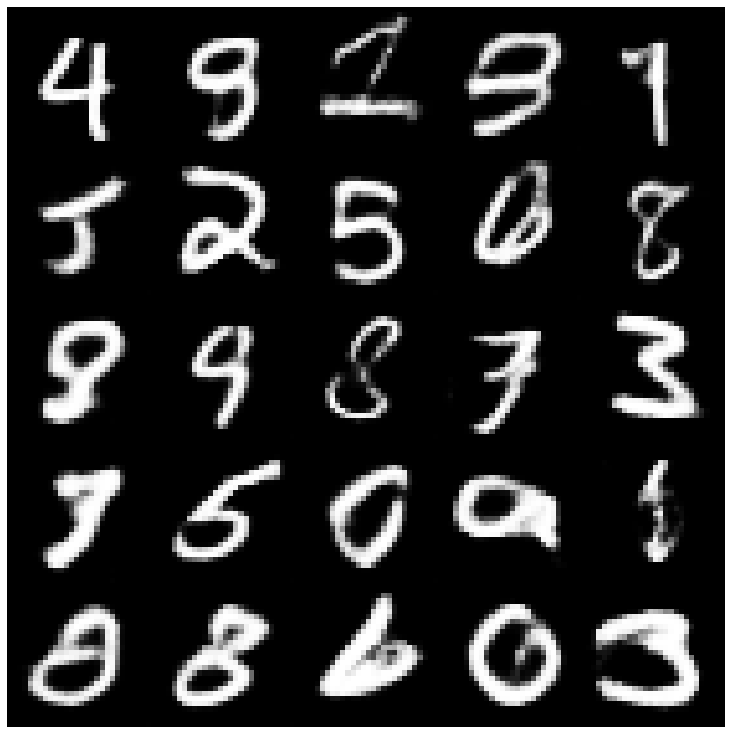 | 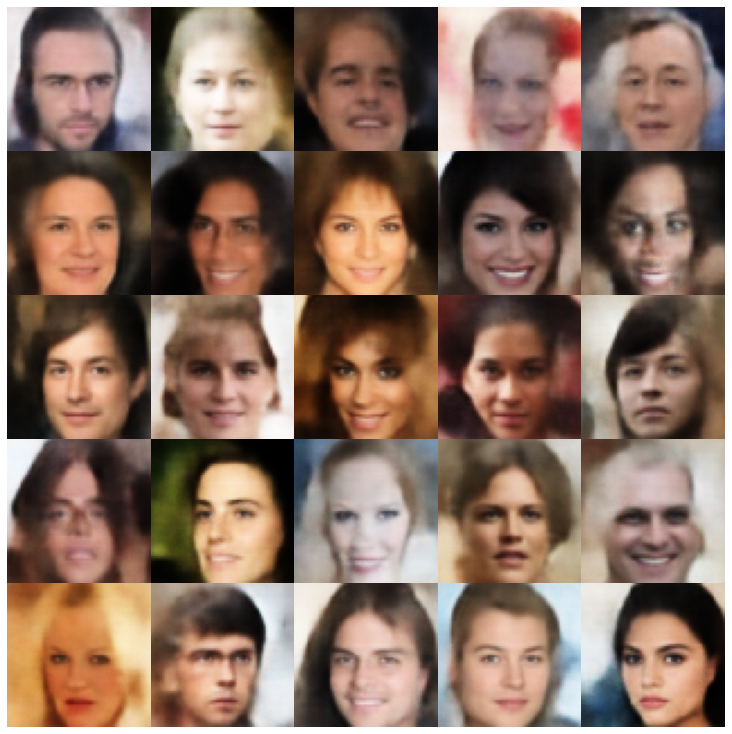 |
| Vaegan + NormalSampler | 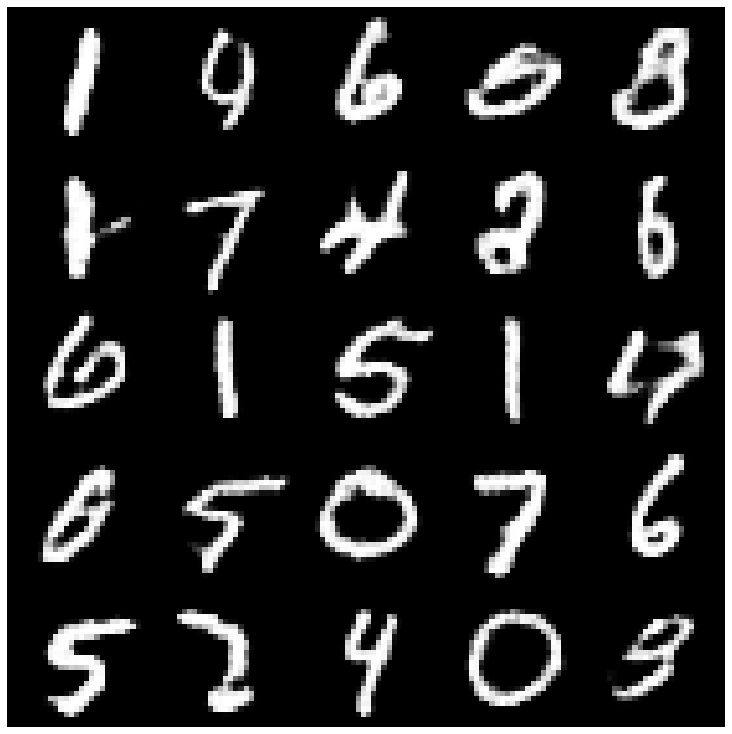 | 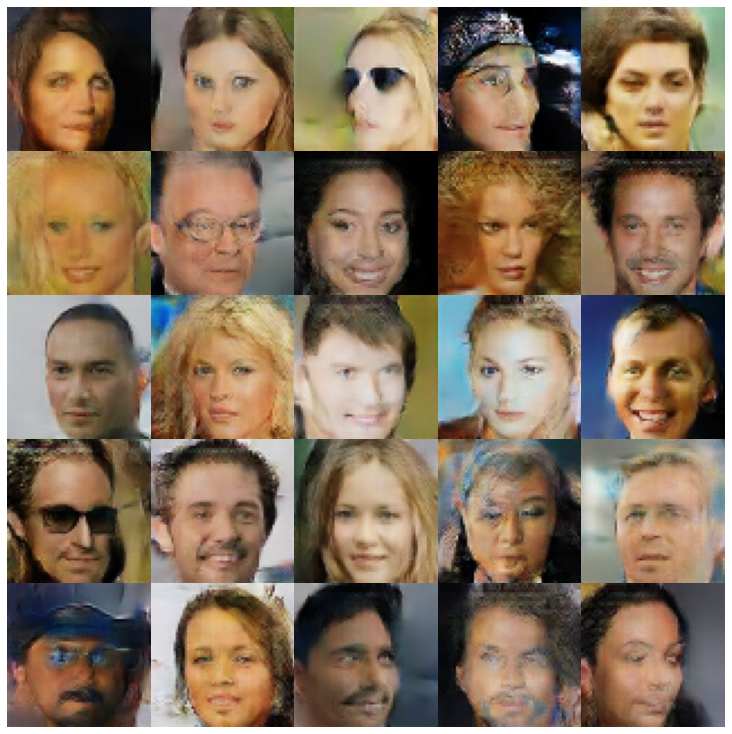 |
| VQVAE + MAFSAMPLER | 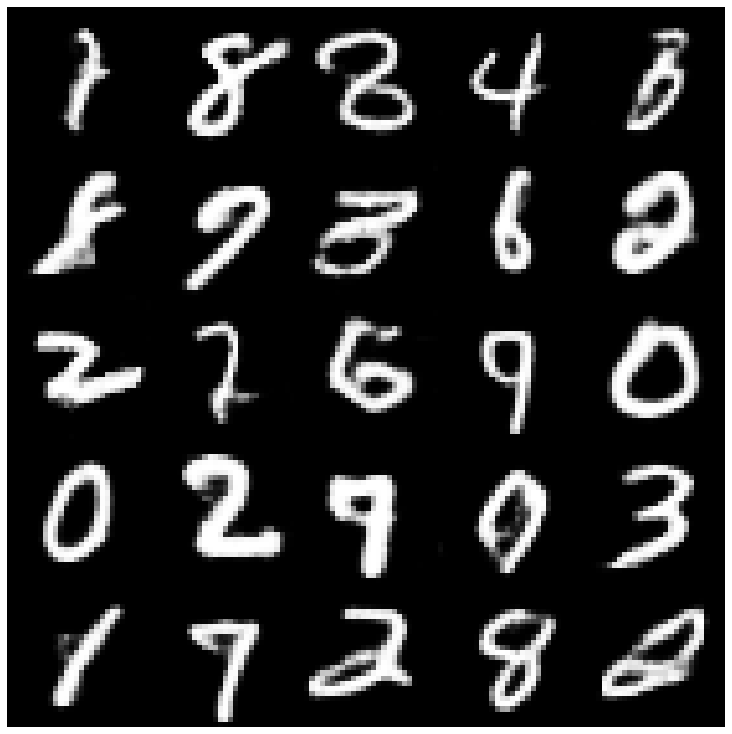 | 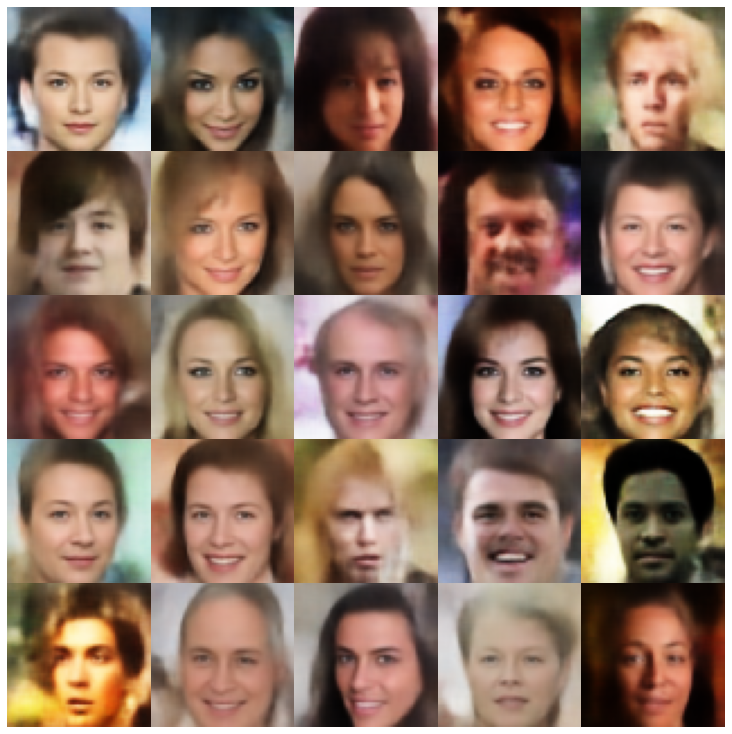 |
| hvae + normalalsampler | 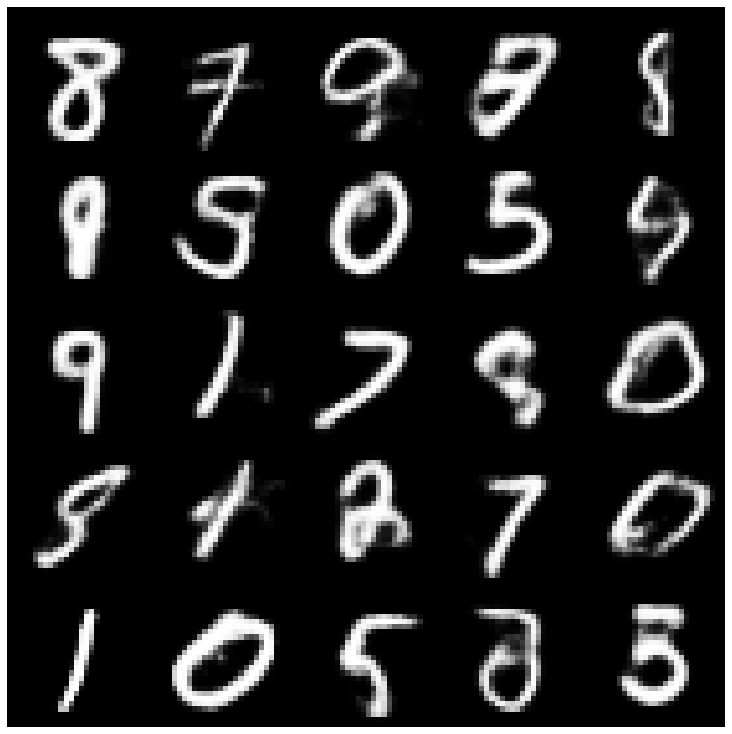 | 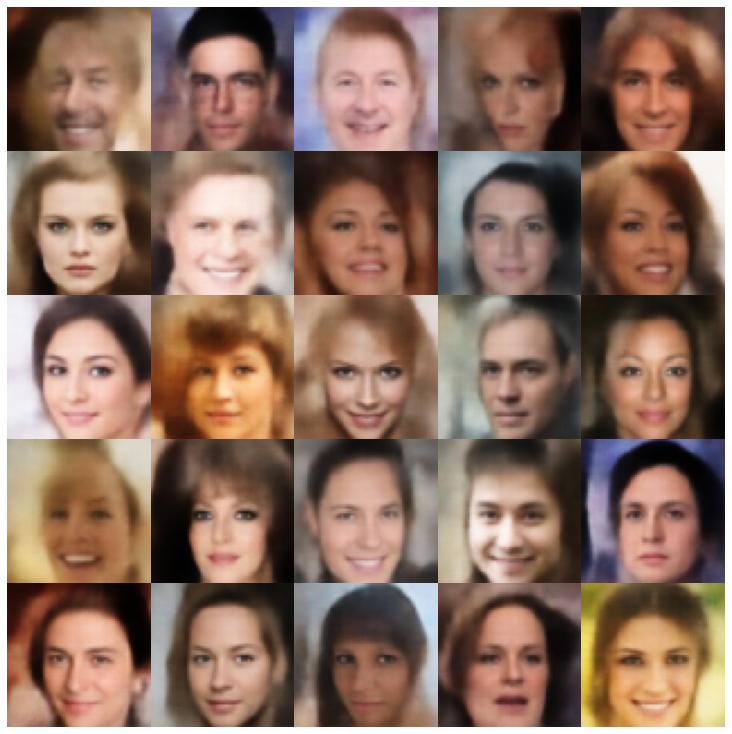 |
| rae_l2 + gaussianmixturesampler | 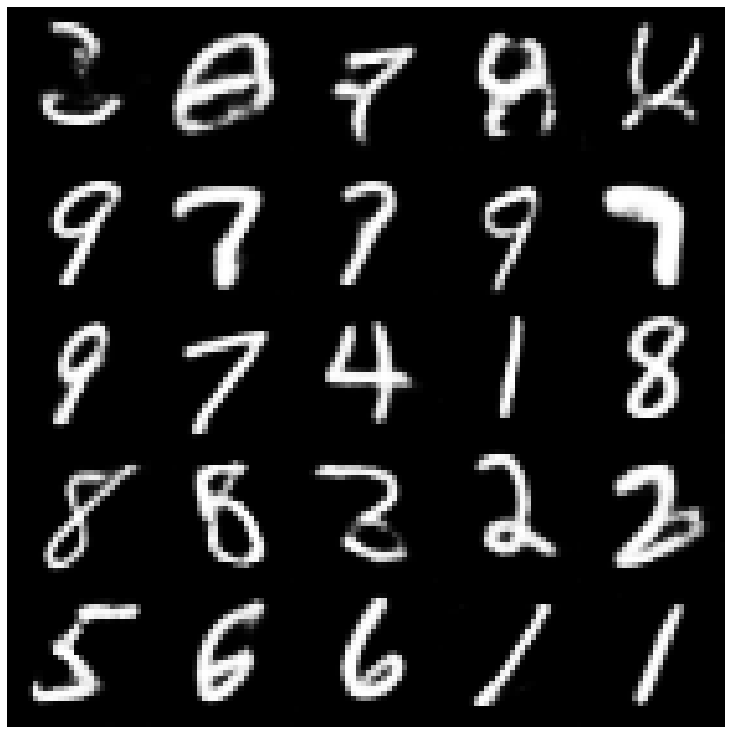 | 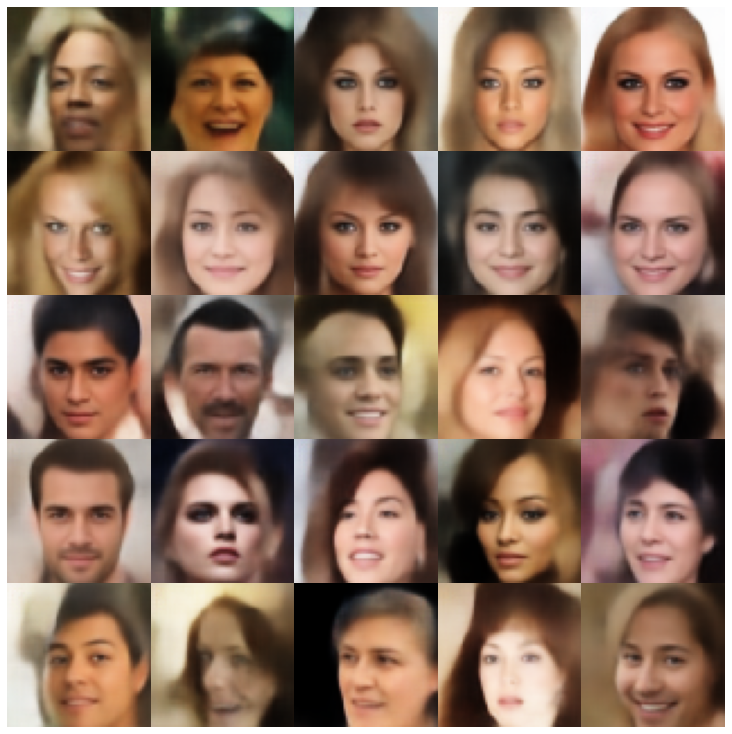 |
| rae_gp + gaussianmixturesampler | 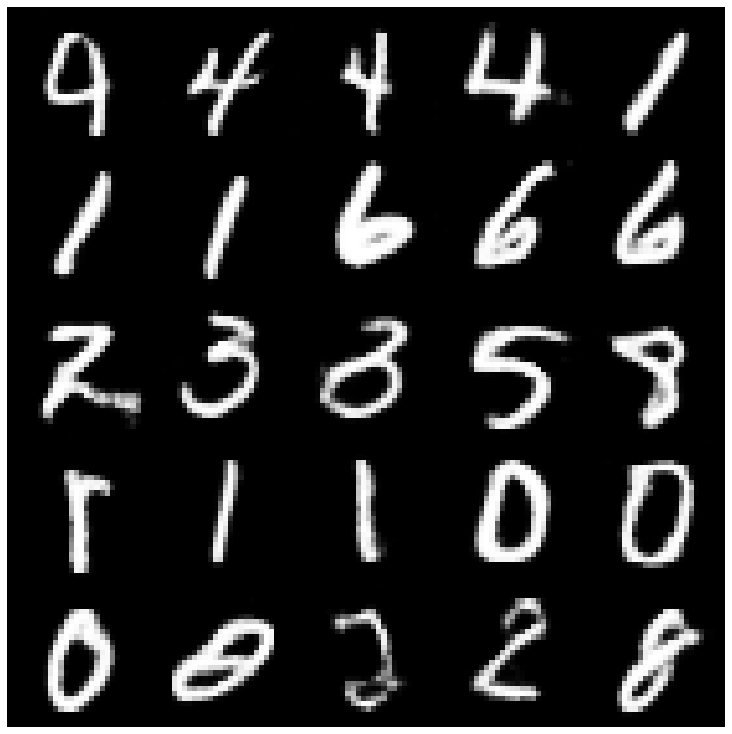 | 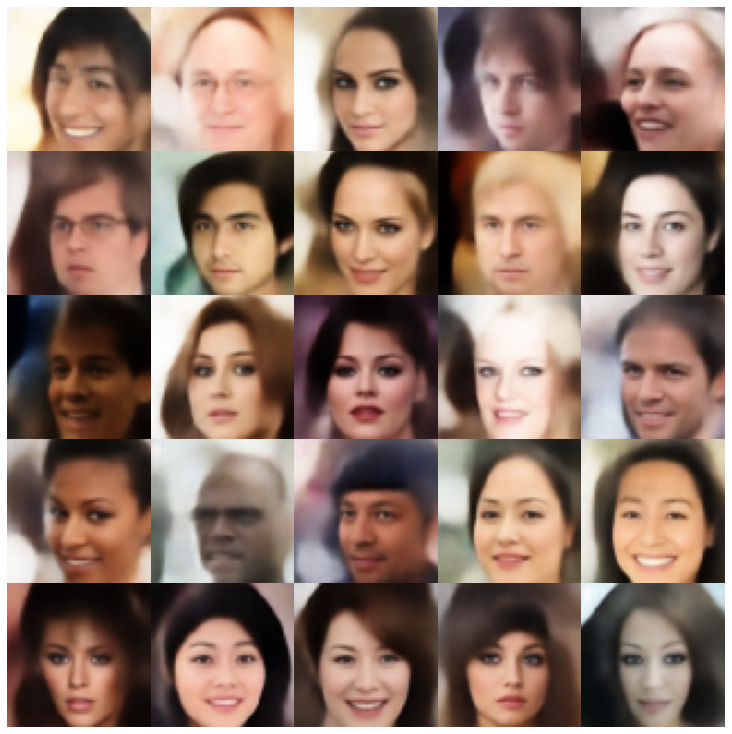 |
| Riemannian Hamiltonian Vae(Rhvae) + Rhvae採樣器 | 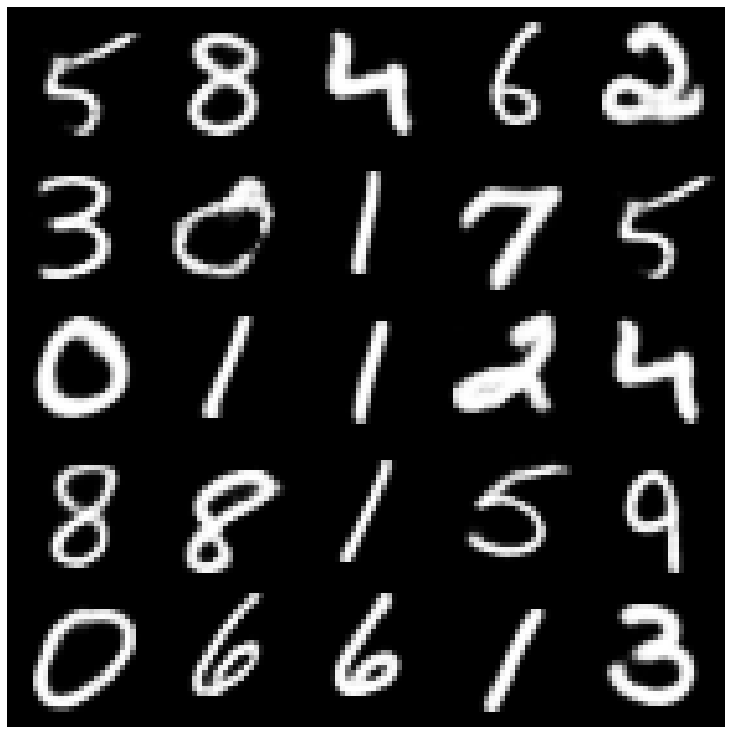 | 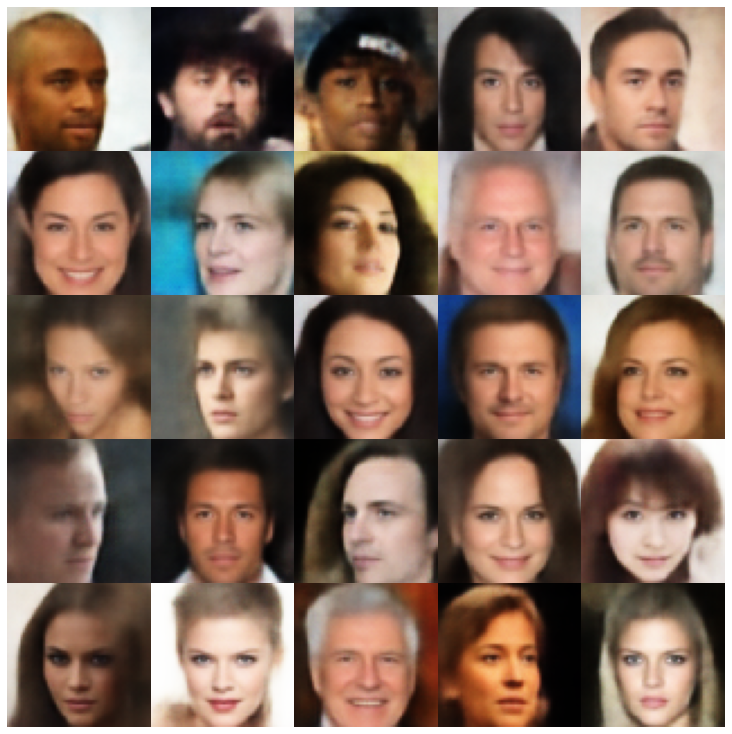 |
如果您發現這項工作有用或在研究中使用,請考慮引用我們
 @inproceedings { chadebec2022pythae ,
 author = { Chadebec, Cl'{e}ment and Vincent, Louis and Allassonniere, Stephanie } ,
 booktitle = { Advances in Neural Information Processing Systems } ,
 editor = { S. Koyejo and S. Mohamed and A. Agarwal and D. Belgrave and K. Cho and A. Oh } ,
 pages = { 21575--21589 } ,
 publisher = { Curran Associates, Inc. } ,
 title = { Pythae: Unifying Generative Autoencoders in Python - A Benchmarking Use Case } ,
 volume = { 35 } ,
 year = { 2022 }
}

