benchmark_VAE
Pythae 0.1.2
文档
该库在统一实现下实现了一些最常见的(变化)自动编码器模型。特别是,它通过训练具有相同自动编码的神经网络体系结构的模型来执行基准实验和比较的可能性。该功能使您自己的自动编码器使您可以使用自己的数据以及自己的编码器和解码器神经网络培训这些模型中的任何一个。它集成了实验监视工具,例如WandB,MLFlow或Comet-ML?并允许从HuggingFace Hub中共享和加载?在几行代码中。
消息?
截至v0.1.0, Pythae现在使用Pytorch的DDP支持分布式培训。现在,您可以更快地训练自己喜欢的VAE,并在较大的数据集上使用几行代码。请参阅我们的加速基准。
wandb /实验跟踪的集线器 /实验跟踪mlflow / comet_ml跟踪要安装此库的最新稳定版本,请使用pip运行以下内容
$ pip install pythae要安装此库的最新GitHub版本,请使用pip运行以下内容
$ pip install git+https://github.com/clementchadebec/benchmark_VAE.git或者,您可以克隆GitHub存储库以访问测试,教程和脚本。
$ git clone https://github.com/clementchadebec/benchmark_VAE.git并安装库
$ cd benchmark_VAE
$ pip install -e . 以下是库当前实现的模型列表。
| 型号 | 训练例子 | 纸 | 官方实施 |
|---|---|---|---|
| 自动编码器(AE) | |||
| 变异自动编码器(VAE) | 关联 | ||
| beta变量自动编码器(betavae) | 关联 | ||
| 带有线性归一化流的VAE(vae_linnf) | 关联 | ||
| VAE具有反向自回旋流动(VAE_IAF) | 关联 | 关联 | |
| 解开的beta差异自动编码器(DisentangledBetavae) | 关联 | ||
| 通过分解(因子Vae)解剖 | 关联 | ||
| beta-tc-vae(betatcvae) | 关联 | 关联 | |
| 重要性加权自动编码器(IWAE) | 关联 | 关联 | |
| 乘以加权自动编码器(MIWAE) | 关联 | ||
| 部分重要性加权自动编码器(PIWAE) | 关联 | ||
| 组合重要性加权自动编码器(CIWAE) | 关联 | ||
| 具有感知度量相似性的VAE(MSSSIM_VAE) | 关联 | ||
| Wasserstein AutoCoder(WAE) | 关联 | 关联 | |
| 信息变性自动编码器(Infovae_mmd) | 关联 | ||
| 鞋面自动编码器(vamp) | 关联 | 关联 | |
| 超球VAE(SVAE) | 关联 | 关联 | |
| Poincaré磁盘vae(Poincarevae) | 关联 | 关联 | |
| 对抗自动编码器(verversarial_ae) | 关联 | ||
| 变异自动编码器gan(vaegan)? | 关联 | 关联 | |
| 矢量量化VAE(VQVAE) | 关联 | 关联 | |
| 汉密尔顿vae(HVAE) | 关联 | 关联 | |
| 使用L2解码器参数(RAE_L2)正规化AE | 关联 | 关联 | |
| 梯度罚款(RAE_GP)正规化AE | 关联 | 关联 | |
| Riemannian Hamiltonian Vae(Rhvae) | 关联 | 关联 | |
| 分层残差量化(HRQVAE) | 关联 | 关联 |
请参阅所有上述模型的重建和生成结果
以下是库当前实现的模型列表。
| 采样器 | 型号 | 纸 | 官方实施 |
|---|---|---|---|
| 正常的先验(正常摄影器) | 所有模型 | 关联 | |
| 高斯混合物(GaussianMixturesAmpler) | 所有模型 | 关联 | 关联 |
| 两级VAE采样器(Twostagevaesampler) | 所有基于VAE的模型 | 关联 | 关联 |
| 单位球均匀采样器(Hyperspherifornsampler) | Svae | 关联 | 关联 |
| Poincaré磁盘采样器(Poincaredisksampler) | Poincarevae | 关联 | 关联 |
| 鞋面先验采样器(vampsampler) | 鞋面 | 关联 | 关联 |
| 歧管采样器(Rhvaesampler) | Rhvae | 关联 | 关联 |
| 掩盖自回旋流动采样器(MAFSAMPLER) | 所有模型 | 关联 | 关联 |
| 反向自回旋流动采样器(IAFSAMPLER) | 所有模型 | 关联 | 关联 |
| Pixelcnn(Pixelcnnsampler) | VQVAE | 关联 |
我们通过在发布官方代码时或有关论文的实验部分的足够详细信息时在原始出版物中介绍的一些结果来验证实现。有关更多详细信息,请参见可重复性。
要启动模型培训,您只需要调用TrainingPipeline实例即可。
 > >> from pythae . pipelines import TrainingPipeline
> >> from pythae . models import VAE , VAEConfig
> >> from pythae . trainers import BaseTrainerConfig

> >> # Set up the training configuration
>> > my_training_config = BaseTrainerConfig (
...	output_dir = 'my_model' ,
...	num_epochs = 50 ,
...	learning_rate = 1e-3 ,
...	per_device_train_batch_size = 200 ,
...	per_device_eval_batch_size = 200 ,
...	train_dataloader_num_workers = 2 ,
...	eval_dataloader_num_workers = 2 ,
...	steps_saving = 20 ,
...	optimizer_cls = "AdamW" ,
...	optimizer_params = { "weight_decay" : 0.05 , "betas" : ( 0.91 , 0.995 )},
...	scheduler_cls = "ReduceLROnPlateau" ,
...	scheduler_params = { "patience" : 5 , "factor" : 0.5 }
... )
> >> # Set up the model configuration
>> > my_vae_config = model_config = VAEConfig (
...	input_dim = ( 1 , 28 , 28 ),
...	latent_dim = 10
... )
> >> # Build the model
>> > my_vae_model = VAE (
...	model_config = my_vae_config
... )
> >> # Build the Pipeline
>> > pipeline = TrainingPipeline (
... 	training_config = my_training_config ,
... 	model = my_vae_model
... )
> >> # Launch the Pipeline
>> > pipeline (
...	train_data = your_train_data , # must be torch.Tensor, np.array or torch datasets
...	eval_data = your_eval_data # must be torch.Tensor, np.array or torch datasets
... )在训练结束时,最佳模型权重,模型配置和训练配置存储在my_model/MODEL_NAME_training_YYYY-MM-DD_hh-mm-ss中的final_model文件夹中( my_model是BaseTrainerConfig的output_dir参数)。如果您进一步将steps_saving参数设置为某个值,则checkpoint_epoch_k包含最佳模型权重,Epoch k的“优化器,调度程序,配置和培训配置”的文件夹也将出现在my_model/MODEL_NAME_training_YYYY-MM-DD_hh-mm-ss中。
我们还提供了一个培训脚本示例,可用于在基准数据集(MNIST,CIFAR10,CELEBA ...)上训练模型。可以使用以下命令行启动脚本
python training.py --dataset mnist --model_name ae --model_config ' configs/ae_config.json ' --training_config ' configs/base_training_config.json '有关此脚本的更多详细信息,请参见readme.md
GenerationPipeline从受过训练的模型中启动数据生成的最简单方法是使用Pythae提供的内置GenerationPipeline 。假设您要使用MAFSampler生成100个样品,您要做的就是1)重新训练的模型,2)定义采样器的配置,3)创建并启动和启动GenerationPipeline如下
 > >> from pythae . models import AutoModel
> >> from pythae . samplers import MAFSamplerConfig
> >> from pythae . pipelines import GenerationPipeline
> >> # Retrieve the trained model
>> > my_trained_vae = AutoModel . load_from_folder (
...	'path/to/your/trained/model'
... )
> >> my_sampler_config = MAFSamplerConfig (
...	n_made_blocks = 2 ,
...	n_hidden_in_made = 3 ,
...	hidden_size = 128
... )
> >> # Build the pipeline
>> > pipe = GenerationPipeline (
...	model = my_trained_vae ,
...	sampler_config = my_sampler_config
... )
> >> # Launch data generation
>> > generated_samples = pipe (
...	num_samples = args . num_samples ,
...	return_gen = True , # If false returns nothing
...	train_data = train_data , # Needed to fit the sampler
...	eval_data = eval_data , # Needed to fit the sampler
...	training_config = BaseTrainerConfig ( num_epochs = 200 ) # TrainingConfig to use to fit the sampler
... )另外,您可以直接使用采样器直接从受过训练的模型启动数据生成过程。例如,要使用采样器生成新数据,请运行以下内容。
 > >> from pythae . models import AutoModel
> >> from pythae . samplers import NormalSampler
> >> # Retrieve the trained model
>> > my_trained_vae = AutoModel . load_from_folder (
...	'path/to/your/trained/model'
... )
> >> # Define your sampler
>> > my_samper = NormalSampler (
...	model = my_trained_vae
... )
> >> # Generate samples
>> > gen_data = my_samper . sample (
...	num_samples = 50 ,
...	batch_size = 10 ,
...	output_dir = None ,
...	return_gen = True
... )如果将output_dir设置为特定路径,则生成的图像将保存为.png文件,名为00000000.png , 00000001.png ...只要适合任何模型,都可以将采样器与任何模型一起使用。例如,可以使用GaussianMixtureSampler实例从任何模型中生成,但是VAMPSampler只能使用VAMP模型使用。在此处查看哪些适用于您的模型。请注意,例如,某些采样器(例如GaussianMixtureSampler mixturesmpler)可能需要通过调用fit方法来拟合。以下是GaussianMixtureSampler的一个示例。
 > >> from pythae . models import AutoModel
> >> from pythae . samplers import GaussianMixtureSampler , GaussianMixtureSamplerConfig
> >> # Retrieve the trained model
>> > my_trained_vae = AutoModel . load_from_folder (
...	'path/to/your/trained/model'
... )
> >> # Define your sampler
... gmm_sampler_config = GaussianMixtureSamplerConfig (
...	n_components = 10
... )
> >> my_samper = GaussianMixtureSampler (
...	sampler_config = gmm_sampler_config ,
...	model = my_trained_vae
... )
> >> # fit the sampler
>> > gmm_sampler . fit ( train_dataset )
> >> # Generate samples
>> > gen_data = my_samper . sample (
...	num_samples = 50 ,
...	batch_size = 10 ,
...	output_dir = None ,
...	return_gen = True
... )Pythae为您提供了在VAE模型中定义自己的神经网络的可能性。例如,说您想用特定的编码器和解码器训练Wassertstein AE,您可以做以下操作:
 > >> from pythae . models . nn import BaseEncoder , BaseDecoder
> >> from pythae . models . base . base_utils import ModelOutput
> >> class My_Encoder ( BaseEncoder ):
...	def __init__ ( self , args = None ): # Args is a ModelConfig instance
...		BaseEncoder . __init__ ( self )
...		self . layers = my_nn_layers ()
...
...	def forward ( self , x : torch . Tensor ) -> ModelOutput :
...		out = self . layers ( x )
...		output = ModelOutput (
...			embedding = out # Set the output from the encoder in a ModelOutput instance
...		)
...		return output
...
... class My_Decoder ( BaseDecoder ):
...	def __init__ ( self , args = None ):
...		BaseDecoder . __init__ ( self )
...		self . layers = my_nn_layers ()
...
...	def forward ( self , x : torch . Tensor ) -> ModelOutput :
...		out = self . layers ( x )
...		output = ModelOutput (
...			reconstruction = out # Set the output from the decoder in a ModelOutput instance
...		)
...		return output
...
> >> my_encoder = My_Encoder ()
> >> my_decoder = My_Decoder ()
现在建立模型
 > >> from pythae . models import WAE_MMD , WAE_MMD_Config
> >> # Set up the model configuration
>> > my_wae_config = model_config = WAE_MMD_Config (
...	input_dim = ( 1 , 28 , 28 ),
...	latent_dim = 10
... )
...
> >> # Build the model
>> > my_wae_model = WAE_MMD (
...	model_config = my_wae_config ,
...	encoder = my_encoder , # pass your encoder as argument when building the model
...	decoder = my_decoder # pass your decoder as argument when building the model
... )
重要说明1 :对于所有基于AE的模型(AE,WAE,RAE_L2,RAE_GP),编码器和解码器都必须返回ModelOutput实例。对于编码器, ModelOutput实例必须包含密钥embedding下的嵌入。对于解码器, ModelOutput实例必须包含关键reconstruction下的重建。
重要说明2 :对于所有基于VAE的模型(VAE,Betavae,Iwae,Hvae,Vamp,Rhvae),编码器和解码器都必须返回ModelOutput实例。对于编码器, ModelOutput实例必须在密钥embedding和log_covariance键下分别包含嵌入式和log -covariance矩阵(shape batch_size x latent_space_dim)。对于解码器, ModelOutput实例必须包含关键reconstruction下的重建。
您还可以找到最常见数据集的预定义神经网络体系结构(即MNIST,CIFAR,CELEBA ...),可以加载如下
 > >> from pythae . models . nn . benchmark . mnist import (
...	Encoder_Conv_AE_MNIST , # For AE based model (only return embeddings)
...	Encoder_Conv_VAE_MNIST , # For VAE based model (return embeddings and log_covariances)
...	Decoder_Conv_AE_MNIST
... )由Cifar或Celeba替换MNIST ,以获取其他神经网。
Pythae分发培训截至v0.1.0 ,Pythae现在使用Pytorch的DDP支持分布式培训。它使您可以使用多GPU和/或多节点培训更快地训练自己喜欢的VAE和较大数据集。
为此,您可以构建一个Python脚本,然后将由启动器(例如群集上的srun )启动。脚本中唯一需要的是直接在培训配置中指定相对于分布式环境(例如节点/GPU的数量)的某些元素
 > >> training_config = BaseTrainerConfig (
...     num_epochs = 10 ,
...     learning_rate = 1e-3 ,
...     per_device_train_batch_size = 64 ,
...     per_device_eval_batch_size = 64 ,
...     train_dataloader_num_workers = 8 ,
...     eval_dataloader_num_workers = 8 ,
...     dist_backend = "nccl" , # distributed backend
...     world_size = 8 # number of gpus to use (n_nodes x n_gpus_per_node),
...     rank = 5 # global gpu id,
...     local_rank = 1 # gpu id within a node,
...     master_addr = "localhost" # master address,
...     master_port = "12345" # master port,
... )
请参阅此示例脚本,该脚本定义了ImageNet数据集上的多GPU VQVAE培训。请注意,分布式环境变量( world_size , rank ...)的恢复方式可能特定于您使用的群集和启动器。
以下是在V100 16GB GPU上使用Pythae的矢量量化VAE(VQ-VAE)的训练时间,在FFHQ(1024x1024映像)上进行50个epochs,在V100 32GB GPU上进行50个epochs(1024x1024映像)。
| 火车数据 | 1 GPU | 4 GPU | 2x4 GPU | |
|---|---|---|---|---|
| MNIST(VQ-VAE) | 28x28图像(50k) | 235.18 s | 62.00 s | 35.86 s |
| FFHQ 1024x1024(VQVAE) | 1024x1024 RGB图像(60k) | 19h 1分钟 | 5H 6分钟 | 2H 37分钟 |
| Imagenet-1K 128x128(VQVAE) | 128x128 RGB图像(〜1.2m) | 6H 25分钟 | 1H 41分钟 | 51min 26s |
对于每个数据集,我们在此处提供基准测试脚本
Pythae还允许您在HuggingFace Hub上共享模型。为此,您需要:
huggingface_hub 。如果没有,您可以安装它 $ python -m pip install huggingface_hub
$ huggingface-cli login
使用方法push_to_hf_hub可以轻松地上传任何Pythae模型
> >> my_vae_model . push_to_hf_hub ( hf_hub_path = "your_hf_username/your_hf_hub_repo" )注意:如果your_hf_hub_repo已经存在并且不是空的,则文件将被覆盖。如果不存在repo your_hf_hub_repo ,则将创建具有相同名称的文件夹。
等效地,您可以使用方法load_from_hf_hub直接从集线器下载或重新加载任何Pythae模型
 > >> from pythae . models import AutoModel
> >> my_downloaded_vae = AutoModel . load_from_hf_hub ( hf_hub_path = "path_to_hf_repo" )wandb监视您的实验?Pythae还集成了实验跟踪工具WANDB,使用户可以存储其配置,监视其培训并通过图形接口进行比较。为了使用此功能,您需要:
wandb安装在您的虚拟env中。如果没有,您可以安装它 $ pip install wandb
$ wandb login
WandbCallback使用pythae的wandb启动实验监测非常简单。用户唯一需要做的就是创建一个WandbCallback实例...
 > >> # Create you callback
>> > from pythae . trainers . training_callbacks import WandbCallback
> >> callbacks = [] # the TrainingPipeline expects a list of callbacks
> >> wandb_cb = WandbCallback () # Build the callback
> >> # SetUp the callback
>> > wandb_cb . setup (
...	training_config = your_training_config , # training config
...	model_config = your_model_config , # model config
...	project_name = "your_wandb_project" , # specify your wandb project
...	entity_name = "your_wandb_entity" , # specify your wandb entity
... )
> >> callbacks . append ( wandb_cb ) # Add it to the callbacks list ...然后将其传递到TrainingPipeline 。
 > >> pipeline = TrainingPipeline (
...	training_config = config ,
...	model = model
... )
> >> pipeline (
...	train_data = train_dataset ,
...	eval_data = eval_dataset ,
...	callbacks = callbacks # pass the callbacks to the TrainingPipeline and you are done!
... )
> >> # You can log to https://wandb.ai/your_wandb_entity/your_wandb_project to monitor your training
查看详细的教程
mlflow监视您的实验?Pythae还集成了实验跟踪工具MLFLOW,使用户可以存储其配置,监视其培训并通过图形接口进行比较。为了使用此功能,您需要:
mlfow安装在您的虚拟env中。如果没有,您可以安装它 $ pip install mlflow
MLFlowCallback在Pythae中使用mlfow启动实验监测非常简单。用户唯一需要做的就是创建一个MLFlowCallback实例...
 > >> # Create you callback
>> > from pythae . trainers . training_callbacks import MLFlowCallback
> >> callbacks = [] # the TrainingPipeline expects a list of callbacks
> >> mlflow_cb = MLFlowCallback () # Build the callback
> >> # SetUp the callback
>> > mlflow_cb . setup (
...	training_config = your_training_config , # training config
...	model_config = your_model_config , # model config
...	run_name = "mlflow_cb_example" , # specify your mlflow run
... )
> >> callbacks . append ( mlflow_cb ) # Add it to the callbacks list ...然后将其传递到TrainingPipeline 。
 > >> pipeline = TrainingPipeline (
...	training_config = config ,
...	model = model
... )
> >> pipeline (
...	train_data = train_dataset ,
...	eval_data = eval_dataset ,
...	callbacks = callbacks # pass the callbacks to the TrainingPipeline and you are done!
... )您可以通过在./mlruns目录中运行以下内容来可视化度量
$ mlflow ui 查看详细的教程
comet_ml监视您的实验?Pythae还集成了实验跟踪工具comet_ml,允许用户存储其配置,监视培训并通过图形接口进行比较。为了使用此功能,您需要:
comet_ml 。如果没有,您可以安装它 $ pip install comet_ml
CometCallback使用Pythae中的comet_ml启动实验监视非常简单。用户唯一需要做的就是创建一个CometCallback实例...
 > >> # Create you callback
>> > from pythae . trainers . training_callbacks import CometCallback
> >> callbacks = [] # the TrainingPipeline expects a list of callbacks
> >> comet_cb = CometCallback () # Build the callback
> >> # SetUp the callback
>> > comet_cb . setup (
...	training_config = training_config , # training config
...	model_config = model_config , # model config
...	api_key = "your_comet_api_key" , # specify your comet api-key
...	project_name = "your_comet_project" , # specify your wandb project
...	#offline_run=True, # run in offline mode
...	#offline_directory='my_offline_runs' # set the directory to store the offline runs
... )
> >> callbacks . append ( comet_cb ) # Add it to the callbacks list ...然后将其传递到TrainingPipeline 。
 > >> pipeline = TrainingPipeline (
...	training_config = config ,
...	model = model
... )
> >> pipeline (
...	train_data = train_dataset ,
...	eval_data = eval_dataset ,
...	callbacks = callbacks # pass the callbacks to the TrainingPipeline and you are done!
... )
> >> # You can log to https://comet.com/your_comet_username/your_comet_project to monitor your training
查看详细的教程
为了帮助您了解Pythae的工作方式以及如何通过此图书馆培训模型,我们还提供教程:
make_your_own_autoencoder.ipynb向您展示了如何将自己的网络传递给Pythae中实现的模型
custom_dataset.ipynb向您展示了如何与Pythae中实现的任何模型一起使用自定义数据集
HF_HUB_MODELS_SHARING.IPYNB向您展示如何上传和下载HuggingFace Hub
wandb_experiment_monitoring.ipynb向您展示了如何使用wandb监视实验
mlflow_experiment_monitoring.ipynb向您展示了如何使用mlflow监视实验
comet_experiment_monitoring.ipynb向您展示了如何使用comet_ml监视实验
Models_training文件夹提供笔记本电脑,展示如何使用pythae.samplers训练每个实现的模型以及如何从中进行采样。
脚本文件夹特别提供了一个训练脚本的示例,用于在基准数据集(MNIST,CIFAR10,CELEBA ...)上训练模型。
如果您在运行代码时遇到任何问题或请求要实现的新功能/模型,请在Github上打开问题。
您想通过添加模型,采样器或简单地修复错误来为此库做出贡献?太棒了!谢谢你!请参阅贡献。md以遵循主要贡献指南。
首先,让我们看一下从评估集中获取的重建样本。
| 型号 | mnist | Celeba |
|---|---|---|
| 评估数据 | 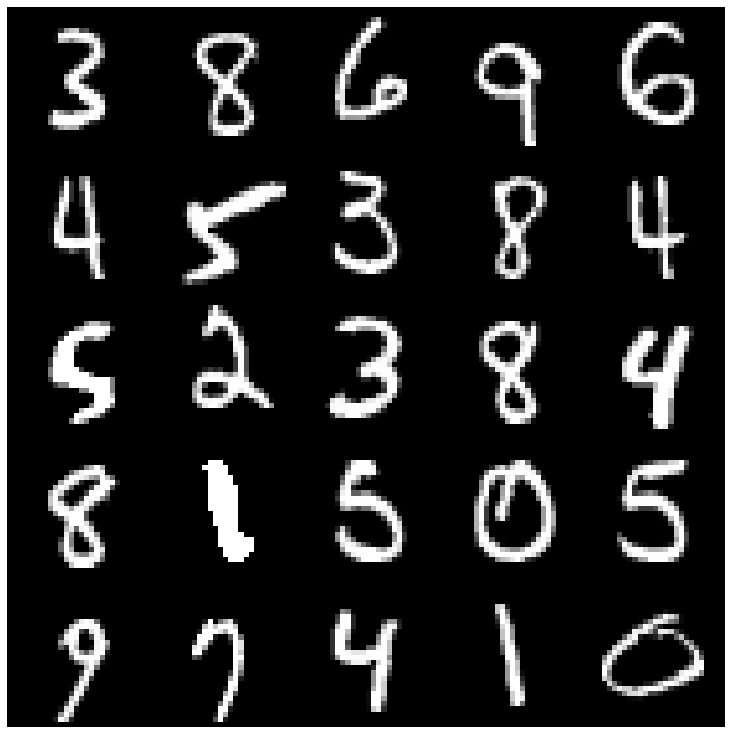 | 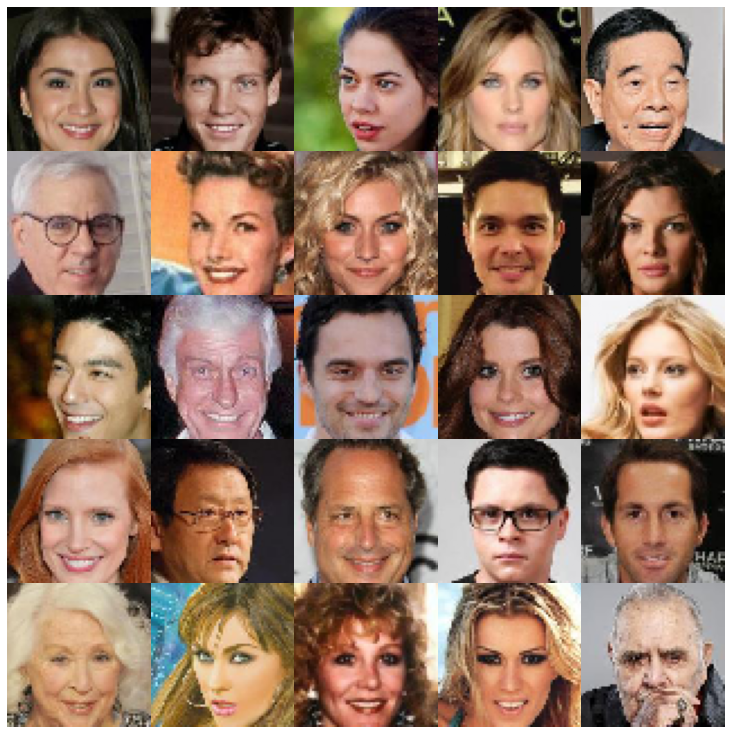 |
| Ae | 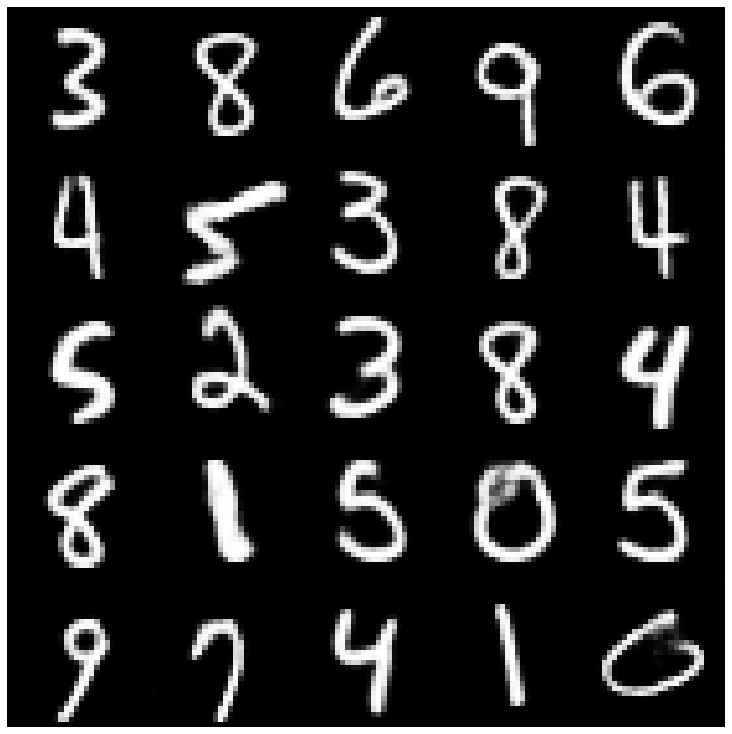 |  |
| vae | 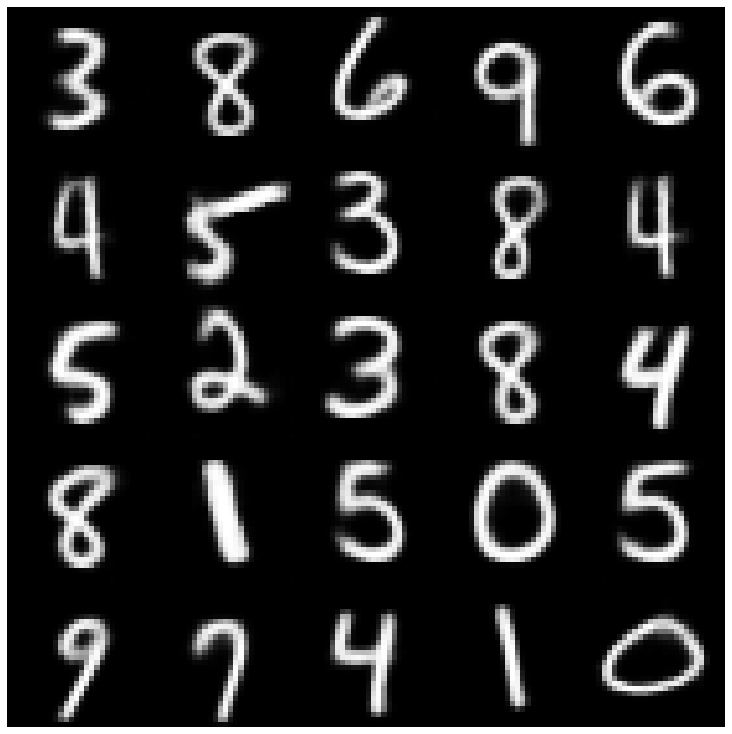 | 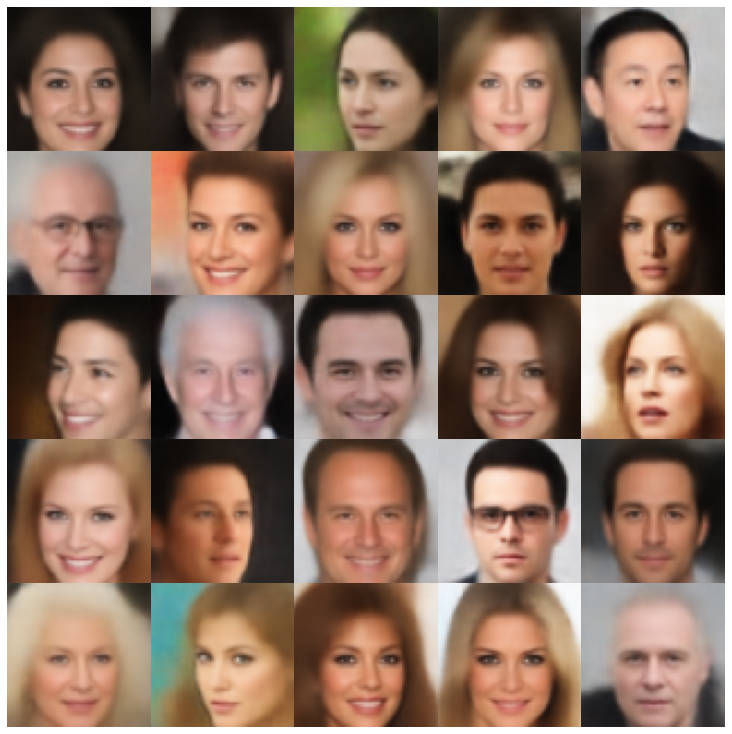 |
| beta-vae | 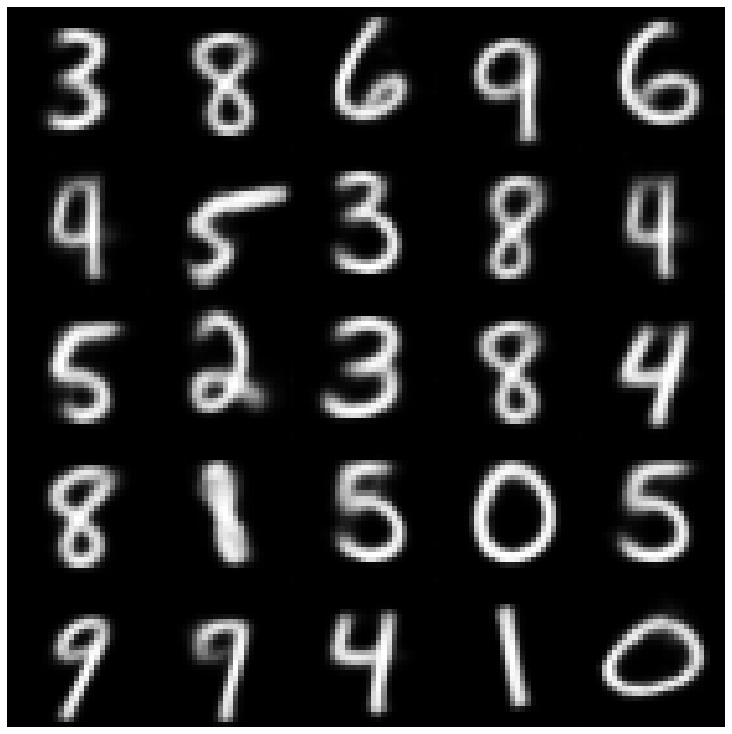 | 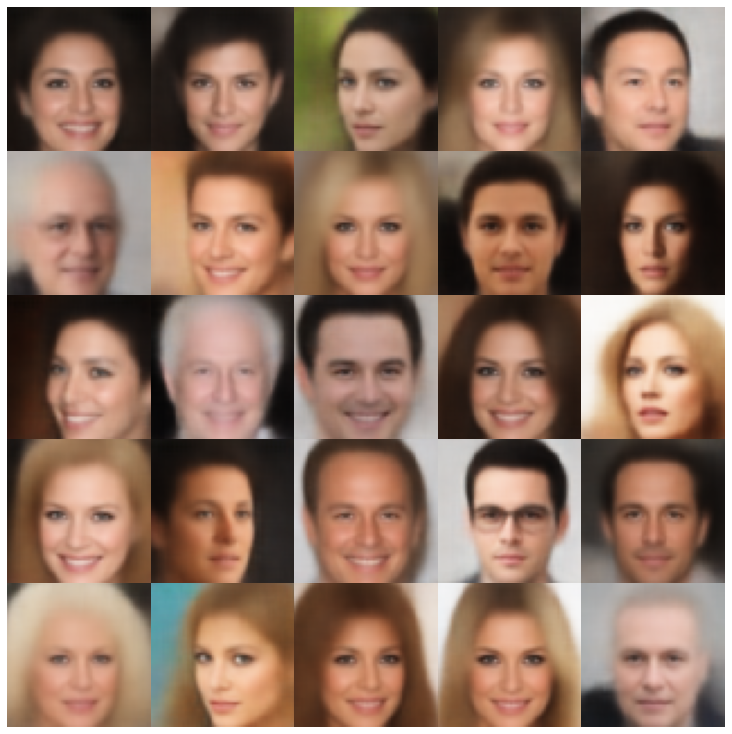 |
| vae lin nf | 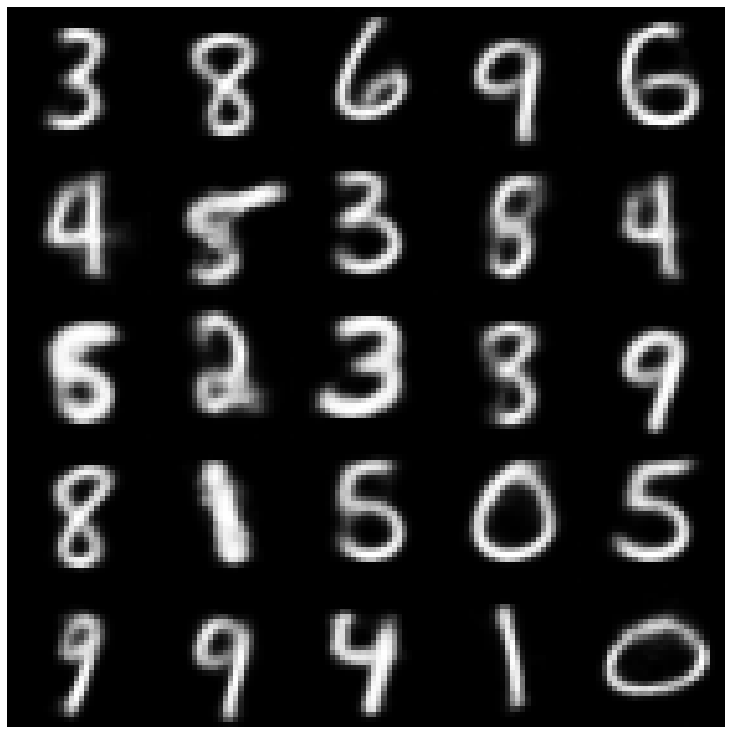 | 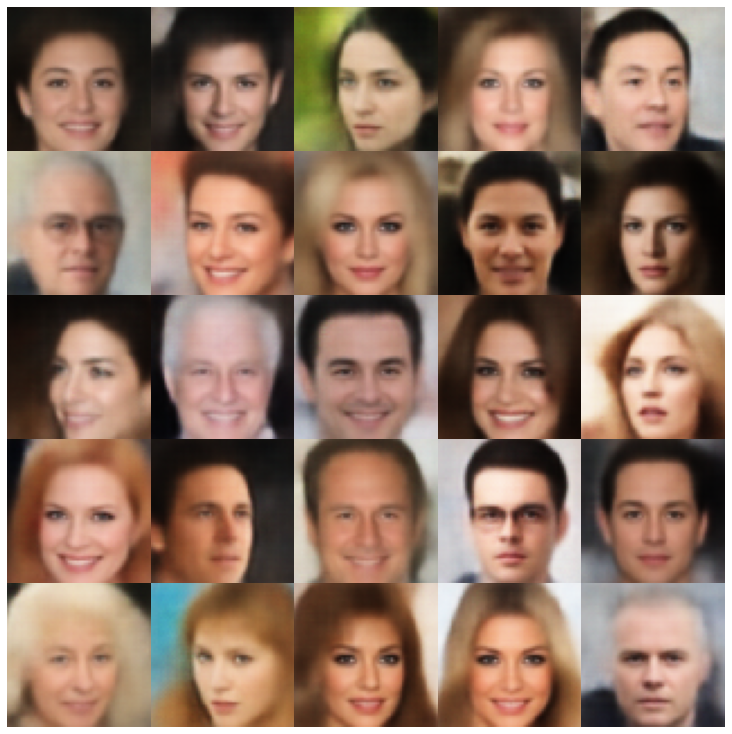 |
| vae iaf | 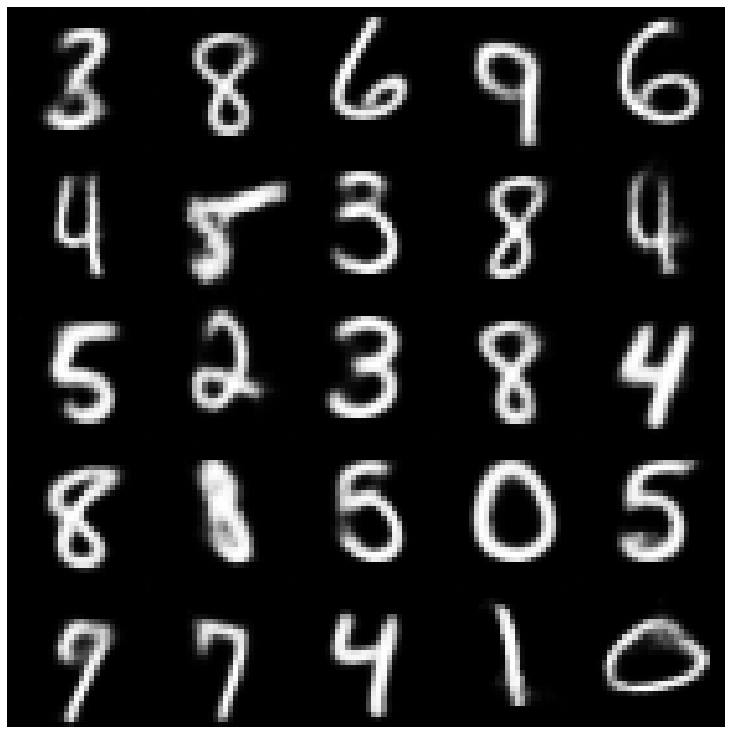 | 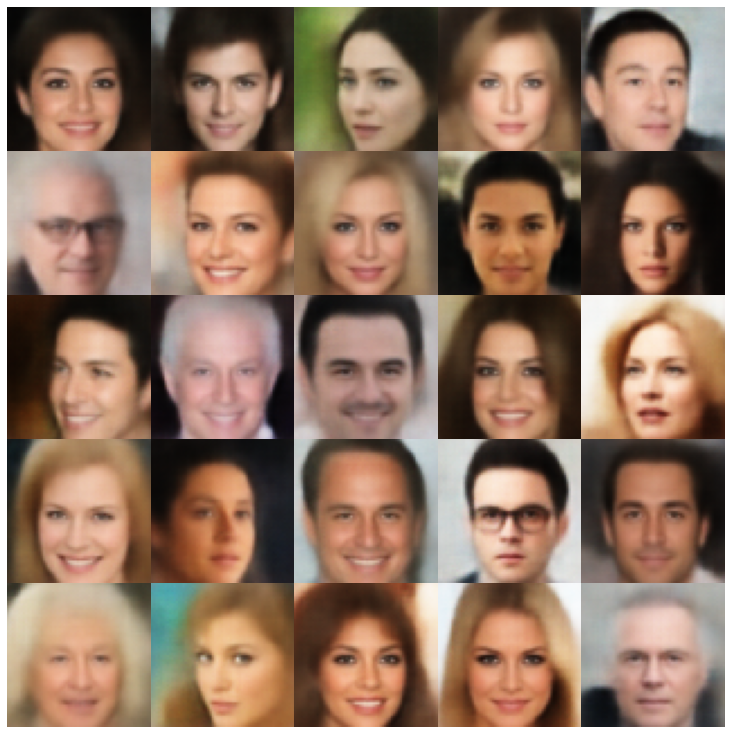 |
| 解开的β-vae | 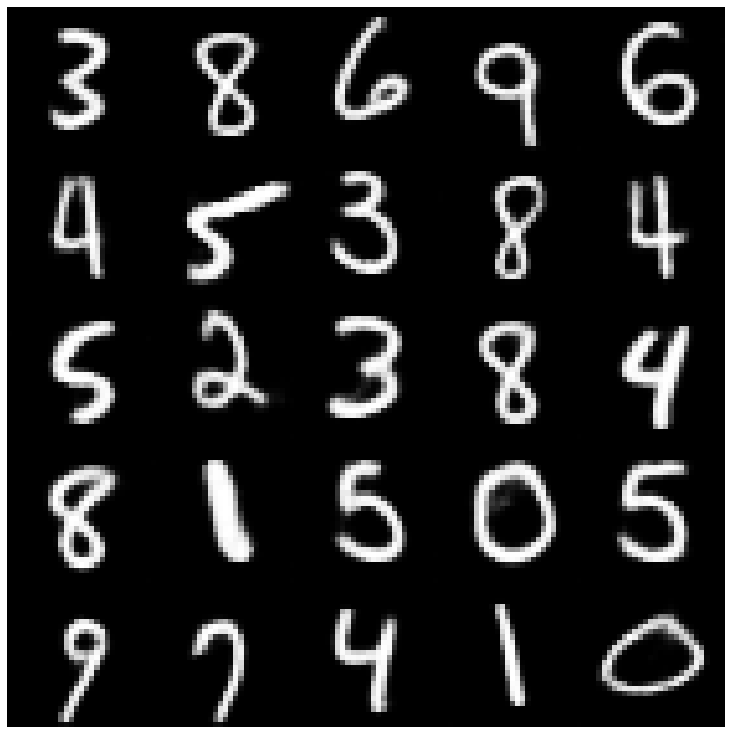 | 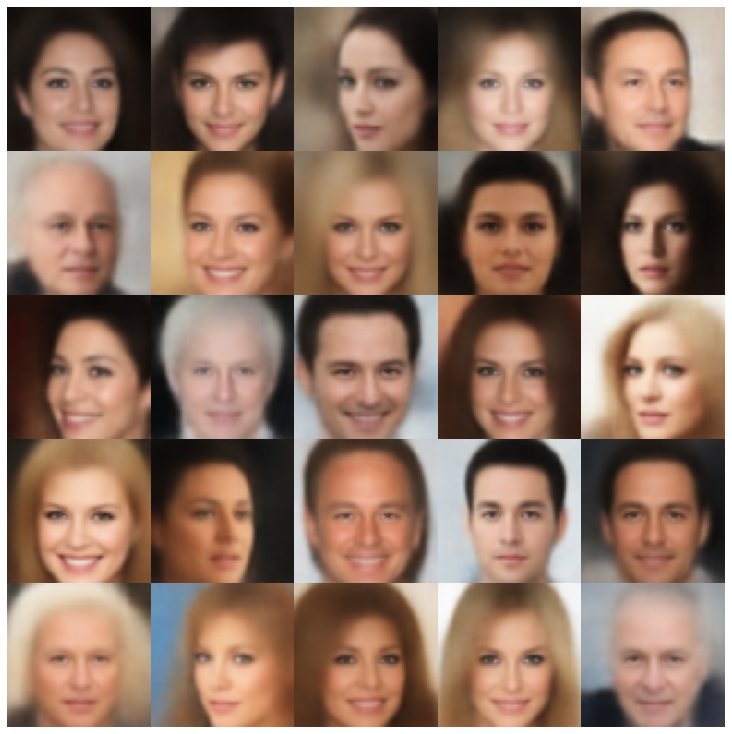 |
| 因子 | 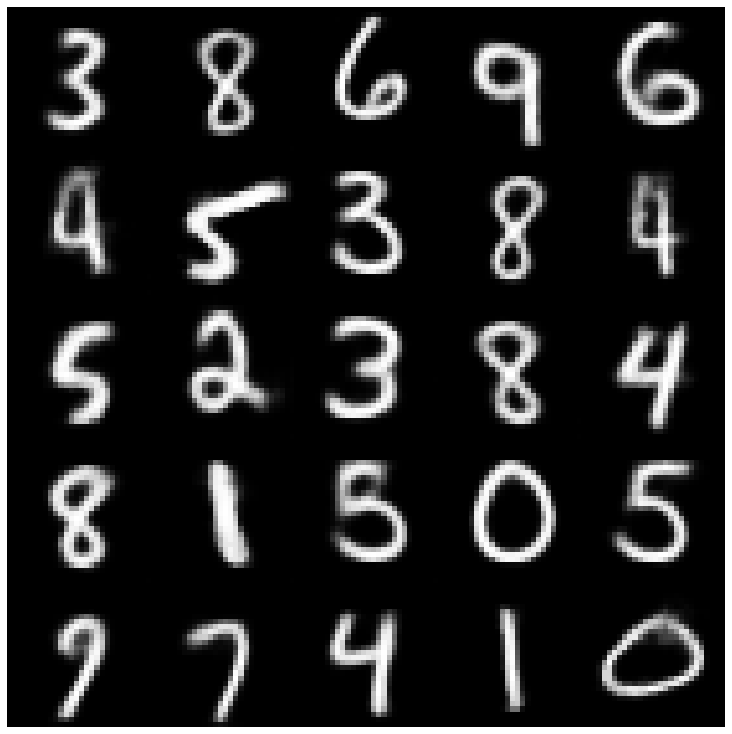 | 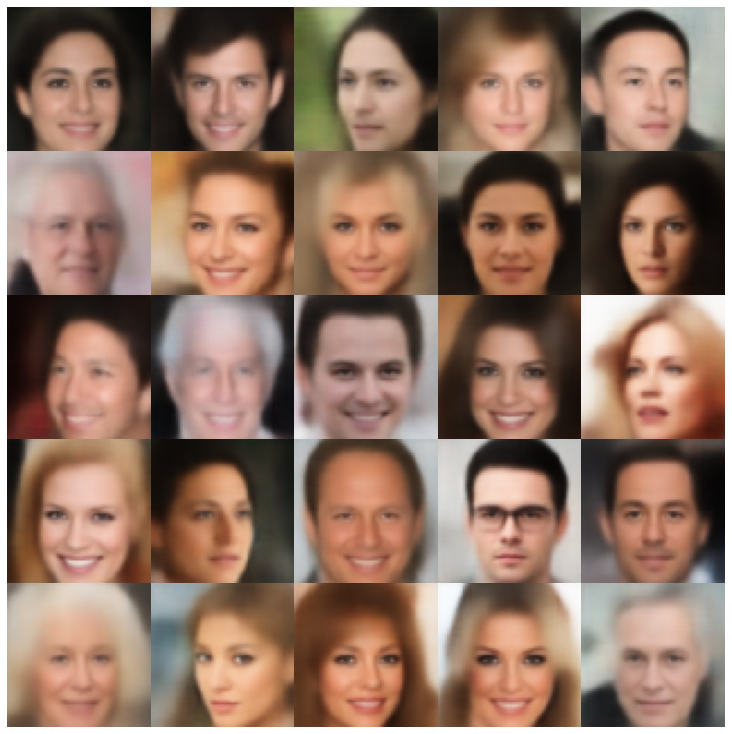 |
| betatcvae | 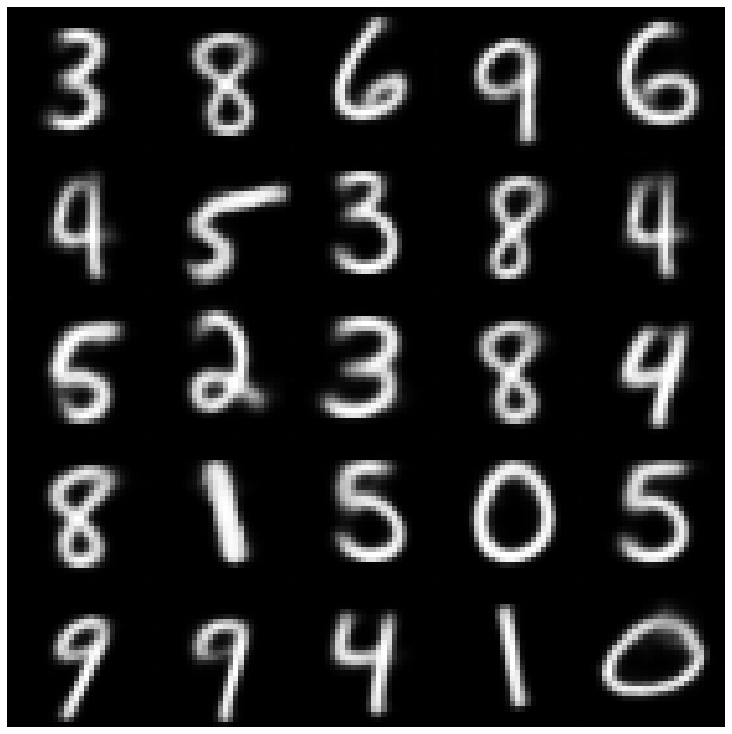 | 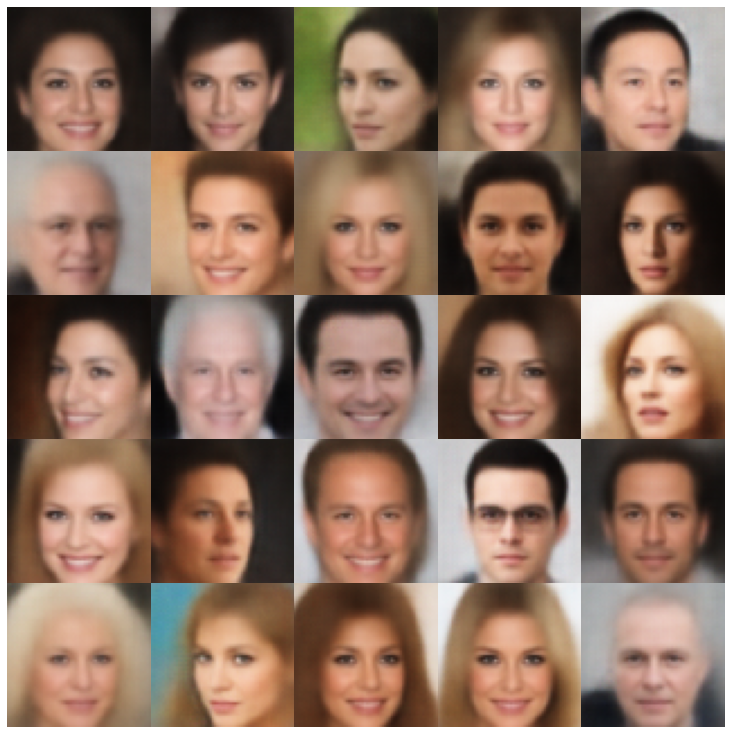 |
| iwae | 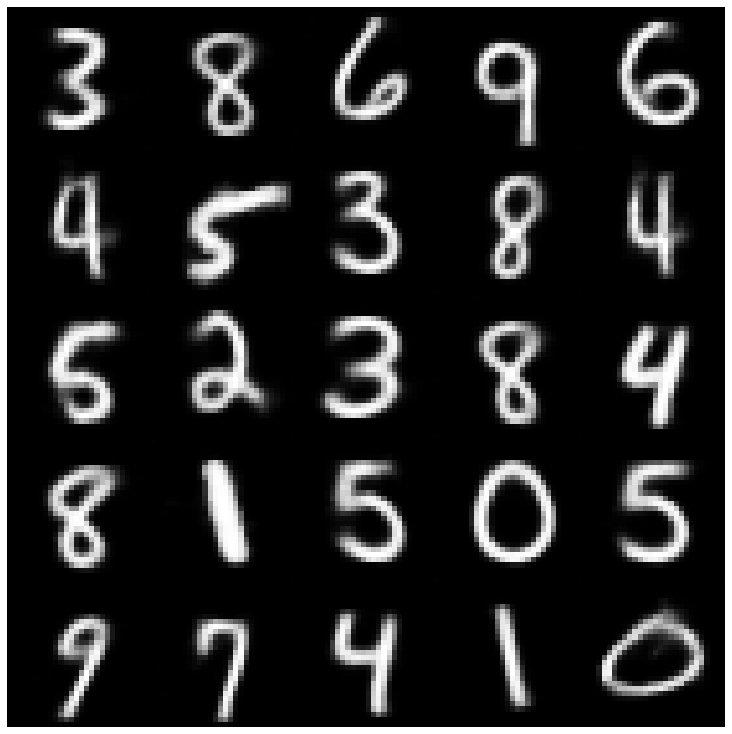 | 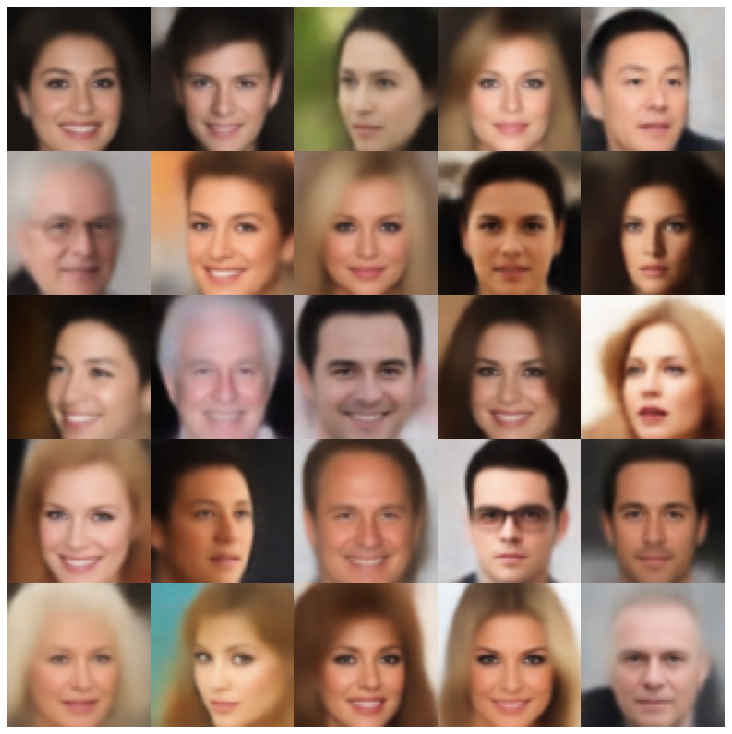 |
| MSSSIM_VAE | 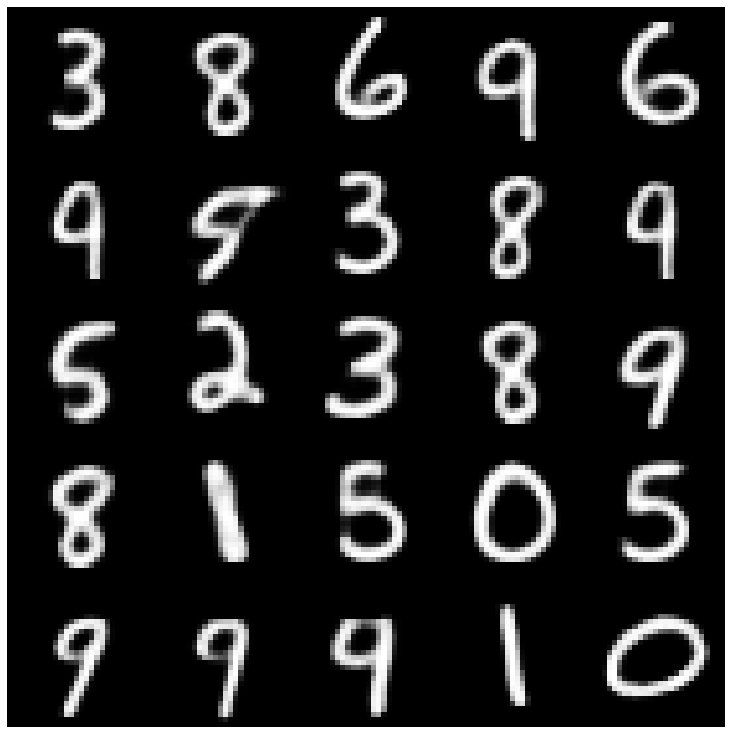 | 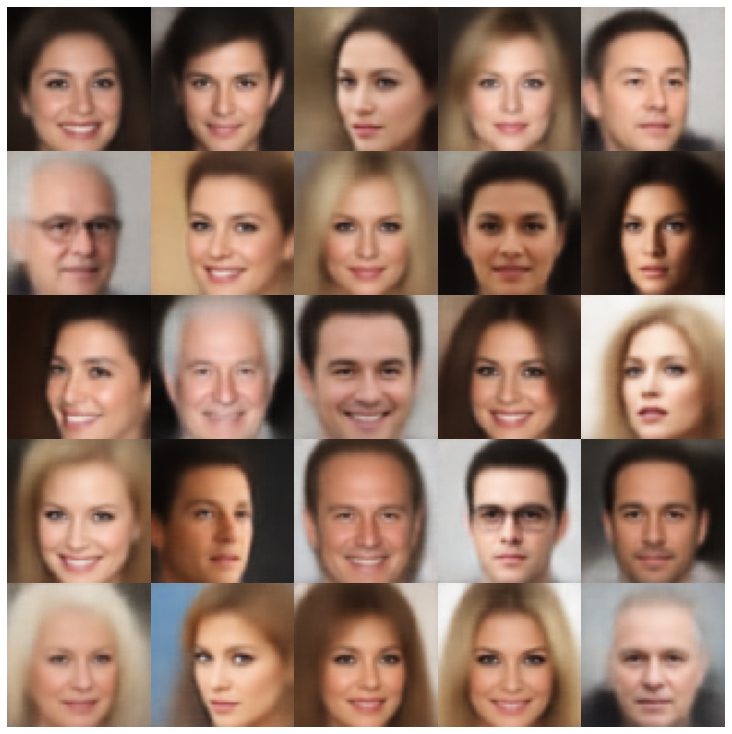 |
| wae | 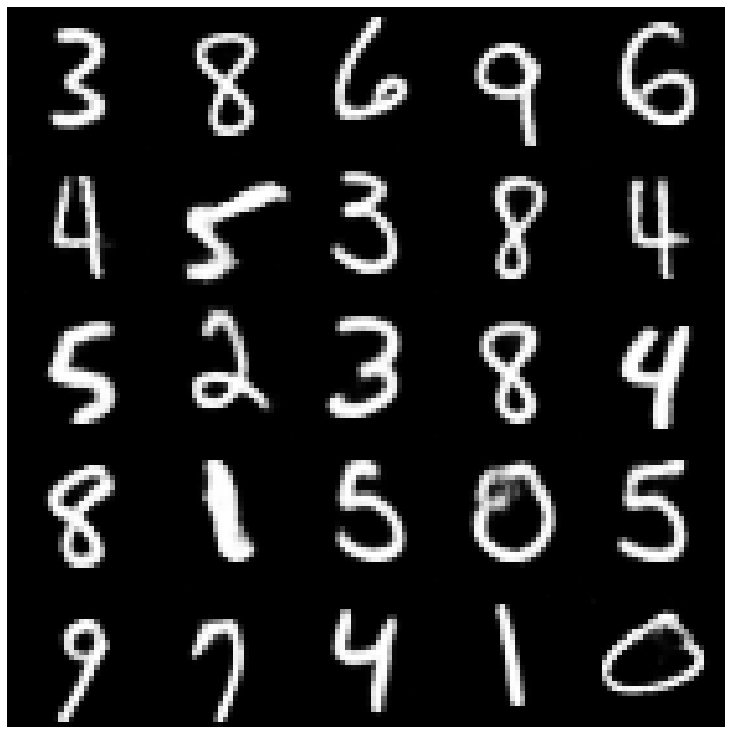 | 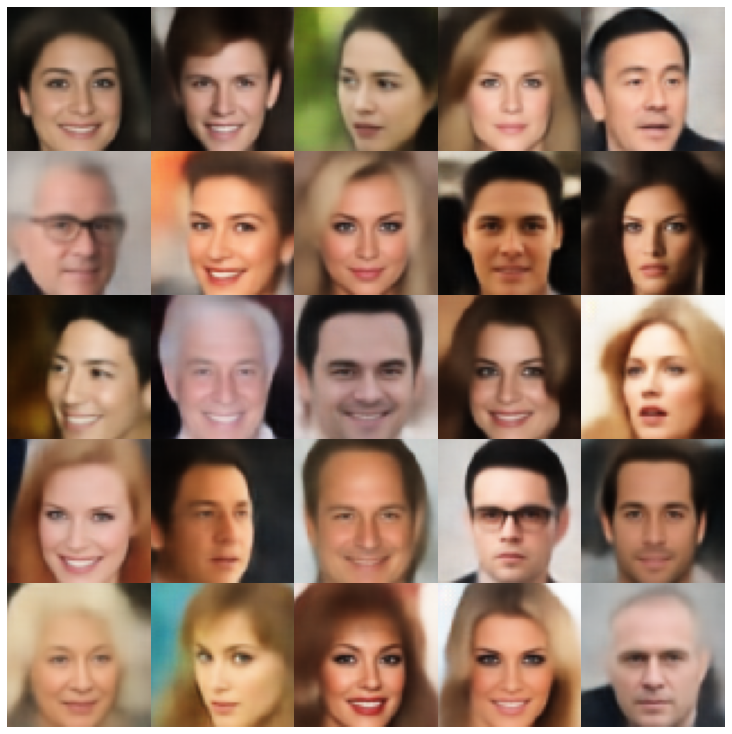 |
| 信息vae | 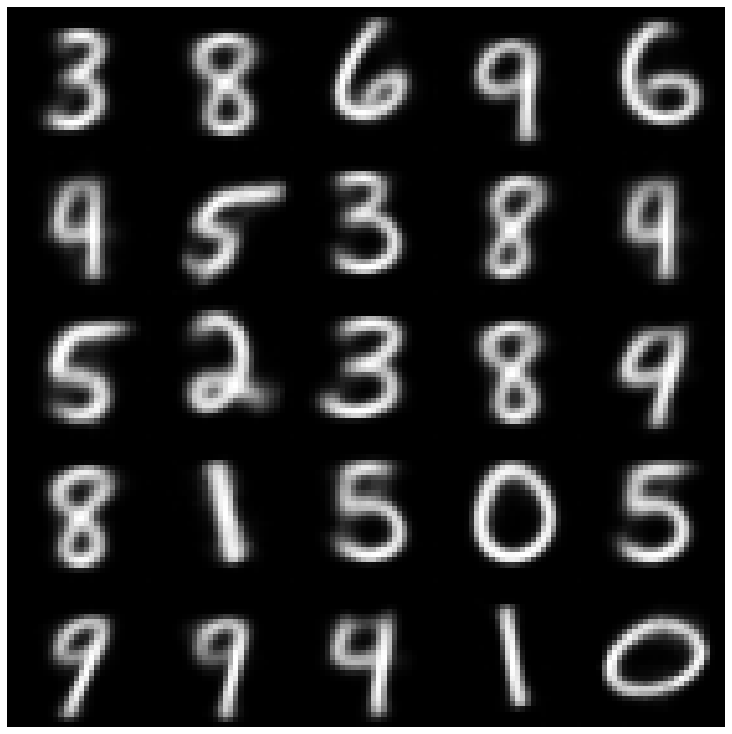 | 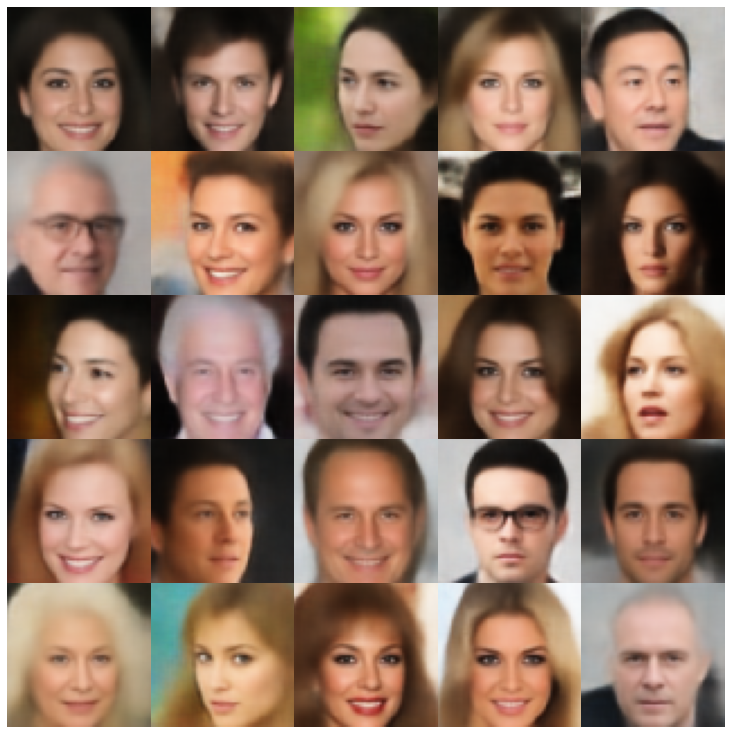 |
| 鞋面 | 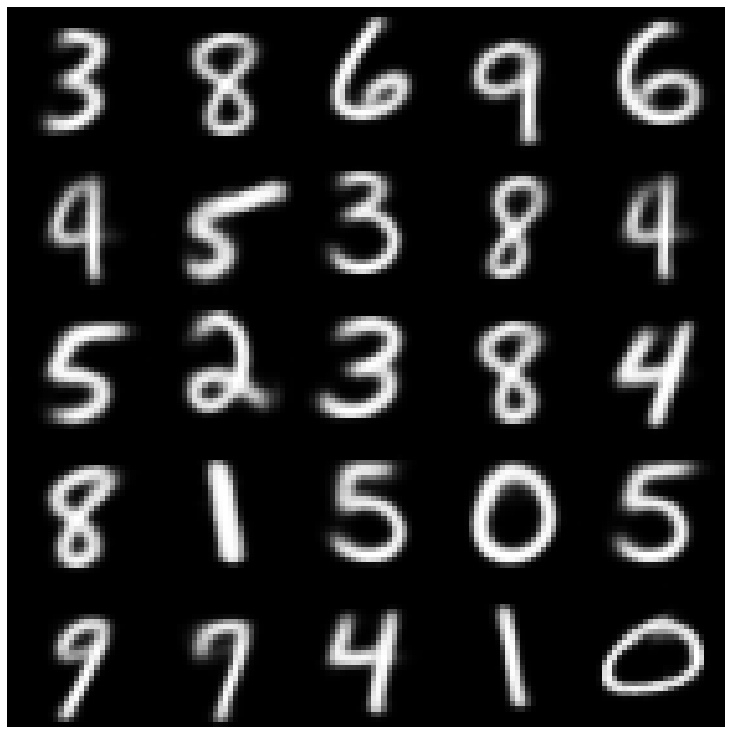 | 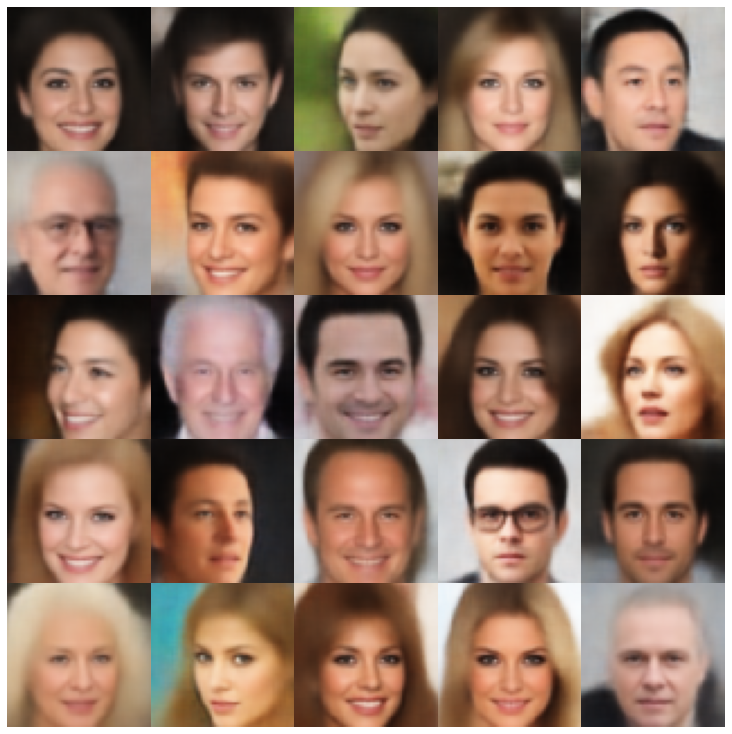 |
| Svae | 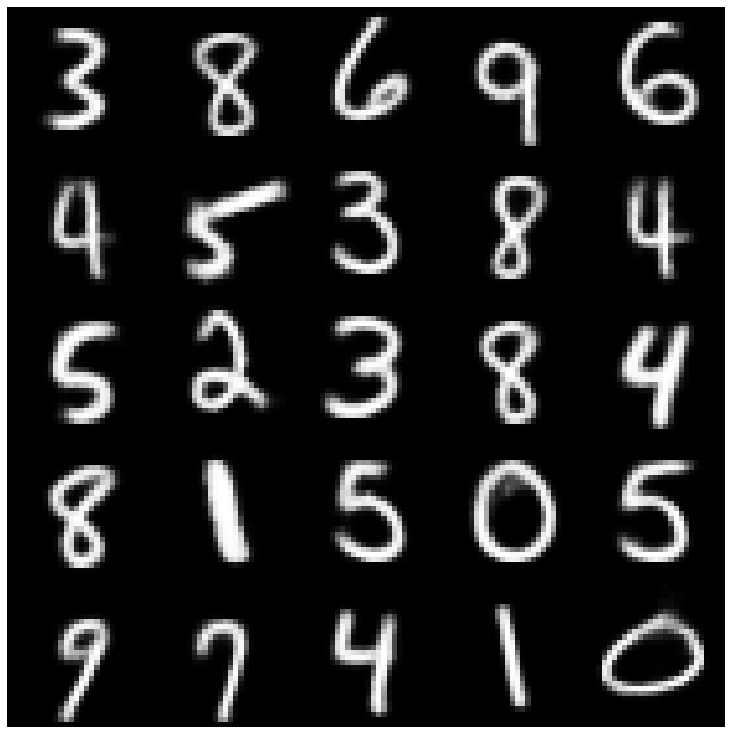 | 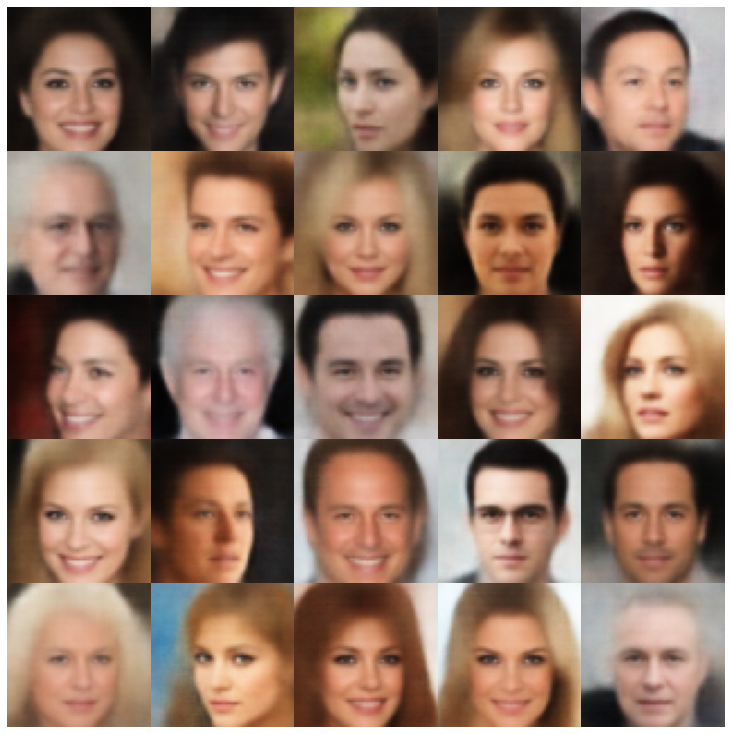 |
| versarial_ae | 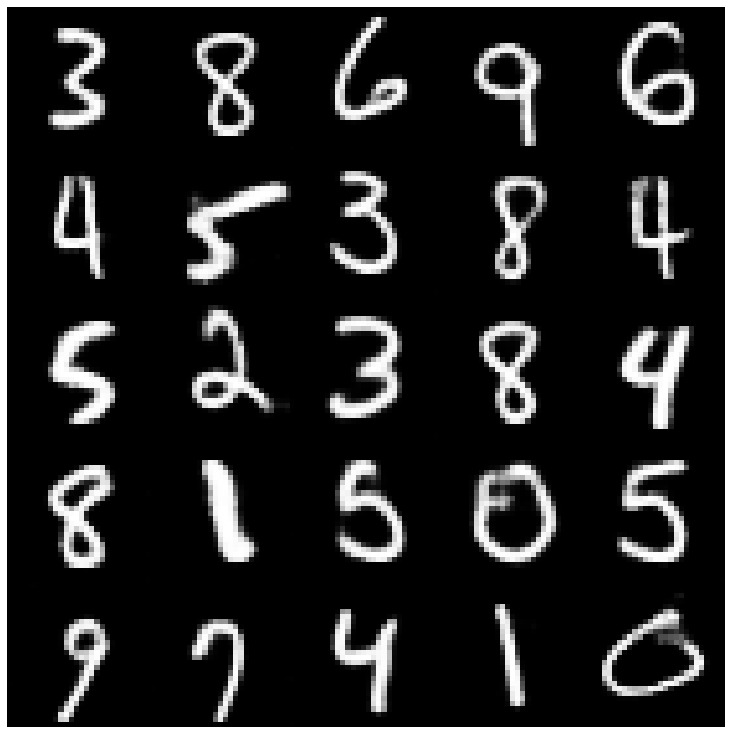 | 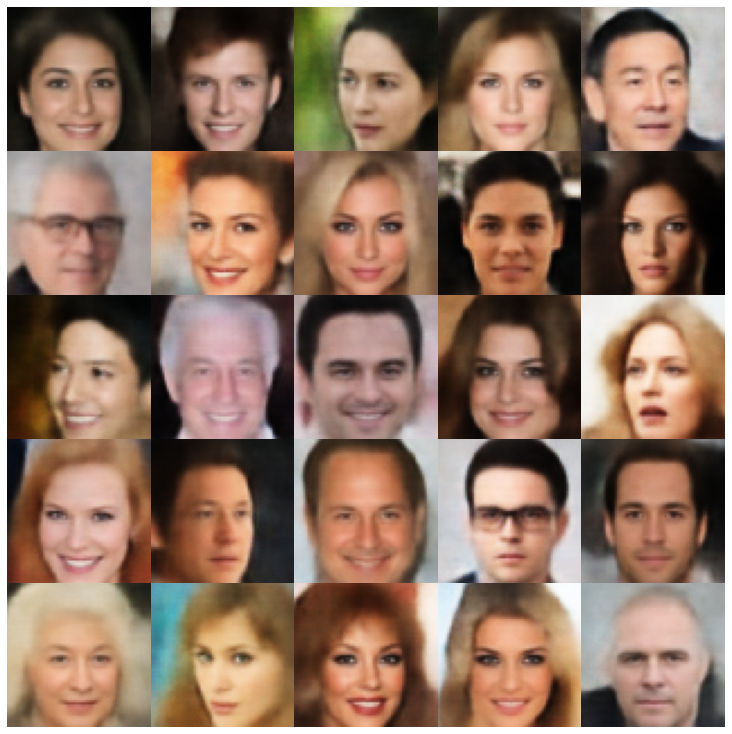 |
| vae_gan | 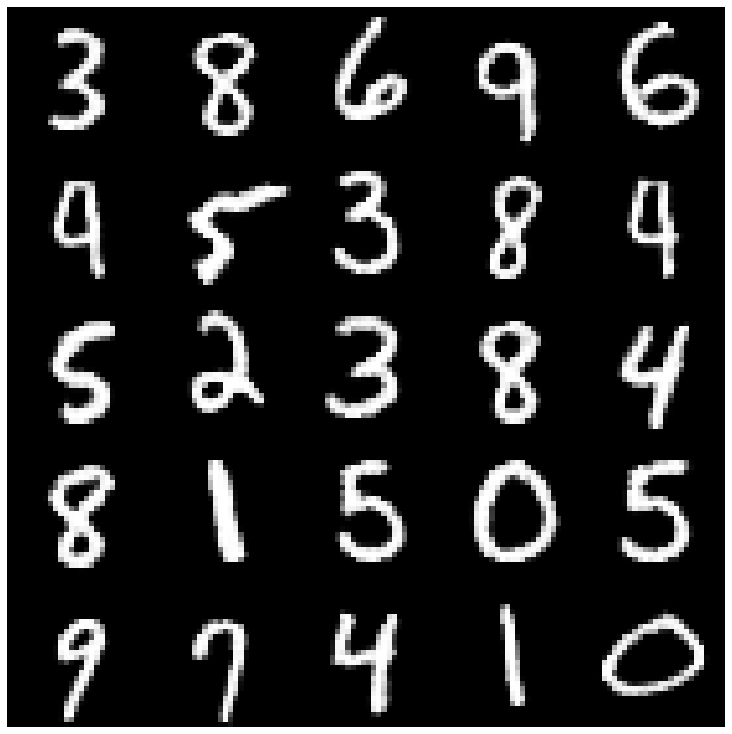 | 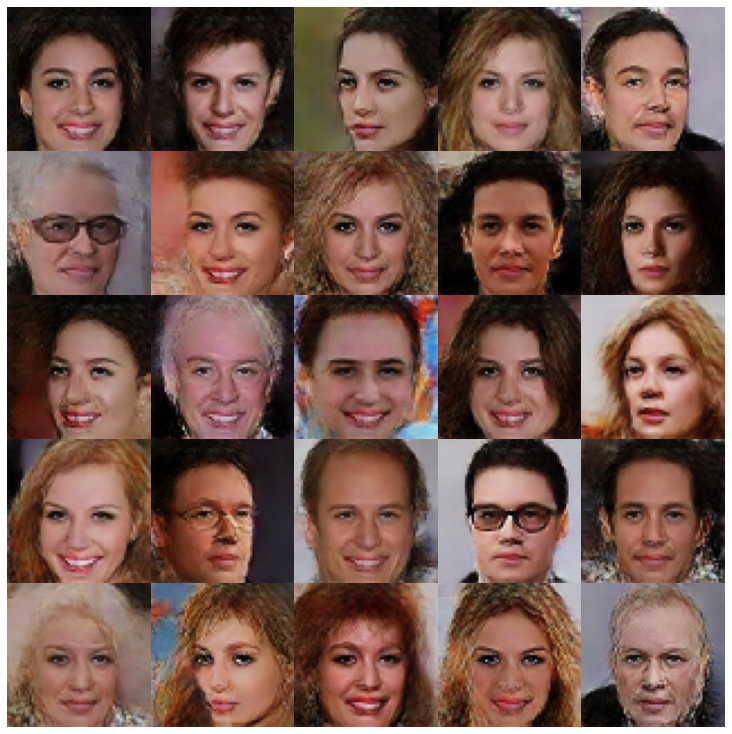 |
| VQVAE | 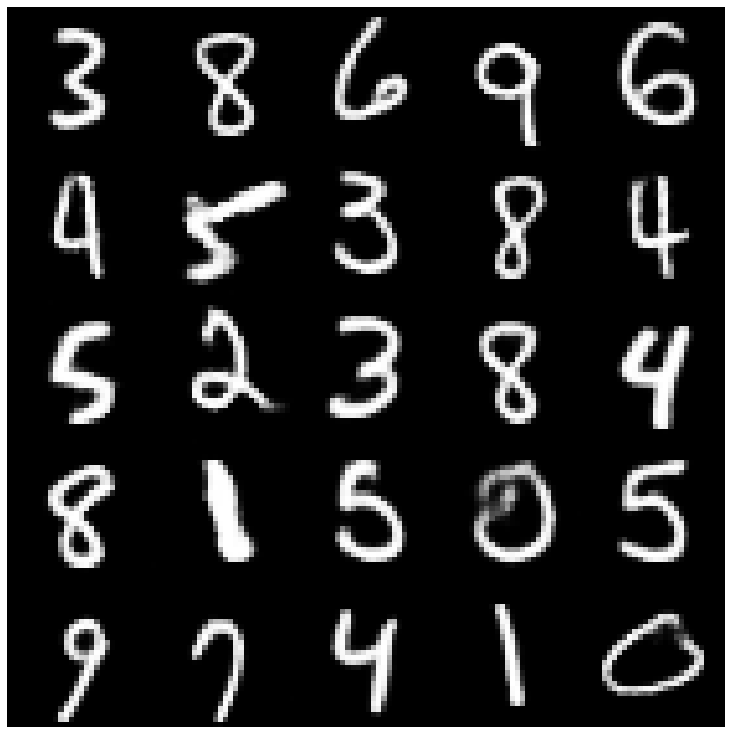 | 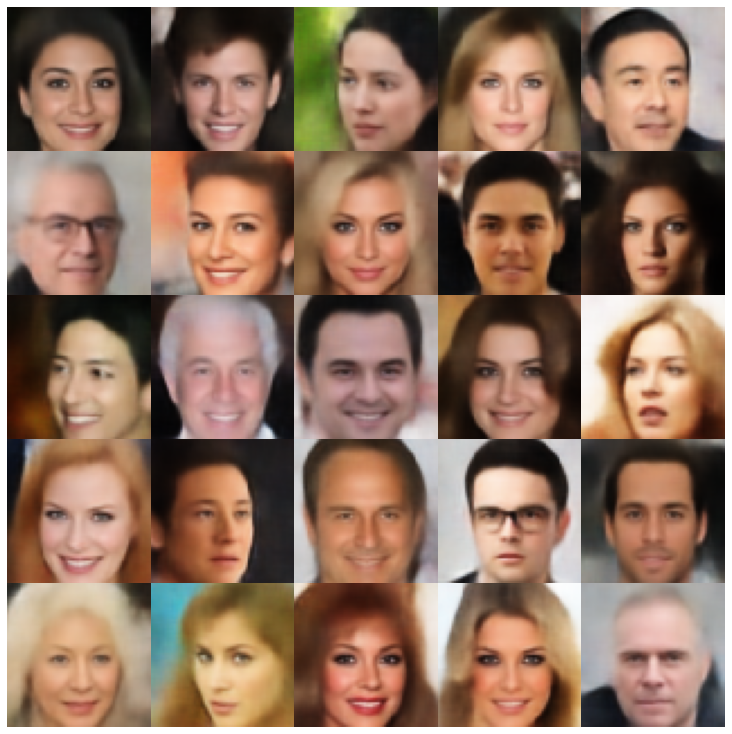 |
| hvae | 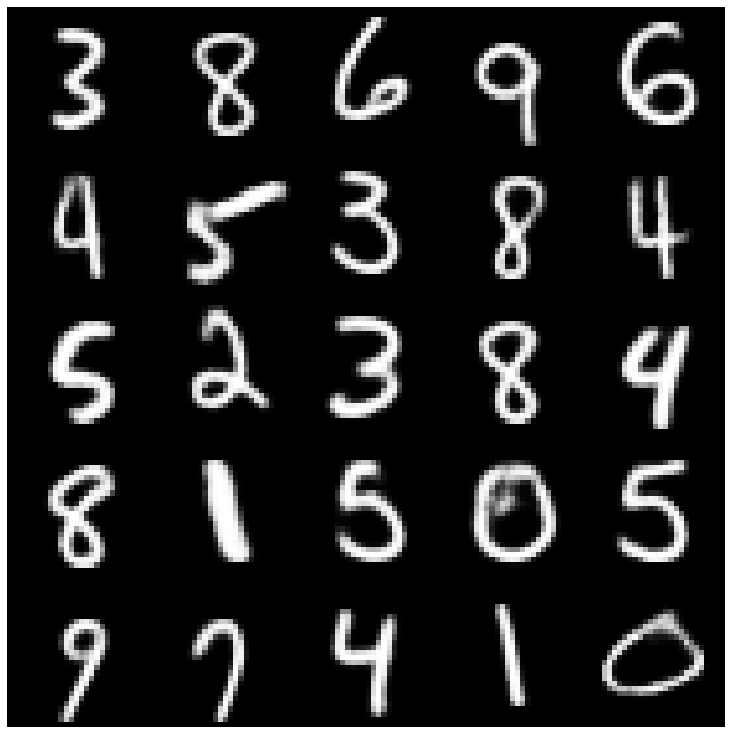 | 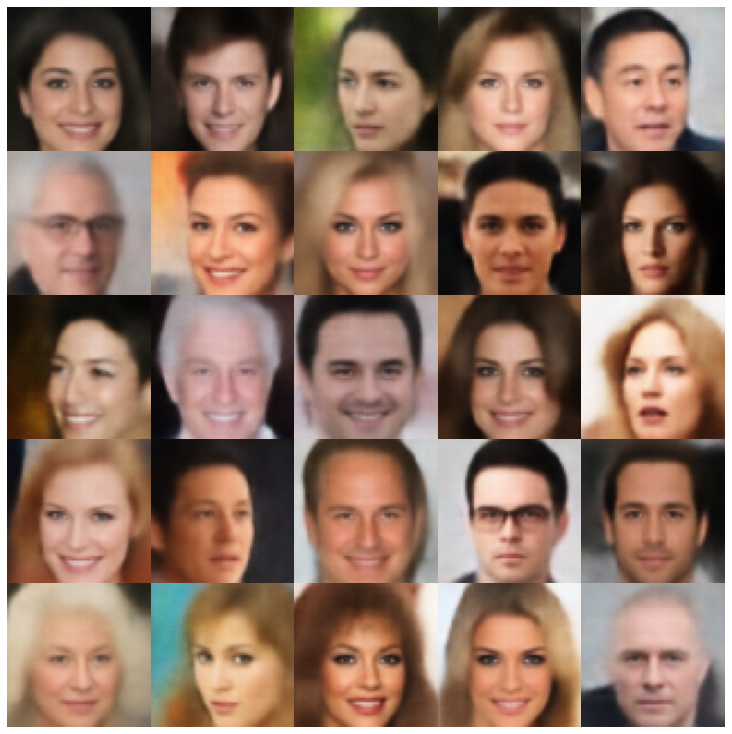 |
| rae_l2 | 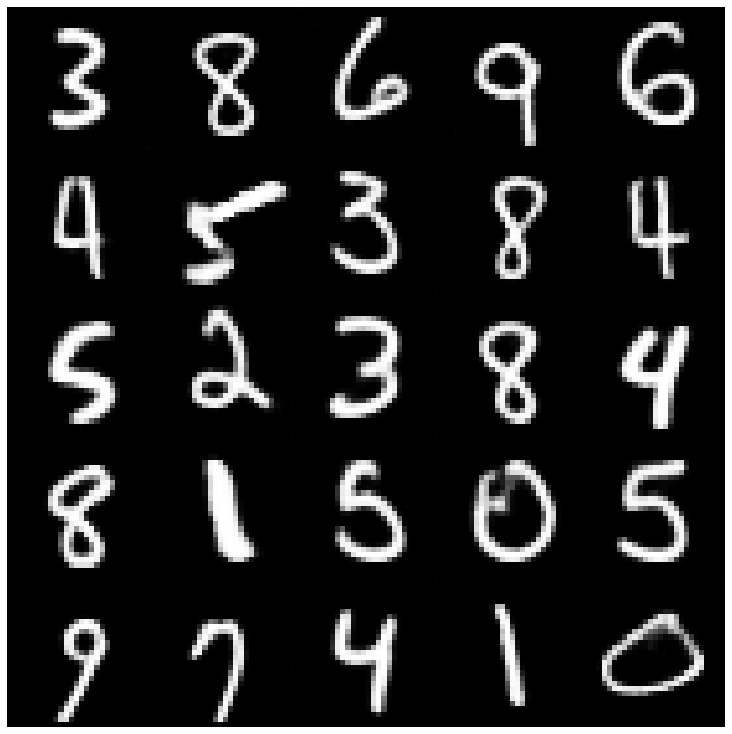 |  |
| rae_gp | 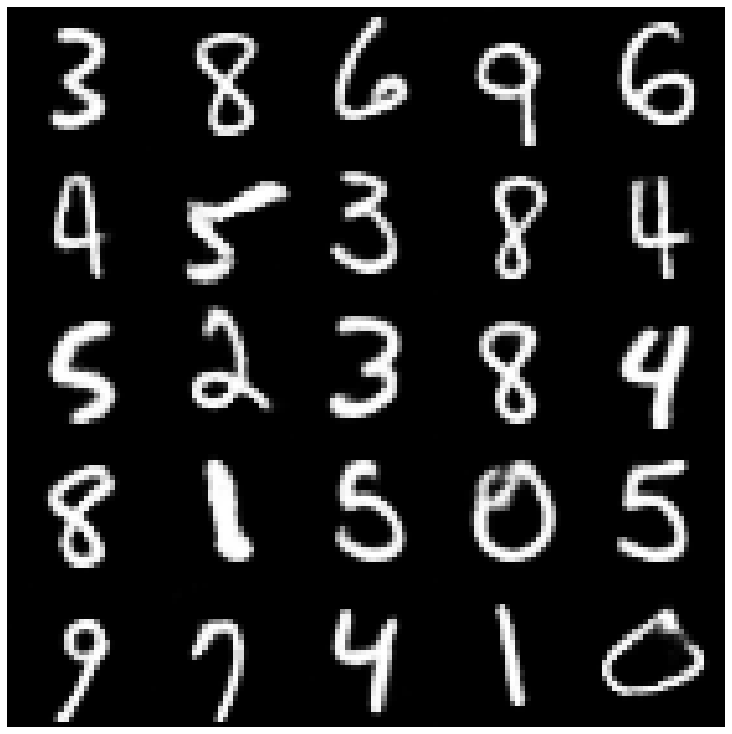 | 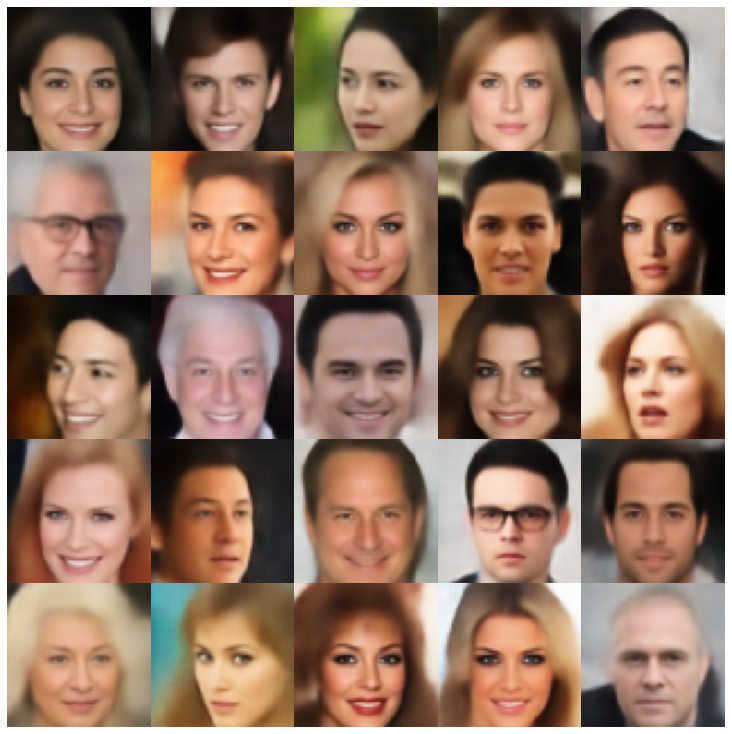 |
| Riemannian Hamiltonian Vae(Rhvae) | 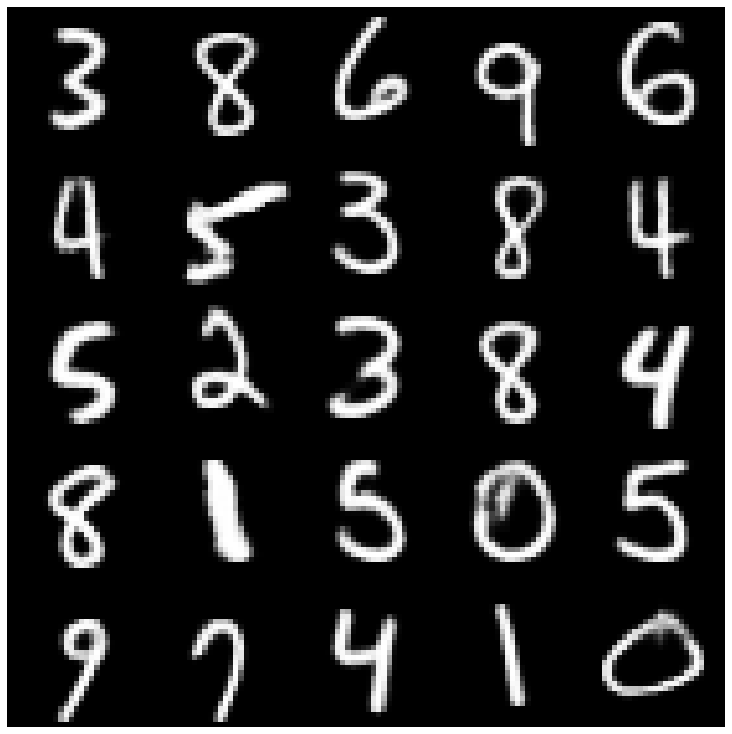 | 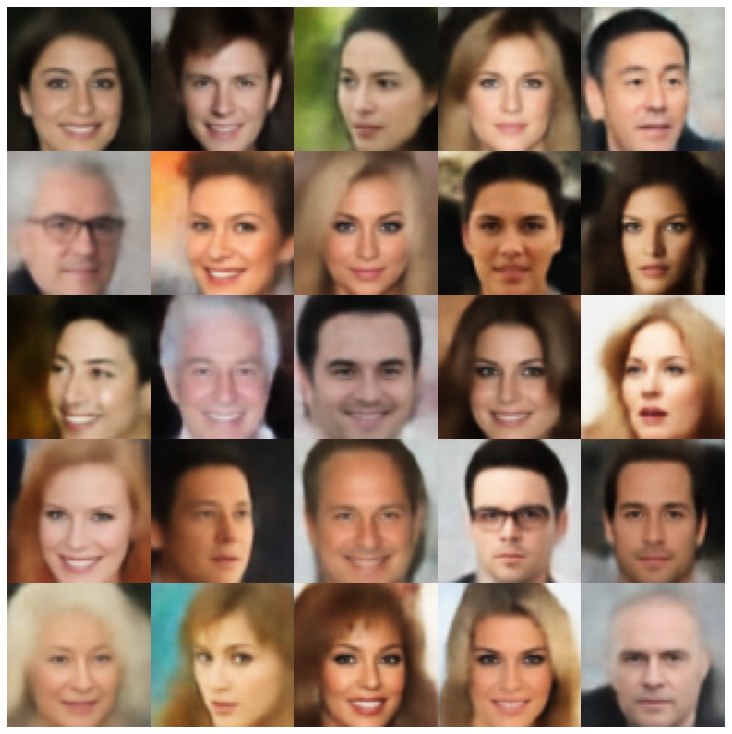 |
在这里,我们使用库和不同采样器中实现的每个模型显示生成的样品。
| 型号 | mnist | Celeba |
|---|---|---|
| AE + GaussianMixturesAmpler | 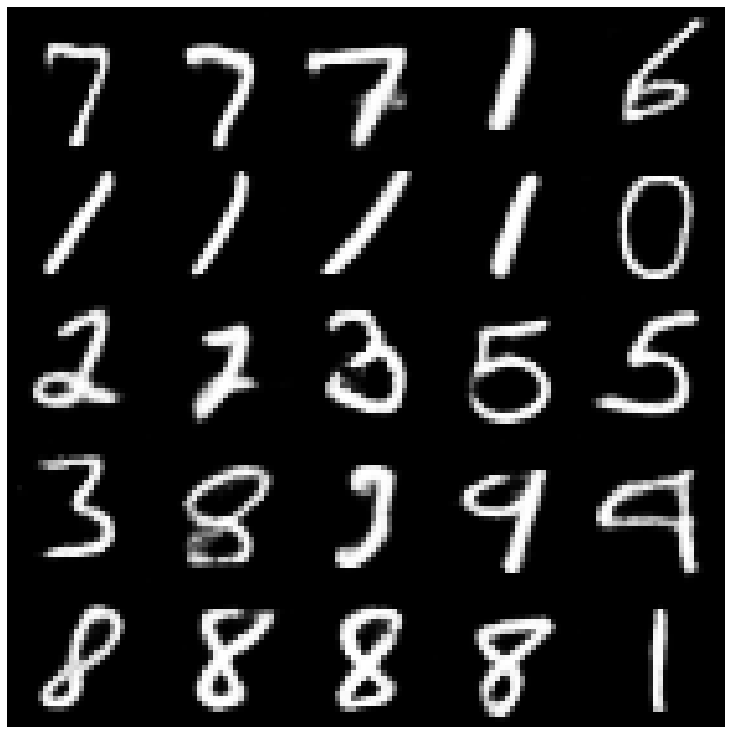 | 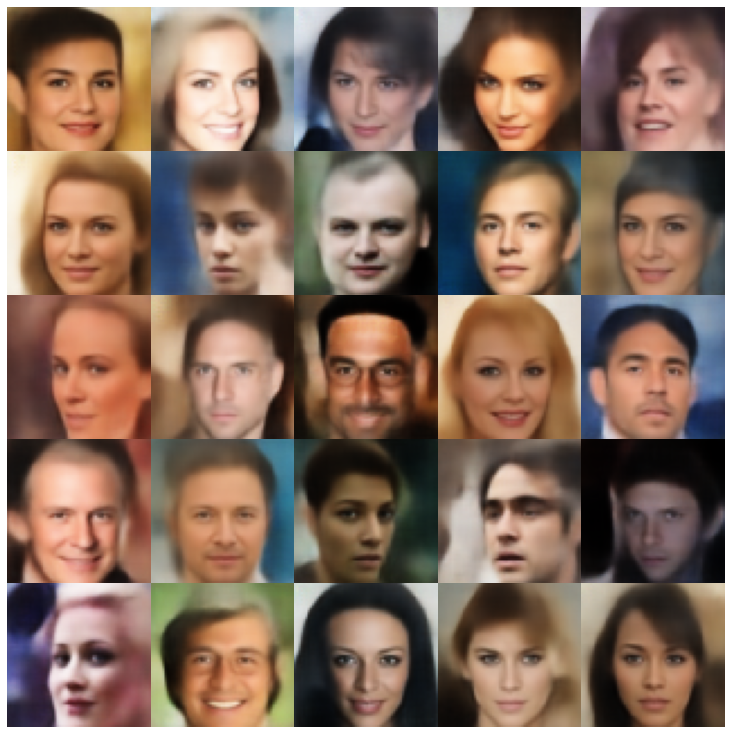 |
| vae + normalalmallpler | 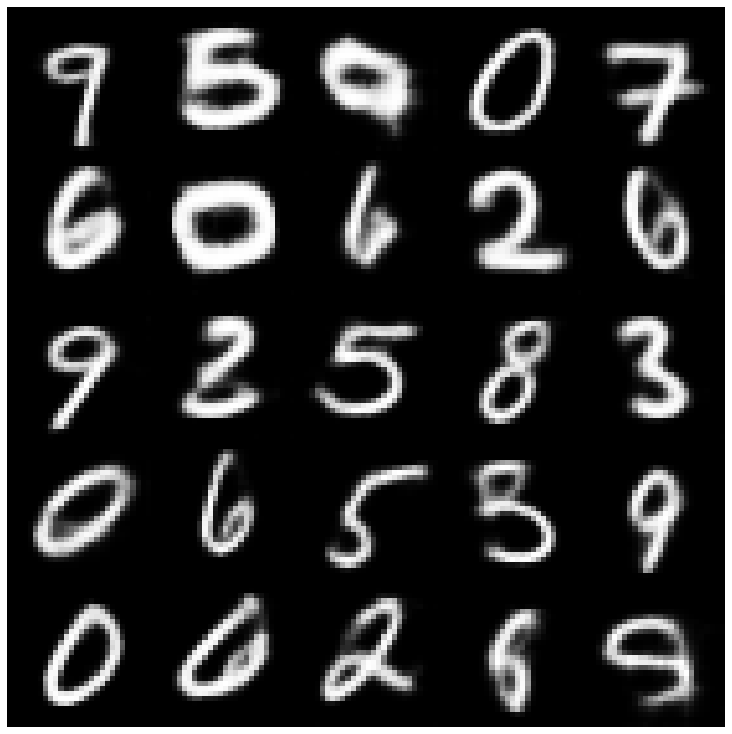 | 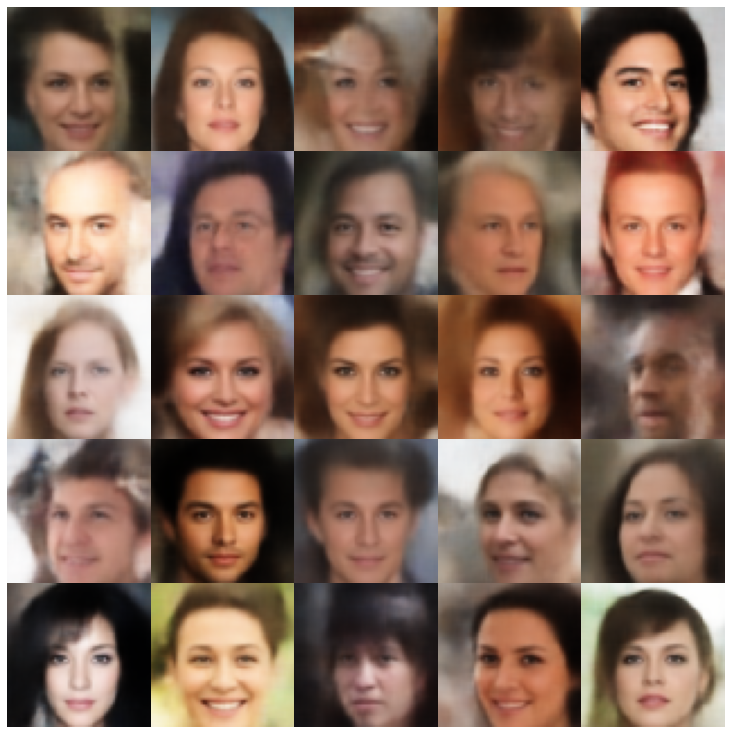 |
| Vae + GaussianMixturesAmpler | 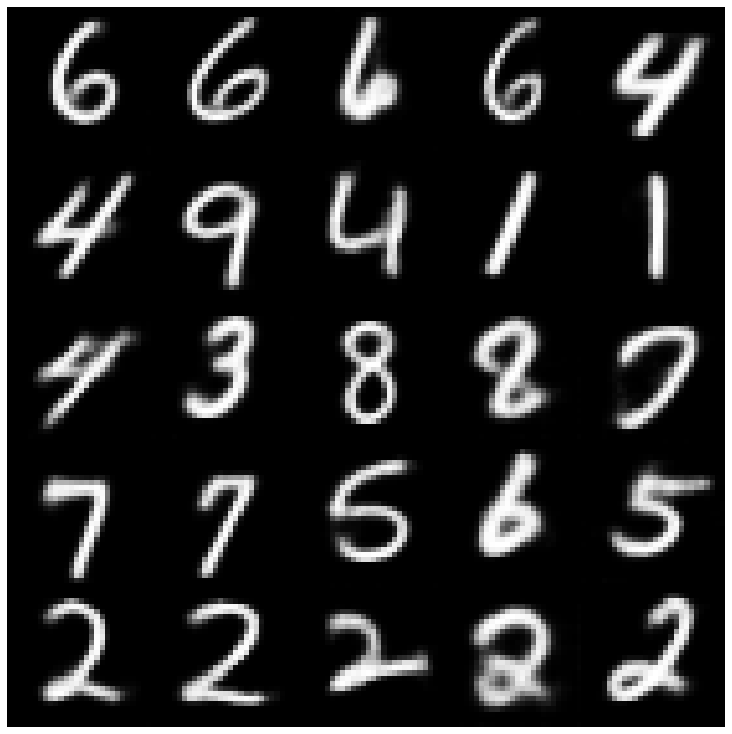 | 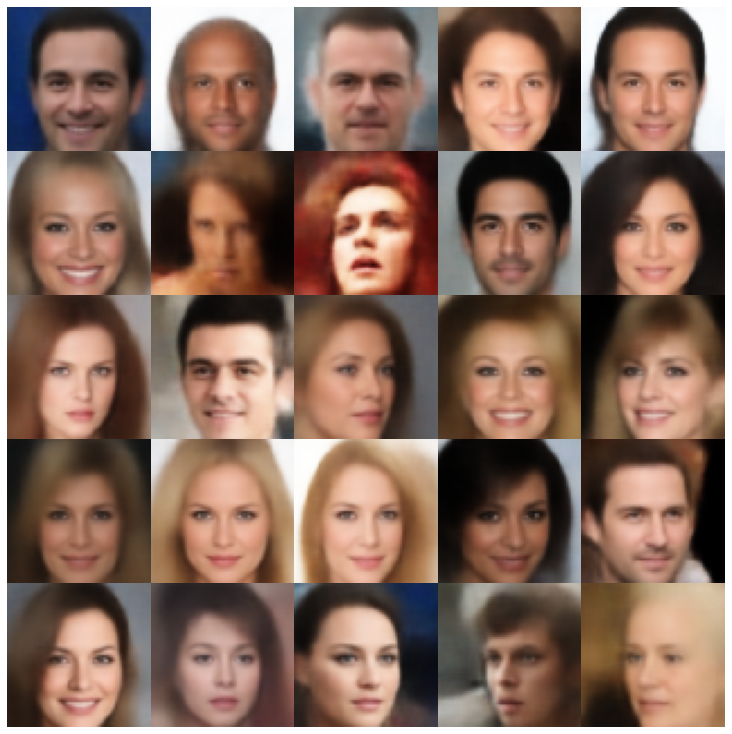 |
| vae + twostagevaesampler | 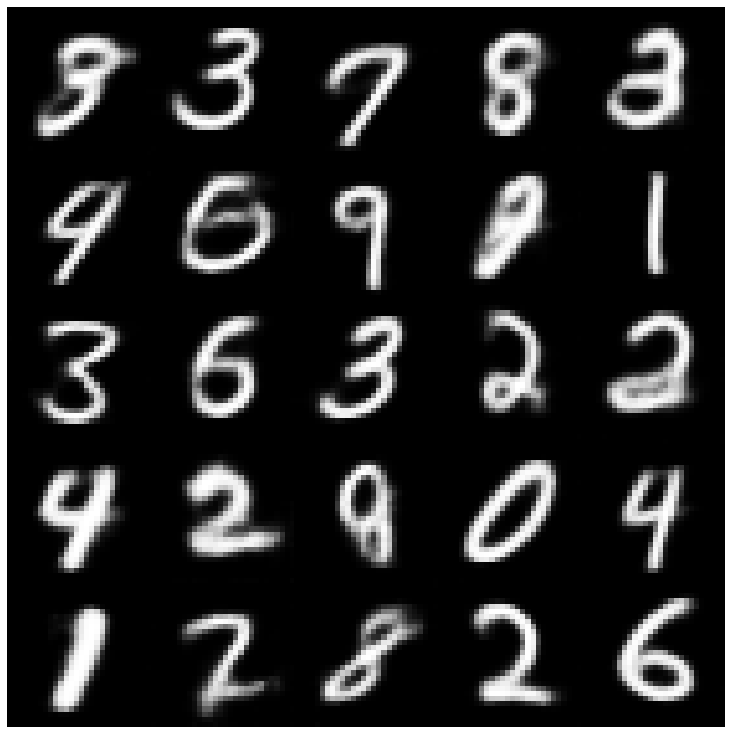 | 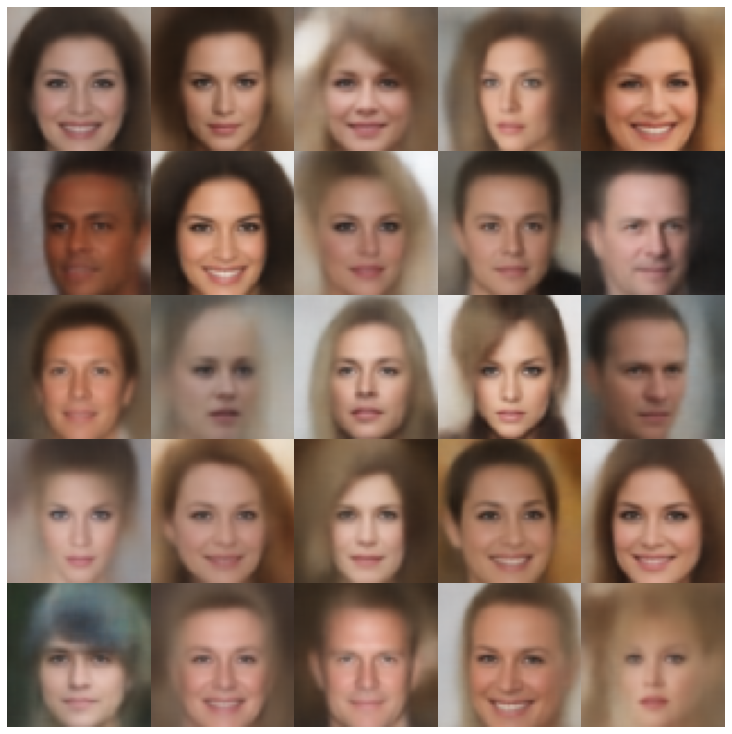 |
| vae + mafsampler | 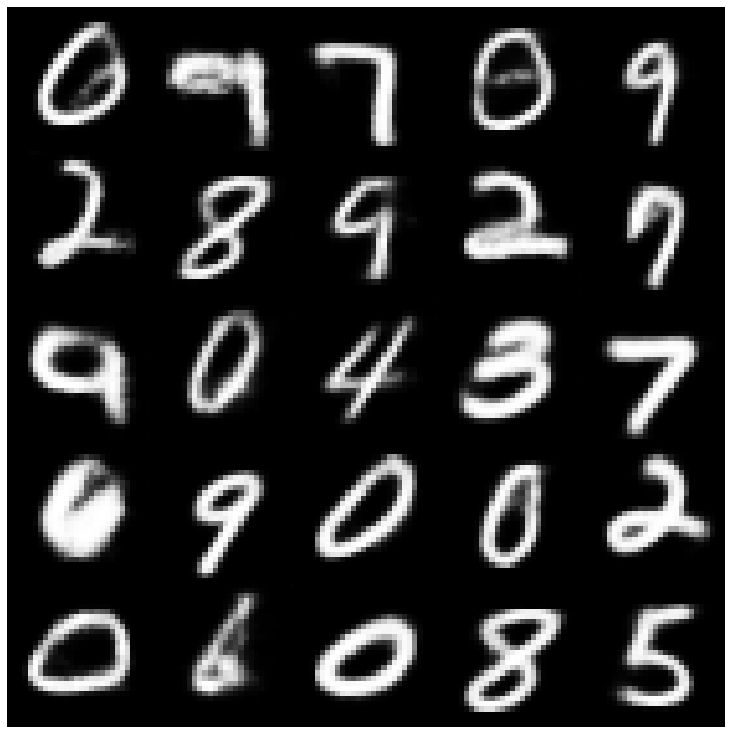 |  |
| beta-vae + normalalSampler | 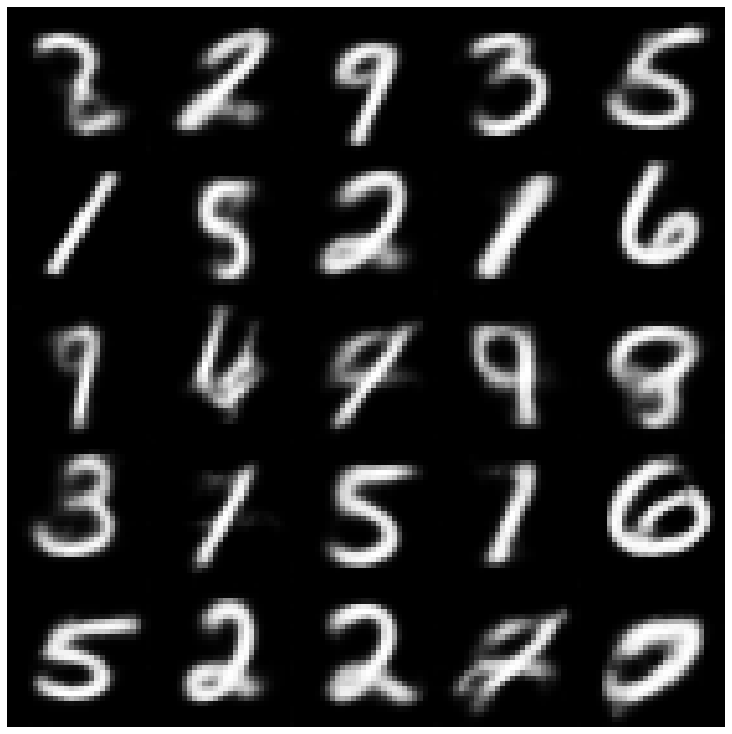 | 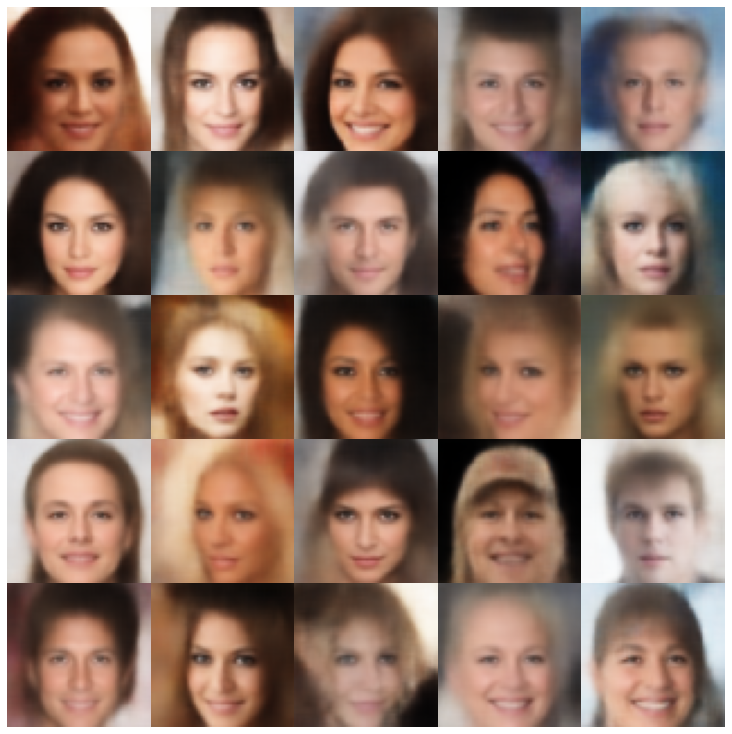 |
| vae lin nf + normalalsampler | 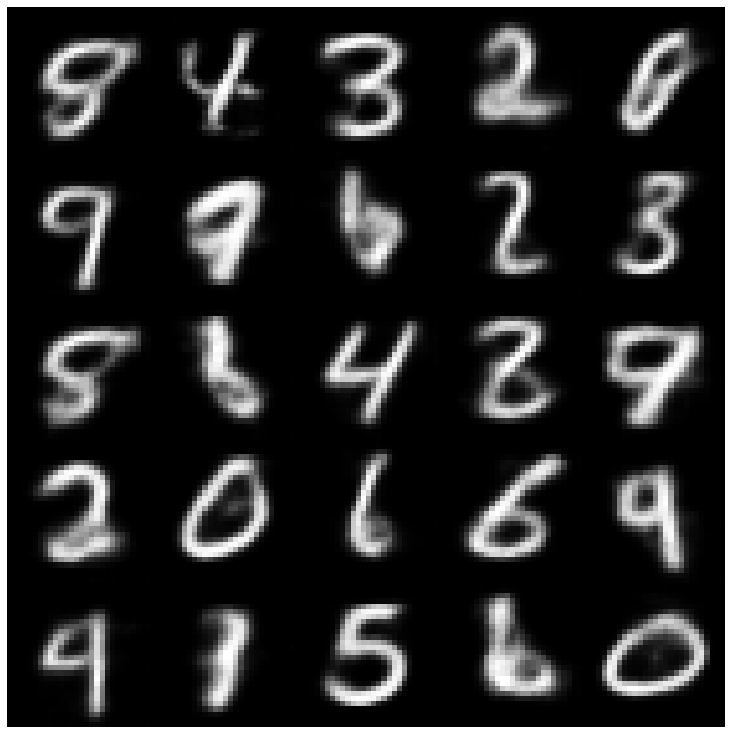 | 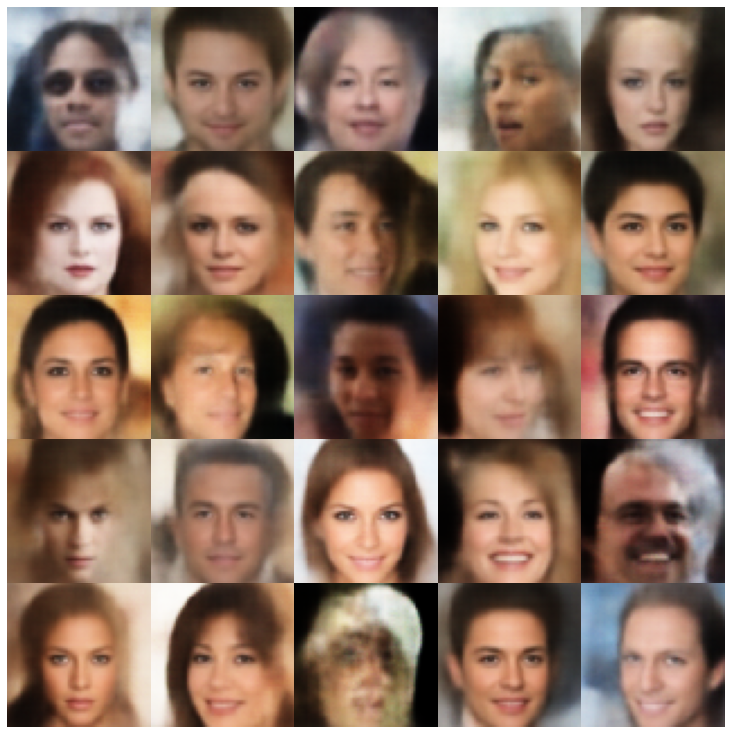 |
| vae iaf + normalalsampler | 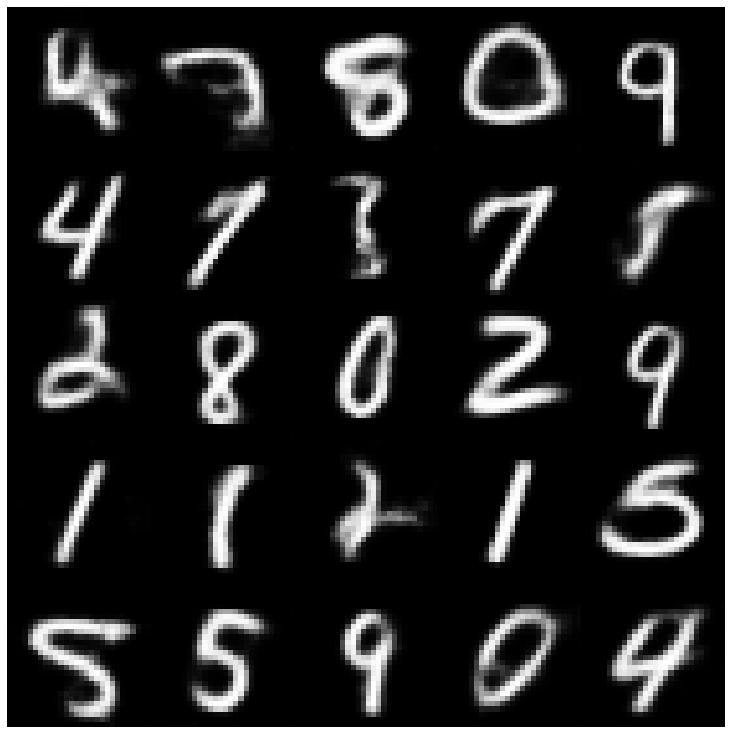 | 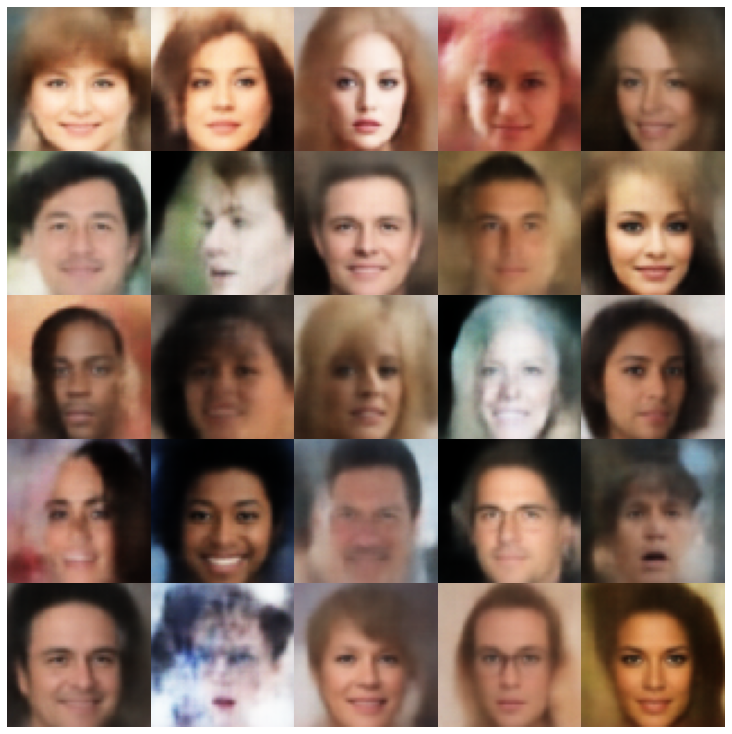 |
| 解开β-VAE + NormalSampler | 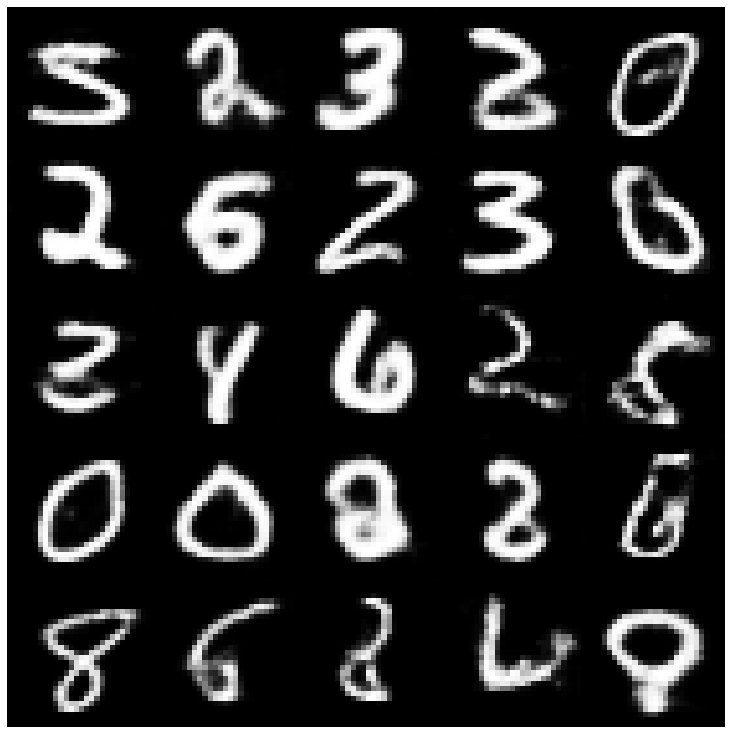 | 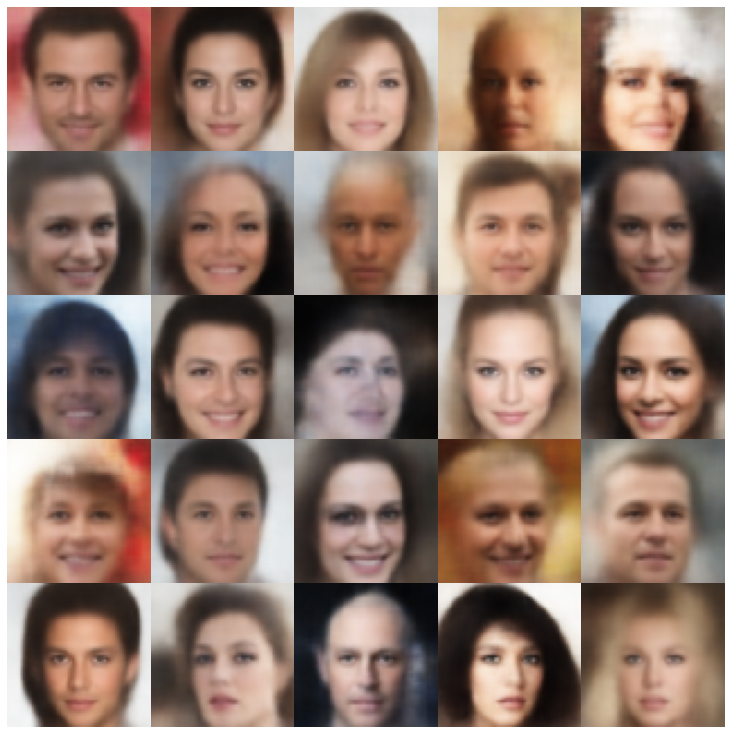 |
| factorvae + normalalsampler | 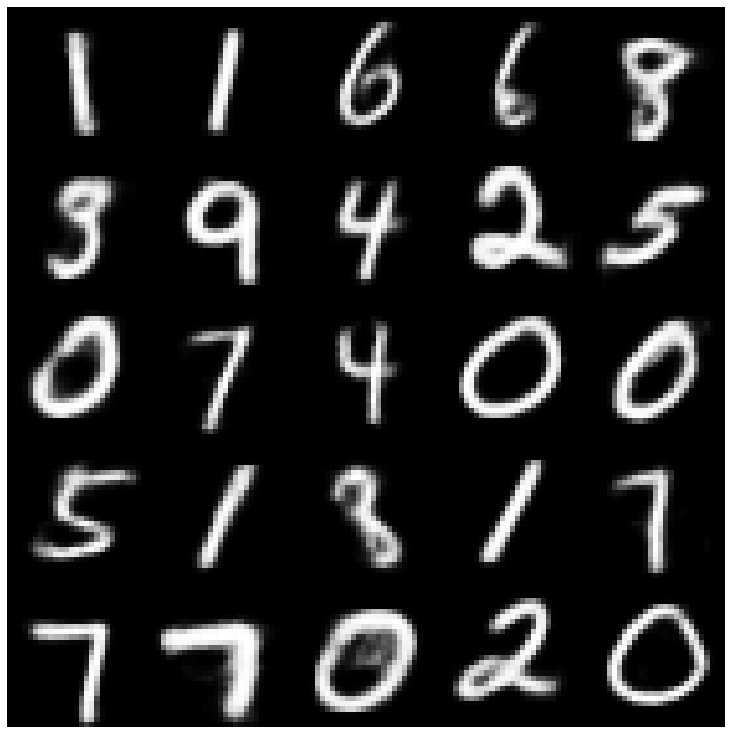 | 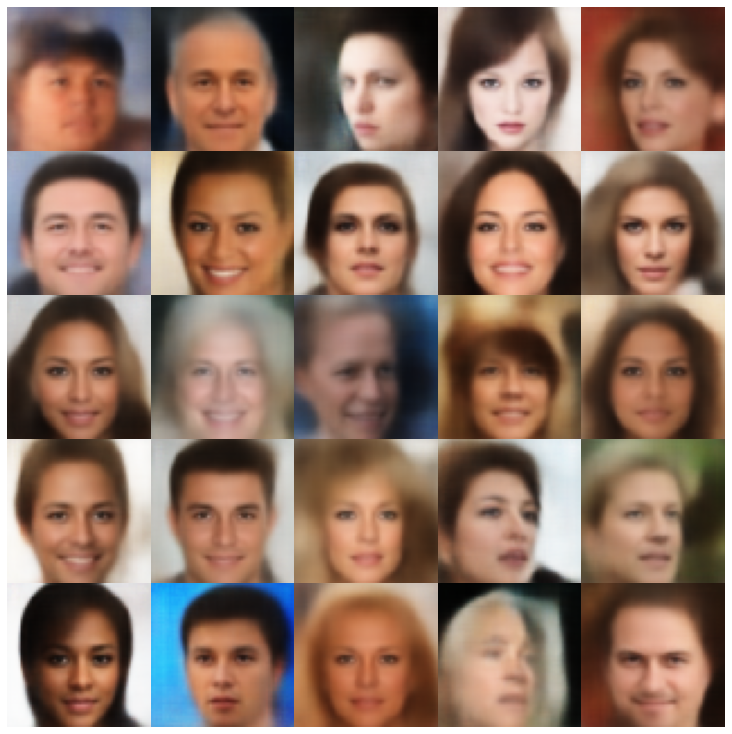 |
| betatcvae + normalalSampler | 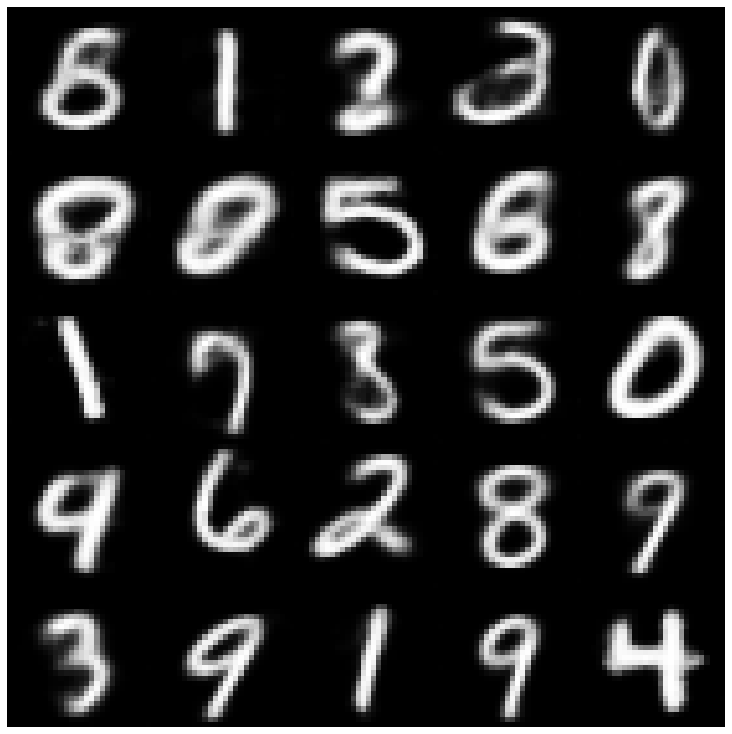 |  |
| IWAE +普通采样器 | 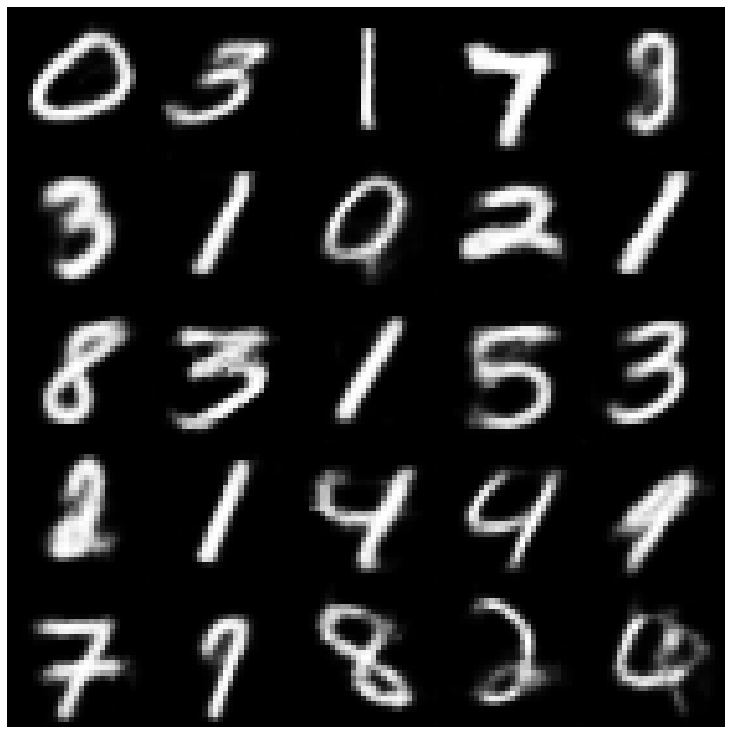 | 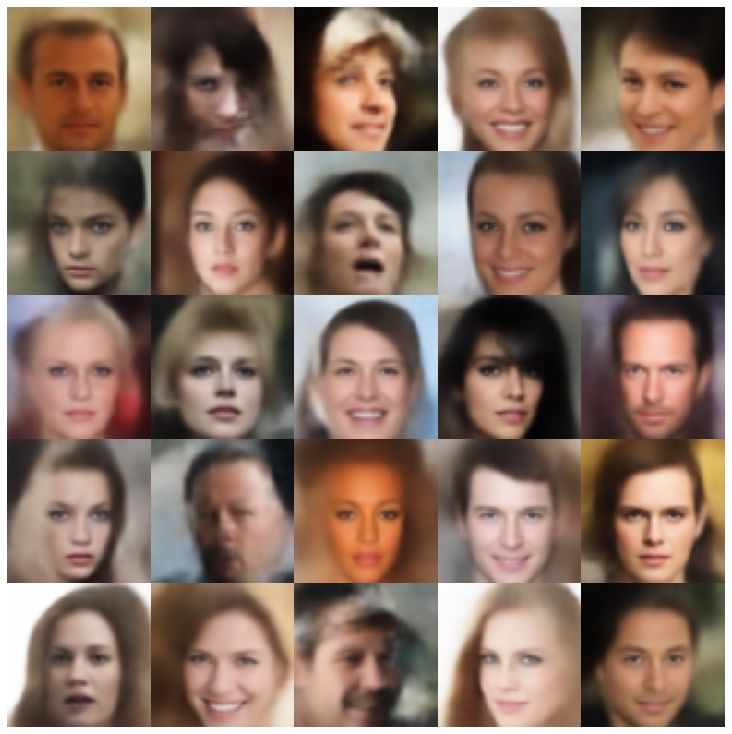 |
| MSSSSIM_VAE + NORMALSAMPLER | 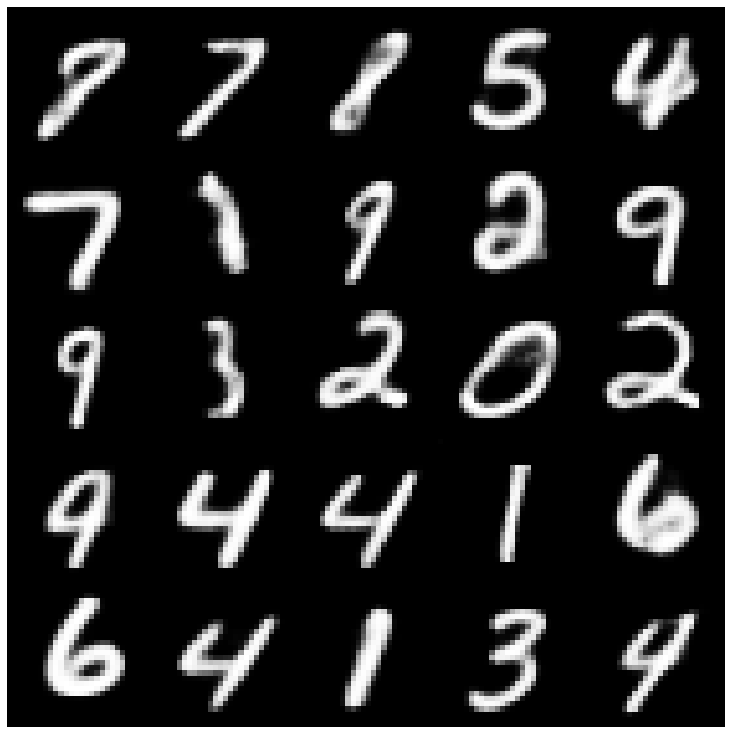 | 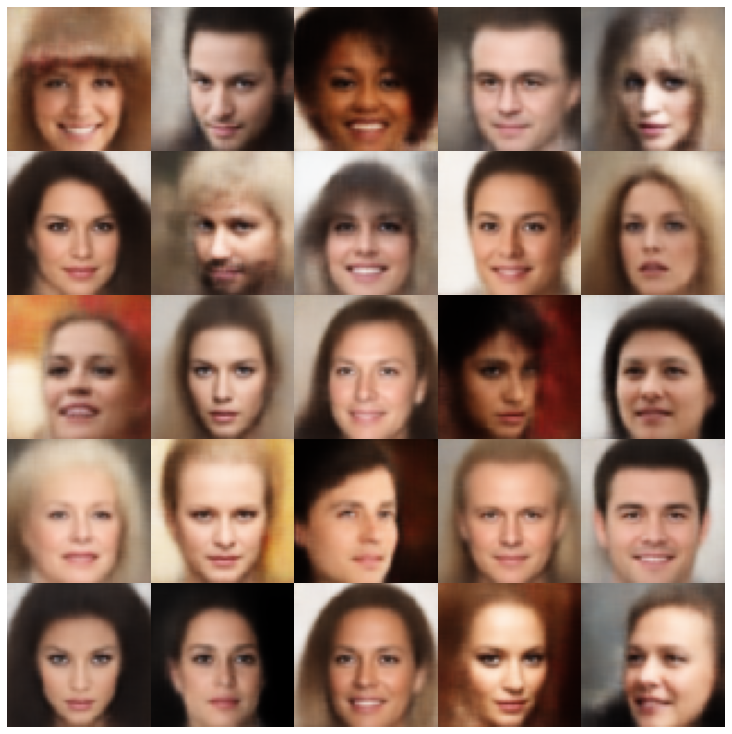 |
| WAE + NORMALSAMPLER | 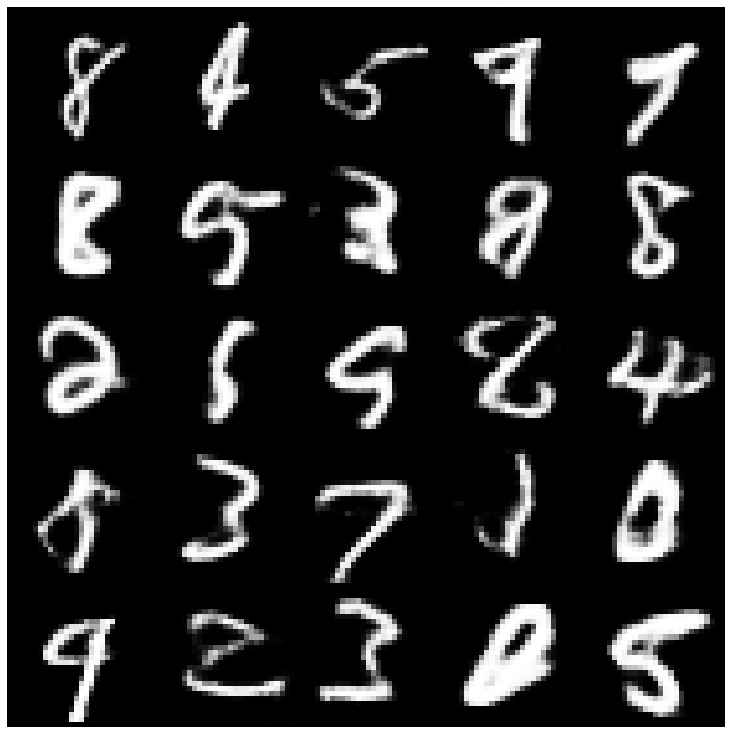 | 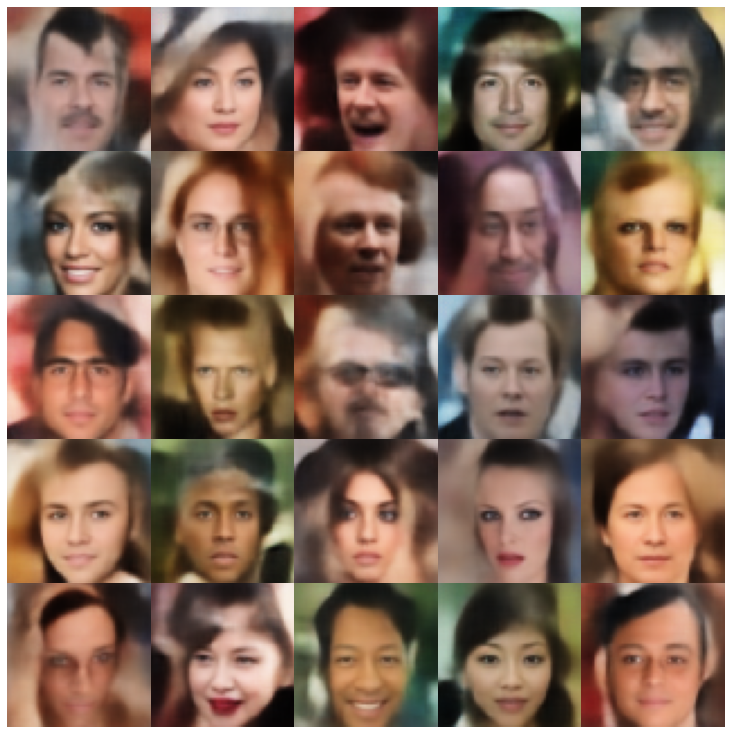 |
| info vae + normalalSampler | 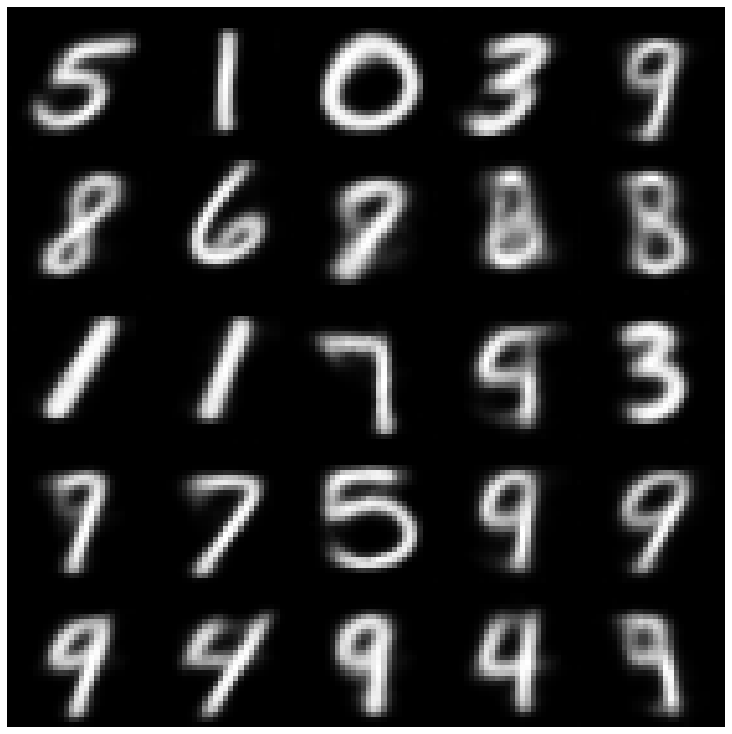 | 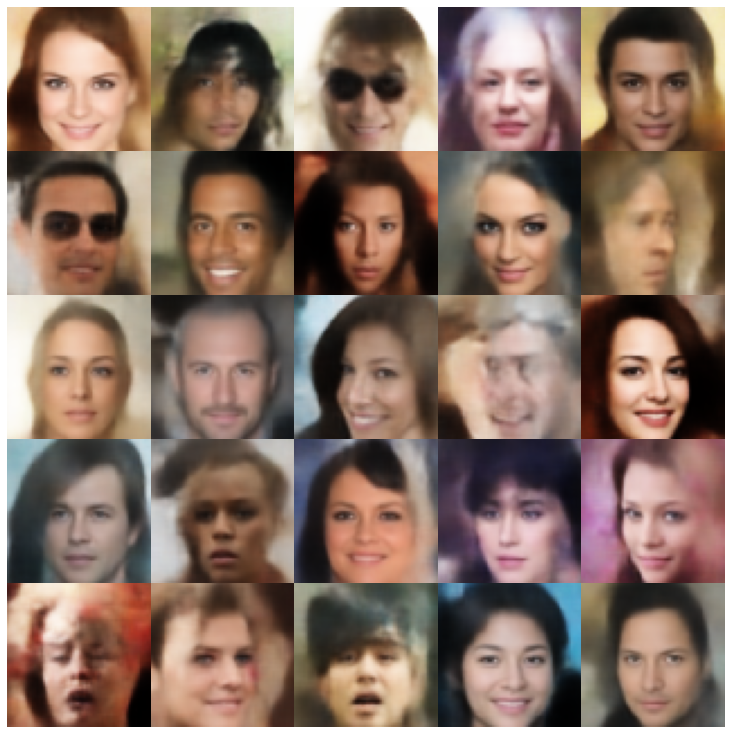 |
| SVAE + HypershiersuniberSampler | 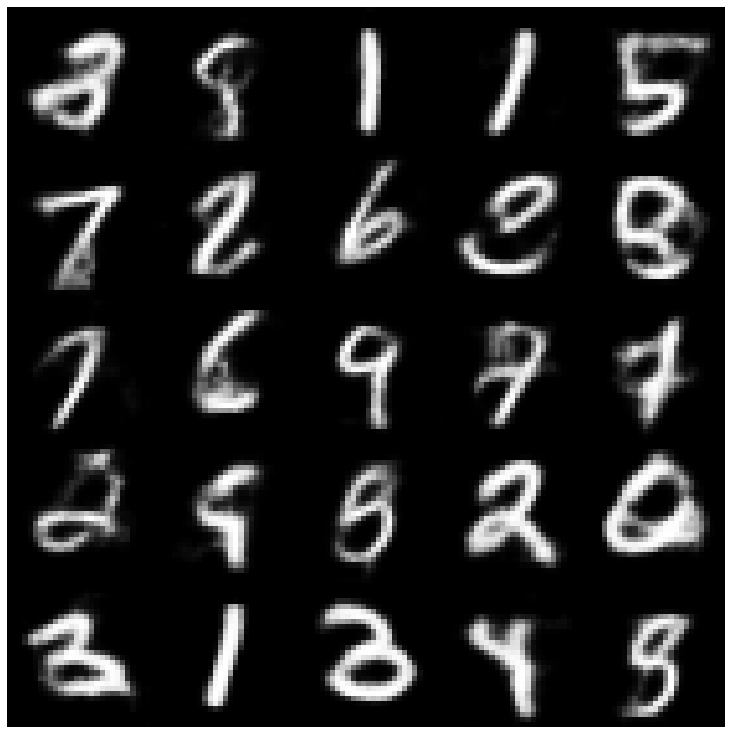 | 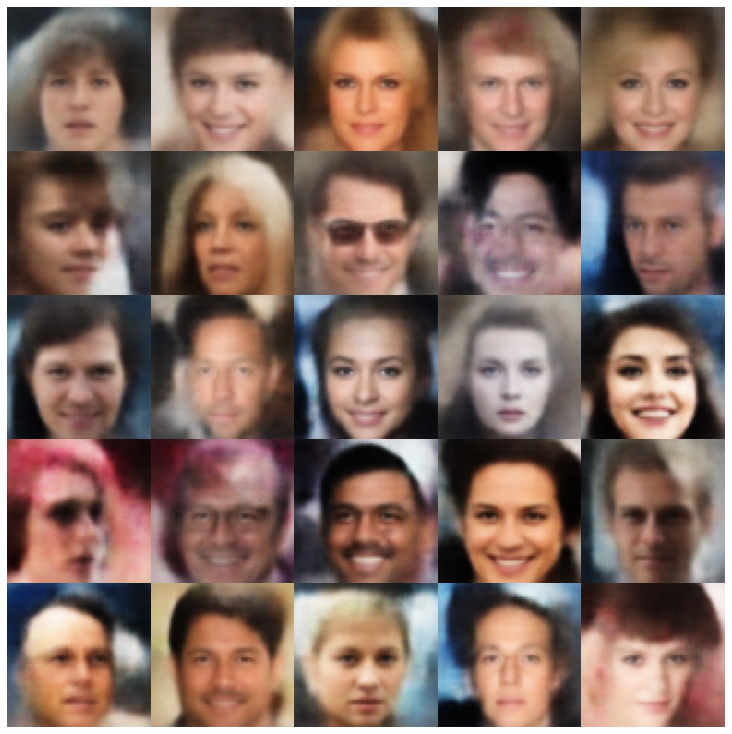 |
| 鞋面 +鞋面采样器 | 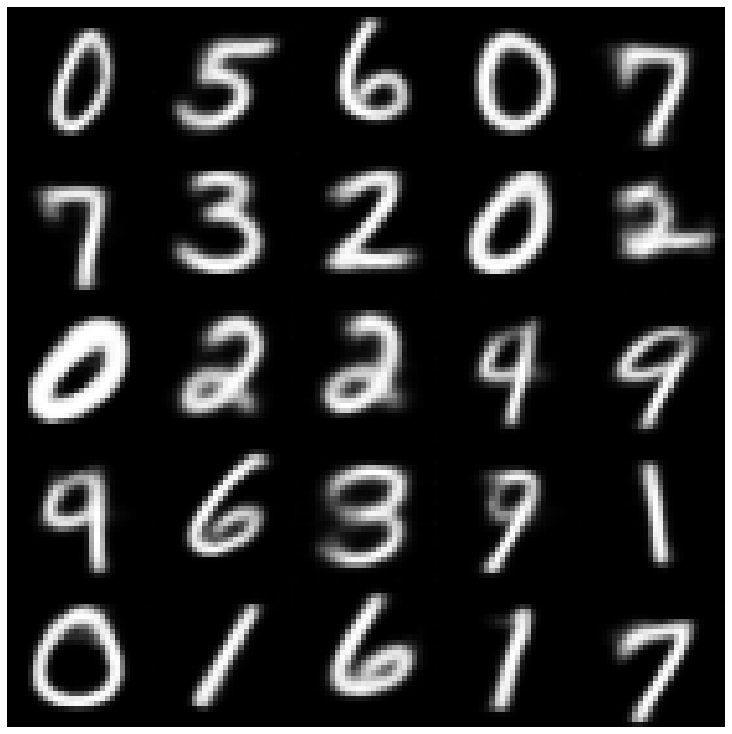 | 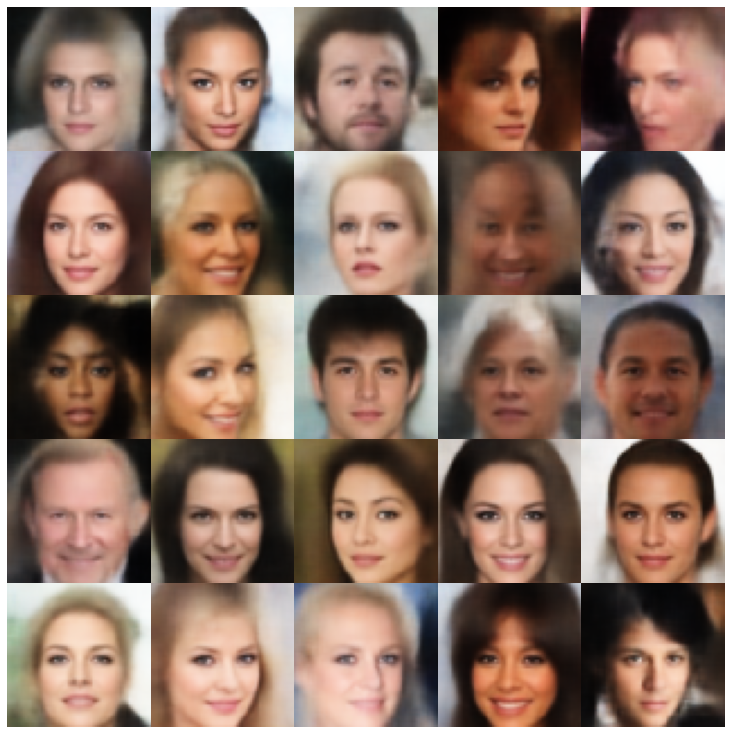 |
| versarial_ae + normalalSampler | 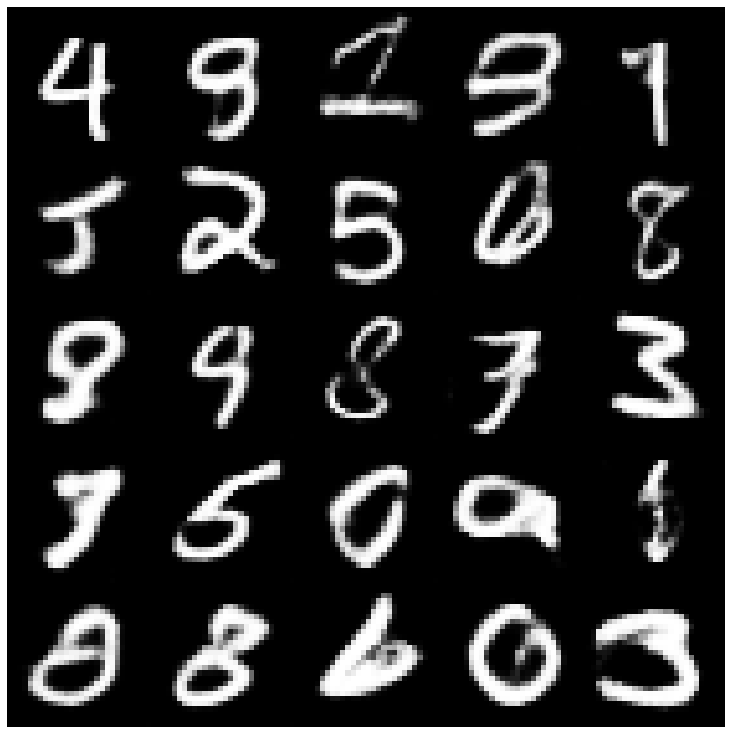 | 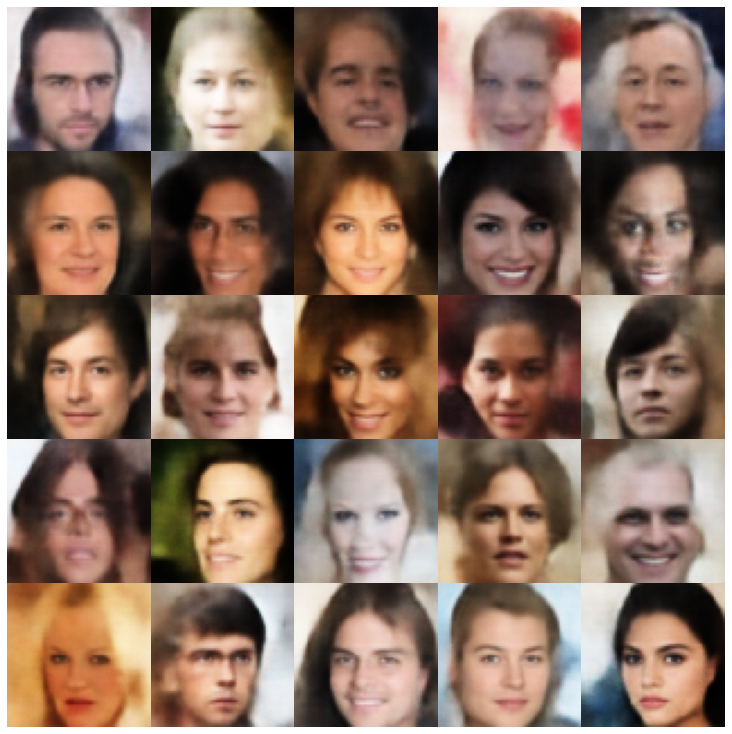 |
| Vaegan + NormalSampler | 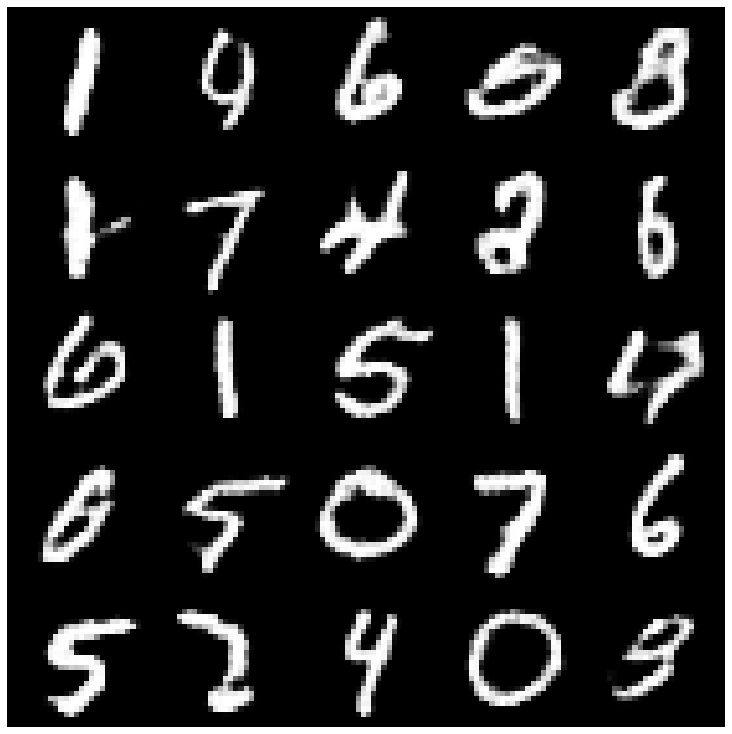 | 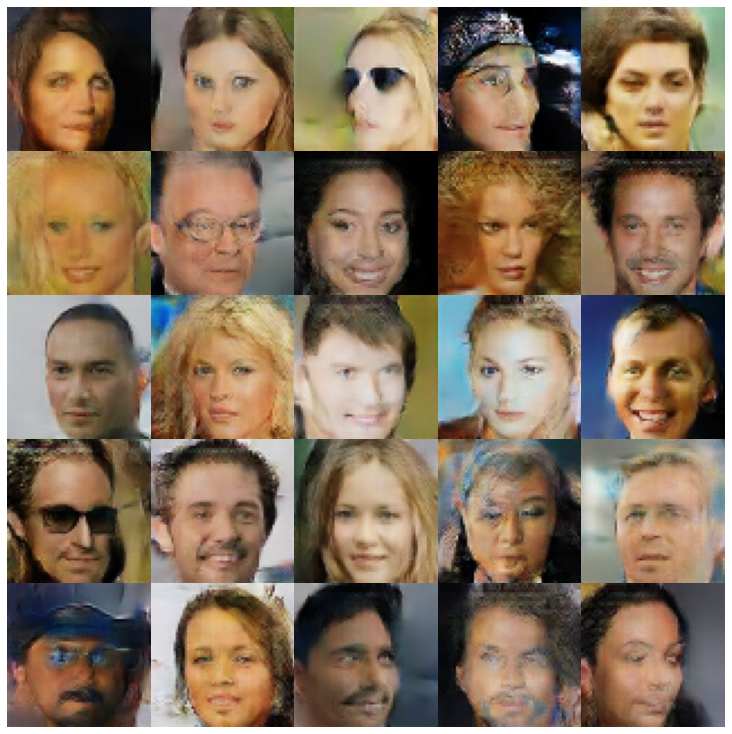 |
| VQVAE + MAFSAMPLER | 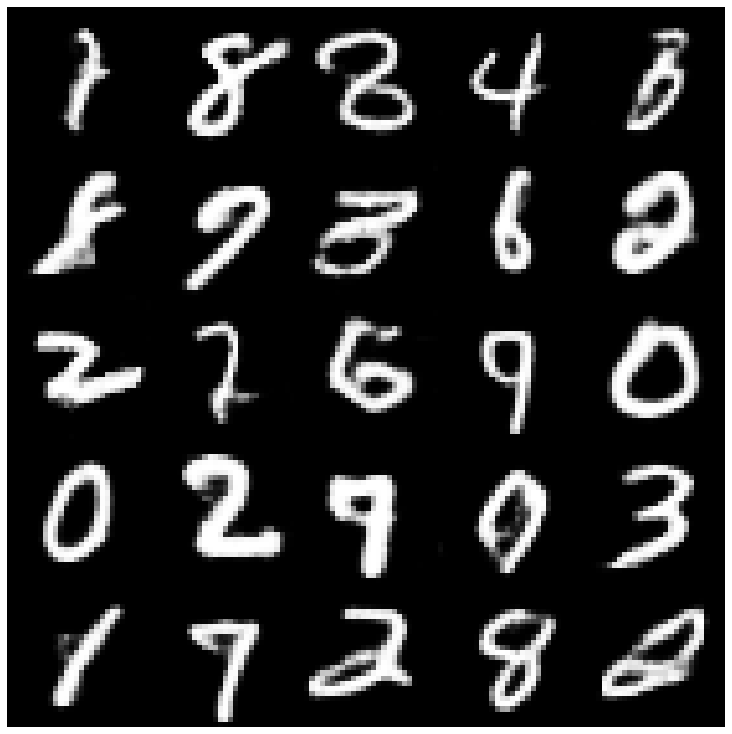 | 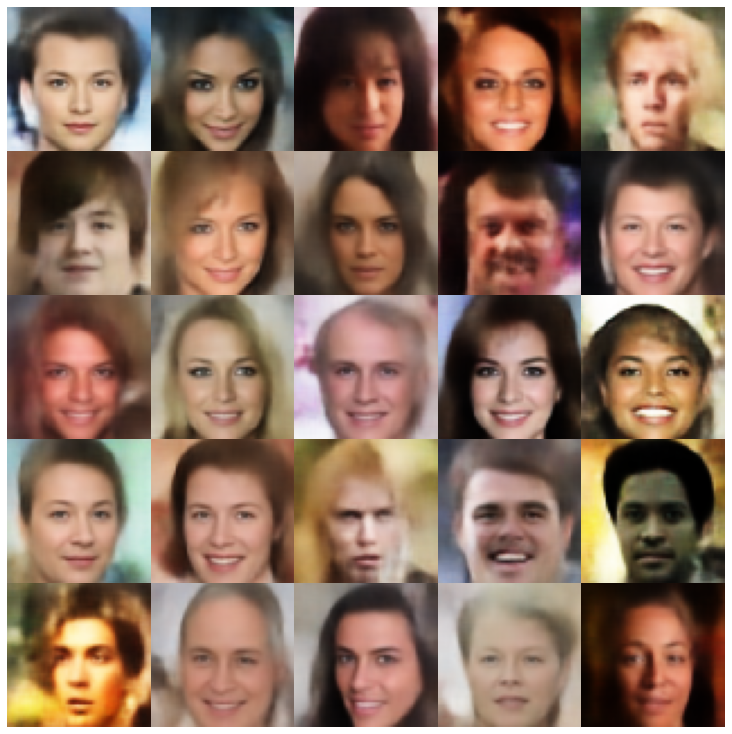 |
| hvae + normalalsampler | 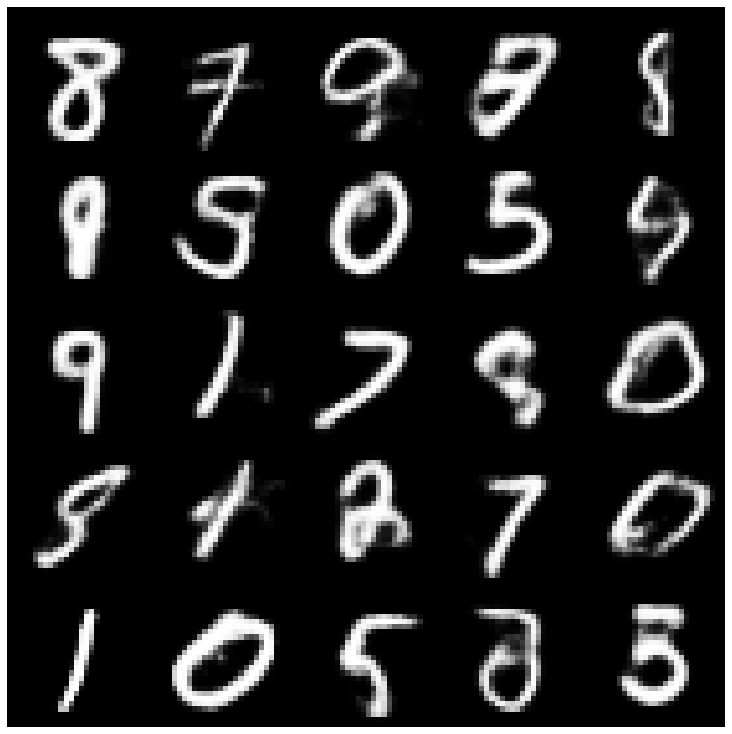 | 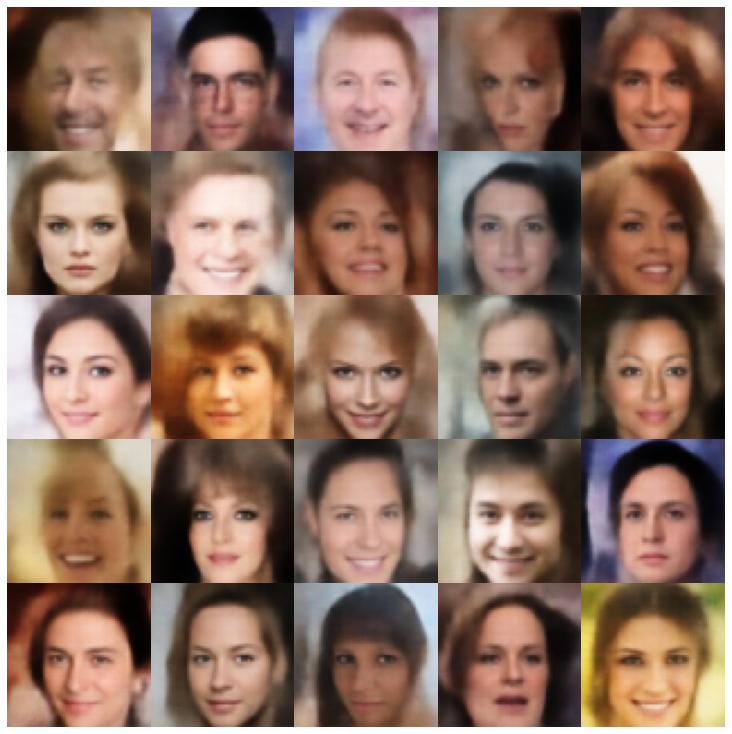 |
| rae_l2 + gaussianmixturesampler | 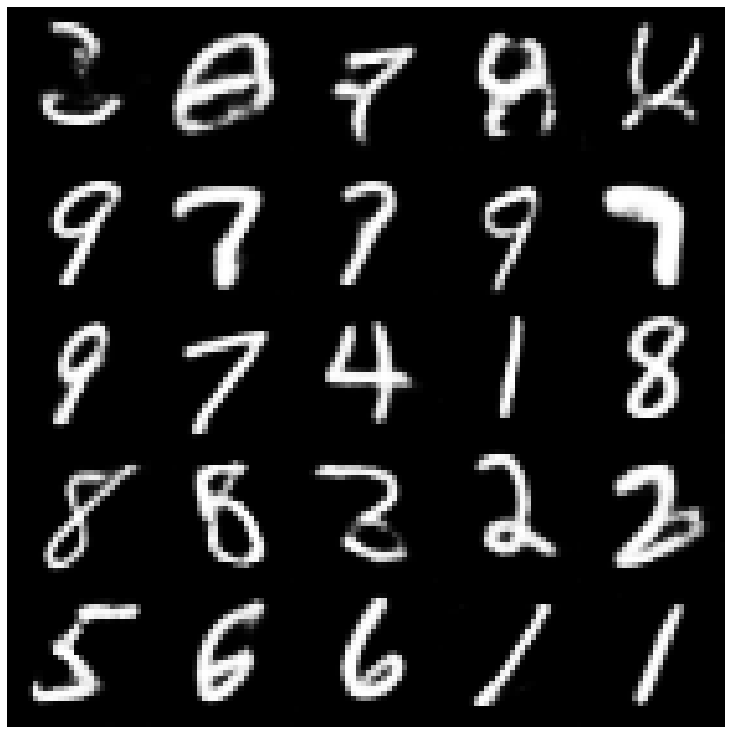 | 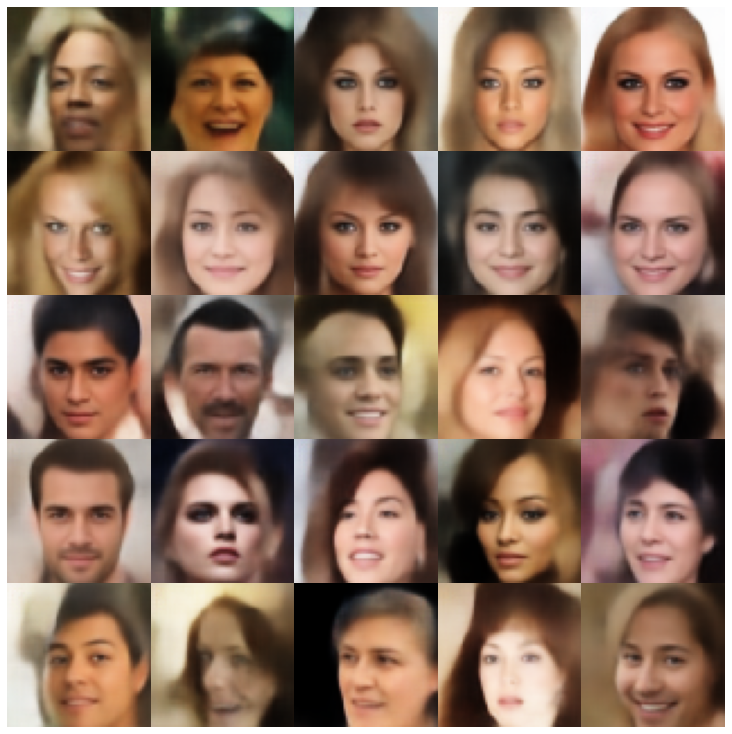 |
| rae_gp + gaussianmixturesampler | 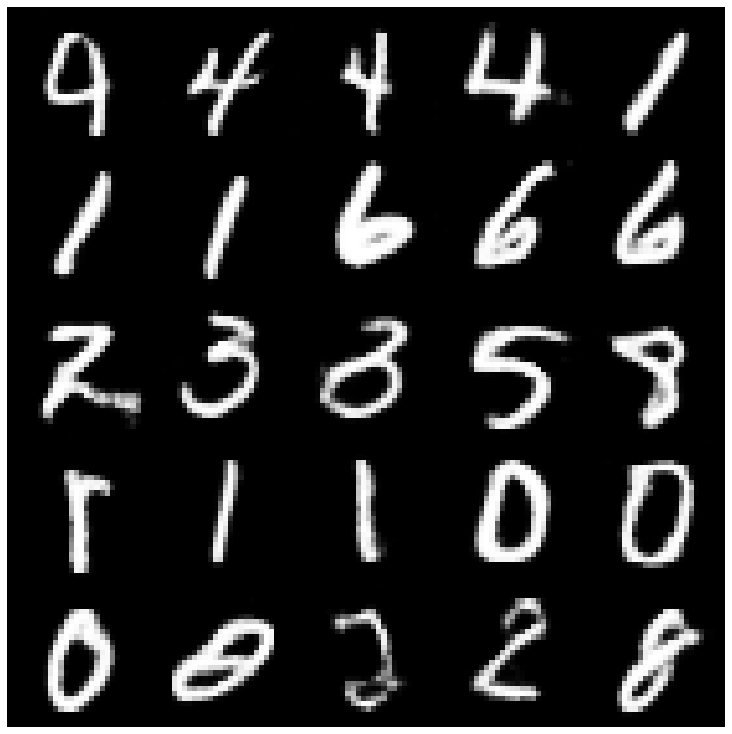 | 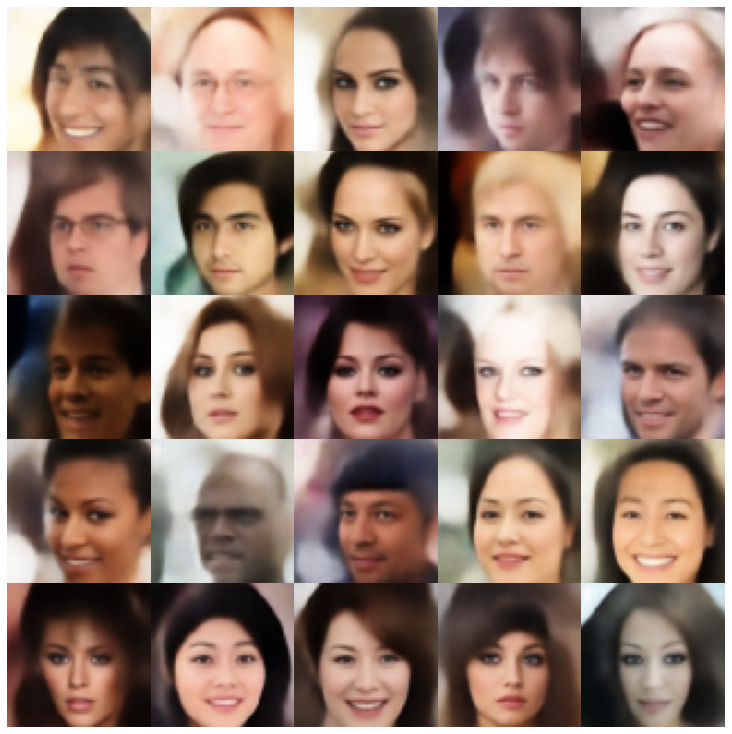 |
| Riemannian Hamiltonian Vae(Rhvae) + Rhvae采样器 | 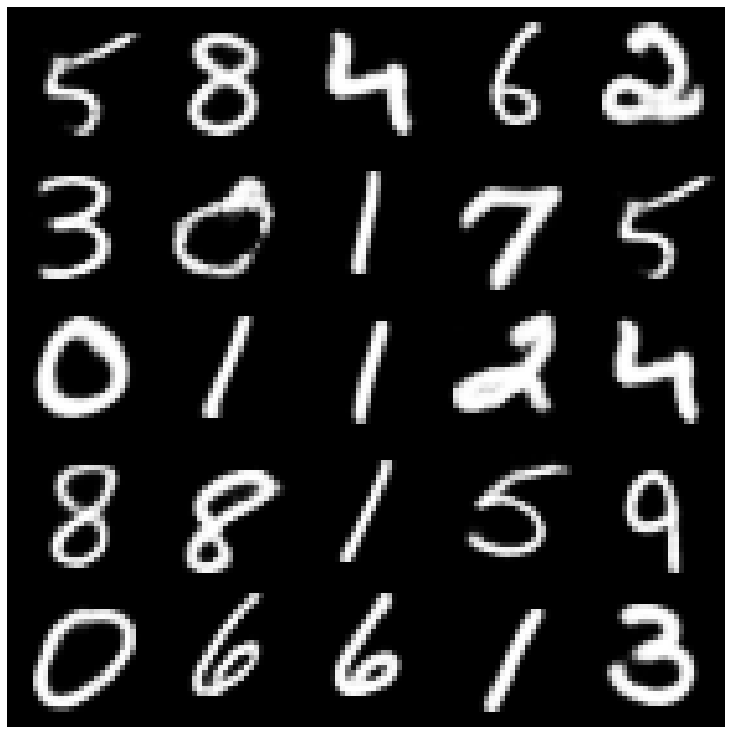 | 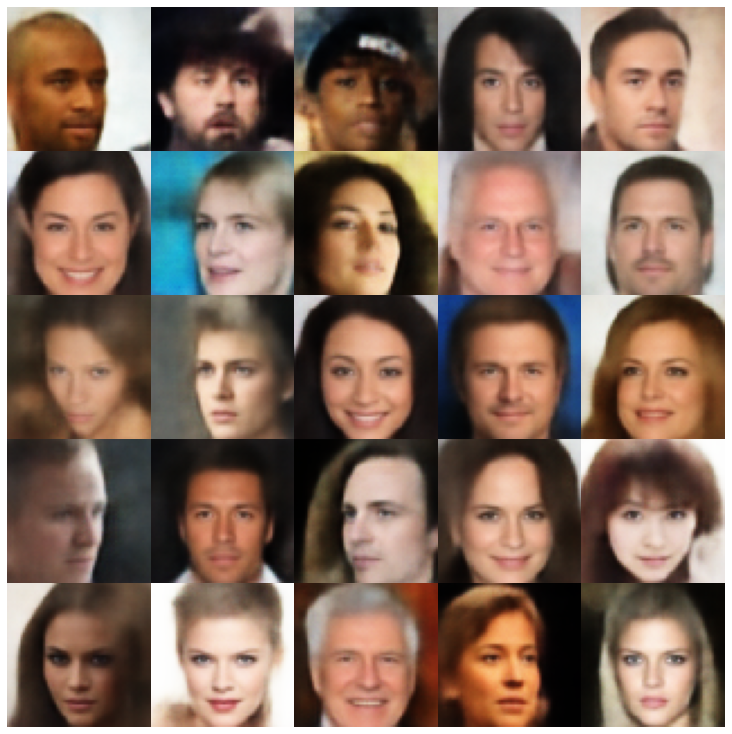 |
如果您发现这项工作有用或在研究中使用,请考虑引用我们
 @inproceedings { chadebec2022pythae ,
 author = { Chadebec, Cl'{e}ment and Vincent, Louis and Allassonniere, Stephanie } ,
 booktitle = { Advances in Neural Information Processing Systems } ,
 editor = { S. Koyejo and S. Mohamed and A. Agarwal and D. Belgrave and K. Cho and A. Oh } ,
 pages = { 21575--21589 } ,
 publisher = { Curran Associates, Inc. } ,
 title = { Pythae: Unifying Generative Autoencoders in Python - A Benchmarking Use Case } ,
 volume = { 35 } ,
 year = { 2022 }
}

