benchmark_VAE
Pythae 0.1.2
เอกสาร
ไลบรารีนี้ใช้โมเดลอัตโนมัติ (variational) ที่พบมากที่สุดบางส่วนภายใต้การใช้งานแบบครบวงจร โดยเฉพาะอย่างยิ่งมันให้ความเป็นไปได้ที่จะทำการทดลองและเปรียบเทียบเกณฑ์มาตรฐานโดยการฝึกอบรมแบบจำลองด้วยสถาปัตยกรรมเครือข่ายประสาทอัตโนมัติแบบเดียวกัน คุณลักษณะนี้ ทำให้ AutoEncoder ของคุณเอง ช่วยให้คุณสามารถฝึกอบรมโมเดลเหล่านี้ด้วยข้อมูลของคุณเองและตัวเข้ารหัสและตัวถอดรหัสเครือข่ายประสาท มันรวมเครื่องมือตรวจสอบการทดลองเช่น WANDB, MLFLOW หรือ Comet-ML? และอนุญาตให้ใช้การแบ่งปันและการโหลดจาก HuggingFace Hub? ในรหัสไม่กี่บรรทัด
ข่าว ?
ณ ตอนนี้ V0.1.0 ตอนนี้ Pythae รองรับการฝึกอบรมแบบกระจายโดยใช้ DDP ของ Pytorch ตอนนี้คุณสามารถฝึกอบรม VAE ที่คุณชื่นชอบได้เร็วขึ้นและบนชุดข้อมูลขนาดใหญ่ยังคงมีรหัสไม่กี่บรรทัด ดูเกณฑ์มาตรฐานความเร็วของเรา
wandb / การทดลองด้วยการติดตาม mlflow / การทดลองด้วย comet_ml ในการติดตั้งรีลีสที่เสถียรล่าสุดของไลบรารีนี้รันต่อไปนี้โดยใช้ pip
$ pip install pythae ในการติดตั้งไลบรารีรุ่น GitHub ล่าสุดรันต่อไปนี้โดยใช้ pip
$ pip install git+https://github.com/clementchadebec/benchmark_VAE.gitหรือหรือคุณสามารถโคลน GitHub Repo เพื่อเข้าถึงการทดสอบบทเรียนและสคริปต์
$ git clone https://github.com/clementchadebec/benchmark_VAE.gitและติดตั้งไลบรารี
$ cd benchmark_VAE
$ pip install -e . ด้านล่างเป็นรายการของโมเดลที่ใช้ในห้องสมุดในปัจจุบัน
| แบบจำลอง | ตัวอย่างการฝึกอบรม | กระดาษ | การดำเนินการอย่างเป็นทางการ |
|---|---|---|---|
| Autoencoder (AE) | |||
| Variational Autoencoder (VAE) | การเชื่อมโยง | ||
| เบต้า variational autoencoder (betavae) | การเชื่อมโยง | ||
| VAE ที่มีกระแสการทำให้เป็นปกติเชิงเส้น (VAE_LINNF) | การเชื่อมโยง | ||
| VAE กับกระแสความไม่เท่ากันผกผัน (VAE_IAF) | การเชื่อมโยง | การเชื่อมโยง | |
| disentangled beta variational autoencoder (disentangledbetavae) | การเชื่อมโยง | ||
| disentangling โดย factorising (factorvae) | การเชื่อมโยง | ||
| Beta-tc-vae (betatcvae) | การเชื่อมโยง | การเชื่อมโยง | |
| ความสำคัญ Autoencoder (IWAE) | การเชื่อมโยง | การเชื่อมโยง | |
| การคูณ AutoEncoder ที่มีความสำคัญต่อน้ำหนัก (Miwae) | การเชื่อมโยง | ||
| Autoencoder ถ่วงน้ำหนักที่มีความสำคัญบางส่วน (Piwae) | การเชื่อมโยง | ||
| การรวมกันความสำคัญ Autoencoder (CIWAE) | การเชื่อมโยง | ||
| vae ที่มีความคล้ายคลึงกันของการรับรู้ (MSSSIM_VAE) | การเชื่อมโยง | ||
| Wasserstein Autoencoder (WAE) | การเชื่อมโยง | การเชื่อมโยง | |
| ข้อมูล AutoEncoder ตัวแปร (infovae_mmd) | การเชื่อมโยง | ||
| Vamp Autoencoder (VAMP) | การเชื่อมโยง | การเชื่อมโยง | |
| Hyperspherical VAE (SVAE) | การเชื่อมโยง | การเชื่อมโยง | |
| Poincaré Disk Vae (Poincarevae) | การเชื่อมโยง | การเชื่อมโยง | |
| AutoEncoder antcersarial (vectarial_ae) | การเชื่อมโยง | ||
| Variational autoencoder gan (vaegan)? | การเชื่อมโยง | การเชื่อมโยง | |
| เวกเตอร์ปริมาณ VAE (VQVAE) | การเชื่อมโยง | การเชื่อมโยง | |
| Hamiltonian Vae (HVAE) | การเชื่อมโยง | การเชื่อมโยง | |
| Are -reganized AE ด้วย L2 Decoder Param (RAE_L2) | การเชื่อมโยง | การเชื่อมโยง | |
| AE AE ปกติด้วยการลงโทษการไล่ระดับสี (RAE_GP) | การเชื่อมโยง | การเชื่อมโยง | |
| Riemannian Hamiltonian Vae (Rhvae) | การเชื่อมโยง | การเชื่อมโยง | |
| ควอนตัมที่เหลืออยู่ตามลำดับชั้น (HRQVAE) | การเชื่อมโยง | การเชื่อมโยง |
ดูการสร้างใหม่และการสร้างผลลัพธ์สำหรับทุกรุ่นดังกล่าวข้างต้น
ด้านล่างเป็นรายการของโมเดลที่ใช้ในห้องสมุดในปัจจุบัน
| ตัวอย่าง | แบบจำลอง | กระดาษ | การดำเนินการอย่างเป็นทางการ |
|---|---|---|---|
| ก่อนหน้านี้ก่อน (normalsampler) | ทุกรุ่น | การเชื่อมโยง | |
| ส่วนผสมแบบเกาส์เซียน (GaussianMixturesAmpler) | ทุกรุ่น | การเชื่อมโยง | การเชื่อมโยง |
| Sampler VAE สองขั้นตอน (Twostagevaesampler) | โมเดลที่ใช้ VAE ทั้งหมด | การเชื่อมโยง | การเชื่อมโยง |
| Unit Sphere Uniform Sampler (Hypersphereuniformsampler) | svae | การเชื่อมโยง | การเชื่อมโยง |
| Poincaré Disk Sampler (Poincaredisksampler) | Poincarevae | การเชื่อมโยง | การเชื่อมโยง |
| VAMP Prior Sampler (Vampsampler) | ปะติดปะต่อ | การเชื่อมโยง | การเชื่อมโยง |
| Manifold Sampler (Rhvaesampler) | Rhvae | การเชื่อมโยง | การเชื่อมโยง |
| Masked Autoregressive Flow Sampler (Mafsampler) | ทุกรุ่น | การเชื่อมโยง | การเชื่อมโยง |
| ตัวอย่างการไหลแบบผกผันแบบอัตโนมัติ (IAFSAMPLER) | ทุกรุ่น | การเชื่อมโยง | การเชื่อมโยง |
| Pixelcnn (Pixelcnnsampler) | vqvae | การเชื่อมโยง |
เราตรวจสอบการใช้งานโดยการทำซ้ำผลลัพธ์บางอย่างที่นำเสนอในสิ่งพิมพ์ต้นฉบับเมื่อมีการเผยแพร่รหัสอย่างเป็นทางการหรือเมื่อมีรายละเอียดเพียงพอเกี่ยวกับส่วนการทดลองของเอกสาร ดูการทำซ้ำสำหรับรายละเอียดเพิ่มเติม
ในการเปิดตัวการฝึกอบรมแบบจำลองคุณจะต้องโทรหาอินสแตนซ์ TrainingPipeline
 > >> from pythae . pipelines import TrainingPipeline
> >> from pythae . models import VAE , VAEConfig
> >> from pythae . trainers import BaseTrainerConfig

> >> # Set up the training configuration
>> > my_training_config = BaseTrainerConfig (
...	output_dir = 'my_model' ,
...	num_epochs = 50 ,
...	learning_rate = 1e-3 ,
...	per_device_train_batch_size = 200 ,
...	per_device_eval_batch_size = 200 ,
...	train_dataloader_num_workers = 2 ,
...	eval_dataloader_num_workers = 2 ,
...	steps_saving = 20 ,
...	optimizer_cls = "AdamW" ,
...	optimizer_params = { "weight_decay" : 0.05 , "betas" : ( 0.91 , 0.995 )},
...	scheduler_cls = "ReduceLROnPlateau" ,
...	scheduler_params = { "patience" : 5 , "factor" : 0.5 }
... )
> >> # Set up the model configuration
>> > my_vae_config = model_config = VAEConfig (
...	input_dim = ( 1 , 28 , 28 ),
...	latent_dim = 10
... )
> >> # Build the model
>> > my_vae_model = VAE (
...	model_config = my_vae_config
... )
> >> # Build the Pipeline
>> > pipeline = TrainingPipeline (
... 	training_config = my_training_config ,
... 	model = my_vae_model
... )
> >> # Launch the Pipeline
>> > pipeline (
...	train_data = your_train_data , # must be torch.Tensor, np.array or torch datasets
...	eval_data = your_eval_data # must be torch.Tensor, np.array or torch datasets
... )
ในตอนท้ายของการฝึกอบรมน้ำหนักรุ่นที่ดีที่สุดการกำหนดค่าแบบจำลองและการกำหนดค่าการฝึกอบรมจะถูกเก็บไว้ในโฟลเดอร์ final_model ที่มีอยู่ใน my_model/MODEL_NAME_training_YYYY-MM-DD_hh-mm-ss (ด้วย my_model เป็น output_dir ของ BaseTrainerConfig ) หากคุณตั้งค่าอาร์กิวเมนต์ steps_saving เพิ่มเติมให้เป็นค่าที่แน่นอนโฟลเดอร์ชื่อ checkpoint_epoch_k ที่มีน้ำหนักรุ่นที่ดีที่สุดเครื่องมือเพิ่มประสิทธิภาพตัวกำหนดตารางเวลาการกำหนดค่าและการกำหนดค่าการฝึกอบรมที่ Epoch K จะปรากฏใน my_model/MODEL_NAME_training_YYYY-MM-DD_hh-mm-ss
นอกจากนี้เรายังให้ตัวอย่างสคริปต์การฝึกอบรมที่นี่ซึ่งสามารถใช้ในการฝึกอบรมแบบจำลองบนชุดข้อมูลมาตรฐาน (MNIST, CIFAR10, Celeba ... ) สคริปต์สามารถเปิดใช้งานได้ด้วยคำสั่งต่อไปนี้
python training.py --dataset mnist --model_name ae --model_config ' configs/ae_config.json ' --training_config ' configs/base_training_config.json 'ดู Readme.md สำหรับรายละเอียดเพิ่มเติมเกี่ยวกับสคริปต์นี้
GenerationPipeline วิธีที่ง่ายที่สุดในการเปิดตัวการสร้างข้อมูลจากรูปแบบที่ผ่านการฝึกอบรมประกอบด้วยการใช้ GenerationPipeline ในตัวที่มีให้ใน Pythae สมมติว่าคุณต้องการสร้างตัวอย่าง 100 ตัวอย่างโดยใช้ MAFSampler สิ่งที่คุณต้องทำคือ 1) Relaod รุ่นที่ผ่านการฝึกอบรม 2) กำหนดค่าการกำหนดค่าของตัวอย่างและ 3) สร้างและเรียกใช้ GenerationPipeline ดังนี้
 > >> from pythae . models import AutoModel
> >> from pythae . samplers import MAFSamplerConfig
> >> from pythae . pipelines import GenerationPipeline
> >> # Retrieve the trained model
>> > my_trained_vae = AutoModel . load_from_folder (
...	'path/to/your/trained/model'
... )
> >> my_sampler_config = MAFSamplerConfig (
...	n_made_blocks = 2 ,
...	n_hidden_in_made = 3 ,
...	hidden_size = 128
... )
> >> # Build the pipeline
>> > pipe = GenerationPipeline (
...	model = my_trained_vae ,
...	sampler_config = my_sampler_config
... )
> >> # Launch data generation
>> > generated_samples = pipe (
...	num_samples = args . num_samples ,
...	return_gen = True , # If false returns nothing
...	train_data = train_data , # Needed to fit the sampler
...	eval_data = eval_data , # Needed to fit the sampler
...	training_config = BaseTrainerConfig ( num_epochs = 200 ) # TrainingConfig to use to fit the sampler
... )หรือคุณสามารถเปิดกระบวนการสร้างข้อมูลจากโมเดลที่ผ่านการฝึกอบรมโดยตรงด้วยตัวอย่าง ตัวอย่างเช่นในการสร้างข้อมูลใหม่ด้วยตัวอย่างของคุณให้เรียกใช้สิ่งต่อไปนี้
 > >> from pythae . models import AutoModel
> >> from pythae . samplers import NormalSampler
> >> # Retrieve the trained model
>> > my_trained_vae = AutoModel . load_from_folder (
...	'path/to/your/trained/model'
... )
> >> # Define your sampler
>> > my_samper = NormalSampler (
...	model = my_trained_vae
... )
> >> # Generate samples
>> > gen_data = my_samper . sample (
...	num_samples = 50 ,
...	batch_size = 10 ,
...	output_dir = None ,
...	return_gen = True
... )
หากคุณตั้งค่า output_dir เป็นพา ธ เฉพาะรูปภาพที่สร้างขึ้นจะถูกบันทึกเป็นไฟล์ .png ชื่อ 00000000.png , 00000001.png ... ตัวอย่างสามารถใช้กับรุ่นใดก็ได้ตราบเท่าที่มันเหมาะสม ตัวอย่างเช่นอินสแตนซ์ GaussianMixtureSampler สามารถใช้ในการสร้างจากรุ่นใดก็ได้ แต่ VAMPSampler จะสามารถใช้งานได้กับรุ่น VAMP เท่านั้น ตรวจสอบที่นี่เพื่อดูว่ามีการใช้โมเดลใดกับโมเดลของคุณ ระวังว่าตัวอย่างบางอย่างเช่น GaussianMixtureSampler อาจต้องติดตั้งโดยเรียกวิธี fit ก่อนที่จะใช้ ด้านล่างเป็นตัวอย่างสำหรับ GaussianMixtureSampler
 > >> from pythae . models import AutoModel
> >> from pythae . samplers import GaussianMixtureSampler , GaussianMixtureSamplerConfig
> >> # Retrieve the trained model
>> > my_trained_vae = AutoModel . load_from_folder (
...	'path/to/your/trained/model'
... )
> >> # Define your sampler
... gmm_sampler_config = GaussianMixtureSamplerConfig (
...	n_components = 10
... )
> >> my_samper = GaussianMixtureSampler (
...	sampler_config = gmm_sampler_config ,
...	model = my_trained_vae
... )
> >> # fit the sampler
>> > gmm_sampler . fit ( train_dataset )
> >> # Generate samples
>> > gen_data = my_samper . sample (
...	num_samples = 50 ,
...	batch_size = 10 ,
...	output_dir = None ,
...	return_gen = True
... )Pythae ให้ความเป็นไปได้ที่จะกำหนดเครือข่ายประสาทของคุณเองภายในรุ่น VAE ตัวอย่างเช่นสมมติว่าคุณต้องการฝึกอบรม ASSSTEIN AE ด้วยเครื่องเข้ารหัสและตัวถอดรหัสเฉพาะคุณสามารถทำได้ดังต่อไปนี้:
 > >> from pythae . models . nn import BaseEncoder , BaseDecoder
> >> from pythae . models . base . base_utils import ModelOutput
> >> class My_Encoder ( BaseEncoder ):
...	def __init__ ( self , args = None ): # Args is a ModelConfig instance
...		BaseEncoder . __init__ ( self )
...		self . layers = my_nn_layers ()
...
...	def forward ( self , x : torch . Tensor ) -> ModelOutput :
...		out = self . layers ( x )
...		output = ModelOutput (
...			embedding = out # Set the output from the encoder in a ModelOutput instance
...		)
...		return output
...
... class My_Decoder ( BaseDecoder ):
...	def __init__ ( self , args = None ):
...		BaseDecoder . __init__ ( self )
...		self . layers = my_nn_layers ()
...
...	def forward ( self , x : torch . Tensor ) -> ModelOutput :
...		out = self . layers ( x )
...		output = ModelOutput (
...			reconstruction = out # Set the output from the decoder in a ModelOutput instance
...		)
...		return output
...
> >> my_encoder = My_Encoder ()
> >> my_decoder = My_Decoder ()
และตอนนี้สร้างโมเดล
 > >> from pythae . models import WAE_MMD , WAE_MMD_Config
> >> # Set up the model configuration
>> > my_wae_config = model_config = WAE_MMD_Config (
...	input_dim = ( 1 , 28 , 28 ),
...	latent_dim = 10
... )
...
> >> # Build the model
>> > my_wae_model = WAE_MMD (
...	model_config = my_wae_config ,
...	encoder = my_encoder , # pass your encoder as argument when building the model
...	decoder = my_decoder # pass your decoder as argument when building the model
... )
หมายเหตุสำคัญ 1 : สำหรับโมเดล AE ทั้งหมด (AE, WAE, RAE_L2, RAE_GP) ทั้งตัวเข้ารหัสและตัวถอดรหัสจะต้องส่งคืน ModelOutput ซ์ ModelOutput สำหรับตัวเข้ารหัสอินสแตนซ์ ModelOutput จะต้องมี embbeddings ภายใต้ embedding คีย์ สำหรับตัวถอดรหัสอินสแตนซ์ ModelOutput จะต้องมีการสร้างใหม่ภายใต้ reconstruction คีย์ใหม่
หมายเหตุสำคัญ 2 : สำหรับโมเดลที่ใช้ VAE ทั้งหมด (VAE, Betavae, Iwae, HVAE, VAMP, Rhvae) ทั้งตัวเข้ารหัสและตัวถอดรหัสจะต้องส่งคืนอินสแตนซ์ ModelOutput สำหรับตัวเข้ารหัสอินสแตนซ์ ModelOutput จะต้องมีเมทริกซ์ embbeddings และ log -covariance (ของรูปร่าง batch_size x latent_space_dim) ตามลำดับภายใต้คีย์ embedding คีย์และ log_covariance สำหรับตัวถอดรหัสอินสแตนซ์ ModelOutput จะต้องมีการสร้างใหม่ภายใต้ reconstruction คีย์ใหม่
นอกจากนี้คุณยังสามารถค้นหาสถาปัตยกรรมเครือข่ายประสาทที่กำหนดไว้ล่วงหน้าสำหรับชุดข้อมูลที่พบบ่อยที่สุด ( เช่น mnist, cifar, celeba ... ) ที่สามารถโหลดได้ดังนี้
 > >> from pythae . models . nn . benchmark . mnist import (
...	Encoder_Conv_AE_MNIST , # For AE based model (only return embeddings)
...	Encoder_Conv_VAE_MNIST , # For VAE based model (return embeddings and log_covariances)
...	Decoder_Conv_AE_MNIST
... )
แทนที่ MNIST โดย CIFAR หรือ Celeba เพื่อเข้าถึงอวนประสาทอื่น ๆ
Pythae ณ ตอนนี้ v0.1.0 ตอนนี้ Pythae รองรับการฝึกอบรมแบบกระจายโดยใช้ DDP ของ Pytorch ช่วยให้คุณฝึกอบรม VAE ที่คุณชื่นชอบได้เร็วขึ้นและบนชุดข้อมูลขนาดใหญ่โดยใช้การฝึกอบรมแบบหลาย GPU และ/หรือการฝึกอบรมแบบหลายโหนด
ในการทำเช่นนั้นคุณสามารถสร้างสคริปต์ Python ที่จะเปิดตัวโดยตัวเรียกใช้งาน (เช่น srun บนคลัสเตอร์) สิ่งเดียวที่จำเป็นในสคริปต์คือการระบุองค์ประกอบบางอย่างที่เกี่ยวข้องกับสภาพแวดล้อมแบบกระจาย (เช่นจำนวนโหนด/GPU) โดยตรงในการกำหนดค่าการฝึกอบรมดังนี้
 > >> training_config = BaseTrainerConfig (
...     num_epochs = 10 ,
...     learning_rate = 1e-3 ,
...     per_device_train_batch_size = 64 ,
...     per_device_eval_batch_size = 64 ,
...     train_dataloader_num_workers = 8 ,
...     eval_dataloader_num_workers = 8 ,
...     dist_backend = "nccl" , # distributed backend
...     world_size = 8 # number of gpus to use (n_nodes x n_gpus_per_node),
...     rank = 5 # global gpu id,
...     local_rank = 1 # gpu id within a node,
...     master_addr = "localhost" # master address,
...     master_port = "12345" # master port,
... )
ดูสคริปต์ตัวอย่างนี้ที่กำหนดการฝึกอบรม Multi-GPU VQVAE ในชุดข้อมูล Imagenet โปรดทราบว่าวิธีการที่ตัวแปรสภาพแวดล้อมแบบกระจาย ( world_size , rank ... ) ถูกกู้คืนอาจเป็นเฉพาะกับคลัสเตอร์และตัวเรียกใช้งานที่คุณใช้
ด้านล่างนี้จะระบุเวลาการฝึกอบรมสำหรับเวกเตอร์ปริมาณ VAE (VQ-vae) ที่มี Pythae สำหรับ 100 Epochs บน MNIST บน V100 16GB GPU (S) สำหรับ 50 EPOCHS บน FFHQ (1024x1024 ภาพ) และ 20 Epochs บน Imagenet-1K
| ฝึกอบรมข้อมูล | 1 GPU | 4 GPU | 2x4 GPU | |
|---|---|---|---|---|
| MNIST (VQ-VAE) | 28x28 รูปภาพ (50k) | 235.18 S | 62.00 s | 35.86 S |
| FFHQ 1024x1024 (VQVAE) | 1024x1024 ภาพ RGB (60K) | 19H 1 นาที | 5h 6 นาที | 2H 37 นาที |
| Imagenet-1K 128x128 (VQVAE) | ภาพ 128x128 RGB (~ 1.2m) | 6h 25 นาที | 1H 41 นาที | 51 นาที 26S |
สำหรับแต่ละชุดข้อมูลเราให้สคริปต์การเปรียบเทียบที่นี่
Pythae ยังช่วยให้คุณแบ่งปันโมเดลของคุณบน HuggingFace Hub คุณต้องการทำเช่นนั้น:
huggingface_hub ติดตั้งใน Env เสมือนของคุณ ถ้าไม่สามารถติดตั้งได้ด้วย $ python -m pip install huggingface_hub
$ huggingface-cli login
โมเดล Pythae ใด ๆ สามารถอัปโหลดได้อย่างง่ายดายโดยใช้เมธอด push_to_hf_hub
> >> my_vae_model . push_to_hf_hub ( hf_hub_path = "your_hf_username/your_hf_hub_repo" ) หมายเหตุ: หาก your_hf_hub_repo มีอยู่แล้วและไม่ว่างเปล่าไฟล์จะถูกแทนที่ ในกรณีที่ไม่มี repo your_hf_hub_repo มีอยู่โฟลเดอร์ที่มีชื่อเดียวกันจะถูกสร้างขึ้น
อย่างเท่าเทียมกันคุณสามารถดาวน์โหลดหรือโหลดโมเดลของ Pythae ได้โดยตรงจากฮับโดยใช้วิธี load_from_hf_hub
 > >> from pythae . models import AutoModel
> >> my_downloaded_vae = AutoModel . load_from_hf_hub ( hf_hub_path = "path_to_hf_repo" )wandb ?Pythae ยังรวมเครื่องมือติดตามการทดลอง Wandb ช่วยให้ผู้ใช้สามารถจัดเก็บการกำหนดค่าตรวจสอบการฝึกอบรมและเปรียบเทียบการทำงานผ่านอินเตอร์เฟสกราฟิก เพื่อให้สามารถใช้คุณสมบัตินี้ที่คุณต้องการ:
wandb ติดตั้งใน Env เสมือนของคุณ ถ้าไม่สามารถติดตั้งได้ด้วย $ pip install wandb
$ wandb login
WandbCallback การเปิดตัวการตรวจสอบการทดลองด้วย wandb ใน Pythae นั้นค่อนข้างง่าย สิ่งเดียวที่ผู้ใช้ต้องทำคือสร้างอินสแตนซ์ WandbCallback ...
 > >> # Create you callback
>> > from pythae . trainers . training_callbacks import WandbCallback
> >> callbacks = [] # the TrainingPipeline expects a list of callbacks
> >> wandb_cb = WandbCallback () # Build the callback
> >> # SetUp the callback
>> > wandb_cb . setup (
...	training_config = your_training_config , # training config
...	model_config = your_model_config , # model config
...	project_name = "your_wandb_project" , # specify your wandb project
...	entity_name = "your_wandb_entity" , # specify your wandb entity
... )
> >> callbacks . append ( wandb_cb ) # Add it to the callbacks list
... แล้วส่งผ่านไปยัง TrainingPipeline
 > >> pipeline = TrainingPipeline (
...	training_config = config ,
...	model = model
... )
> >> pipeline (
...	train_data = train_dataset ,
...	eval_data = eval_dataset ,
...	callbacks = callbacks # pass the callbacks to the TrainingPipeline and you are done!
... )
> >> # You can log to https://wandb.ai/your_wandb_entity/your_wandb_project to monitor your training
ดูการสอนโดยละเอียด
mlflow ?Pythae ยังรวมเครื่องมือติดตามการทดลอง MLFlow ช่วยให้ผู้ใช้สามารถจัดเก็บการกำหนดค่าของพวกเขาตรวจสอบการฝึกอบรมและเปรียบเทียบการทำงานผ่านอินเตอร์เฟสกราฟิก เพื่อให้สามารถใช้คุณสมบัตินี้ที่คุณต้องการ:
mlfow ที่ติดตั้งใน Env เสมือนของคุณ ถ้าไม่สามารถติดตั้งได้ด้วย $ pip install mlflow
MLFlowCallback การเปิดตัวการตรวจสอบการทดลองด้วย mlfow ใน Pythae นั้นค่อนข้างง่าย สิ่งเดียวที่ผู้ใช้ต้องทำคือสร้างอินสแตนซ์ MLFlowCallback ...
 > >> # Create you callback
>> > from pythae . trainers . training_callbacks import MLFlowCallback
> >> callbacks = [] # the TrainingPipeline expects a list of callbacks
> >> mlflow_cb = MLFlowCallback () # Build the callback
> >> # SetUp the callback
>> > mlflow_cb . setup (
...	training_config = your_training_config , # training config
...	model_config = your_model_config , # model config
...	run_name = "mlflow_cb_example" , # specify your mlflow run
... )
> >> callbacks . append ( mlflow_cb ) # Add it to the callbacks list
... แล้วส่งผ่านไปยัง TrainingPipeline
 > >> pipeline = TrainingPipeline (
...	training_config = config ,
...	model = model
... )
> >> pipeline (
...	train_data = train_dataset ,
...	eval_data = eval_dataset ,
...	callbacks = callbacks # pass the callbacks to the TrainingPipeline and you are done!
... )
คุณสามารถเห็นภาพการวัดของคุณโดยใช้สิ่งต่อไปนี้ในไดเรกทอรีที่ ./mlruns
$ mlflow ui ดูการสอนโดยละเอียด
comet_ml ?Pythae ยังรวมเครื่องมือติดตามการทดลอง COMET_ML ช่วยให้ผู้ใช้สามารถจัดเก็บการกำหนดค่าของพวกเขาตรวจสอบการฝึกอบรมและเปรียบเทียบการทำงานผ่านอินเตอร์เฟสกราฟิก เพื่อให้สามารถใช้คุณสมบัตินี้ที่คุณต้องการ:
comet_ml ติดตั้งใน Env เสมือนของคุณ ถ้าไม่สามารถติดตั้งได้ด้วย $ pip install comet_ml
CometCallback การเปิดตัวการตรวจสอบการทดลองด้วย comet_ml ใน Pythae นั้นค่อนข้างง่าย สิ่งเดียวที่ผู้ใช้ต้องทำคือสร้างอินสแตนซ์ CometCallback ...
 > >> # Create you callback
>> > from pythae . trainers . training_callbacks import CometCallback
> >> callbacks = [] # the TrainingPipeline expects a list of callbacks
> >> comet_cb = CometCallback () # Build the callback
> >> # SetUp the callback
>> > comet_cb . setup (
...	training_config = training_config , # training config
...	model_config = model_config , # model config
...	api_key = "your_comet_api_key" , # specify your comet api-key
...	project_name = "your_comet_project" , # specify your wandb project
...	#offline_run=True, # run in offline mode
...	#offline_directory='my_offline_runs' # set the directory to store the offline runs
... )
> >> callbacks . append ( comet_cb ) # Add it to the callbacks list
... แล้วส่งผ่านไปยัง TrainingPipeline
 > >> pipeline = TrainingPipeline (
...	training_config = config ,
...	model = model
... )
> >> pipeline (
...	train_data = train_dataset ,
...	eval_data = eval_dataset ,
...	callbacks = callbacks # pass the callbacks to the TrainingPipeline and you are done!
... )
> >> # You can log to https://comet.com/your_comet_username/your_comet_project to monitor your training
ดูการสอนโดยละเอียด
เพื่อช่วยให้คุณเข้าใจวิธีการทำงานของ Pythae และวิธีการฝึกอบรมแบบจำลองของคุณด้วยห้องสมุดนี้เรายังมีบทเรียน:
Making_your_own_autoencoder.ipynb แสดงวิธีส่งเครือข่ายของคุณเองไปยังโมเดลที่ใช้ใน Pythae
custom_dataset.ipynb แสดงวิธีใช้ชุดข้อมูลที่กำหนดเองกับรุ่นใด ๆ ที่ใช้ใน Pythae
hf_hub_models_sharing.ipynb แสดงวิธีอัปโหลดและดาวน์โหลดรุ่นสำหรับฮับ HuggingFace
wandb_experiment_monitoring.ipynb แสดงวิธีการตรวจสอบการทดลองของคุณโดยใช้ wandb
mlflow_experiment_monitoring.ipynb แสดงวิธีการตรวจสอบการทดลองของคุณโดยใช้ mlflow
comet_experiment_monitoring.ipynb แสดงวิธีการตรวจสอบการทดลองของคุณโดยใช้ comet_ml
โมเดล _training โฟลเดอร์ให้โน้ตบุ๊กที่แสดงวิธีการฝึกอบรมแต่ละรุ่นที่นำไปใช้และวิธีการสุ่มตัวอย่างจากมันโดยใช้ pythae.samplers
สคริปต์โฟลเดอร์ให้ตัวอย่างของสคริปต์การฝึกอบรมโดยเฉพาะอย่างยิ่งเพื่อฝึกอบรมโมเดลในชุดข้อมูลมาตรฐาน (MNIST, CIFAR10, Celeba ... )
หากคุณกำลังประสบปัญหาใด ๆ ในขณะที่เรียกใช้รหัสหรือขอคุณสมบัติ/รุ่นใหม่ที่จะนำไปใช้โปรดเปิดปัญหาเกี่ยวกับ GitHub
คุณต้องการมีส่วนร่วมในไลบรารีนี้โดยการเพิ่มโมเดลตัวอย่างหรือเพียงแค่แก้ไขข้อผิดพลาด? สุดยอดมาก! ขอบคุณ! โปรดดูการสนับสนุน. MD เพื่อปฏิบัติตามแนวทางหลักที่สนับสนุน
ก่อนอื่นมาดูตัวอย่างที่สร้างขึ้นใหม่จากชุดการประเมินผล
| แบบจำลอง | MNIST | ซีเลบา |
|---|---|---|
| ข้อมูลประเมิน | 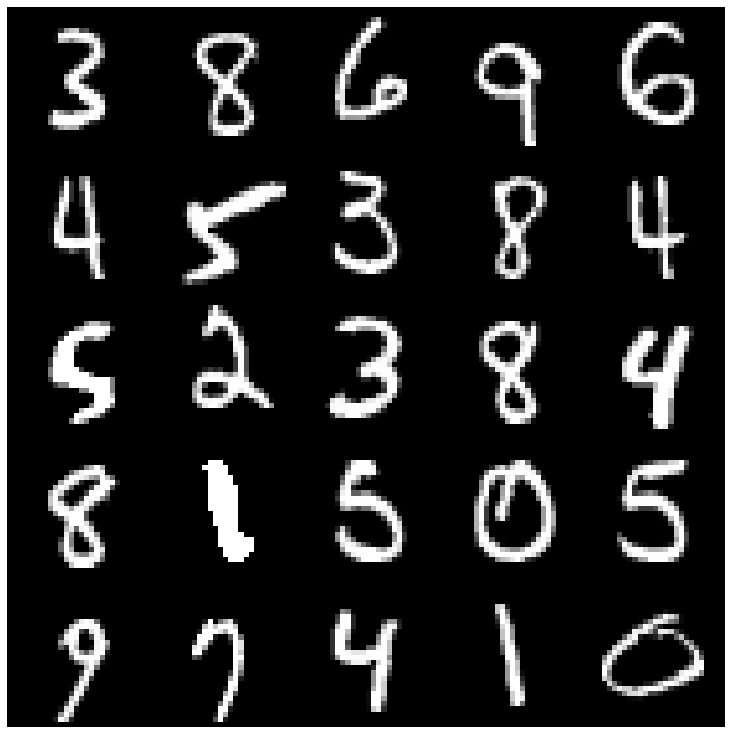 | 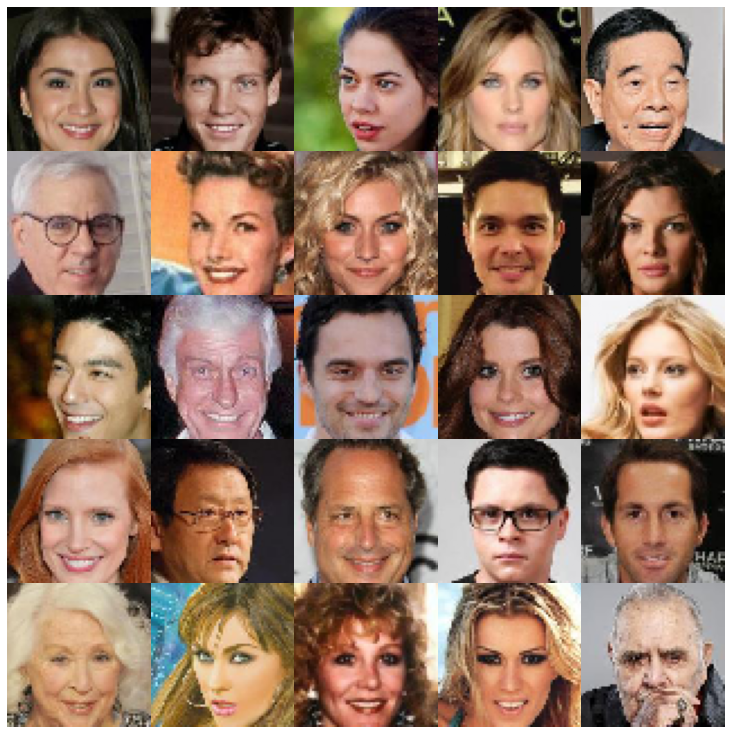 |
| ae | 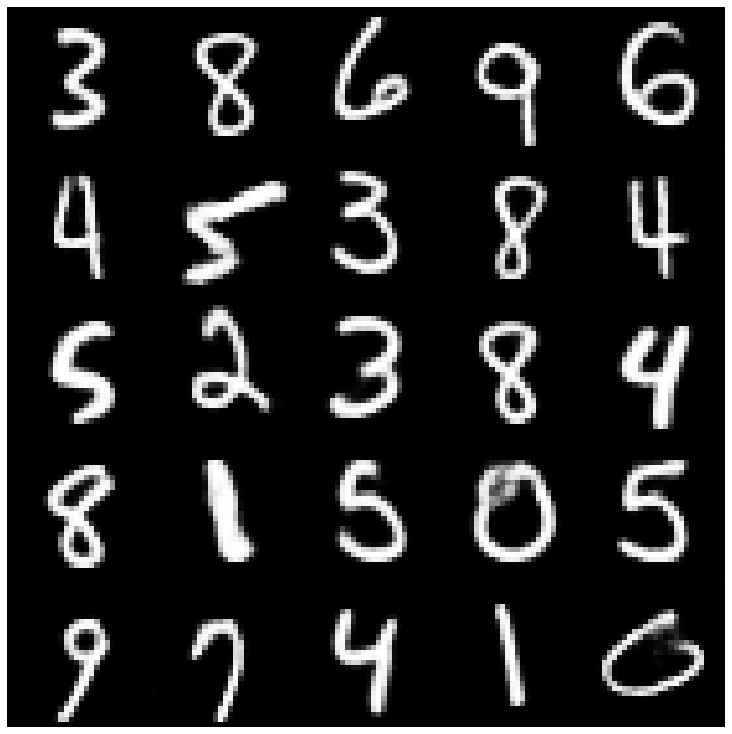 |  |
| vae | 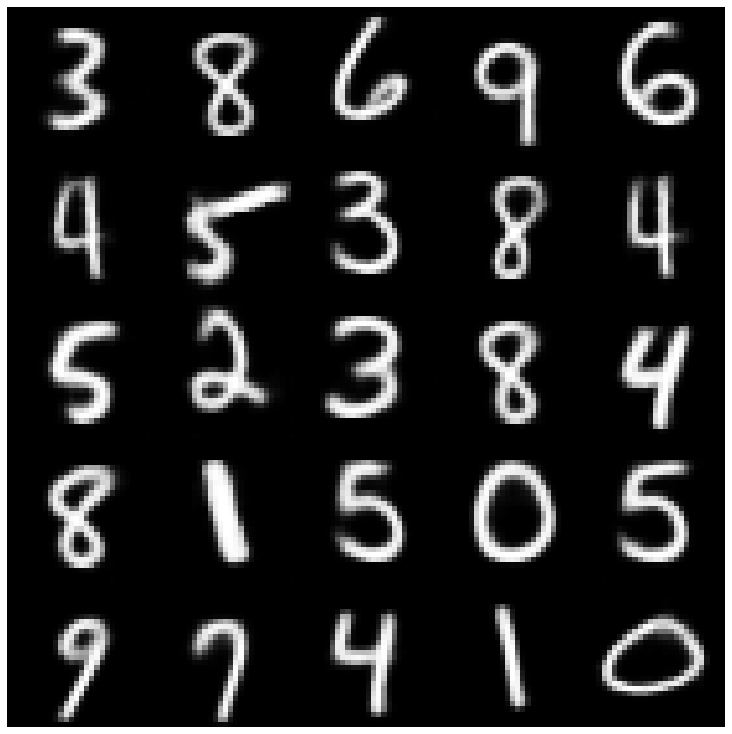 | 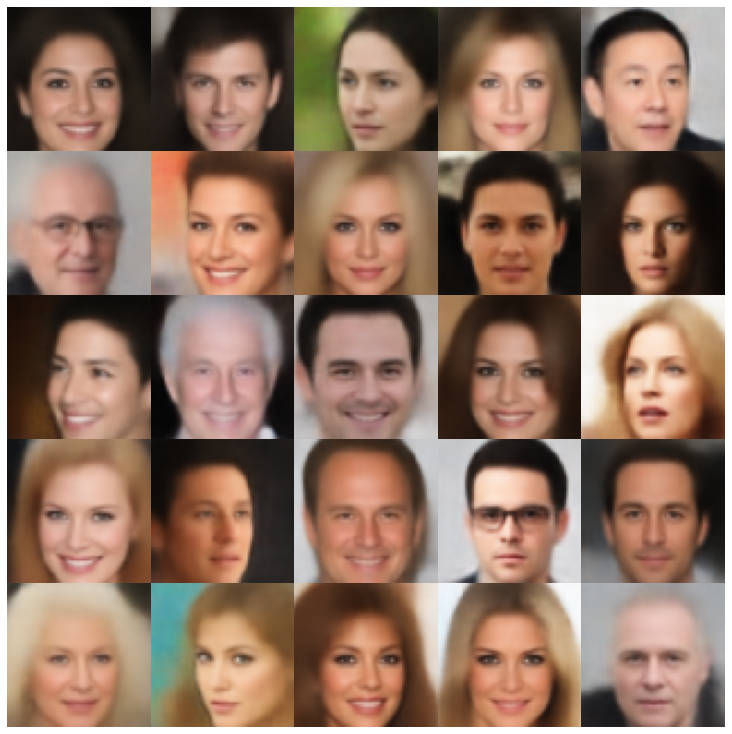 |
| เบต้า-วา | 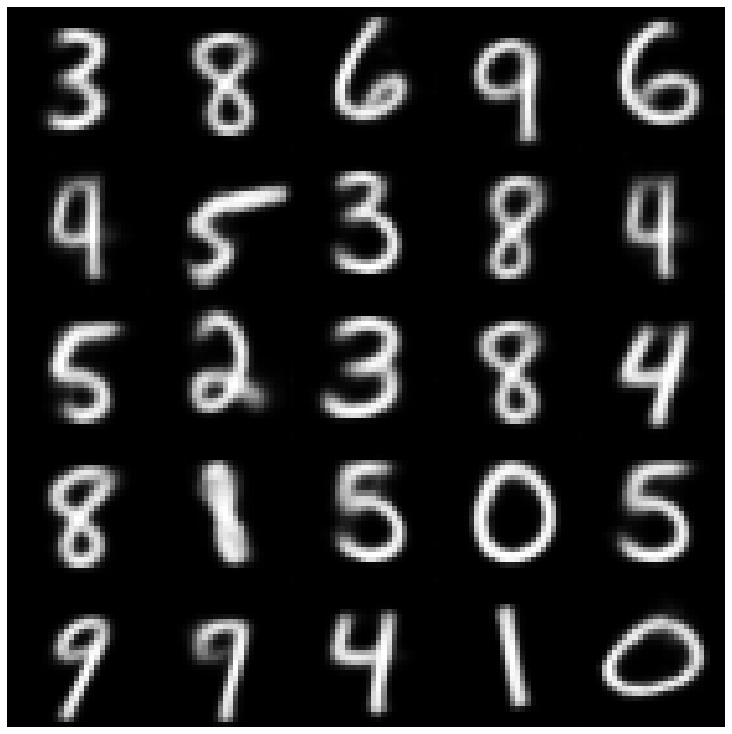 | 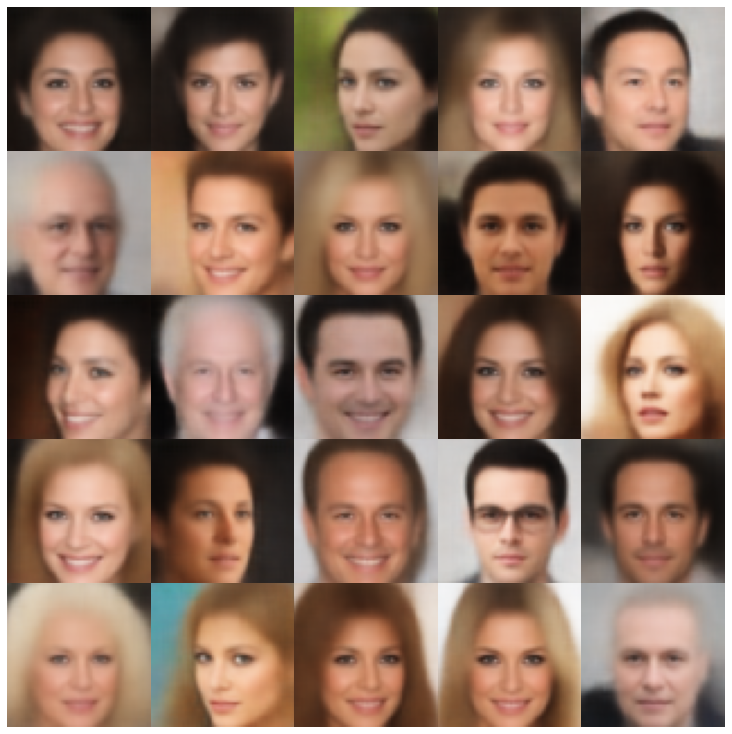 |
| vae lin nf | 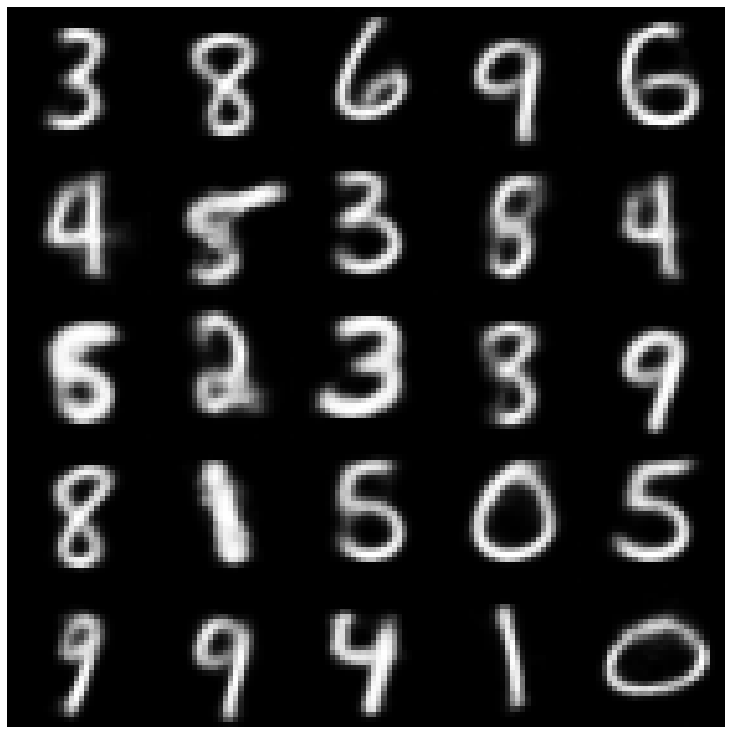 | 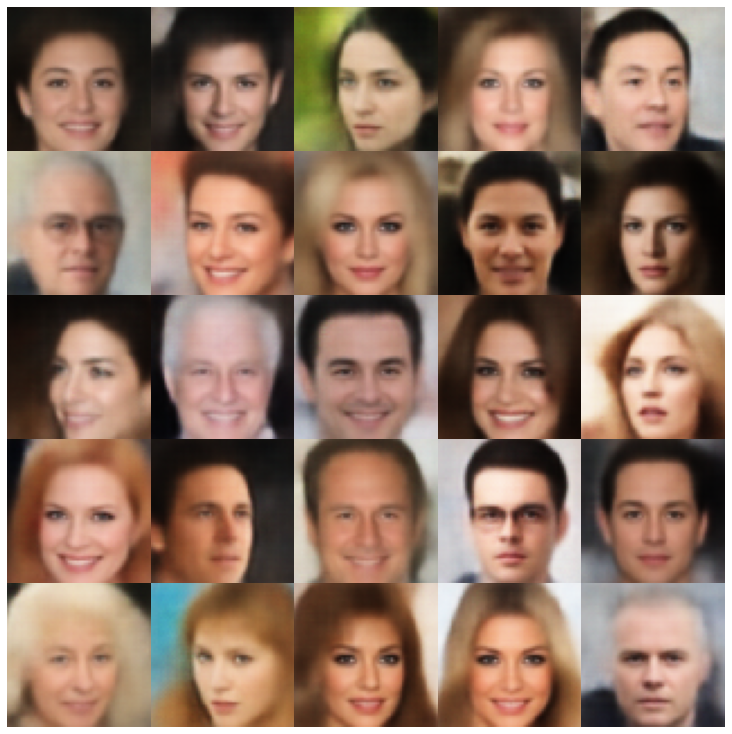 |
| vae iaf | 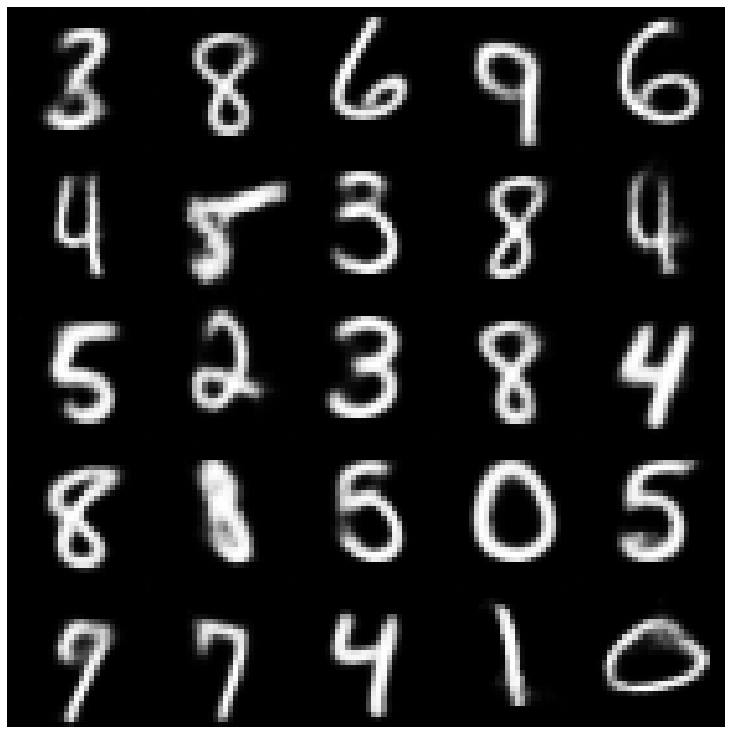 | 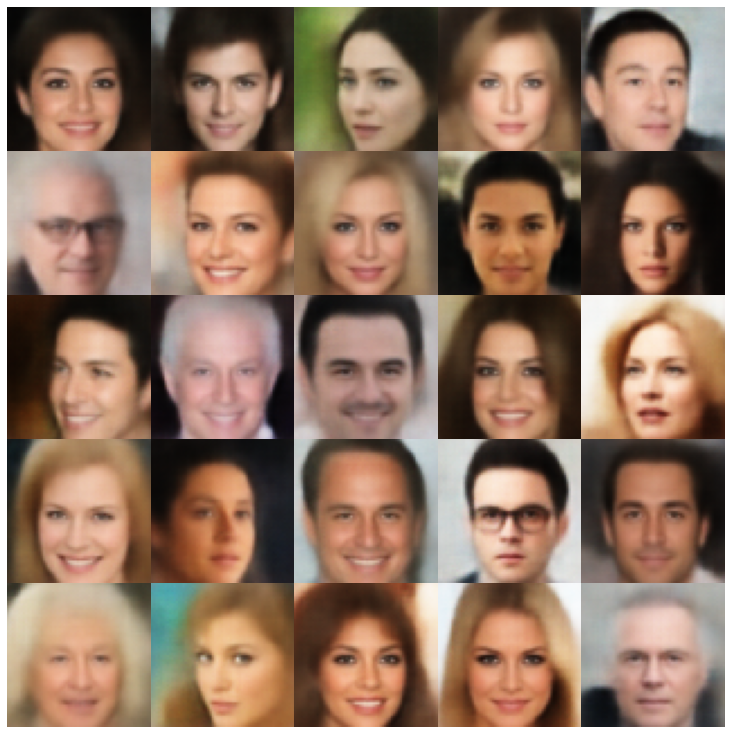 |
| เบต้าวาเบีย | 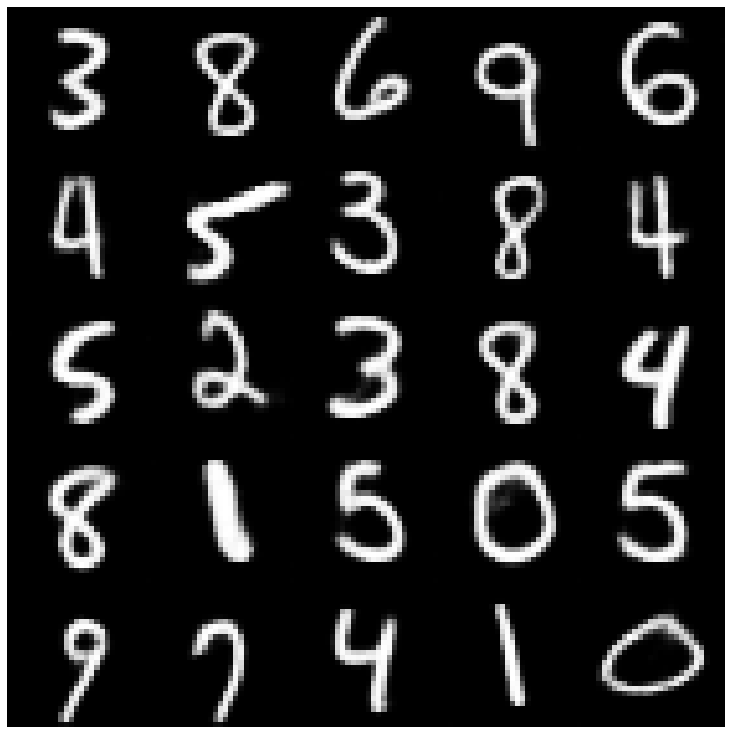 | 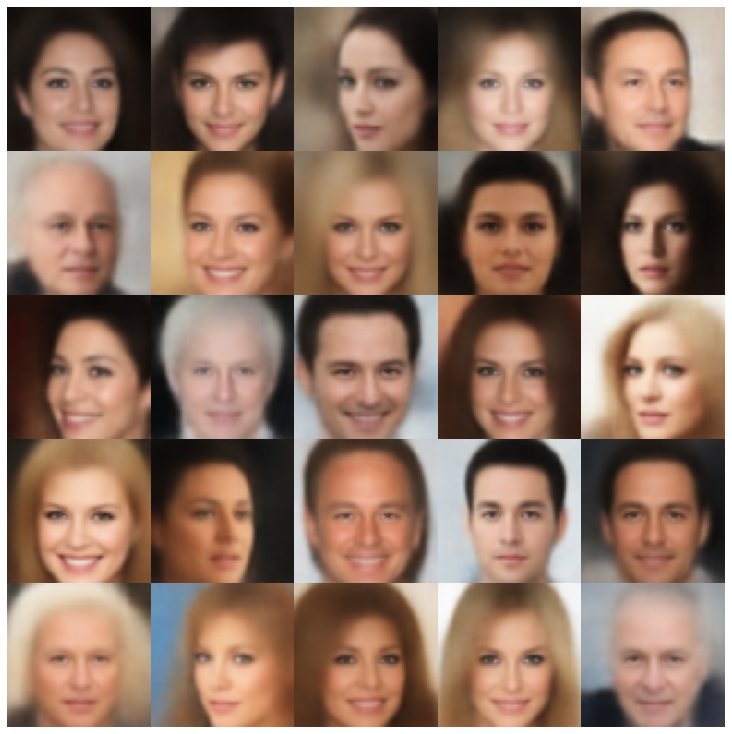 |
| ปัจจัย | 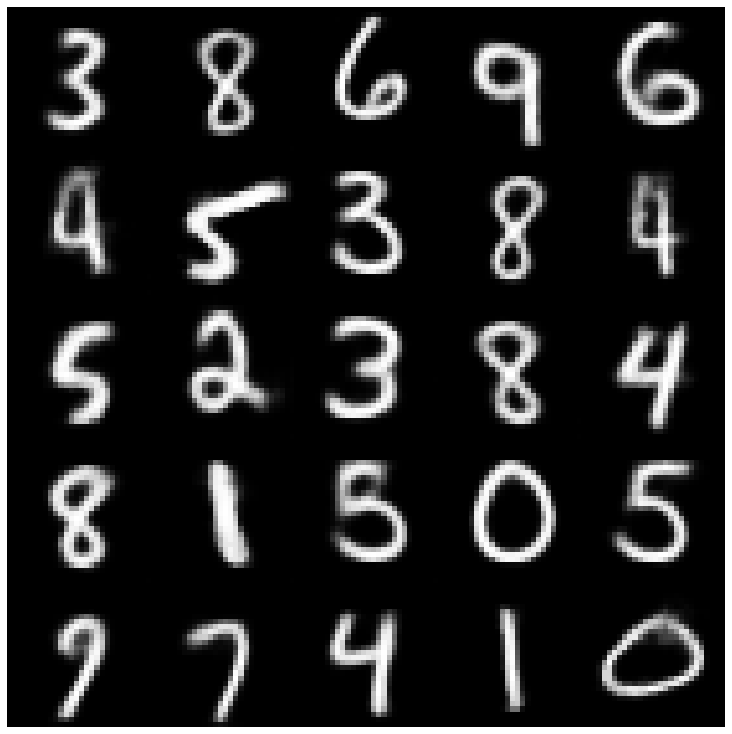 | 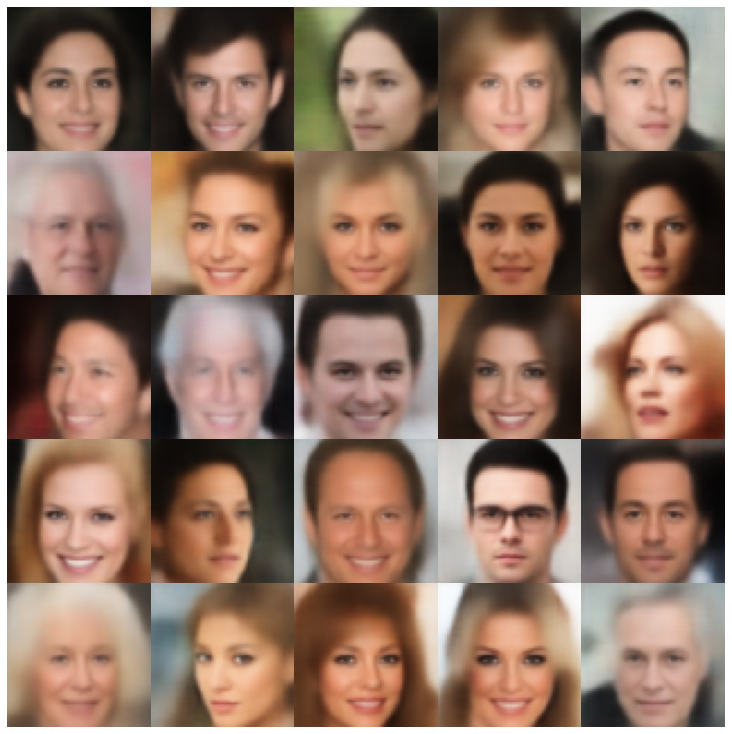 |
| betatcvae | 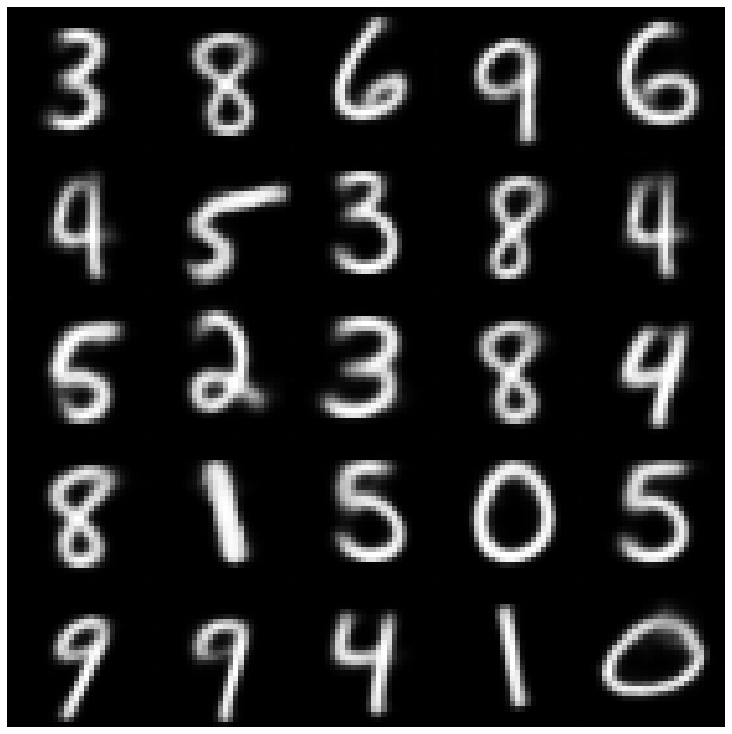 | 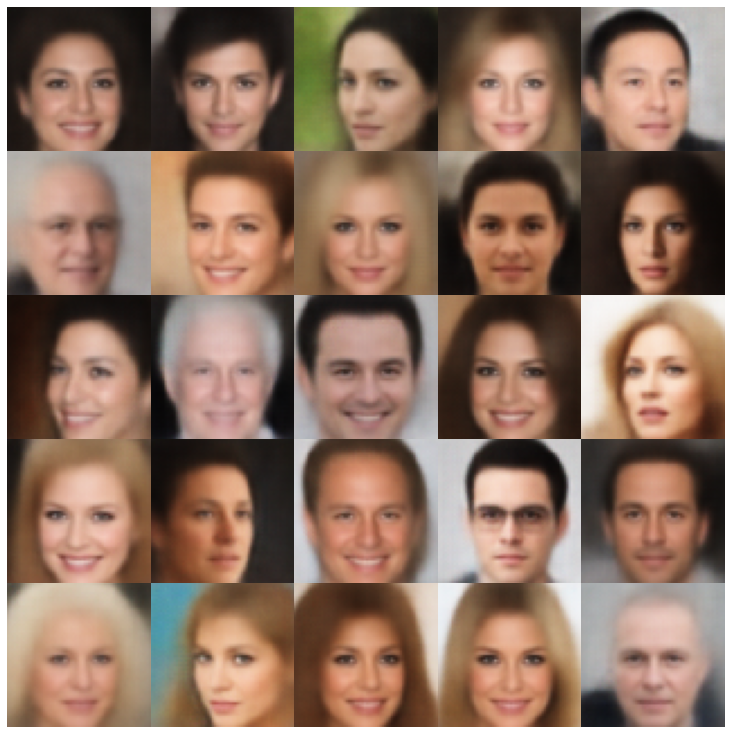 |
| Iwae | 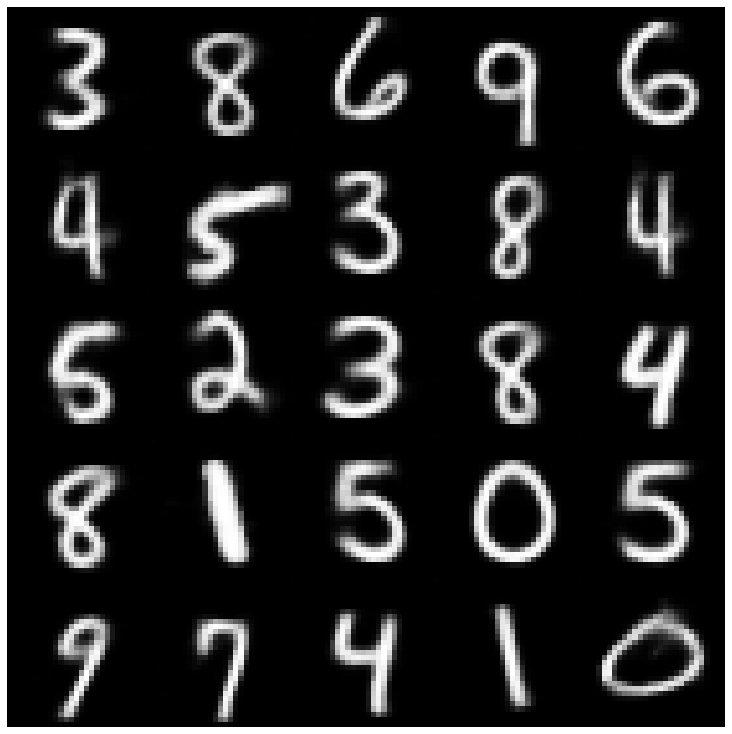 | 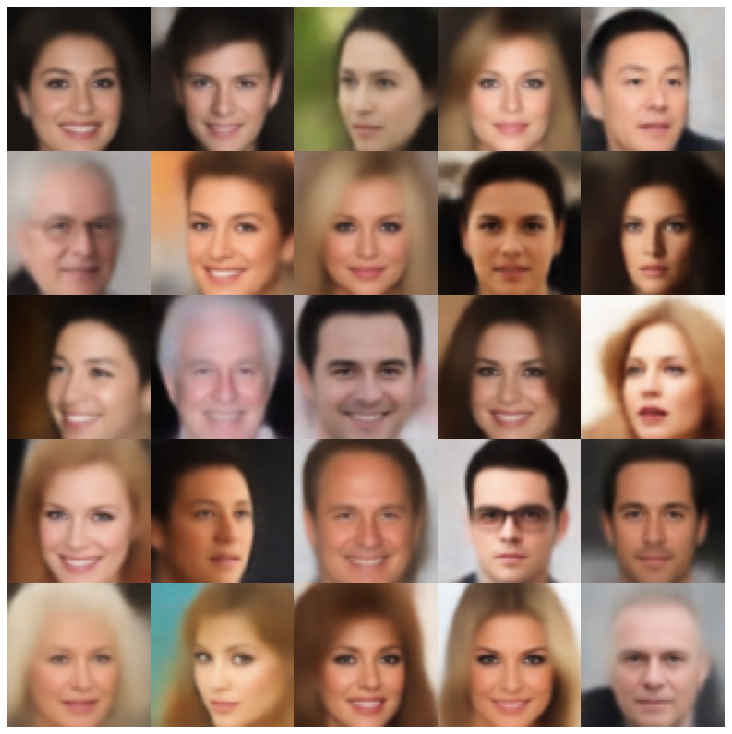 |
| msssim_vae | 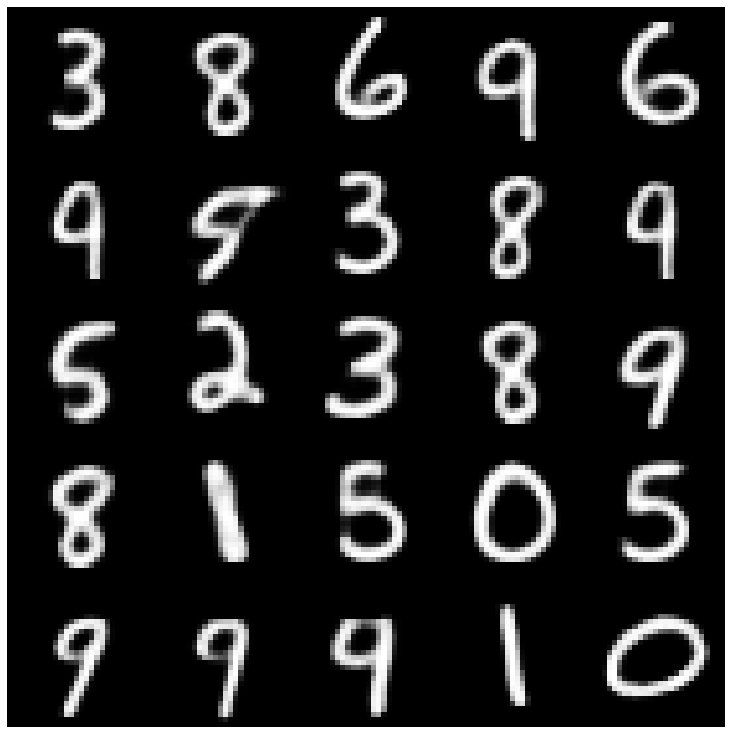 | 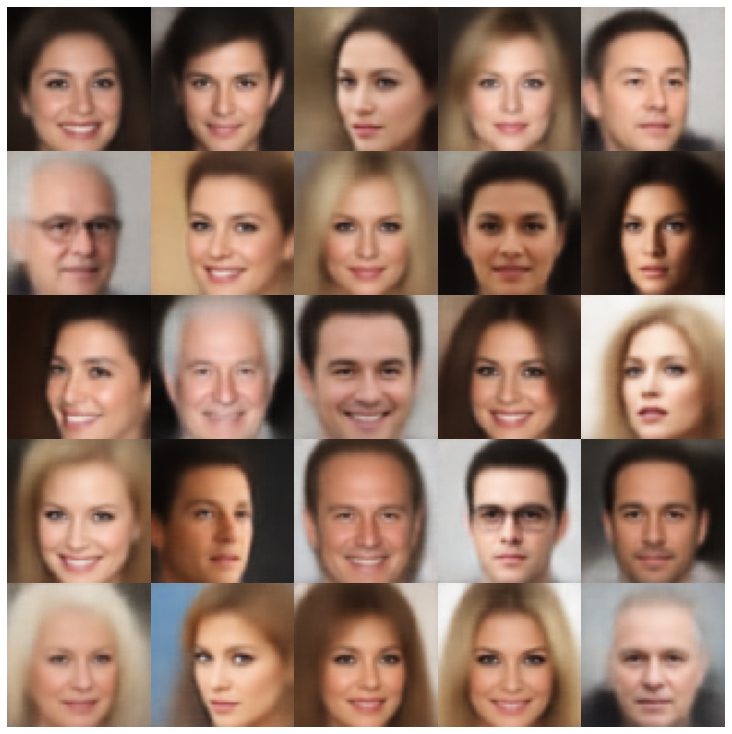 |
| ความสุข | 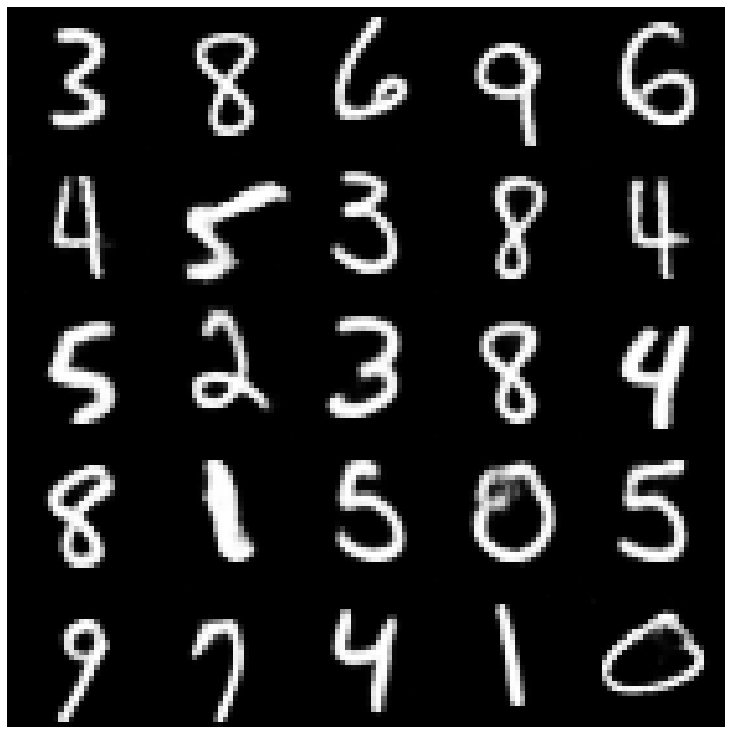 | 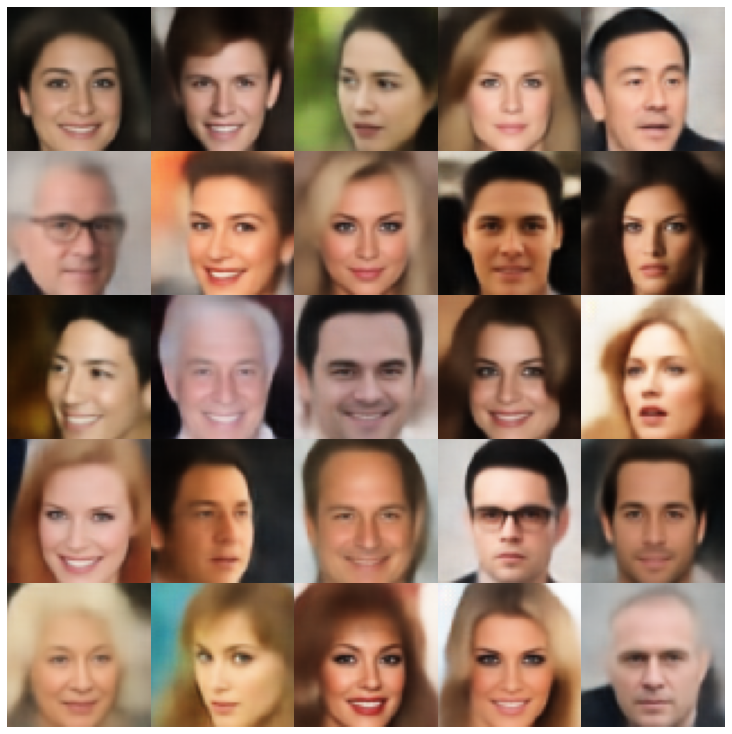 |
| ข้อมูล vae | 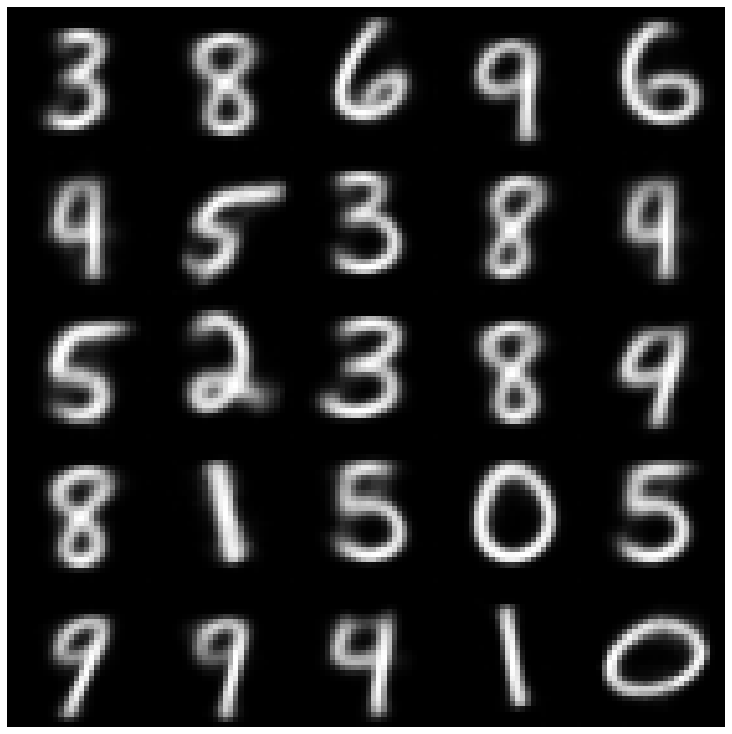 | 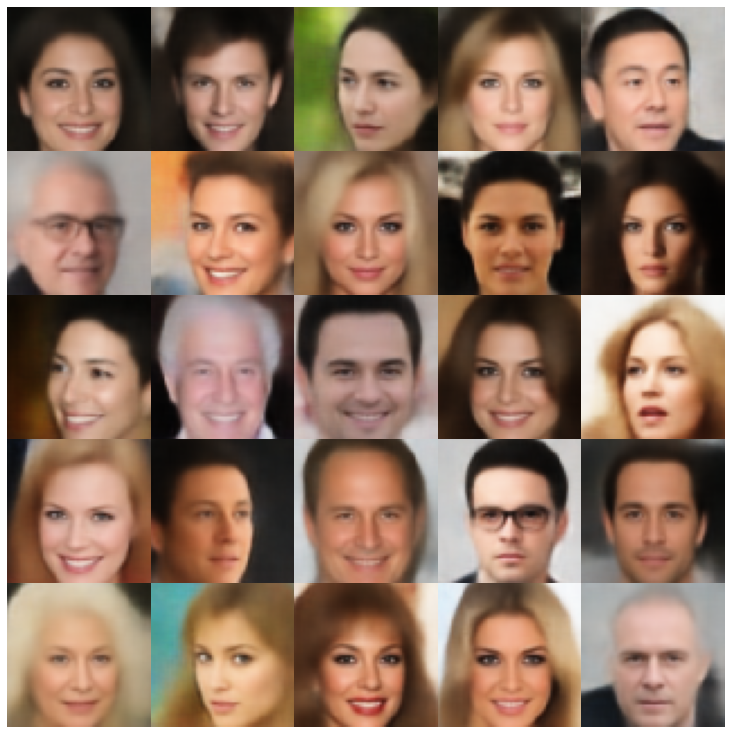 |
| ปะติดปะต่อ | 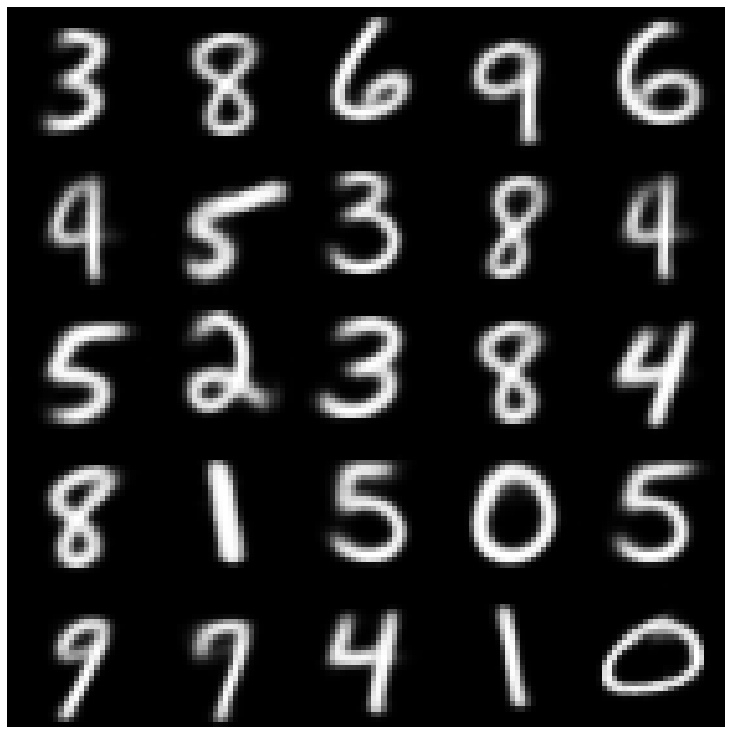 | 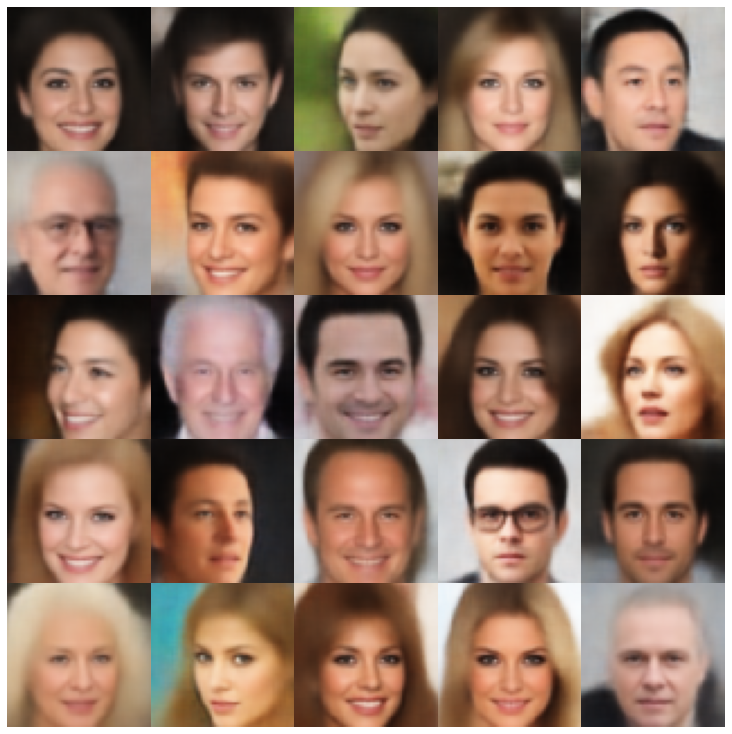 |
| svae | 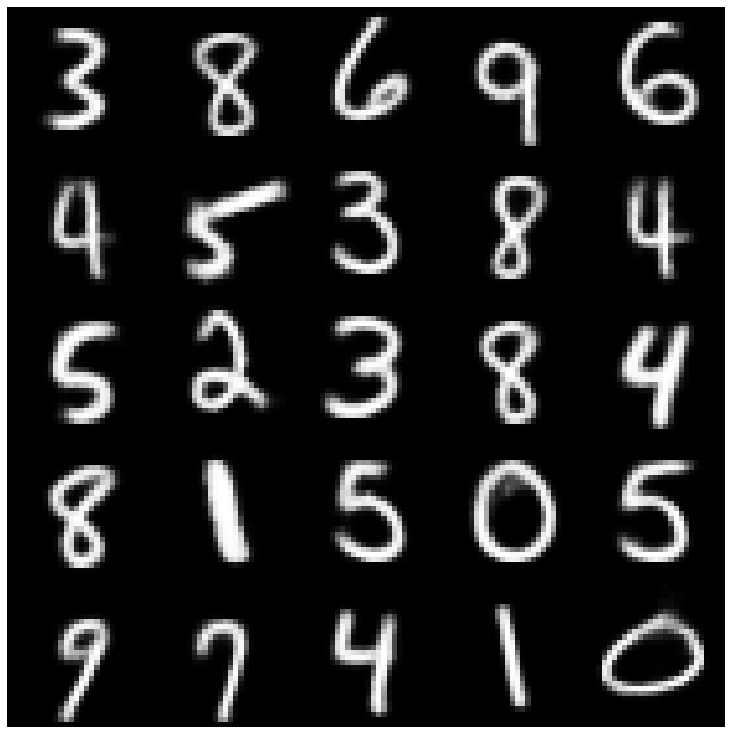 | 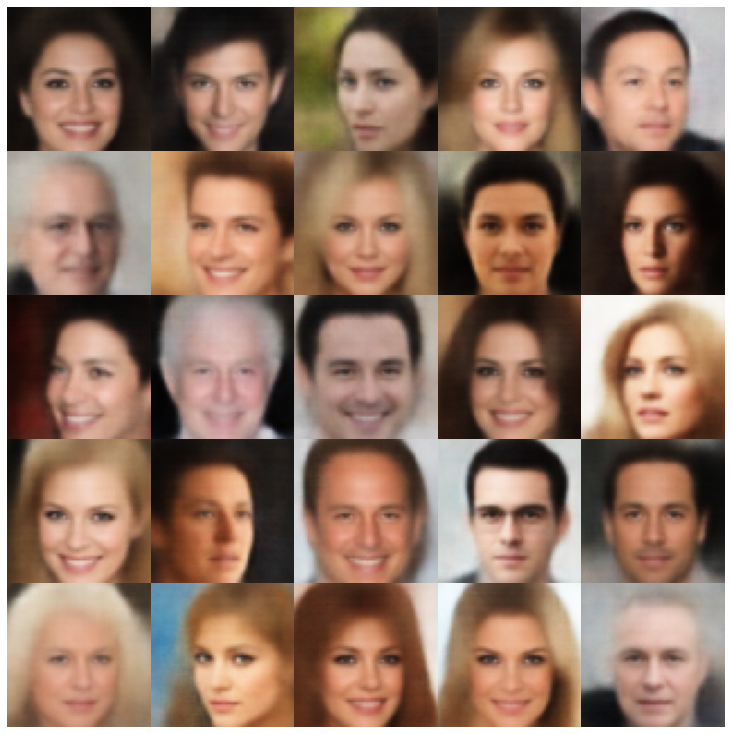 |
| antcersarial_ae | 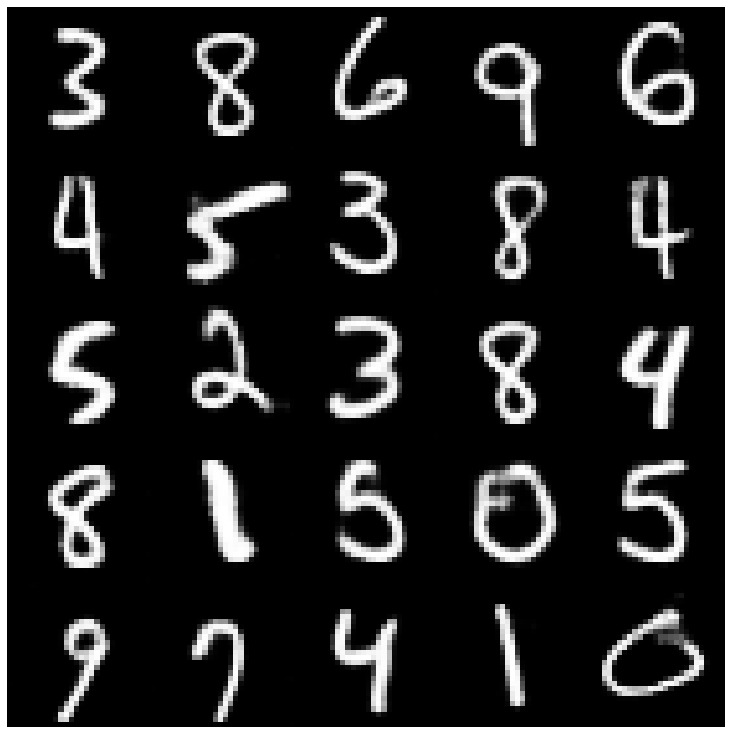 | 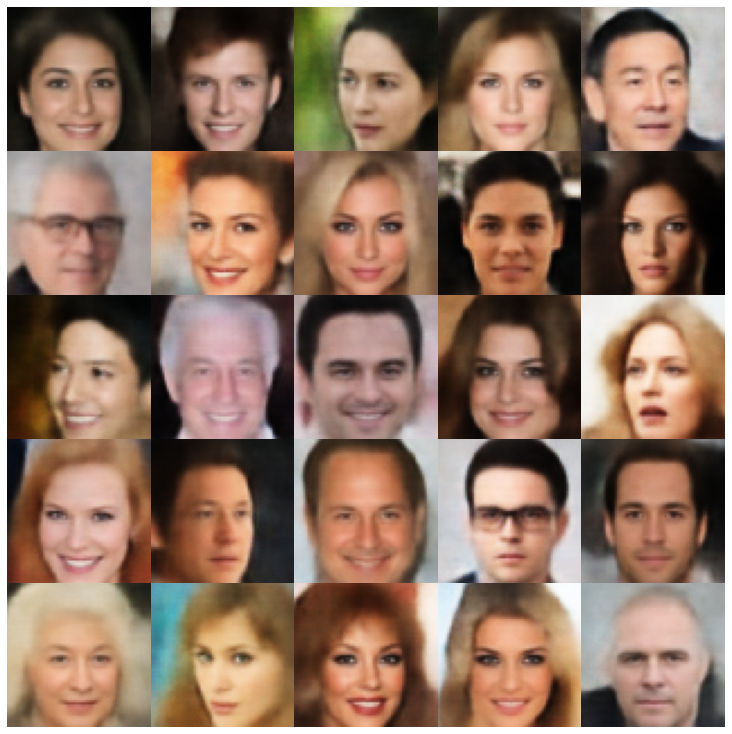 |
| vae_gan | 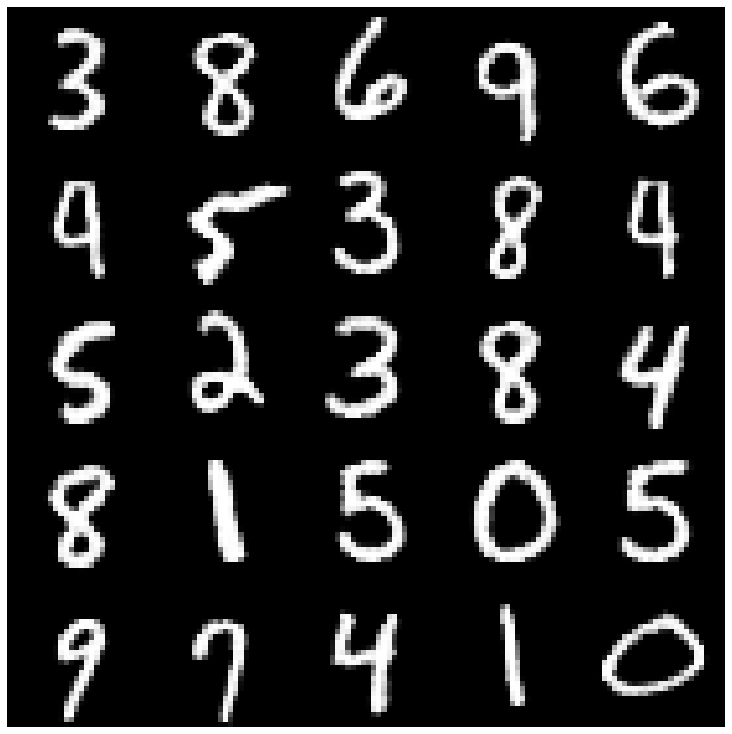 | 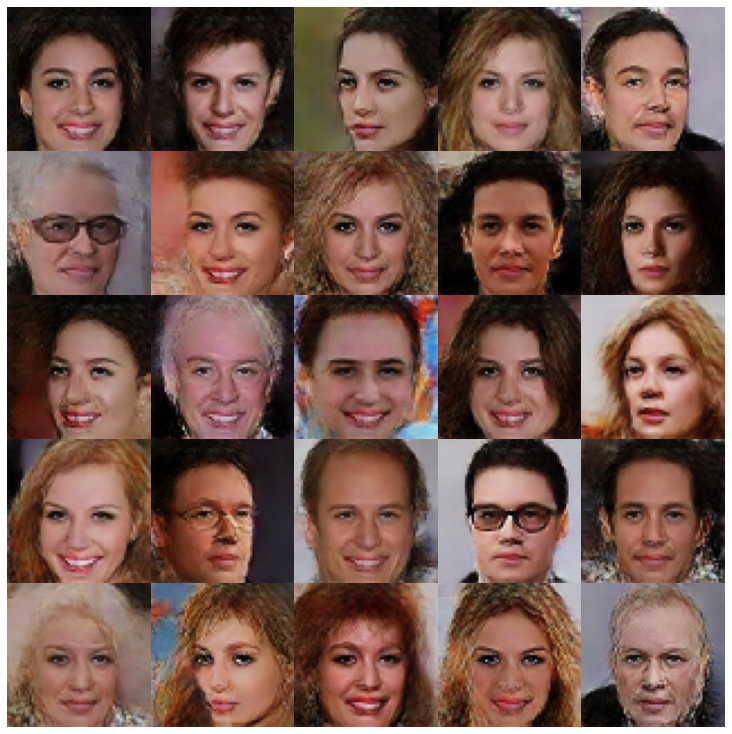 |
| vqvae | 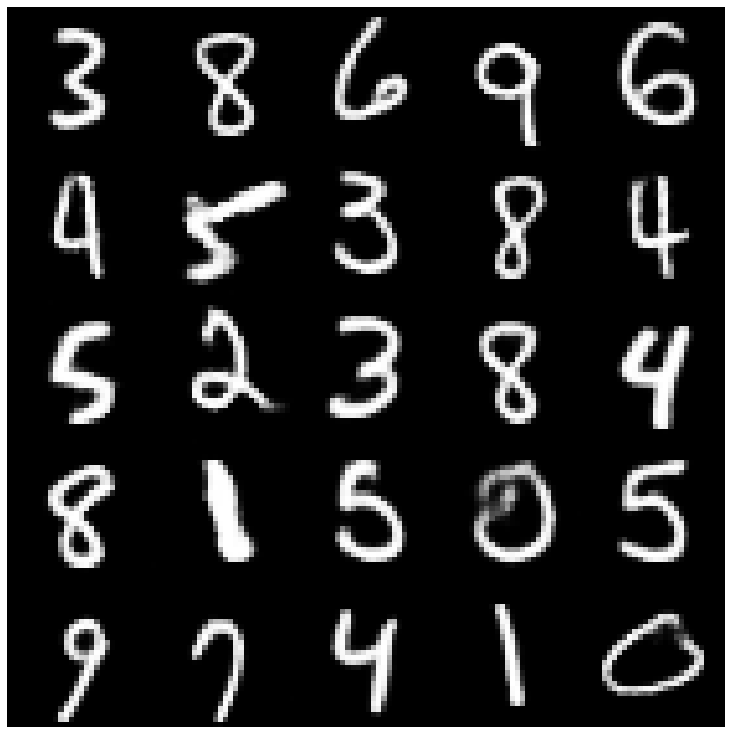 | 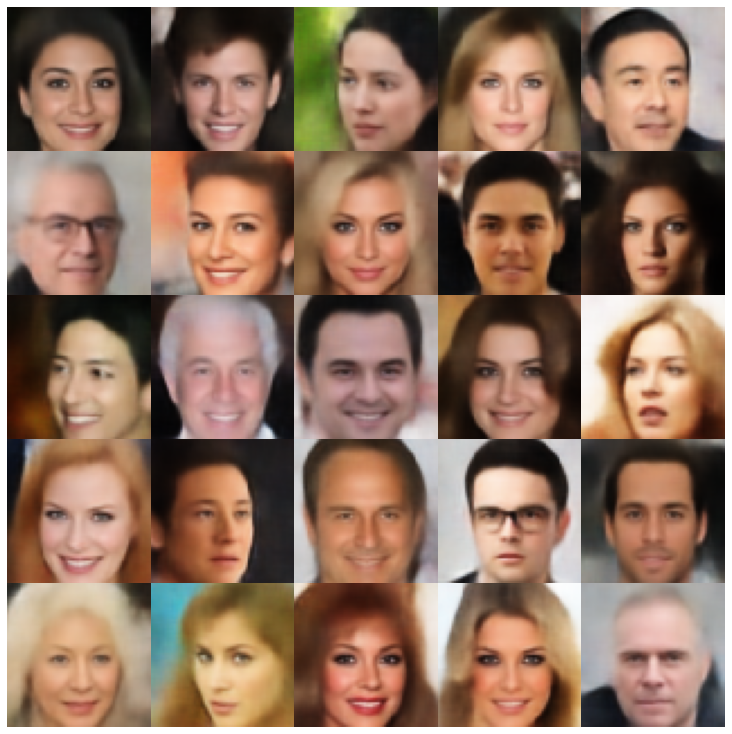 |
| hvae | 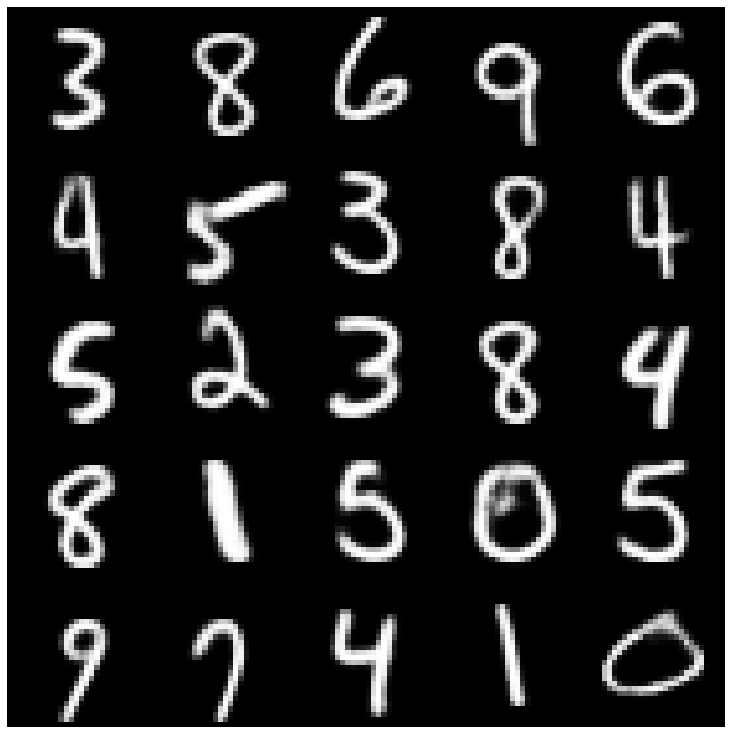 | 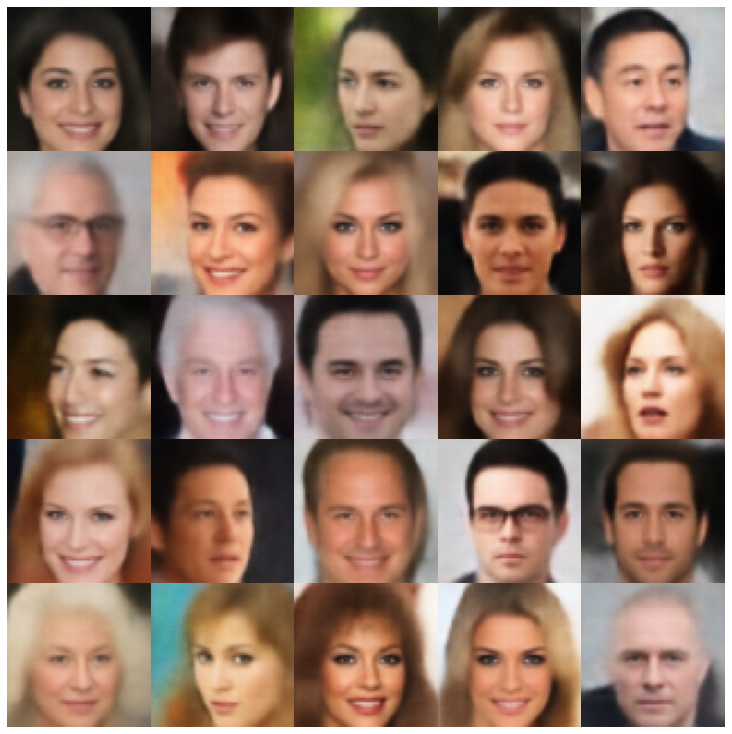 |
| rae_l2 | 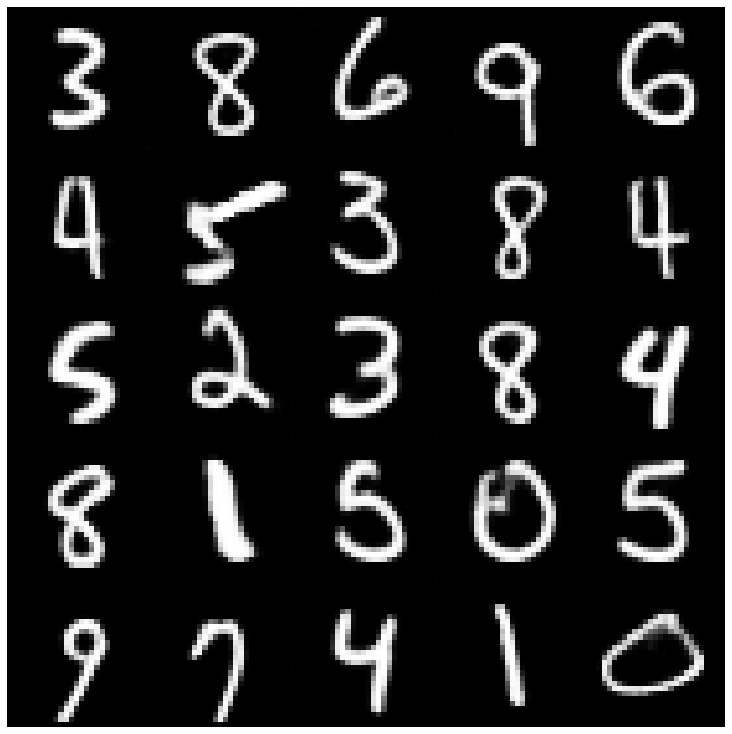 |  |
| rae_gp | 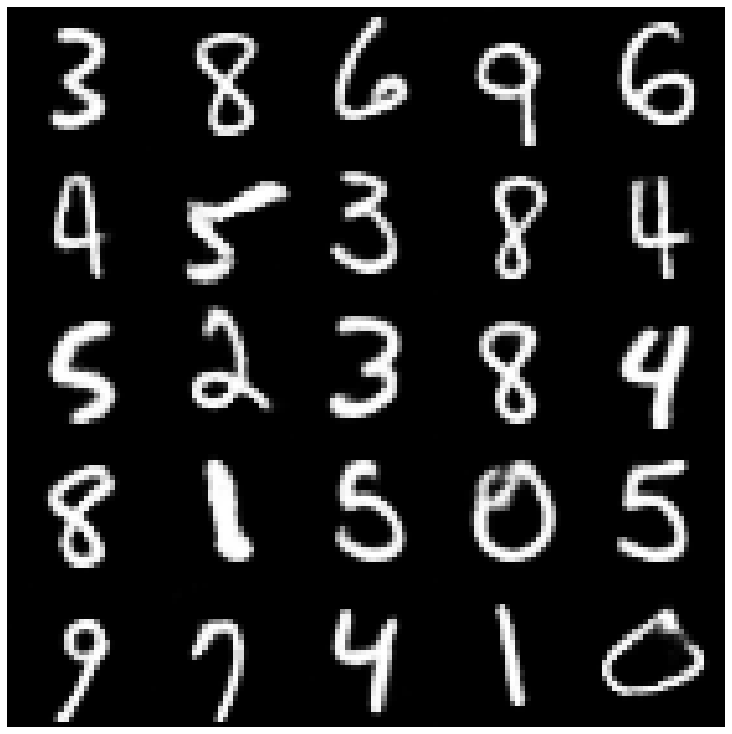 | 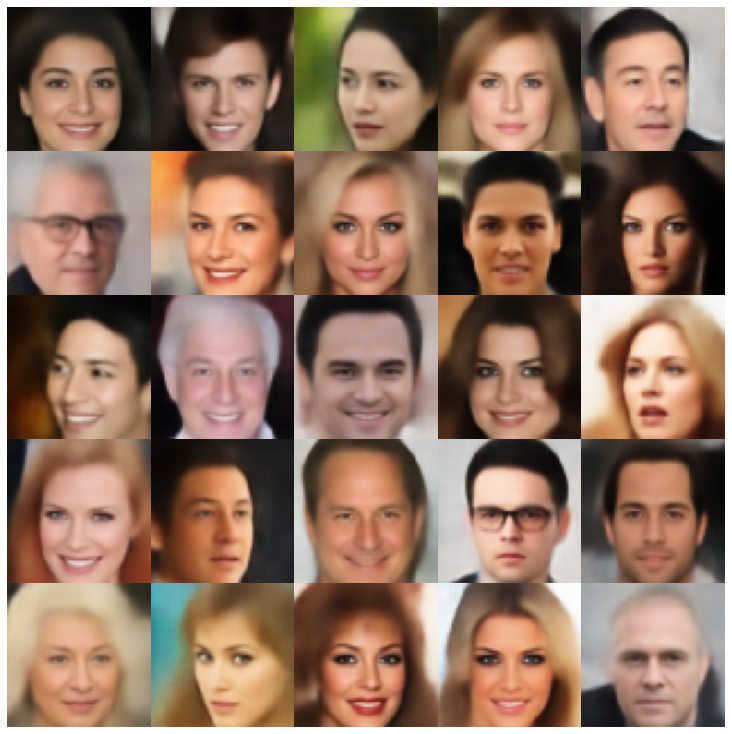 |
| Riemannian Hamiltonian Vae (Rhvae) | 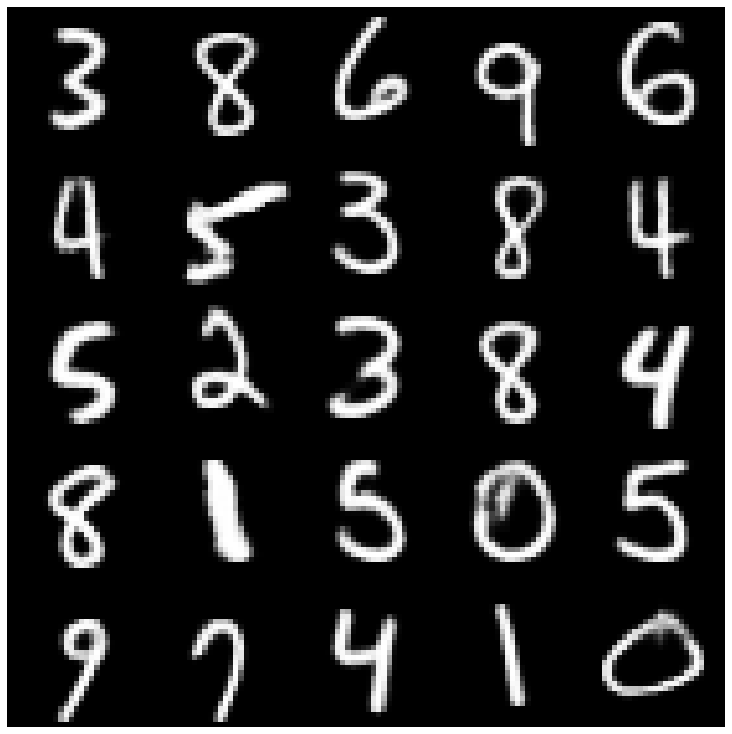 | 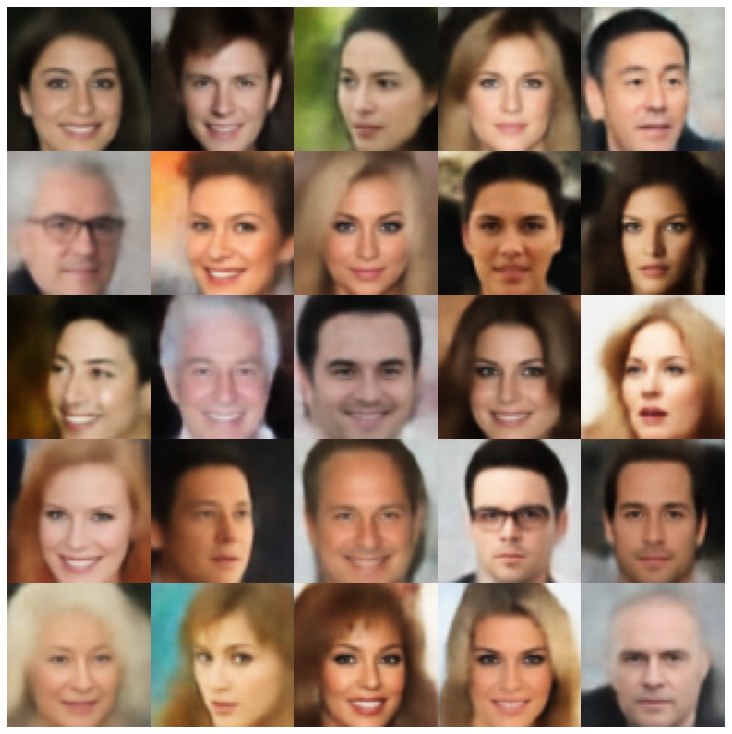 |
ที่นี่เราแสดงตัวอย่างที่สร้างขึ้นโดยใช้แต่ละรุ่นที่ใช้ในไลบรารีและตัวอย่างที่แตกต่างกัน
| แบบจำลอง | MNIST | ซีเลบา |
|---|---|---|
| ae + gaussianmixturesampler | 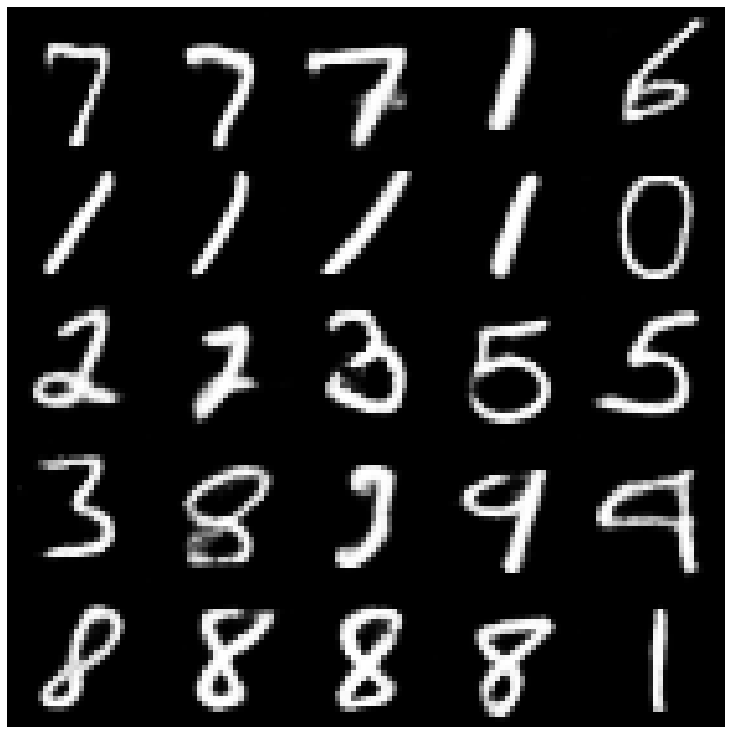 | 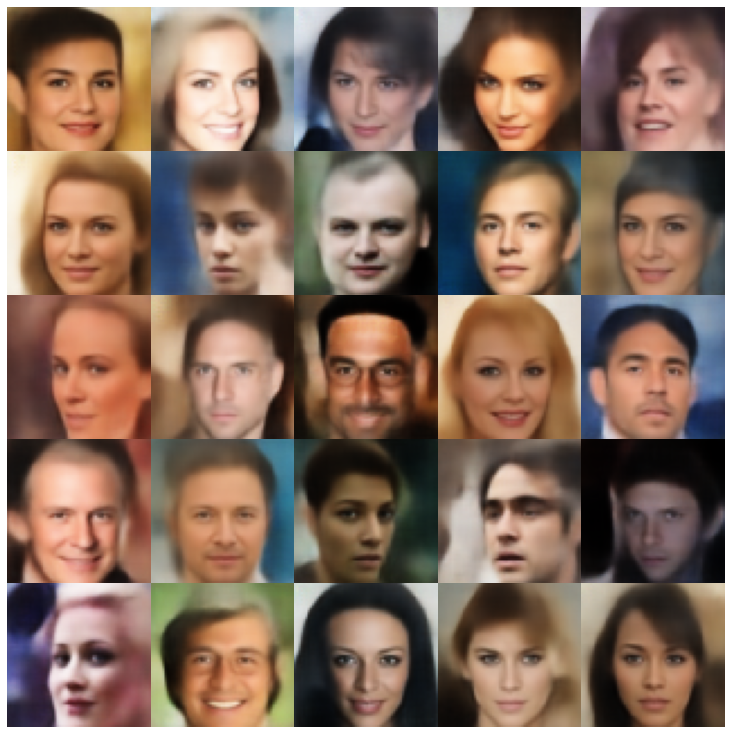 |
| vae + normalsampler | 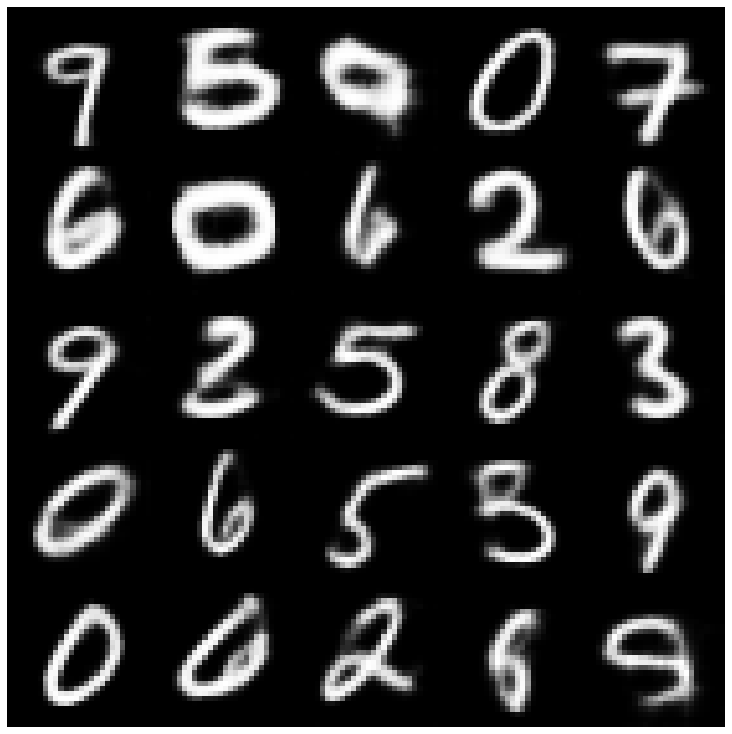 | 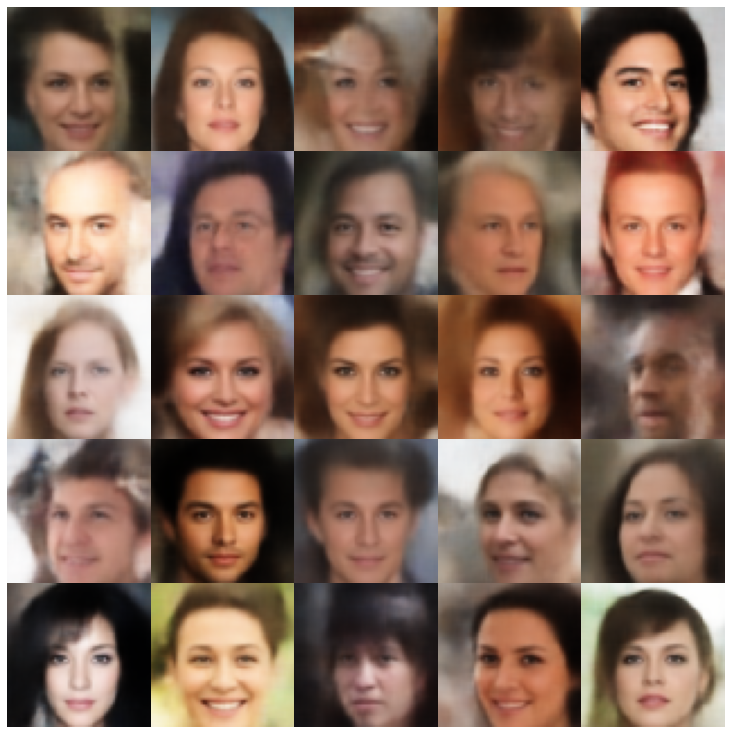 |
| vae + gaussianmixturesampler | 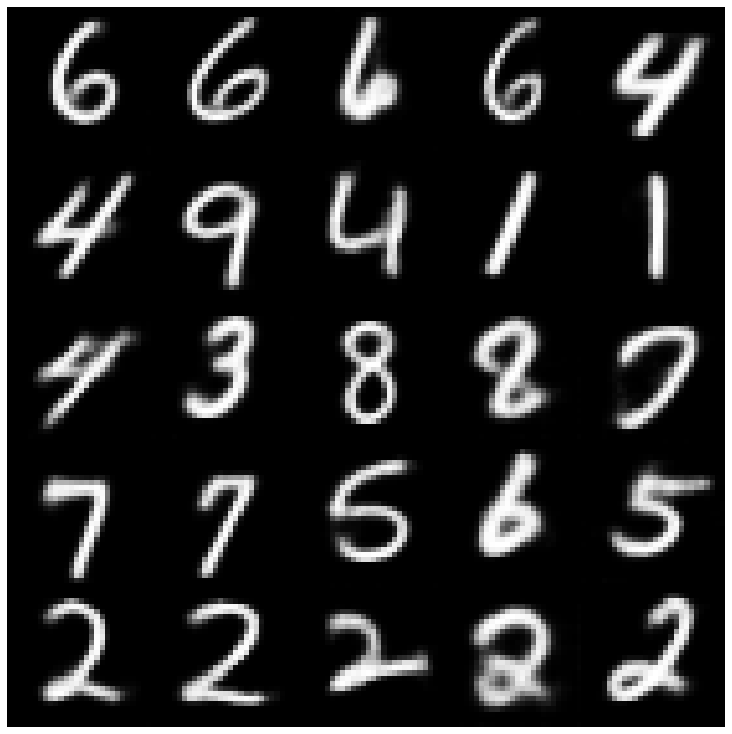 | 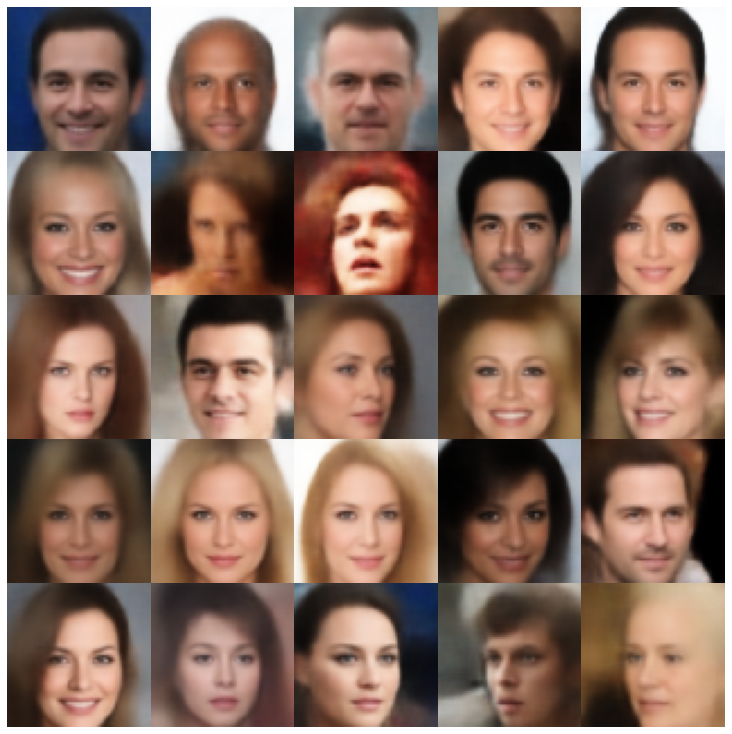 |
| VAE + TWOSTAGEVAESAMPLER | 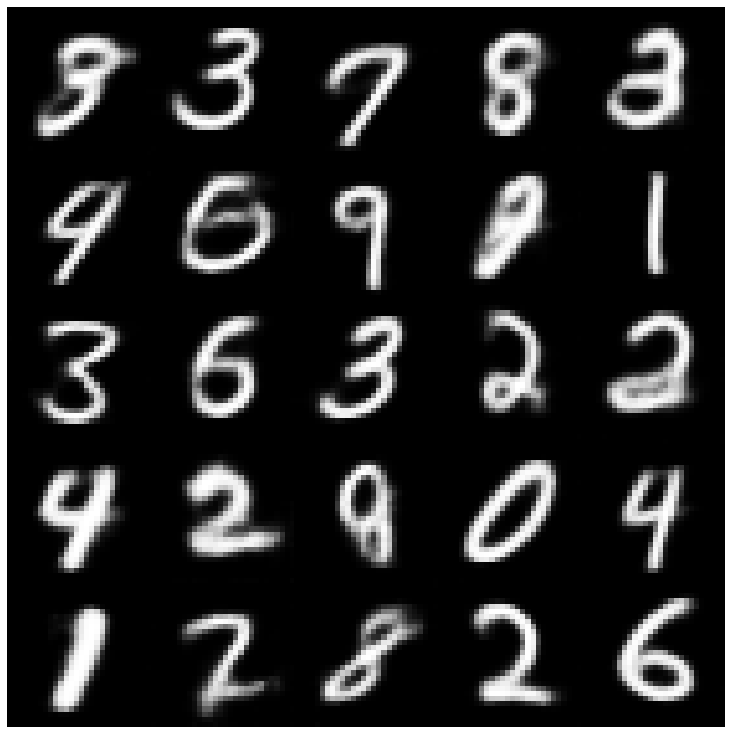 | 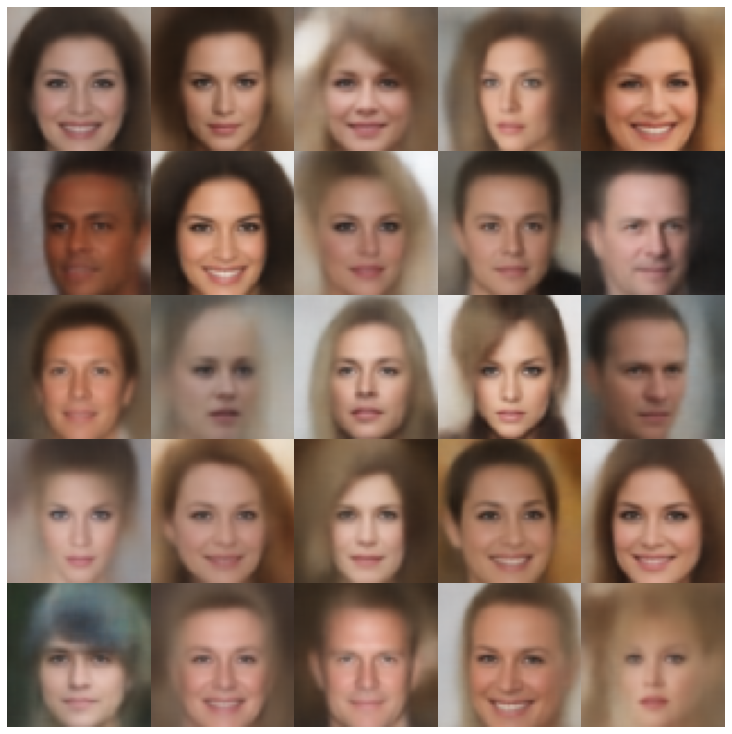 |
| vae + mafsampler | 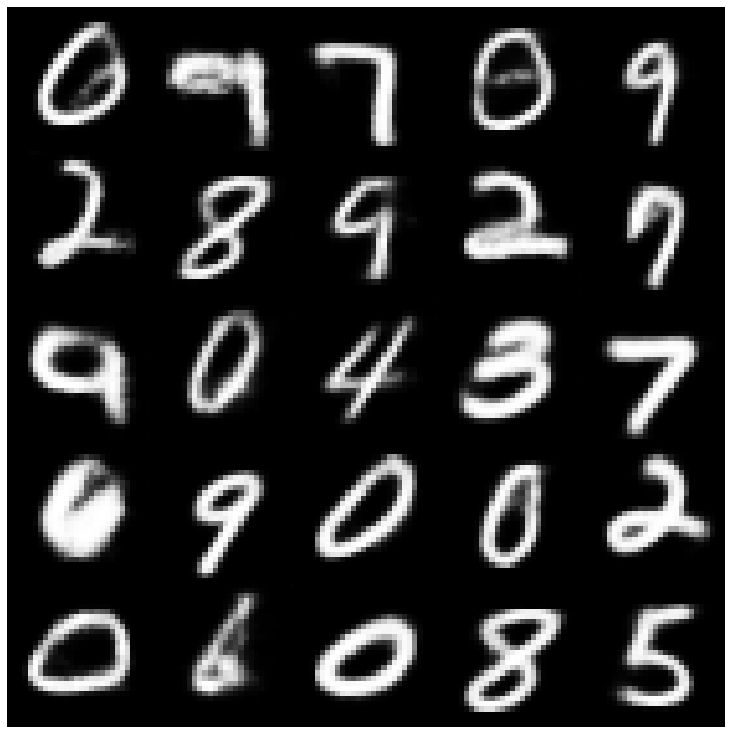 |  |
| Beta-Vae + NormalsAmpler | 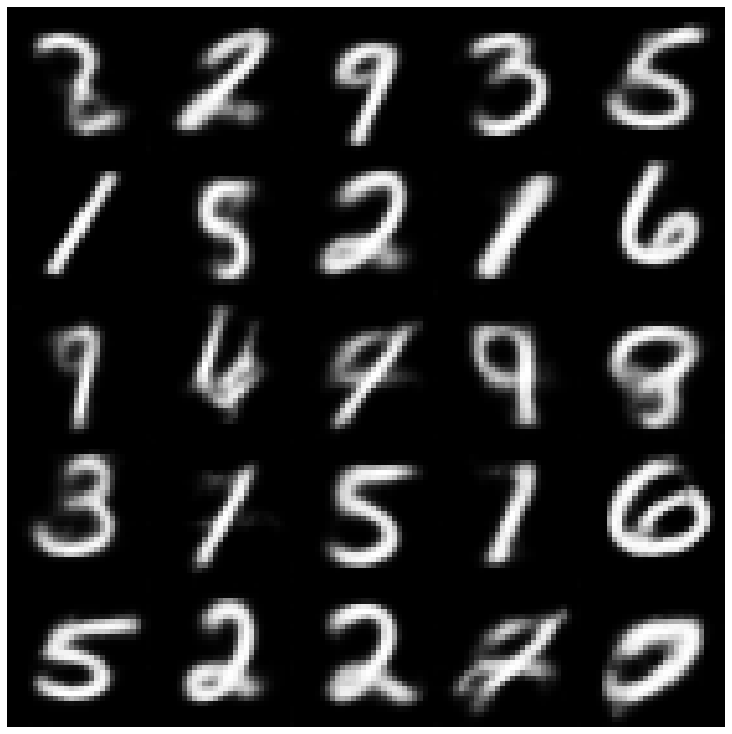 | 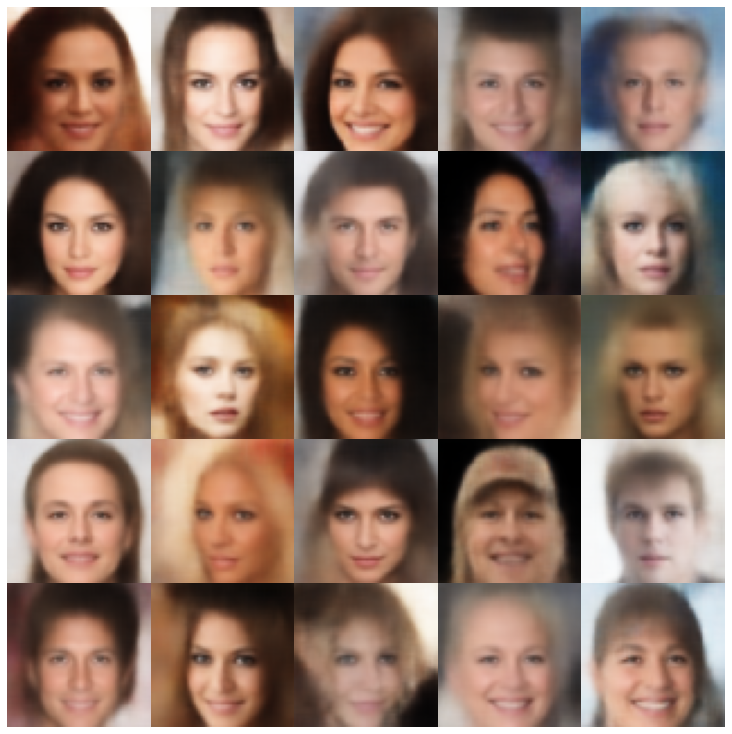 |
| vae lin nf + normalsampler | 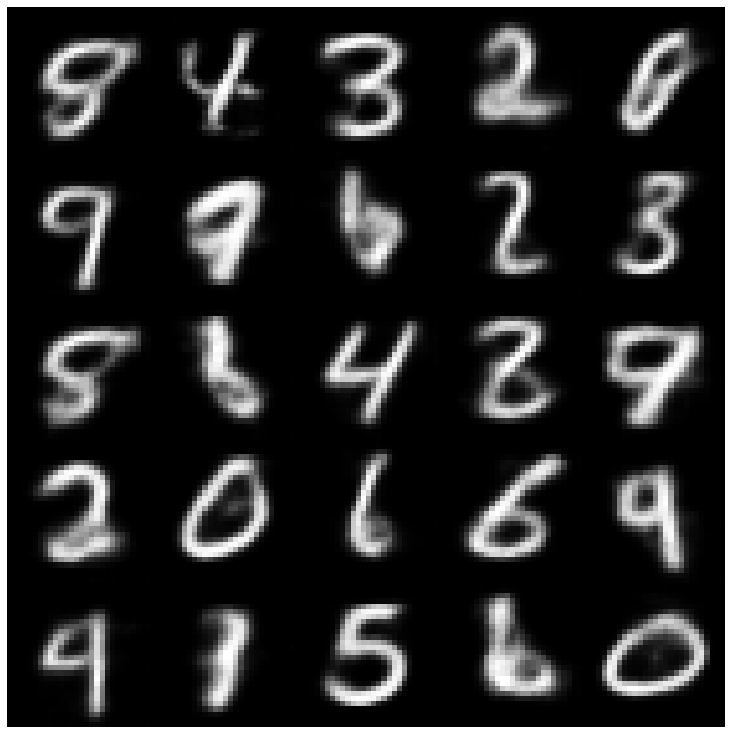 | 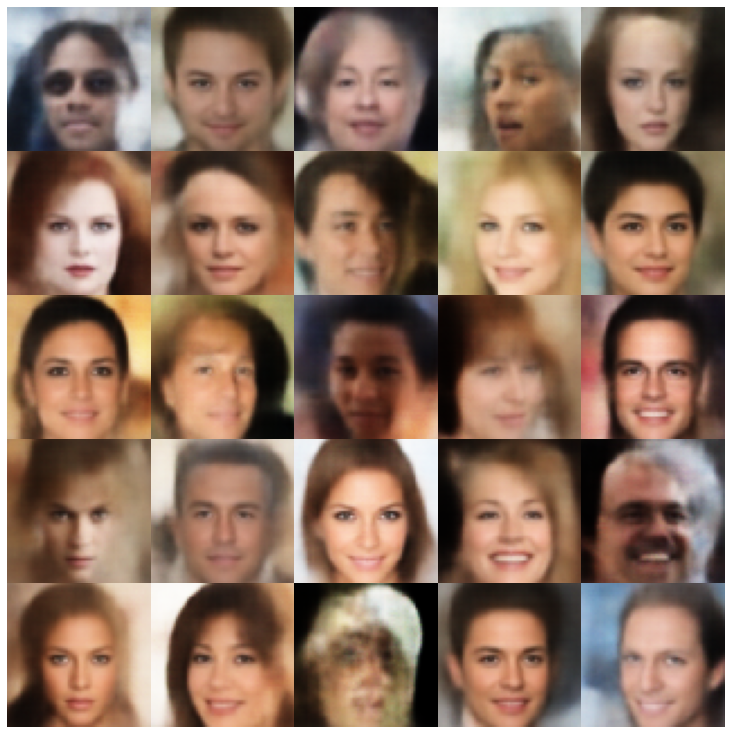 |
| vae iaf + normalsampler | 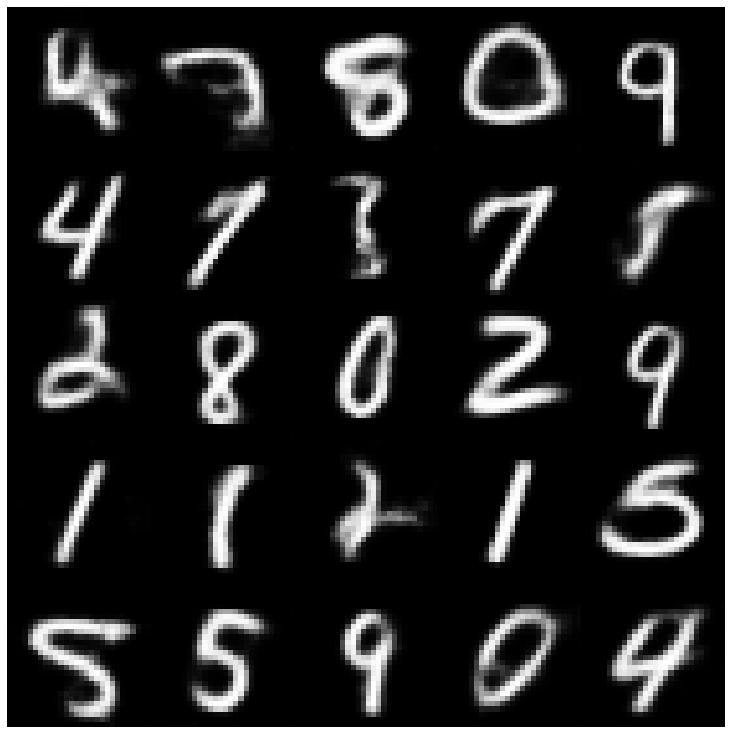 | 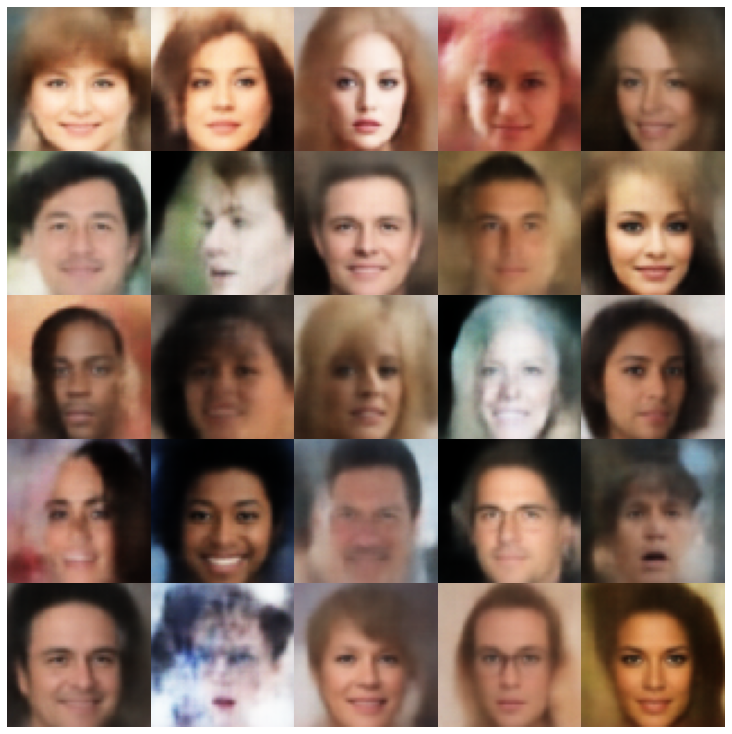 |
| disentangled beta-vae + normalsampler | 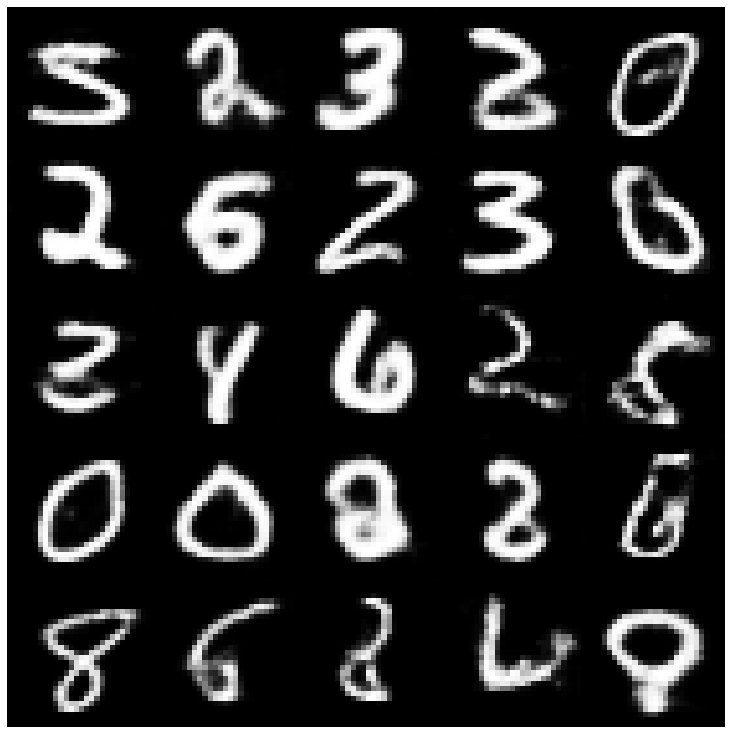 | 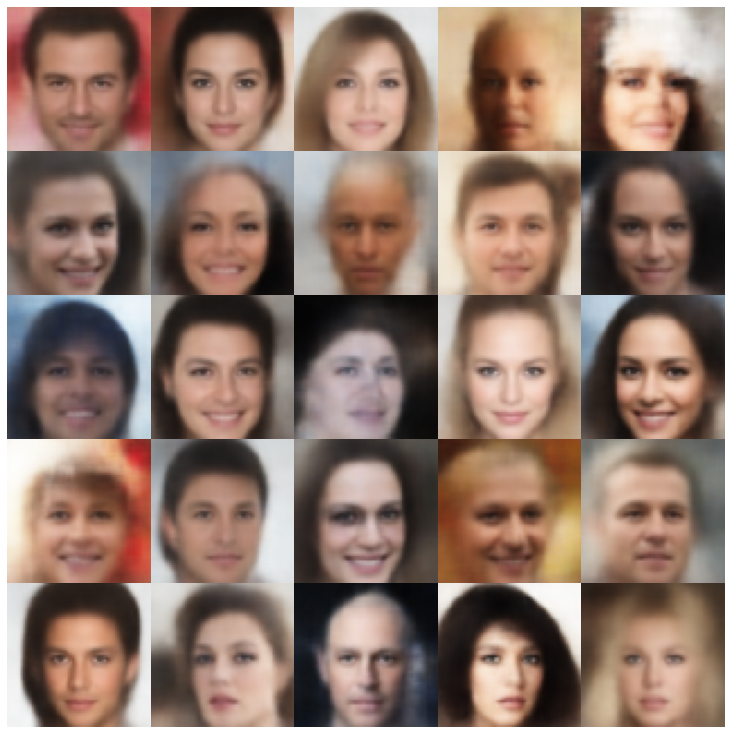 |
| factorvae + normalsampler | 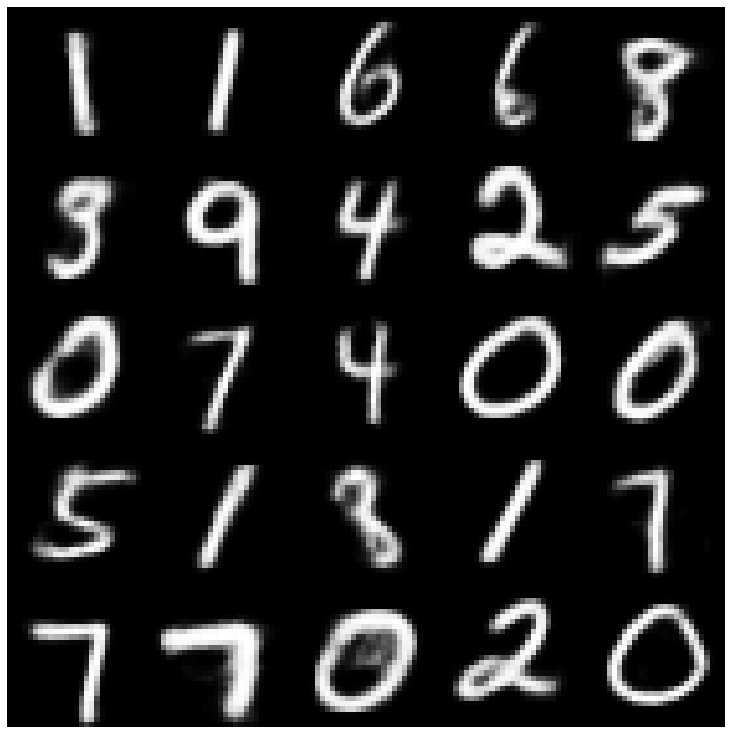 | 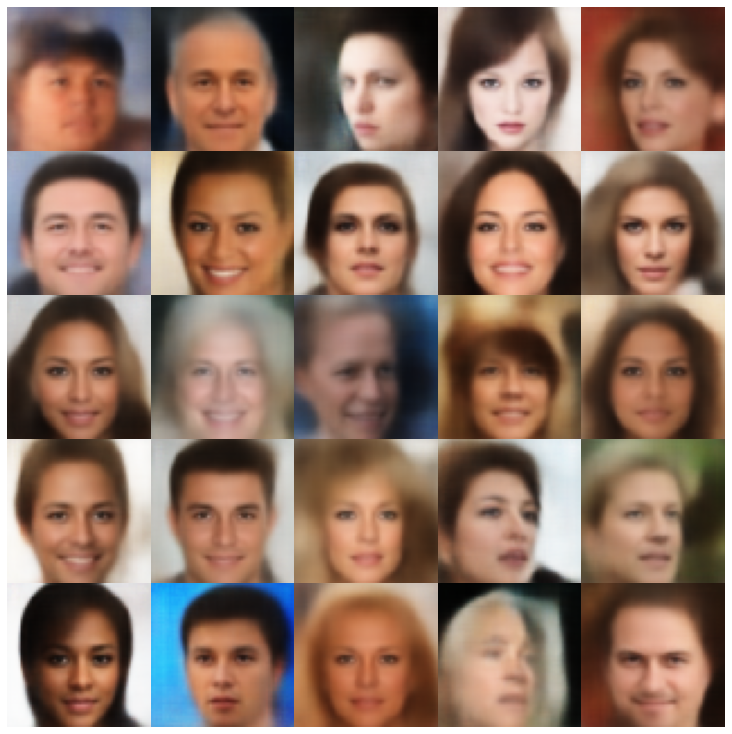 |
| betatcvae + normalsampler | 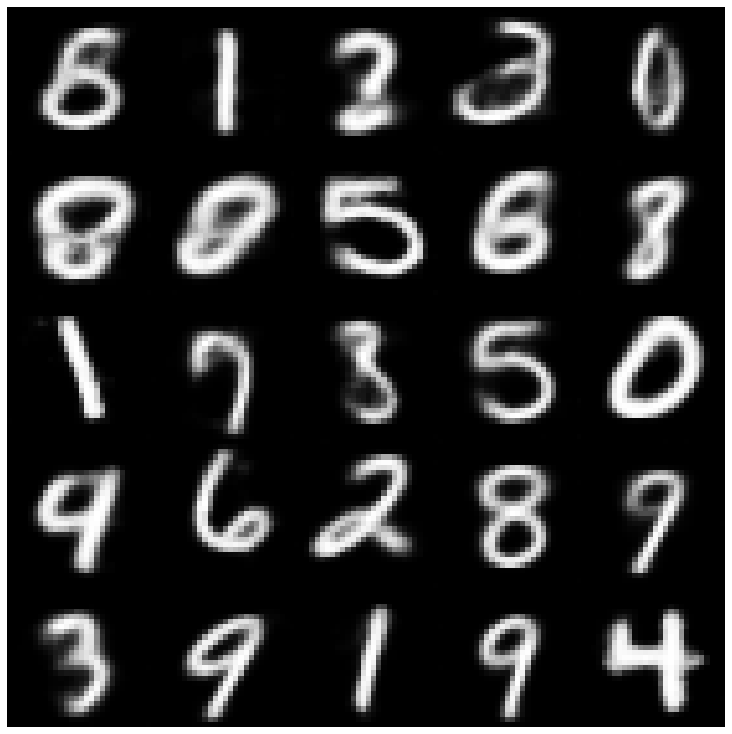 | 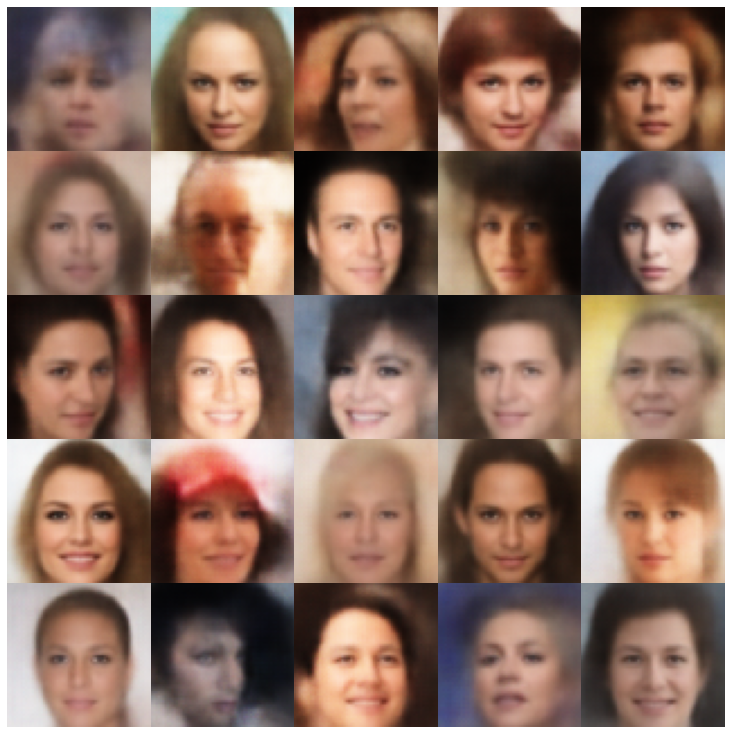 |
| Iwae + Sampler ปกติ | 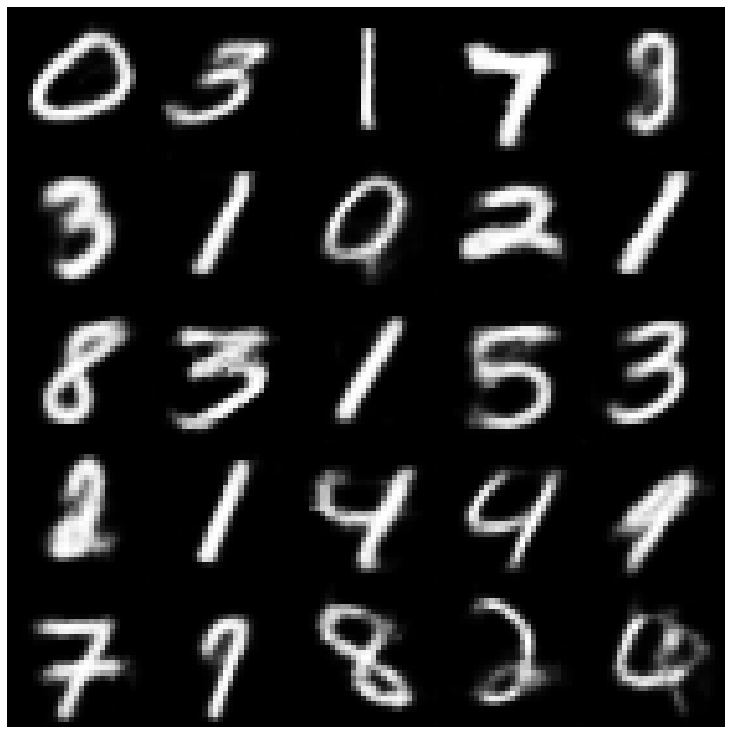 | 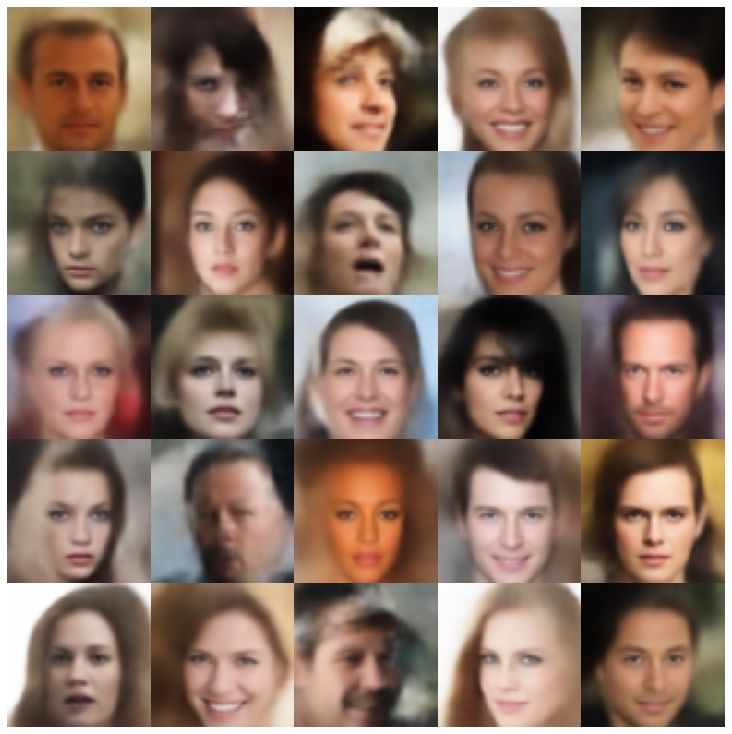 |
| msssim_vae + normalsampler | 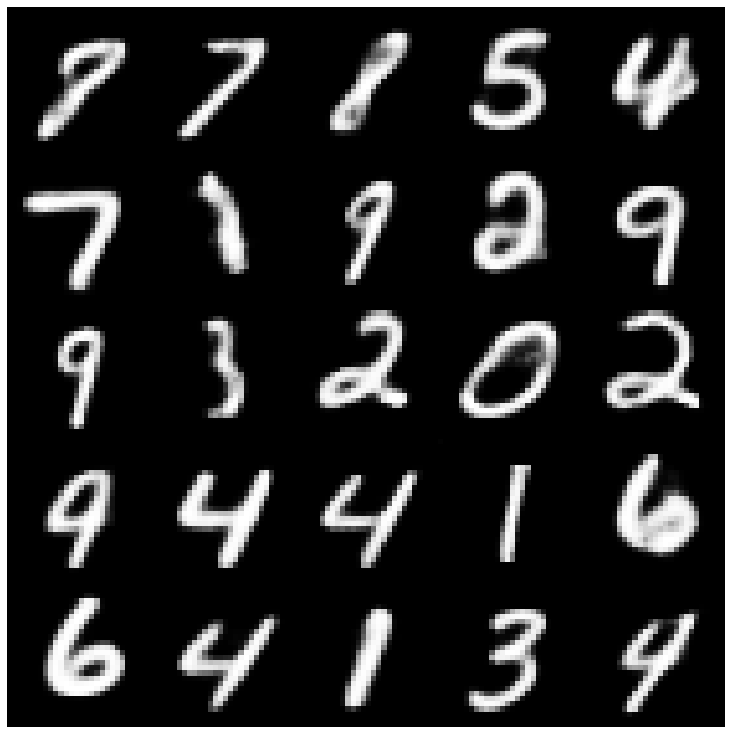 | 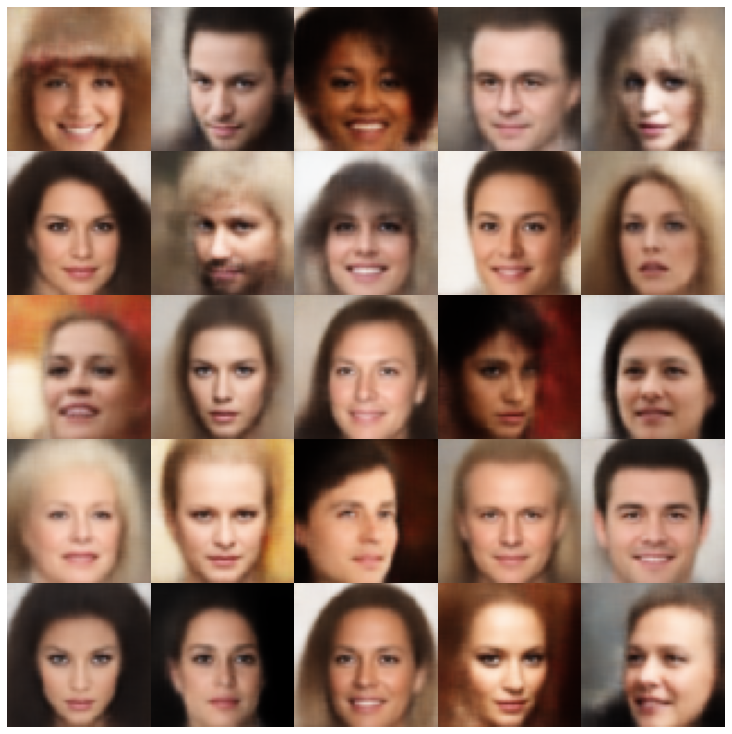 |
| wae + normalsampler | 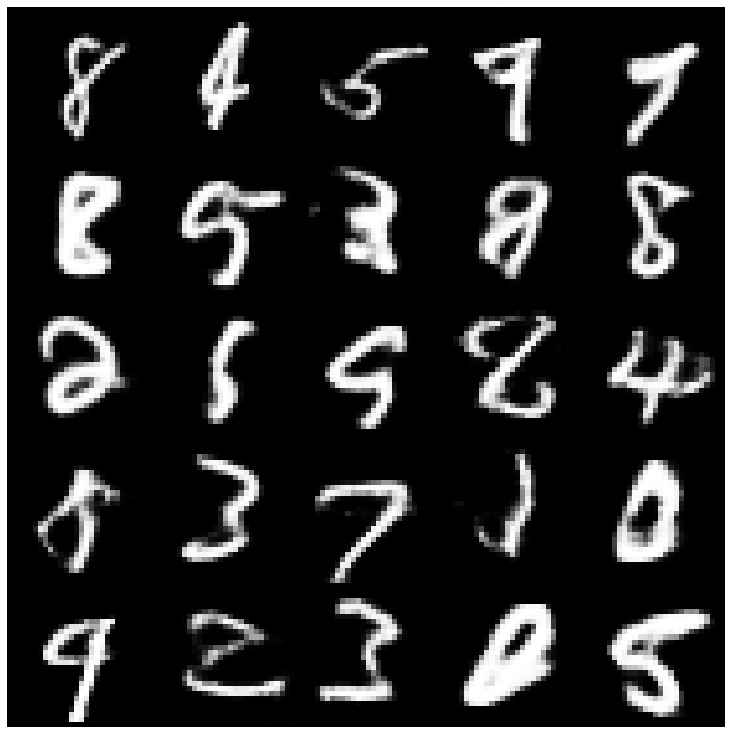 | 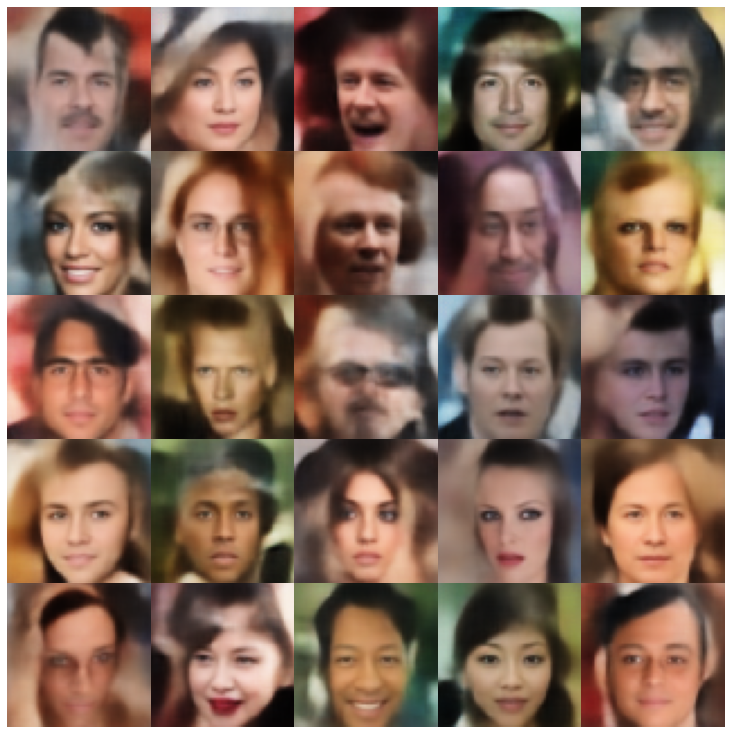 |
| ข้อมูล vae + normalsampler | 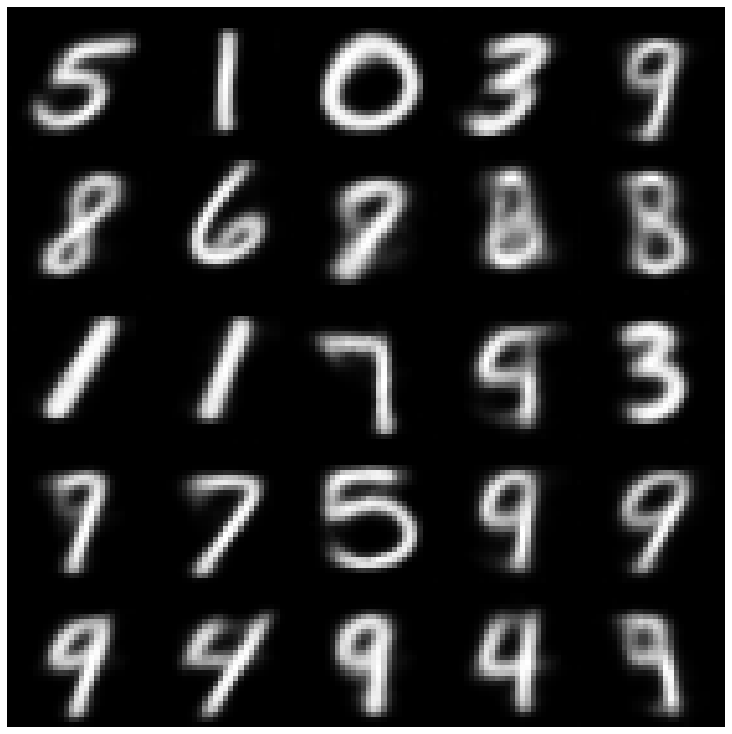 | 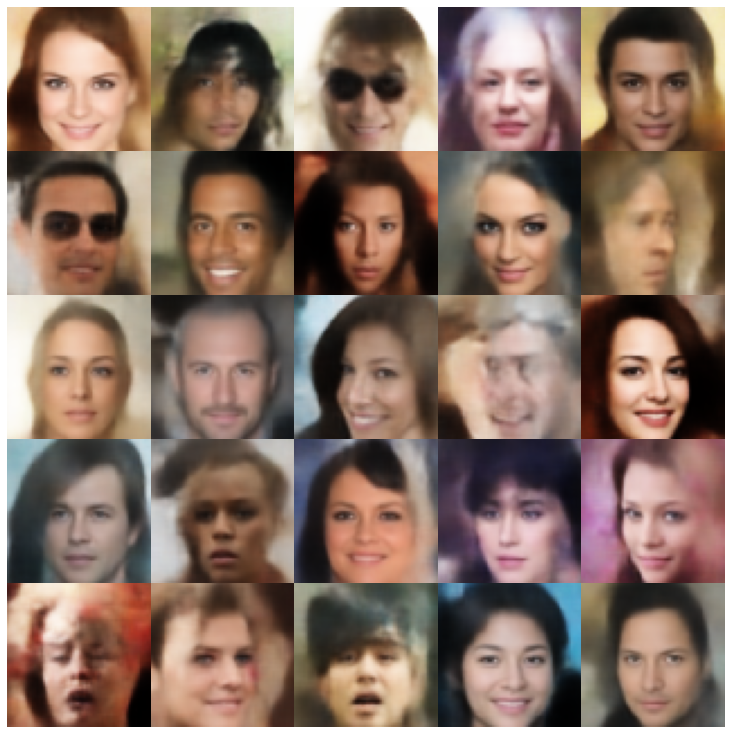 |
| svae + hypershereuniformsampler | 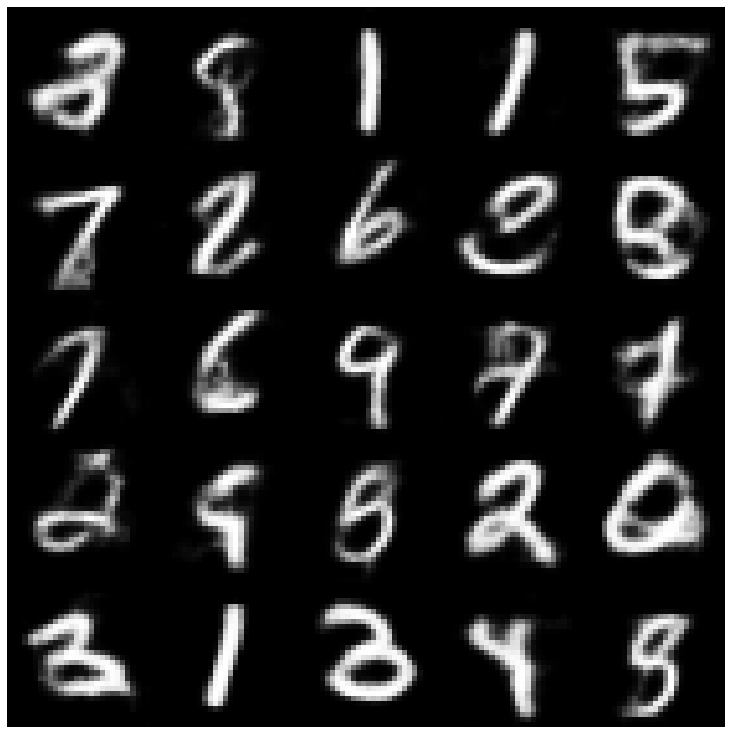 | 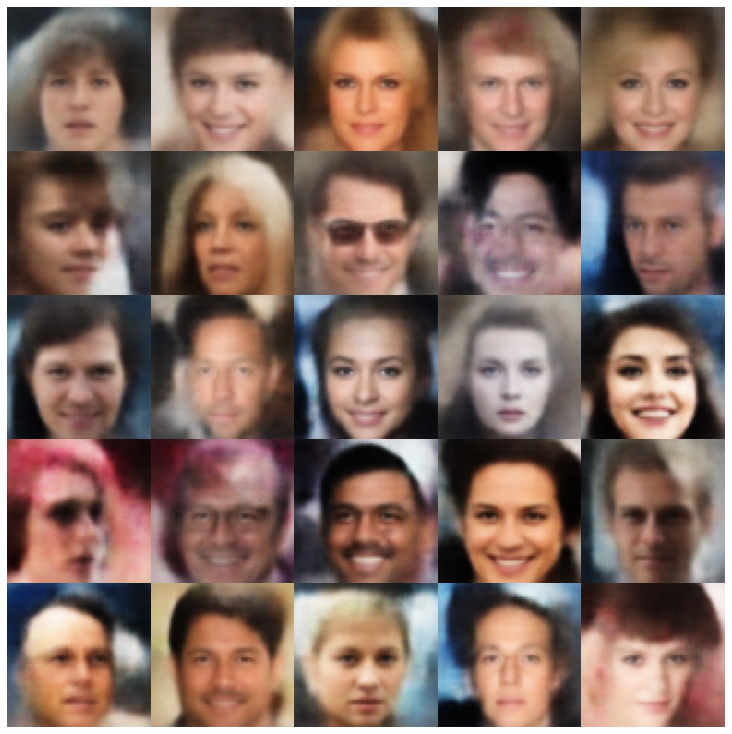 |
| VAMP + VAMPSAMPLER | 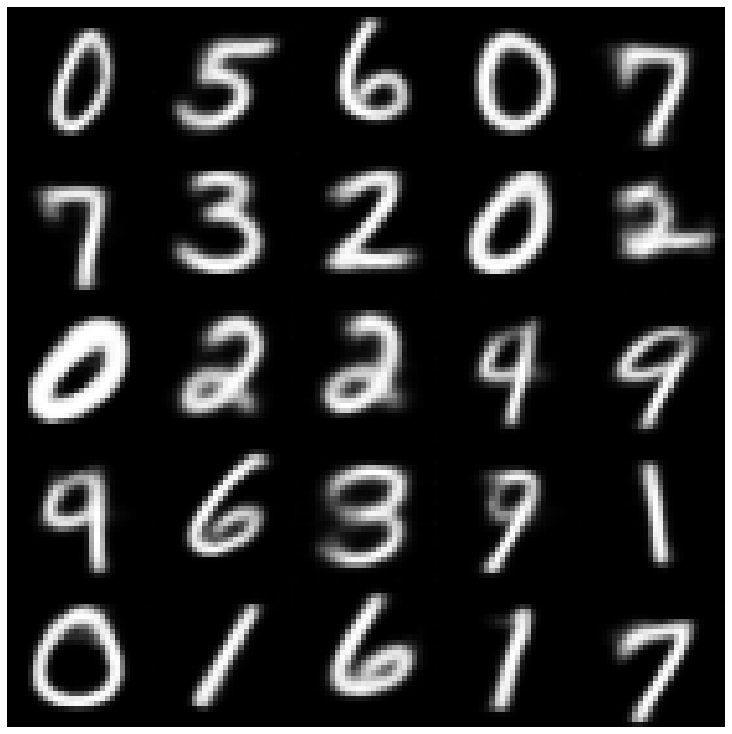 | 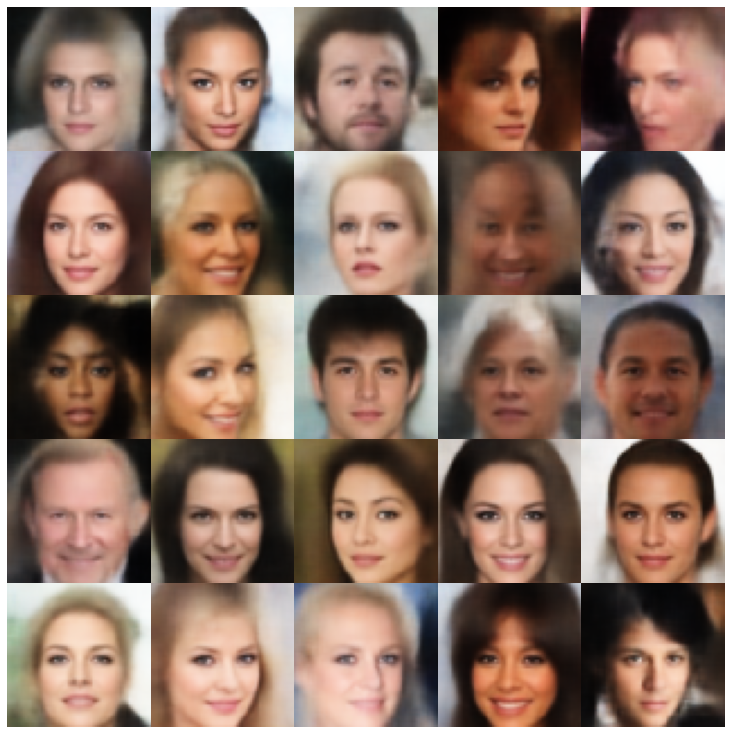 |
| antcersarial_ae + normalsampler | 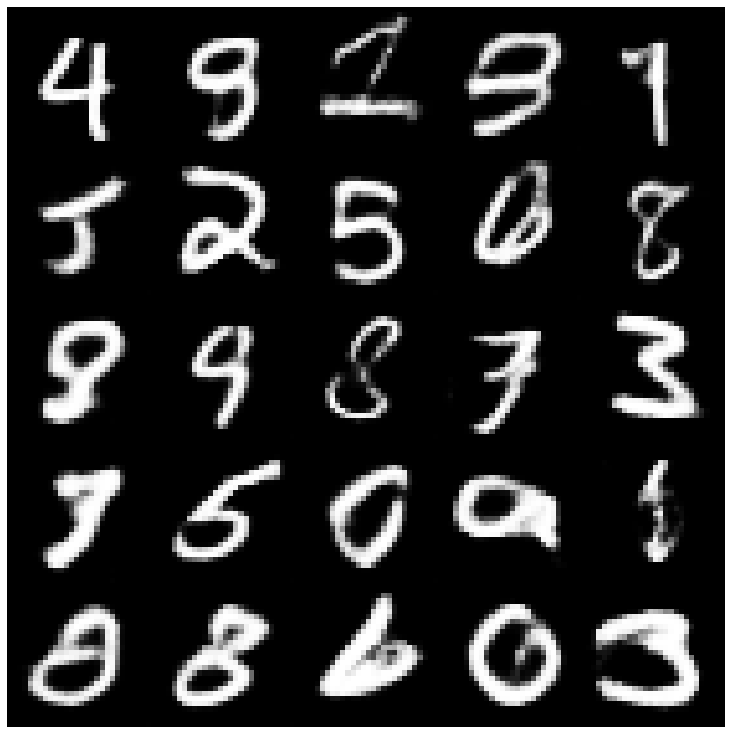 | 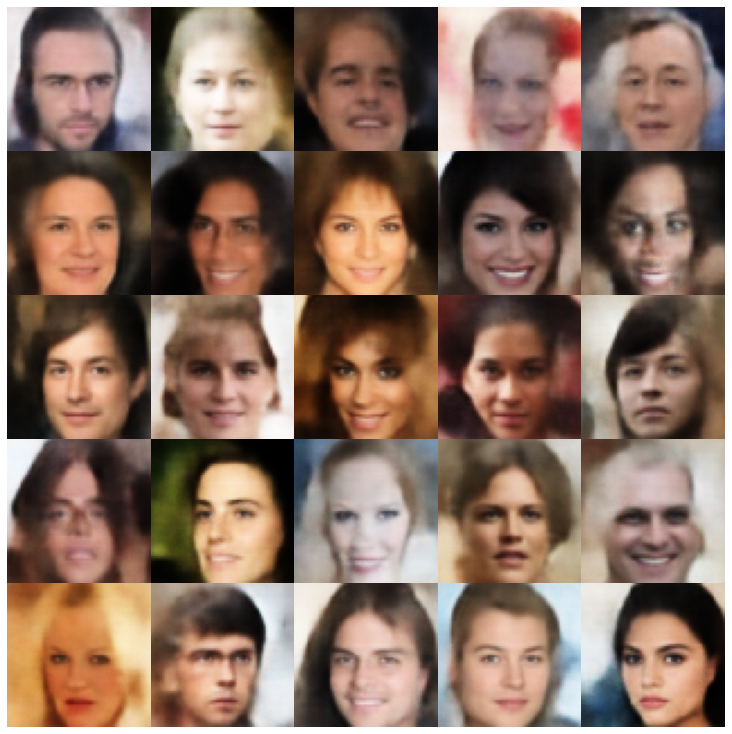 |
| vaegan + normalsampler | 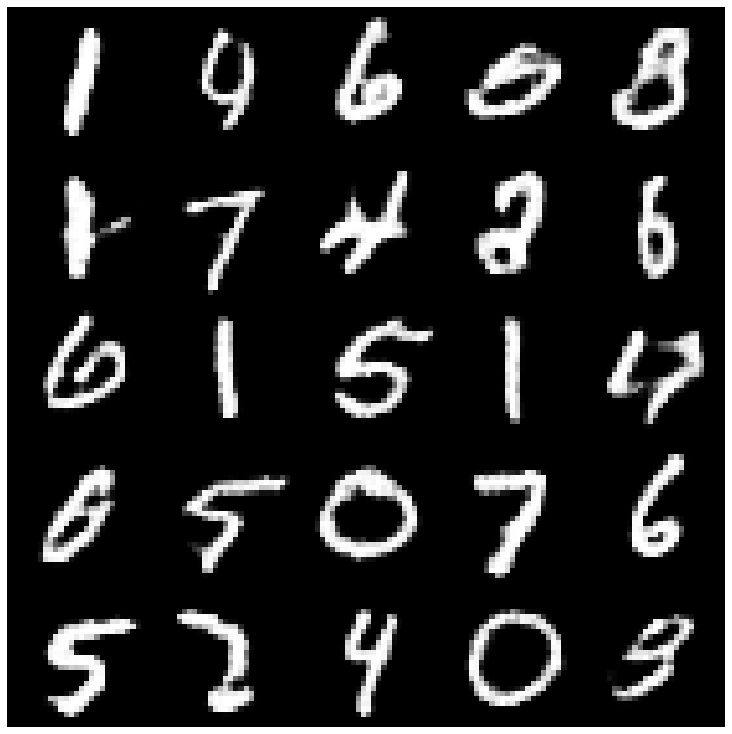 | 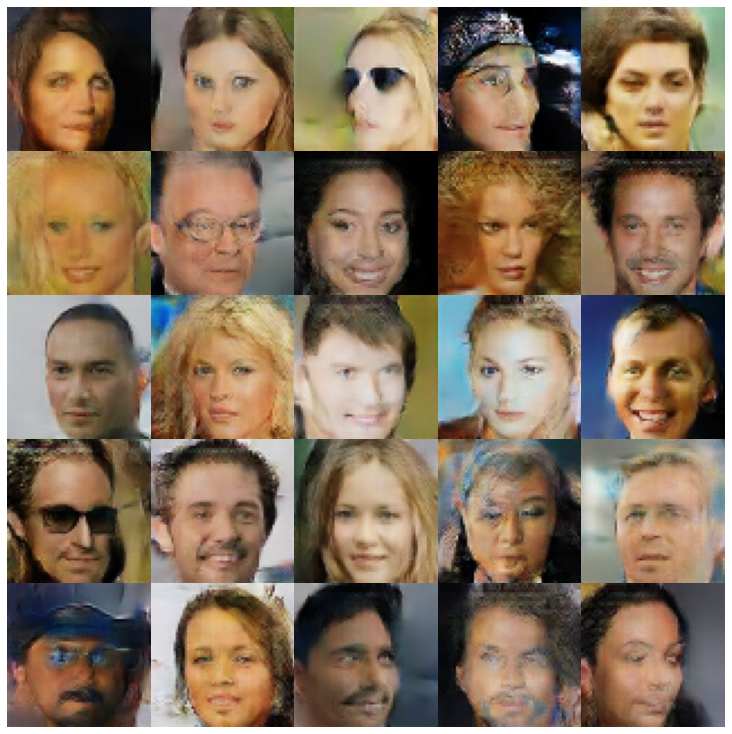 |
| vqvae + mafsampler | 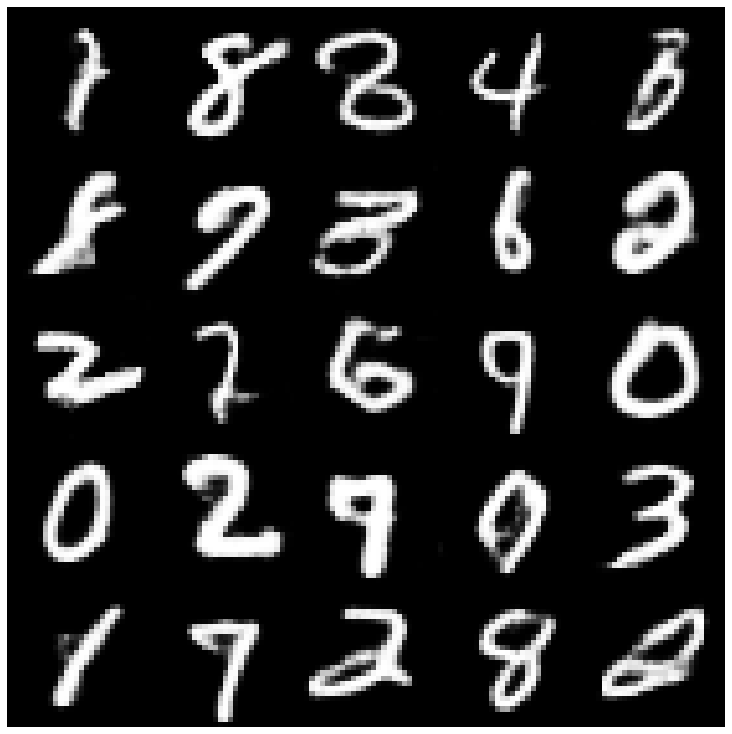 | 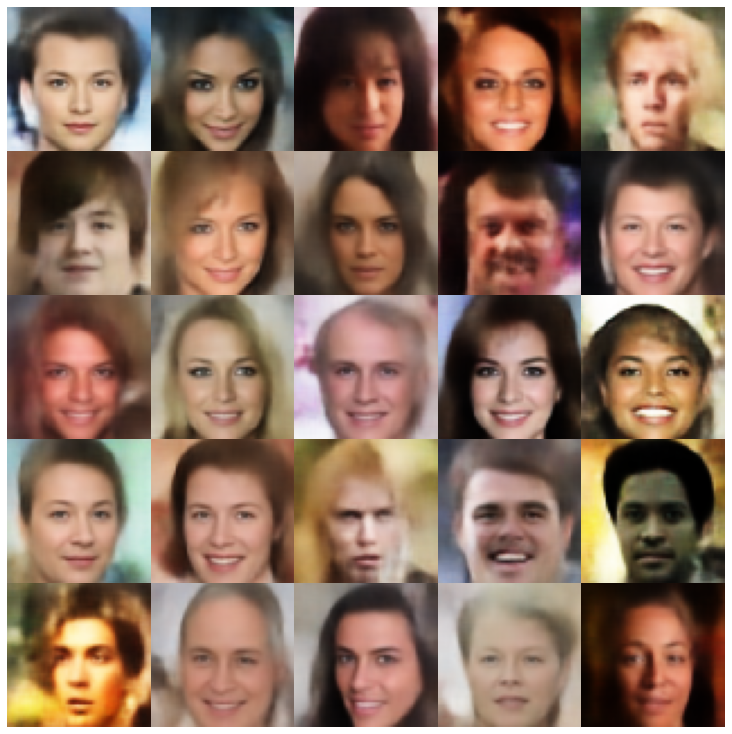 |
| hvae + normalsampler | 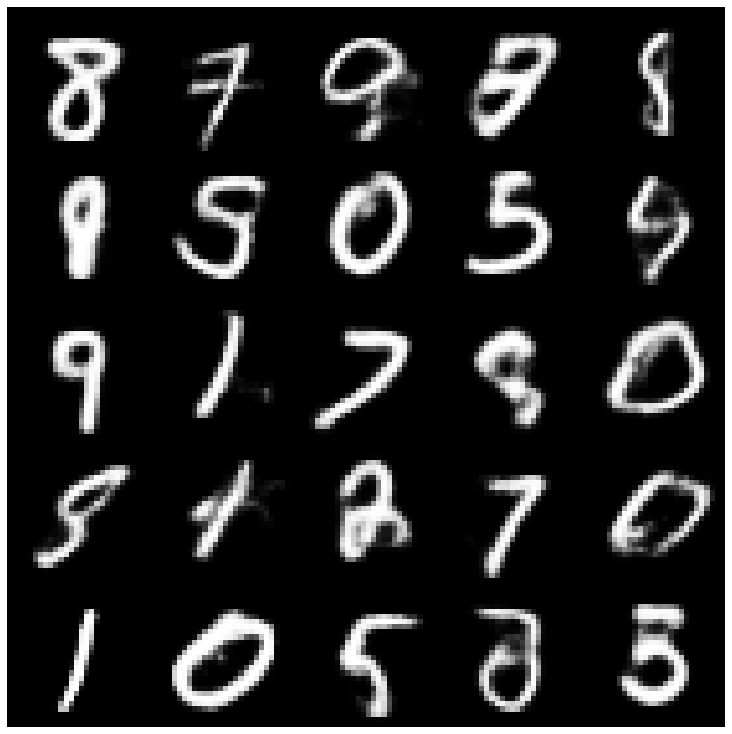 | 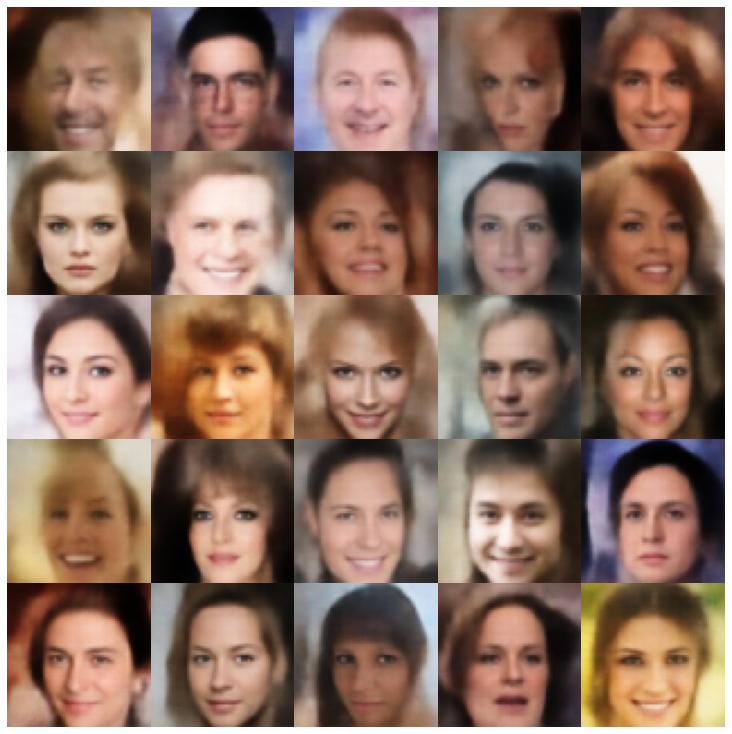 |
| RAE_L2 + GAUSSIANMIXTUREMPLER | 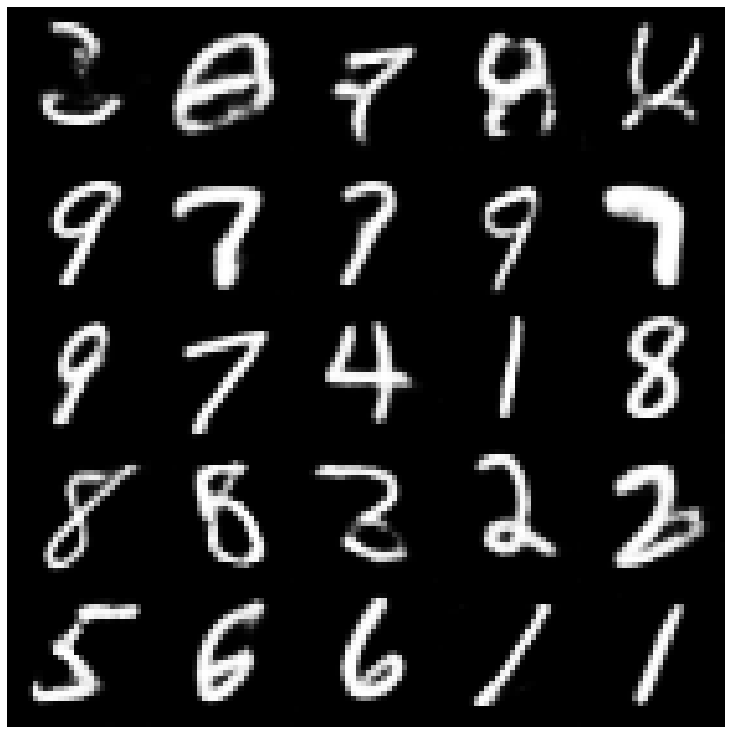 | 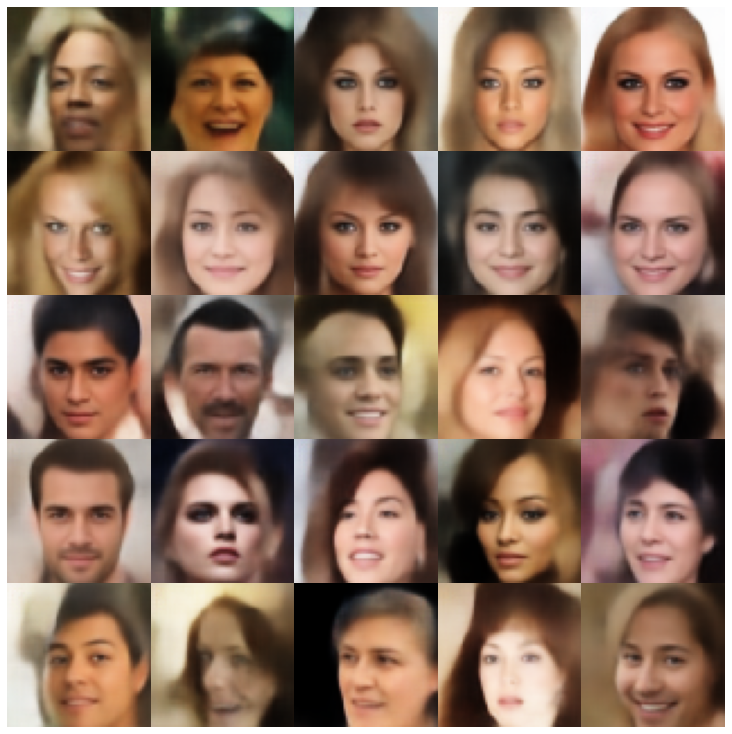 |
| rae_gp + gaussianmixturesampler | 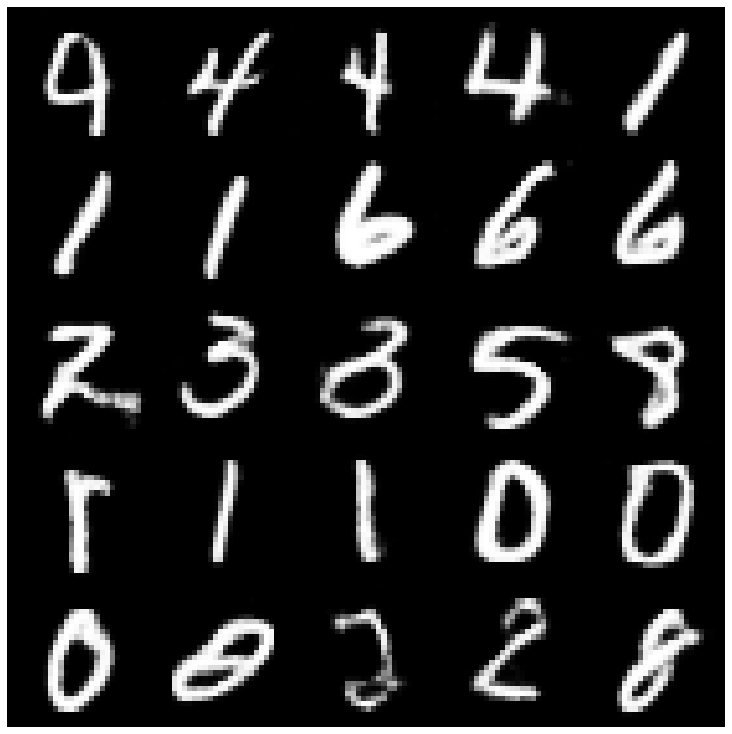 | 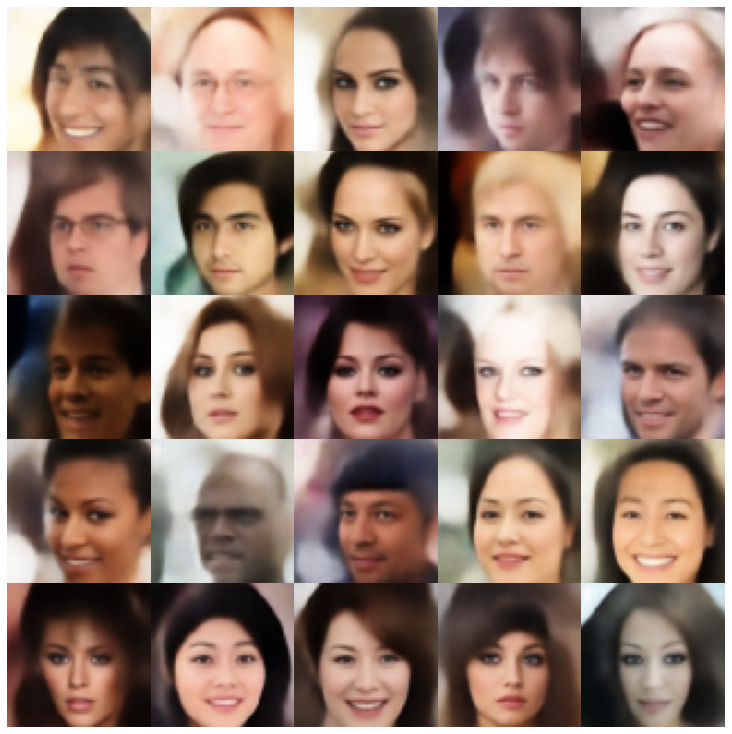 |
| Riemannian Hamiltonian Vae (Rhvae) + Rhvae Sampler | 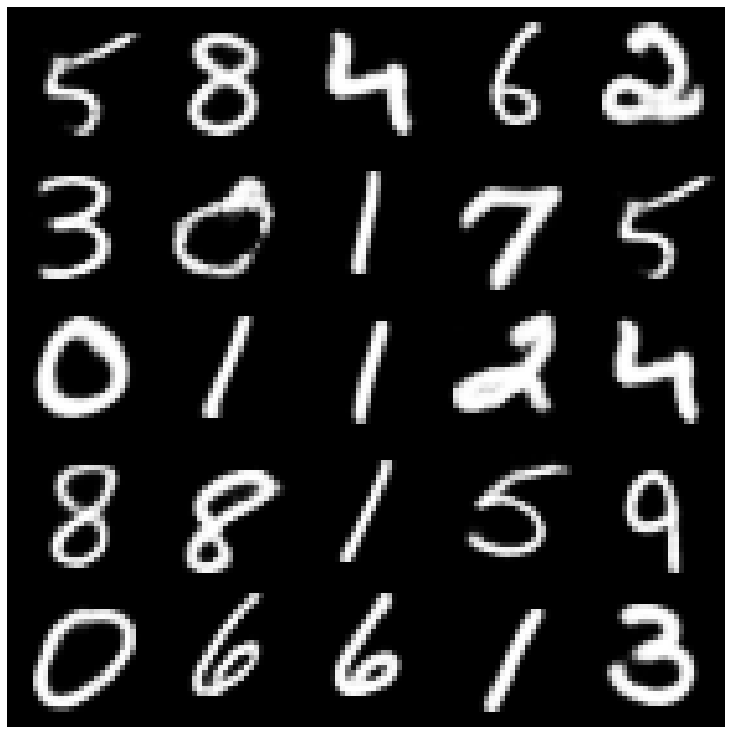 | 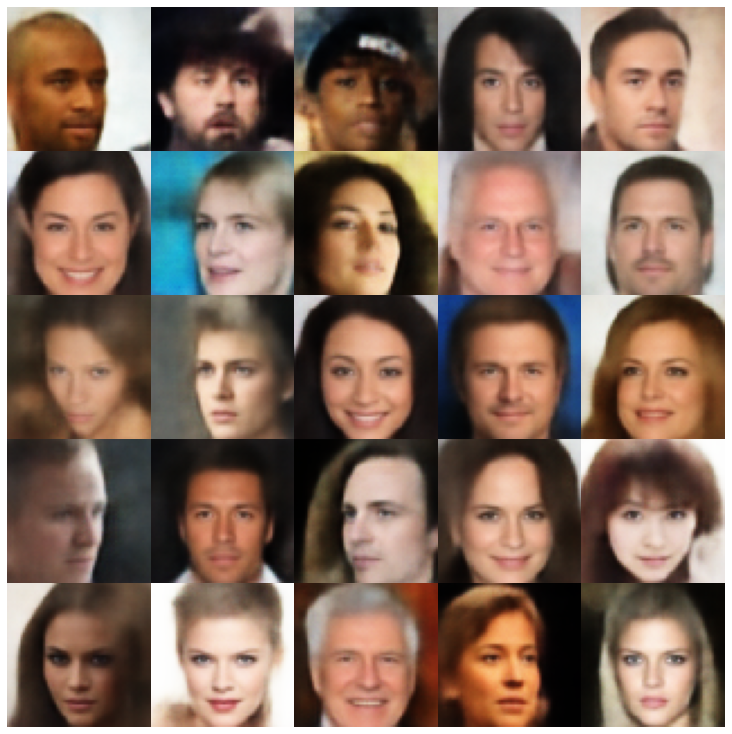 |
หากคุณพบว่างานนี้มีประโยชน์หรือใช้ในการวิจัยของคุณโปรดพิจารณาอ้างเรา
 @inproceedings { chadebec2022pythae ,
 author = { Chadebec, Cl'{e}ment and Vincent, Louis and Allassonniere, Stephanie } ,
 booktitle = { Advances in Neural Information Processing Systems } ,
 editor = { S. Koyejo and S. Mohamed and A. Agarwal and D. Belgrave and K. Cho and A. Oh } ,
 pages = { 21575--21589 } ,
 publisher = { Curran Associates, Inc. } ,
 title = { Pythae: Unifying Generative Autoencoders in Python - A Benchmarking Use Case } ,
 volume = { 35 } ,
 year = { 2022 }
}

