lens up
1.0.0
Guest sees Gallery UI with other guest photos. He also sees QR code in the application corner.
Guest scans QR code, which redirects him to Photo Collector UI and there he can upload photo and wishes.
Photo Collector UI send data to Photo Collector Service.
Photo Collector Service upload guest photo to blob storage.
Photo Collector Service add guest data to database.
Photo Collector Service publish event to queue.
Gallery Service receive the event and process it.
Gallery Service push notification about new photo in the gallery for Gallery UI, and then Gallery UI adds new guest photo to gallery collection.
Description:
Backend services:
UI applications:
Azure Services:
You can run the project locally on your machine using Docker. Follow the steps below to run the application locally:
Before we start you should generate dev-certs for LensUp on your machine. This operation is required to hosting ASP.NET Core images with Docker over HTTPS. So generate a certificate using these commands:
dotnet dev-certs https -ep "%USERPROFILE%.aspnethttpslens-up.pfx" -p localCertPassword
dotnet dev-certs https --trust
Replace %USERPROFILE% with your computer name. Example "C:UsersDell Precision 7520.aspnethttpslens-up.pfx"
For local development purposes, we will use the password localCertPassword. Do not change this, as the same password is used in the docker-compose.yml file.
The above commands should generate a lens-up.pfx certificate, and should place it in the directory as shown in the screenshot below.

This is necessary step, because docker-compose refers to that certificate!
Install docker desktop on your machine (skip if you already done it).
Run your docker desktop application.
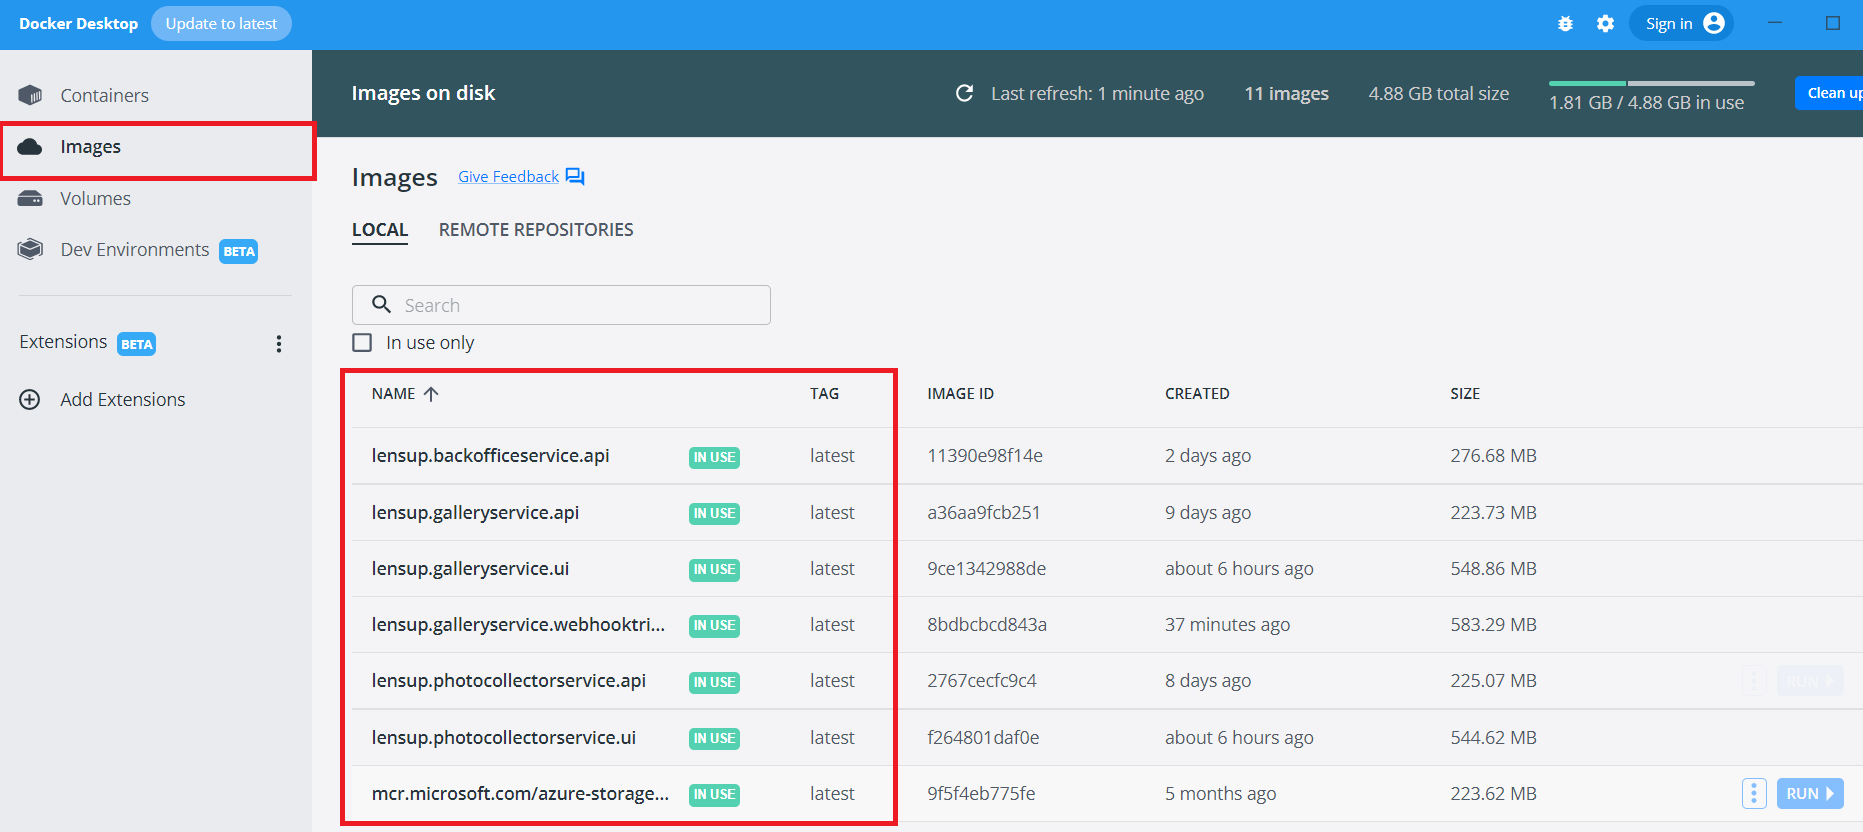
In the main project directory (lens-up), where the docker-compose.yml file is located, run the command docker-compose build. This will build 7 necessary LensUp images. The first time build may take a few minutes (up to 10 minutes). After completing these steps, you should see new images in the Docker Desktop application.
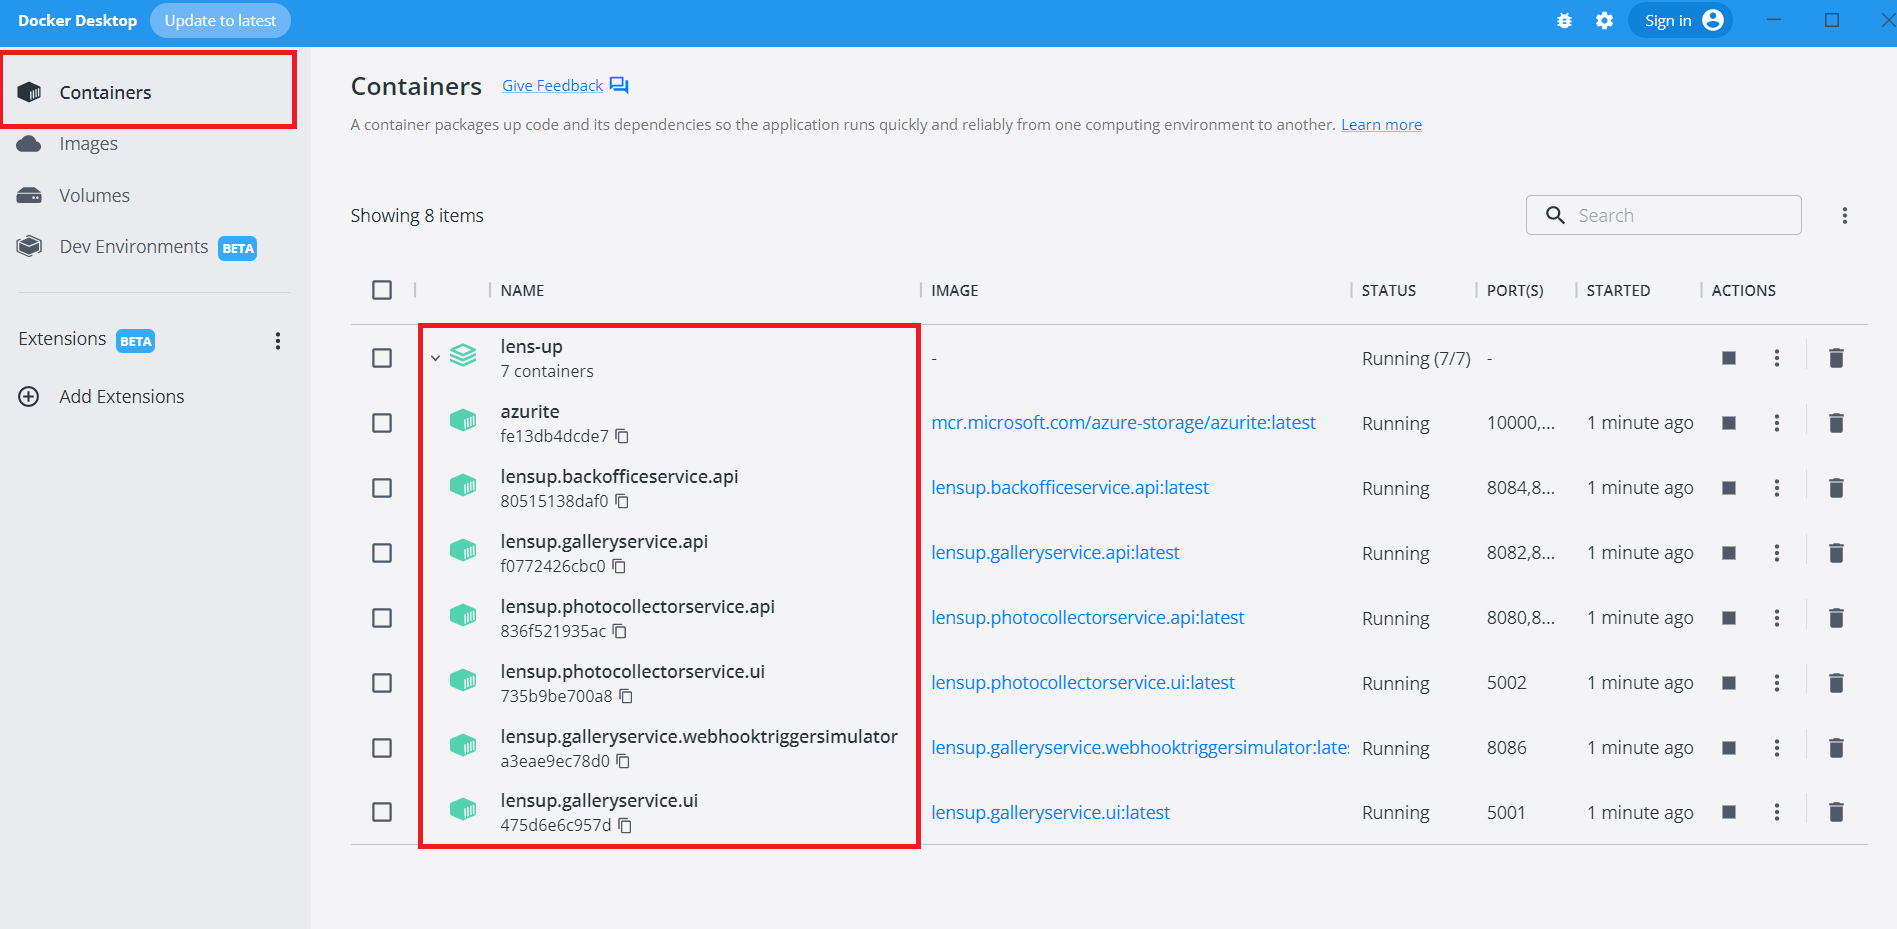
After the build command, run the docker-compose up to start the entire infrastructure. You should see in Docker Desktop that 7 containers related to LensUp have been started.
Now the entire application is running on your machine. You can use the following addresses:
Backend services:
LensUp.BackOfficeService.API swagger - https://localhost:8085/swagger/index.htmlLensUp.GalleryService.API swagger - https://localhost:8083/swagger/index.htmlLensUp.GalleryService.WebhookTriggerSimulator - http://localhost:8086/LensUp.PhotoCollectorService.API swagger - https://localhost:8081/swagger/index.htmlUI applications:
LensUp.GalleryService.UI - http://localhost:5001/
LensUp.PhotoCollectorService.UI - http://localhost:5002/
On LensUp.PhotoCollectorService.UI you will see error page, because you need to navigate to the view associated with a specific gallery, which you haven't created yet.
How to create your first gallery and have fun with LensUp?
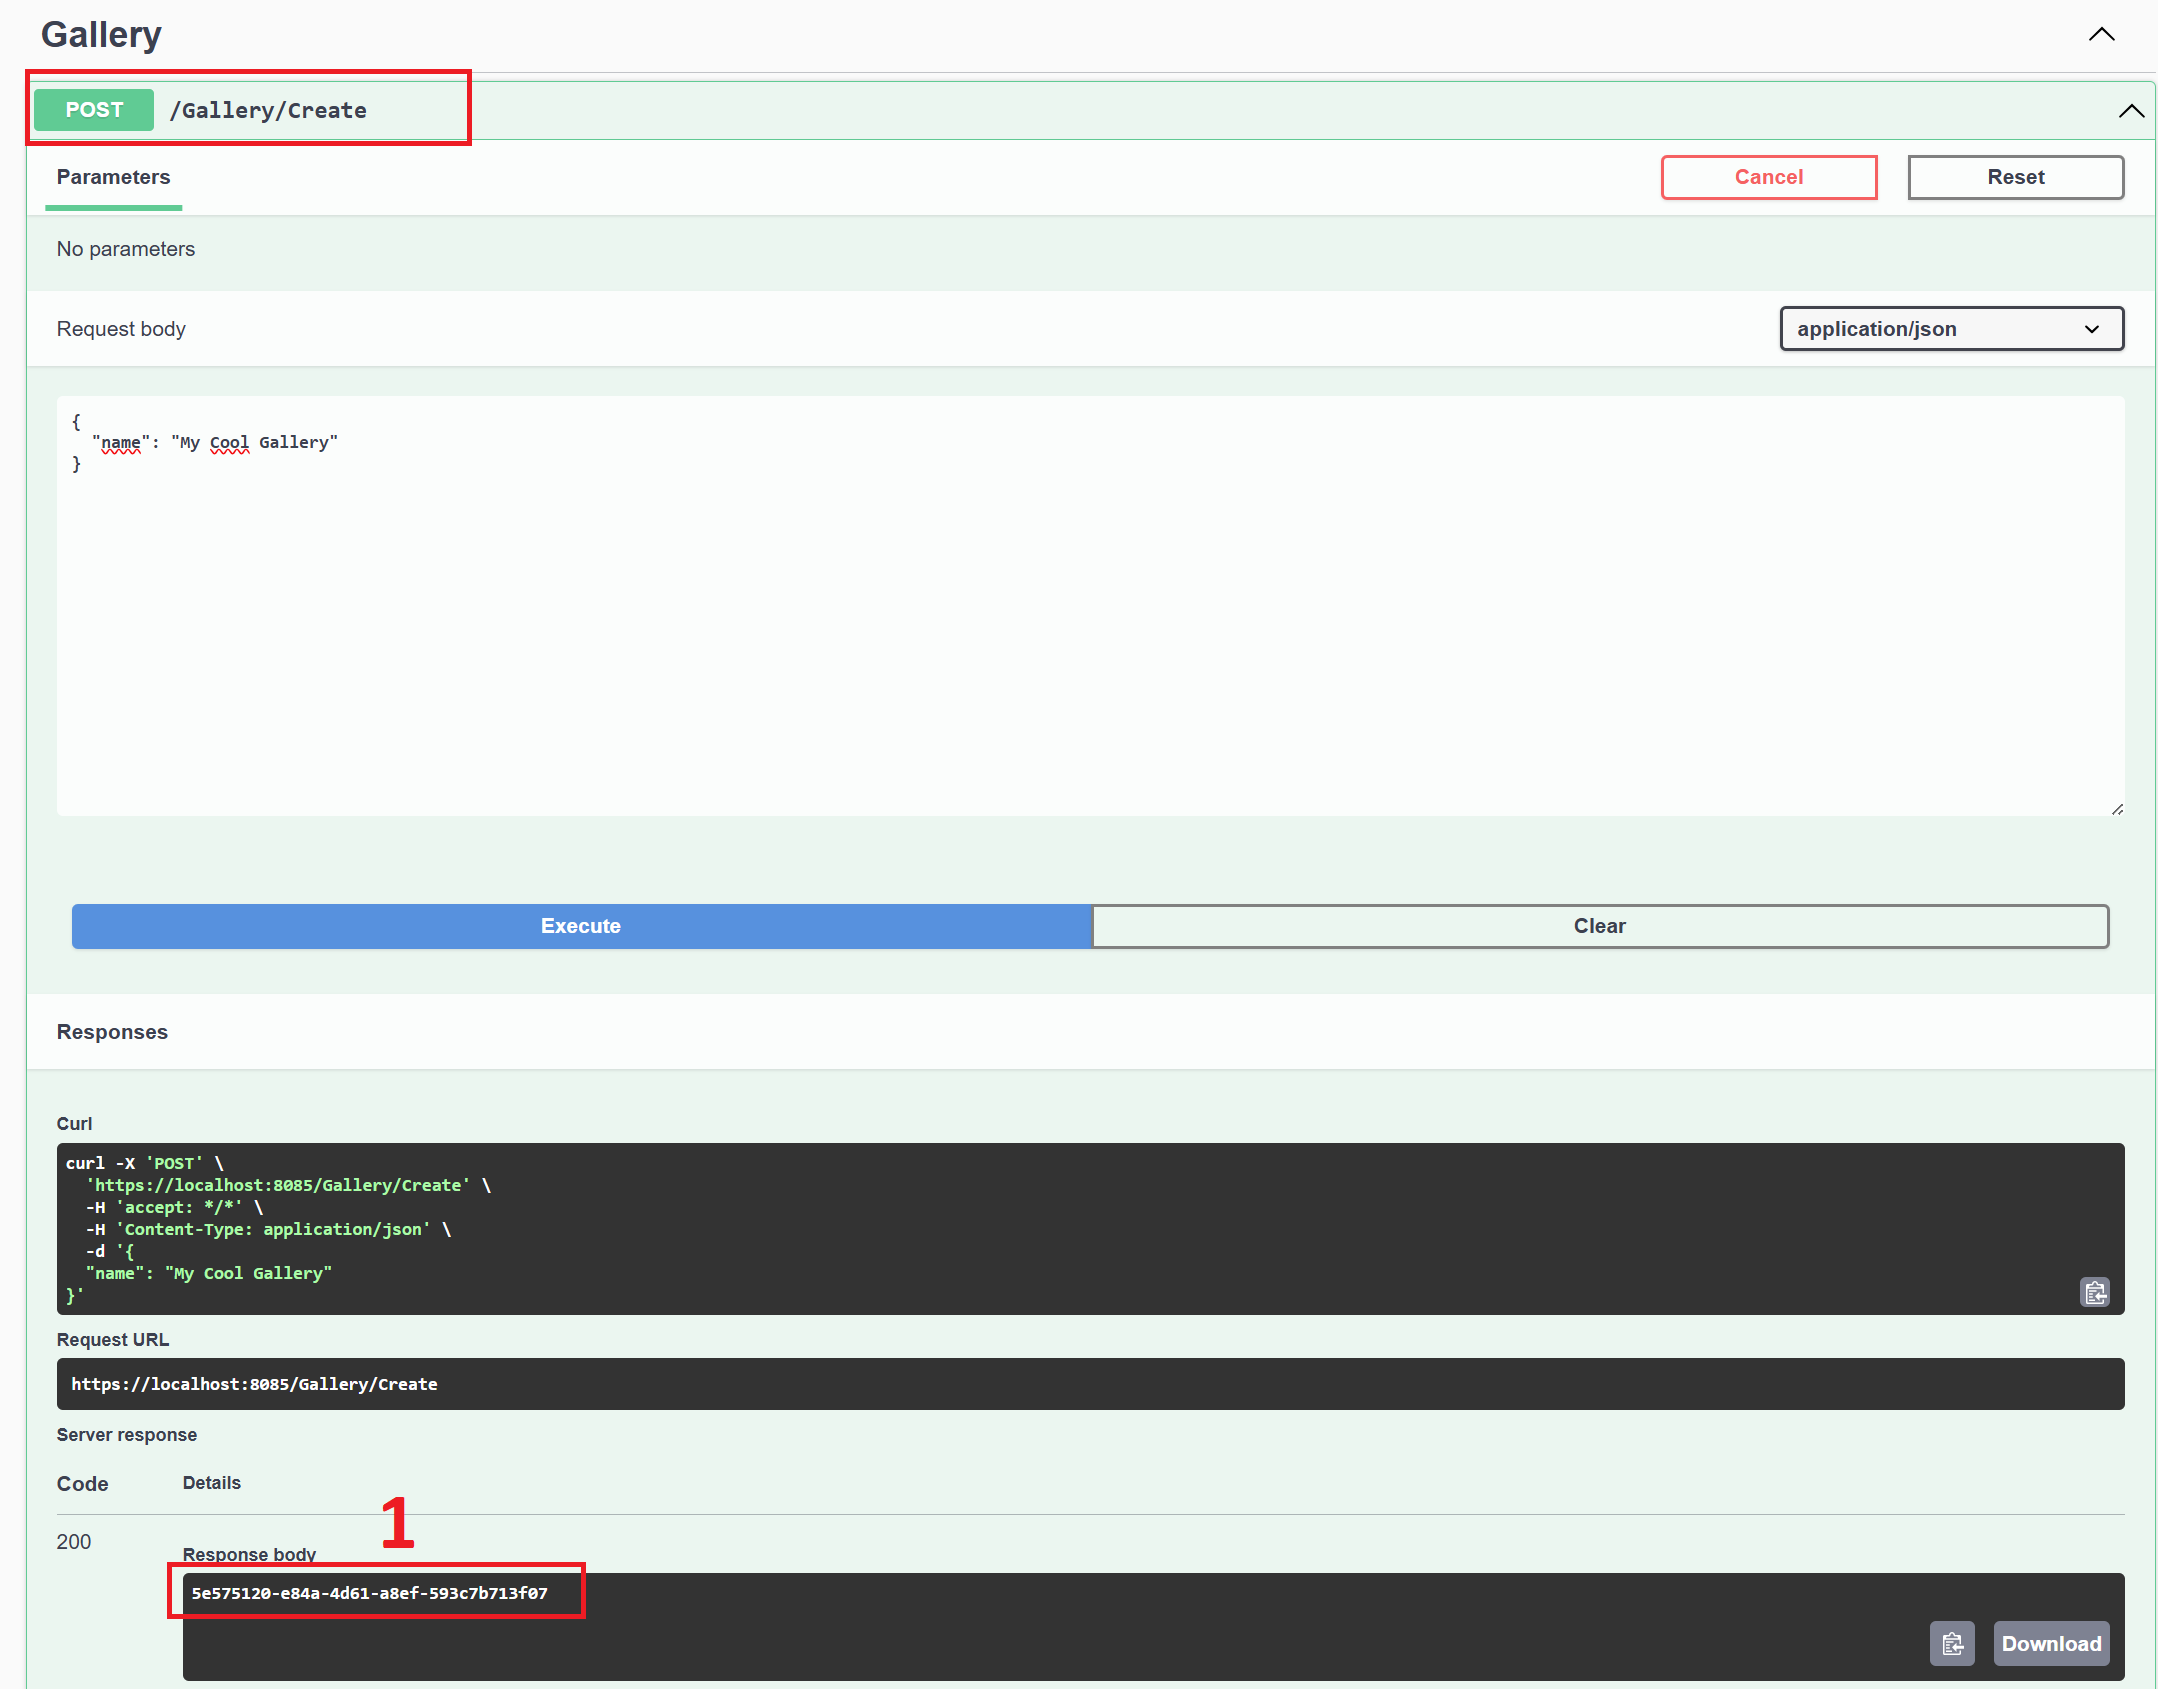
Go to LensUp.BackOfficeService.API - https://localhost:8085/swagger/index.html
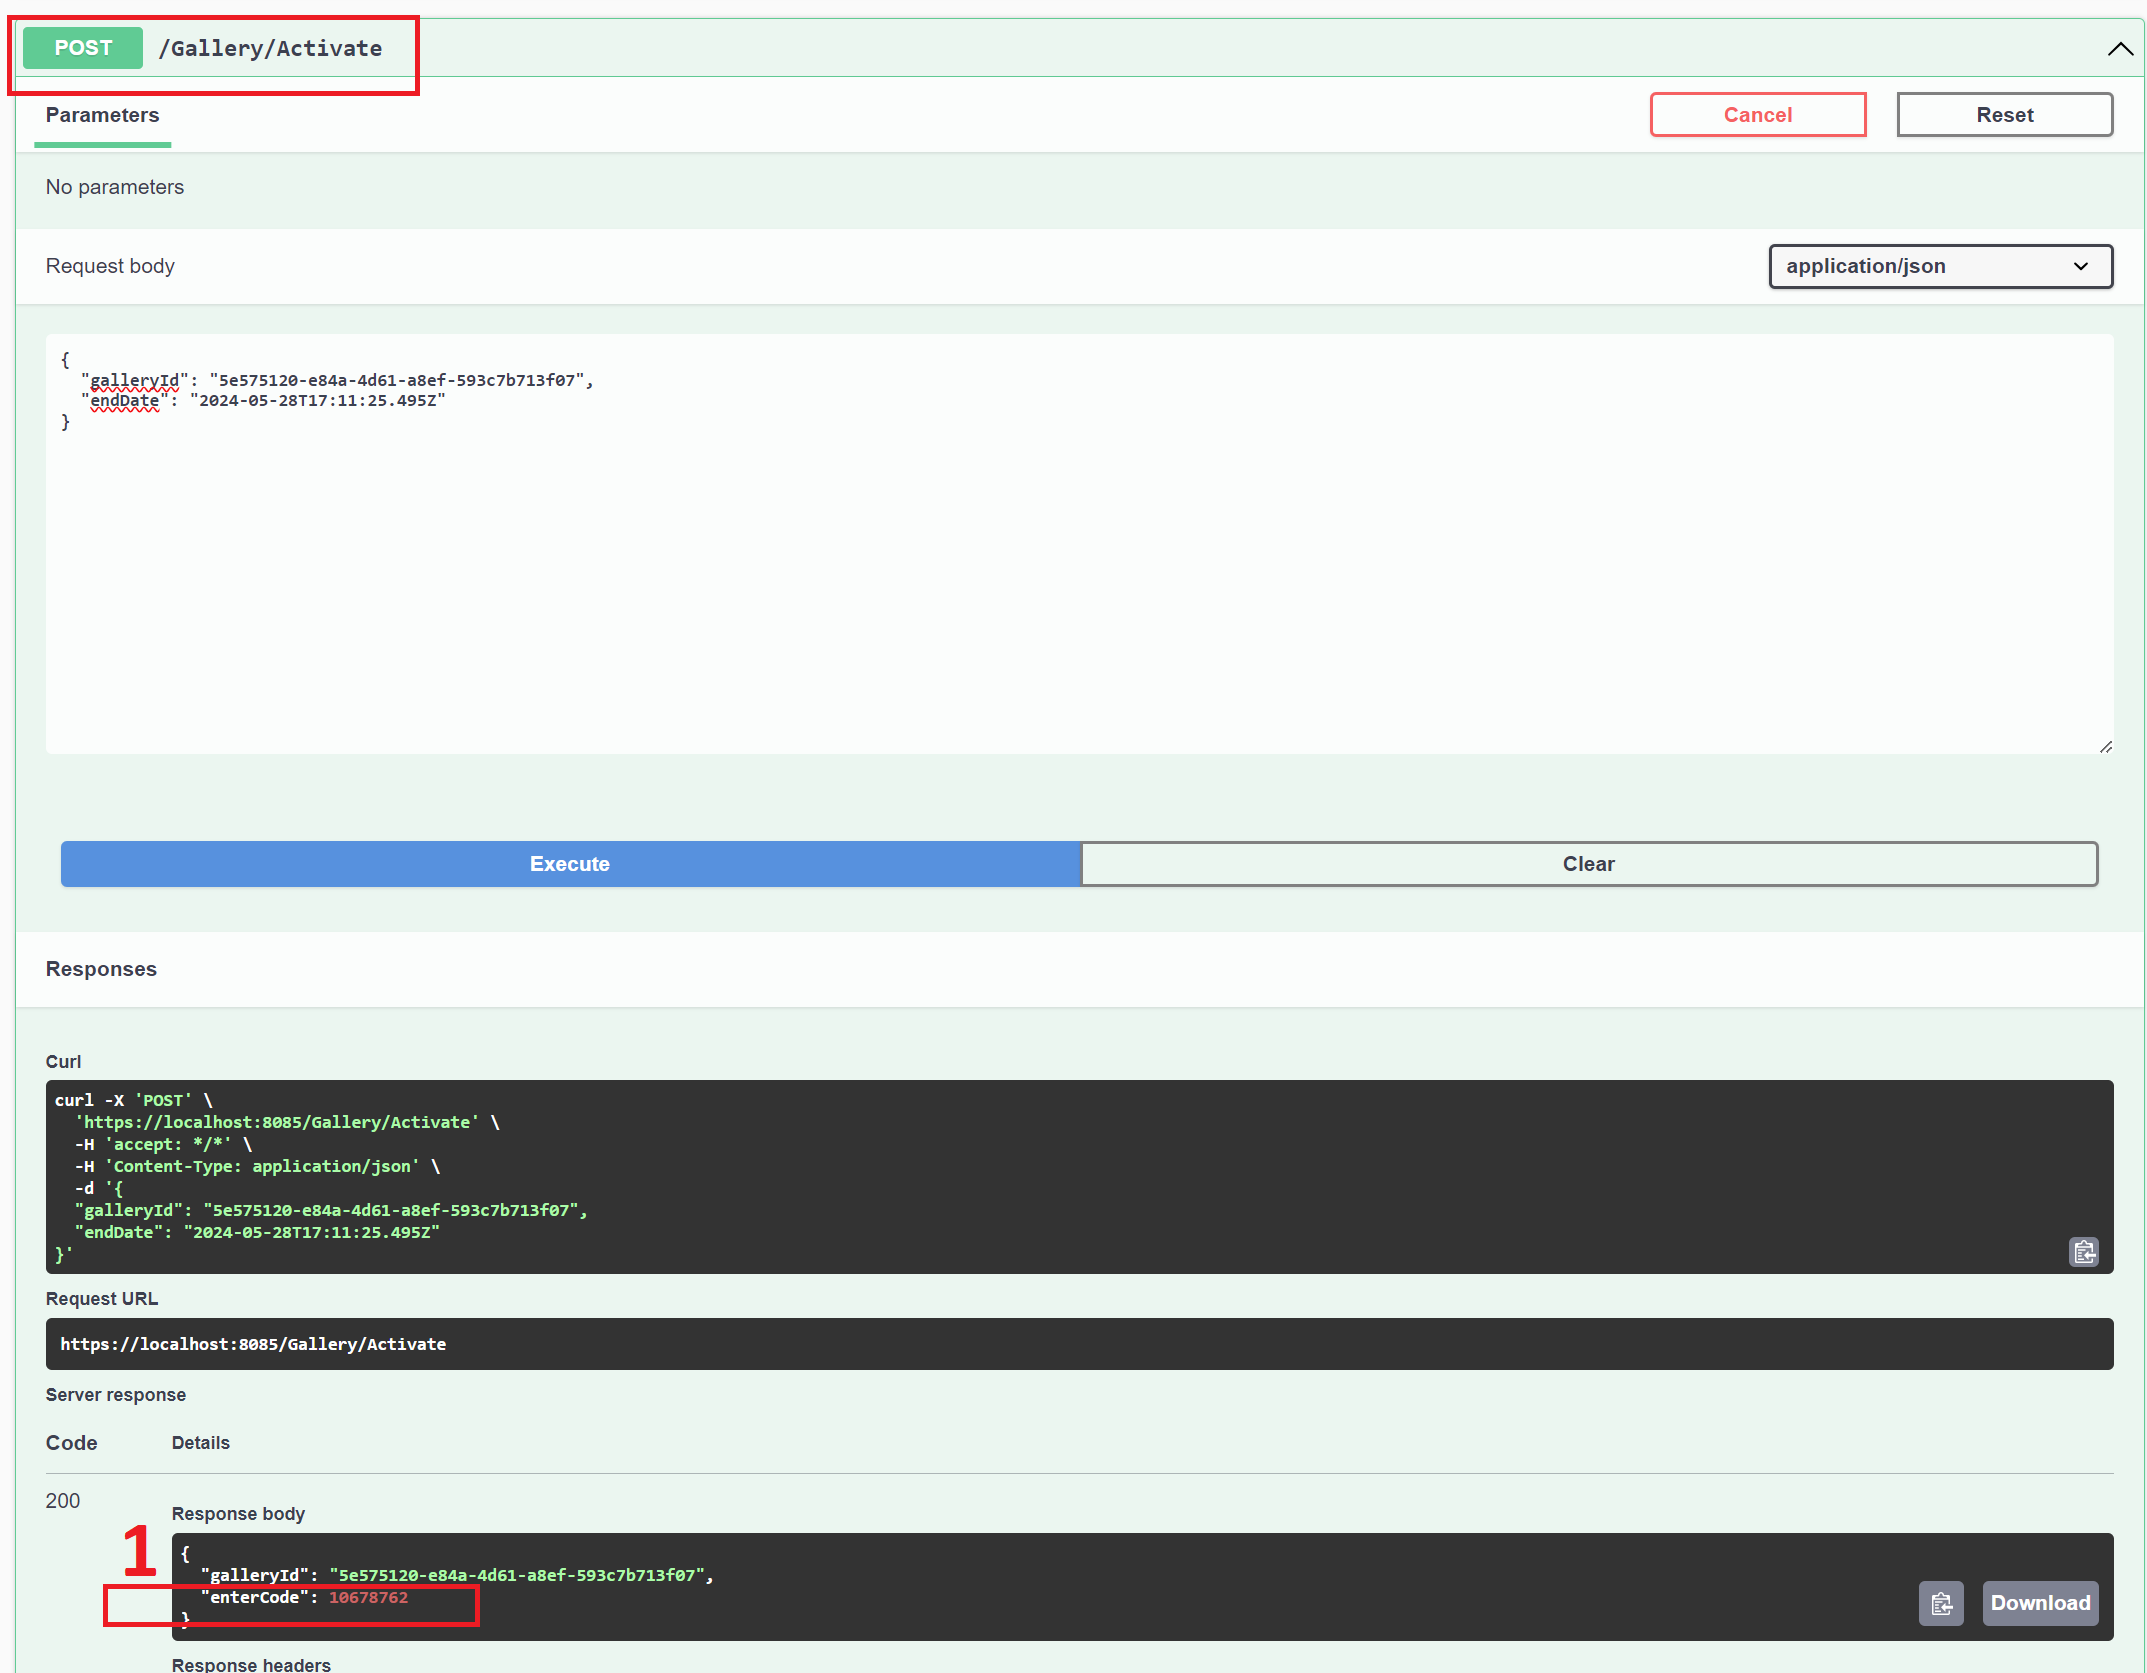
Use Create endpoint to create your gallery. The endpoint returns the gallery identifier after it is created (1).
Before using the gallery, we need to activate it. In that case use Activate endpoint and pass galleryId and endDate in request body. Remember the endDate is validated and must be greater than the current time. Otherwise, your gallery will be treated as expired. The endpoint returns the gallery enterCode after it is activated (1).
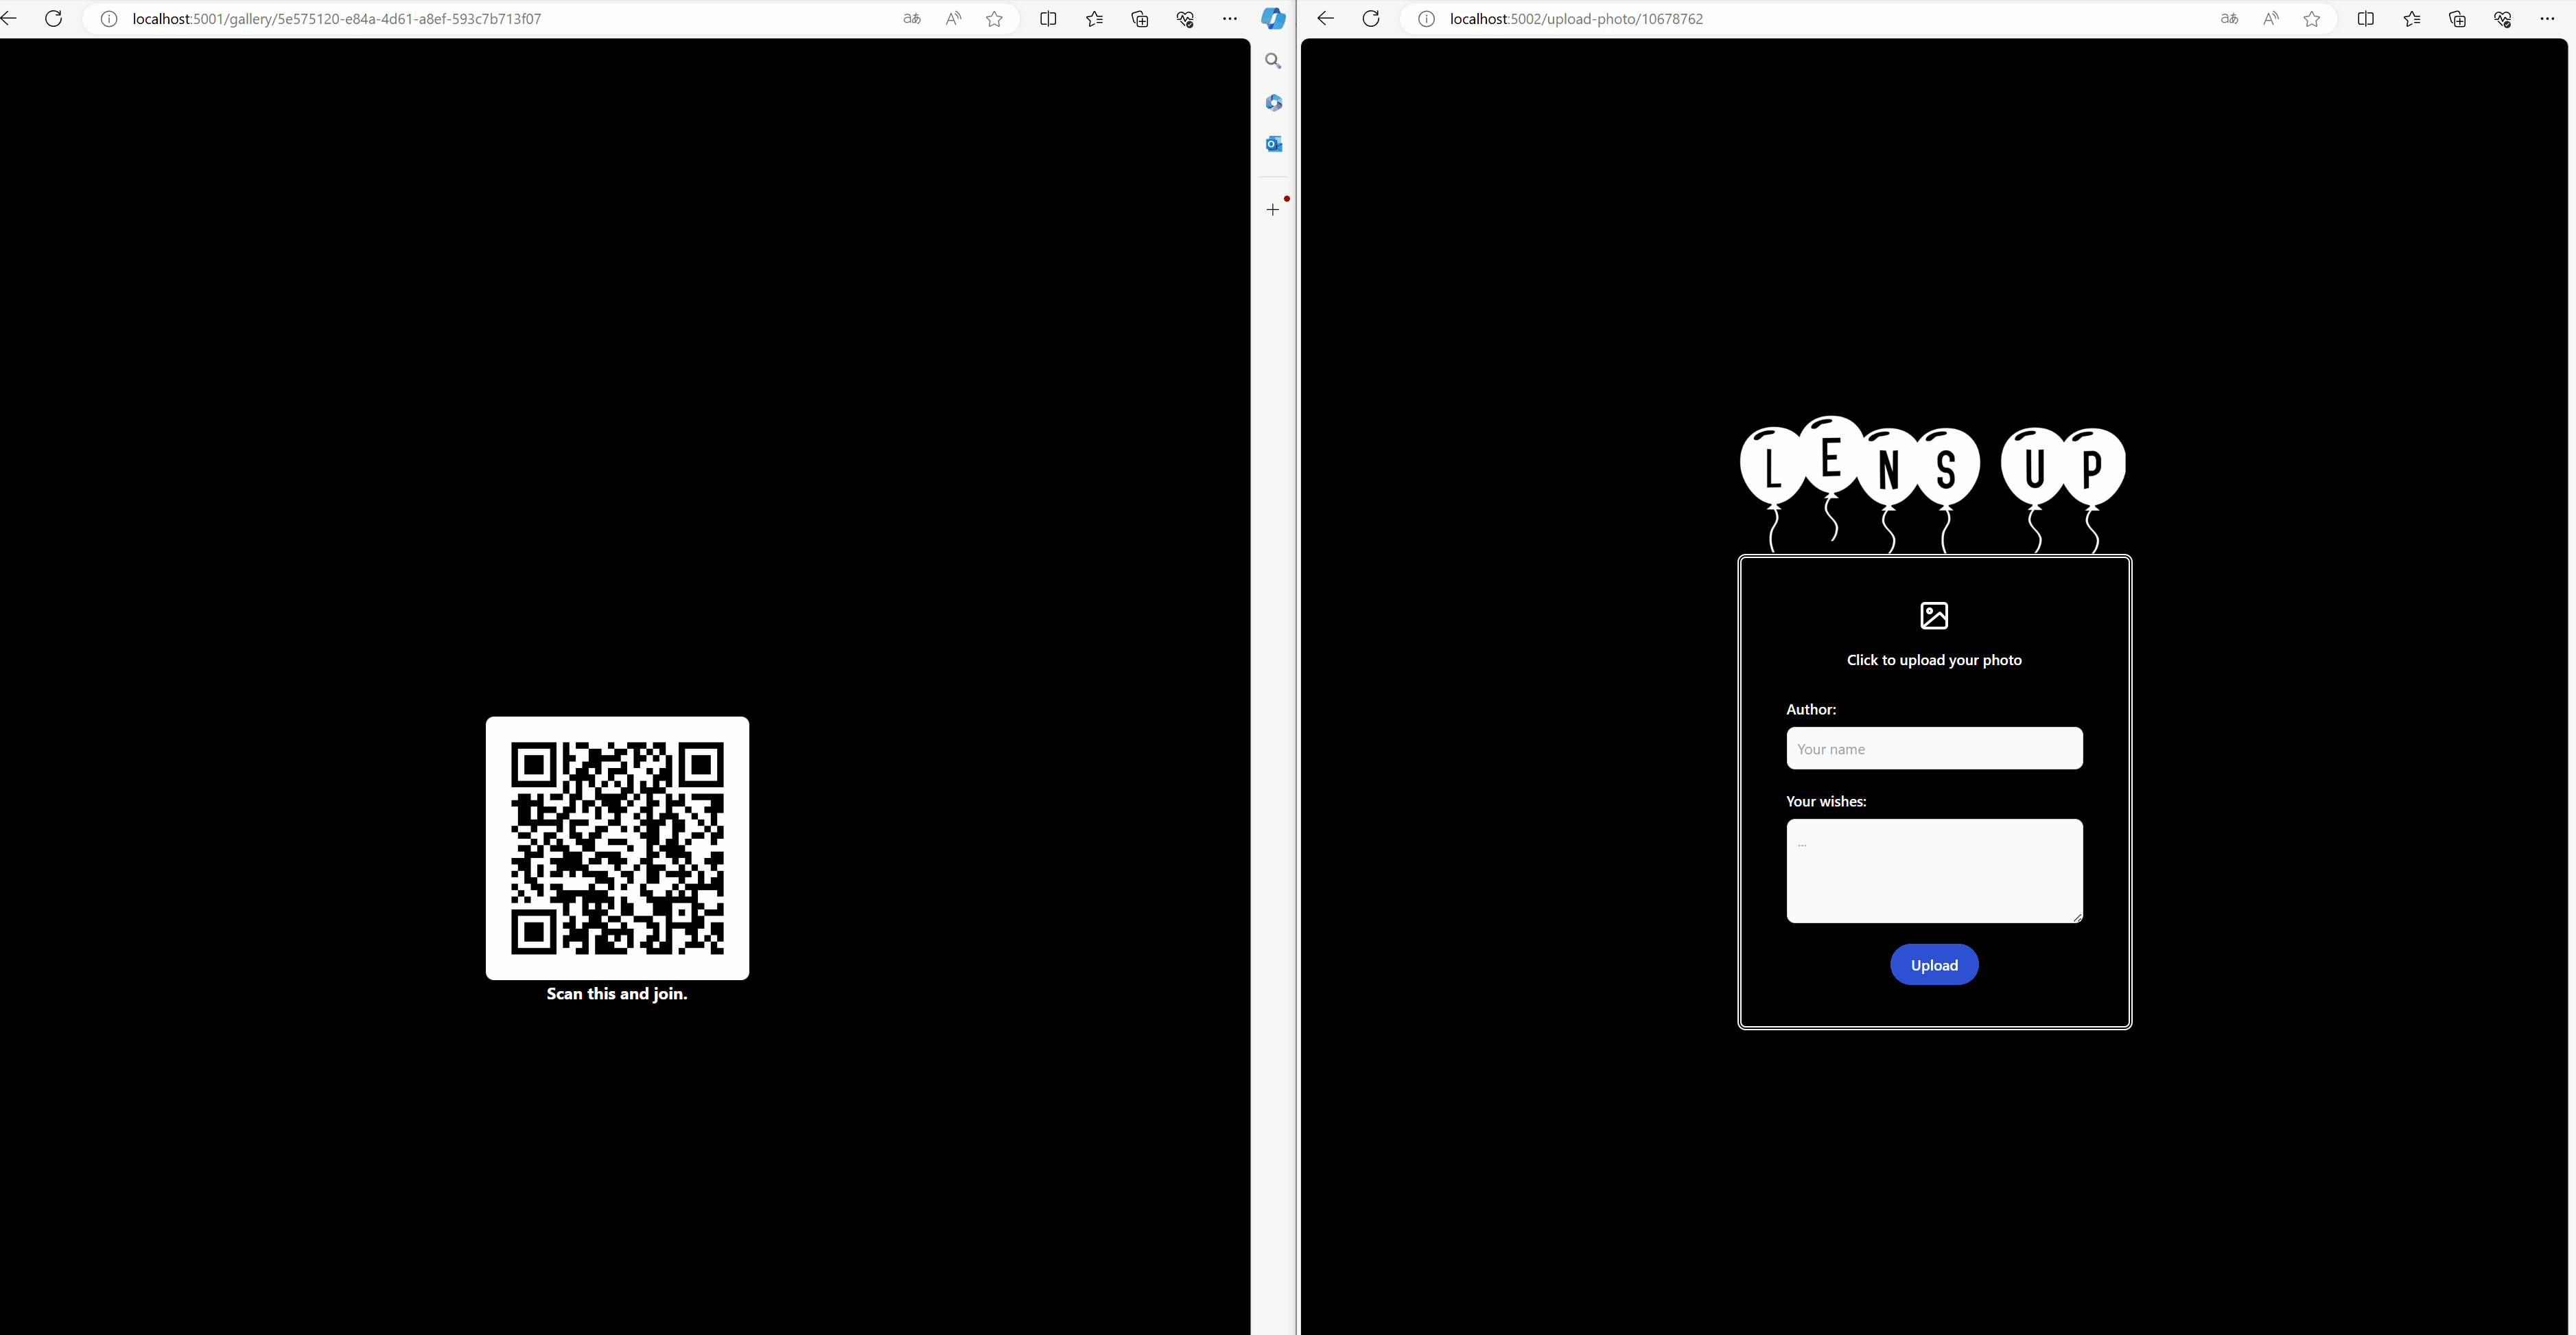
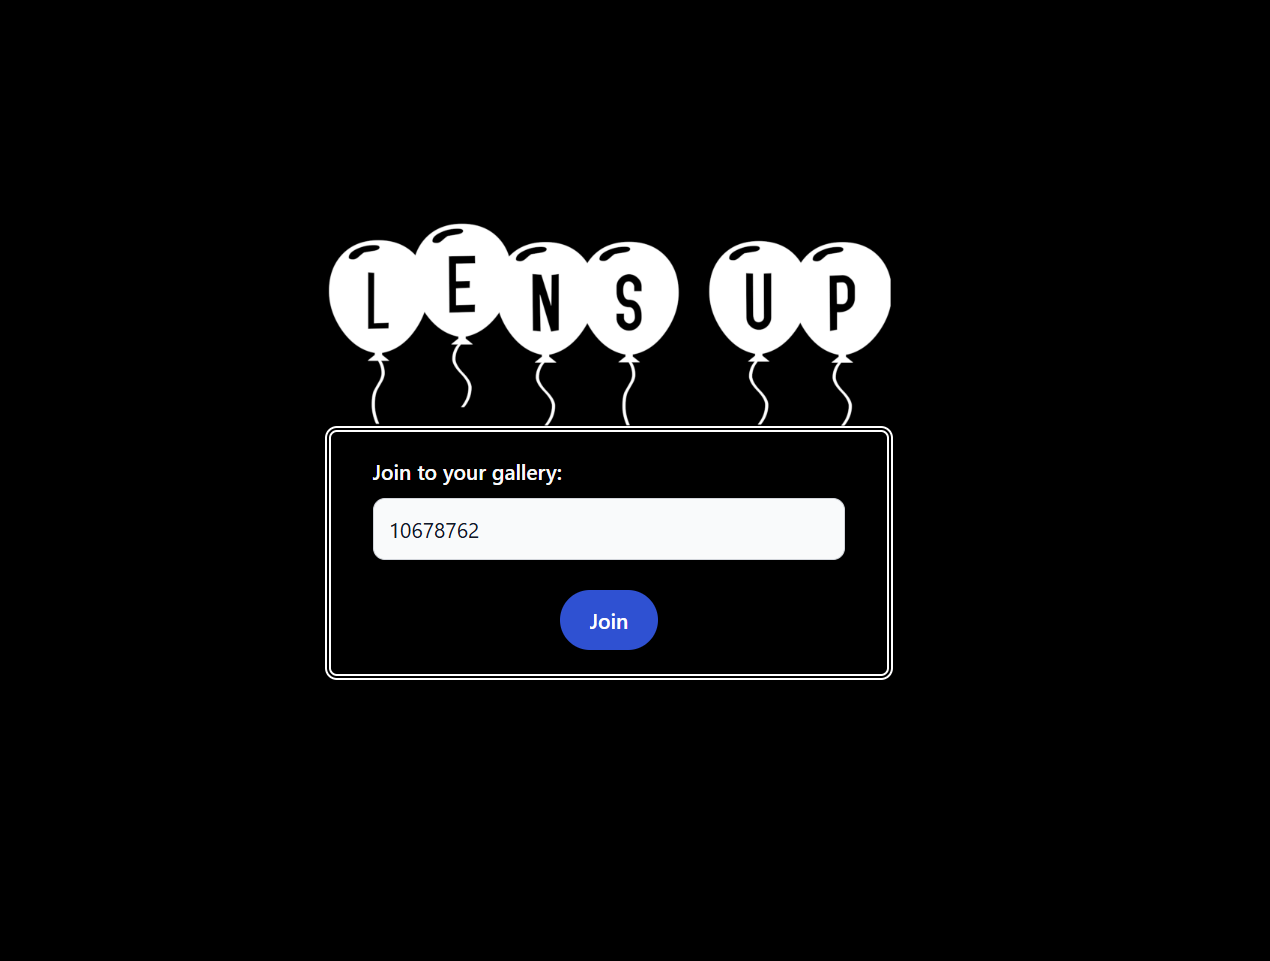
With your gallery enterCode you can open your gallery using LensUp.GalleryService.UI - http://localhost:5001/
Log in to your gallery using enterCode.
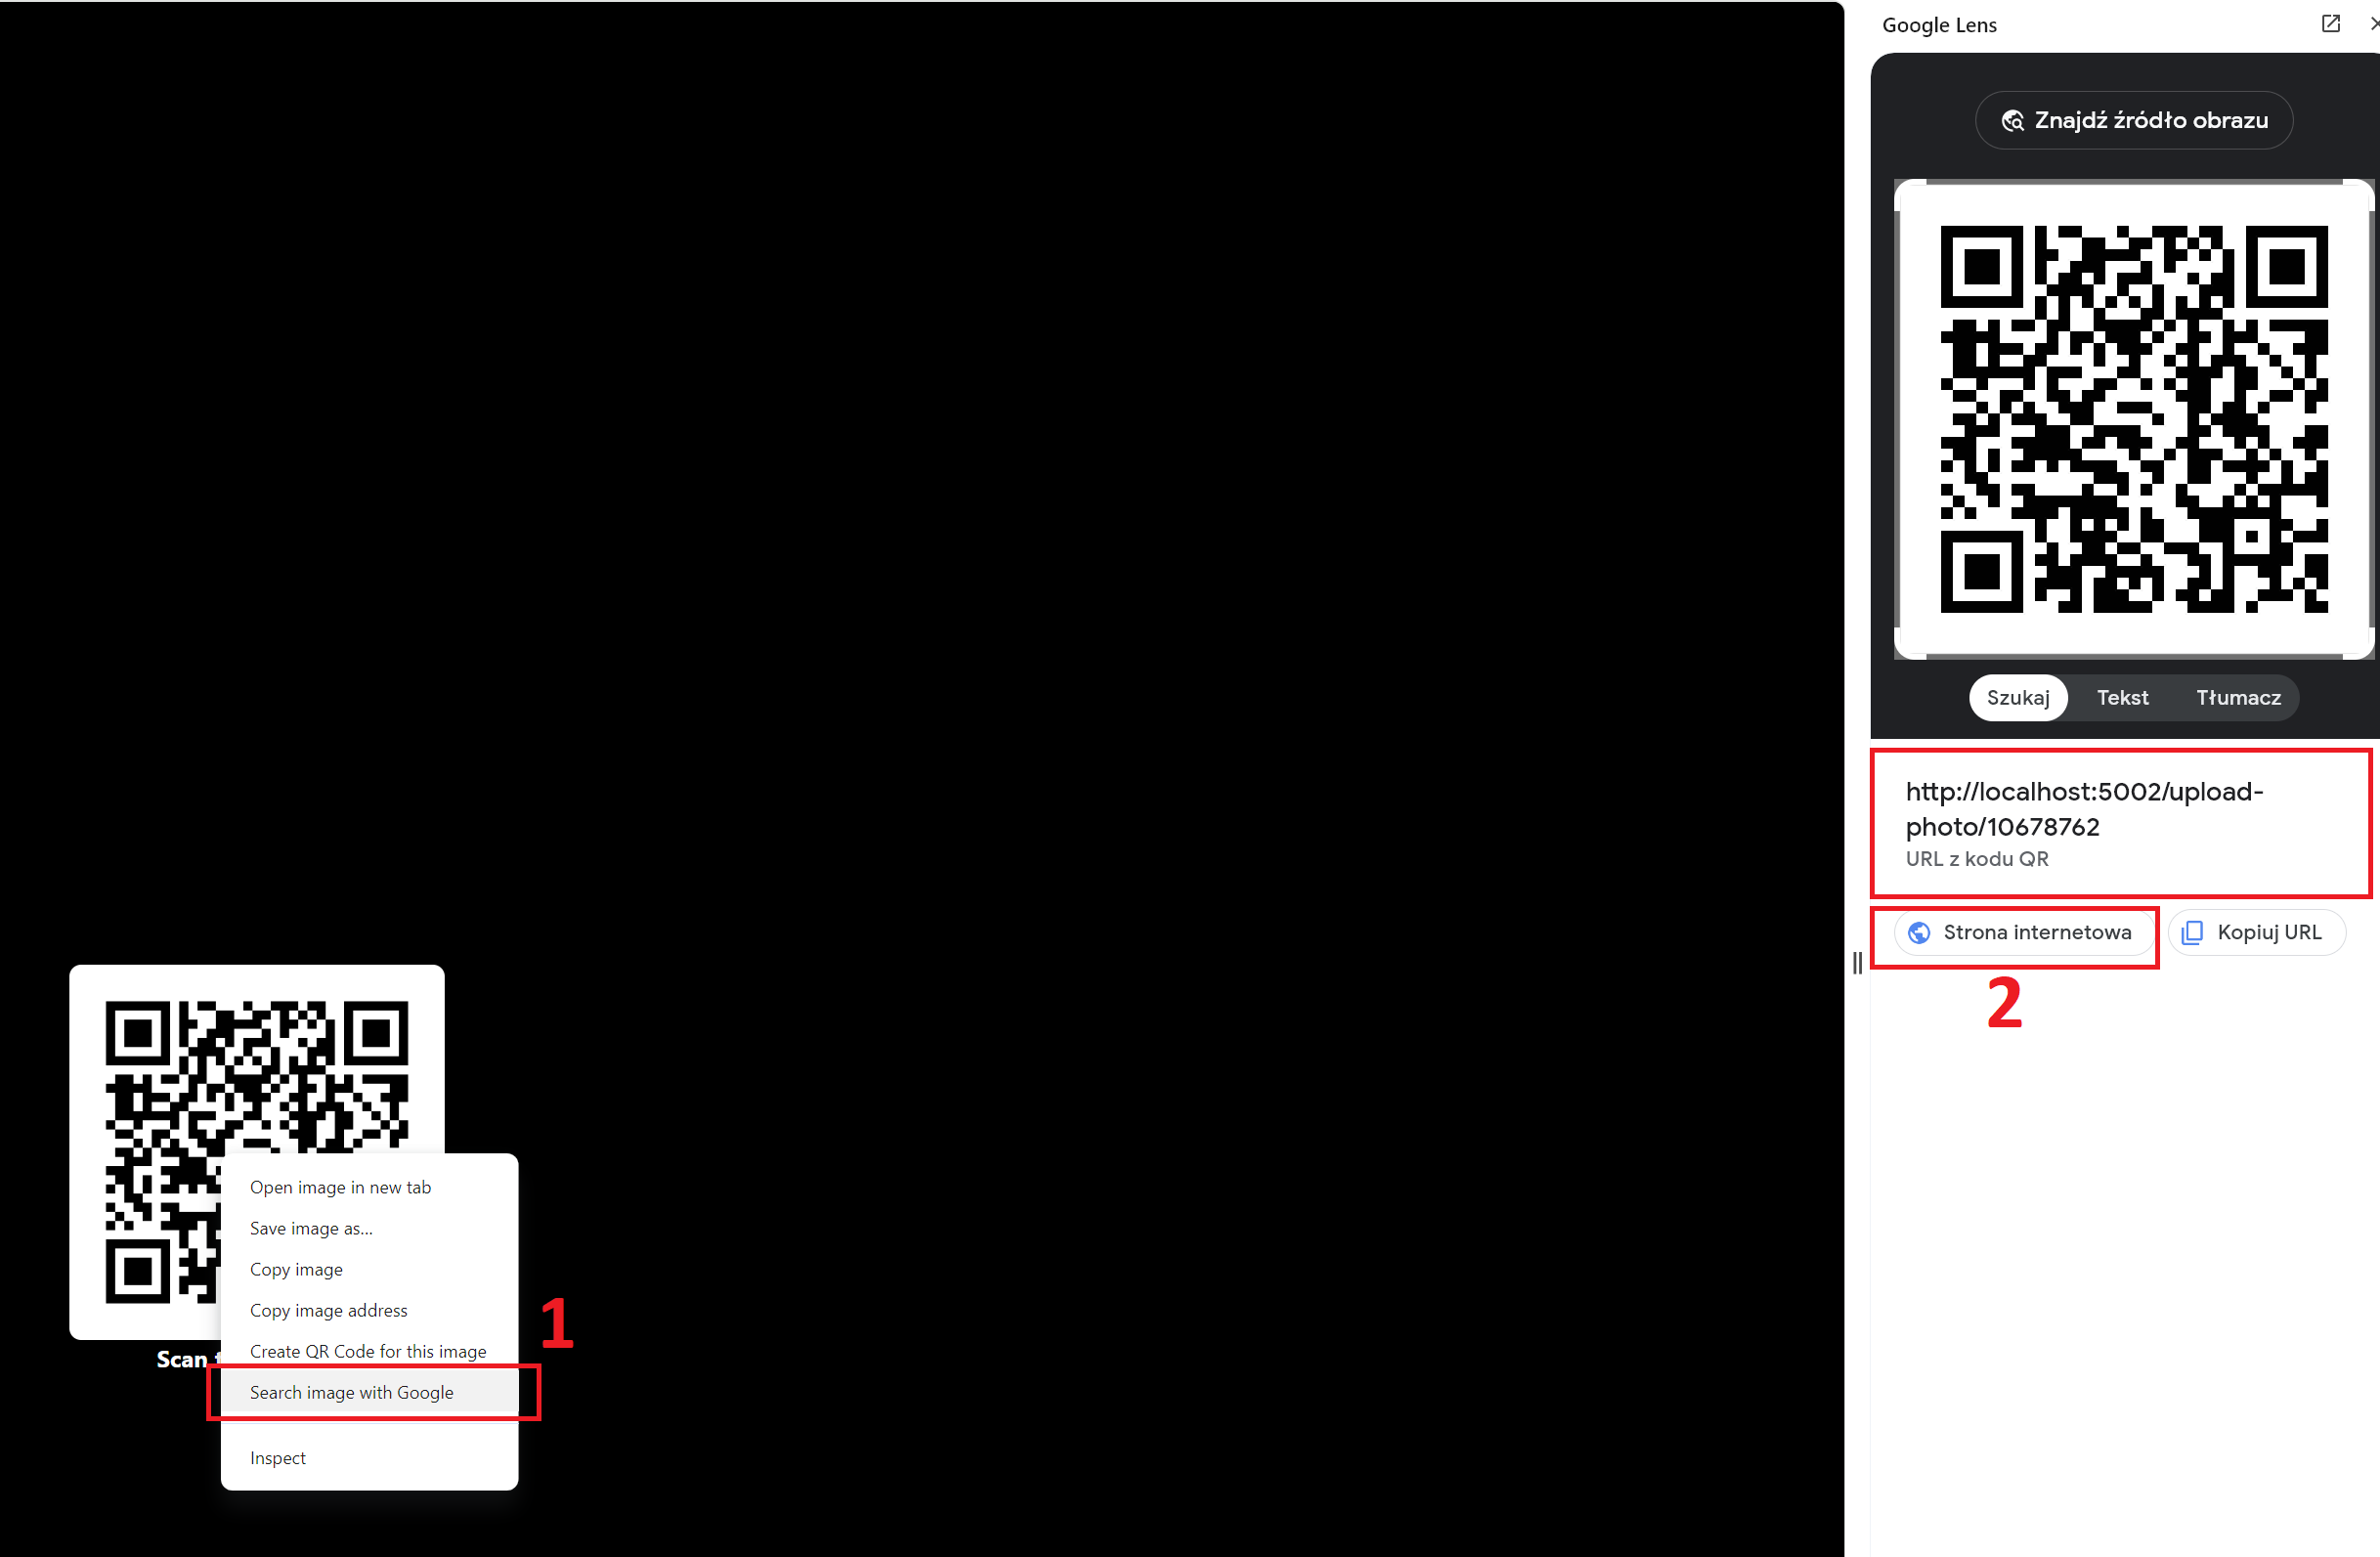
Now you can scan gallery QR code and upload photos to it. The code redirects to a form for adding photos to the gallery. You can use browser tool to scan QR code or if it doesn't work you can just go to http://localhost:5002/upload-photo/{enterCode}.
QR Code redirects you to add photo and wishes form. Now you can upload your data to gallery.
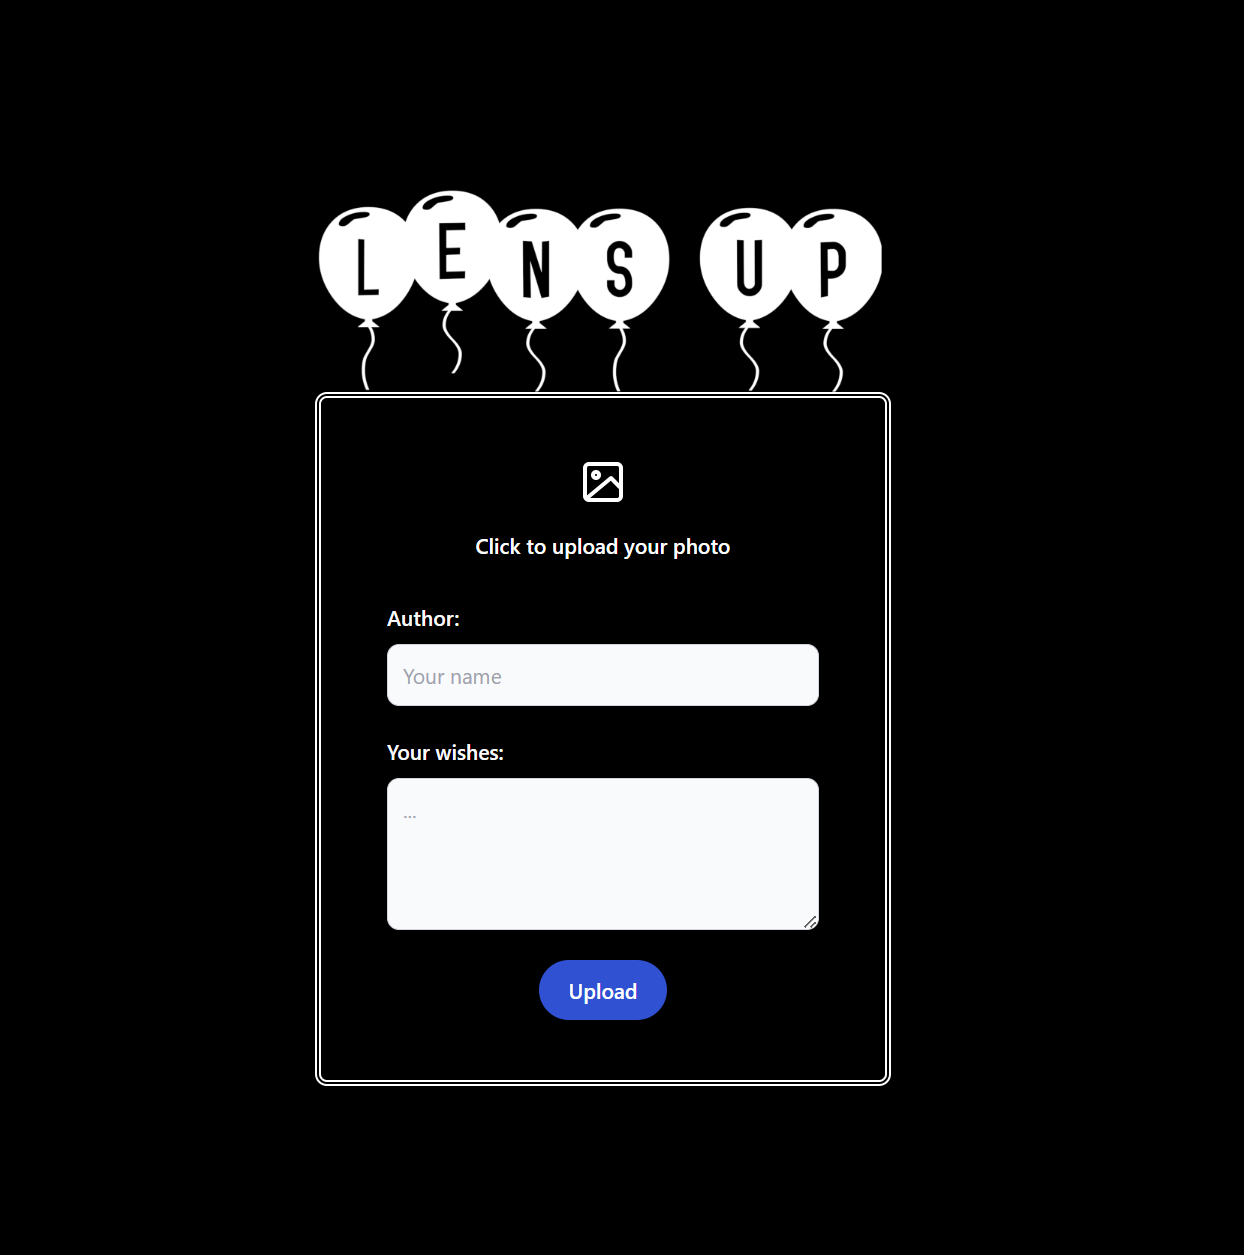
After successfully completing the form, we should see success notification and the photo should appear in the gallery.