WaveGrad2
v1.0.0
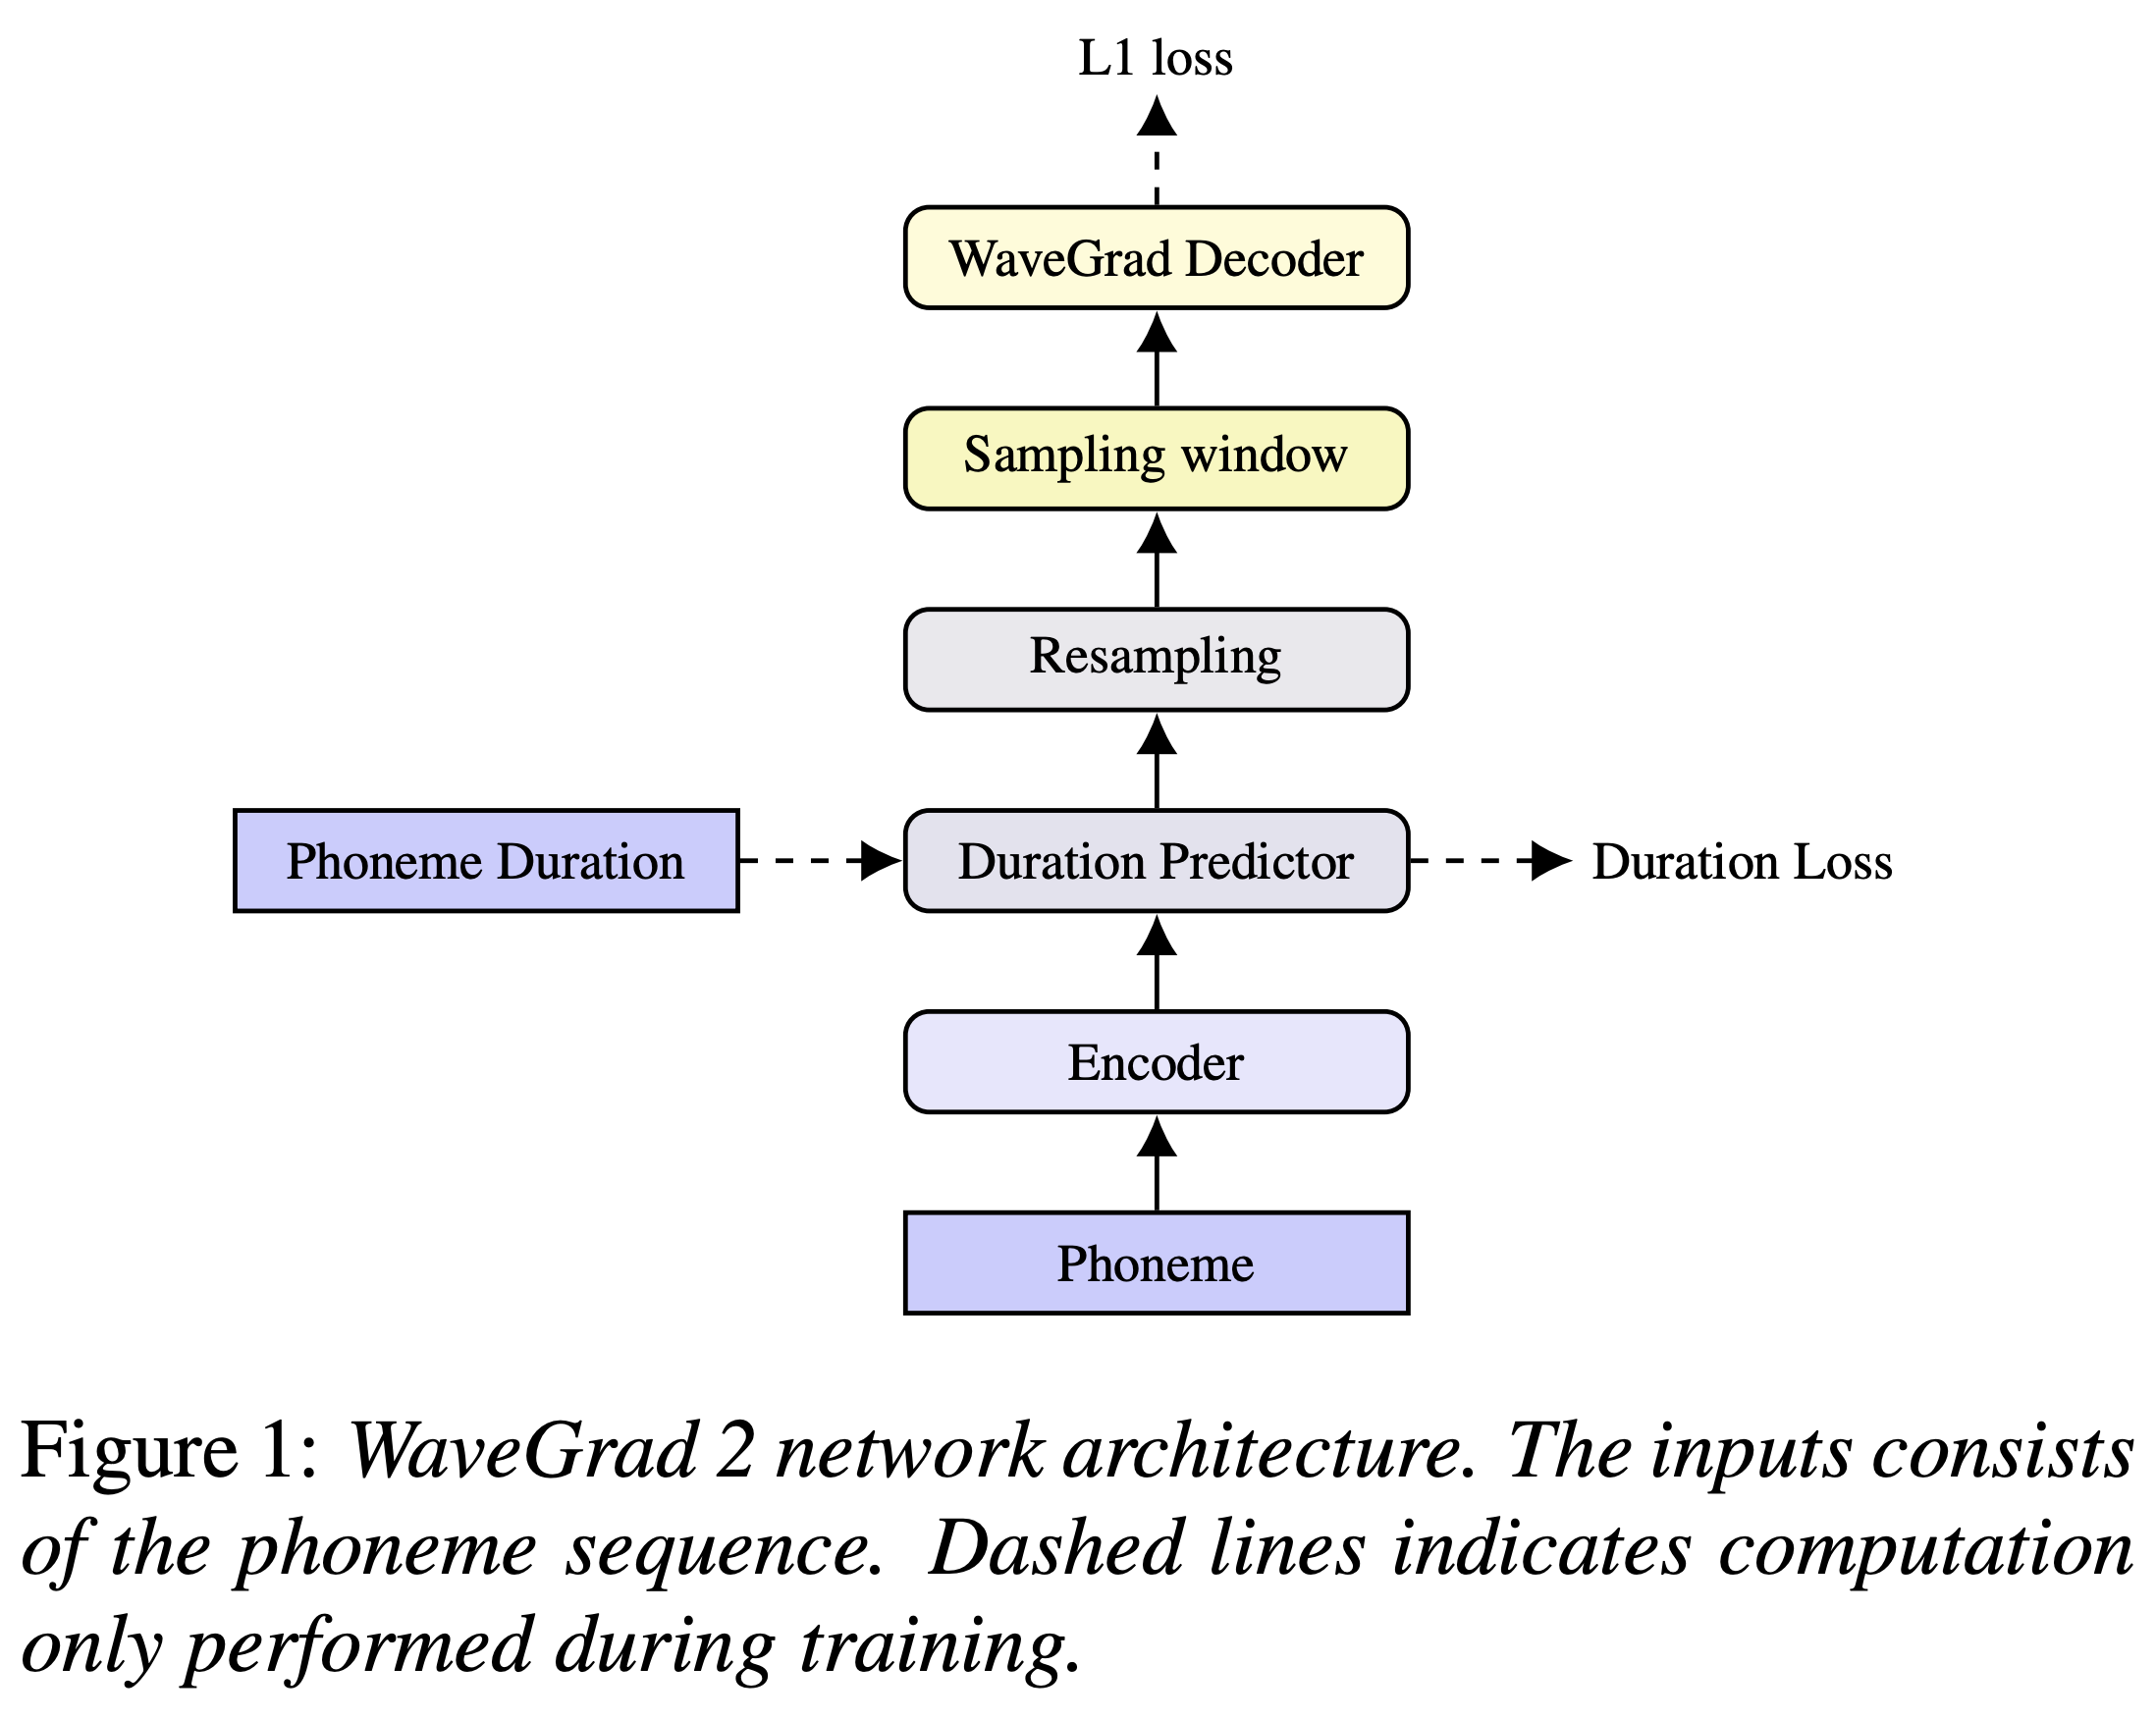
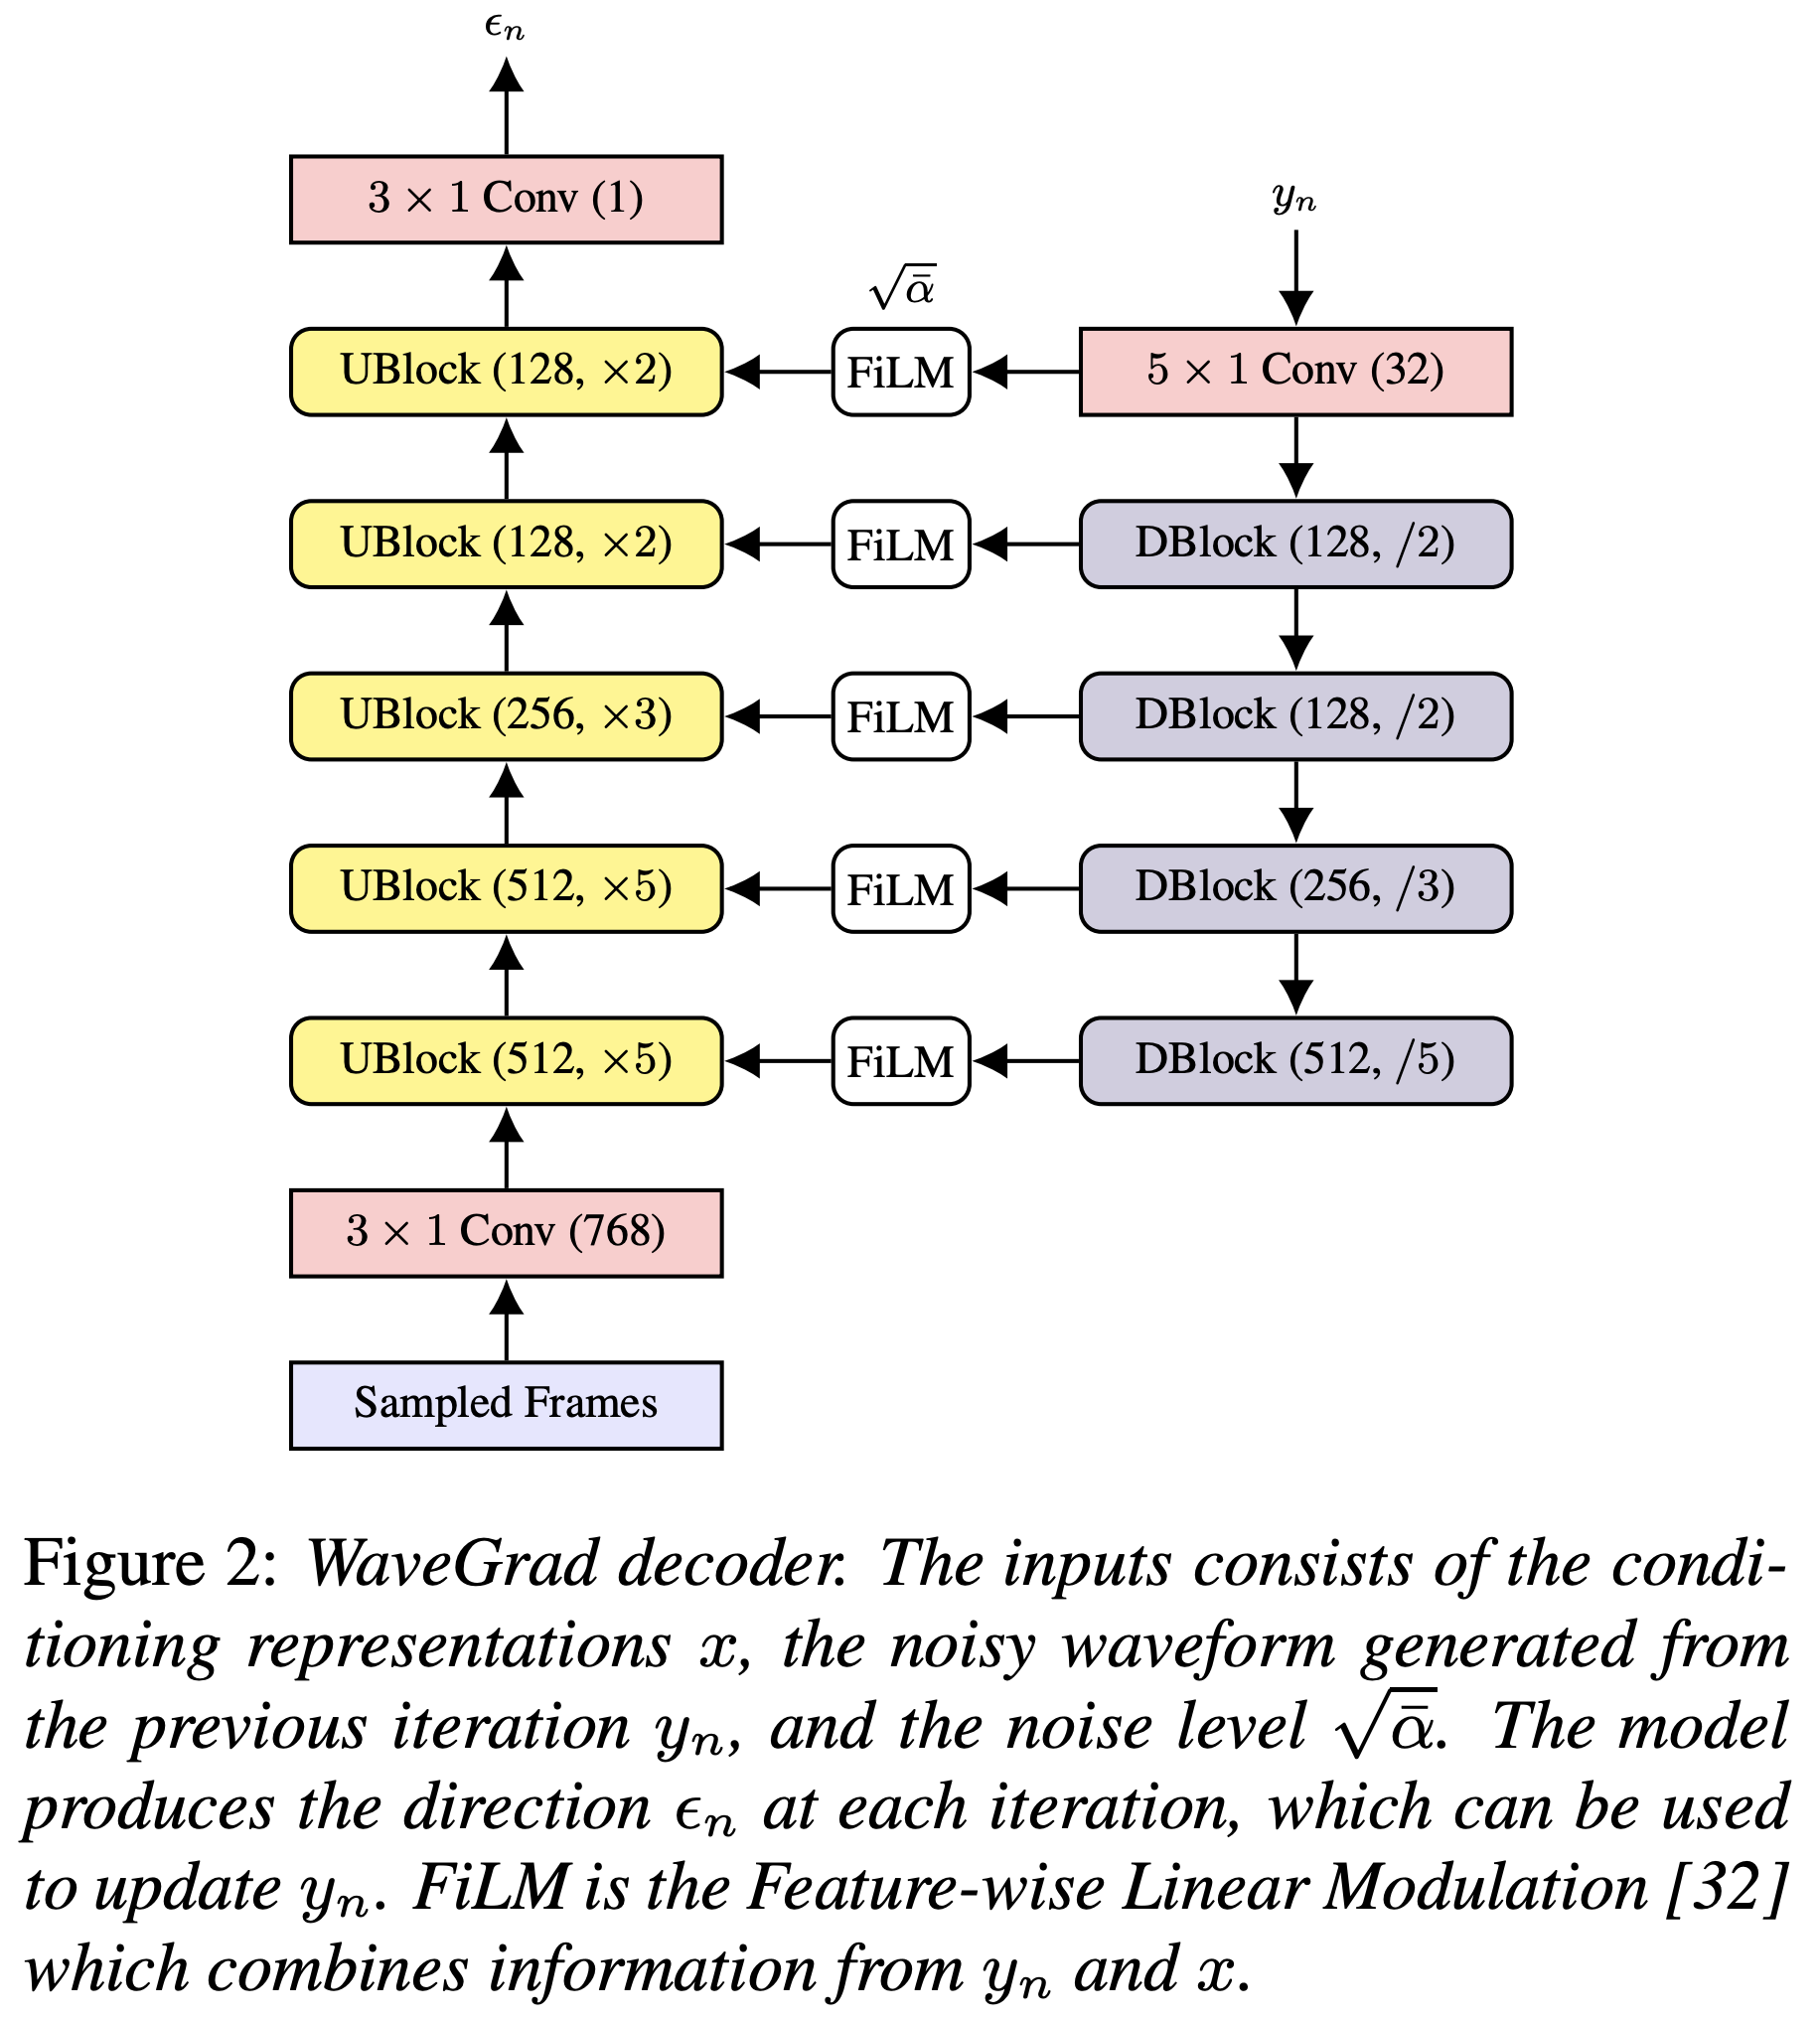
Google Brain Wavegrad 2的Pytorch實現:文本到語音綜合的迭代精緻。
您可以使用
pip3 install -r requirements.txt
您必須下載驗證的型號,並將它們放入output/ckpt/LJSpeech/ 。
對於英語單揚聲器TTS,運行
python3 synthesize.py --text "YOUR_DESIRED_TEXT" --restore_step RESTORE_STEP --mode single -p config/LJSpeech/preprocess.yaml -m config/LJSpeech/model.yaml -t config/LJSpeech/train.yaml
生成的話語將放入output/result/ 。
也支持批次推理,嘗試
python3 synthesize.py --source preprocessed_data/LJSpeech/val.txt --restore_step RESTORE_STEP --mode batch -p config/LJSpeech/preprocess.yaml -m config/LJSpeech/model.yaml -t config/LJSpeech/train.yaml
綜合preprocessed_data/LJSpeech/val.txt中的所有話語
可以通過指定所需的持續時間比來控制合成的話語的口語速率。例如,人們可以將口語率提高20%
python3 synthesize.py --text "YOUR_DESIRED_TEXT" --restore_step RESTORE_STEP --mode single -p config/LJSpeech/preprocess.yaml -m config/LJSpeech/model.yaml -t config/LJSpeech/train.yaml --duration_control 0.8
支持的數據集是
首先,運行
python3 prepare_align.py config/LJSpeech/preprocess.yaml
用於一些準備工作。
如本文所述,蒙特利爾強制對準器(MFA)用於獲得話語和音素序列之間的比對。這裡提供了LJSpeech數據集的對齊(這要歸功於Ming024的FastSpeech2)。您必須在preprocessed_data/LJSpeech/TextGrid/中解壓縮文件。
之後,通過
python3 preprocess.py config/LJSpeech/preprocess.yaml
或者,您可以自己對齊語料庫。下載官方MFA軟件包並運行
./montreal-forced-aligner/bin/mfa_align raw_data/LJSpeech/ lexicon/librispeech-lexicon.txt english preprocessed_data/LJSpeech
或者
./montreal-forced-aligner/bin/mfa_train_and_align raw_data/LJSpeech/ lexicon/librispeech-lexicon.txt preprocessed_data/LJSpeech
對齊語料庫,然後運行預處理腳本。
python3 preprocess.py config/LJSpeech/preprocess.yaml
培訓您的模型
python3 train.py -p config/LJSpeech/preprocess.yaml -m config/LJSpeech/model.yaml -t config/LJSpeech/train.yaml
使用
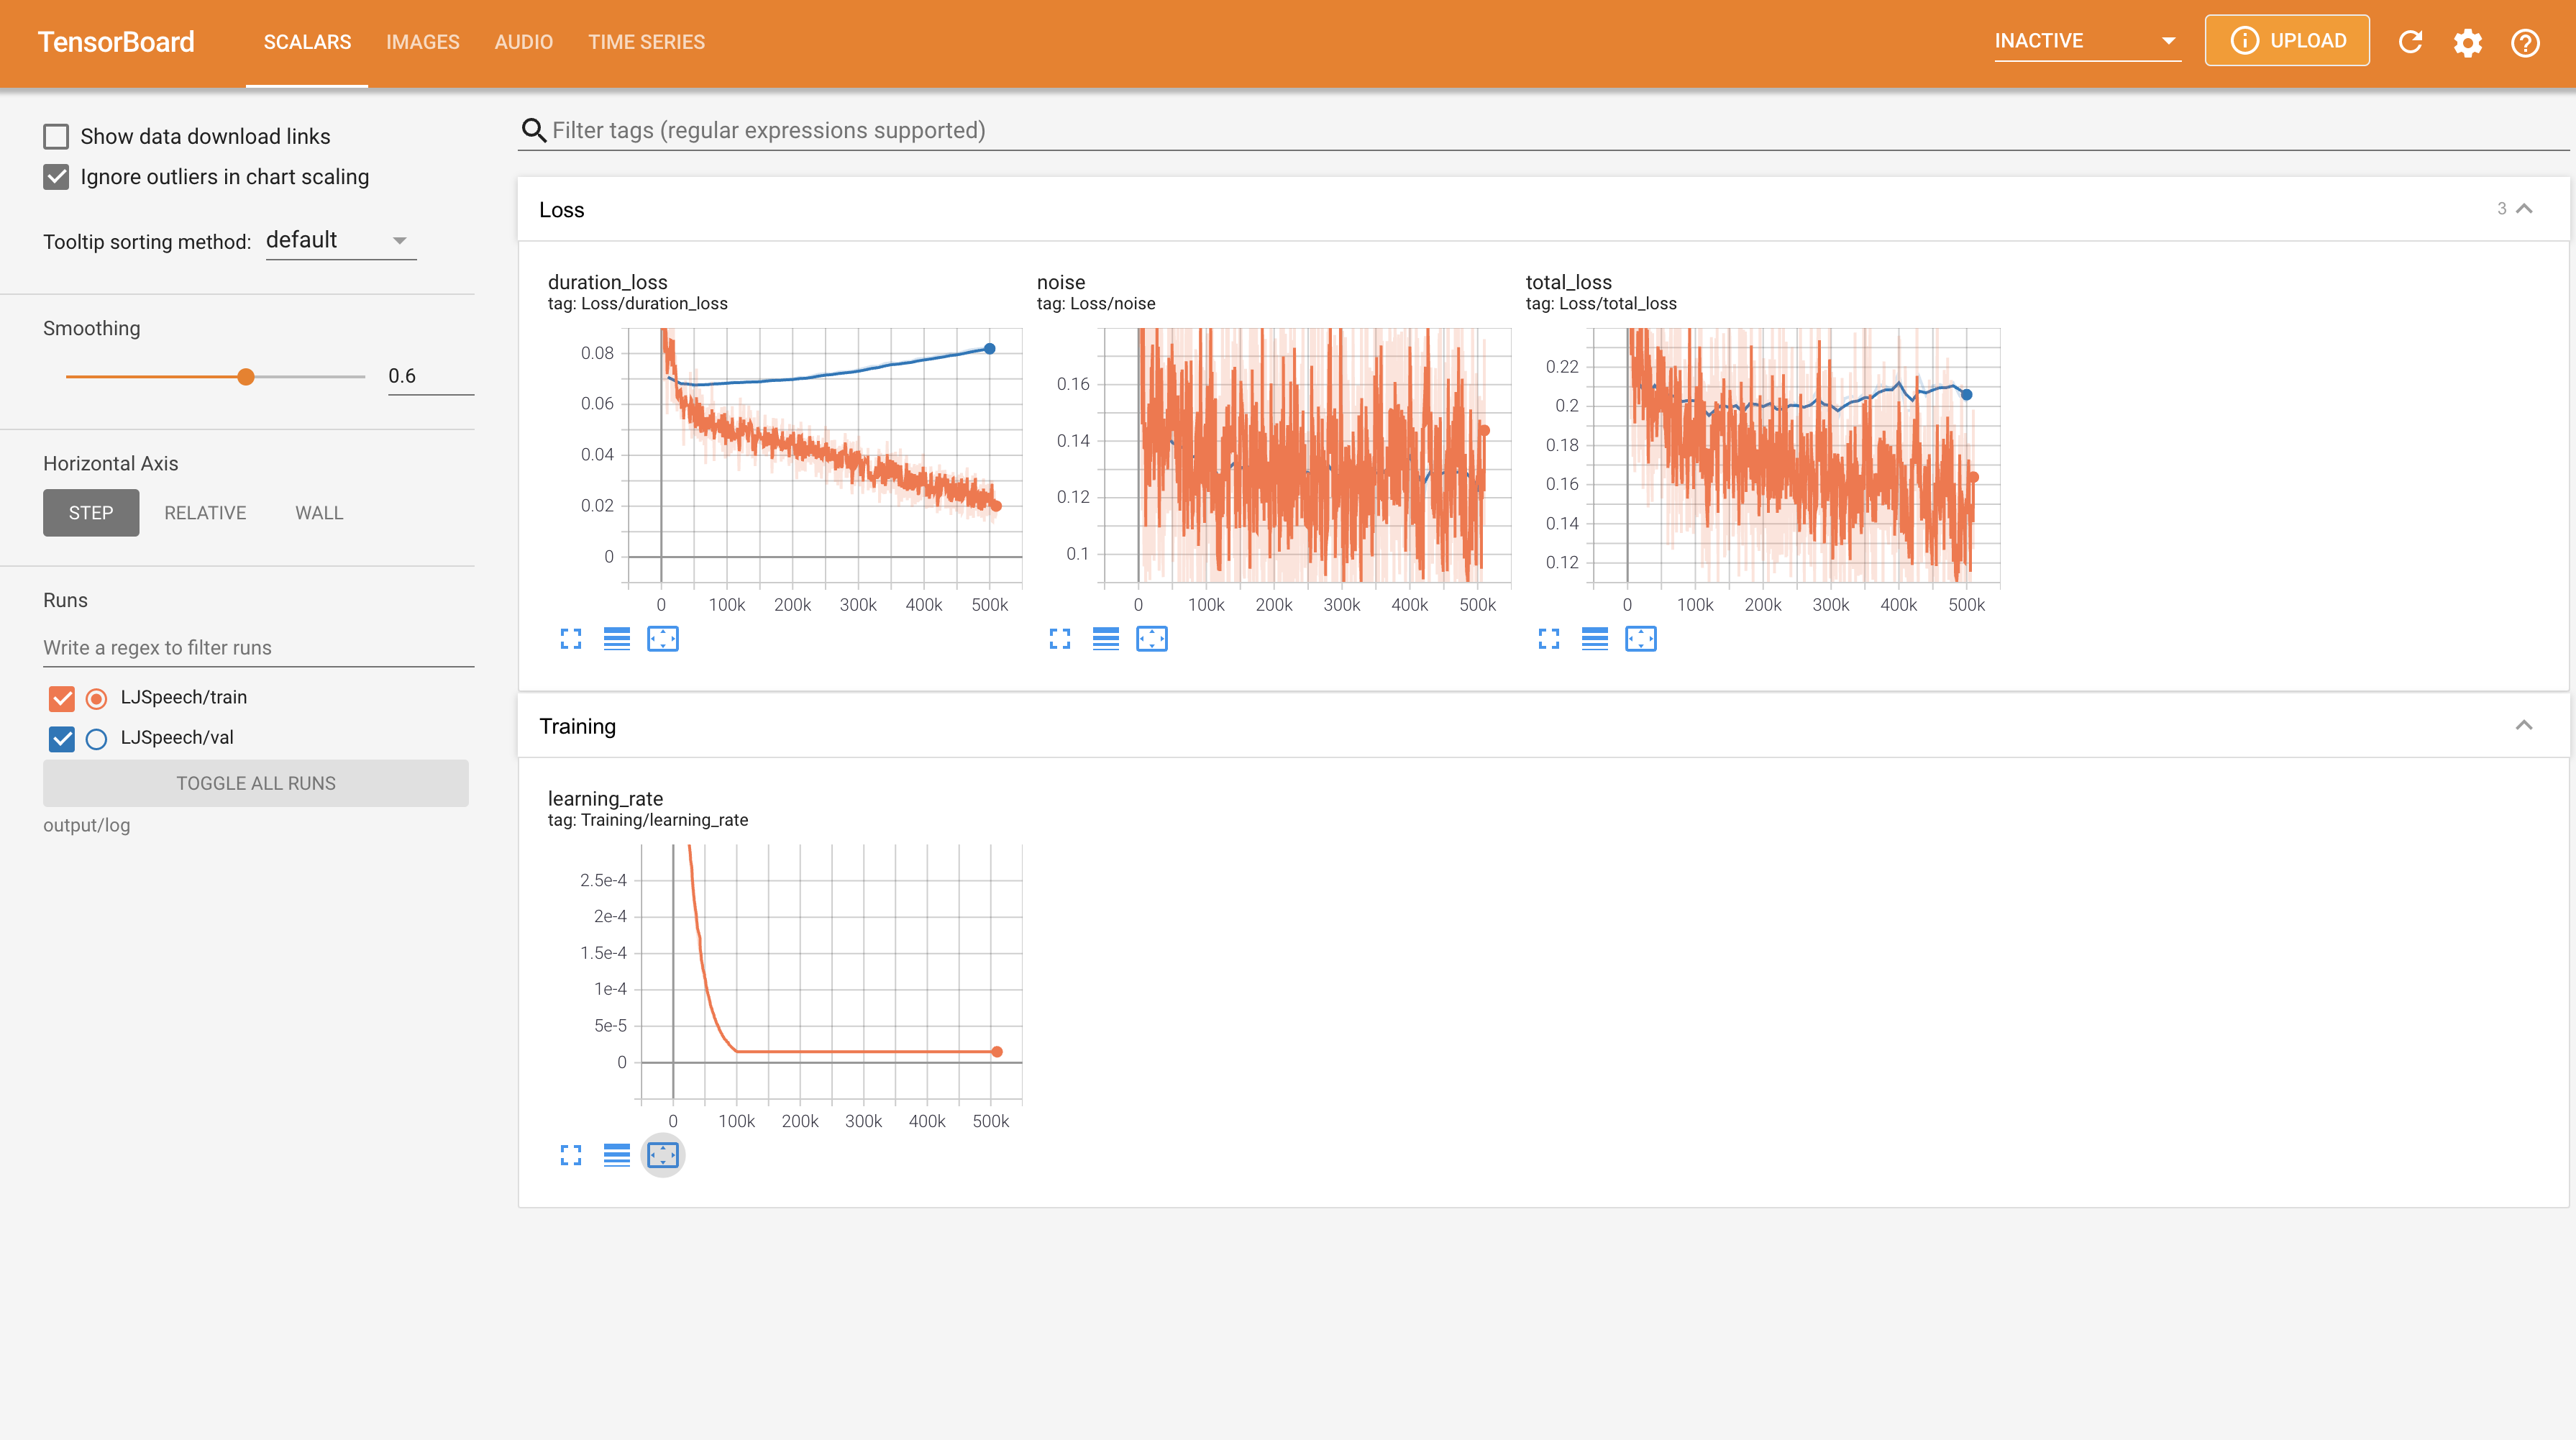
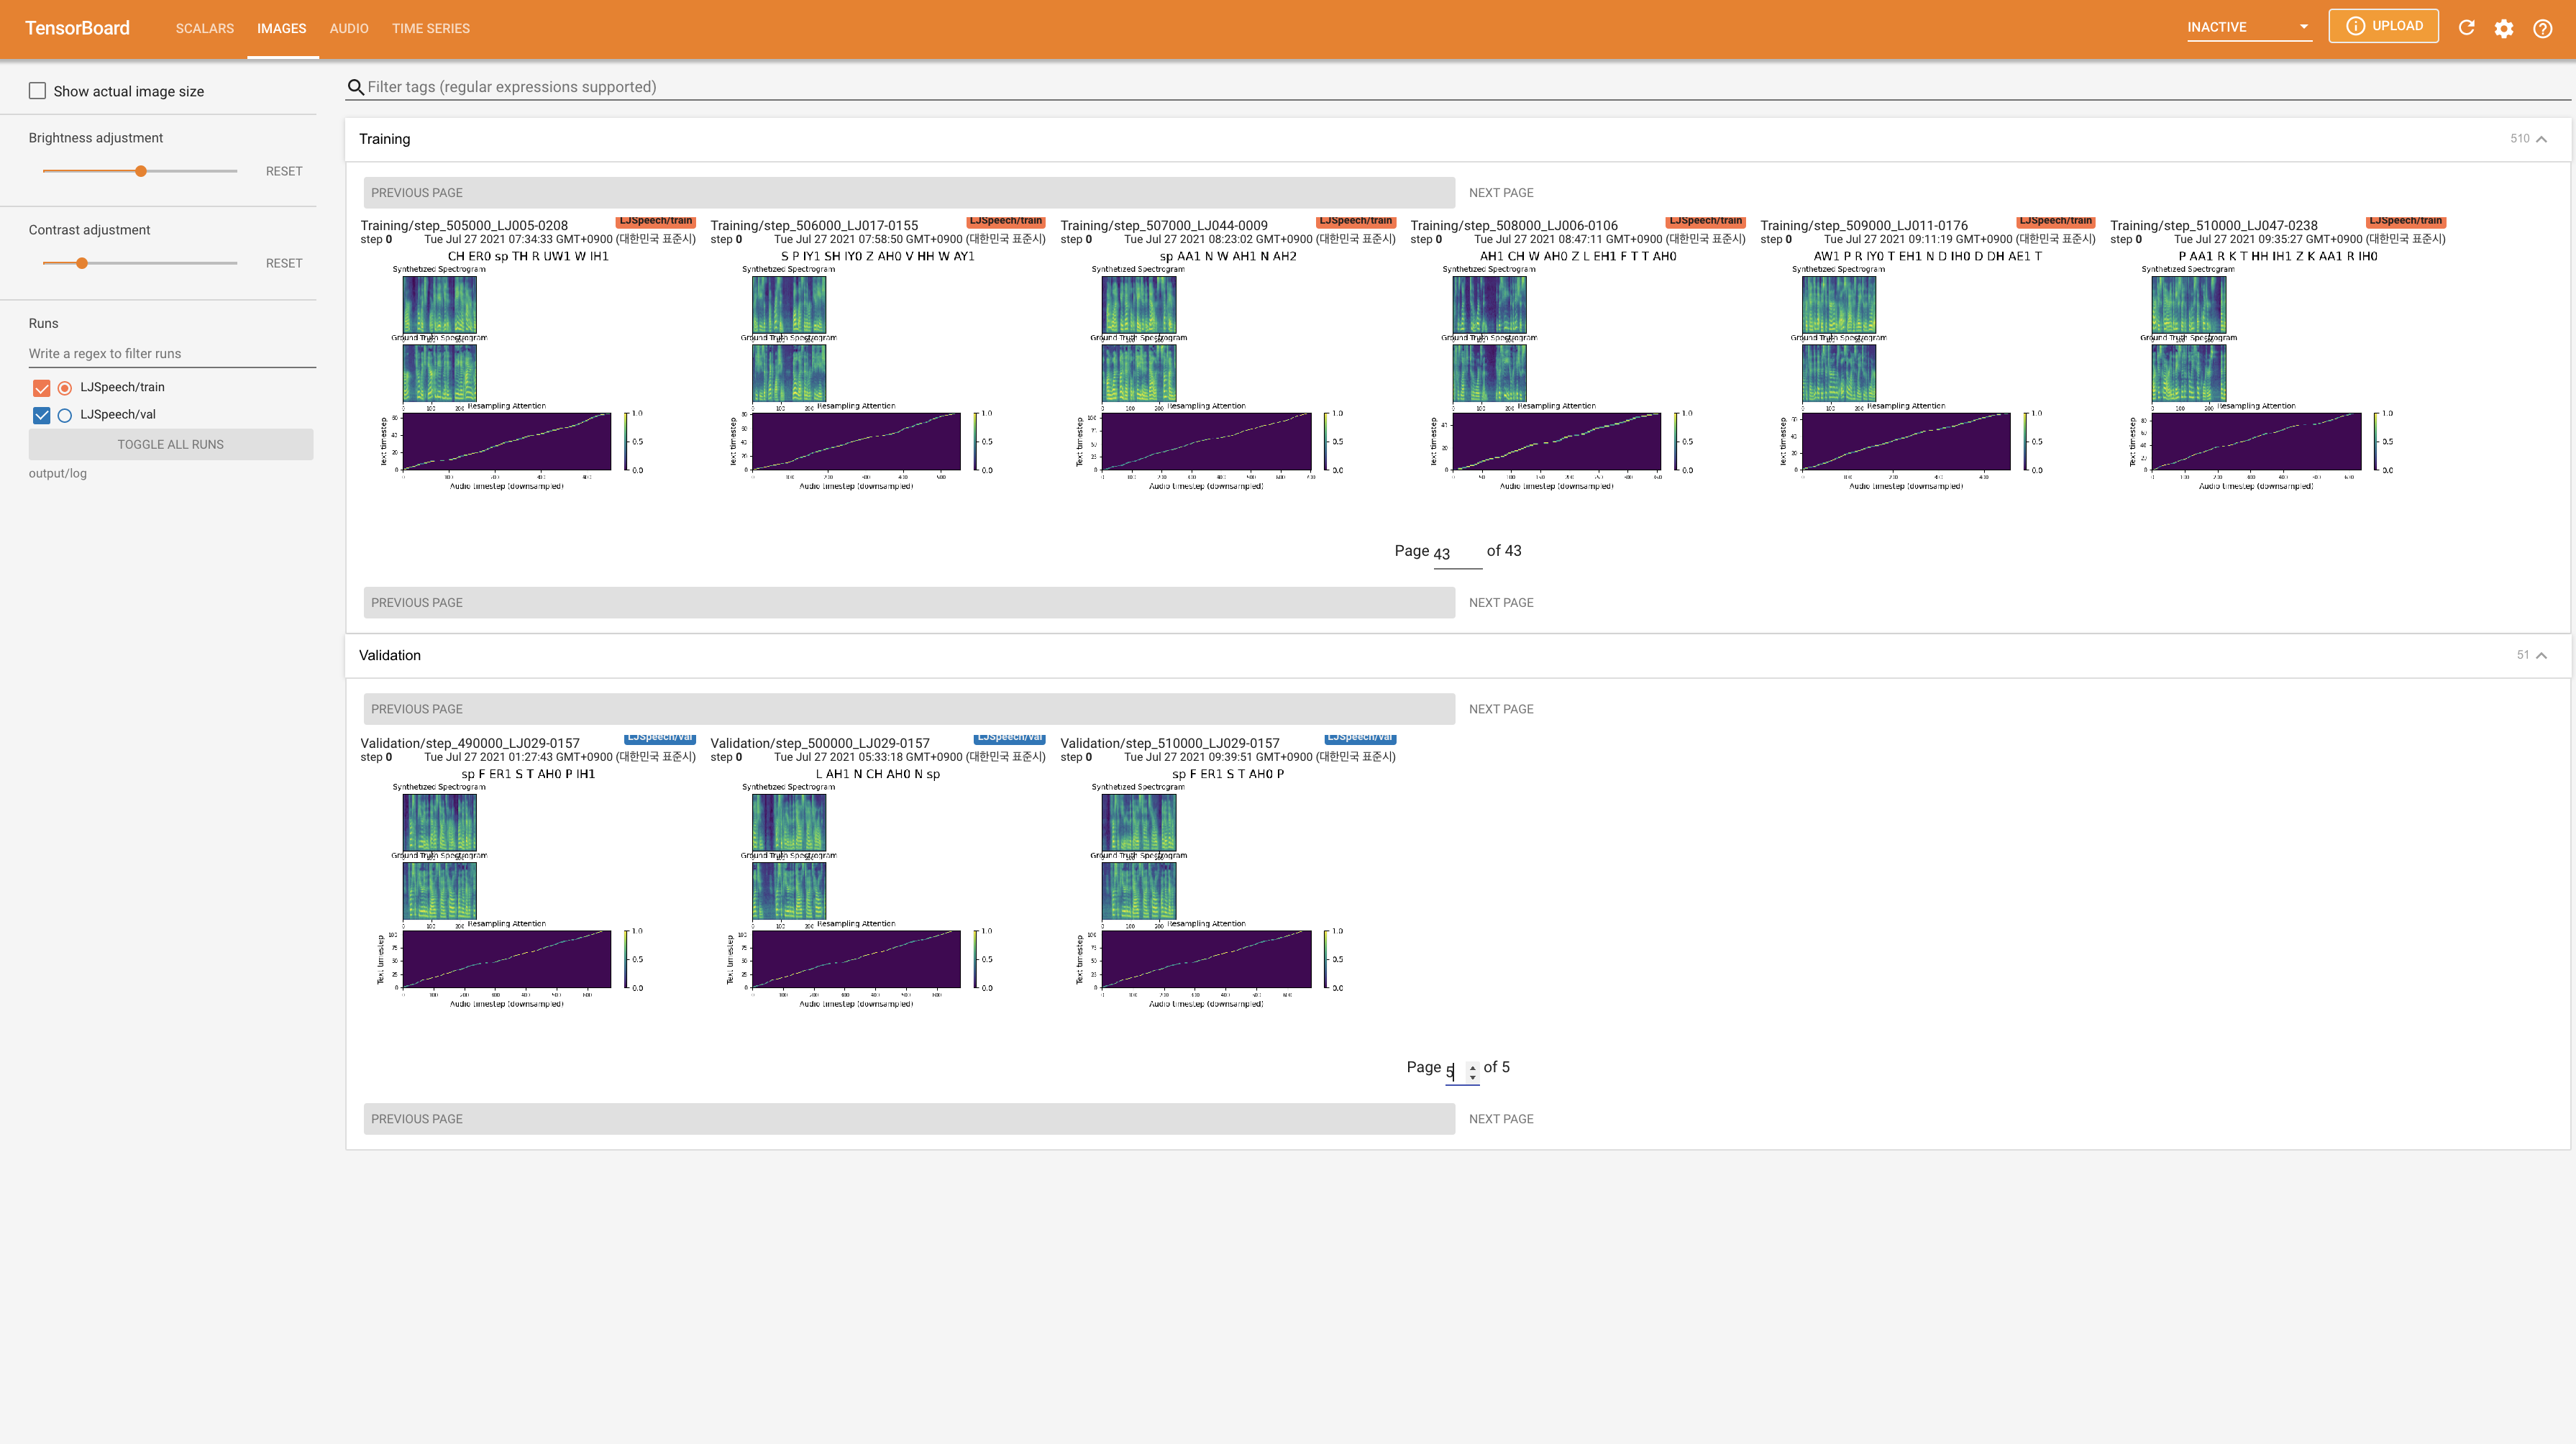
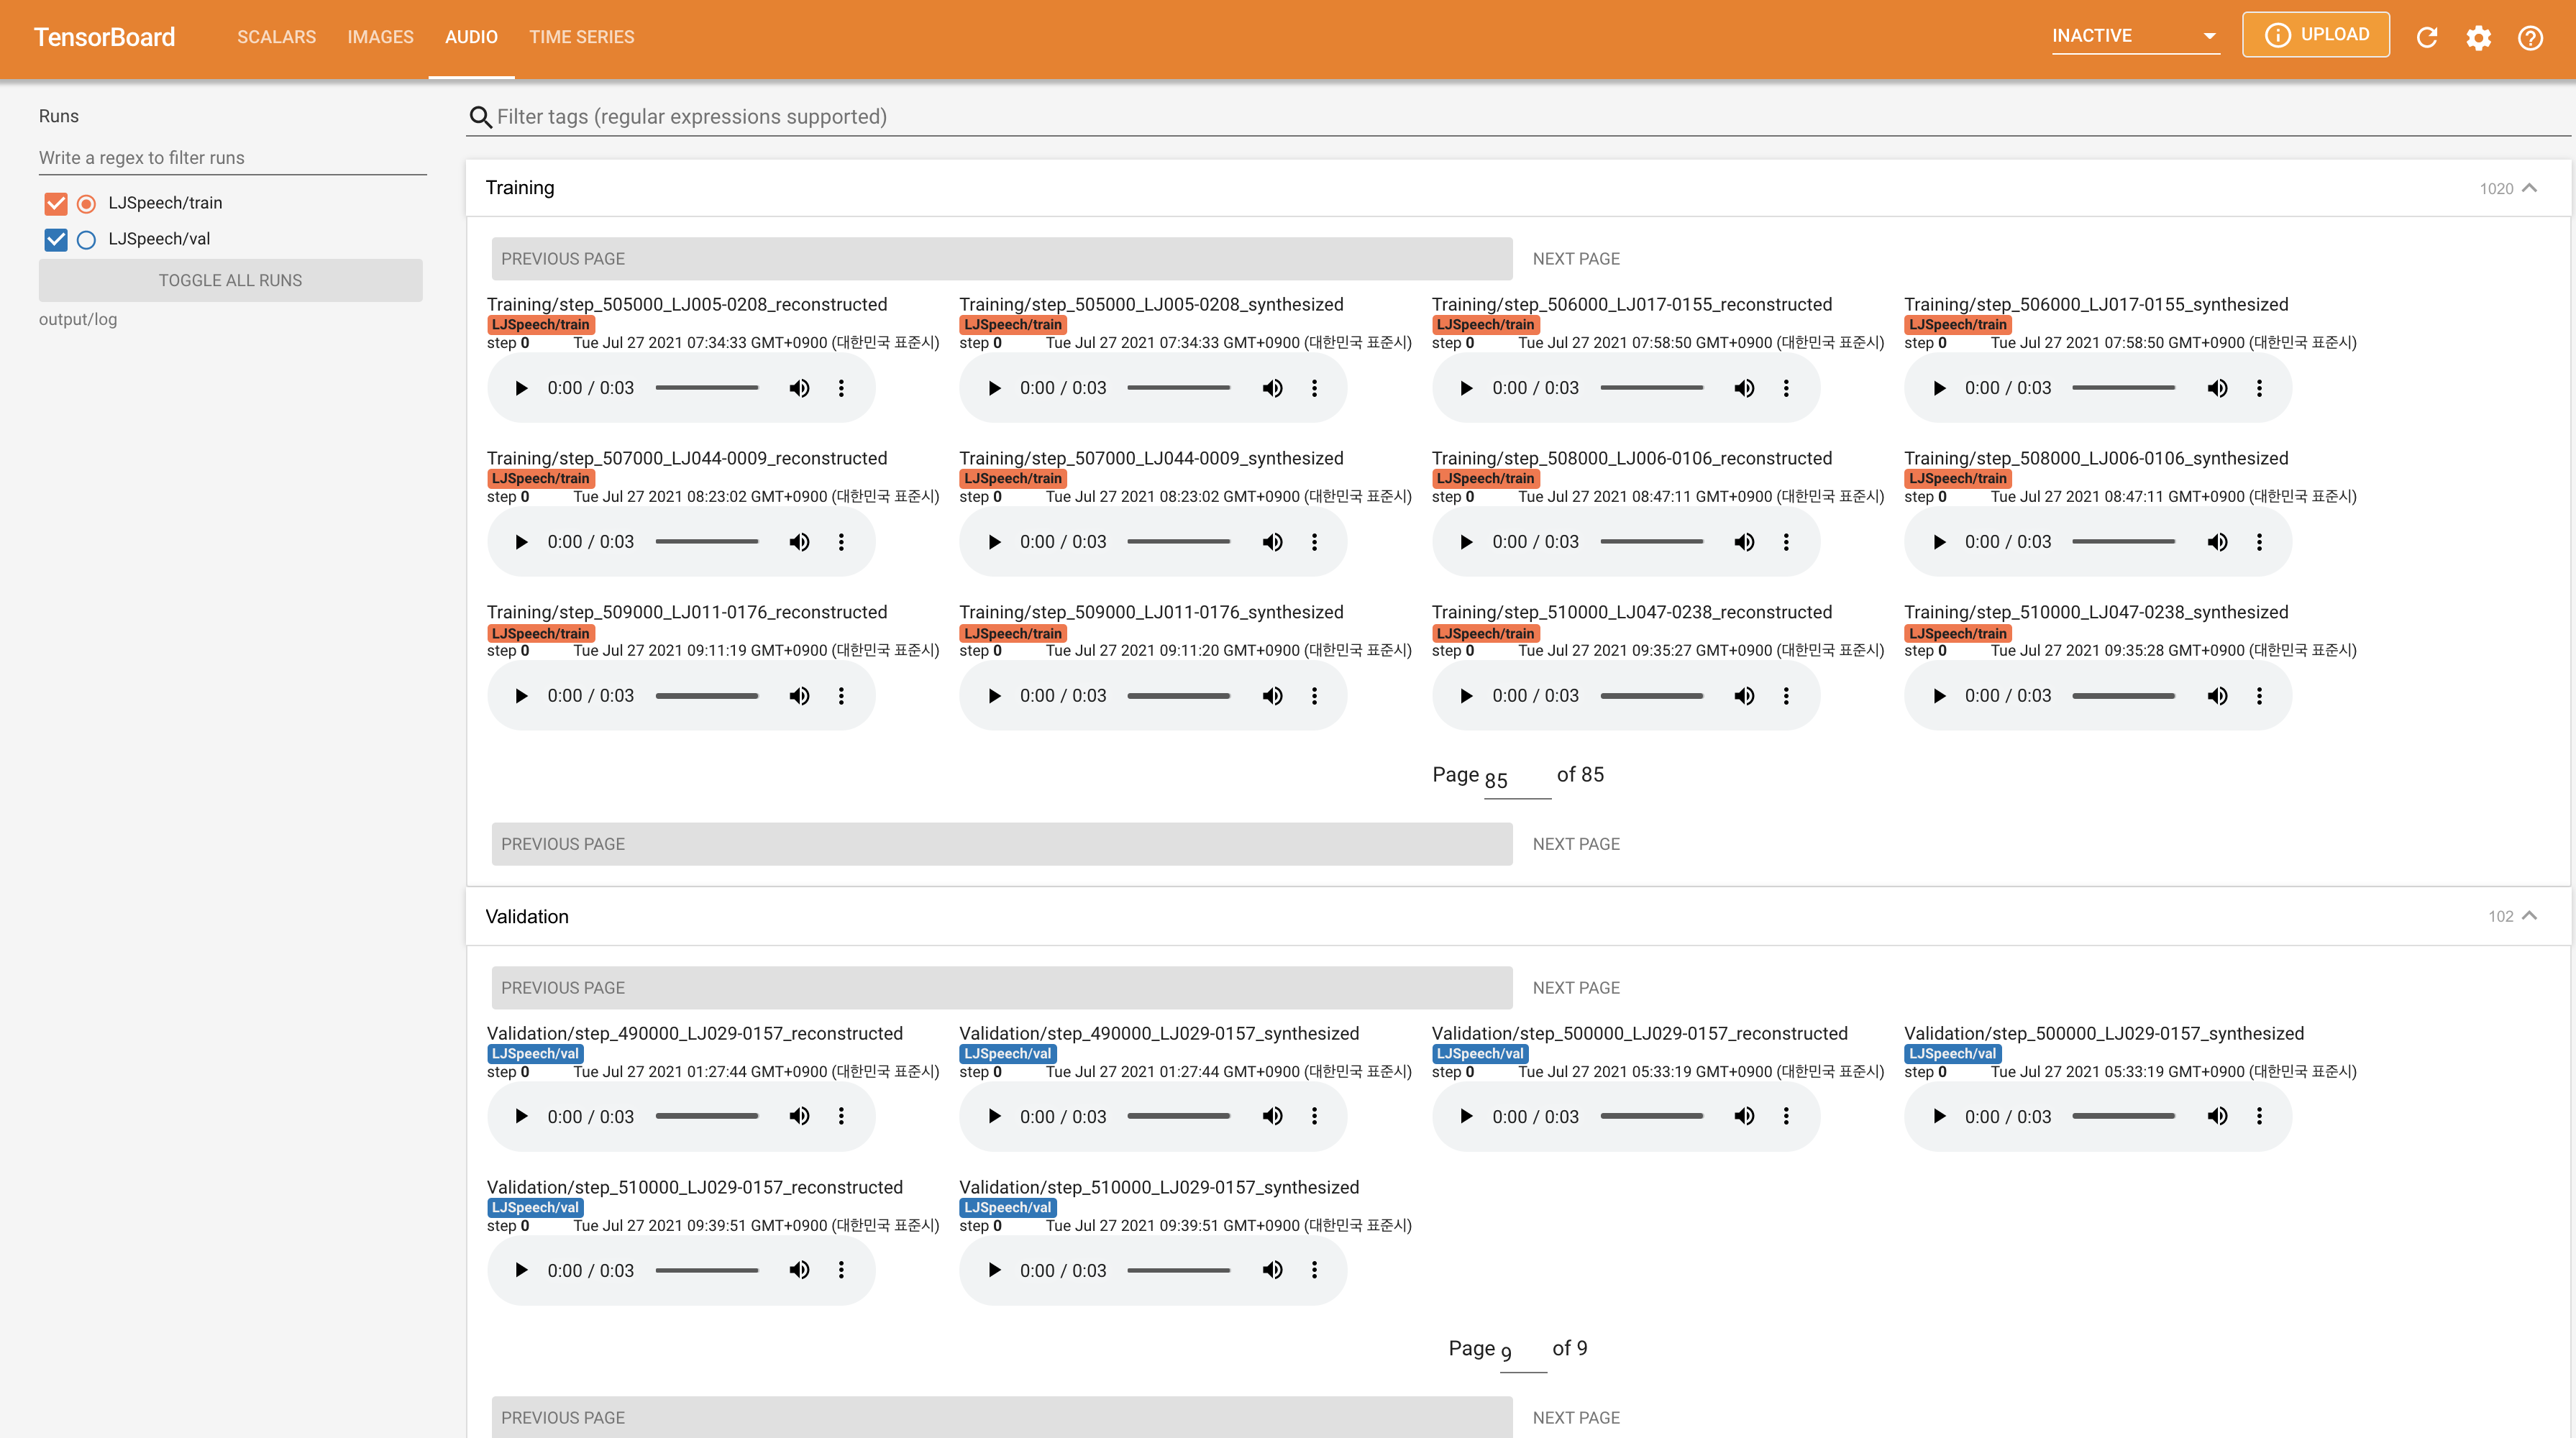
tensorboard --logdir output/log/LJSpeech
在您的本地主機上提供張板。顯示了損耗曲線,合成的MEL光譜圖和音頻。
22050Hz而不是24KHz ,並遵循一般的LJSpeech配置。nn.LSTM 。 @misc{lee2021wavegrad2,
author = {Lee, Keon},
title = {WaveGrad2},
year = {2021},
publisher = {GitHub},
journal = {GitHub repository},
howpublished = {url{https://github.com/keonlee9420/WaveGrad2}}
}


