torch points3d
v 1.3.0
這是用於運行針對經典基準測試的點雲分析任務的常見深度學習模型的框架。它在很大程度上依賴Pytorch幾何和Facebook Hydra。
該框架允許以最小的努力和出色的可重複性建立精益而復雜的模型。它還提供了高水平的API,以使對PointClouds的深入學習民主化。有關最先進網絡的框架容量和基準,請參見3DV的論文。
對於更無縫的設置,建議使用Docker。這種方法可確保兼容性並簡化安裝過程,尤其是在使用CUDA和PYTORCH的特定版本時。您可以按照以下方式提取適當的Docker映像:
docker pull pytorch/pytorch:1.10.0-cuda11.3-cudnn8-devel設置環境(本地或通過Docker)後,使用PIP安裝所需的Python軟件包:
pip install torch-points3d├─ benchmark # Output from various benchmark runs
├─ conf # All configurations for training nad evaluation leave there
├─ notebooks # A collection of notebooks that allow result exploration and network debugging
├─ docker # Docker image that can be used for inference or training
├─ docs # All the doc
├─ eval.py # Eval script
├─ find_neighbour_dist.py # Script to find optimal #neighbours within neighbour search operations
├─ forward_scripts # Script that runs a forward pass on possibly non annotated data
├─ outputs # All outputs from your runs sorted by date
├─ scripts # Some scripts to help manage the project
├─ torch_points3d
├─ core # Core components
├─ datasets # All code related to datasets
├─ metrics # All metrics and trackers
├─ models # All models
├─ modules # Basic modules that can be used in a modular way
├─ utils # Various utils
└─ visualization # Visualization
├─ test
└─ train.py # Main script to launch a training作為一般理念,我們已按任務將數據集和模型拆分。例如,數據集有五個子文件夾:
每個文件夾包含與每個任務相關的數據集。
請參閱我們的文檔,以直接從API訪問其中一些模型,並查看我們的KPCONV和RSCONV的示例筆記本,以獲取更多詳細信息。
任務 | 例子 |
|---|---|
分類 /零件分段 | 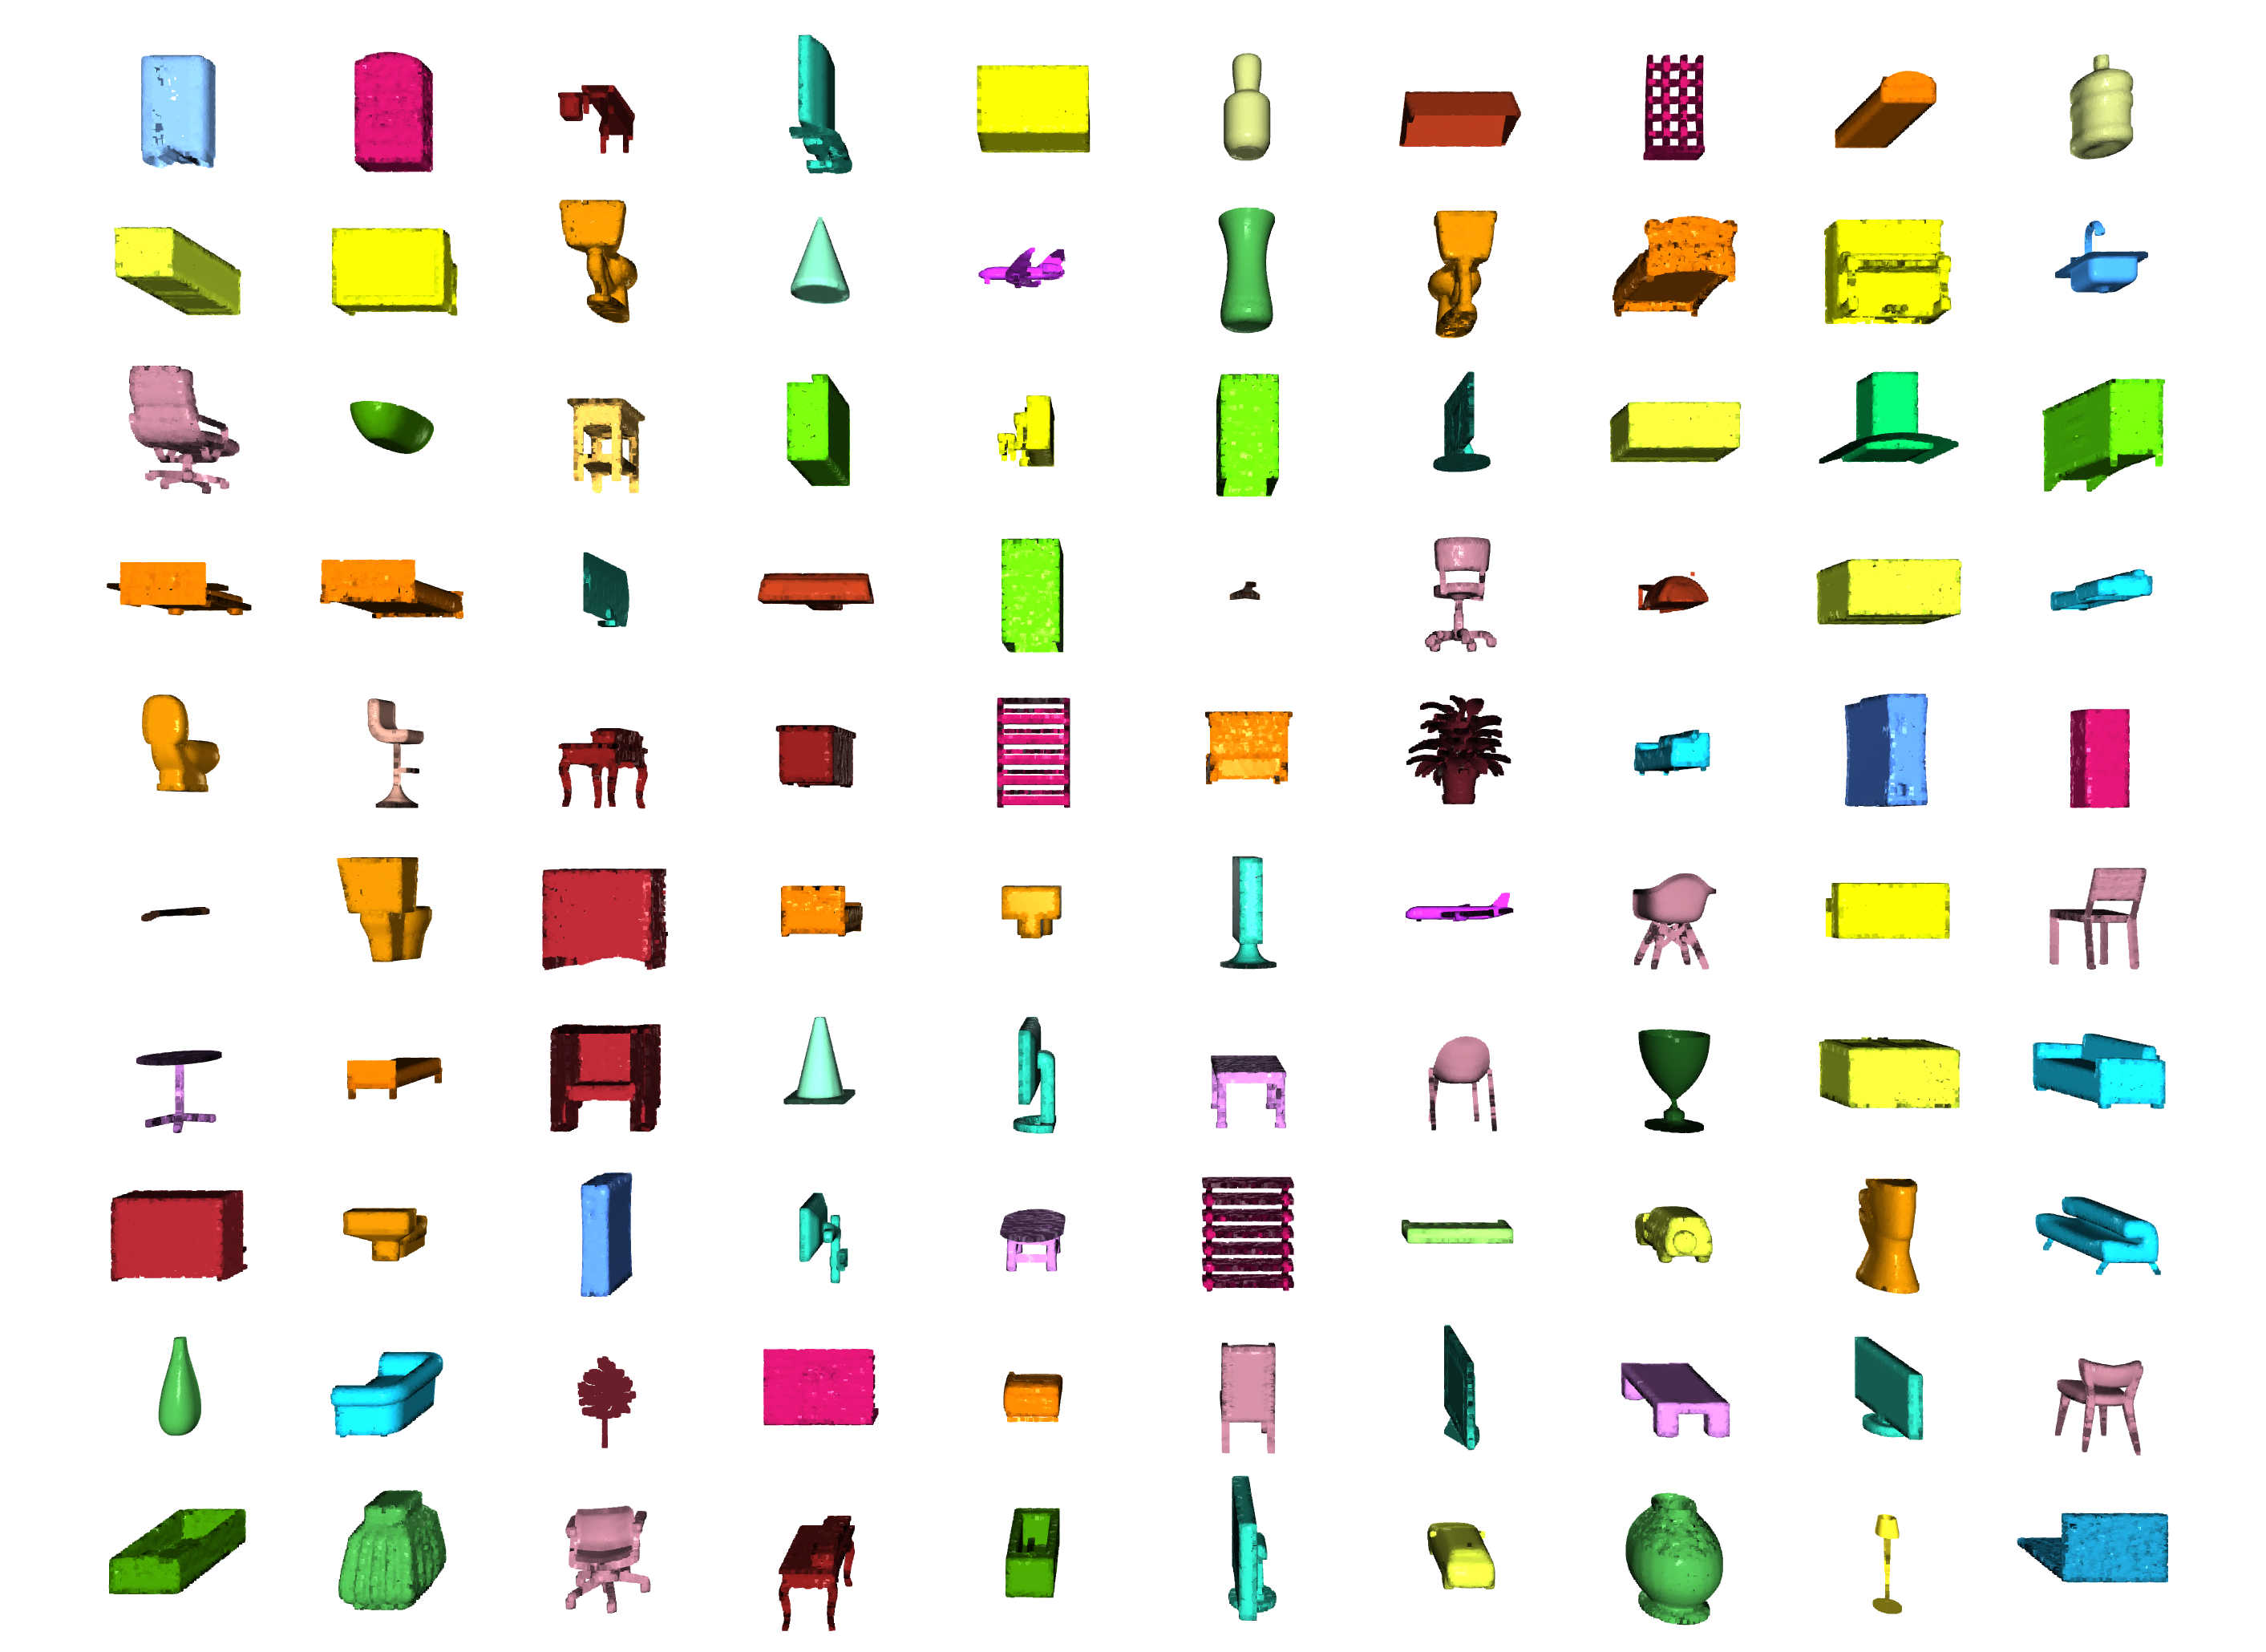 |
分割 | 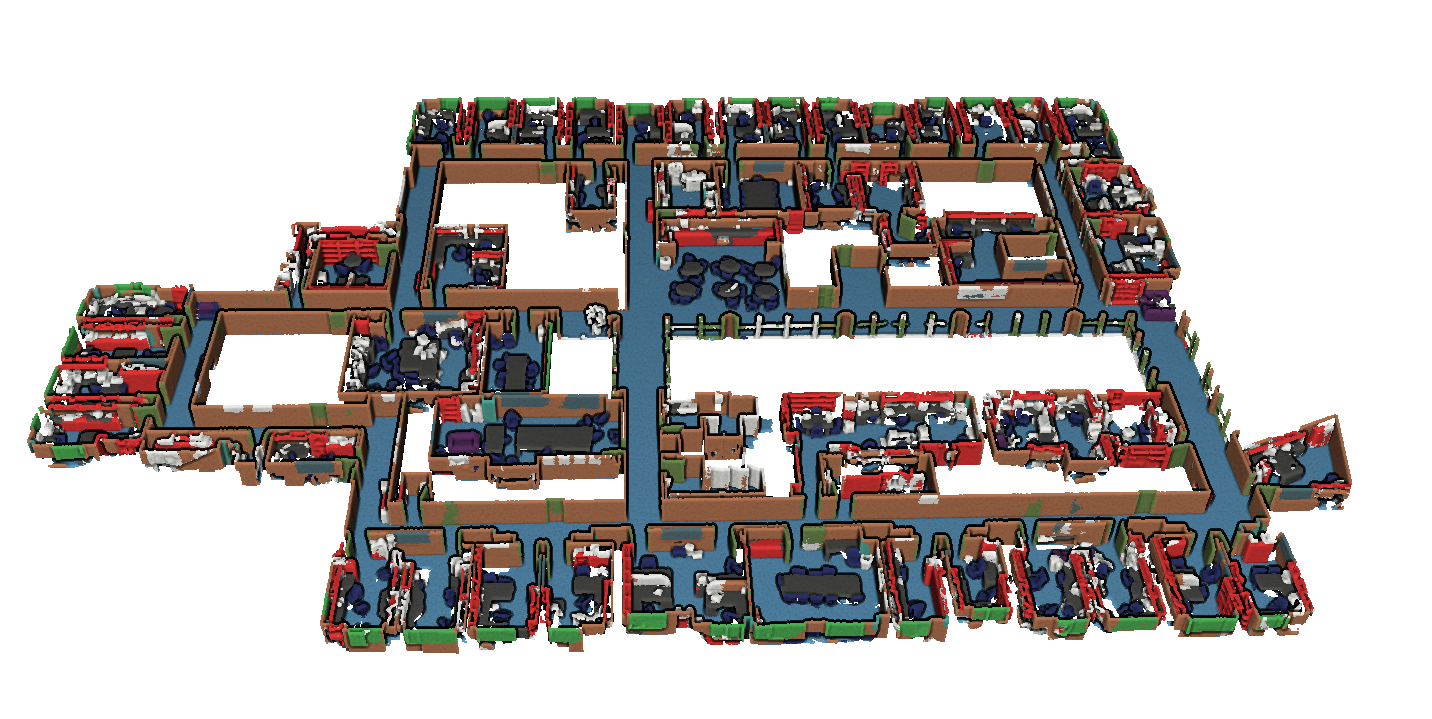 |
對象檢測 | 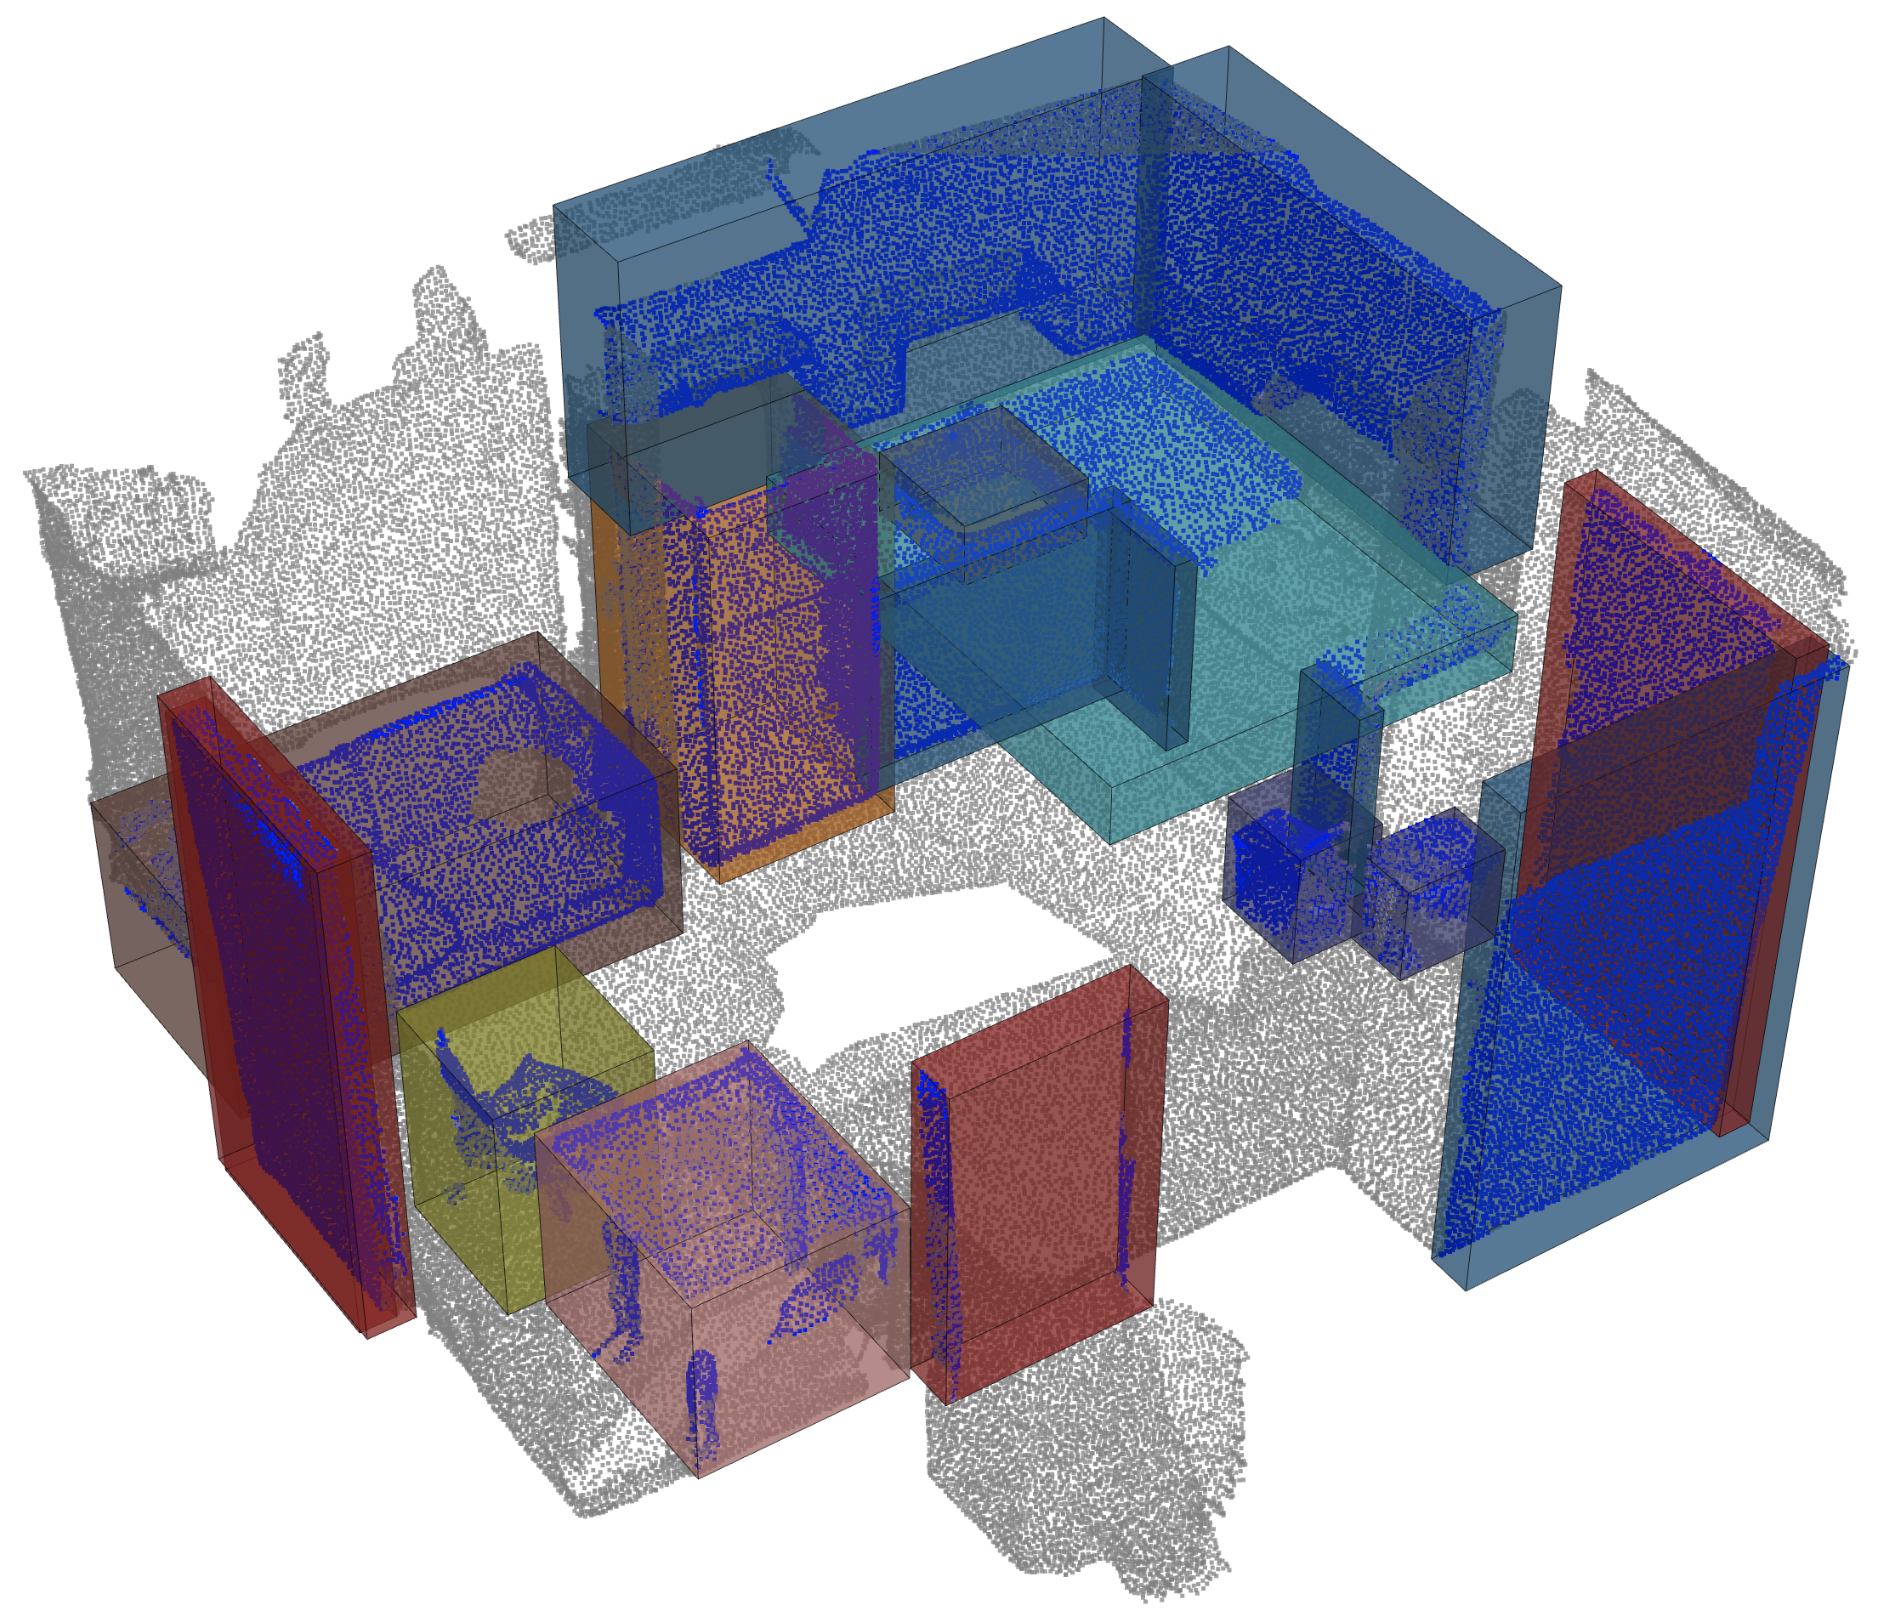 |
全景分割 | 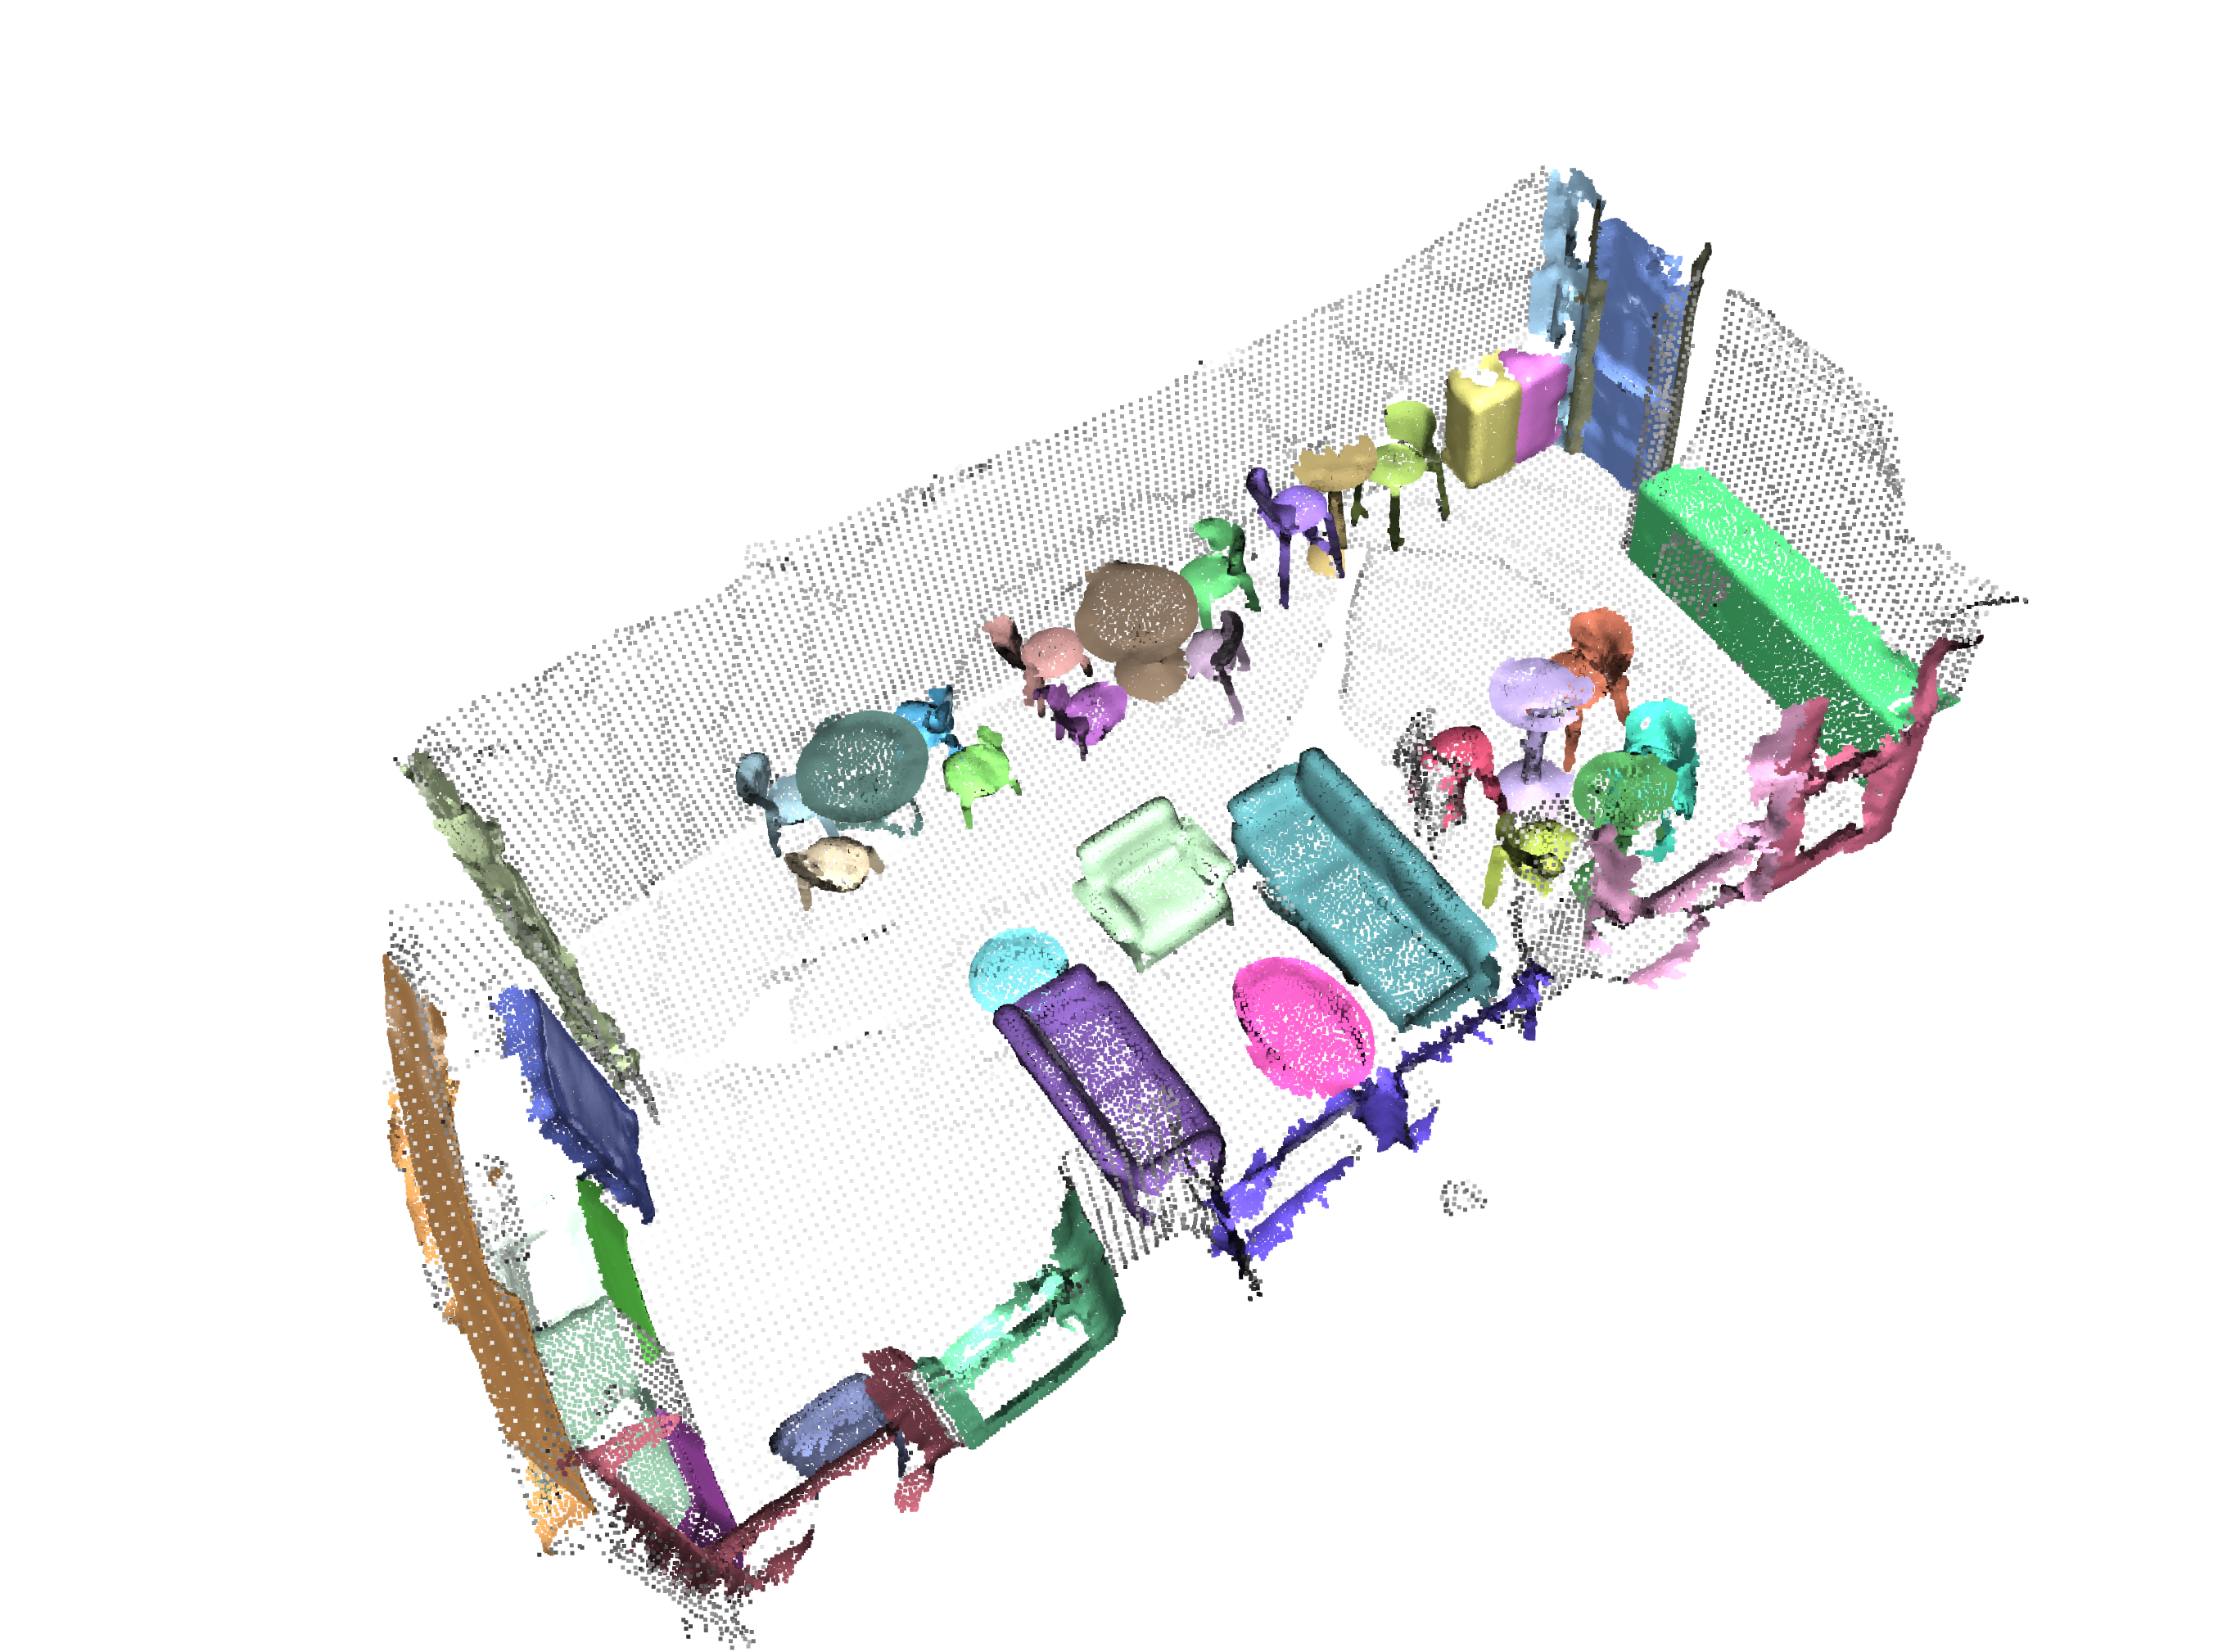 |
登記 | 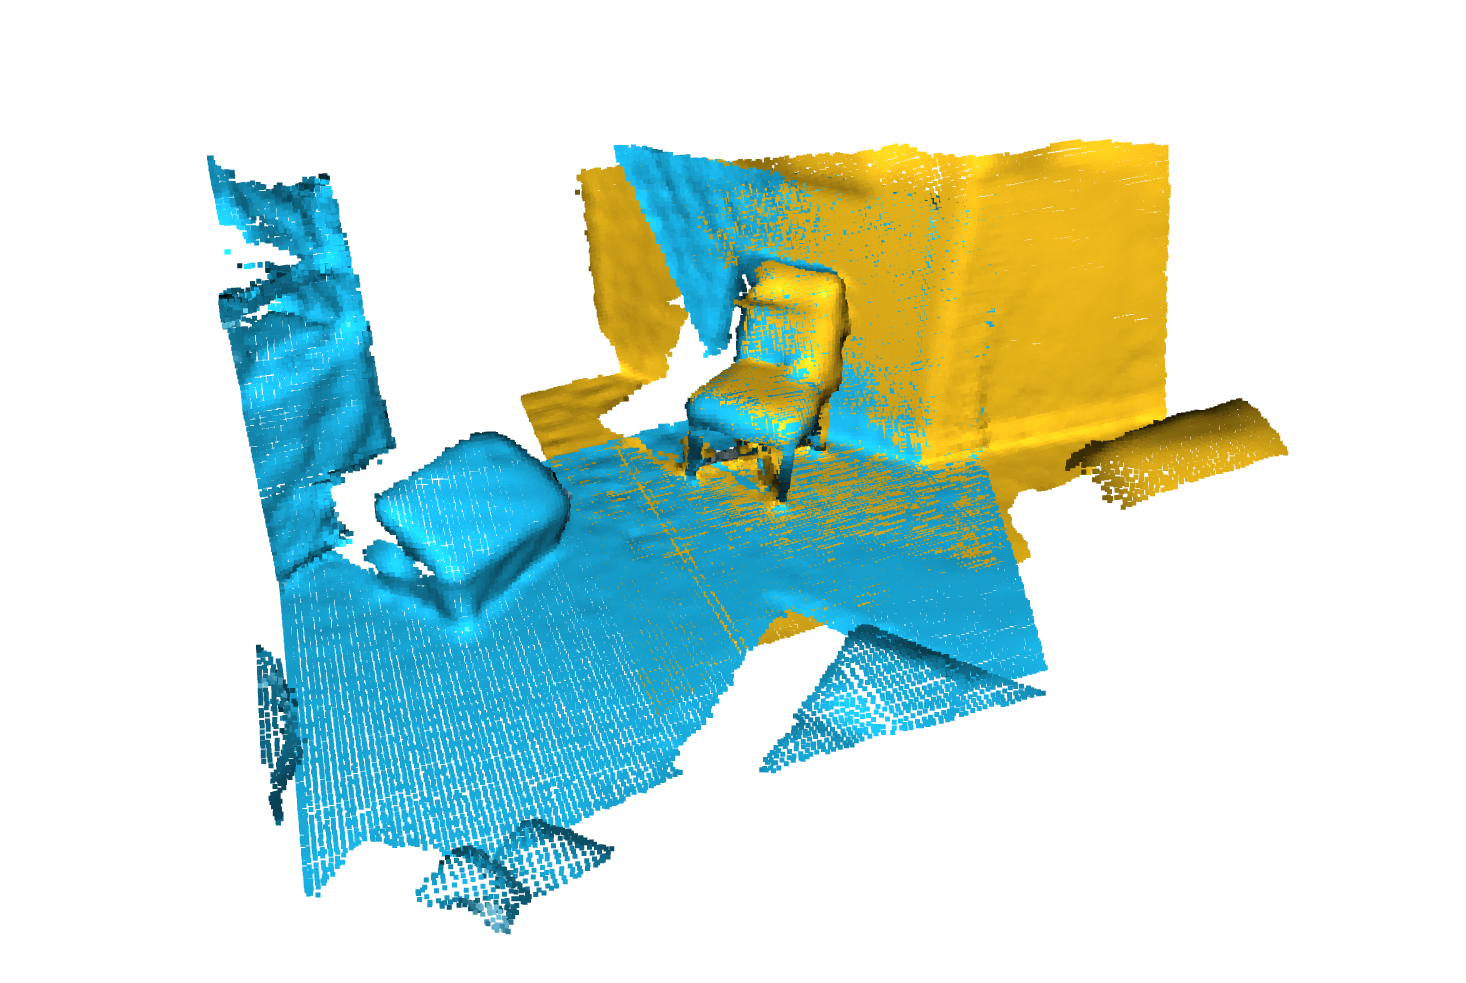 |
Angela Dai等人的掃描儀。 :SCANNET:室內場景豐富的3D重建
來自IRO Armeni等人的S3DIS 。 :接頭2d-3d-semantic數據,用於室內場景的理解
 * S3DIS 1x1
* S3DIS Room
* S3DIS Fused - Sphere | Cylinder
* S3DIS Fused - Sphere | Cylinder
來自Andy Zeng等人的3DMatch 。 :3DMatch:從RGB-D重建中學習本地幾何描述符
Simone Fontana等人的Iralab基準測試。 :點雲註冊算法的基準,該算法由以下數據組成:
A. Geiger等人的Kitti Odometry具有更正的姿勢(感謝 @humanpose1):我們準備好進行自動駕駛了嗎? Kitti Vision基準套件
目前,我們支持Minkowski Engine> V0.5和Torchsparse> = V1.4.0作為稀疏卷積的後端。這些軟件包需要獨立於Torch Points3D安裝,請按照安裝說明和對各自存儲庫的說明進行故障排除。目前, MinkowskiEngine在這裡見(謝謝Chris Choy)展示了更快的訓練。請注意, torchsparse仍在Beta中,不支持CPU培訓。
一旦設置了這兩個稀疏卷積框架之一,您可以開始使用高級來定義UNET主鍊或簡單的編碼器:
 from torch_points3d . applications . sparseconv3d import SparseConv3d

model = SparseConv3d ( "unet" , input_nc = 3 , output_nc = 5 , num_layers = 4 , backend = "torchsparse" ) # minkowski by default您還可以使用torch_points3d/modules/SparseConv3d/nn中提供的模塊來組裝自己的網絡。例如,如果您想使用torchsparse後端,則可以執行以下操作:
 import torch_points3d . modules . SparseConv3d as sp3d

sp3d . nn . set_backend ( "torchsparse" )
conv = sp3d . nn . Conv3d ( 10 , 10 )
bn = sp3d . nn . BatchNorm ( 10 )混合精度可以通過在float16中執行稀疏卷積,合併和梯度OPS來使GPU上的記憶較低,並稍微更快。目前,與Torchsparse後端在SparseConv3d網絡上進行CUDA培訓的混合精度培訓。要啟用混合精度,請確保您擁有帶有pip install --upgrade git+https://github.com/mit-han-lab/torchsparse.git的最新版本的Torchsparse。然後,在培訓配置文件中設置training.enable_mixed=True 。如果滿足所有條件,那麼當您開始培訓時,您會看到一個日誌條目說明:
[torch_points3d.models.base_model][INFO] - Model will use mixed precision
但是,如果您嘗試使用不支持的後端使用混合精度培訓,您將看到:
[torch_points3d.models.base_model][WARNING] - Mixed precision is not supported on this model, using default precision...
PretrainedRegistry使任何人都可以添加自己的預培訓模型,並僅使用2行代碼re-create它們,以finetunning或production目的。
[You]使用wandb激活( wandb.log=True )啟動模型培訓[TorchPoints3d]一旦訓練完成, TorchPoints3d將在我們的自定義檢查點中將訓練的型號上傳到WANDB中。[You]在PretainedRegistry中,在其屬性MODELS中添加一個key-value pair 。 key應描述您的模型,數據集和培訓超參數(可能是最佳模型), value應為url引用WANDB上的.pt文件。示例:鍵: pointnet2_largemsg-s3dis-1和url值: https://api.wandb.ai/files/loicland/benchmark-torch-points-3d-s3dis/1e1p0csk/pointnet2_largemsg.pt pointnet2_largemsg.pt鍵DESRIBES pointnet2 largemsg trained on s3dis fold 1 。
[Anyone]通過使用PretainedRegistry Registry類並提供key ,將downloaded相關的模型權重,並且預訓練的模型將ready to use 。 [ In ]:
from torch_points3d . applications . pretrained_api import PretainedRegistry
model = PretainedRegistry . from_pretrained ( "pointnet2_largemsg-s3dis-1" )
print ( model . wandb )
print ( model . print_transforms ())
[ Out ]:
== == == == == == == == == == == == == == == == == == == == == == == == == = WANDB URLS == == == == == == == == == == == == == == == == == == == == == == == == == == ==
WEIGHT_URL : https : // api . wandb . ai / files / loicland / benchmark - torch - points - 3 d - s3dis / 1e1 p0csk / pointnet2_largemsg . pt
LOG_URL : https : // app . wandb . ai / loicland / benchmark - torch - points - 3 d - s3dis / runs / 1e1 p0csk / logs
CHART_URL : https : // app . wandb . ai / loicland / benchmark - torch - points - 3 d - s3dis / runs / 1e1 p0csk
OVERVIEW_URL : https : // app . wandb . ai / loicland / benchmark - torch - points - 3 d - s3dis / runs / 1e1 p0csk / overview
HYDRA_CONFIG_URL : https : // app . wandb . ai / loicland / benchmark - torch - points - 3 d - s3dis / runs / 1e1 p0csk / files / hydra - config . yaml
OVERRIDES_URL : https : // app . wandb . ai / loicland / benchmark - torch - points - 3 d - s3dis / runs / 1e1 p0csk / files / overrides . yaml
== == == == == == == == == == == == == == == == == == == == == == == == == == == == == == == == == == == == == == == == == == == == == == == == == == == == == == == == == == ==
pre_transform = None
test_transform = Compose ([
FixedPoints ( 20000 , replace = True ),
XYZFeature ( axis = [ 'z' ]),
AddFeatsByKeys ( rgb = True , pos_z = True ),
Center (),
ScalePos ( scale = 0.5 ),
])
train_transform = Compose ([
FixedPoints ( 20000 , replace = True ),
RandomNoise ( sigma = 0.001 , clip = 0.05 ),
RandomRotate (( - 180 , 180 ), axis = 2 ),
RandomScaleAnisotropic ([ 0.8 , 1.2 ]),
RandomAxesSymmetry ( x = True , y = False , z = False ),
DropFeature ( proba = 0.2 , feature = 'rgb' ),
XYZFeature ( axis = [ 'z' ]),
AddFeatsByKeys ( rgb = True , pos_z = True ),
Center (),
ScalePos ( scale = 0.5 ),
])
val_transform = Compose ([
FixedPoints ( 20000 , replace = True ),
XYZFeature ( axis = [ 'z' ]),
AddFeatsByKeys ( rgb = True , pos_z = True ),
Center (),
ScalePos ( scale = 0.5 ),
])
inference_transform = Compose ([
FixedPoints ( 20000 , replace = True ),
XYZFeature ( axis = [ 'z' ]),
AddFeatsByKeys ( rgb = True , pos_z = True ),
Center (),
ScalePos ( scale = 0.5 ),
])
pre_collate_transform = Compose ([
PointCloudFusion (),
SaveOriginalPosId ,
GridSampling3D ( grid_size = 0.04 , quantize_coords = False , mode = mean ),
])我們使用詩歌來管理包裹。為了開始,請克隆此存儲庫,然後從倉的根部運行以下命令
poetry install --no-root
這將在新的虛擬環境中安裝所有必需的依賴項。
激活環境
poetry shell您可以通過運行來檢查安裝是否成功
python -m unittest -v對於pycuda支持(僅需要註冊任務):
pip install pycudapoetry run python train.py task=segmentation models=segmentation/pointnet2 model_name=pointnet2_charlesssg data=segmentation/shapenet-fixed你應該看到這樣的東西
PointNet ++的配置是如何定義模型並如下:
 # PointNet++: Deep Hierarchical Feature Learning on Point Sets in a Metric Space (https://arxiv.org/abs/1706.02413)
# Credit Charles R. Qi: https://github.com/charlesq34/pointnet2/blob/master/models/pointnet2_part_seg_msg_one_hot.py

pointnet2_onehot :
  architecture : pointnet2.PointNet2_D
  conv_type : " DENSE "
  use_category : True
  down_conv :
    module_name : PointNetMSGDown
    npoint : [1024, 256, 64, 16]
    radii : [[0.05, 0.1], [0.1, 0.2], [0.2, 0.4], [0.4, 0.8]]
    nsamples : [[16, 32], [16, 32], [16, 32], [16, 32]]
    down_conv_nn :
      [
        [[FEAT, 16, 16, 32], [FEAT, 32, 32, 64]],
        [[32 + 64, 64, 64, 128], [32 + 64, 64, 96, 128]],
        [[128 + 128, 128, 196, 256], [128 + 128, 128, 196, 256]],
        [[256 + 256, 256, 256, 512], [256 + 256, 256, 384, 512]],
      ]
  up_conv :
    module_name : DenseFPModule
    up_conv_nn :
      [
        [512 + 512 + 256 + 256, 512, 512],
        [512 + 128 + 128, 512, 512],
        [512 + 64 + 32, 256, 256],
        [256 + FEAT, 128, 128],
      ]
    skip : True
  mlp_cls :
    nn : [128, 128]
dropout : 0.5 我們提供一個腳本,用於在可能不會註釋的自定義數據上運行給定的預訓練模型。您將在Shapenet上找到一個示例,以進行零件分割任務。就像代碼庫中的其餘部分一樣,大多數自定義都通過配置文件發生,並且提供的示例可以擴展到其他數據集。您也可以輕鬆地從那裡創建自己的。回到部分分段任務,說您有一個裝滿了飛機的點雲的文件夾,並且擁有在飛機上訓練的模型的檢查站,並且可能會編輯config.yaml和shapenet.yaml。
python forward_scripts/forward.py向前運行的結果將放置在指定的output_folder中,您可以使用提供的筆記本探索結果。下面是使用在帽子上訓練的模型的結果,只是找到飛機和蓋的部分。
最後,對於有興趣將其模型部署到生產環境中的人們,我們提供了一個Dockerfile以及一個構建腳本。假設您已經培訓了一個用於語義細分的網絡,該網絡給出了權重<outputfolder/weights.pt> ,以下命令將為您構建Docker映像:
 cd docker
./build.sh outputfolder/weights.pt然後,您可以使用它在input_path中的所有點雲上運行前向通行證,並在output_path中生成結果
docker run -v /test_data:/in -v /test_data/out:/out pointnet2_charlesssg:latest python3 forward_scripts/forward.py dataset=shapenet data.forward_category=Cap input_path= " /in " output_path= " /out " -v選項將本地目錄安裝到容器的文件系統上。例如,在上面的命令行中, /test_data/out將安裝在位置/out 。結果,所有在計算機上的文件夾/test_data/out中/out提供所有文件。
我們建議使用snakeviz和cProfile
使用CPROFILE介紹您的代碼
poetry run python -m cProfile -o {your_name}.prof train.py ... debugging.profiling=True
並使用Snakeviz可視化結果。
snakeviz {your_name}.prof
也可以使用torch.utils.bottleneck
python -m torch.utils.bottleneck /path/to/source/script.py [args]
確保安裝了至少pytorch 1.8.0,並驗證cuda/bin and cuda/include是否分別在您的$PATH和$CPATH中,例如:
 $ python -c "import torch; print(torch.__version__)"
>>> 1.8.0

$ echo $PATH
>>> /usr/local/cuda/bin:...

$ echo $CPATH
>>> /usr/local/cuda/include:...
當我們更新使用的Pytorch版本時,需要重新安裝編譯的軟件包,否則您將遇到一個看起來像這樣的錯誤:
... scatter_cpu.cpython-36m-x86_64-linux-gnu.so: undefined symbol: _ZN3c1012CUDATensorIdEv
以下庫可能會發生這種情況:
解決此操作的一種簡單方法是使用Virtual Env激活運行以下命令:
 pip uninstall torch-scatter torch-sparse torch-cluster torch-points-kernels -y
rm -rf ~/.cache/pip
poetry install
當試圖在GPU上運行代碼與用於編譯torch-points-kernels庫的代碼時,可能會發生這種情況。設置TORCH_CUDA_ARCH_LIST環境變量之後,卸載torch-points-kernels ,清除緩存和重新安裝。例如,使用Tesla T4(Turing 7.5)編譯並在Tesla V100(Volta 7.0)上運行代碼:
export TORCH_CUDA_ARCH_LIST="7.0;7.5"
有關更多體系結構的兼容性,請參見此有用的圖表。
提高OSError: [WinError 6] The handle is invalid / wandb: ERROR W&B process failed to launch WANDB,目前在Windows上損壞了WandB(請參閱此問題),解決方法是使用命令行參數wandb.log=false
我們提供了一個基於筆記本的Pyvista和麵板,可讓您在視覺上探索過去的實驗。使用Jupyter Lab時,您必須安裝一個擴展名:
jupyter labextension install @pyviz/jupyterlab_pyviz
通過筆記本電腦運行,您應該看到一個儀表板啟動,看起來如下:
歡迎捐款!唯一的問題是您堅持樣式,並在添加更多功能時添加測試!
對於樣式,您可以使用預先承諾的掛鉤來幫助您:
pre-commit install
一系列檢查將為您運行,您可能必須再次將固定文件添加到藏匿的文件中。
在DocStrings方面,我們使用Numpy樣式Docstrings,對於那些使用Visual Studio代碼的人來說,有一個很棒的擴展名可以幫助您。安裝它並將格式設置為numpy,您應該很好!
最終,如果您想與我們直接聊天,請隨時加入我們的Slack,只需向我們發送電子郵件,我們會添加您。
如果您發現我們的工作有用,請隨時引用:
 @inproceedings{
  tp3d,
  title={Torch-Points3D: A Modular Multi-Task Frameworkfor Reproducible Deep Learning on 3D Point Clouds},
  author={Chaton, Thomas and Chaulet Nicolas and Horache, Sofiane and Landrieu, Loic},
  booktitle={2020 International Conference on 3D Vision (3DV)},
  year={2020},
  organization={IEEE},
  url = {url{https://github.com/nicolas-chaulet/torch-points3d}}
}
並且還請引用您在實驗中使用的模型或數據集的引用!


