torch points3d
v 1.3.0
这是用于运行针对经典基准测试的点云分析任务的常见深度学习模型的框架。它在很大程度上依赖Pytorch几何和Facebook Hydra。
该框架允许以最小的努力和出色的可重复性建立精益而复杂的模型。它还提供了高水平的API,以使对PointClouds的深入学习民主化。有关最先进网络的框架容量和基准,请参见3DV的论文。
对于更无缝的设置,建议使用Docker。这种方法可确保兼容性并简化安装过程,尤其是在使用CUDA和PYTORCH的特定版本时。您可以按照以下方式提取适当的Docker映像:
docker pull pytorch/pytorch:1.10.0-cuda11.3-cudnn8-devel设置环境(本地或通过Docker)后,使用PIP安装所需的Python软件包:
pip install torch-points3d├─ benchmark # Output from various benchmark runs
├─ conf # All configurations for training nad evaluation leave there
├─ notebooks # A collection of notebooks that allow result exploration and network debugging
├─ docker # Docker image that can be used for inference or training
├─ docs # All the doc
├─ eval.py # Eval script
├─ find_neighbour_dist.py # Script to find optimal #neighbours within neighbour search operations
├─ forward_scripts # Script that runs a forward pass on possibly non annotated data
├─ outputs # All outputs from your runs sorted by date
├─ scripts # Some scripts to help manage the project
├─ torch_points3d
├─ core # Core components
├─ datasets # All code related to datasets
├─ metrics # All metrics and trackers
├─ models # All models
├─ modules # Basic modules that can be used in a modular way
├─ utils # Various utils
└─ visualization # Visualization
├─ test
└─ train.py # Main script to launch a training作为一般理念,我们已按任务将数据集和模型拆分。例如,数据集有五个子文件夹:
每个文件夹包含与每个任务相关的数据集。
请参阅我们的文档,以直接从API访问其中一些模型,并查看我们的KPCONV和RSCONV的示例笔记本,以获取更多详细信息。
任务 | 例子 |
|---|---|
分类 /零件分段 | 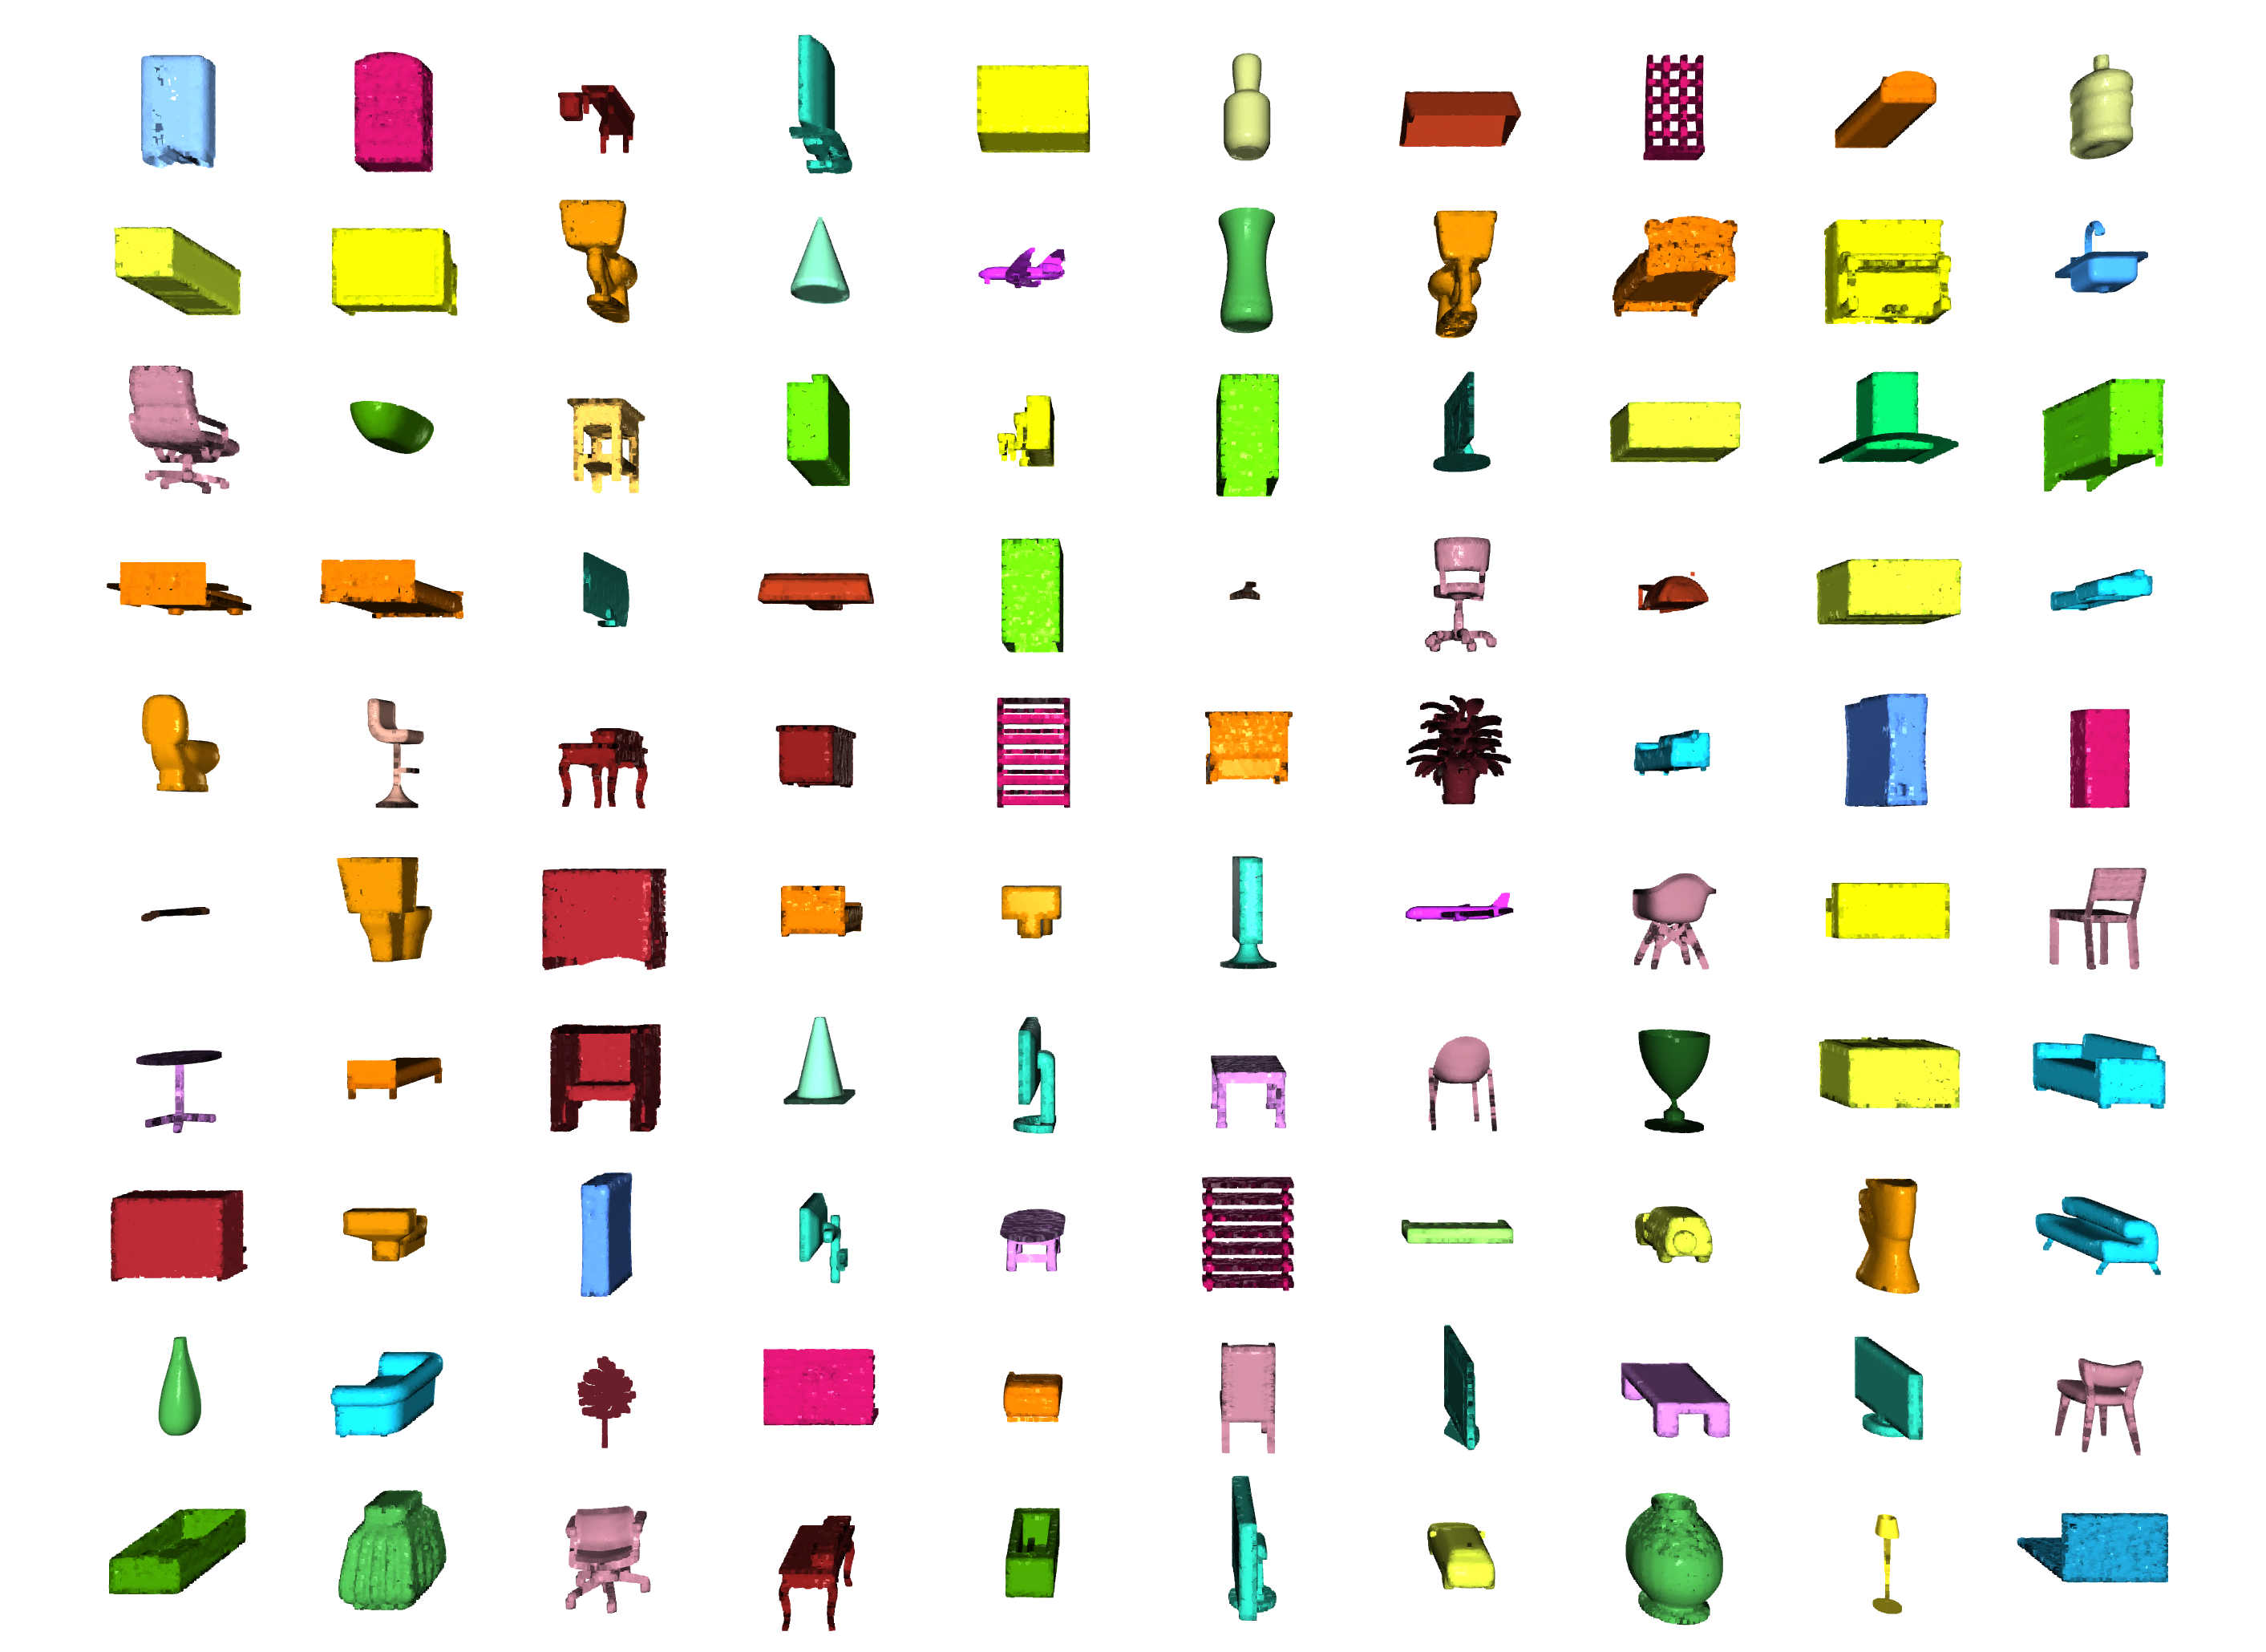 |
分割 | 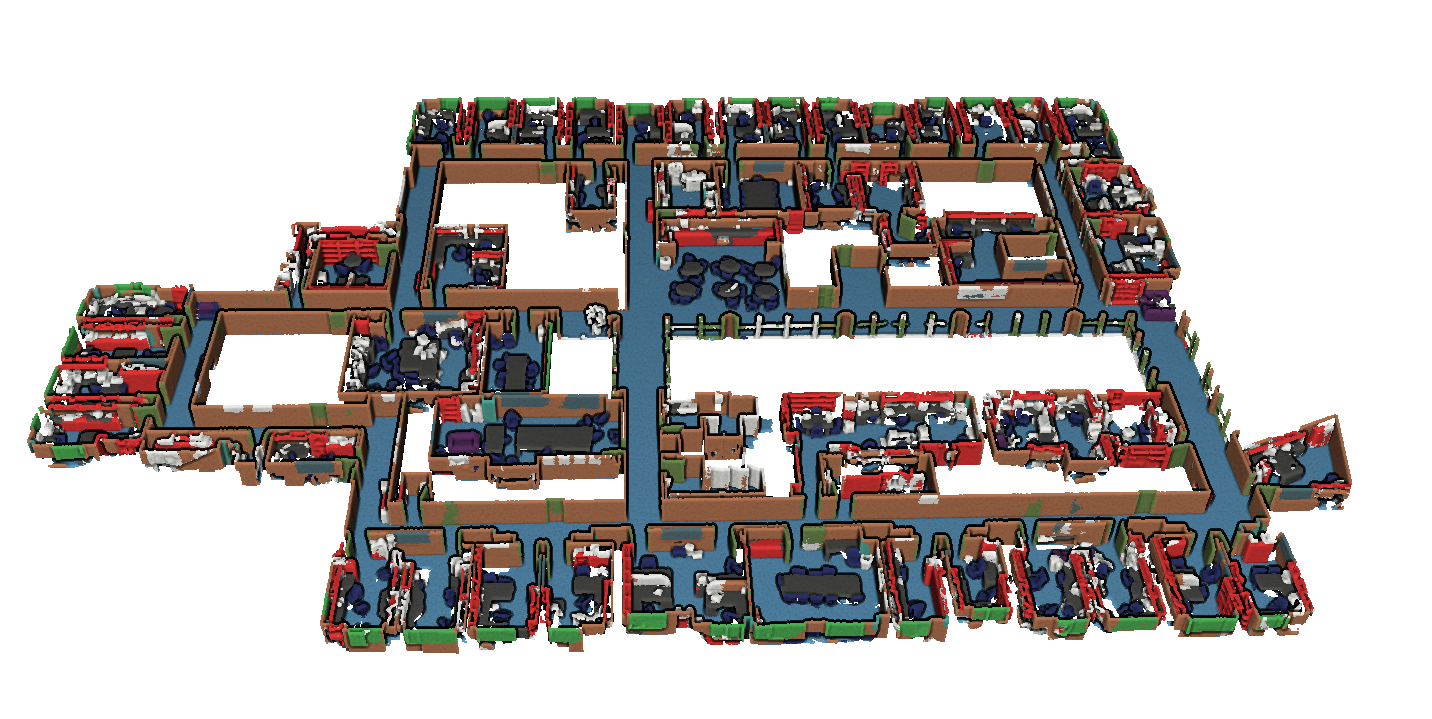 |
对象检测 | 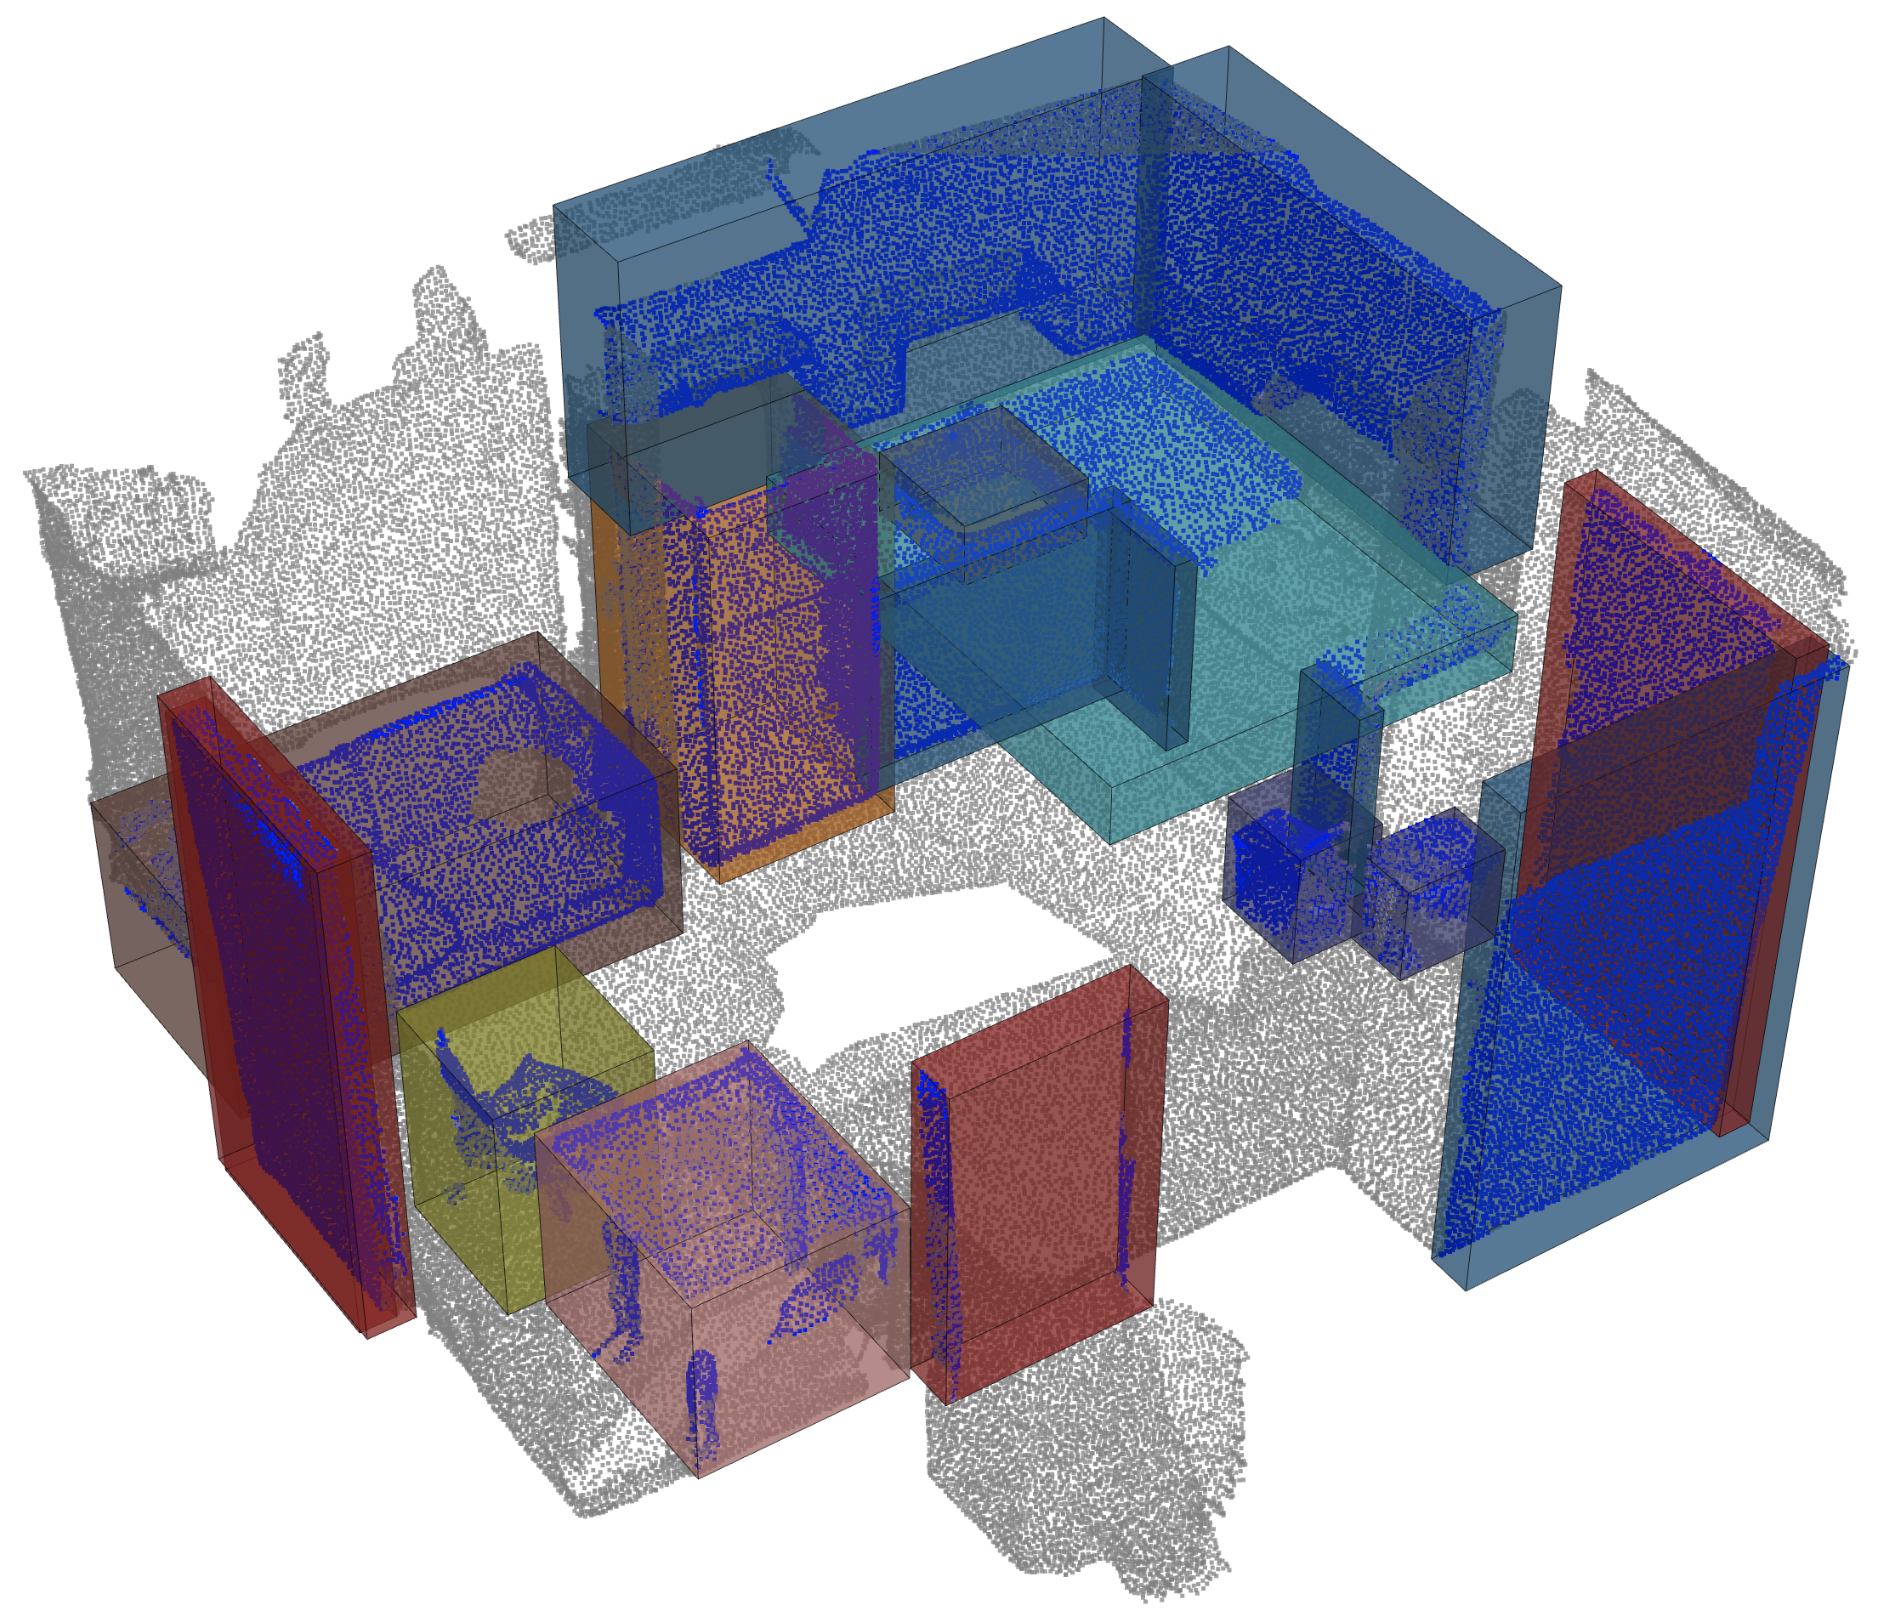 |
全景分割 | 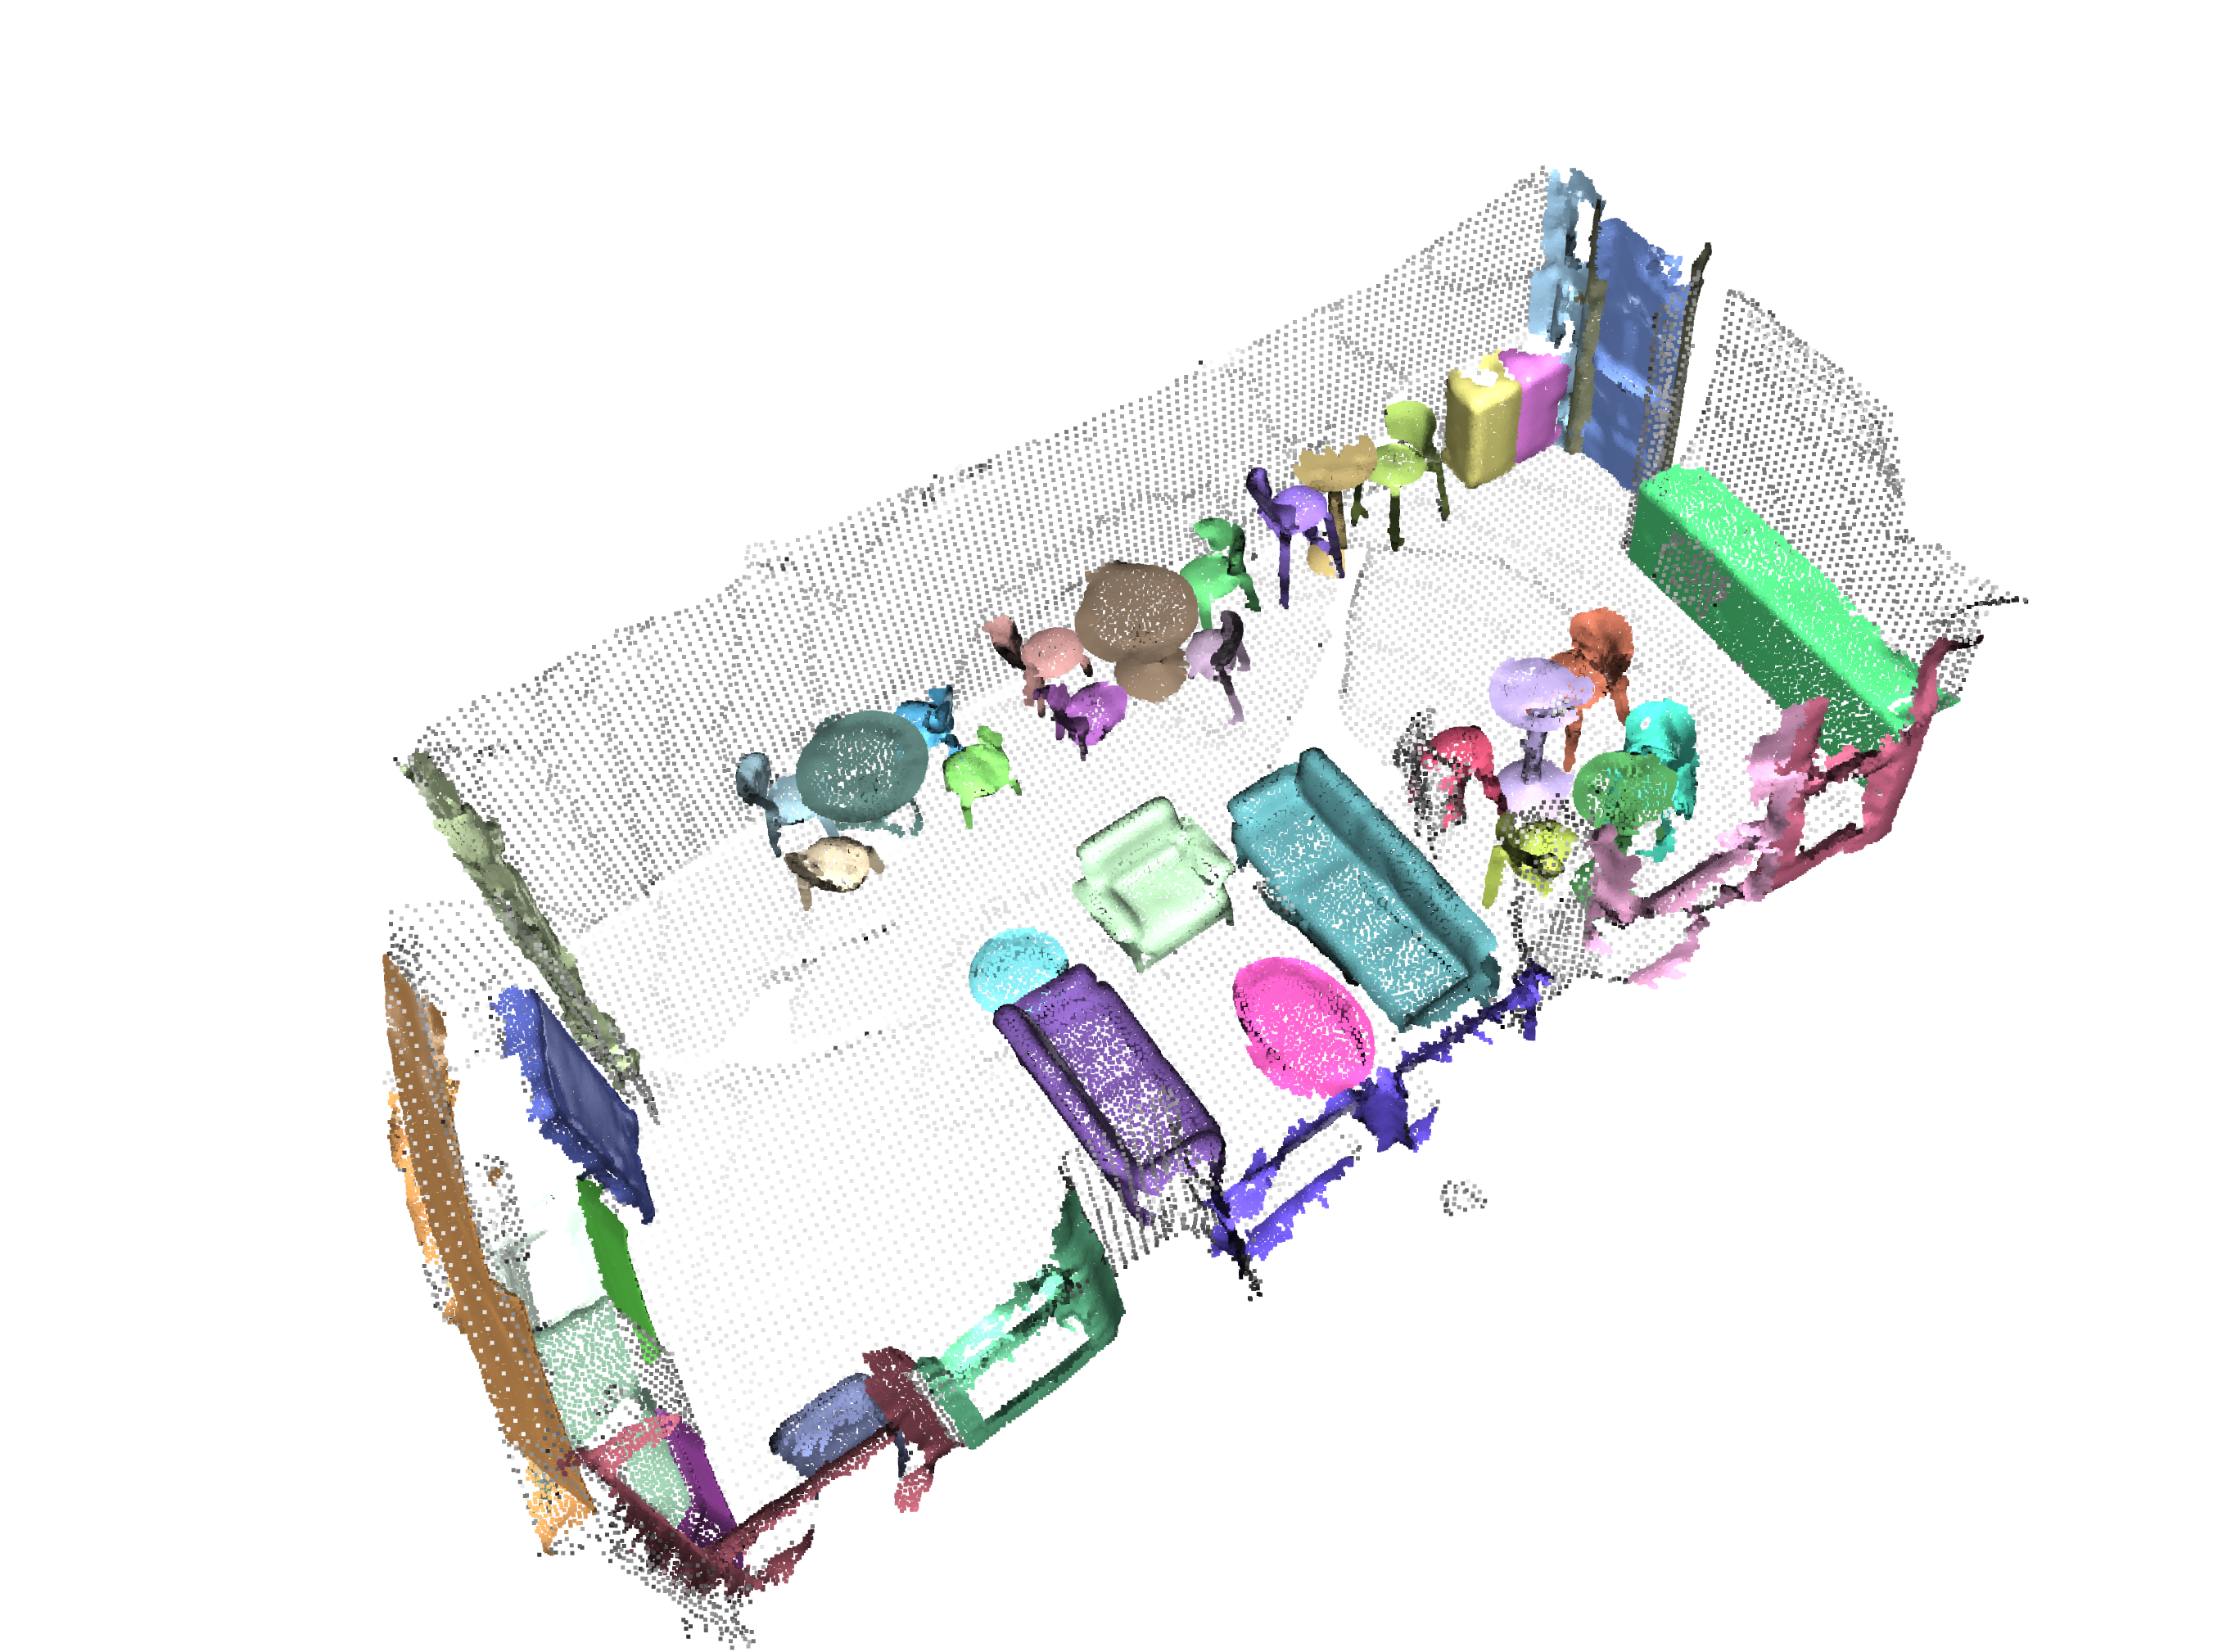 |
登记 |  |
Angela Dai等人的扫描仪。 :SCANNET:室内场景丰富的3D重建
来自IRO Armeni等人的S3DIS 。 :接头2d-3d-semantic数据,用于室内场景的理解
 * S3DIS 1x1
* S3DIS Room
* S3DIS Fused - Sphere | Cylinder
* S3DIS Fused - Sphere | Cylinder
来自Andy Zeng等人的3DMatch 。 :3DMatch:从RGB-D重建中学习本地几何描述符
Simone Fontana等人的Iralab基准测试。 :点云注册算法的基准,该算法由以下数据组成:
A. Geiger等人的Kitti Odometry具有更正的姿势(感谢 @humanpose1):我们准备好进行自动驾驶了吗? Kitti Vision基准套件
目前,我们支持Minkowski Engine> V0.5和Torchsparse> = V1.4.0作为稀疏卷积的后端。这些软件包需要独立于Torch Points3D安装,请按照安装说明和对各自存储库的说明进行故障排除。目前, MinkowskiEngine在这里见(谢谢Chris Choy)展示了更快的训练。请注意, torchsparse仍在Beta中,不支持CPU培训。
一旦设置了这两个稀疏卷积框架之一,您可以开始使用高级来定义UNET主链或简单的编码器:
 from torch_points3d . applications . sparseconv3d import SparseConv3d

model = SparseConv3d ( "unet" , input_nc = 3 , output_nc = 5 , num_layers = 4 , backend = "torchsparse" ) # minkowski by default您还可以使用torch_points3d/modules/SparseConv3d/nn中提供的模块来组装自己的网络。例如,如果您想使用torchsparse后端,则可以执行以下操作:
 import torch_points3d . modules . SparseConv3d as sp3d

sp3d . nn . set_backend ( "torchsparse" )
conv = sp3d . nn . Conv3d ( 10 , 10 )
bn = sp3d . nn . BatchNorm ( 10 )混合精度可以通过在float16中执行稀疏卷积,合并和梯度OPS来使GPU上的记忆较低,并稍微更快。目前,与Torchsparse后端在SparseConv3d网络上进行CUDA培训的混合精度培训。要启用混合精度,请确保您拥有带有pip install --upgrade git+https://github.com/mit-han-lab/torchsparse.git的最新版本的Torchsparse。然后,在培训配置文件中设置training.enable_mixed=True 。如果满足所有条件,那么当您开始培训时,您会看到一个日志条目说明:
[torch_points3d.models.base_model][INFO] - Model will use mixed precision
但是,如果您尝试使用不支持的后端使用混合精度培训,您将看到:
[torch_points3d.models.base_model][WARNING] - Mixed precision is not supported on this model, using default precision...
PretrainedRegistry使任何人都可以添加自己的预培训模型,并仅使用2行代码re-create它们,以finetunning或production目的。
[You]使用wandb激活( wandb.log=True )启动模型培训[TorchPoints3d]一旦训练完成, TorchPoints3d将在我们的自定义检查点中将训练的型号上传到WANDB中。[You]在PretainedRegistry中,在其属性MODELS中添加一个key-value pair 。 key应描述您的模型,数据集和培训超参数(可能是最佳模型), value应为url引用WANDB上的.pt文件。示例:键: pointnet2_largemsg-s3dis-1和url值: https://api.wandb.ai/files/loicland/benchmark-torch-points-3d-s3dis/1e1p0csk/pointnet2_largemsg.pt pointnet2_largemsg.pt键DESRIBES pointnet2 largemsg trained on s3dis fold 1 。
[Anyone]通过使用PretainedRegistry Registry类并提供key ,将downloaded相关的模型权重,并且预训练的模型将ready to use 。 [ In ]:
from torch_points3d . applications . pretrained_api import PretainedRegistry
model = PretainedRegistry . from_pretrained ( "pointnet2_largemsg-s3dis-1" )
print ( model . wandb )
print ( model . print_transforms ())
[ Out ]:
== == == == == == == == == == == == == == == == == == == == == == == == == = WANDB URLS == == == == == == == == == == == == == == == == == == == == == == == == == == ==
WEIGHT_URL : https : // api . wandb . ai / files / loicland / benchmark - torch - points - 3 d - s3dis / 1e1 p0csk / pointnet2_largemsg . pt
LOG_URL : https : // app . wandb . ai / loicland / benchmark - torch - points - 3 d - s3dis / runs / 1e1 p0csk / logs
CHART_URL : https : // app . wandb . ai / loicland / benchmark - torch - points - 3 d - s3dis / runs / 1e1 p0csk
OVERVIEW_URL : https : // app . wandb . ai / loicland / benchmark - torch - points - 3 d - s3dis / runs / 1e1 p0csk / overview
HYDRA_CONFIG_URL : https : // app . wandb . ai / loicland / benchmark - torch - points - 3 d - s3dis / runs / 1e1 p0csk / files / hydra - config . yaml
OVERRIDES_URL : https : // app . wandb . ai / loicland / benchmark - torch - points - 3 d - s3dis / runs / 1e1 p0csk / files / overrides . yaml
== == == == == == == == == == == == == == == == == == == == == == == == == == == == == == == == == == == == == == == == == == == == == == == == == == == == == == == == == == ==
pre_transform = None
test_transform = Compose ([
FixedPoints ( 20000 , replace = True ),
XYZFeature ( axis = [ 'z' ]),
AddFeatsByKeys ( rgb = True , pos_z = True ),
Center (),
ScalePos ( scale = 0.5 ),
])
train_transform = Compose ([
FixedPoints ( 20000 , replace = True ),
RandomNoise ( sigma = 0.001 , clip = 0.05 ),
RandomRotate (( - 180 , 180 ), axis = 2 ),
RandomScaleAnisotropic ([ 0.8 , 1.2 ]),
RandomAxesSymmetry ( x = True , y = False , z = False ),
DropFeature ( proba = 0.2 , feature = 'rgb' ),
XYZFeature ( axis = [ 'z' ]),
AddFeatsByKeys ( rgb = True , pos_z = True ),
Center (),
ScalePos ( scale = 0.5 ),
])
val_transform = Compose ([
FixedPoints ( 20000 , replace = True ),
XYZFeature ( axis = [ 'z' ]),
AddFeatsByKeys ( rgb = True , pos_z = True ),
Center (),
ScalePos ( scale = 0.5 ),
])
inference_transform = Compose ([
FixedPoints ( 20000 , replace = True ),
XYZFeature ( axis = [ 'z' ]),
AddFeatsByKeys ( rgb = True , pos_z = True ),
Center (),
ScalePos ( scale = 0.5 ),
])
pre_collate_transform = Compose ([
PointCloudFusion (),
SaveOriginalPosId ,
GridSampling3D ( grid_size = 0.04 , quantize_coords = False , mode = mean ),
])我们使用诗歌来管理包裹。为了开始,请克隆此存储库,然后从仓的根部运行以下命令
poetry install --no-root
这将在新的虚拟环境中安装所有必需的依赖项。
激活环境
poetry shell您可以通过运行来检查安装是否成功
python -m unittest -v对于pycuda支持(仅需要注册任务):
pip install pycudapoetry run python train.py task=segmentation models=segmentation/pointnet2 model_name=pointnet2_charlesssg data=segmentation/shapenet-fixed你应该看到这样的东西
PointNet ++的配置是如何定义模型并如下:
 # PointNet++: Deep Hierarchical Feature Learning on Point Sets in a Metric Space (https://arxiv.org/abs/1706.02413)
# Credit Charles R. Qi: https://github.com/charlesq34/pointnet2/blob/master/models/pointnet2_part_seg_msg_one_hot.py

pointnet2_onehot :
  architecture : pointnet2.PointNet2_D
  conv_type : " DENSE "
  use_category : True
  down_conv :
    module_name : PointNetMSGDown
    npoint : [1024, 256, 64, 16]
    radii : [[0.05, 0.1], [0.1, 0.2], [0.2, 0.4], [0.4, 0.8]]
    nsamples : [[16, 32], [16, 32], [16, 32], [16, 32]]
    down_conv_nn :
      [
        [[FEAT, 16, 16, 32], [FEAT, 32, 32, 64]],
        [[32 + 64, 64, 64, 128], [32 + 64, 64, 96, 128]],
        [[128 + 128, 128, 196, 256], [128 + 128, 128, 196, 256]],
        [[256 + 256, 256, 256, 512], [256 + 256, 256, 384, 512]],
      ]
  up_conv :
    module_name : DenseFPModule
    up_conv_nn :
      [
        [512 + 512 + 256 + 256, 512, 512],
        [512 + 128 + 128, 512, 512],
        [512 + 64 + 32, 256, 256],
        [256 + FEAT, 128, 128],
      ]
    skip : True
  mlp_cls :
    nn : [128, 128]
dropout : 0.5 我们提供一个脚本,用于在可能不会注释的自定义数据上运行给定的预训练模型。您将在Shapenet上找到一个示例,以进行零件分割任务。就像代码库中的其余部分一样,大多数自定义都通过配置文件发生,并且提供的示例可以扩展到其他数据集。您也可以轻松地从那里创建自己的。回到部分分段任务,说您有一个装满了飞机的点云的文件夹,并且拥有在飞机上训练的模型的检查站,并且可能会编辑config.yaml和shapenet.yaml。
python forward_scripts/forward.py向前运行的结果将放置在指定的output_folder中,您可以使用提供的笔记本探索结果。下面是使用在帽子上训练的模型的结果,只是找到飞机和盖的部分。
最后,对于有兴趣将其模型部署到生产环境中的人们,我们提供了一个Dockerfile以及一个构建脚本。假设您已经培训了一个用于语义细分的网络,该网络给出了权重<outputfolder/weights.pt> ,以下命令将为您构建Docker映像:
 cd docker
./build.sh outputfolder/weights.pt然后,您可以使用它在input_path中的所有点云上运行前向通行证,并在output_path中生成结果
docker run -v /test_data:/in -v /test_data/out:/out pointnet2_charlesssg:latest python3 forward_scripts/forward.py dataset=shapenet data.forward_category=Cap input_path= " /in " output_path= " /out " -v选项将本地目录安装到容器的文件系统上。例如,在上面的命令行中, /test_data/out将安装在位置/out 。结果,所有在计算机上的文件夹/test_data/out中/out提供所有文件。
我们建议使用snakeviz和cProfile
使用CPROFILE介绍您的代码
poetry run python -m cProfile -o {your_name}.prof train.py ... debugging.profiling=True
并使用Snakeviz可视化结果。
snakeviz {your_name}.prof
也可以使用torch.utils.bottleneck
python -m torch.utils.bottleneck /path/to/source/script.py [args]
确保安装了至少pytorch 1.8.0,并验证cuda/bin and cuda/include是否分别在您的$PATH和$CPATH中,例如:
 $ python -c "import torch; print(torch.__version__)"
>>> 1.8.0

$ echo $PATH
>>> /usr/local/cuda/bin:...

$ echo $CPATH
>>> /usr/local/cuda/include:...
当我们更新使用的Pytorch版本时,需要重新安装编译的软件包,否则您将遇到一个看起来像这样的错误:
... scatter_cpu.cpython-36m-x86_64-linux-gnu.so: undefined symbol: _ZN3c1012CUDATensorIdEv
以下库可能会发生这种情况:
解决此操作的一种简单方法是使用Virtual Env激活运行以下命令:
 pip uninstall torch-scatter torch-sparse torch-cluster torch-points-kernels -y
rm -rf ~/.cache/pip
poetry install
当试图在GPU上运行代码与用于编译torch-points-kernels库的代码时,可能会发生这种情况。设置TORCH_CUDA_ARCH_LIST环境变量之后,卸载torch-points-kernels ,清除缓存和重新安装。例如,使用Tesla T4(Turing 7.5)编译并在Tesla V100(Volta 7.0)上运行代码:
export TORCH_CUDA_ARCH_LIST="7.0;7.5"
有关更多体系结构的兼容性,请参见此有用的图表。
提高OSError: [WinError 6] The handle is invalid / wandb: ERROR W&B process failed to launch WANDB,目前在Windows上损坏了WandB(请参阅此问题),解决方法是使用命令行参数wandb.log=false
我们提供了一个基于笔记本的Pyvista和面板,可让您在视觉上探索过去的实验。使用Jupyter Lab时,您必须安装一个扩展名:
jupyter labextension install @pyviz/jupyterlab_pyviz
通过笔记本电脑运行,您应该看到一个仪表板启动,看起来如下:
欢迎捐款!唯一的问题是您坚持样式,并在添加更多功能时添加测试!
对于样式,您可以使用预先承诺的挂钩来帮助您:
pre-commit install
一系列检查将为您运行,您可能必须再次将固定文件添加到藏匿的文件中。
在DocStrings方面,我们使用Numpy样式Docstrings,对于那些使用Visual Studio代码的人来说,有一个很棒的扩展名可以帮助您。安装它并将格式设置为numpy,您应该很好!
最终,如果您想与我们直接聊天,请随时加入我们的Slack,只需向我们发送电子邮件,我们会添加您。
如果您发现我们的工作有用,请随时引用:
 @inproceedings{
  tp3d,
  title={Torch-Points3D: A Modular Multi-Task Frameworkfor Reproducible Deep Learning on 3D Point Clouds},
  author={Chaton, Thomas and Chaulet Nicolas and Horache, Sofiane and Landrieu, Loic},
  booktitle={2020 International Conference on 3D Vision (3DV)},
  year={2020},
  organization={IEEE},
  url = {url{https://github.com/nicolas-chaulet/torch-points3d}}
}
并且还请引用您在实验中使用的模型或数据集的引用!


