ControlNet for Diffusers
1.0.0
이 저장소는 WebUI 대신 Diffuser 프레임 워크에서 Basemodel을 사용하여 Controlnet을 사용하는 개발자에게 가장 간단한 자습서 코드를 제공합니다. 우리의 작품은 다른 훌륭한 작품을 많이 구축합니다. 이 작품은 약간의 시도를했지만 디퓨저에서 다양한 Controlnet을 지원하기위한 튜토리얼은 없습니다.
우리는 또한 Diffusers, Lora-for-diffusers를 지원했습니다. 그것이 당신에게 Helful이라면 우리에게 별을주는 것을 의미하지 마십시오.
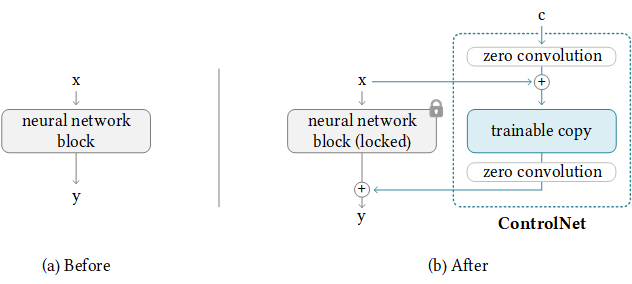
우리의 목표는 Controlnet의베이스 모델을 대체하고 Diffusers 프레임 워크에서 추론하는 것입니다. 원래 Controlnet은 Pytorch_lightning에서 훈련을 받고 있으며 Basemodel로 안정된 확산 -1.5 만있는 방출 된 가중치. 그러나 사용자는 SD-1.5 대신 자체베이스 모델을 채택하는 것이 더 유연합니다. 이제 V3를 예로 들어 보겠습니다. 우리는 이것 (controlnet-anthingv3)을 단계별로 달성하는 방법을 보여줄 것입니다. 우리는 Colab 데모를 제공하지만 더 큰 RAM을 가진 Colab Pro 사용자에게만 적용됩니다.
다행스럽게도 Controlnet은 이미 ControlNet을 다른 커뮤니티 모델로 전송하기위한 지침을 제공했습니다. 뒤의 논리는 다음과 같습니다. 여기서 추가 제어 중량을 유지하고베이스 모드 만 교체합니다. Controlnet은 Basemodel에 약간의 기차가 많은 무게를 가질 수 있으므로 항상 작동하지 않을 수 있습니다.
NewBaseModel-ControlHint = NewBaseModel + OriginalBaseModel-ControlHint - OriginalBaseModel먼저 Controlnet 에서이 repo를 복제합니다.
git clone https://github.com/lllyasviel/ControlNet.git
cd ControlNet
그런 다음 OriginalBasemodel (Path_SD15), OriginalBasemodel-Controlhint (Path_SD15_With_Control), Newbasemodel (Path_Input)에 필요한 가중치를 준비해야합니다. 당신은 중량을 따르는 것만 다운로드하면됩니다. 예를 들어 포즈를 ControlHint로, 예를 들어 V3를 사용합니다. 우리는 모든 무게를 ./models 안에 넣었습니다.
path_sd15 = ' ./models/v1-5-pruned.ckpt '
path_sd15_with_control = ' ./models/control_sd15_openpose.pth '
path_input = ' ./models/anything-v3-full.safetensors '
path_output = ' ./models/control_any3_openpose.pth '
마지막으로 직접 실행할 수 있습니다
python tool_transfer_control.py성공하면 새로운 모델을 얻게됩니다. 이 모델은 이미 Controlnet Codebase에서 사용할 수 있습니다.
models/control_any3_openpose.pth다른 모델로 시도하려면 자신의 path_sd15_with_control 및 path_input 만 정의 할 수 있습니다. Path_Input이 디퓨저로 훈련 된 경우 convert_diffusers_to_original_stable_diffusion.py를 사용하여 먼저 SAFETENSORS로 변환 할 수 있습니다.
Takuma Mori는이 최근 PR에서이를 지원하여이를 쉽게 달성 할 수 있도록 감사했습니다. 여전히 비정규 적이므로 불안정 할 수 있으므로 특정 커밋 버전을 사용해야합니다. 우리는 Diffusers가 20123 년 3 월 2 일에 PR을 병합했으며 곧 튜토리얼을 재구성 할 것입니다.
git clone https://github.com/takuma104/diffusers.git
cd diffusers
git checkout 9a37409663a53f775fa380db332d37d7ea75c915
pip install .
단계 (1)에서 생성 된 모델의 경로가 주어지면
python ./scripts/convert_controlnet_to_diffusers.py --checkpoint_path control_any3_openpose.pth --dump_path control_any3_openpose --device cpuControl_any3_openpose에 저장된 모델이 있습니다. 이제 정기적으로 테스트 할 수 있습니다.
from diffusers import StableDiffusionControlNetPipeline
from diffusers . utils import load_image
pose_image = load_image ( 'https://huggingface.co/takuma104/controlnet_dev/resolve/main/pose.png' )
pipe = StableDiffusionControlNetPipeline . from_pretrained ( "control_any3_openpose" ). to ( "cuda" )
pipe . safety_checker = lambda images , clip_input : ( images , False )
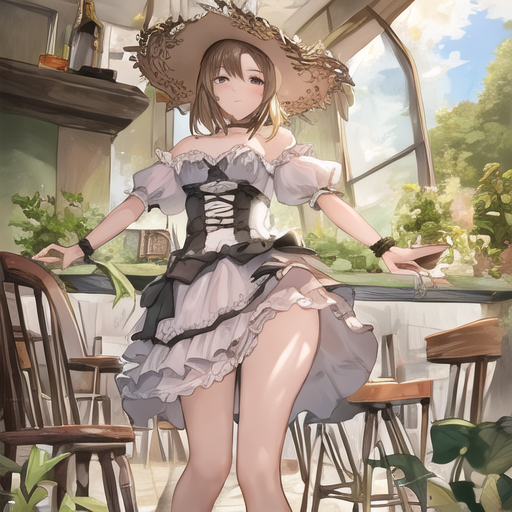
image = pipe ( prompt = "1gril,masterpiece,graden" , controlnet_hint = pose_image ). images [ 0 ]
image . save ( "generated.png" )포즈가 어렵 기 때문에 생성 된 결과는 충분하지 않을 수 있습니다. 따라서 모든 것이 잘 진행되도록하기 위해 포즈 메이커를 통해 일반 포즈를 생성하거나 제공된 포즈 이미지를 ./images/pose.png로 사용하는 것이 좋습니다.

이는 안정적인 확산과 같은 전체 이미지 대신 대상 영역 만 수정할 수있는 기능을 갖춘 Controlnet을 지원하는 것입니다. 현재로서는 조건 (POSE, SEGNGINTATION MAP)을 미리 제공하지만 Controlnet에 사용되는 사전 훈련 된 검출기를 사용할 수 있습니다.
우리는 사용에 필요한 파이프 라인을 제공했습니다. 그러나이 파일은 완전한 테스트없이 깨지기 쉬우므로 나중에 Diffusers 프레임 워크에서 지원하는 것을 고려할 것입니다. 또한, 우리는 Controlnet (SD1.5 기반)이 안정적인 분해 -2- 인화와 호환되지 않는다는 것을 알 수 있습니다. 일부 레이어는 다른 모듈과 치수를 가지므로 무게를 강제로로드하고 비 칭호 레이어를 건너 뛰면 결과가 나빠질 것입니다.
 # assume you already know the absolute path of installed diffusers
cp pipeline_stable_diffusion_controlnet_inpaint.py  PATH/pipelines/stable_diffusion
그런 다음 해당 파일 에서이 새로운 추가 파이프 라인을 가져와야합니다.
 PATH/pipelines/__init__.py
PATH/__init__.py
이제 우리는 달릴 수 있습니다
import torch
from diffusers . utils import load_image
from diffusers import StableDiffusionInpaintPipeline , StableDiffusionControlNetInpaintPipeline
# we have downloaded models locally, you can also load from huggingface
# control_sd15_seg is converted from control_sd15_seg.safetensors using instructions above
pipe_control = StableDiffusionControlNetInpaintPipeline . from_pretrained ( "./diffusers/control_sd15_seg" , torch_dtype = torch . float16 ). to ( 'cuda' )
pipe_inpaint = StableDiffusionInpaintPipeline . from_pretrained ( "./diffusers/stable-diffusion-inpainting" , torch_dtype = torch . float16 ). to ( 'cuda' )
# yes, we can directly replace the UNet
pipe_control . unet = pipe_inpaint . unet
pipe_control . unet . in_channels = 4
# we also the same example as stable-diffusion-inpainting
image = load_image ( "https://raw.githubusercontent.com/CompVis/latent-diffusion/main/data/inpainting_examples/overture-creations-5sI6fQgYIuo.png" )
mask = load_image ( "https://raw.githubusercontent.com/CompVis/latent-diffusion/main/data/inpainting_examples/overture-creations-5sI6fQgYIuo_mask.png" )
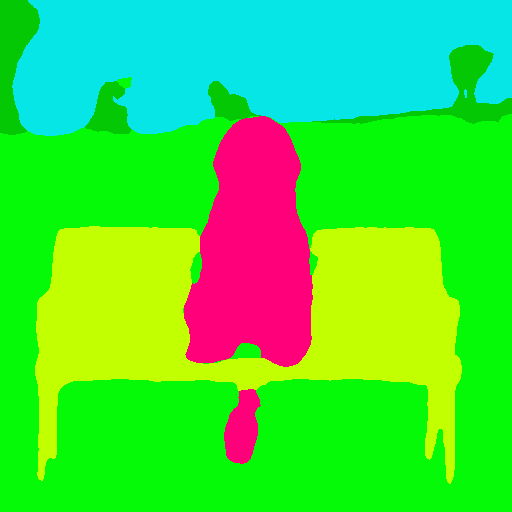
# the segmentation result is generated from https://huggingface.co/spaces/hysts/ControlNet
control_image = load_image ( 'tmptvkkr0tg.png' )
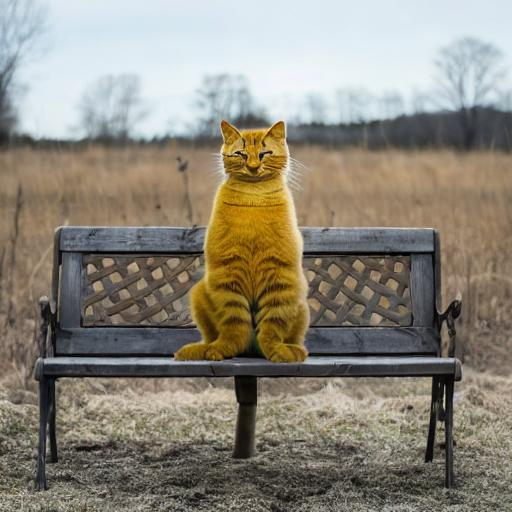
image = pipe_control ( prompt = "Face of a yellow cat, high resolution, sitting on a park bench" ,
negative_prompt = "lowres, bad anatomy, worst quality, low quality" ,
controlnet_hint = control_image ,
image = image ,
mask_image = mask ,
num_inference_steps = 100 ). images [ 0 ]
image . save ( "inpaint_seg.jpg" )다음 이미지는 원본 이미지, 마스크 이미지, 세분화 (Control Hint) 및 새로운 이미지를 생성합니다.
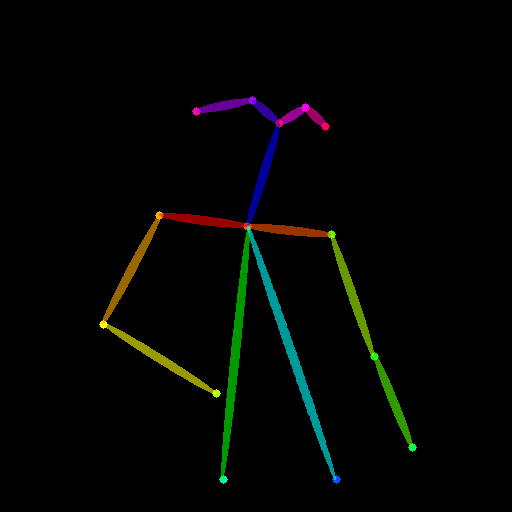
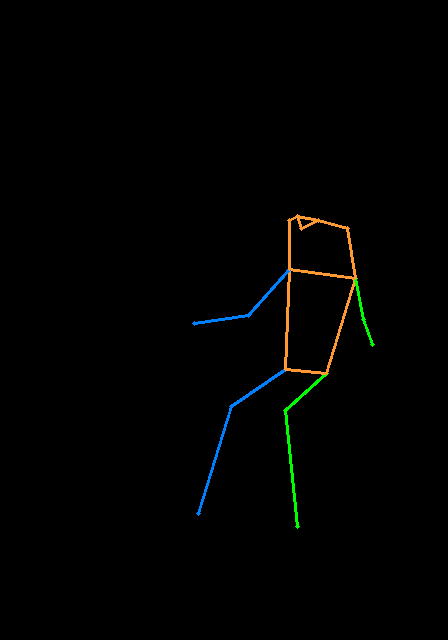
포즈를 제어 힌트로 사용할 수도 있습니다. 그러나 훈련 과정과 일치하는 Openpose 형식을 사용하는 것이 좋습니다. 로컬에서 Openpose를 설치하지 않고 몇 개의 이미지를 테스트하려면 ControlNet의 온라인 데모를 직접 사용하여 크기가 크기가 512x512 입력이 주어지면 포즈 이미지를 생성 할 수 있습니다.
 image = load_image ( "./images/pose_image.jpg" )
mask = load_image ( "./images/pose_mask.jpg" )
pose_image = load_image ( './images/pose_hint.png' )

image = pipe_control ( prompt = "Face of a young boy smiling" ,
                     negative_prompt = "lowres, bad anatomy, worst quality, low quality" ,
                     controlnet_hint = pose_image ,
                     image = image ,
                     mask_image = mask ,
                     num_inference_steps = 100 ). images [ 0 ]

image . save ( "inpaint_pos.jpg" )

IMG2IMG를 지원하기 위해 pipeline_stable_diffusion_controlnet_inpaint_img2img.py를 업로드했습니다. 이 섹션과 동일한 지시를 따를 수 있습니다.
T2i 어드 응용 프로그램과 유사하게 Controlnet은 입력으로 여러 제어 이미지를 지원합니다. 기본 모델이 얼어서 ControlNet1과 ControlNet2의 출력을 결합하여 UNET의 입력으로 사용할 수 있습니다. 여기서는 참조를 위해 의사 코드를 제공합니다. 아래와 같이 파이프 라인을 수정해야합니다.
control1 = controlnet1 ( latent_model_input , t , encoder_hidden_states = prompt_embeds , controlnet_hint = controlnet_hint1 )
control2 = controlnet2 ( latent_model_input , t , encoder_hidden_states = prompt_embeds , controlnet_hint = controlnet_hint2 )
# please note that the weights should be adjusted accordingly
control1_weight = 1.00 # control_any3_openpose
control2_weight = 0.50 # control_sd15_depth
merged_control = []
for i in range ( len ( control1 )):
merged_control . append ( control1_weight * control [ i ] + control2_weight * control_1 [ i ])
control = merged_control
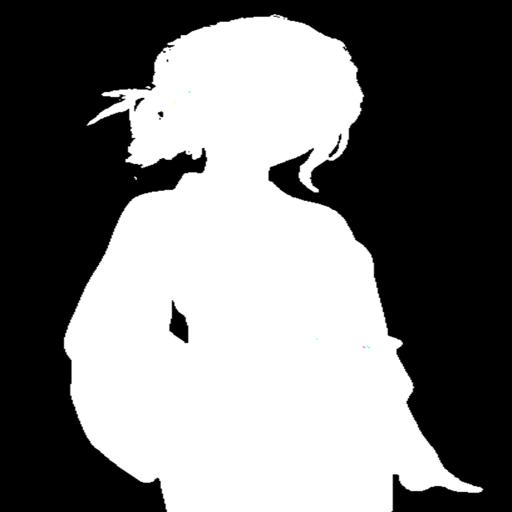
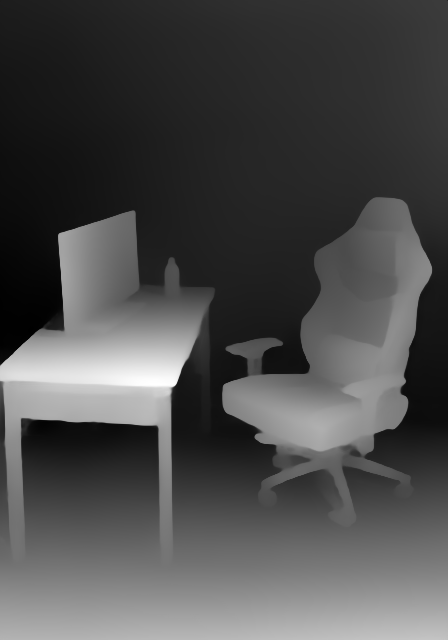
noise_pred = unet ( latent_model_input , t , encoder_hidden_states = prompt_embeds , cross_attention_kwargs = cross_attention_kwargs , control = control ). sample다음은 포즈와 깊이 맵을 사용하는 다중 제어의 예입니다. 제어 힌트입니다. 테스트 이미지는 모두 T2I 어드페이프로 인정됩니다.
이 repo를 피하기 위해 너무 부풀어 오르기 위해, 우리는 열차 컨트롤 넷-디 퍼스에 대한 훈련에 관한 자습서를 제공합니다.
우리는 먼저 훌륭한 작업에 대해 Controlnet의 저자에게 감사드립니다. 우리의 변환 코드는 여기에서 빌려 왔습니다. 또한 Diffusers 의이 풀 요청의 기여에 감사하여 Controlnet을 디퓨저에로드 할 수 있습니다.
레포는 여전히 활발한 개발 중이며, 사용할 때 문제가 있으면 자유롭게 문제를여십시오.


