SkeletonView
? 1.31.0
功能•指南•安裝•使用•其他•貢獻
? README提供其他語言:?? 。 ? 。 ? 。 ? 。 ? 。 ?
如今,幾乎所有應用程序都具有異步過程,例如API請求,長期運行過程等。當這些流程正常工作時,通常開發人員會放置加載視圖,以向用戶展示正在發生的事情。
Skeletonview已被構想以滿足這一需求,這是一種優雅的方式,向用戶展示正在發生的事情,並為內容準備等待的內容做好準備。
好好享受! ?
| SkeletonView指南 - 入門 | 如何在ikh4ever Studio中使用Swift 5.2中使用骨架視圖創建加載視圖 | 在應用程序(Swift 5)中創建骨骼加載視圖-Xcode 11,2020 by ios Academy | CómoCrearunaanimacióndeCarga de Datos en ios by Mouredev |
pod 'SkeletonView' github "Juanpe/SkeletonView"dependencies: [
. package ( url : " https://github.com/Juanpe/SkeletonView.git " , from : " 1.7.0 " )
]重要的!
由於版本1.30.0,
SkeletonView支持XCFrameWorks ,因此,如果要以XCFramework的形式安裝它,請改用此倉庫。
使用SkeletonView只需3個步驟:
1️⃣在適當的位置導入SkeletonView。
import SkeletonView 2️⃣現在,設置哪些視圖將是skeletonables 。您可以通過兩種方式實現這一目標:
使用代碼:
avatarImageView . isSkeletonable = true使用IB/故事板:
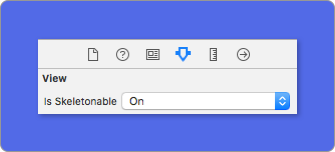
3️⃣一旦設置了視圖,就可以顯示骨架。為此,您有4個選擇:
 ( 1 ) view . showSkeleton ( )                 // Solid
( 2 ) view . showGradientSkeleton ( )         // Gradient
( 3 ) view . showAnimatedSkeleton ( )         // Solid animated
( 4 ) view . showAnimatedGradientSkeleton ( ) // Gradient animated
預覽
| 堅硬的 | 坡度 | 紮實的動畫 | 漸變動畫 |
 |  |  |  |
重要的!
SkeletonView是遞歸的,因此,如果要在所有可骨架視圖中顯示骨架,則只需要在主容器視圖中調用顯示方法即可。例如,使用UIViewControllers。
SkeletonView與UITableView和UICollectionView兼容。
uitableview
如果您想在UITableView中顯示骨架,則需要符合SkeletonTableViewDataSource協議。
 public protocol SkeletonTableViewDataSource : UITableViewDataSource {
    func numSections ( in collectionSkeletonView : UITableView ) -> Int // Default: 1
    func collectionSkeletonView ( _ skeletonView : UITableView , numberOfRowsInSection section : Int ) -> Int
    func collectionSkeletonView ( _ skeletonView : UITableView , cellIdentifierForRowAt indexPath : IndexPath ) -> ReusableCellIdentifier
    func collectionSkeletonView ( _ skeletonView : UITableView , skeletonCellForRowAt indexPath : IndexPath ) -> UITableViewCell ? // Default: nil
    func collectionSkeletonView ( _ skeletonView : UITableView , prepareCellForSkeleton cell : UITableViewCell , at indexPath : IndexPath )
}如您所見,此協議從UITableViewDataSource繼承,因此您可以用骨架協議替換此協議。
該協議具有某些方法的默認實現。例如,在運行時計算每個部分的行數:
 func collectionSkeletonView ( _ skeletonView : UITableView , numberOfRowsInSection section : Int ) -> Int
// Default:
// It calculates how many cells need to populate whole tableview
重要的!
如果您返回上述方法中的
UITableView.automaticNumberOfSkeletonRows,則其作用類似於默認行為(即它計算了填充整個tableview需要多少個單元格)。
您只需要實現一種方法來讓骨架知道單元格標識符。此方法沒有默認實現:
 func collectionSkeletonView ( _ skeletonView : UITableView , cellIdentifierForRowAt indexPath : IndexPath ) -> ReusableCellIdentifier {
   return " CellIdentifier "
}
默認情況下,圖書館從每個Indexpath中列出了單元格,但是如果您想在出現骨架之前進行一些更改,也可以這樣做:
 func collectionSkeletonView ( _ skeletonView : UITableView , skeletonCellForRowAt indexPath : IndexPath ) -> UITableViewCell ? {
    let cell = skeletonView . dequeueReusableCell ( withIdentifier : " CellIdentifier " , for : indexPath ) as? Cell
    cell ? . textField . isHidden = indexPath . row == 0
    return cell
}
如果您希望將Deque零件留到庫,則可以使用此方法配置單元格:
 func collectionSkeletonView ( _ skeletonView : UITableView , prepareCellForSkeleton cell : UITableViewCell , at indexPath : IndexPath ) {
    let cell = cell as? Cell
    cell ? . textField . isHidden = indexPath . row == 0
}此外,您可以將標頭和頁腳骨骼化。您需要符合SkeletonTableViewDelegate協議。
 public protocol SkeletonTableViewDelegate : UITableViewDelegate {
    func collectionSkeletonView ( _ skeletonView : UITableView , identifierForHeaderInSection section : Int ) -> ReusableHeaderFooterIdentifier ? // default: nil
    func collectionSkeletonView ( _ skeletonView : UITableView , identifierForFooterInSection section : Int ) -> ReusableHeaderFooterIdentifier ? // default: nil
}
重要的!
1️⃣如果您使用的是可分解的單元格(
tableView.rowHeight = UITableViewAutomaticDimension),則必須定義estimatedRowHeight。2️⃣當您在
UITableViewCell中添加元素時,應將其添加到contentView,而不是直接到單元格中。self . contentView . addSubview ( titleLabel ) ✅ self . addSubview ( titleLabel )
UicollectionView
對於UICollectionView ,您需要符合SkeletonCollectionViewDataSource協議。
 public protocol SkeletonCollectionViewDataSource : UICollectionViewDataSource {
    func numSections ( in collectionSkeletonView : UICollectionView ) -> Int  // default: 1
    func collectionSkeletonView ( _ skeletonView : UICollectionView , numberOfItemsInSection section : Int ) -> Int
    func collectionSkeletonView ( _ skeletonView : UICollectionView , cellIdentifierForItemAt indexPath : IndexPath ) -> ReusableCellIdentifier
    func collectionSkeletonView ( _ skeletonView : UICollectionView , supplementaryViewIdentifierOfKind : String , at indexPath : IndexPath ) -> ReusableCellIdentifier ? // default: nil
    func collectionSkeletonView ( _ skeletonView : UICollectionView , skeletonCellForItemAt indexPath : IndexPath ) -> UICollectionViewCell ?  // default: nil
    func collectionSkeletonView ( _ skeletonView : UICollectionView , prepareCellForSkeleton cell : UICollectionViewCell , at indexPath : IndexPath )
    func collectionSkeletonView ( _ skeletonView : UICollectionView , prepareViewForSkeleton view : UICollectionReusableView , at indexPath : IndexPath )
}該過程的其餘部分與UITableView相同
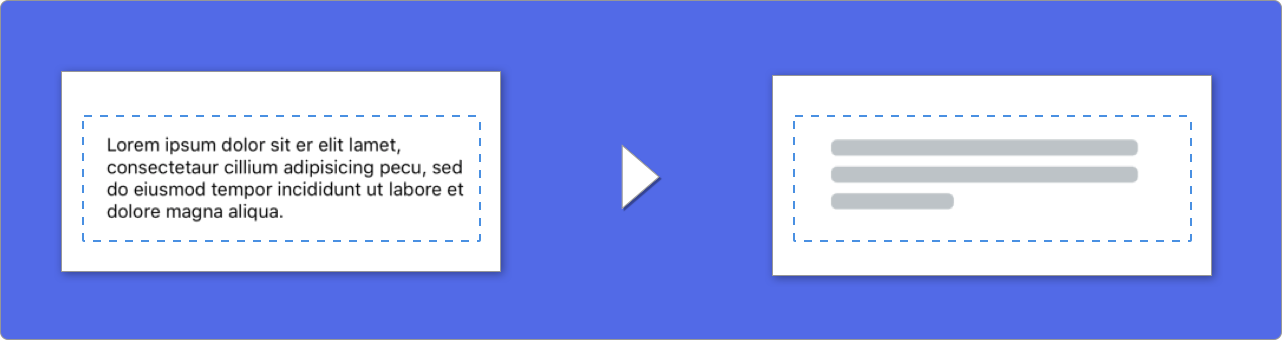
當使用文本元素時, SkeletonView繪製線以模擬文本。
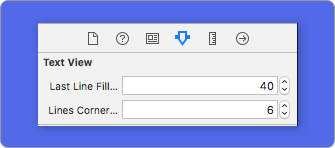
您可以為多線元素設置一些屬性。
| 財產 | 類型 | 預設 | 預覽 |
|---|---|---|---|
| LastLineFillpercent | CGFloat | 70 |  |
| 線cornerradius | Int | 0 | 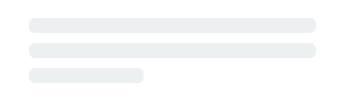 |
| 骨骼路線 | CGFloat | 10 | 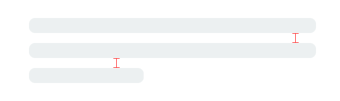 |
| 骨架padding劑 | UIEdgeInsets | .zero | 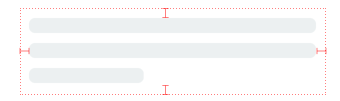 |
| SkeletontextlineHeight | SkeletonTextLineHeight | .fixed(15) | 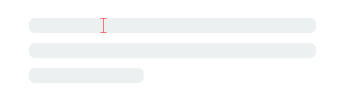 |
| Skeletontextnumberoflines | SkeletonTextNumberOfLines | .inherited | |
要使用代碼修改百分比或半徑,請設置屬性:
descriptionTextView . lastLineFillPercent = 50
descriptionTextView . linesCornerRadius = 5或者,如果您喜歡使用IB/故事板:
如何定義行數?
默認情況下,行數與numberOfLines屬性的值相同。而且,如果設置為零,它將計算需要多少行以填充整個骨架並繪製它。
但是,如果要設置特定數量的骨架線,則可以通過設置skeletonTextNumberOfLines屬性來完成。該屬性具有兩個可能的值,該inherited將返回numberOfLines值和custom(Int)該值返回指定為關聯值的線數。
例如:
label . skeletonTextNumberOfLines = 3 // .custom(3)
配x 棄用!UsefontlineHeight已被棄用。您可以使用SkeletonTextlineHeight :
descriptionTextView . skeletonTextLineHeight = . relativeToFont
重要的!
請注意,對於沒有多行的視圖,單行將被視為最後一行。
骨架具有默認外觀。因此,當您不指定顏色,梯度或多行屬性時, SkeletonView會使用默認值。
預設值:
UIColor.skeletonDefault (與.clouds相同但適應黑暗模式)SkeletonGradient(baseColor: .skeletonDefault)CGFloatCGFloatIntIntCGFloat (ibinspectable)(帶有角落的骨架視圖)要獲取這些默認值,您可以使用SkeletonAppearance.default 。使用此屬性,您也可以設置值:
 SkeletonAppearance . default . multilineHeight = 20
SkeletonAppearance . default . tintColor = . green
配x 棄用!UsefontlineHeight已被棄用。您可以使用textlineHeight :
SkeletonAppearance . default . textLineHeight = . relativeToFont
您可以確定骨骼有色的顏色。您只需要作為參數傳遞的顏色或梯度即可。
使用純色
view . showSkeleton ( usingColor : UIColor . gray ) // Solid
// or
view . showSkeleton ( usingColor : UIColor ( red : 25.0 , green : 30.0 , blue : 255.0 , alpha : 1.0 ) )
使用梯度
let gradient = SkeletonGradient ( baseColor : UIColor . midnightBlue )
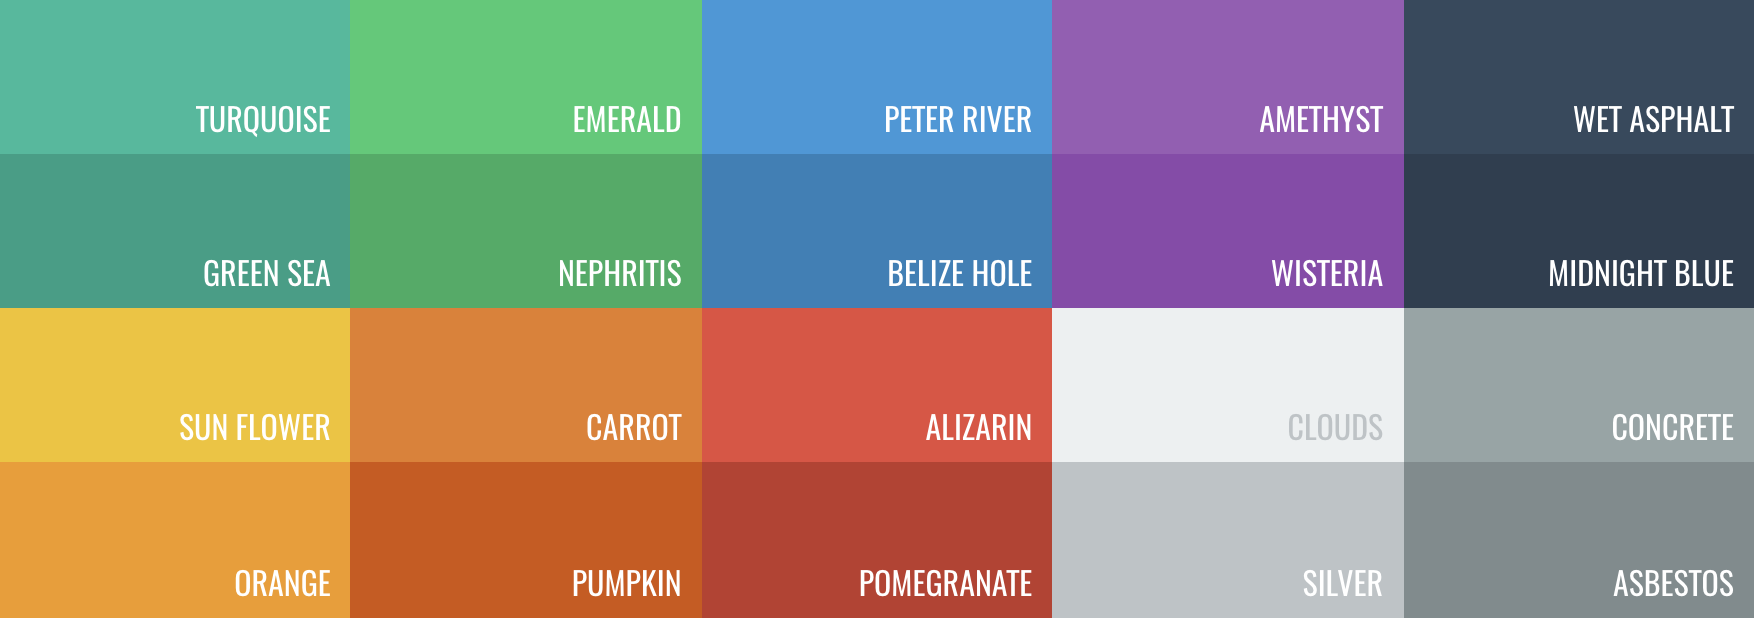
view . showGradientSkeleton ( usingGradient : gradient ) // Gradient此外, SkeletonView具有20種平面顏色?
UIColor.turquoise, UIColor.greenSea, UIColor.sunFlower, UIColor.flatOrange ...
SkeletonView具有兩個內置動畫,用於實心骨架的脈衝和梯度滑動。
此外,如果您想做自己的骨架動畫,那真的很容易。
Skeleton提供了showAnimatedSkeleton功能,該功能具有SkeletonLayerAnimation閉合,您可以在其中定義自定義動畫。
public typealias SkeletonLayerAnimation = ( CALayer ) -> CAAnimation您可以這樣調用函數:
view . showAnimatedSkeleton { ( layer ) -> CAAnimation in
  let animation = CAAnimation ( )
  // Customize here your animation

  return animation
}它SkeletonAnimationBuilder 。這是製造SkeletonLayerAnimation的建造者。
今天,您可以為梯度創建滑動動畫,決定方向並設置動畫的持續時間(默認= 1.5s)。
// func makeSlidingAnimation(withDirection direction: GradientDirection, duration: CFTimeInterval = 1.5) -> SkeletonLayerAnimation

let animation = SkeletonAnimationBuilder ( ) . makeSlidingAnimation ( withDirection : . leftToRight )
view . showAnimatedGradientSkeleton ( usingGradient : gradient , animation : animation ) GradientDirection是一個枚舉,有這些案例:
| 方向 | 預覽 |
|---|---|
| .leftright | 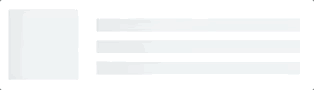 |
| 。右路 |  |
| .topbottom | 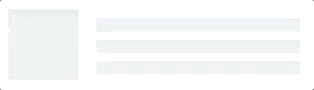 |
| .bottomtop | 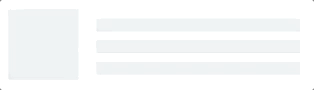 |
| .topleftbottomright | 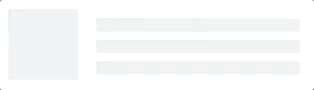 |
| .bottomrighttopleft | 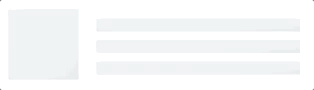 |
詭計!
存在另一種創建滑動動畫的方法,只需使用此快捷方式:
let animation = GradientDirection . leftToRight . slidingAnimation ( )
Skeletonview具有內置的過渡,以更平滑的方式顯示或隱藏骨架?
要使用過渡,只需將transition參數添加到您的showSkeleton()或hideSkeleton()函數中的過渡時間,例如:
view . showSkeleton ( transition : . crossDissolve ( 0.25 ) )     //Show skeleton cross dissolve transition with 0.25 seconds fade time
view . hideSkeleton ( transition : . crossDissolve ( 0.25 ) ) //Hide skeleton cross dissolve transition with 0.25 seconds fade time默認值是crossDissolve(0.25)
預覽
| 沒有任何 | 交叉溶解 |
 |  |
等級制度
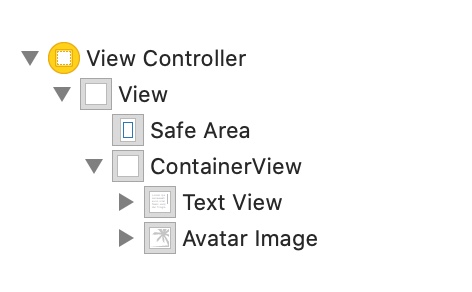
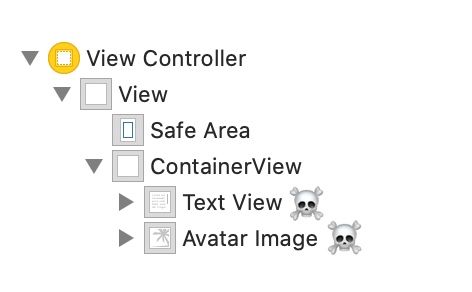
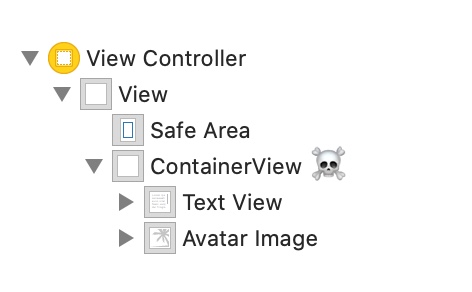
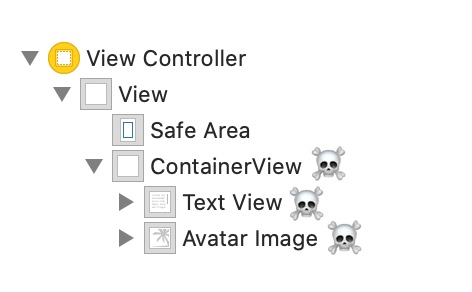
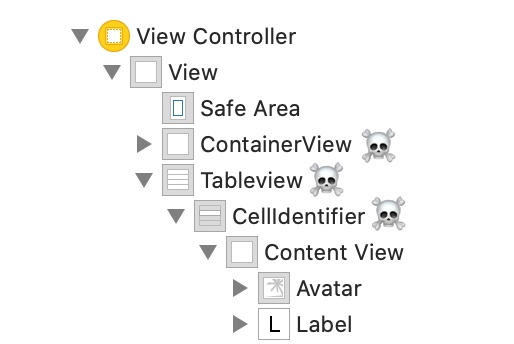
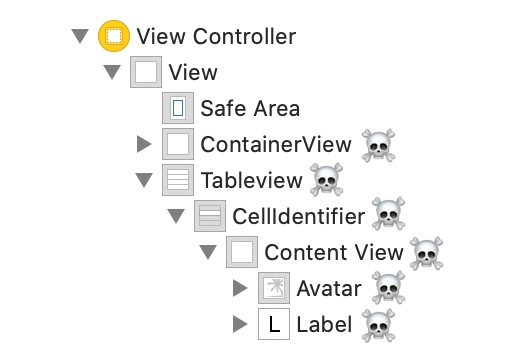
由於SkeletonView是遞歸的,我們希望骨骼非常有效,因此我們希望盡快停止遞歸。因此,您必須將容器視圖設置為Skeletonable視圖,因為一旦視圖不可骨骼,骨架就會停止尋找skeletonable子視圖,然後折斷遞歸。
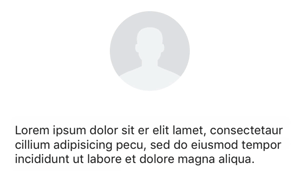
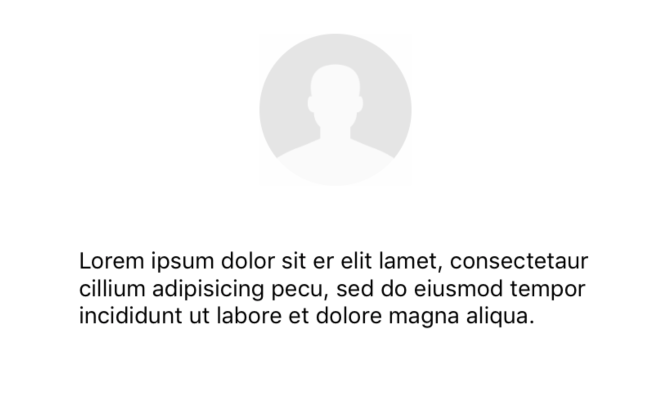
因為圖像價值一千個字:
在此示例中,我們有一個帶有ContainerView和UITableView UIViewController 。當視圖準備就緒時,我們使用此方法顯示骨骼:
view.showSkeleton()
isSkeletonable=☠️
| 配置 | 結果 |
|---|---|
 |  |
 | |
 |  |
 |  |
 |  |
 |  |
骨架視圖佈局
有時,骨架佈局可能不符合您的佈局,因為父視圖已更改。例如,旋轉設備。
您可以像這樣轉發骨架視圖:
 override func viewDidLayoutSubviews ( ) {
    view . layoutSkeletonIfNeeded ( )
}
重要的!
您不應該調用此方法。從版本1.8.1中,您無需調用此方法,庫會自動進行。因此,僅在需要手動更新骨架的佈局的情況下,才能使用此方法。
更新骨骼
您可以隨時更改骨架配置,例如其顏色,動畫等。使用以下方法:
 ( 1 ) view . updateSkeleton ( )                 // Solid
( 2 ) view . updateGradientSkeleton ( )         // Gradient
( 3 ) view . updateAnimatedSkeleton ( )         // Solid animated
( 4 ) view . updateAnimatedGradientSkeleton ( ) // Gradient animated
動畫開始時隱藏視圖
有時,當動畫啟動時,您想隱藏一些視圖,因此您可以使用快速的屬性來實現這一目標:
view . isHiddenWhenSkeletonIsActive = true // This works only when isSkeletonable = true當骨架處於活動狀態時,請勿修改用戶互動
默認情況下,用於骨架的項目禁用了用戶交互,但是如果您不想在骨架處於活動狀態時修改用戶交互指示器,則可以使用isUserInteractionDisabledWhenSkeletonIsActive屬性:
view . isUserInteractionDisabledWhenSkeletonIsActive = false // The view will be active when the skeleton will be active.不要使用標籤中的骨架線的字體線高度
虛假至禁用骨骼以自動調整到UILabel或UITextView的字體高度。默認情況下,將骨架線的高度自動調整至字體高度,以更準確地反映標籤rect中的文本,而不是使用邊界框。
label . useFontLineHeight = false延遲的表演骨骼
如果視圖迅速更新,則可以延遲骨骼的呈現。
 func showSkeleton ( usingColor : UIColor ,
                  animated : Bool ,
                  delay : TimeInterval ,
                  transition : SkeletonTransitionStyle )
func showGradientSkeleton ( usingGradient : SkeletonGradient ,
animated : Bool ,
delay : TimeInterval ,
transition : SkeletonTransitionStyle )偵錯
當某些事情不正常時,可以促進調試任務。 SkeletonView有一些新工具。
首先, UIView提供了帶有其骨骼信息的屬性:
var sk . skeletonTreeDescription : String此外,您可以激活新的調試模式。您只需添加環境變量SKELETON_DEBUG並激活它即可。
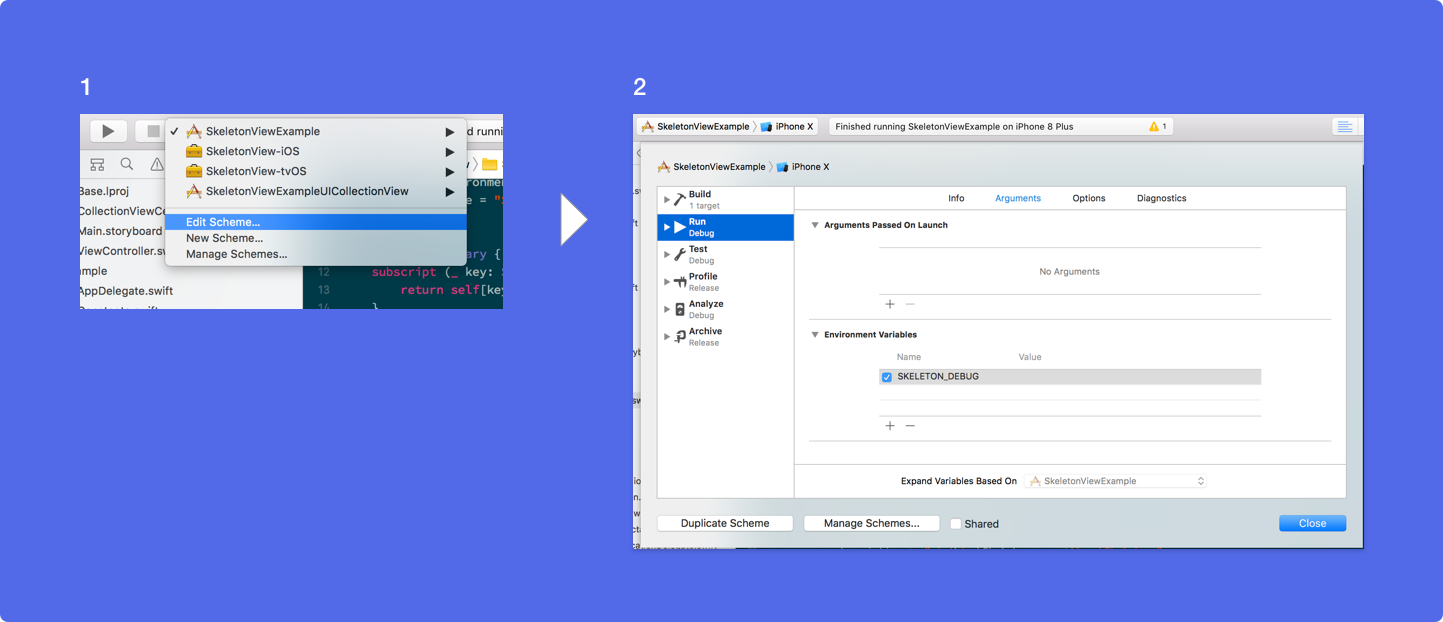
然後,當骨骼出現時,您可以在Xcode控制台中看到視圖層次結構。
 {
  "type" : "UIView", // UITableView, UILabel...
  "isSkeletonable" : true,
  "reference" : "0x000000014751ce30",
  "children" : [
    {
      "type" : "UIView",
      "isSkeletonable" : true,
      "children" : [ ... ],
      "reference" : "0x000000014751cfa0"
    }
  ]
}
支持的OS和SDK版本
這是一個開源項目,因此請隨時做出貢獻。如何?
查看所有貢獻者
有關更多信息,請閱讀貢獻指南。
沒有您的幫助,開源項目就不長。如果您發現SkeletonView很有用,請考慮通過成為贊助商來支持該項目。
通過GitHub贊助商❤️成為贊助商
JuanpeCatalán
 MIT License

Copyright (c) 2017 Juanpe Catalán

Permission is hereby granted, free of charge, to any person obtaining a copy
of this software and associated documentation files (the "Software"), to deal
in the Software without restriction, including without limitation the rights
to use, copy, modify, merge, publish, distribute, sublicense, and/or sell
copies of the Software, and to permit persons to whom the Software is
furnished to do so, subject to the following conditions:

The above copyright notice and this permission notice shall be included in all
copies or substantial portions of the Software.

THE SOFTWARE IS PROVIDED "AS IS", WITHOUT WARRANTY OF ANY KIND, EXPRESS OR
IMPLIED, INCLUDING BUT NOT LIMITED TO THE WARRANTIES OF MERCHANTABILITY,
FITNESS FOR A PARTICULAR PURPOSE AND NONINFRINGEMENT. IN NO EVENT SHALL THE
AUTHORS OR COPYRIGHT HOLDERS BE LIABLE FOR ANY CLAIM, DAMAGES OR OTHER
LIABILITY, WHETHER IN AN ACTION OF CONTRACT, TORT OR OTHERWISE, ARISING FROM,
OUT OF OR IN CONNECTION WITH THE SOFTWARE OR THE USE OR OTHER DEALINGS IN THE
SOFTWARE.


