SkeletonView
? 1.31.0
특징 • 가이드 • 설치 • 사용 • 기타 • 기여
? readme은 다른 언어로 제공됩니다 :? . ?? . ?? . ?? . ?? . ??
오늘날 거의 모든 앱에는 API 요청, 장기 실행 프로세스 등과 같은 비동기 프로세스가 있습니다. 프로세스가 작동하는 동안 일반적으로 개발자는로드 뷰를 설정하여 사용자에게 무언가가 진행되고 있음을 보여줍니다.
SkeletonView는 이러한 요구를 해결하기 위해 고안되었습니다. 사용자에게 무언가가 일어나고 있음을 보여주고 내용이 대기중인 내용을 준비하는 우아한 방법입니다.
즐기세요! ?
| skeletonview 안내서 - 시작하기 | Swift 5.2에서 Skeleton View로 로딩보기를 만드는 방법 ikh4ever Studio | 앱에서 골격 로딩보기 생성 (Swift 5) -Xcode 11, 2020 by iOS Academy | Cómo Crear una animación de carga de datos en ios by mouredev |
pod 'SkeletonView' github "Juanpe/SkeletonView"dependencies: [
. package ( url : " https://github.com/Juanpe/SkeletonView.git " , from : " 1.7.0 " )
]중요한!
버전 1.30.0이므로
SkeletonViewXCFrameworks를 지원하므로 XCFramework 로 설치하려면 대신이 리포트를 사용하십시오.
SkeletonView 사용하는 데 필요한 3 단계 만 :
1️v 적절한 장소에서 skeletonview를 가져옵니다.
import SkeletonView 2️ view 이제, 어떤 뷰가 skeletonables 일 것인지 세트하십시오. 당신은 이것을 두 가지 방법으로 달성합니다.
코드 사용 :
avatarImageView . isSkeletonable = trueIB/스토리 보드 사용 :
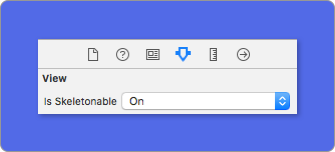
3️ view 일단 뷰를 설정하면 골격을 보여줄 수 있습니다. 그렇게하려면 4 가지 선택이 있습니다.
 ( 1 ) view . showSkeleton ( )                 // Solid
( 2 ) view . showGradientSkeleton ( )         // Gradient
( 3 ) view . showAnimatedSkeleton ( )         // Solid animated
( 4 ) view . showAnimatedGradientSkeleton ( ) // Gradient animated
시사
| 단단한 | 구배 | 견고한 애니메이션 | 그라디언트 애니메이션 |
 |  |  |  |
중요한!
SkeletonView는 재귀 적이므로 모든 골격 가능한보기에서 골격을 표시하려면 기본 컨테이너보기에서 쇼 메소드 만 호출하면됩니다. 예를 들어,UIViewControllers와 함께.
SkeletonView UITableView 및 UICollectionView 와 호환됩니다.
uitableview
UITableView 에서 골격을 보여 주려면 SkeletonTableViewDataSource 프로토콜을 준수해야합니다.
 public protocol SkeletonTableViewDataSource : UITableViewDataSource {
    func numSections ( in collectionSkeletonView : UITableView ) -> Int // Default: 1
    func collectionSkeletonView ( _ skeletonView : UITableView , numberOfRowsInSection section : Int ) -> Int
    func collectionSkeletonView ( _ skeletonView : UITableView , cellIdentifierForRowAt indexPath : IndexPath ) -> ReusableCellIdentifier
    func collectionSkeletonView ( _ skeletonView : UITableView , skeletonCellForRowAt indexPath : IndexPath ) -> UITableViewCell ? // Default: nil
    func collectionSkeletonView ( _ skeletonView : UITableView , prepareCellForSkeleton cell : UITableViewCell , at indexPath : IndexPath )
}
보시다시피,이 프로토콜은 UITableViewDataSource 를 물려 받으 므로이 프로토콜을 골격 프로토콜로 바꿀 수 있습니다.
이 프로토콜에는 일부 방법에 대한 기본 구현이 있습니다. 예를 들어, 각 섹션의 행 수는 런타임에 계산됩니다.
 func collectionSkeletonView ( _ skeletonView : UITableView , numberOfRowsInSection section : Int ) -> Int
// Default:
// It calculates how many cells need to populate whole tableview
중요한!
위의 방법에서
UITableView.automaticNumberOfSkeletonRows반환하면 기본 동작과 같이 작용합니다 (즉, 전체 테이블 뷰를 채우는 데 필요한 셀 수를 계산합니다).
Skeleton에 셀 식별자를 알리기 위해 구현 해야하는 방법은 하나뿐입니다. 이 방법에는 기본 구현이 없습니다.
 func collectionSkeletonView ( _ skeletonView : UITableView , cellIdentifierForRowAt indexPath : IndexPath ) -> ReusableCellIdentifier {
   return " CellIdentifier "
}
기본적으로 라이브러리는 각 인덱스 경로에서 셀을 탈취하지만 해골이 나타나기 전에 약간의 변경을 원할 경우 다음을 수행 할 수도 있습니다.
 func collectionSkeletonView ( _ skeletonView : UITableView , skeletonCellForRowAt indexPath : IndexPath ) -> UITableViewCell ? {
    let cell = skeletonView . dequeueReusableCell ( withIdentifier : " CellIdentifier " , for : indexPath ) as? Cell
    cell ? . textField . isHidden = indexPath . row == 0
    return cell
}
라이브러리에 Deque 부품을 남겨두고 싶다면이 방법을 사용하여 셀을 구성 할 수 있습니다.
 func collectionSkeletonView ( _ skeletonView : UITableView , prepareCellForSkeleton cell : UITableViewCell , at indexPath : IndexPath ) {
    let cell = cell as? Cell
    cell ? . textField . isHidden = indexPath . row == 0
}
게다가 헤더와 바닥 글을 모두 골격 할 수 있습니다. SkeletonTableViewDelegate 프로토콜을 준수해야합니다.
 public protocol SkeletonTableViewDelegate : UITableViewDelegate {
    func collectionSkeletonView ( _ skeletonView : UITableView , identifierForHeaderInSection section : Int ) -> ReusableHeaderFooterIdentifier ? // default: nil
    func collectionSkeletonView ( _ skeletonView : UITableView , identifierForFooterInSection section : Int ) -> ReusableHeaderFooterIdentifier ? // default: nil
}
중요한!
1ØLES RESIZABLE 셀 (
tableView.rowHeight = UITableViewAutomaticDimension)을 사용하는 경우 의무적 인 경우estimatedRowHeight정의합니다.
UITableViewCell에 요소를 추가하면 셀에 직접가 아니라contentView에 추가해야합니다.self . contentView . addSubview ( titleLabel ) ✅ self . addSubview ( titleLabel )
uicollectionView
UICollectionView 의 경우 SkeletonCollectionViewDataSource 프로토콜을 준수해야합니다.
 public protocol SkeletonCollectionViewDataSource : UICollectionViewDataSource {
    func numSections ( in collectionSkeletonView : UICollectionView ) -> Int  // default: 1
    func collectionSkeletonView ( _ skeletonView : UICollectionView , numberOfItemsInSection section : Int ) -> Int
    func collectionSkeletonView ( _ skeletonView : UICollectionView , cellIdentifierForItemAt indexPath : IndexPath ) -> ReusableCellIdentifier
    func collectionSkeletonView ( _ skeletonView : UICollectionView , supplementaryViewIdentifierOfKind : String , at indexPath : IndexPath ) -> ReusableCellIdentifier ? // default: nil
    func collectionSkeletonView ( _ skeletonView : UICollectionView , skeletonCellForItemAt indexPath : IndexPath ) -> UICollectionViewCell ?  // default: nil
    func collectionSkeletonView ( _ skeletonView : UICollectionView , prepareCellForSkeleton cell : UICollectionViewCell , at indexPath : IndexPath )
    func collectionSkeletonView ( _ skeletonView : UICollectionView , prepareViewForSkeleton view : UICollectionReusableView , at indexPath : IndexPath )
}
나머지 프로세스는 UITableView 와 동일합니다.
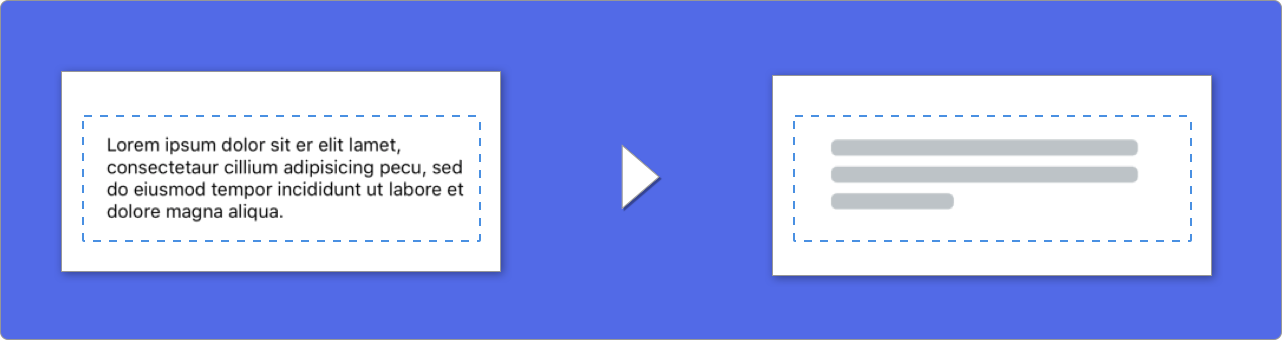
텍스트와 함께 요소를 사용하는 경우 SkeletonView 텍스트를 시뮬레이션하기 위해 줄을 그립니다.
멀티 라인 요소에 대한 속성을 설정할 수 있습니다.
| 재산 | 유형 | 기본 | 시사 |
|---|---|---|---|
| LastlineFillpercent | CGFloat | 70 |  |
| Linescornerradius | Int | 0 | 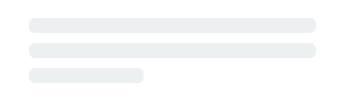 |
| SkeletonLinespacing | CGFloat | 10 | 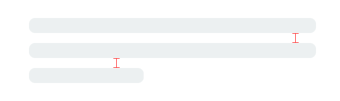 |
| SkeletonPaddingInsets | UIEdgeInsets | .zero | 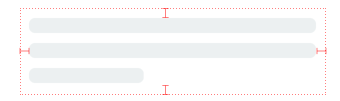 |
| SkeletonTextLineHeight | SkeletonTextLineHeight | .fixed(15) | 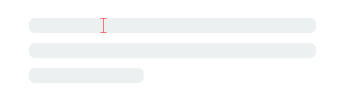 |
| skeletontextnumberoflines | SkeletonTextNumberOfLines | .inherited | |
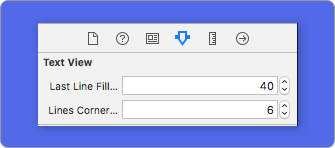
코드를 사용하여 백분율 또는 반경을 수정하려면 속성을 설정하십시오.
descriptionTextView . lastLineFillPercent = 50
descriptionTextView . linesCornerRadius = 5
또는 IB/스토리 보드를 선호하는 경우 :
줄 수를 정의하는 방법은 무엇입니까?
기본적으로 라인 수는 numberOfLines 속성의 값과 동일합니다. 그리고 0 으로 설정되면 전체 골격을 채우고 그릴 때 필요한 선수를 계산합니다.
그러나 특정 수의 골격 라인을 설정하려면 skeletonTextNumberOfLines 속성을 설정하여 수행 할 수 있습니다. 이 속성에는 2 개의 가능한 값이 있으며, inherited custom(Int) 는 numberOfLines 를 반환하고 관련 값으로 지정된 특정 줄 수를 반환합니다.
예를 들어:
label . skeletonTextNumberOfLines = 3 // .custom(3)
켈 더 이상!UseFontlineHeight가 더 이상 사용되지 않았습니다. 대신 skeletonTextLineHeight를 사용할 수 있습니다.
descriptionTextView . skeletonTextLineHeight = . relativeToFont
중요한!
여러 줄이없는 뷰의 경우 한 줄은 마지막 줄로 간주됩니다.
해골에는 기본 모양이 있습니다. 따라서 색상, 그라디언트 또는 멀티 라인 특성을 지정하지 않으면 SkeletonView 기본값을 사용합니다.
기본값 :
UIColor.skeletonDefault ( .clouds 와 동일하지만 Dark Mode에 적응)SkeletonGradient(baseColor: .skeletonDefault)CGFloatCGFloatIntIntCGFloat (ibinspectable) (코너로 골격을 볼 수 있습니다) 이러한 기본값을 얻으려면 SkeletonAppearance.default 사용할 수 있습니다. 이 속성을 사용하면 값도 설정할 수 있습니다.
 SkeletonAppearance . default . multilineHeight = 20
SkeletonAppearance . default . tintColor = . green
켈 더 이상!UseFontlineHeight가 더 이상 사용되지 않았습니다. 대신 TextLineHeight를 사용할 수 있습니다.
SkeletonAppearance . default . textLineHeight = . relativeToFont
골격이 착색되는 색상을 결정할 수 있습니다. 원하는 색상 또는 그라디언트를 매개 변수로만 전달하면됩니다.
단색 사용
view . showSkeleton ( usingColor : UIColor . gray ) // Solid
// or
view . showSkeleton ( usingColor : UIColor ( red : 25.0 , green : 30.0 , blue : 255.0 , alpha : 1.0 ) )
그라디언트 사용
let gradient = SkeletonGradient ( baseColor : UIColor . midnightBlue )
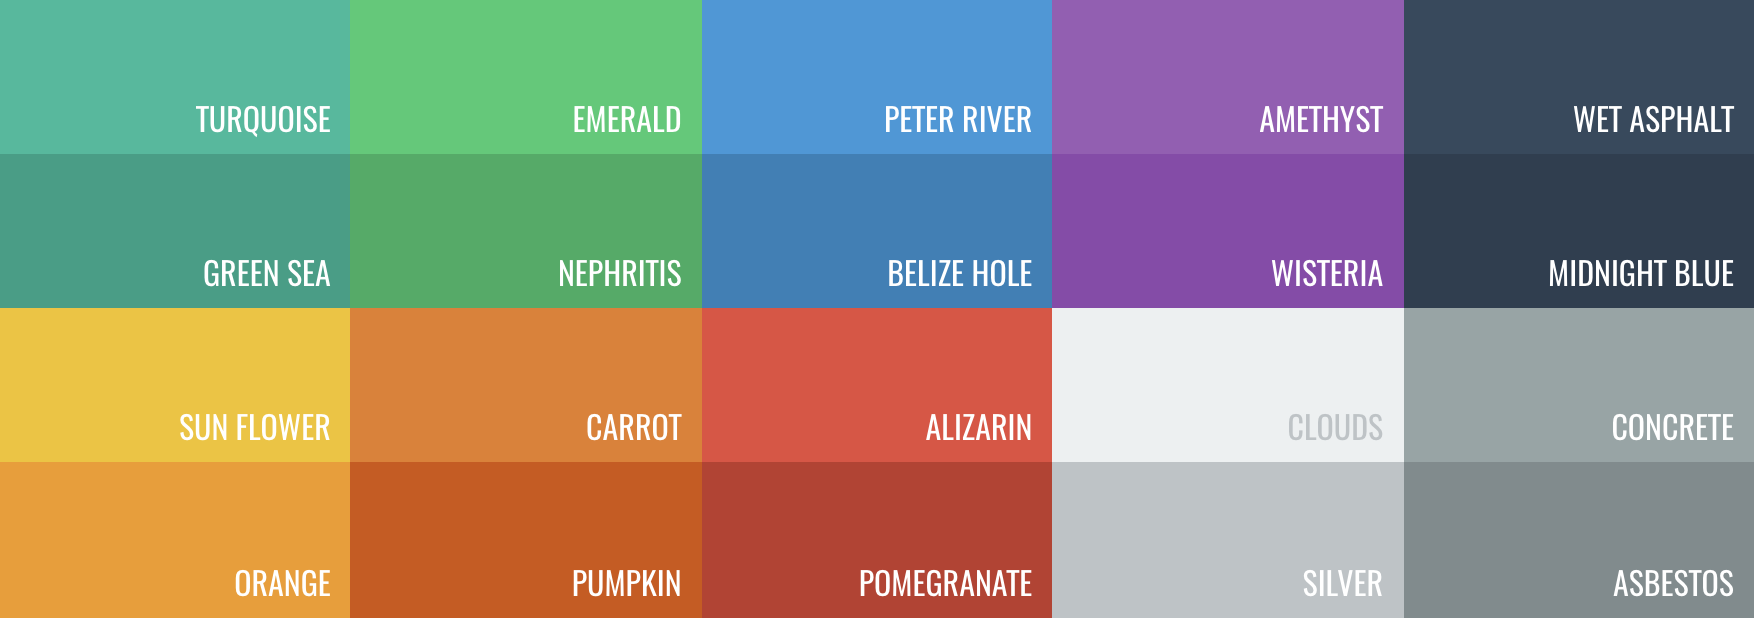
view . showGradientSkeleton ( usingGradient : gradient ) // Gradient게다가, skeletonview는 20 개의 평평한 색상을 특징으로합니까 ??
UIColor.turquoise, UIColor.greenSea, UIColor.sunFlower, UIColor.flatOrange ...
SkeletonView 에는 두 개의 내장 애니메이션, 단단한 골격 용 펄스 및 그라디언트를위한 슬라이딩이 있습니다.
게다가, 자신의 스켈레톤 애니메이션을하고 싶다면 정말 쉽습니다.
Skeleton은 사용자 정의 애니메이션을 정의 할 수있는 SkeletonLayerAnimation Closure가있는 showAnimatedSkeleton 기능을 제공합니다.
public typealias SkeletonLayerAnimation = ( CALayer ) -> CAAnimation다음과 같은 기능을 호출 할 수 있습니다.
view . showAnimatedSkeleton { ( layer ) -> CAAnimation in
  let animation = CAAnimation ( )
  // Customize here your animation

  return animation
}
SkeletonAnimationBuilder 입니다. SkeletonLayerAnimation 만드는 것은 건축업자입니다.
오늘날, 당신은 그라디언트에 대한 슬라이딩 애니메이션을 만들고 방향을 결정하고 애니메이션의 지속 시간을 설정할 수 있습니다 (default = 1.5s).
// func makeSlidingAnimation(withDirection direction: GradientDirection, duration: CFTimeInterval = 1.5) -> SkeletonLayerAnimation

let animation = SkeletonAnimationBuilder ( ) . makeSlidingAnimation ( withDirection : . leftToRight )
view . showAnimatedGradientSkeleton ( usingGradient : gradient , animation : animation )
GradientDirection 열거적인 사례와 함께 열거입니다.
| 방향 | 시사 |
|---|---|
| .leftright |  |
| . 오른쪽 |  |
| .topbottom |  |
| .bottomTop |  |
| .TopleftBottomright |  |
| .BottomrightTopleft |  |
장난!
이 바로 가기를 사용하는 것만으로 슬라이딩 애니메이션을 만드는 또 다른 방법이 있습니다.
let animation = GradientDirection . leftToRight . slidingAnimation ( )
SkeletonView는 더 매끄러운 방식으로 골격을 보여 주거나 숨기는 내장 전환이 있습니까?
전환을 사용하려면 전환 시간과 같은 전환 시간에 transition 매개 변수를 showSkeleton() 또는 hideSkeleton() 함수에 추가하십시오.
view . showSkeleton ( transition : . crossDissolve ( 0.25 ) )     //Show skeleton cross dissolve transition with 0.25 seconds fade time
view . hideSkeleton ( transition : . crossDissolve ( 0.25 ) )     //Hide skeleton cross dissolve transition with 0.25 seconds fade time
기본값은 crossDissolve(0.25) 입니다.
시사
| 없음 | 크로스 용해 |
 |  |
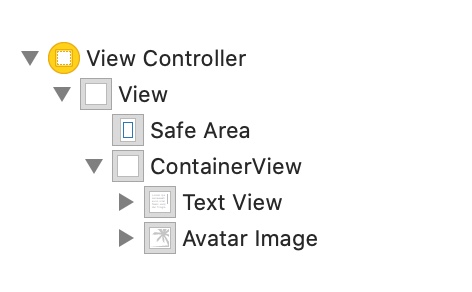
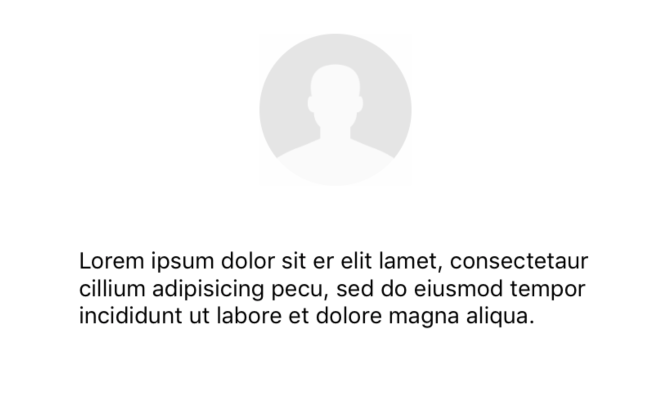
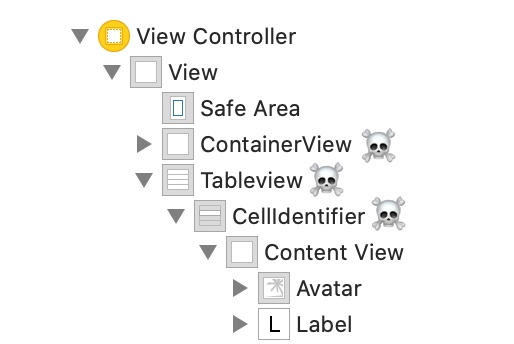
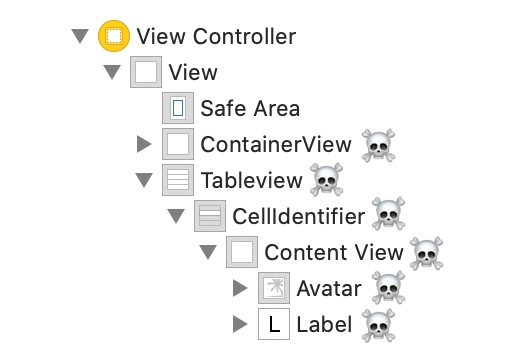
계층
SkeletonView 재귀 적이며 Skeleton이 매우 효율적이되기를 원하기 때문에 가능한 빨리 재귀를 중단하고 싶습니다. 이러한 이유로, 컨테이너 뷰를 Skeletonable 것으로 설정해야합니다. 골격은 골격이없는 즉시 skeletonable 하위 뷰를 찾지 않기 때문에 재귀가 깨지는 대신 컨테이너가 뼈대 가능한 하위 뷰를 찾지 않기 때문입니다.
이미지는 천 단어의 가치가 있기 때문에 :
이 예에서는 ContainerView 와 UITableView 있는 UIViewController 있습니다. 보기가 준비되면이 방법을 사용하여 골격을 표시합니다.
view.showSkeleton()
isSkeletonable= on️
| 구성 | 결과 |
|---|---|
 |  |
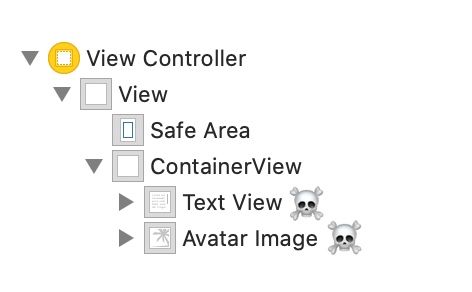 | |
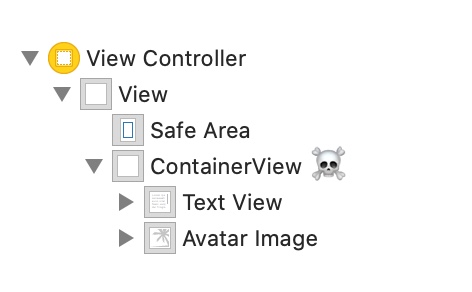 |  |
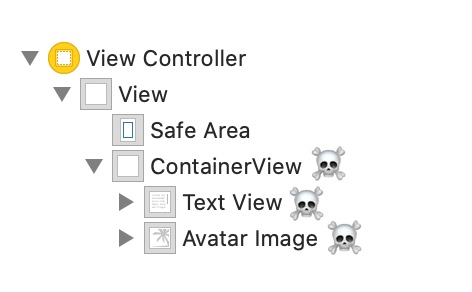 | 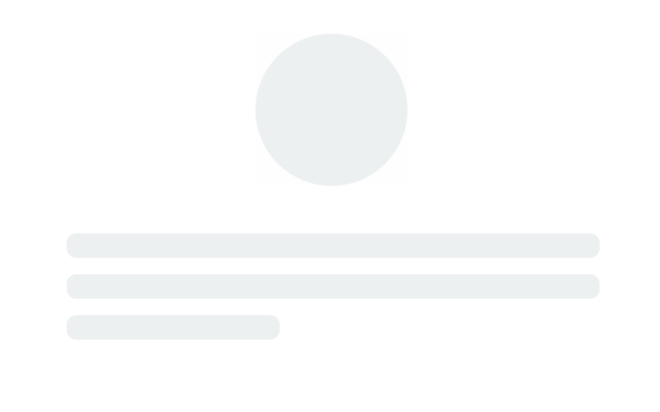 |
 |  |
 |  |
골격 뷰 레이아웃
때로는 스켈레톤 레이아웃이 부모보기 범위가 변경 되었기 때문에 레이아웃에 맞지 않을 수 있습니다. 예를 들어 장치를 회전합니다.
SO와 같은 골격보기를 전달할 수 있습니다.
 override func viewDidLayoutSubviews ( ) {
    view . layoutSkeletonIfNeeded ( )
}
중요한!
이 방법을 호출해서는 안됩니다. 버전 1.8.1 에서이 방법을 호출 할 필요가 없으면 라이브러리가 자동으로 수행됩니다. 따라서 골격의 레이아웃을 수동으로 업데이트 해야하는 경우 에만 이 방법을 사용할 수 있습니다.
골격 업데이트
색상, 애니메이션 등과 같이 언제든지 골격 구성을 변경할 수 있습니다.
 ( 1 ) view . updateSkeleton ( )                 // Solid
( 2 ) view . updateGradientSkeleton ( )         // Gradient
( 3 ) view . updateAnimatedSkeleton ( )         // Solid animated
( 4 ) view . updateAnimatedGradientSkeleton ( ) // Gradient animated
애니메이션이 시작될 때보기를 숨기고 있습니다
때로는 애니메이션이 시작될 때 약간의보기를 숨기고 싶어서이를 수행하는 데 사용할 수있는 빠른 속성이 있습니다.
view . isHiddenWhenSkeletonIsActive = true // This works only when isSkeletonable = true골격이 활성화 될 때는 사용자 상호 작용을 수정하지 마십시오
기본적으로 스켈레톤 항목에 대해 사용자 상호 작용이 비활성화되지만 Skeleton이 활성화 될 때 사용자 상호 작용 표시기를 수정하지 않으려면 isUserInteractionDisabledWhenSkeletonIsActive 속성을 사용할 수 있습니다.
view . isUserInteractionDisabledWhenSkeletonIsActive = false // The view will be active when the skeleton will be active.레이블의 골격 라인의 글꼴 라인 높이를 사용하지 마십시오.
UILabel 또는 UITextView 의 골격을 자동 조정으로 자동 조정하는 데있어서 거짓. 기본적으로, 골격 라인 높이는 파운드 높이로 자동 조정되어 경계 상자를 사용하지 않고 레이블의 텍스트를보다 정확하게 반영합니다.
label . useFontLineHeight = false지연된 쇼 골격
보기가 빠르게 업데이트되면 골격의 프레젠테이션을 지연시킬 수 있습니다.
 func showSkeleton ( usingColor : UIColor ,
                  animated : Bool ,
                  delay : TimeInterval ,
                  transition : SkeletonTransitionStyle )
func showGradientSkeleton ( usingGradient : SkeletonGradient ,
animated : Bool ,
delay : TimeInterval ,
transition : SkeletonTransitionStyle )디버그
무언가가 잘 작동하지 않을 때 디버그 작업을 용이하게합니다. SkeletonView 에는 몇 가지 새로운 도구가 있습니다.
먼저 UIView 해골 정보가 포함 된 속성을 사용할 수 있습니다.
var sk . skeletonTreeDescription : String 또한 새 디버그 모드를 활성화 할 수 있습니다. 환경 변수 SKELETON_DEBUG 추가하고 활성화하십시오.
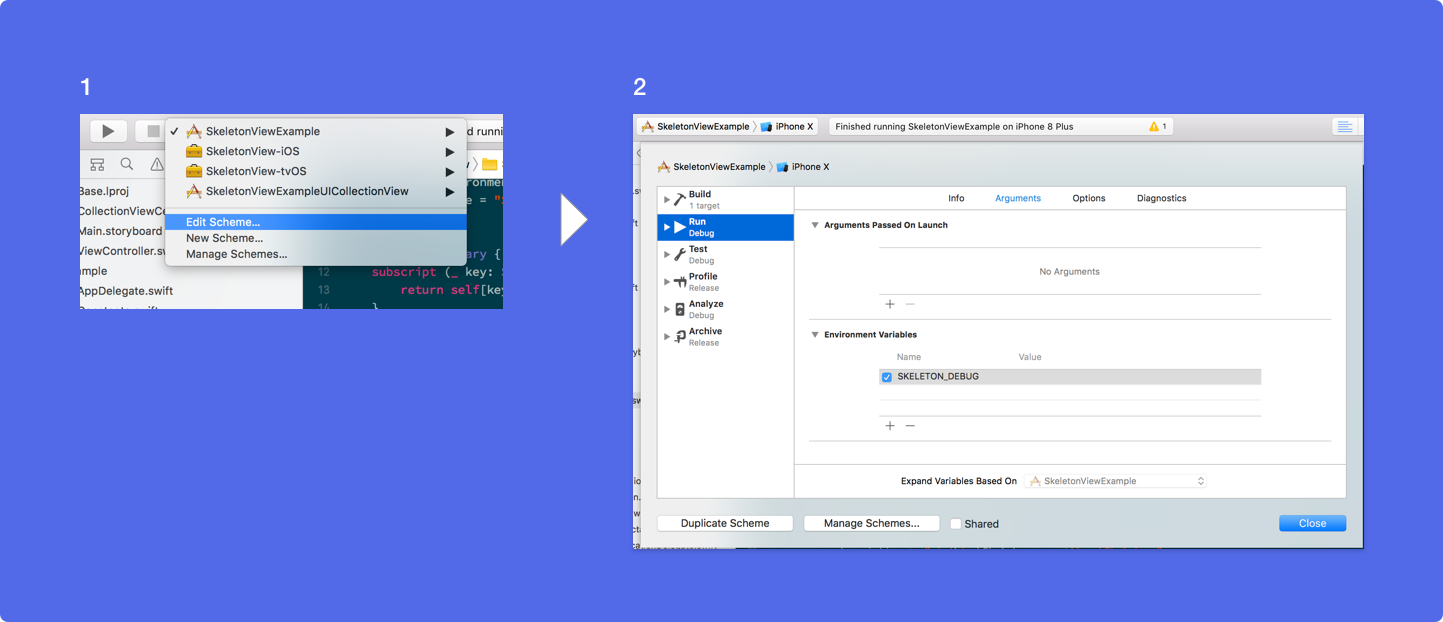
그런 다음 골격이 나타나면 Xcode 콘솔에서 View Hierarchy를 볼 수 있습니다.
 {
  "type" : "UIView", // UITableView, UILabel...
  "isSkeletonable" : true,
  "reference" : "0x000000014751ce30",
  "children" : [
    {
      "type" : "UIView",
      "isSkeletonable" : true,
      "children" : [ ... ],
      "reference" : "0x000000014751cfa0"
    }
  ]
}
지원되는 OS & SDK 버전
이것은 오픈 소스 프로젝트이므로 자유롭게 기여하십시오. 어떻게?
모든 기고자를 참조하십시오
자세한 내용은 기고 가이드 라인을 읽으십시오.
오픈 소스 프로젝트는 도움 없이는 오래 살 수 없습니다. skeletonview가 유용하다고 생각되면 스폰서가 되어이 프로젝트를 지원하는 것을 고려하십시오.
Github 스폰서 ❤️를 통해 후원자가 되십시오
후안페 카탈란
 MIT License

Copyright (c) 2017 Juanpe Catalán

Permission is hereby granted, free of charge, to any person obtaining a copy
of this software and associated documentation files (the "Software"), to deal
in the Software without restriction, including without limitation the rights
to use, copy, modify, merge, publish, distribute, sublicense, and/or sell
copies of the Software, and to permit persons to whom the Software is
furnished to do so, subject to the following conditions:

The above copyright notice and this permission notice shall be included in all
copies or substantial portions of the Software.

THE SOFTWARE IS PROVIDED "AS IS", WITHOUT WARRANTY OF ANY KIND, EXPRESS OR
IMPLIED, INCLUDING BUT NOT LIMITED TO THE WARRANTIES OF MERCHANTABILITY,
FITNESS FOR A PARTICULAR PURPOSE AND NONINFRINGEMENT. IN NO EVENT SHALL THE
AUTHORS OR COPYRIGHT HOLDERS BE LIABLE FOR ANY CLAIM, DAMAGES OR OTHER
LIABILITY, WHETHER IN AN ACTION OF CONTRACT, TORT OR OTHERWISE, ARISING FROM,
OUT OF OR IN CONNECTION WITH THE SOFTWARE OR THE USE OR OTHER DEALINGS IN THE
SOFTWARE.


