pynotif
1.0.0
另一個用於訪問libnotify Python API以及通知聲音支持(帶有vlc後端) 。
小心:您已經進行了嚴格的安裝產品,這可能永遠不是首選的選擇。但這是非常確保的,您將學習一些新知識。
我將在Solus Linux上演示安裝過程。
gcc , glibc , glibc-devel 。我將使用gcc 9.3.0 。 $ sudo eopkg it gcc, glibc, glibc-devel
$ gcc --version # check versionCython ,我們也會安裝pip 。我正在使用Python3.7.6 。 $ sudo eopkg it python3, python3-devel, pip
$ python3 --version
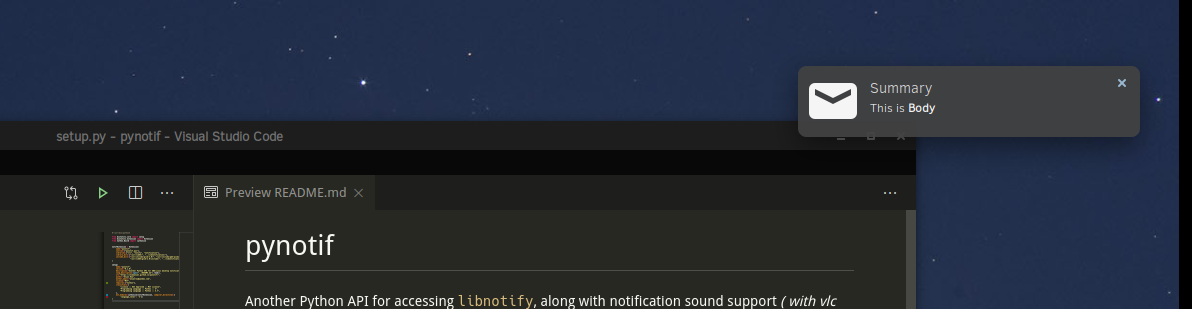
$ python3 -m pip install --user Cythonlibnotify , libnotify-devel ,它將為我們提供程序化接口,以便從我們的C-library中與libnotify交談。 $ sudo eopkg it libnotify libnotify-devel$ notify-send " Summary " " Body of Notification "vlc將用於播放通知聲音,可能有助於提醒用戶。 $ sudo eopkg it vlc vlc-devel讓我們首先轉到計算機目錄層次結構中的方便位置,您可以在其中克隆此回購併開始工作。
$ git clone https://github.com/itzmeanjan/pynotif.git進入pynotif目錄並檢查目錄的內容。
$ cd pynotif
$ tree -h
.
├── [4.0K]  libnotification
│   ├── [2.4K]  play_sound.c
│   ├── [  45]  play_sound.h
│   ├── [2.4K]  send_notification.c
│   └── [ 235]  send_notification.h
├── [1.0K]  LICENSE
├── [4.0K]  pynotif
│   ├── [1.5K]  pynotif.pyx
│   └── [1.1K]  setup.py
├── [7.0K]  README.md
├── [4.0K]  sound
│   ├── [ 30K]  button_sound.wav
│   └── [ 29K]  when.mp3
└── [4.0K]  ss
    └── [ 71K]  screenshot.png

4 directories, 11 files首先,我們要進行libnotification ,該libnotification將被編譯成靜態的C圖。文件名是非常不言自明的,其目的是什麼。
$ cd libnotification
$ ls
play_sound.c  play_sound.h  send_notification.c  send_notification.h
是時候編譯這些C文件並生成對象代碼了。
$ gcc -c play_sound.c
$ gcc -I /usr/include/glib-2.0/ -I /usr/include/gdk-pixbuf-2.0/ -I /usr/lib64/glib-2.0/include/ -c send_notification.c現在,我們需要將這些對象文件存檔到一個靜態庫中,該庫將從Cython代碼(*.pyx文件)調用。
$ ar rcs libnotification.a play_sound.o send_notification.o正如我們獲得的靜態庫一樣,現在可以刪除編譯的對象代碼。您可以考慮檢查一種生成的靜態庫。
$ rm * .o
$ file libnotification.a
libnotification.a: current ar archive現在,我們將進入擁有Cython代碼的pynotif Directory,該目錄與C-Library, libnotification.a交談所需的Cython代碼。
$ cd ../pynotif
$ ls
pynotif.pyx setup.py pynotif.pyx包含用於與libnotification.a接口的Cython代碼,該代碼應編譯為等效的C代碼(使用Cython編譯器) 。然後,我們將構建C擴展庫(動態鏈接的庫) ,可以從Python調用。
$ python3 setup.py build_ext --inplace
Compiling pynotif.pyx because it changed.
[1/1] Cythonizing pynotif.pyx
running build_ext
building ' pynotif ' extension
creating build
creating build/temp.linux-x86_64-3.7
x86_64-solus-linux-gcc -pthread -Wno-unused-result -Wsign-compare -DNDEBUG -g -fwrapv -O3 -Wall -mtune=generic -march=x86-64 -g2 -pipe -fPIC -Wformat -Wformat-security -D_FORTIFY_SOURCE=2 -fstack-protector-strong --param ssp-buffer-size=32 -fasynchronous-unwind-tables -ftree-vectorize -feliminate-unused-debug-types -Wall -Wno-error -Wp,-D_REENTRANT -fno-semantic-interposition -O3 -falign-functions=32 -I/usr/include -mtune=generic -march=x86-64 -g2 -pipe -fPIC -Wformat -Wformat-security -D_FORTIFY_SOURCE=2 -fstack-protector-strong --param ssp-buffer-size=32 -fasynchronous-unwind-tables -ftree-vectorize -feliminate-unused-debug-types -Wall -Wno-error -Wp,-D_REENTRANT -fno-semantic-interposition -O3 -falign-functions=32 -fPIC -I/usr/include/glib-2.0/ -I/usr/include/gdk-pixbuf-2.0/ -I/usr/lib64/glib-2.0/include/ -I../libnotification/ -I/usr/include/python3.7m -c pynotif.c -o build/temp.linux-x86_64-3.7/pynotif.o
x86_64-solus-linux-gcc -pthread -shared -Wl,--copy-dt-needed-entries -Wl,-O1 -Wl,-z,relro -Wl,-z,now -Wl,-z,max-page-size=0x1000 -Wl,-Bsymbolic-functions -Wl,--sort-common -Wl,--copy-dt-needed-entries -Wl,-O1 -Wl,-z,relro -Wl,-z,now -Wl,-z,max-page-size=0x1000 -Wl,-Bsymbolic-functions -Wl,--sort-common build/temp.linux-x86_64-3.7/pynotif.o -L/usr/lib64/ -L../libnotification/ -L/usr/lib64 -lvlc -lnotify -lnotification -lpython3.7m -o /home/anjan/Documents/my_programs/still_working/open/pynotif/pynotif/pynotif.cpython-37m-x86_64-linux-gnu.so

$ tree -h
.
├── [4.0K]  build
│   └── [4.0K]  temp.linux-x86_64-3.7
│       └── [203K]  pynotif.o
├── [125K]  pynotif.c
├── [146K]  pynotif.cpython-37m-x86_64-linux-gnu.so
├── [1.5K]  pynotif.pyx
└── [1.1K]  setup.py

2 directories, 5 files
pynotif.*.so 。 ./build目錄和pynotif.c可以刪除。但是您可能有興趣查看pynotif.c ,該pynotif.c是由Cython編譯器從pynotif.pyx生成的C代碼。
$ rm build/ pynotif.c -rv
$ file pynotif.cpython- * .so # check it out現在,您可以使用pynotif ,但只能來自此工作目錄。讓我們先檢查一下。
$ python3
>>> import pynotif
>>> pynotif.__version__
' 0.1.0 '
>>> pynotif.startNotif(b " My Application " )
1
>>> pynotif.sendNotif(b " Summary " , b " Body of Notification " , 2, 1, b " /path/to/icon/file " , b " /path/to/notification/sound/file " )
1
>> pynotif.stopNotif ()
>>> help ()
help > pynotif # shows you API documentation
...
但是,我們想使其可用於該機器上安裝的所有腳本,不是嗎?然後,我們將將此庫安裝到某個標準位置。
$ python3 setup.py install --user現在,轉到$HOME DIRECTORY並調用Python3 REPP提示。
$ cd
$ python3
>> import pynotif # and it works as expected恭喜,您已成功地從C-Library構建和安裝了pynotif 。現在按照您的意願使用。
謝謝你


