pynotif
1.0.0
Python API อื่นสำหรับการเข้าถึง libnotify พร้อมกับการสนับสนุนการแจ้งเตือนเสียง (พร้อมแบ็กเอนด์ vlc )
ข้อควรระวัง: คุณต้องผ่านการติดตั้งอย่างเข้มงวดซึ่งอาจไม่ใช่ทางเลือกที่ต้องการเสมอ แต่มันค่อนข้างมั่นใจได้คุณจะได้เรียนรู้สิ่งใหม่ ๆ
ฉันจะแสดงขั้นตอนการติดตั้งบน Solus Linux
gcc , glibc , glibc-devel ฉันจะใช้ gcc 9.3.0 $ sudo eopkg it gcc, glibc, glibc-devel
$ gcc --version # check versionCython เราจะติดตั้ง pip ด้วย ฉันใช้ Python3.7.6 $ sudo eopkg it python3, python3-devel, pip
$ python3 --version
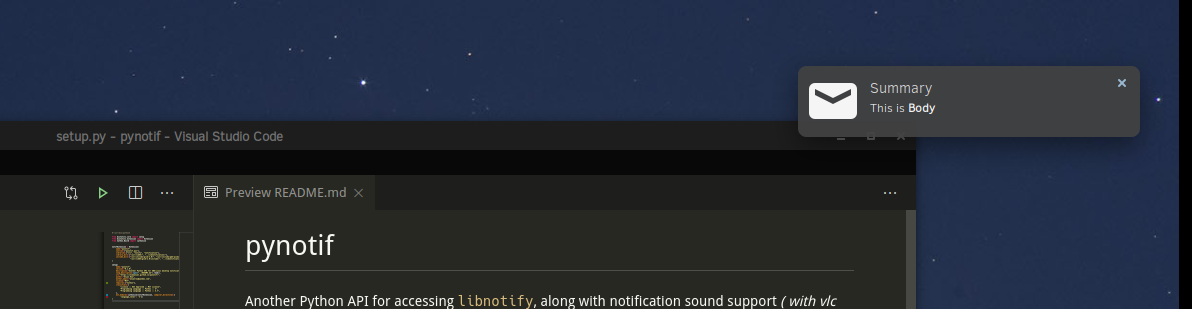
$ python3 -m pip install --user Cythonlibnotify , libnotify-devel ซึ่งจะให้อินเทอร์เฟซโปรแกรมสำหรับการพูดคุยกับ Libnotify จาก C-library ของเรา $ sudo eopkg it libnotify libnotify-devel$ notify-send " Summary " " Body of Notification "vlc ซึ่งจะใช้สำหรับการเล่นเสียงการแจ้งเตือนอาจเป็นประโยชน์สำหรับการแจ้งเตือนผู้ใช้ $ sudo eopkg it vlc vlc-develก่อนอื่นไปที่ตำแหน่งที่สะดวกในลำดับชั้นไดเรกทอรีของเครื่องของคุณที่คุณสามารถโคลน repo นี้และเริ่มทำงาน
$ git clone https://github.com/itzmeanjan/pynotif.git เข้าสู่ไดเรกทอรี pynotif และตรวจสอบเนื้อหาของไดเรกทอรี
$ cd pynotif
$ tree -h
.
├── [4.0K]  libnotification
│   ├── [2.4K]  play_sound.c
│   ├── [  45]  play_sound.h
│   ├── [2.4K]  send_notification.c
│   └── [ 235]  send_notification.h
├── [1.0K]  LICENSE
├── [4.0K]  pynotif
│   ├── [1.5K]  pynotif.pyx
│   └── [1.1K]  setup.py
├── [7.0K]  README.md
├── [4.0K]  sound
│   ├── [ 30K]  button_sound.wav
│   └── [ 29K]  when.mp3
└── [4.0K]  ss
    └── [ 71K]  screenshot.png

4 directories, 11 files
ก่อนอื่นเราจะไปที่ libnotification ซึ่งจะถูกรวบรวมเป็น C-library แบบคงที่ ชื่อไฟล์เป็นคำอธิบายตัวเองค่อนข้างจะให้บริการอะไร
$ cd libnotification
$ ls
play_sound.c  play_sound.h  send_notification.c  send_notification.h
เวลาในการรวบรวมไฟล์ C แต่ละไฟล์เหล่านี้และสร้างรหัสวัตถุ
$ gcc -c play_sound.c
$ gcc -I /usr/include/glib-2.0/ -I /usr/include/gdk-pixbuf-2.0/ -I /usr/lib64/glib-2.0/include/ -c send_notification.c
ตอนนี้เราต้องเก็บไฟล์วัตถุเหล่านี้ไว้ในไลบรารีคงที่ซึ่งจะถูกเรียกใช้จากรหัส Cython (*.pyx ไฟล์)
$ ar rcs libnotification.a play_sound.o send_notification.oเมื่อเราได้รับไลบรารีแบบคงที่รหัสวัตถุที่รวบรวมได้สามารถลบออกได้ในขณะนี้ คุณอาจพิจารณาตรวจสอบประเภทของไลบรารีคงที่ที่สร้างขึ้น
$ rm * .o
$ file libnotification.a
libnotification.a: current ar archive
ตอนนี้เราจะเข้าสู่ไดเรกทอรี pynotif ซึ่งถือรหัสไซธอนซึ่งจำเป็นสำหรับการพูดคุยกับ C-library, libnotification.a
$ cd ../pynotif
$ ls
pynotif.pyx  setup.py
pynotif.pyx ถือรหัส cython สำหรับการเชื่อมต่อกับ libnotification.a ซึ่งจะถูกรวบรวมเป็นรหัส C เทียบเท่า (โดยใช้คอมไพเลอร์ Cython) จากนั้นเราจะสร้างไลบรารีส่วนขยาย C (ไลบรารีที่เชื่อมโยงแบบไดนามิก) ซึ่งสามารถเรียกใช้จาก Python
$ python3 setup.py build_ext --inplace
Compiling pynotif.pyx because it changed.
[1/1] Cythonizing pynotif.pyx
running build_ext
building ' pynotif ' extension
creating build
creating build/temp.linux-x86_64-3.7
x86_64-solus-linux-gcc -pthread -Wno-unused-result -Wsign-compare -DNDEBUG -g -fwrapv -O3 -Wall -mtune=generic -march=x86-64 -g2 -pipe -fPIC -Wformat -Wformat-security -D_FORTIFY_SOURCE=2 -fstack-protector-strong --param ssp-buffer-size=32 -fasynchronous-unwind-tables -ftree-vectorize -feliminate-unused-debug-types -Wall -Wno-error -Wp,-D_REENTRANT -fno-semantic-interposition -O3 -falign-functions=32 -I/usr/include -mtune=generic -march=x86-64 -g2 -pipe -fPIC -Wformat -Wformat-security -D_FORTIFY_SOURCE=2 -fstack-protector-strong --param ssp-buffer-size=32 -fasynchronous-unwind-tables -ftree-vectorize -feliminate-unused-debug-types -Wall -Wno-error -Wp,-D_REENTRANT -fno-semantic-interposition -O3 -falign-functions=32 -fPIC -I/usr/include/glib-2.0/ -I/usr/include/gdk-pixbuf-2.0/ -I/usr/lib64/glib-2.0/include/ -I../libnotification/ -I/usr/include/python3.7m -c pynotif.c -o build/temp.linux-x86_64-3.7/pynotif.o
x86_64-solus-linux-gcc -pthread -shared -Wl,--copy-dt-needed-entries -Wl,-O1 -Wl,-z,relro -Wl,-z,now -Wl,-z,max-page-size=0x1000 -Wl,-Bsymbolic-functions -Wl,--sort-common -Wl,--copy-dt-needed-entries -Wl,-O1 -Wl,-z,relro -Wl,-z,now -Wl,-z,max-page-size=0x1000 -Wl,-Bsymbolic-functions -Wl,--sort-common build/temp.linux-x86_64-3.7/pynotif.o -L/usr/lib64/ -L../libnotification/ -L/usr/lib64 -lvlc -lnotify -lnotification -lpython3.7m -o /home/anjan/Documents/my_programs/still_working/open/pynotif/pynotif/pynotif.cpython-37m-x86_64-linux-gnu.so

$ tree -h
.
├── [4.0K]  build
│   └── [4.0K]  temp.linux-x86_64-3.7
│       └── [203K]  pynotif.o
├── [125K]  pynotif.c
├── [146K]  pynotif.cpython-37m-x86_64-linux-gnu.so
├── [1.5K]  pynotif.pyx
└── [1.1K]  setup.py

2 directories, 5 files
pynotif.*.so วัตถุที่ใช้ร่วมกันแบบคงที่ของเราซึ่งเป็นที่น่าสนใจ ./build DIRECTORY & pynotif.c สามารถลบได้ แต่คุณอาจสนใจที่จะดู pynotif.c ซึ่งสร้างรหัส C จาก pynotif.pyx โดยคอมไพเลอร์ Cython
$ rm build/ pynotif.c -rv
$ file pynotif.cpython- * .so # check it out
ตอนนี้คุณสามารถใช้ pynotif แต่จากไดเรกทอรีการทำงานนี้เท่านั้น ให้ตรวจสอบก่อน
$ python3
>>> import pynotif
>>> pynotif.__version__
' 0.1.0 '
>>> pynotif.startNotif(b " My Application " )
1
>>> pynotif.sendNotif(b " Summary " , b " Body of Notification " , 2, 1, b " /path/to/icon/file " , b " /path/to/notification/sound/file " )
1
>> pynotif.stopNotif ()
>>> help ()
help > pynotif # shows you API documentation
...
แต่เราต้องการให้สคริปต์ทั้งหมดที่ติดตั้งบนเครื่องนี้ไม่ได้ใช่ไหม? จากนั้นเราจะติดตั้งไลบรารีนี้ลงในตำแหน่งมาตรฐาน
$ python3 setup.py install --user ตอนนี้ไปที่ $HOME Directory & เรียกใช้ Python3 Repl Prompt
$ cd
$ python3
>> import pynotif # and it works as expected
ขอแสดงความยินดีคุณประสบความสำเร็จในการสร้างและติดตั้ง pynotif จาก C-Library ตอนนี้ใช้ตามที่คุณต้องการ
ขอบคุณคุณ


