phoenix todo list tutorial
1.0.0
一個完整的初學者,用於在鳳凰城建立待辦事項列表的逐步教程。
100%功能。 0%JavaScript。只是HTML , CSS和Elixir 。快速可維護。
大多數人都熟悉待辦事項名單。我們一直在列出清單。從頭開始構建待辦事項列表是學習Elixir / Phoenix好方法,因為UI / UX很簡單,因此我們可以專注於實現。
對於@dwyl團隊,此應用程序/教程是一個展示服務器端渲染(具有客戶端漸進增強)如何在開發人員有效性(快速運輸功能),UX和可訪問性之間提供良好平衡的展示。服務器渲染的頁面需要少於5毫秒的響應,因此UX很快。 fly.io:phxtodo.fly.dev往返響應時間是所有互動的200ms,因此感覺就像是客戶端渲染的應用程序。
一個待辦事項列表教程,該教程顯示了一個完整的初學者如何從頭開始在Elixir/Phoenix中構建應用程序。
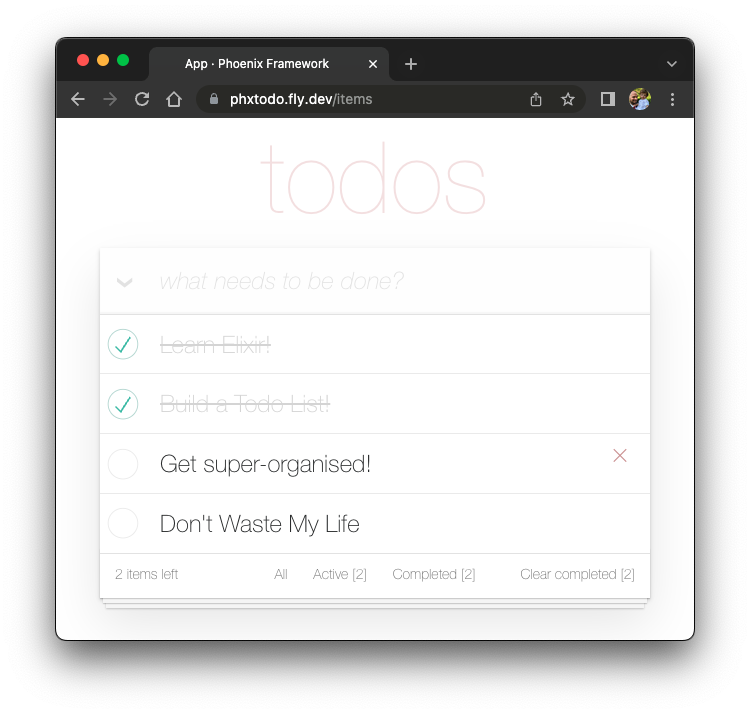
嘗試fly.io版本。在列表中添加一些項目並測試功能。
即使每次相互作用進行完整的HTTP往返,響應時間也很快。請注意Chrome | Firefox | Safari在重新呈現頁面之前等待服務器的響應。過去的舊整頁刷新消失了。現代瀏覽器巧妙地渲染了變化!因此,UX近似於“本機”!認真地,嘗試手機上的fly.io應用程序,然後查看!
在本教程中,我們使用todomVC CSS來簡化我們的UI。這有幾個優勢,最大程度地減少了我們必須撰寫多少CSS!這也意味著我們有一個指南,需要實現哪些功能才能實現完整的功能。
注意:我們喜歡
CSS的功能/靈活性,但我們知道並不是每個人都喜歡它。請參閱:學習tachyons#為什麼我們想要的最後一件事是在Phoenix教程中與CSS浪費大量時間!
本教程適用於正在學習精靈/鳳凰城的任何人。沒有假定/預期的鳳凰經驗。我們包括構建應用程序所需的所有步驟。
如果您遇到任何步驟,請在Github上打開一個問題,我們很樂意幫助您解開!如果您認為任何代碼線都可以使用更多的解釋/清晰度,請隨時通知我們!我們知道成為初學者的感覺,當某事沒有意義時,它可能會令人沮喪!在Github上詢問問題可以幫助每個人學習!
請給我們反饋!如果您發現它有幫助,請將其播放。
在嘗試構建待辦事項列表之前,請確保您在計算機上安裝了所有需要的東西。請參閱:先決條件
確認已安裝了Phoenix&PostgreSQL後,請嘗試運行完成的應用程序。
localhost上運行完成的應用程序在開始構建自己的TODO List應用程序版本之前,請在localhost上運行完成版本以確認其有效。
從Github克隆該項目:
git clone [email protected]:dwyl/phoenix-todo-list-tutorial.git && cd phoenix-todo-list-tutorial安裝依賴項並設置數據庫:
mix setup啟動Phoenix服務器:
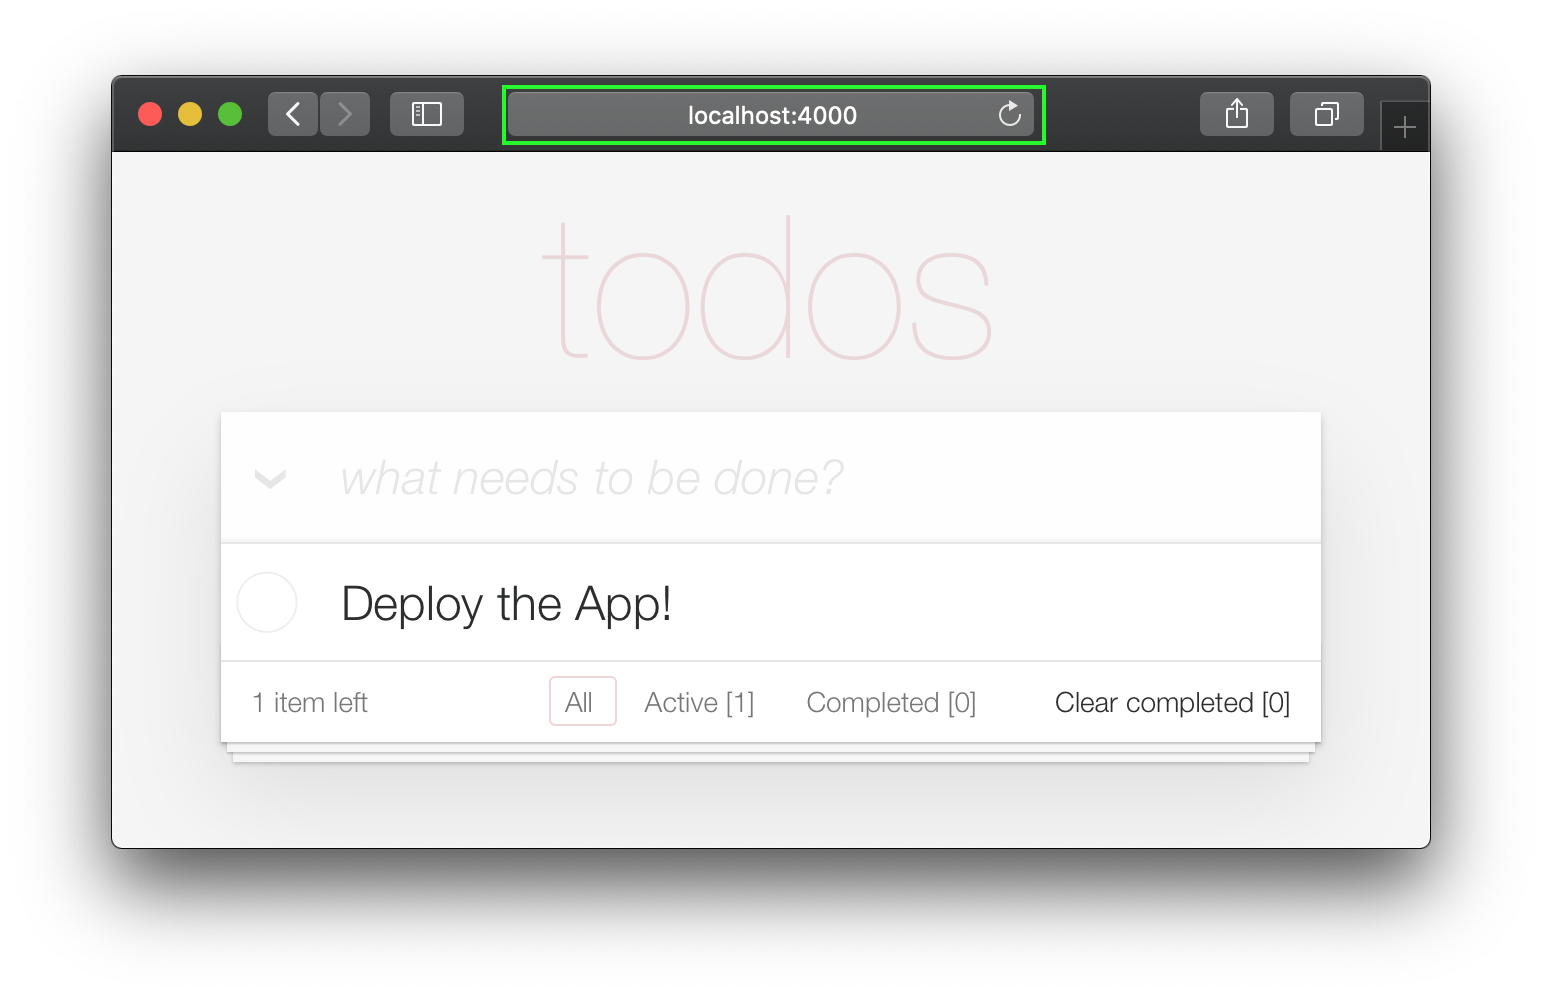
mix phx.server訪問localhost:4000在您的Web瀏覽器中。
您應該看到:
現在,您已經在localhost上運行完成的示例應用程序,
讓我們從頭開始構建它,並了解所有步驟。
在localhost上運行完成的示例應用程序時,如果您想嘗試login按鈕,則需要獲得AUTH_API_KEY 。 [1分鐘]請參閱:獲取您的AUTH_API_KEY
如果您在localhost上運行完成的應用程序(您真的應該! ),
在啟動教程之前,您需要更改目錄:
cd ..
現在您準備好建造了!
在您的終端中,使用以下mix命令創建一個新的鳳凰應用程序:
mix phx.new app --no-dashboard --no-gettext --no-mailer 當提示安裝依賴項時,鍵入y ,然後輸入。
注意:
app名稱之後的那些標誌只是為了避免創建這個簡單示例我們不需要的文件。請參閱:hexdocs.pm/phoenix/mix.tasks.phx.new
更改為新創建的app目錄( cd app ),並確保您擁有所需的一切:
mix setup啟動Phoenix服務器:
mix phx.server現在,您可以在Web瀏覽器中訪問localhost:4000 。您應該看到類似的東西:
關閉Phoenix服務器CTRL + C。
運行測試以確保一切按預期運行:
mix test您應該看到:
Compiling 16 files (.ex)
Generated app app

17:49:40.111 [info]  Already up
...

Finished in 0.04 seconds
3 tests, 0 failures
確定Phoenix應用程序可以按預期工作,讓我們繼續創建一些文件!
items模式在創建基本待辦事項列表時,我們只需要一個架構: items 。稍後,我們可以添加單獨的列表和標籤來組織/分類我們的items ,但是現在這就是我們所需要的。
運行以下生成器命令來創建項目表:
mix phx.gen.html Todo Item items text:string person_id:integer status:integer嚴格來說,我們只需要text和status字段,但是由於我們知道我們想將項目與人相關聯(_教程中的_ -later),所以我們現在正在添加該字段。
您將看到以下輸出:
 * creating lib/app_web/controllers/item_controller.ex
* creating lib/app_web/controllers/item_html/edit.html.heex
* creating lib/app_web/controllers/item_html/index.html.heex
* creating lib/app_web/controllers/item_html/new.html.heex
* creating lib/app_web/controllers/item_html/show.html.heex
* creating lib/app_web/controllers/item_html.ex
* creating test/app_web/controllers/item_controller_test.exs
* creating lib/app/todo/item.ex
* creating priv/repo/migrations/20221205102303_create_items.exs
* creating lib/app/todo.ex
* injecting lib/app/todo.ex
* creating test/app/todo_test.exs
* injecting test/app/todo_test.exs
* creating test/support/fixtures/todo_fixtures.ex
* injecting test/support/fixtures/todo_fixtures.ex

Add the resource to your browser scope in lib/app_web/router.ex:

    resources "/items", ItemController


Remember to update your repository by running migrations:

    $ mix ecto.migrate
那創建了一堆文件!其中一些我們不需要。
我們只能手動創建所需的文件,但這是在鳳凰城創建CRUD應用程序的“官方”方式,因此我們將其用於速度。
注意:在此示例中表示為
Todo鳳凰語境是“暴露和組相關功能的專用模塊”。我們認為他們不必要地將基本的鳳凰應用程序與“接口”層複雜化,我們真的希望我們能避免使用它們。但是,鑑於它們被烤到發電機中,並且框架的創建者喜歡它們,我們可以選擇:要么加入上下文,要么手動在我們的Phoenix項目中創建所有文件。發電機是一種更快的構建方式!擁抱它們,即使您最終不得不沿此過程中delete一些未使用的文件!
我們不會在教程中的此階段解釋這些文件中的每個文件,因為在構建應用程序時,更容易理解文件!當您通過編輯它們進行編輯時,每個文件的目的將變得清晰。
/items資源添加到router.ex請按照發電機指出的說明將resources "/items", ItemController添加到router.ex 。
打開lib/app_web/router.ex文件並找到行: scope "/", AppWeb do 。將行添加到塊的末端。例如:
 scope "/" , AppWeb do
  pipe_through :browser

  get "/" , PageController , :index
  resources "/items" , ItemController # this is the new line
end您的router.ex文件應該看起來像: router.ex#L20
現在,正如終端所建議的那樣,運行mix ecto.migrate 。這將完成設置數據庫表並運行必要的遷移,以便一切正常工作!
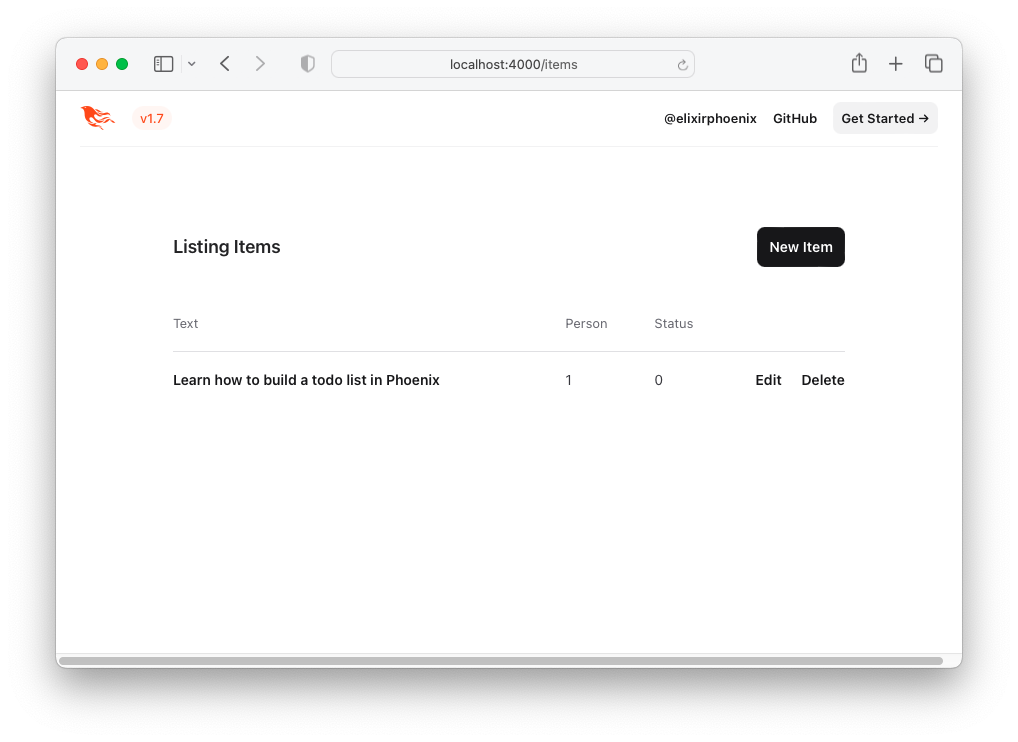
在這一點上,我們已經有一個功能性的待辦事項列表(如果我們願意使用默認的Phoenix UI )。
嘗試在您的localhost上運行該應用程序:使用mix ecto.migrate運行生成的遷移。
mix phx.server
請訪問:http:// localhost:4000/ittem/new並輸入一些數據。
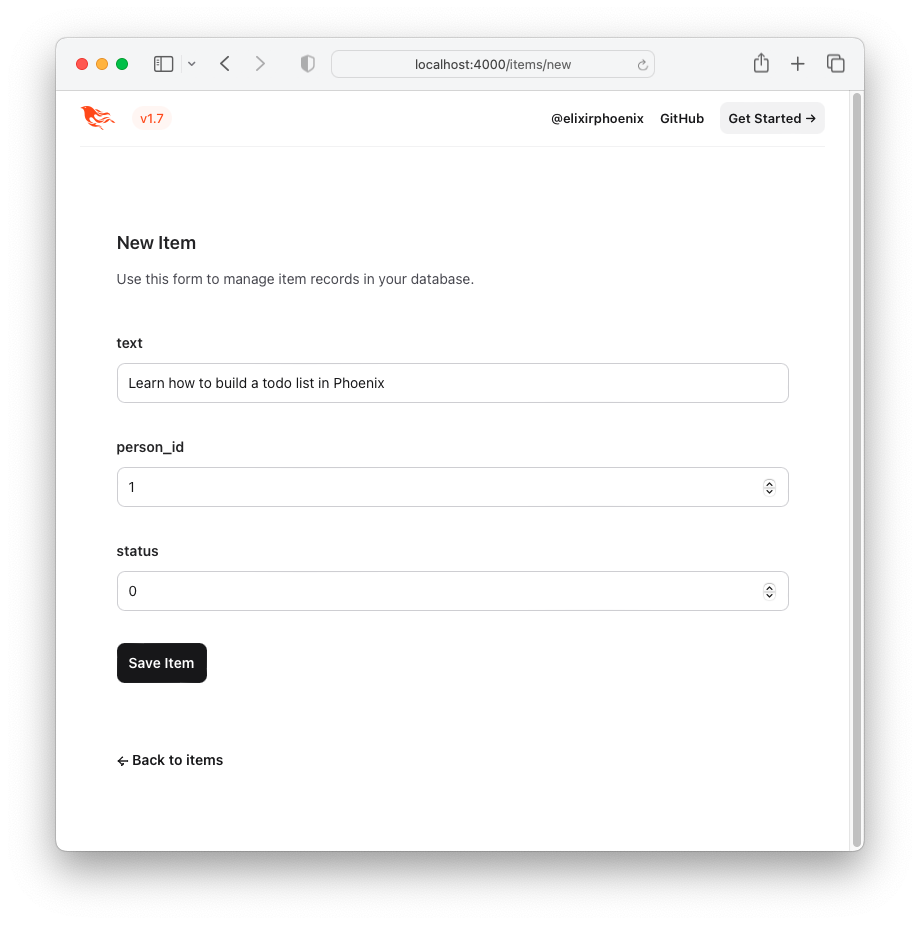
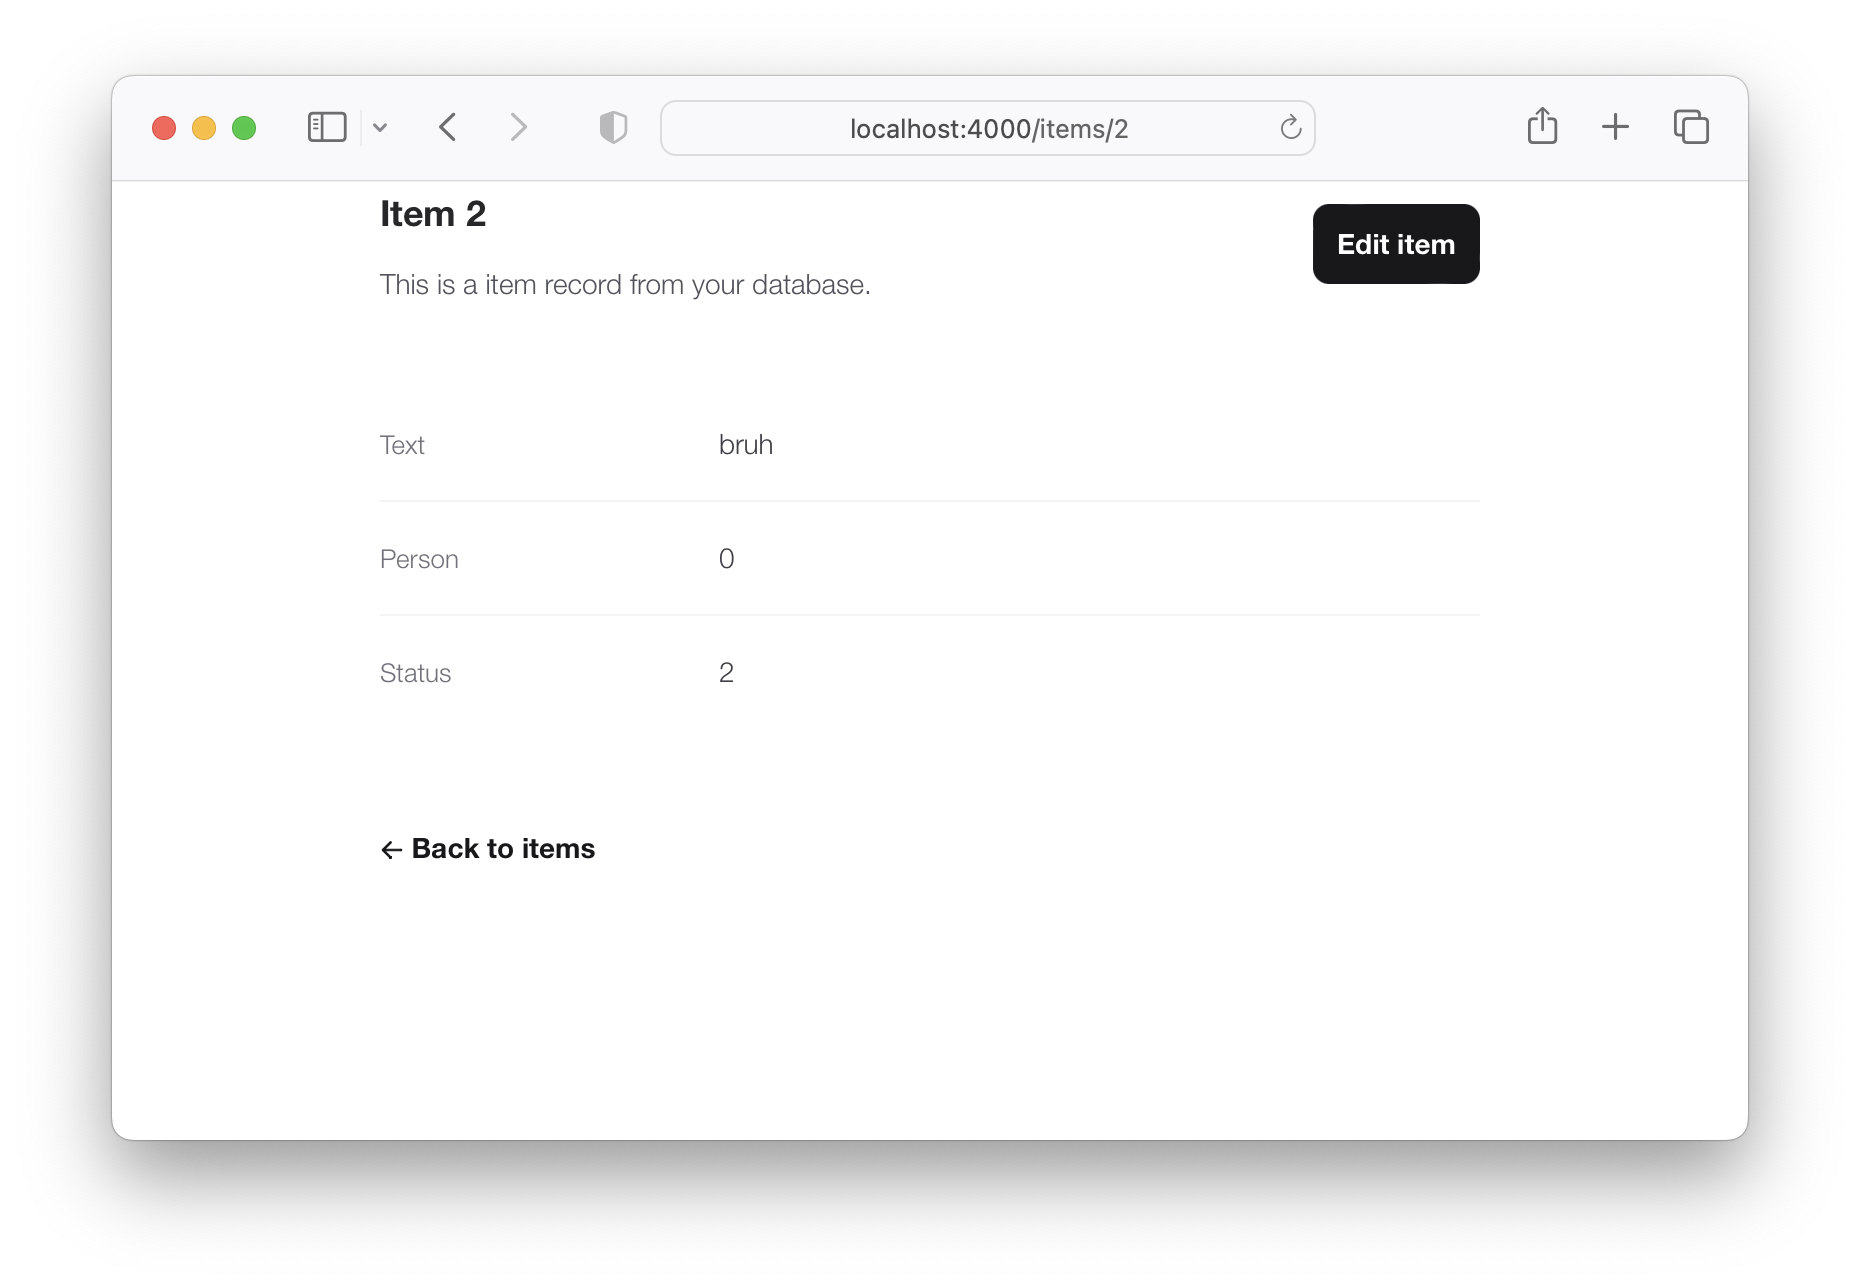
單擊“保存項目”按鈕,您將被重定向到“顯示”頁面:http:// localhost:4000/tock/tock/1
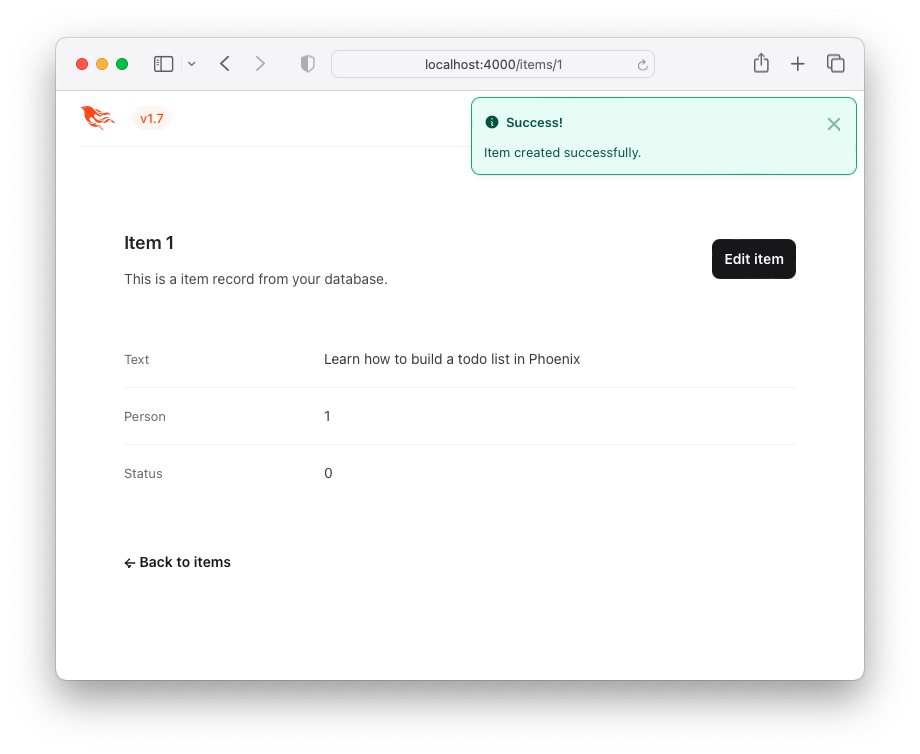
這不是一個有吸引力的用戶體驗(UX),但它起作用了!這是項目列表- “待辦事項列表”。您可以通過單擊Back to items按鈕或訪問以下URL http:// localhost:4000/items來訪問此。
讓我們使用TODONVC HTML和CSS來改進UX!
要重新創建TODONVC UI/UX,讓我們直接從示例中藉用HTML代碼。
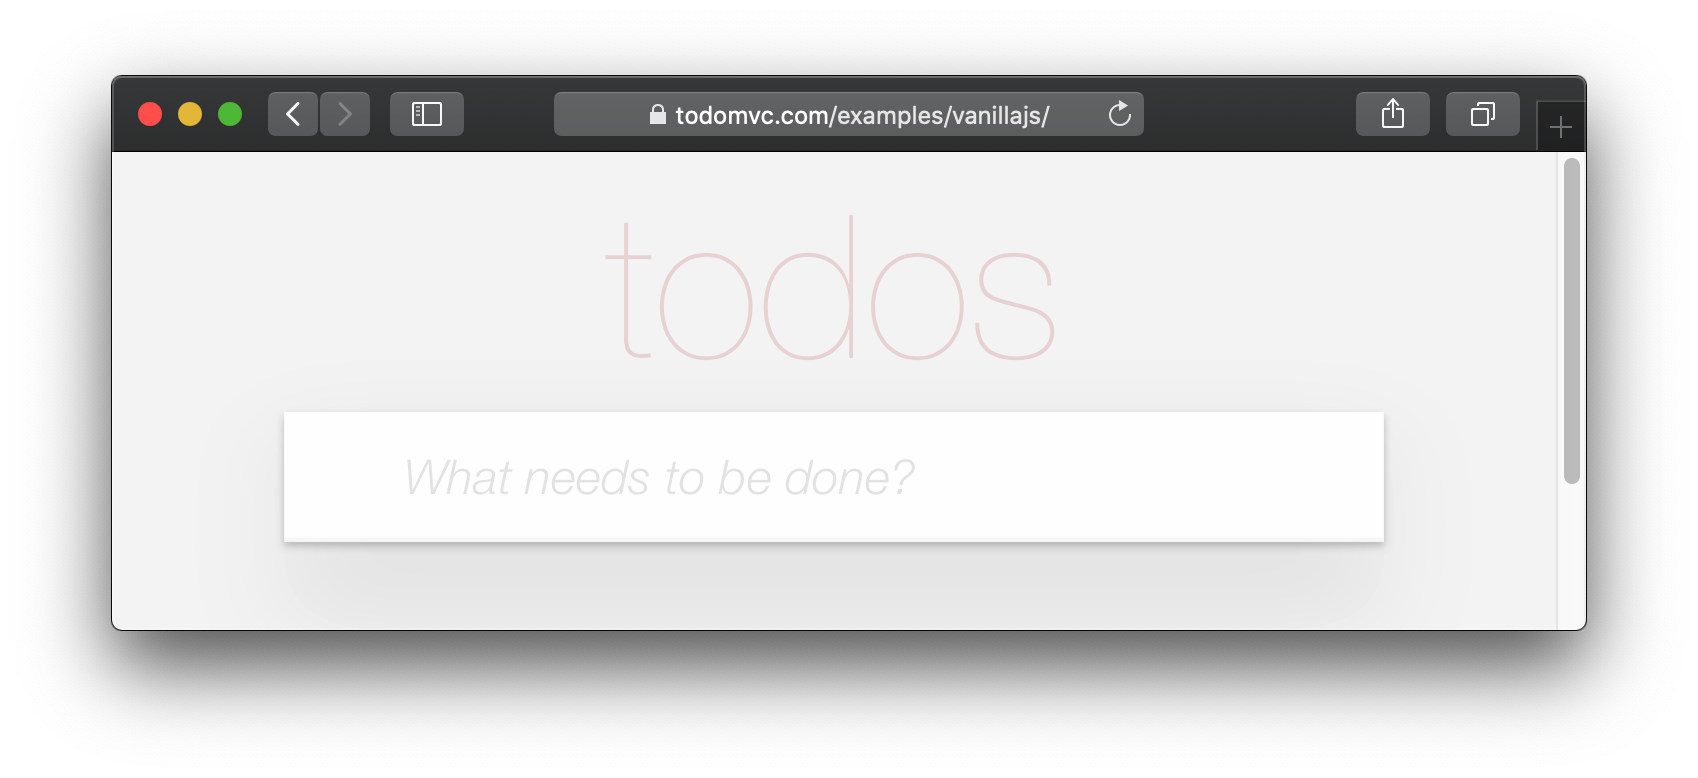
訪問:http://todomvc.com/examples/vanillajs在列表中添加了幾個項目。然後,使用瀏覽器的開發工具檢查源。例如:
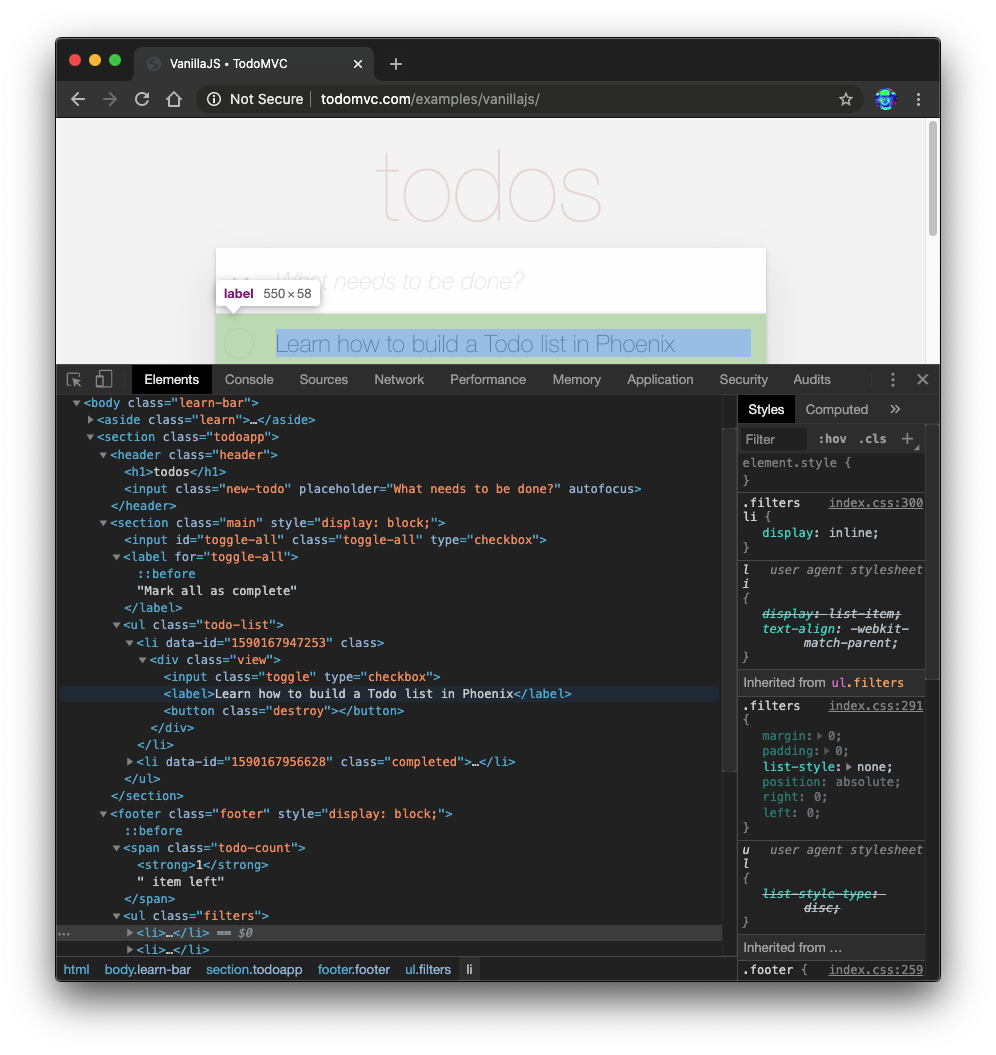
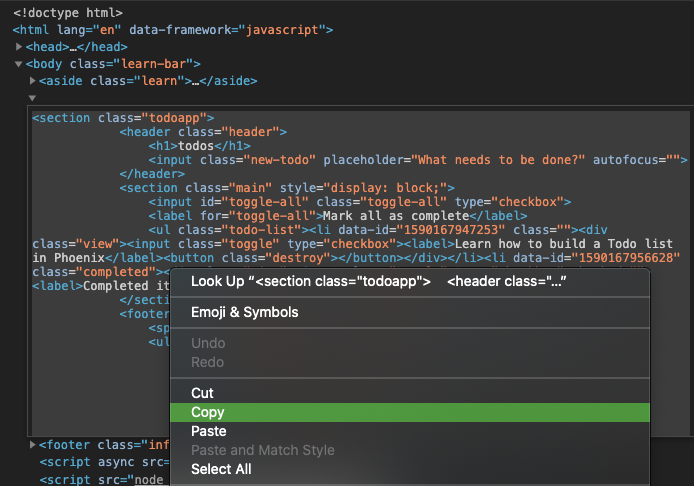
右鍵單擊所需的源(例如: <section class="todoapp"> ),然後選擇“編輯為html”:

一旦<section>的HTML可編輯,請選擇並複制它。
HTML代碼是:
 < section class =" todoapp " >
  < header class =" header " >
    < h1 > todos </ h1 >
    < input class =" new-todo " placeholder =" What needs to be done? " autofocus ="" />
  </ header >
  < section class =" main " style =" display: block; " >
    < input id =" toggle-all " class =" toggle-all " type =" checkbox " />
    < label for =" toggle-all " > Mark all as complete </ label >
    < ul class =" todo-list " >
      < li data-id =" 1590167947253 " class ="" >
        < div class =" view " >
          < input class =" toggle " type =" checkbox " />
          < label > Learn how to build a Todo list in Phoenix </ label >
          < button class =" destroy " > </ button >
        </ div >
      </ li >
      < li data-id =" 1590167956628 " class =" completed " >
        < div class =" view " >
          < input class =" toggle " type =" checkbox " />
          < label > Completed item </ label >
          < button class =" destroy " > </ button >
        </ div >
      </ li >
    </ ul >
  </ section >
  < footer class =" footer " style =" display: block; " >
    < span class =" todo-count " > < strong > 1 </ strong > item left </ span >
    < ul class =" filters " >
      < li >
        < a href =" #/ " class =" selected " > All </ a >
      </ li >
      < li >
        < a href =" #/active " > Active </ a >
      </ li >
      < li >
        < a href =" #/completed " > Completed </ a >
      </ li >
    </ ul >
    < button class =" clear-completed " style =" display: block; " >
      Clear completed
    </ button >
  </ footer >
</ section >讓我們將此HTML轉換為嵌入式長生不老藥( EEx )模板。
注意:我們是從瀏覽器的元素檢查器複製此
HTML原因,而不是直接從GitHub上的源:examples/vanillajs/index.html上,這是一個“單頁應用程序”,因此<ul class="todo-list"></ul>僅在browser中填充。從瀏覽器開發工具中復制它是獲得完整HTML最簡單方法。
index.html.eex中打開lib/app_web/controllers/item_html/index.html.eex文件,然後滾動到底部。
然後(不刪除已經存在的代碼)粘貼我們從todomvc採購的HTML代碼。
例如:
/lib/app_web/controllers/item_html/index.html.eex#L27-L73
如果您嘗試立即運行該應用並訪問http:// localhost:4000/tock/times/
您將看到此(沒有TODOMVC CSS ):
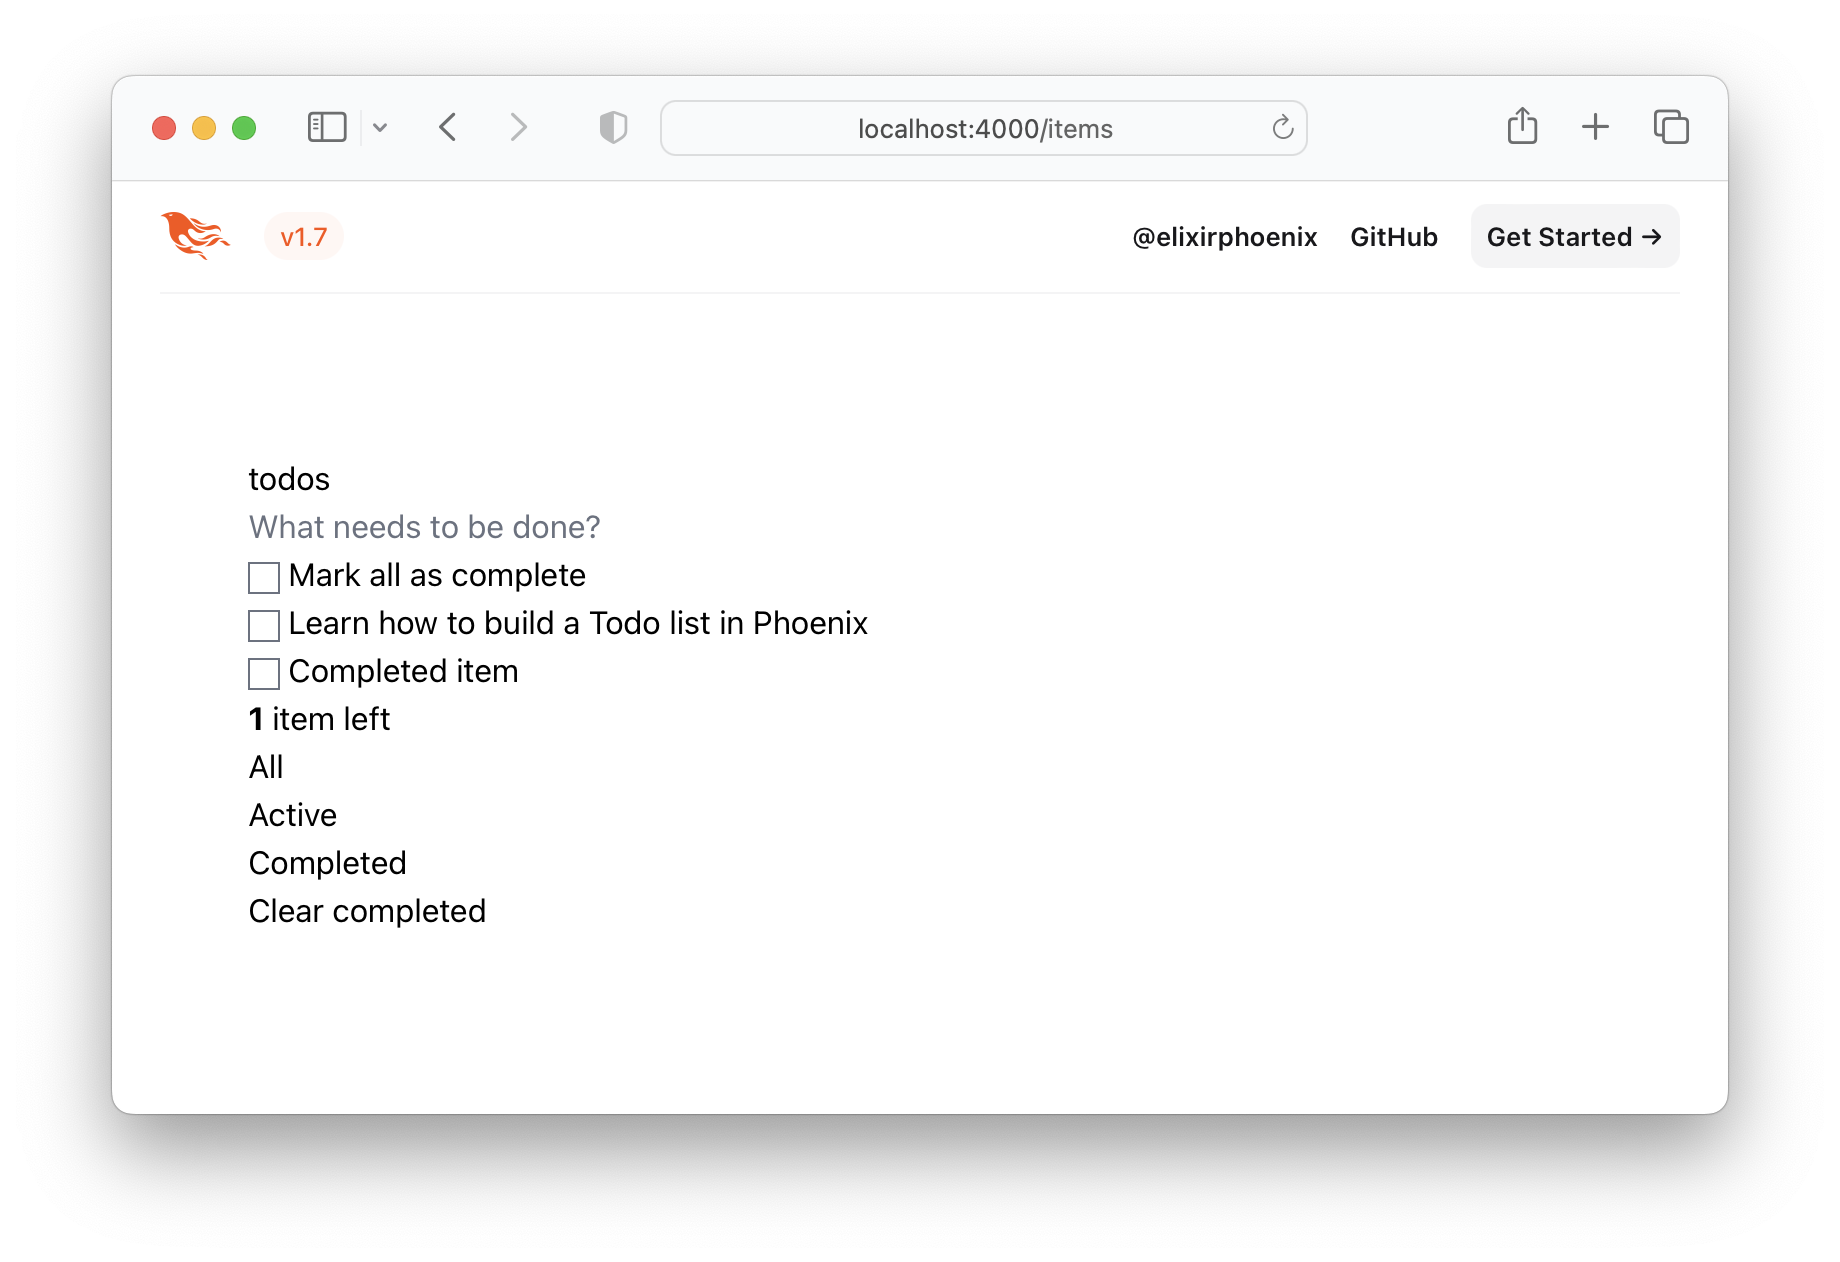
這顯然不是我們想要的,所以讓我們獲取TodomVC CSS並將其保存在我們的項目中!
/assets/css訪問http://todomvc.com/examples/vanillajs/node_modules/todomvc-app-css/index.css
並將文件保存到/assets/css/todomvc-app.css 。
例如: /assets/css/todomvc-app.css
app.scss中導入todomvc-app.css打開assets/css/app.scss文件,然後用以下內容替換它:
 /* This file is for your main application css. */
/* @import "./phoenix.css"; */
@import "./todomvc-app.css" ;
例如: /assets/css/app.scss#L4
打開您的lib/app_web/components/layouts/app.html.heex文件,然後用以下代碼替換內容:
 <!DOCTYPE html >
< html lang =" en " >
  < head >
    < meta charset =" utf-8 " />
    < meta http-equiv =" X-UA-Compatible " content =" IE=edge " />
    < meta name =" viewport " content =" width=device-width, initial-scale=1.0 " />
    < title > Phoenix Todo List </ title >
    < link rel =" stylesheet " href = {~p "/assets/app.css"} />
    < script defer type =" text/javascript " src = {~p "/assets/app.js"} > </ script >
  </ head >
  < body >
    < main role =" main " class =" container " >
      < %= @inner_content % >
    </ main >
  </ body >
</ html >
在之前:
lib/app_web/components/layouts/app.html.eex
之後:lib/app_web/components/layouts/app.html.heex
<%= @inner_content %>是渲染TODO應用的地方。
注意:
<script>標籤包含在常規中。但是,我們不會在本教程中編寫任何JavaScript。我們將在不編寫JS行的情況下實現100%的特徵奇偶校驗。我們不“討厭”JS,實際上,我們有一個“姐妹”教程,該教程在JS:Dwyl/Javascript-todo-list-Tutearial中構建了相同的應用程序,我們只想提醒您,您不需要任何JS就可以使用出色的UX構建功能齊全的Web應用程序!
保存的佈局模板後,將保存到/assets/css/todomvc-app.css和app.scss中導入的todomvc-app.css todomvc css文件保存到 /todomvc-app.cs.css和todomvc-app.css,您的/items頁面現在應該看起來像這樣:
因此,我們的待辦事項列表開始看起來像domvc,但它仍然只是一個虛擬列表。
為了在TODOMVC模板中渲染item數據,我們將需要添加一些功能。當我們創建項目並生成item模型時,創建了一個控制器(位於lib/app_web/controllers/item_controller.ex中)和組件/視圖(位於lib/app_web/controllers/item_html.ex中)。此組件/視圖是有效地控制我們使用先驗修改的lib/app_web/controllers/item_html目錄中內容的渲染。
我們知道我們需要更改UI,因此我們將在此組件中添加一些功能(類似於MVC範式的視圖部分)。
這是我們第一次進行測試驅動開發(TDD)的機會。
使用路徑test/app_web/controllers/item_html_test.exs創建一個新文件。
在文件中鍵入以下代碼:
 defmodule AppWeb.ItemHTMLTest do
  use AppWeb.ConnCase , async: true
  alias AppWeb.ItemHTML

  test "complete/1 returns completed if item.status == 1" do
    assert ItemHTML . complete ( % { status: 1 } ) == "completed"
  end

  test "complete/1 returns empty string if item.status == 0" do
    assert ItemHTML . complete ( % { status: 0 } ) == ""
  end
end
例如: /test/app_web/controllers/item_html_test.exs
如果您嘗試運行此測試文件:
mix test test/app_web/controllers/item_html_test.exs您會看到以下錯誤(因為函數尚不存在!):
** (UndefinedFunctionError) function AppWeb.ItemHTML.checked/1 is undefined or private
打開lib/app_web/controllers/item_html.ex文件並寫入功能以使測試通過。
這就是我們實施功能的方式。您的item_html.ex文件現在應該看起來像以下內容。
 defmodule AppWeb.ItemHTML do
  use AppWeb , :html

  embed_templates "item_html/*"

  # add class "completed" to a list item if item.status=1
  def complete ( item ) do
    case item . status do
      1 -> "completed"
      _ -> "" # empty string means empty class so no style applied
    end
  end
end
重新進行測試,現在應該通過:
mix test test/app_web/controllers/item_html_test.exs您應該看到:
....

Finished in 0.1 seconds
4 tests, 0 failures現在我們已經創建了這兩個視圖功能,並且我們的測試正在通過,讓我們在模板中使用它們!
打開lib/app_web/controllers/item_html/index.html.eex文件並找到行:
< ul class =" todo-list " >用以下內容替換<ul>的內容:
 < %= for item < - @items do % >
  < li data-id = {item.id} class = {complete(item)} >
    < div class =" view " >
      < %= if item.status == 1 do % >
        < input class =" toggle " type =" checkbox " checked />
      < % else % >
        < input class =" toggle " type =" checkbox " />
      < % end % >
      < label > < %= item.text % > </ label >
      < .link
        class="destroy"
        href={~p"/items/#{item}"}
        method="delete"
      >
      </ .link >
    </ div >
  </ li >
< % end % >
例如: lib/app_web/controllers/item_html/index.html.heex#L43-L53
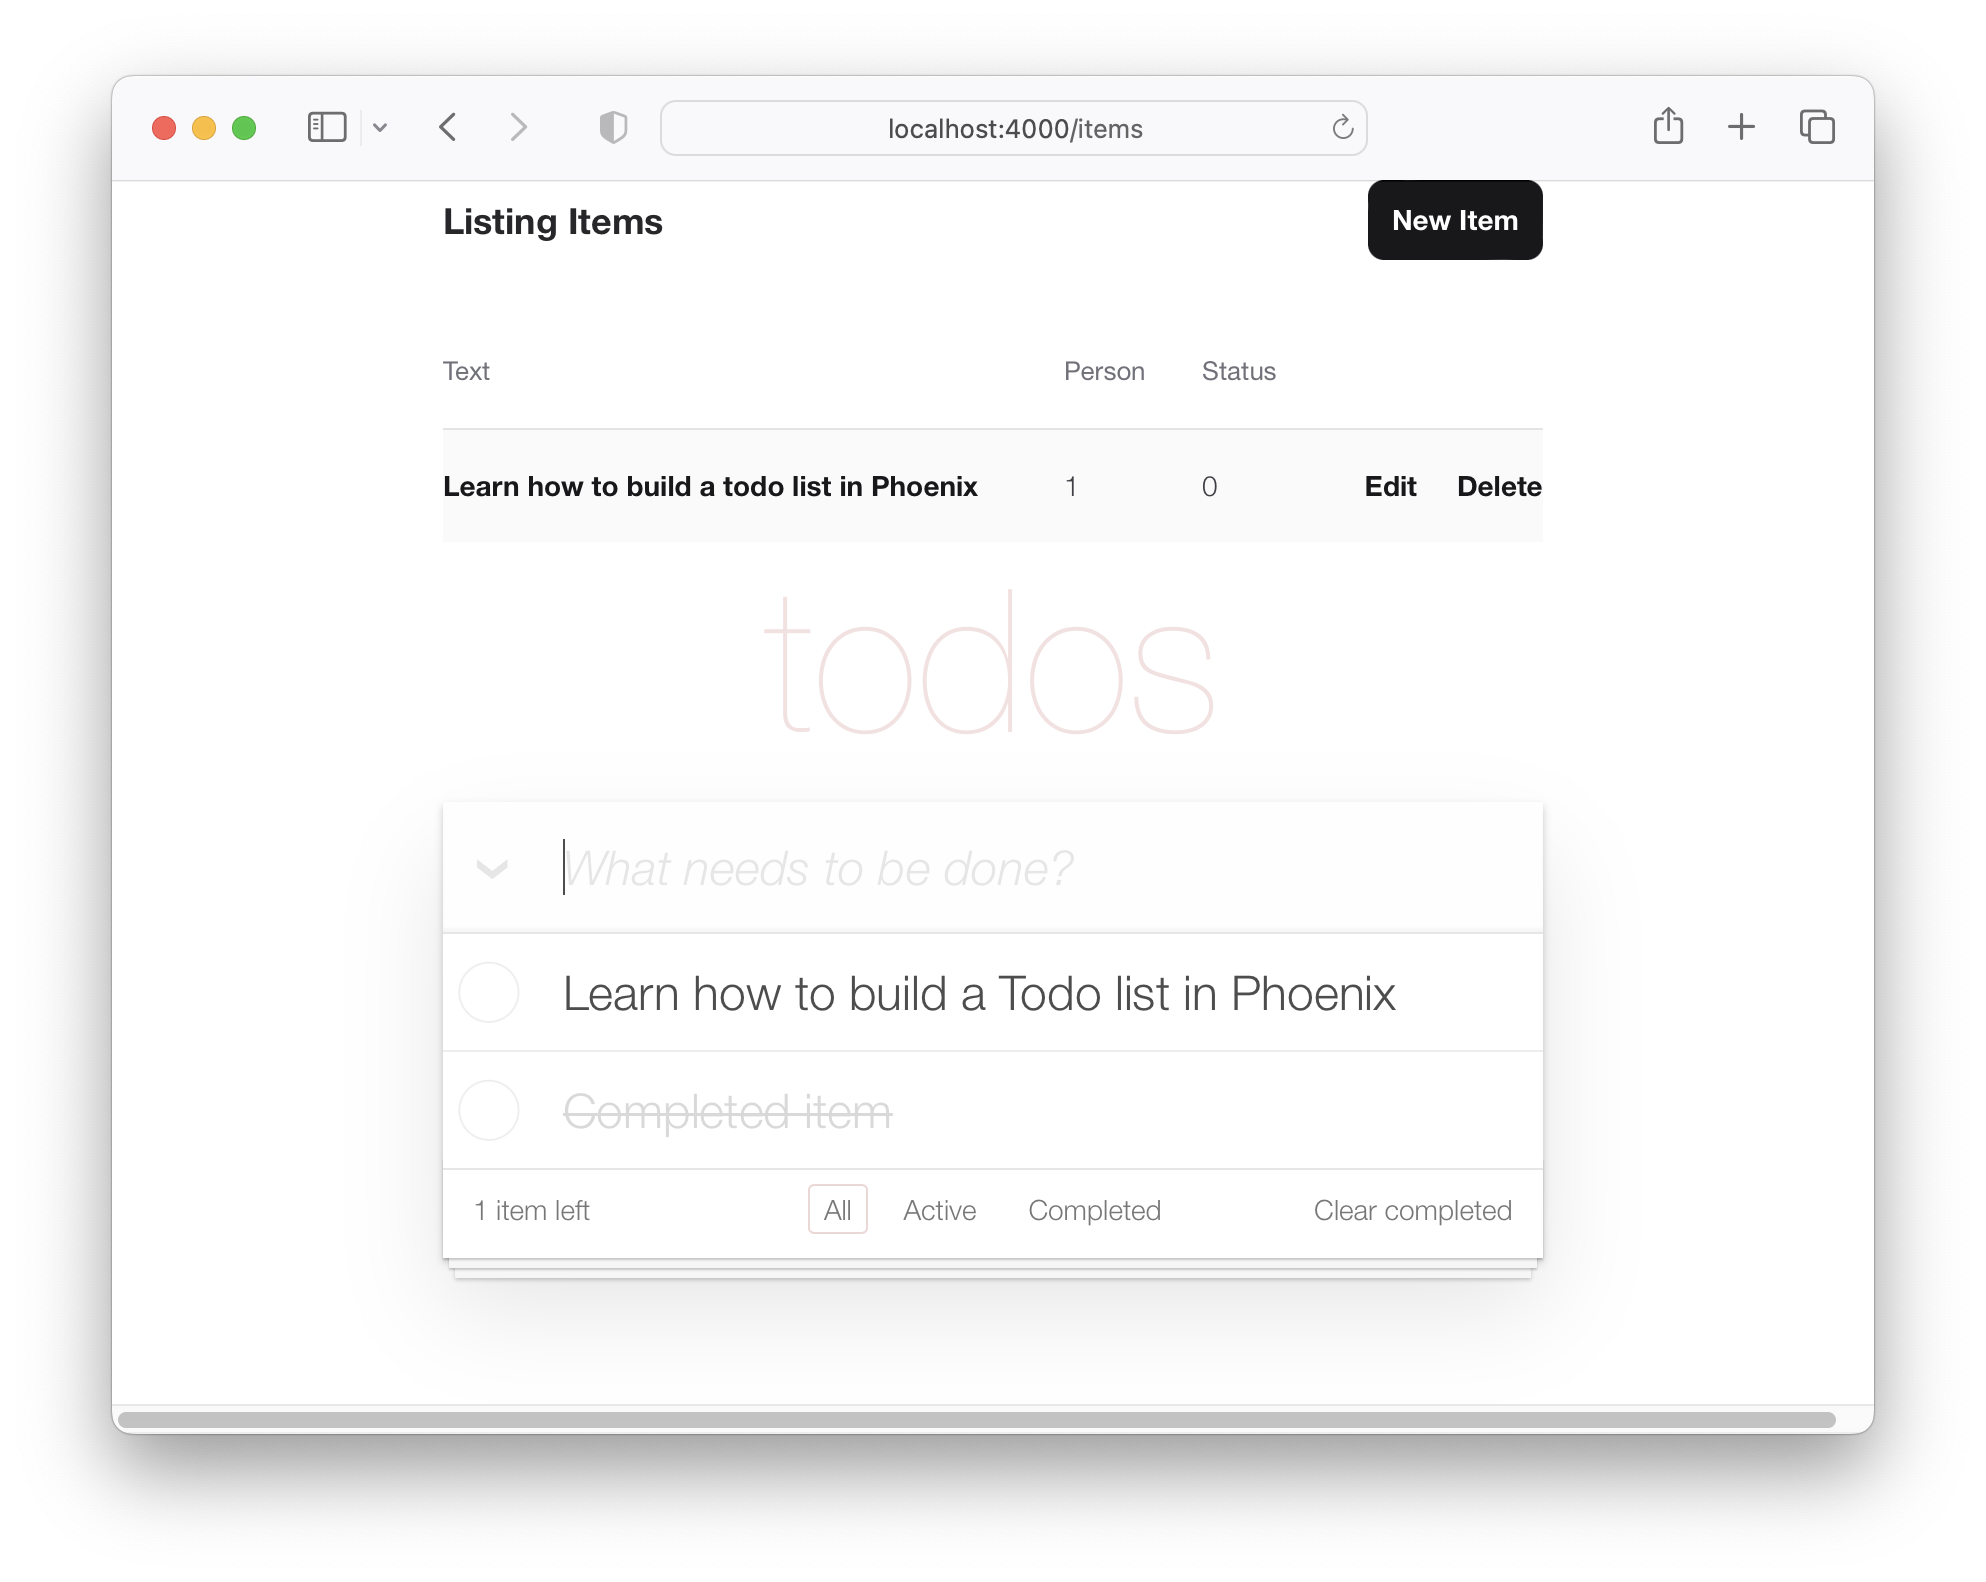
保存了這兩個文件後,如果您立即運行該應用程序: mix phx.server並訪問http:// localhost:4000/items。
您將在上面的步驟2.2中看到您創建的實際items :

現在,我們已經在todomvc佈局中渲染了項目,讓我們開始在“單頁應用程序”樣式中創建新項目。
目前,我們的“新項目”表格可在以下網址提供:http:// localhost:4000/ittem/new(如上步驟2所述)
我們希望該人能夠創建一個新項目,而無需導航到其他頁面。為了實現該目標,我們將在lib/app_web/controllers/item_html/new.html.heex模板中包括lib/app_web/controllers/item_html/index.html.heex模板(部分)模板。例如:
在這樣做之前,我們需要整理new.html.heex模板以刪除我們不需要的字段。
讓我們打開lib/app_web/controllers/item_html/new.html.heex並將其簡化為基本字段:text :
 < . simple_form :let = { f } for = { @ changeset } action = { ~p " /items " } >
  < . input
    field = { { f , :text } }
    type = "text"
    placeholder = "what needs to be done?"
  / >
  < :actions >
    < . button style = "display:none" > Save Item< / . button >
  < / :actions >
< / . simple_form >
之前:
/lib/app_web/controllers/item_html/new.html.heex
之後:/lib/app_web/controllers/item_html/new.html.heex
我們需要另外更改<.input>標籤的樣式。使用Phoenix,在lib/app_web/components/core_components.ex文件中,為預構建的組件定義了樣式( <.input>是這種情況)。
要更改此操作,以便使用與todomVc相同的樣式,請找到以下行。
def input ( assigns ) do
使用new-todo類更改類屬性。此功能應該看起來如下。
  def input ( assigns ) do
    ~H """
    <div phx-feedback-for={@name}>
      <.label for={@id}><%= @label %></.label>
      <input
        type={@type}
        name={@name}
        id={@id || @name}
        value={@value}
        class={[
          input_border(@errors),
          "new-todo"
        ]}
        {@rest}
      />
      <.error :for={msg <- @errors}><%= msg %></.error>
    </div>
    """
end我們還需要更改simple_form中的actions樣式。在同一文件中,搜索def simple_form(assigns) do並更改它,因此看起來如此:
  def simple_form ( assigns ) do
    ~H """
    <.form :let={f} for={@for} as={@as} {@rest}>
      <div>
        <%= render_slot(@inner_block, f) %>
        <div :for={action <- @actions}>
          <%= render_slot(action, f) %>
        </div>
      </div>
    </.form>
    """
  end
如果您立即運行Phoenix應用,然後訪問http:// localhost:4000/items/new,您將看到單曲:text輸入字段,否“保存”按鈕:
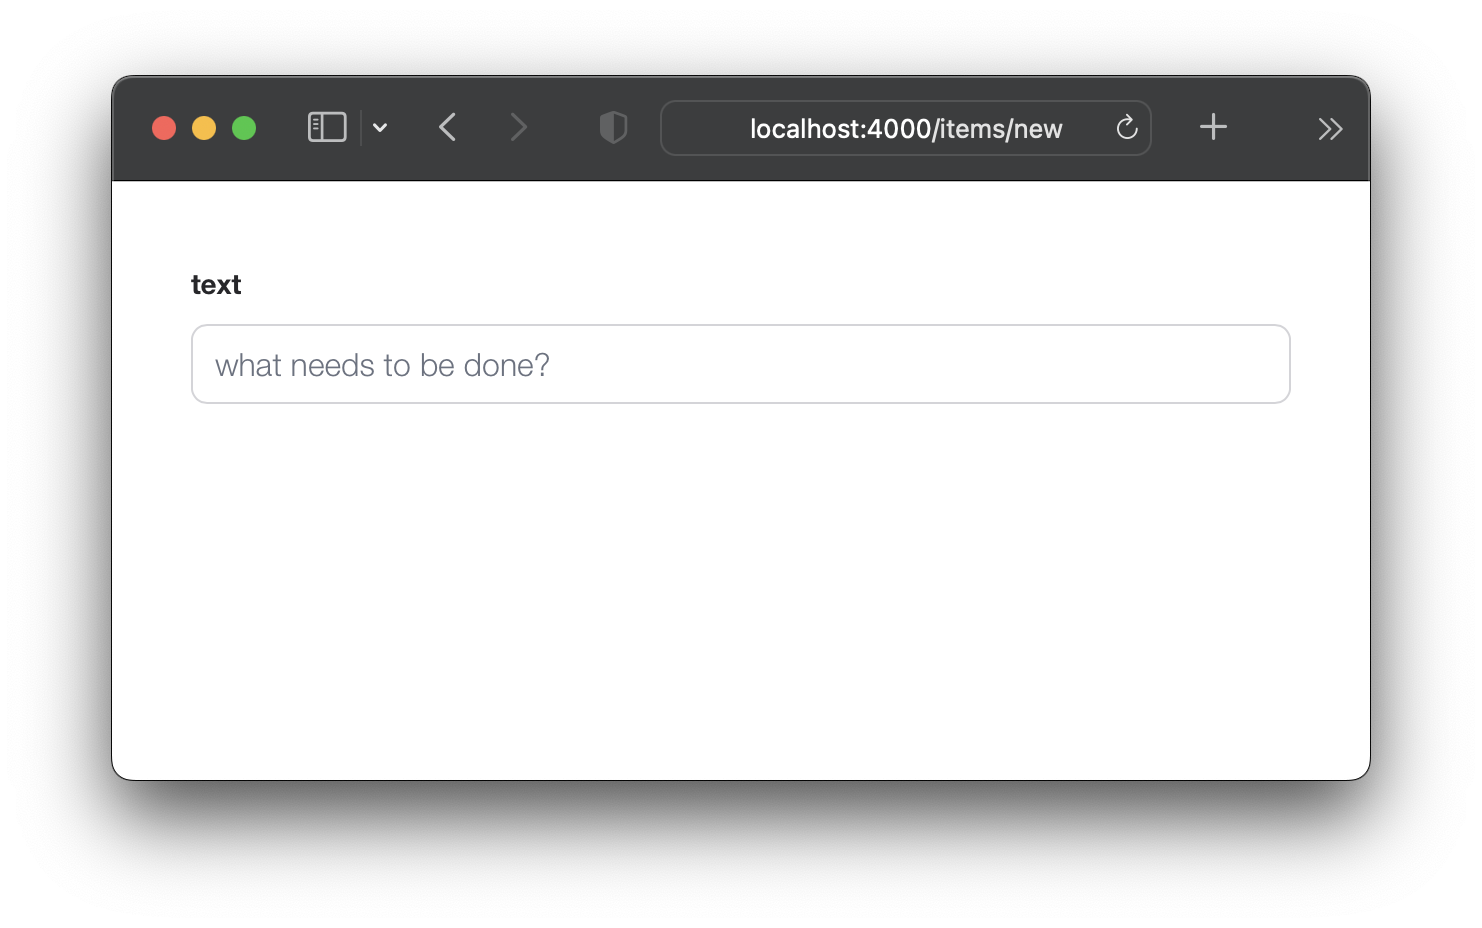
不用擔心,您仍然可以提交帶有Enter (return)密鑰的表格。但是,如果您現在試圖提交表格,它將無法使用,因為我們刪除了changeset所需的兩個字段!讓我們解決這個問題。
items模式以設置default值鑑於我們已經從new.html.eex中刪除了兩個字段( :person_id and :status ),我們需要確保在架構中為這些值提供默認值。打開lib/app/todo/item.ex文件,然後用以下內容替換內容:
 defmodule App.Todo.Item do
  use Ecto.Schema
  import Ecto.Changeset

  schema "items" do
    field :person_id , :integer , default: 0
    field :status , :integer , default: 0
    field :text , :string

    timestamps ( )
  end

  @ doc false
  def changeset ( item , attrs ) do
    item
    |> cast ( attrs , [ :text , :person_id , :status ] )
    |> validate_required ( [ :text ] )
  end
end
在這裡,我們正在更新“項目” schema ,以將person_id和status的默認值設置為0 。在changeset/2中,我們正在刪除對person_id和status的要求。這樣一來,我們的新item表單就可以僅使用text字段提交。
例如: /lib/app/todo/item.ex#L6-L7
現在,我們有default值為person_id和status如果您提交/items/new表格,它將成功。
ItemController中更新index/2為了在index.html.eex模板中插入新項目表單( new.html.eex ),我們需要更新AppWeb.ItemController.index/2以包括一個更改。
打開lib/app_web/controllers/item_controller.ex文件,然後將index/2函數更新到以下:
 def index ( conn , _params ) do
  items = Todo . list_items ( )
  changeset = Todo . change_item ( % Item { } )
  render ( conn , "index.html" , items: items , changeset: changeset )
end
之前: /lib/app_web/controllers/item_controller.ex
之後: /lib/app_web/controllers/item_controller.ex#L9-L10
在此步驟之後,您將看不到UI或測試的任何更改。只需轉移到“ aha”時刻發生的5.3。
new.html.eex內部index.html.eex現在我們已經完成了所有準備工作,下一步是在index.html.eex模板中渲染new.html.eex (部分)。
打開lib/app_web/controllers/item_html/index.html.heex文件並找到行:
< input class =" new-todo " placeholder =" What needs to be done? " autofocus ="" >用此替換:
< % = new ( Map . put ( assigns , :action , ~p " /items/new " ) ) % >讓我們分解我們剛剛做的事情。我們將new.html.heex部分嵌入index.html.heex文件中。我們正在通過在item_controller.ex中調用new/2函數來執行此操作。此功能與URL items/new頁面有關,並呈現new.html.heex文件。因此,為什麼我們將此功能稱為成功嵌入?
之前: /lib/app_web/controllers/item_html/index.html.heex#L36
之後: /lib/app_web/controllers/item_html/index.html.heex#L36
如果您立即運行該應用並訪問:http:// localhost:4000/ittem
您可以通過鍵入文本並使用Enter (return)密鑰提交項目來創建項目。
重定向到“顯示”模板是“確定”,但是我們可以通過重定向回到index.html模板來做得更好。值得慶幸的是,這與更新代碼中的一行一樣容易。
create/2中的redirect打開lib/app_web/controllers/item_controller.ex文件並找到create函數。具體的行:
|> redirect ( to: ~p " /items/ #{ item } " )將行更新為:
|> redirect ( to: ~p " /items/ " )之前: /lib/app_web/controllers/item_controller.ex#L22
之後: /lib/app_web/controllers/item_controller.ex#L23
現在,當我們創建一個新item時,我們將重定向到index.html模板:

item_controller_test.exs以重定向到index我們對new.html.heex文件和上述步驟進行的更改打破了我們的一些自動測試。我們應該解決這個問題。
運行測試:
mix test您將看到以下輸出:
 Finished in 0.08 seconds (0.03s async, 0.05s sync)
23 tests, 3 failures
打開test/app_web/controllers/item_controller_test.exs文件並找到describe "new item"並describe "create item" 。將這兩個更改為以下內容。
更換測試:
 describe "new item" do
  test "renders form" , % { conn: conn } do
    conn = get ( conn , ~p " /items/new " )
    assert html_response ( conn , 200 ) =~ "what needs to be done?"
  end
end

describe "create item" do
  test "redirects to show when data is valid" , % { conn: conn } do
    conn = post ( conn , ~p " /items " , item: @ create_attrs )

    assert % { } = redirected_params ( conn )
    assert redirected_to ( conn ) == ~p " /items/ "
  end

  test "errors when invalid attributes are passed" , % { conn: conn } do
    conn = post ( conn , ~p " /items " , item: @ invalid_attrs )
    assert html_response ( conn , 200 ) =~ "can't be blank"
  end
end
更新的代碼:
/test/app_web/controllers/item_controller_test.exs#L34-L55
如果重新運行測試mix test ,現在將再次通過。
......................
Finished in 0.2 seconds (0.09s async, 0.1s sync)
22 tests, 0 failures到目前為止,TODOMVC UI的主要功能正在運行,我們可以創建新項目,並且它們出現在我們的列表中。在此步驟中,我們將增強UI,以包括左下角剩餘項目的計數。
打開test/app_web/controllers/item_html_test.exs文件並創建以下兩個測試:
 test "remaining_items/1 returns count of items where item.status==0" do
  items = [
    % { text: "one" , status: 0 } ,
    % { text: "two" , status: 0 } ,
    % { text: "done" , status: 1 }
  ]
  assert ItemHTML . remaining_items ( items ) == 2
end

test "remaining_items/1 returns 0 (zero) when no items are status==0" do
  items = [ ]
  assert ItemHTML . remaining_items ( items ) == 0
end
例如: test/app_web/controllers/item_html_test.exs#L14-L26
這些測試將失敗,因為ItemHTML.remaining_items/1函數不存在。
通過將以下代碼添加到lib/app_web/controllers/item_html.ex文件中來進行測試:
 # returns integer value of items where item.status == 0 (not "done")
def remaining_items ( items ) do
  Enum . filter ( items , fn i -> i . status == 0 end ) |> Enum . count
end
例如: /lib/app_web/controllers/item_html#L15-L17
現在測試正在通過,請在index.html模板中使用remaining_items/1 。打開lib/app_web/controllers/item_html/index.html.eex文件並找到代碼行:
< span class =" todo-count " > < strong > 1 </ strong > item left </ span >用這一行替換:
< span class =" todo-count " > < %= remaining_items(@items) % > items left </ span >這只需調用ItemHTML.remaining_items/1函數@items列表,@Items將返回尚未“完成”的剩餘項目的整數。
例如: /lib/app_web/controllers/item_html/index.html.eex#L60
在這一點上,TODOMVC UI左下方的(剩餘)項目計數器正在工作!
將new項目添加到您的列表中,並觀看數量增加:
這很容易,讓我們嘗試一些更先進的東西!
休息一下,抓住一杯新鮮的水,下一部分將要激烈!
status切換到1 TODO列表的核心功能之一是將item status從0到1 (“完整”)切換。
在我們的架構中,完整的item的status為1 。
我們將在控制器中需要兩個功能:
toggle_status/1切換項目的狀態,例如:0至1和1至0。toggle/2 HTTP請求的處理程序功能要切換項目的狀態。打開test/app_web/controllers/item_controller_test.exs文件。我們將在這裡進行一些更改,以便我們可以將測試添加到先前提到的功能中。我們將在item_controller_test.exs中導入App.Todo ,並修復創建和屬性常數以創建模擬項目。確保文件的開始看起來像是這樣。
 defmodule AppWeb.ItemControllerTest do
  use AppWeb.ConnCase
  alias App.Todo

  import App.TodoFixtures

  @ create_attrs % { person_id: 42 , status: 0 , text: "some text" }
  @ public_create_attrs % { person_id: 0 , status: 0 , text: "some public text" }
  @ completed_attrs % { person_id: 42 , status: 1 , text: "some text completed" }
  @ public_completed_attrs % { person_id: 0 , status: 1 , text: "some public text completed" }
  @ update_attrs % { person_id: 43 , status: 1 , text: "some updated text" }
  @ invalid_attrs % { person_id: nil , status: nil , text: nil }
我們將固定的Item屬性添加到稍後在測試中使用。我們正在指定public Item ,因為稍後我們將在此應用中添加身份驗證。
之後,在同一文件中找到defp create_item()/1函數。更改它,看起來像是如此。
  defp create_item ( _ ) do
    item = item_fixture ( @ create_attrs )
    % { item: item }
end我們將使用此功能創建Item對象,以在要添加的測試中使用。說到哪個,讓我們這樣做!將以下片段添加到文件中。
 describe "toggle updates the status of an item 0 > 1 | 1 > 0" do
  setup [ :create_item ]

  test "toggle_status/1 item.status 1 > 0" , % { item: item } do
    assert item . status == 0
    # first toggle
    toggled_item = % { item | status: AppWeb.ItemController . toggle_status ( item ) }
    assert toggled_item . status == 1
    # second toggle sets status back to 0
    assert AppWeb.ItemController . toggle_status ( toggled_item ) == 0
  end

  test "toggle/2 updates an item.status 0 > 1" , % { conn: conn , item: item } do
    assert item . status == 0
    get ( conn , ~p ' /items/toggle/ #{ item . id } ' )
    toggled_item = Todo . get_item! ( item . id )
    assert toggled_item . status == 1
  end
end
例如: /test/app_web/controllers/item_controller_test.exs#L64-L82
打開lib/app_web/controllers/item_controller.ex文件,然後向其添加以下功能:
  def toggle_status ( item ) do
    case item . status do
      1 -> 0
      0 -> 1
    end
  end

  def toggle ( conn , % { "id" => id } ) do
    item = Todo . get_item! ( id )
    Todo . update_item ( item , % { status: toggle_status ( item ) } )
    conn
    |> redirect ( to: ~p " /items " )
  end
例如: /lib/app_web/controllers/item_controller.ex#L64-L76
此時測試仍將失敗,因為我們在測試中調用的路線尚不存在。讓我們解決這個問題!
get /items/toggle/:id調用toggle/2 ID路由打開lib/app_web/router.ex並找到行resources "/items", ItemController 。添加新行:
get "/items/toggle/:id" , ItemController , :toggle例如: /lib/app_web/router.ex#L21
現在我們的測試最終將通過:
mix test您應該看到:
22:39:42.231 [info]  Already up
...........................

Finished in 0.5 seconds
27 tests, 0 failuresindex.html中單擊複選框時調用toggle/2現在我們的測試正在過去,現在是時候使用我們在UI中構建的所有這些功能了。打開/lib/app_web/controllers/item_html/index.html.heex文件並找到行:
 < %= if item.status == 1 do % >
...
< % else % >
...
< % end % >
用以下內容替換:
  < %= if item.status == 1 do % >
    < .link href={~p"/items/toggle/#{item.id}"}
        class="toggle checked" >
        type="checkbox"
    </ .link >
  < % else % >
    < .link href={~p"/items/toggle/#{item.id}"}
        type="checkbox"
        class="toggle" >
    </ .link >
< % end % >單擊此鏈接時,調用了get /items/toggle/:id端點,
反過來,這觸發了我們上面定義的toggle/2處理程序。
之前:
/lib/app_web/controllers/item_html/index.html.heex#L40
之後:/lib/app_web/controllers/item_html/index.html.heex#L47-L57
.checked CSS到app.scss不幸的是, <a>標籤(使用<.link>生成的標籤)不能具有:checked偽選擇器,因此在<input>標籤上使用的默認todomvc樣式將無法適用於鏈接。因此,我們需要在app.scss中添加幾行CSS。
打開assets/css/app.scss文件,然後向其添加以下行:
. todo-list li . checked + label {
	background-image : url ( 'data:image/svg+xml;utf8,%3Csvg%20xmlns%3D%22http%3A//www.w3.org/2000/svg%22%20width%3D%2240%22%20height%3D%2240%22%20viewBox%3D%22-10%20-18%20100%20135%22%3E%3Ccircle%20cx%3D%2250%22%20cy%3D%2250%22%20r%3D%2250%22%20fill%3D%22none%22%20stroke%3D%22%23bddad5%22%20stroke-width%3D%223%22/%3E%3Cpath%20fill%3D%22%235dc2af%22%20d%3D%22M72%2025L42%2071%2027%2056l-4%204%2020%2020%2034-52z%22/%3E%3C/svg%3E' );
	background-repeat : no-repeat;
}
保存文件後,您應該擁有: /assets/css/app.scss#L8
當您查看應用程序時,切換功能正常工作:

實施注意:我們非常故意在本教程中不使用JavaScript ,因為我們正在演示如何執行100%服務器端渲染應用程序。即使在瀏覽器中禁用JS或設備超級舊,並且沒有現代的Web瀏覽器,這總是有效的。我們可以很容易地將一個onclick屬性添加到<input>標籤,例如:
 < input < %= checked(item) % > type="checkbox" class="toggle"
onclick="location.href='
< %= Routes.item_path(@conn, :toggle, item.id) % > ';" >但是onclick是JavaScript ,我們不需要求助於JS 。
<a> (鏈接)是一種完美的語義非JS方法來切換item.status 。
todo順序如果您“完成”或恢復操作,則這些操作之間的托多斯訂單可能會有所不同。為了保持這種一致,讓我們以相同的順序獲取所有todo 。
在lib/app/todo.ex中,將list_items/0更改為以下內容。
  def list_items do
    query =
      from (
        i in Item ,
        select: i ,
        order_by: [ asc: i . id ]
      )

    Repo . all ( query )
end通過獲取todo物品並訂購它們,我們保證UX保持一致!
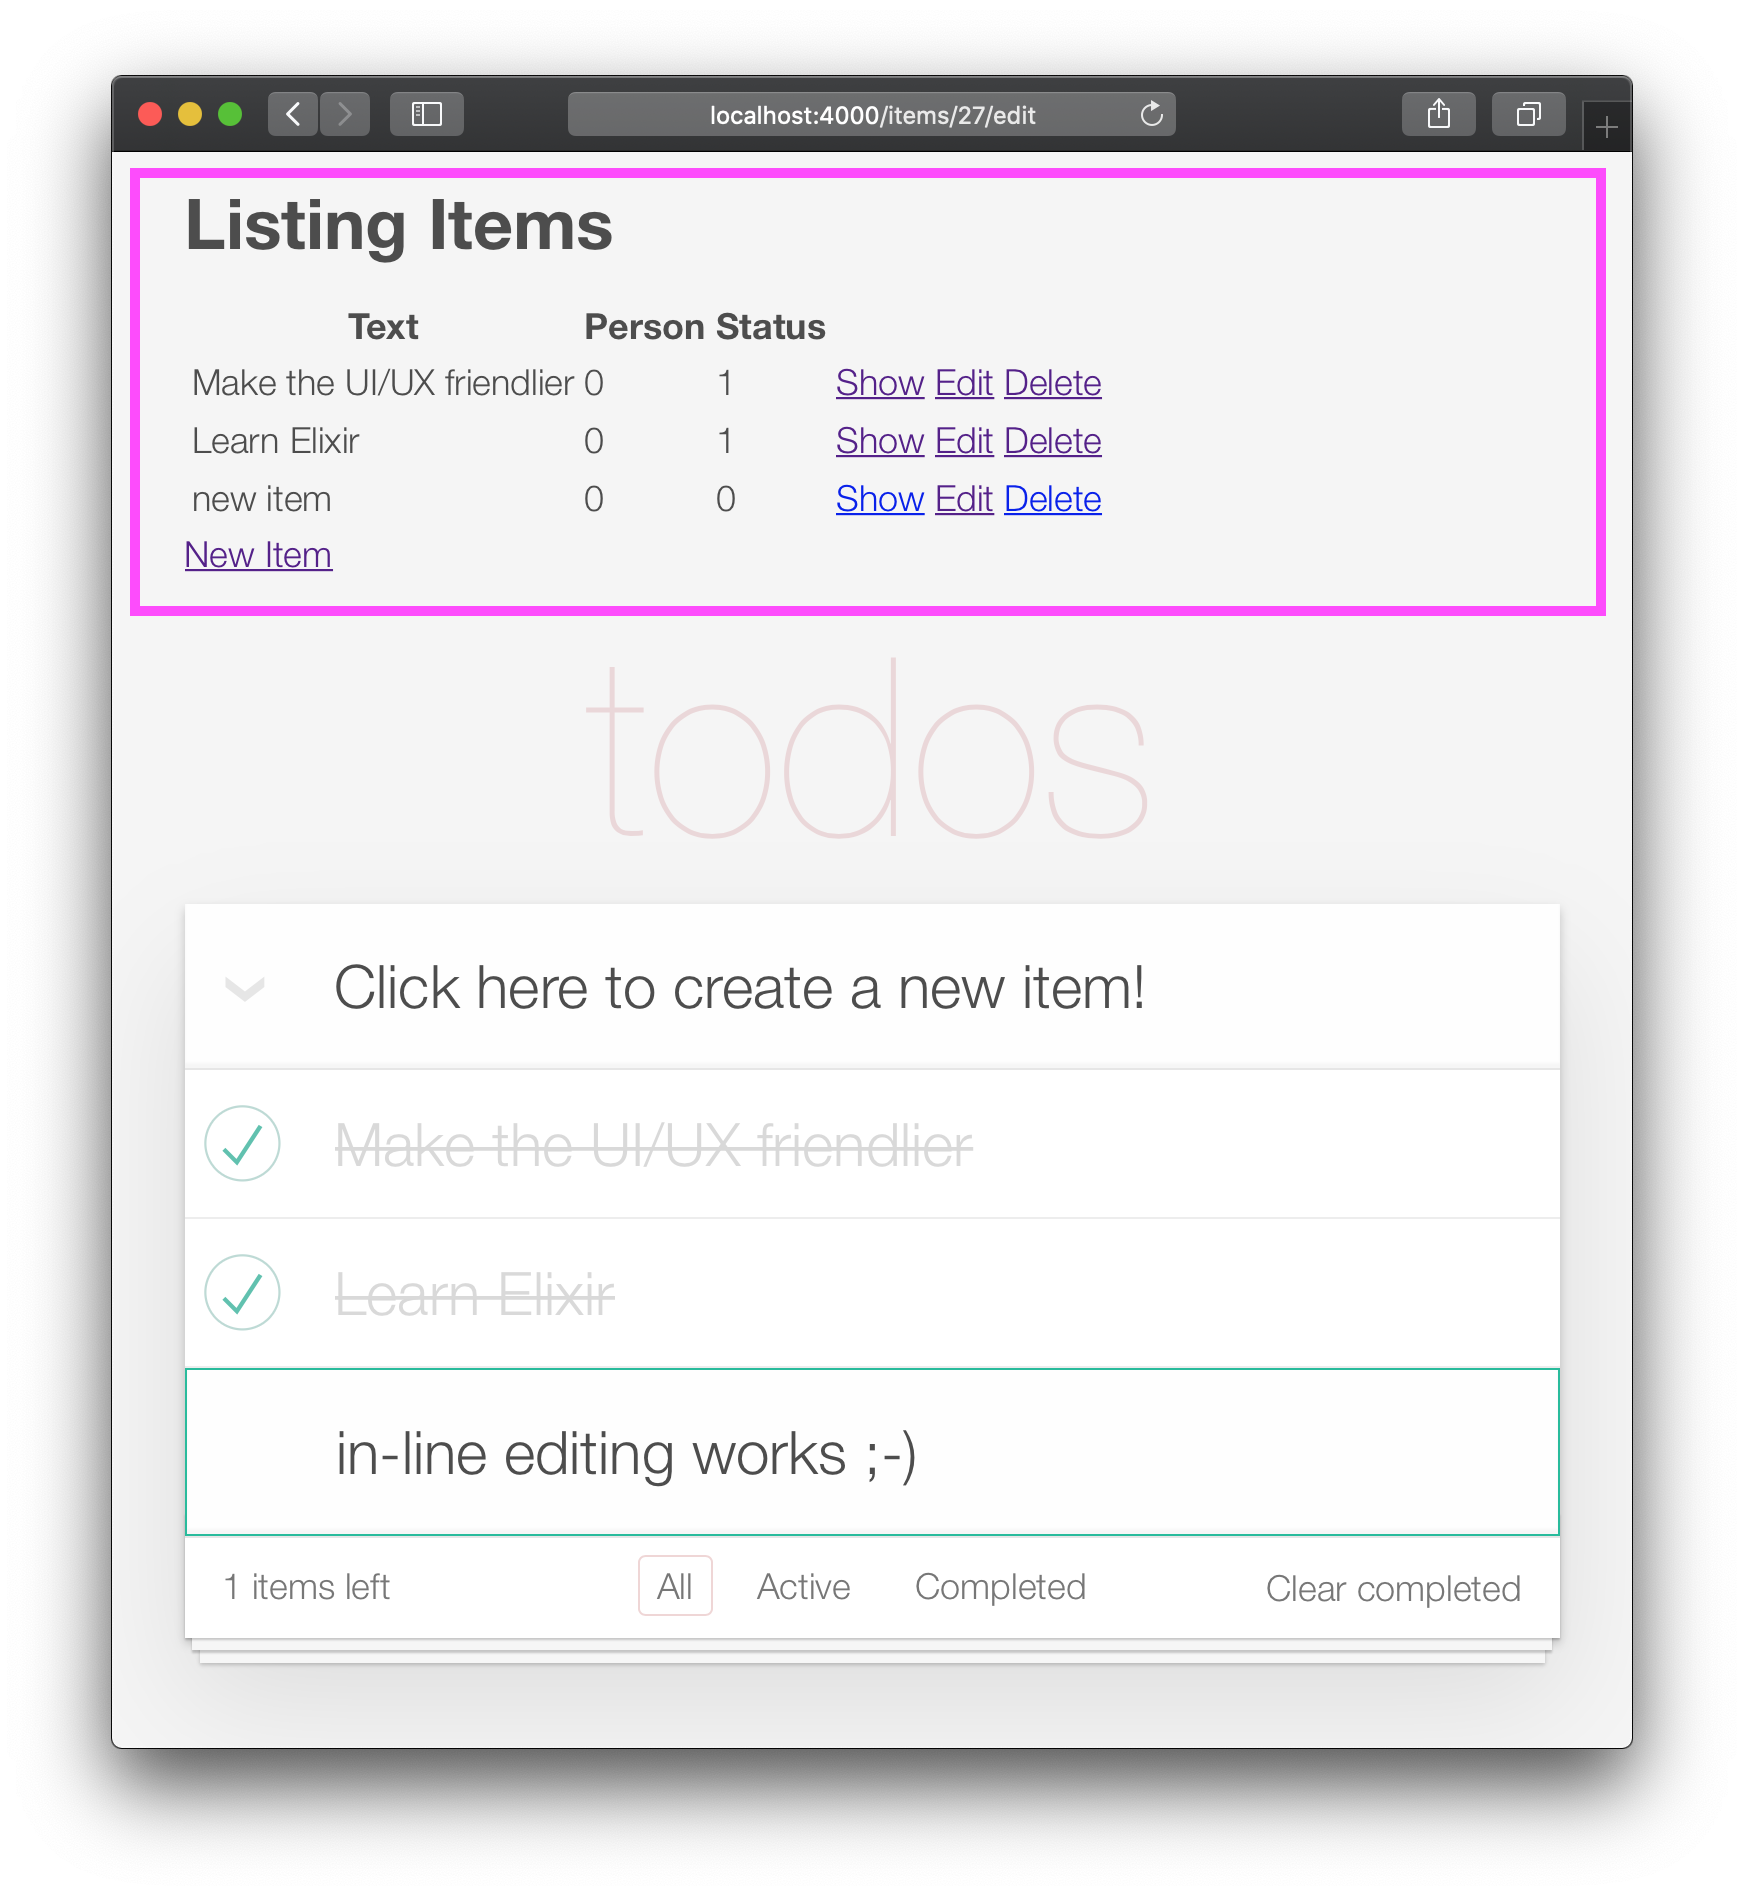
我們需要添加到UI的最終功能是編輯項目文本的能力。
在此步驟結束時,您將進行在線編輯工作:

需要兩次單擊以編輯項目的原因是,人們不會在滾動時意外編輯項目。因此,他們必須故意單擊/點擊兩次才能進行編輯。
在TODOMVC規格中,這是通過為雙擊事件創建事件偵聽器並用<input>替換<label>元素來實現的。我們正在嘗試避免在服務器端渲染的Phoenix應用中使用JavaScript (目前),因此我們要使用替代方法。值得慶幸的是,我們可以使用HTML和CSS模擬雙擊事件。請參閱:https://css-tricks.com/double-click-in-css(我們建議閱讀該帖子和演示,以完全了解此CSS的工作方式!)
注意:CSS實現不是真正的雙擊,更準確的描述將是“兩次點擊”,因為兩次單擊可以通過任意延遲發生。即首次單擊,然後進行10秒等待,第二次點擊將與快速連續兩次點擊具有相同的效果。如果您想實現真正的雙擊,請參見:github.com/dwyl/javascript-todo-list-tutorial#52-double-click
讓我們繼續吧!打開lib/app_web/controllers/item_html/index.html.heex文件並找到行:
< % = new ( Map . put ( assigns , :action , ~p " /items/new " ) ) % >替換為:
 < % = if @ editing . id do % >
  <. link href = { ~p " /items " }
      method = "get"
      class= "new-todo" >
      Click here to create a new item!
  < / . link >
< % else % >
  < % = new ( Map . put ( assigns , :action , ~p " /items/new " ) ) % >
< % end % >在這裡,我們正在檢查是否正在編輯項目,並呈現鏈接而不是表單。我們這樣做是為了避免頁面上有多個表格。如果我們不編輯項目,請像以前一樣渲染new.html.heex 。這樣,如果用戶正在編輯項目,他可以通過單擊渲染的鏈接來“擺脫編輯模式”。
例如: lib/app_web/controllers/item_html/index.html.heex#L30-L38
接下來,仍在index.html.eex文件中,找到該行:
< %= for item < - @items do % >用以下代碼替換整個<li>標籤。
 < li data - id = { item . id } class= { complete ( item ) } >
    < % = if item . status == 1 do % >
      <. link href = { ~p " /items/toggle/ #{ item . id } " }
          class= "toggle checked" >
          type = "checkbox"
      < / . link >
    < % else % >
      < . link href = { ~p " /items/toggle/ #{ item . id } " }
          type = "checkbox"
          class= "toggle" >
      < / . link >
    < % end % >

  < div class = "view" >
    < % = if item . id == @ editing . id do % >
      < % = edit (
        Map . put ( assigns , :action , ~p " /items/ #{ item . id } /edit " )
        |> Map . put ( :item , item )
      ) % >
    < % else % >
      < . link href = { ~p " /items/ #{ item } /edit " } class= "dblclick" >
        < label > < % = item . text % > < / label >
      < / . link >
      < span > < / span > < ! -- used for CSS Double Click -- >
    < % end % >

    < . link
      class = "destroy"
      href = { ~p " /items/ #{ item } " }
      method= "delete"
    >
    < / . link >
  < / div >
< /li>
例如: lib/app_web/controllers/item_html/index.html.heex#L46-L79
我們在這裡做了一些事情。我們更改了<div class="view> tag之外的切換按鈕。此外,我們已經使用a if else block語句更改了文本。
如果用戶不編輯,則會渲染鏈接( <a> ),單擊時,該鏈接允許用戶輸入“編輯”模式。另一方面,如果用戶正在編輯,則呈現edit.html.heex文件。
說到哪個,讓我們編輯edit.html.heex ,這樣就可以呈現我們想要的內容:一個文本字段,一旦按下Enter ,就會編輯引用todo項目。
 < .simple_form :let={f} for={@changeset} method="put" action={~p"/items/#{@item}"} >
  < .input
    field={{f, :text}}
    type="text"
    placeholder="what needs to be done?"
    class="new-todo"
  />
  < :actions >
    < .button
    style="display: none;"
    type="submit" >
      Save
    </ .button >
  </ :actions >
  <!-- submit the form using the Return/Enter key -->
</ .simple_form >CSS用於編輯要啟用CSS雙擊效果以輸入edit模式,我們需要將以下CSS添加到我們的assets/css/app.scss文件:
. dblclick {
  position : relative; /* So z-index works later, but no surprises now */
}

. dblclick + span {
  position : absolute;
  top : -1 px ; /* these negative numbers are to ensure */
  left : -1 px ; /* that the <span> covers the <a> */
  width : 103 % ; /* Gotta do this instead of right: 0; */
  bottom : -1 px ;
  z-index : 1 ;
}

. dblclick + span : active {
  left : -9999 px ;
}

. dblclick : hover {
  z-index : 2 ;
}
例如: assets/css/app.css#L13-L32
此外,由於我們的標記與TODOMVC標記略有不同,因此我們需要添加更多CSS以保持UI一致:
. todo-list li . toggle + div > a > label {
  background-image : url ( 'data:image/svg+xml;utf8,%3Csvg%20xmlns%3D%22http%3A//www.w3.org/2000/svg%22%20width%3D%2240%22%20height%3D%2240%22%20viewBox%3D%22-10%20-18%20100%20135%22%3E%3Ccircle%20cx%3D%2250%22%20cy%3D%2250%22%20r%3D%2250%22%20fill%3D%22none%22%20stroke%3D%22%23ededed%22%20stroke-width%3D%223%22/%3E%3C/svg%3E' );
  background-repeat : no-repeat;
  background-position : center left;
}

. todo-list li . checked + div > a > label
{
  background-image : url ( 'data:image/svg+xml;utf8,%3Csvg%20xmlns%3D%22http%3A//www.w3.org/2000/svg%22%20width%3D%2240%22%20height%3D%2240%22%20viewBox%3D%22-10%20-18%20100%20135%22%3E%3Ccircle%20cx%3D%2250%22%20cy%3D%2250%22%20r%3D%2250%22%20fill%3D%22none%22%20stroke%3D%22%23bddad5%22%20stroke-width%3D%223%22/%3E%3Cpath%20fill%3D%22%235dc2af%22%20d%3D%22M72%2025L42%2071%2027%2056l-4%204%2020%2020%2034-52z%22/%3E%3C/svg%3E' );
  background-repeat : no-repeat;
  background-position : center left;
}

. toggle {
  width : 10 % ;
  z-index : 3 ; /* keep the toggle checkmark above the rest */
}

a . new-todo {
  display : block;
  text-decoration : none;
}

. todo-list . new-todo {
  border : 1 px # 1abc9c solid;
}

. view a , . view a : visited {
  display : block;
  text-decoration : none;
  color : # 2b2d2f ;
}

. todo-list li . destroy {
  text-decoration : none;
  text-align : center;
  z-index : 3 ; /* keep the delete link above the text */
}這是您的app.scss文件在此步驟結束時的樣子: assets/css/app.css#L34-L71
ItemController.edit/2功能為了啟用在線編輯,我們需要修改edit/2功能。打開lib/app_web/controllers/item_controller.ex文件,然後用以下內容替換edit/2函數:
 def edit ( conn , params ) do
  index ( conn , params )
end此外,鑑於我們要求我們的index/2函數來處理編輯,我們需要更新index/2 :
 def index ( conn , params ) do
  item = if not is_nil ( params ) and Map . has_key? ( params , "id" ) do
    Todo . get_item! ( params [ "id" ] )
  else
    % Item { }
  end
  items = Todo . list_items ( )
  changeset = Todo . change_item ( item )
  render ( conn , "index.html" , items: items , changeset: changeset , editing: item )
end最後,我們需要處理提交表單以更新項目(在edit.html.heex中渲染)。當我們按Enter時, update/2處理程序在lib/app_web/controllers/item_controller.ex中被調用。更新項目後,我們希望留在同一頁面上。
因此,更改它,看起來像這樣。
 def update ( conn , % { "id" => id , "item" => item_params } ) do
  item = Todo . get_item! ( id )

  case Todo . update_item ( item , item_params ) do
    { :ok , _item } ->
      conn
      |> redirect ( to: ~p " /items/ " )

    { :error , % Ecto.Changeset { } = changeset } ->
      render ( conn , :edit , item: item , changeset: changeset )
  end
end您的item_controller.ex文件現在應該看起來像: lib/app_web/controllers/item_controller.ex
ItemControllerTest中的測試為了構建單頁應用程序,我們打破了一些測試!沒關係。它們很容易修復。
打開test/app_web/controllers/item_controller_test.exs文件,並使用以下文本找到測試。
test "renders form for editing chosen item"
並更改它,以便如下。
  test "renders form for editing chosen item" , % { conn: conn , item: item } do
    conn = get ( conn , ~p " /items/ #{ item } /edit " )
    assert html_response ( conn , 200 ) =~ "Click here to create a new item"
end當我們輸入“編輯計時器模式”時,我們會創建<a>鏈接以返回/items ,如我們先前實現的。此標籤具有“單擊此處創建新項目”文本,這就是我們所說的。
例如: test/app_web/controllers/item_controller_test.exs#L37-L39
接下來,使用以下描述找到測試:
describe "update item"將塊更新為以下代碼。
 describe "update item" do
  setup [ :create_item ]

  test "redirects when data is valid" , % { conn: conn , item: item } do
    conn = put ( conn , ~p " /items/ #{ item } " , item: @ update_attrs )
    assert redirected_to ( conn ) == ~p " /items/ "

    conn = get ( conn , ~p " /items/ " )
    assert html_response ( conn , 200 ) =~ "some updated text"
  end

  test "errors when invalid attributes are passed" , % { conn: conn , item: item } do
    conn = put ( conn , ~p " /items/ #{ item } " , item: @ invalid_attrs )
    assert html_response ( conn , 200 ) =~ "can't be blank"
  end
end
例如: test/app_web/controllers/item_controller_test.exs#L67-L80
我們已將應用程序重定向的路徑更新到更新項目後。由於我們正在構建一個單頁應用程序,因此該路徑與/items/ URL路徑有關。
如果您現在進行測試,它們應該再次通過:
 mix test

23:08:01.785 [info]  Already up
...........................

Finished in 0.5 seconds
27 tests, 0 failures

Randomized with seed 956565
index.html中刪除舊模板現在,我們已經有了toggle和edit功能工作,我們最終可以從lib/app_web/controllers/item_html/index.html.heex模板中刪除默認的鳳凰(表)佈局。
打開lib/app_web/controllers/item_html/index.html.eex文件,然後在行之前刪除所有代碼:
< section class =" todoapp " >例如: lib/app_web/controllers/item_html/index.html.heex
您的應用現在應該看起來像這樣: 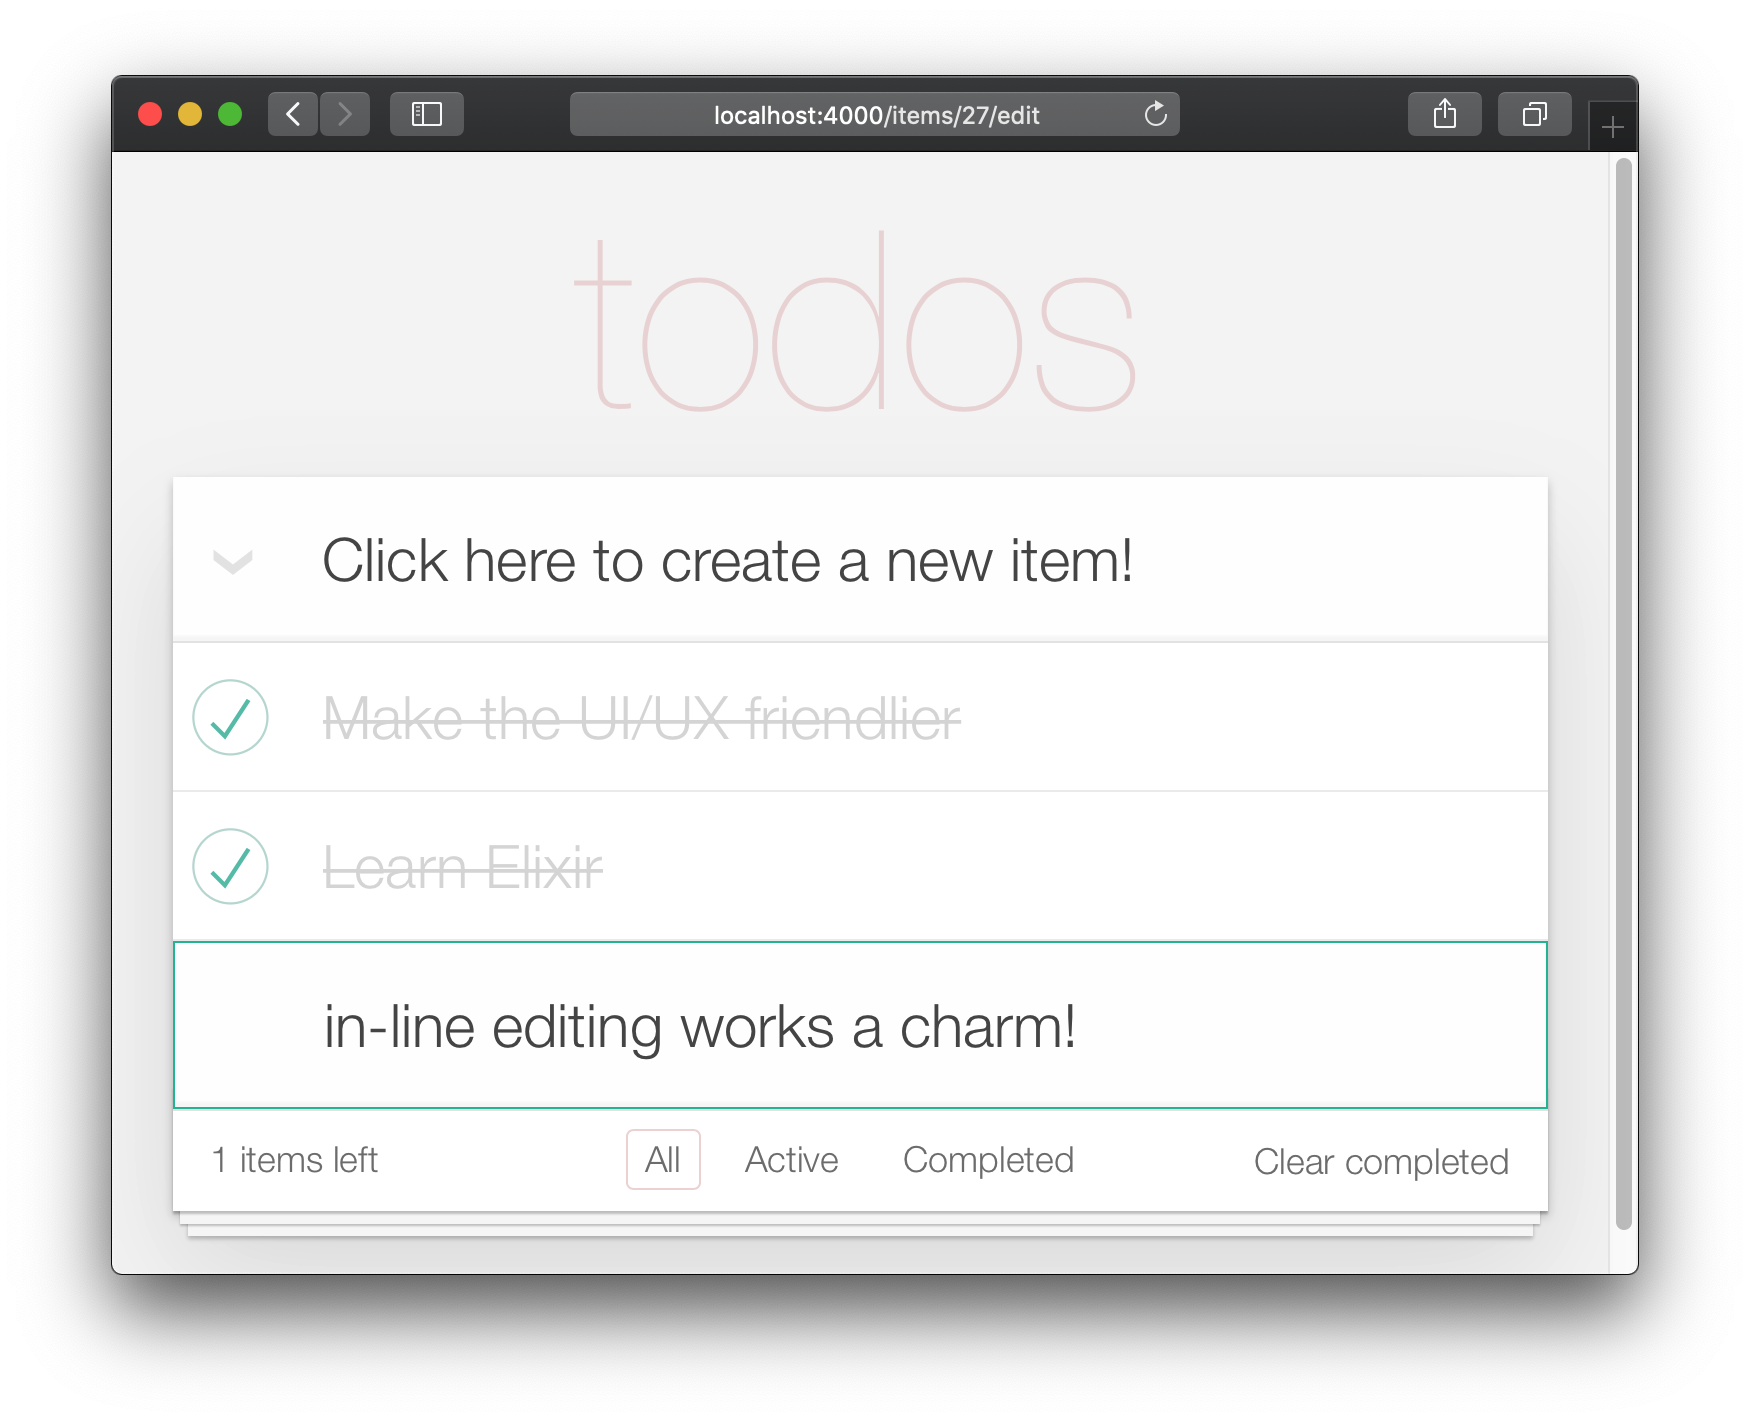
不幸的是,通過刪除默認佈局,我們“打破”了測試。
打開test/app_web/controllers/item_controller_test.exs文件並找到具有以下描述的測試:
test "lists all items"從:
assert html_response ( conn , 200 ) =~ "Listing Items"到:
assert html_response ( conn , 200 ) =~ "todos"例如: test/app_web/controllers/item_controller_test.exs#L14
現在,核心(創建,編輯/更新,刪除)功能正在正常工作,我們可以添加最終的UI增強功能。在此步驟中,我們將添加頁腳導航/過濾。
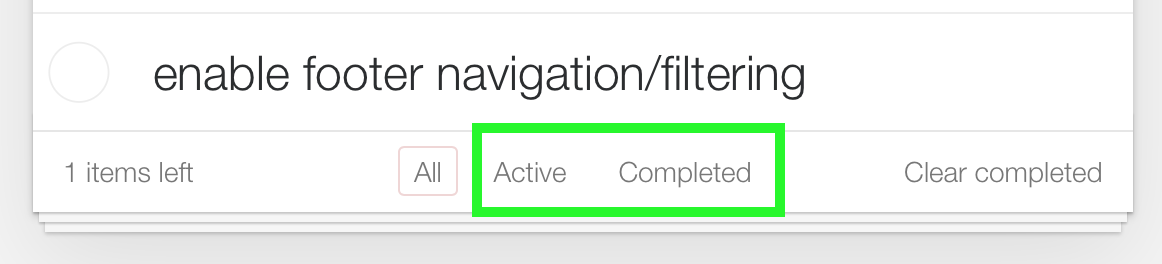
“全”視圖是默認值。 “活動”是所有項目status==0 。 “已完成”是所有具有status==1項目。
/:filter路線開始之前,讓我們添加一個單元測試。我們希望根據所選的過濾器顯示過濾的項目。
打開test/app_web/controllers/item_controller_test.exs並找到describe "index" do 。在此塊中,添加以下測試。它檢查更改過濾器時是否正確顯示該項目。
  test "lists items in filter" , % { conn: conn } do
    conn = post ( conn , ~p " /items " , item: @ public_create_attrs )

    # After creating item, navigate to 'active' filter page
    conn = get ( conn , ~p " /items/filter/active " )
    assert html_response ( conn , 200 ) =~ @ public_create_attrs . text

    # Navigate to 'completed page'
    conn = get ( conn , ~p " /items/filter/completed " )
    assert ! ( html_response ( conn , 200 ) =~ @ public_create_attrs . text )
  end
例如: test/app_web/controllers/item_controller_test.exs#L21-L32
打開lib/app_web/router.ex並添加以下路由:
get "/items/filter/:filter" , ItemController , :index例如: /lib/app_web/router.ex#L23
index/2以將filter發送到視圖/模板打開lib/app_web/controllers/item_controller.ex文件並找到index/2函數。替換index/2末尾的render/3的調用:用以下內容:
 render ( conn , "index.html" ,
  items: items ,
  changeset: changeset ,
  editing: item ,
  filter: Map . get ( params , "filter" , "all" )
)
例如: lib/app_web/controllers/item_controller.ex#L17-L22
Map.get(params, "filter", "all")將filter的默認值設置為“ all”,因此當啟用index.html時,顯示“所有”項目。
filter/2視圖功能為了通過其狀態過濾這些項目,我們需要創建一個新功能。
打開lib/app_web/controllers/item_html.ex文件,然後創建filter/2函數如下:
 def filter ( items , str ) do
  case str do
    "items" -> items
    "active" -> Enum . filter ( items , fn i -> i . status == 0 end )
    "completed" -> Enum . filter ( items , fn i -> i . status == 1 end )
    _ -> items
  end
end
例如: lib/app_web/controllers/item_html.ex#L19-L26
這將使我們能夠在下一步中過濾這些項目。
index.html模板中的頁腳使用filter/2功能過濾顯示的項目。打開lib/app_web/controllers/item_html/index.html.heex文件並找到for loop Line:
< % = for item <- @ items do % >替換為:
< % = for item <- filter ( @ items , @ filter ) do % >例如: lib/app_web/controllers/item_html/index.html.heex#L18
這將調用我們在@items和所選@filter列表中的上一個步驟中定義的filter/2函數。
接下來,找到<footer> ,然後用以下代碼替換<ul class="filters">的內容:
  < li >
    < % = if @ filter == "items" do % >
      <a href = "/items/filter/items" class= "selected" >
        All
      < / a >
    < % else % >
      <a href = "/items/filter/items" >
        All
      < / a >
    < % end % >
  < / li >
  < li >
    < % = if @ filter == "active" do % >
      <a href = "/items/filter/active" class= 'selected' >
        Active
        [ < % = Enum . count ( filter ( @ items , "active" ) ) % > ]
      < / a >
    < % else % >
      <a href = "/items/filter/active" >
        Active
        [ < % = Enum . count ( filter ( @ items , "active" ) ) % > ]
      < / a >
    < % end % >
  < / li >
  < li >
    < % = if @ filter == "completed" do % >
      <a href = "/items/filter/completed" class= 'selected' >
        Completed
        [ < % = Enum . count ( filter ( @ items , "completed" ) ) % > ]
      < / a >
    < % else % >
      <a href = "/items/filter/completed" >
        Completed
        [ < % = Enum . count ( filter ( @ items , "completed" ) ) % > ]
      < / a >
    < % end % >
< / li >我們將根據@filter分配值有條件地添加selected類。
例如: /lib/app_web/controllers/item_html/index.html.heex#L62-L98
在此步驟結束時,您將擁有一個功能齊全的頁腳過濾器:
我們可以快速覆蓋我們通過小型單元測試添加的功能。打開test/app_web/controllers/item_html_test.exs並添加以下內容。
  test "test filter function" do
    items = [
      % { text: "one" , status: 0 } ,
      % { text: "two" , status: 0 } ,
      % { text: "three" , status: 1 } ,
      % { text: "four" , status: 2 } ,
      % { text: "five" , status: 2 } ,
      % { text: "six" , status: 1 } ,
    ]

    assert length ( ItemHTML . filter ( items , "items" ) ) == 4
    assert length ( ItemHTML . filter ( items , "active" ) ) == 2
    assert length ( ItemHTML . filter ( items , "completed" ) ) == 2
    assert length ( ItemHTML . filter ( items , "any" ) ) == 4
  end
而且您應該完成此功能嗎?很棒的工作!
我們幾乎完成了鳳凰城的實施todomvc。要實現的最後一件事是“清晰完成”。
打開您的lib/app_web/router.ex文件,並添加以下路由:
get "/items/clear" , ItemController , :clear_completed您的scope "/"現在看起來如下:
  scope "/" , AppWeb do
    pipe_through :browser

    get "/" , PageController , :home
    get "/items/toggle/:id" , ItemController , :toggle
    get "/items/clear" , ItemController , :clear_completed
    get "/items/filter/:filter" , ItemController , :index
    resources "/items" , ItemController
end在lib/app_web/controllers/item_controller.ex文件中添加以下代碼:
 import Ecto.Query
alias App.Repo

def clear_completed ( conn , _param ) do
  person_id = 0
  query = from ( i in Item , where: i . person_id == ^ person_id , where: i . status == 1 )
  Repo . update_all ( query , set: [ status: 2 ] )
  # render the main template:
  index ( conn , % { filter: "all" } )
end
例如: lib/app_web/controllers/item_controller.ex#L87-L93
這使用Handy update_all/3函數來更新與query匹配的所有項目。在我們的情況下,我們搜索所有屬於person_id==0並具有status==1 items 。
我們不是在刪除項目,而是將其狀態更新為2 ,這是為了我們的示例,這意味著它們是“存檔”的。
注意:這是
update_all的有用指南:https://adamdelong.com/bulk-update-ecto
最後,在lib/app_web/controllers/item_html/index.html.eex滾動到文件底部並替換行:
 < button class = "clear-completed" style = "display: block;" >
  Clear completed
< / button >
和:
 < a class = "clear-completed" href = "/items/clear" >
  Clear completed
  [ < % = Enum . count ( filter ( @ items , "completed" ) ) % > ]
< / a >
例如: lib/app_web/controllers/item_html/index.html.heex#L104-L107
我們需要做的最後一件事是在lib/app_web/controllers/item_html.ex中更新filter/2函數。由於status = 2現在與存檔狀態有關,因此我們要返回任何未存檔的內容。
更改filter/2功能,使其看起來如此。
def filter ( items , str ) do
case str do
"items" -> Enum . filter ( items , fn i -> i . status !== 2 end )
"active" -> Enum . filter ( items , fn i -> i . status == 0 end )
"completed" -> Enum . filter ( items , fn i -> i . status == 1 end )
_ -> Enum . filter ( items , fn i -> i . status !== 2 end )
end
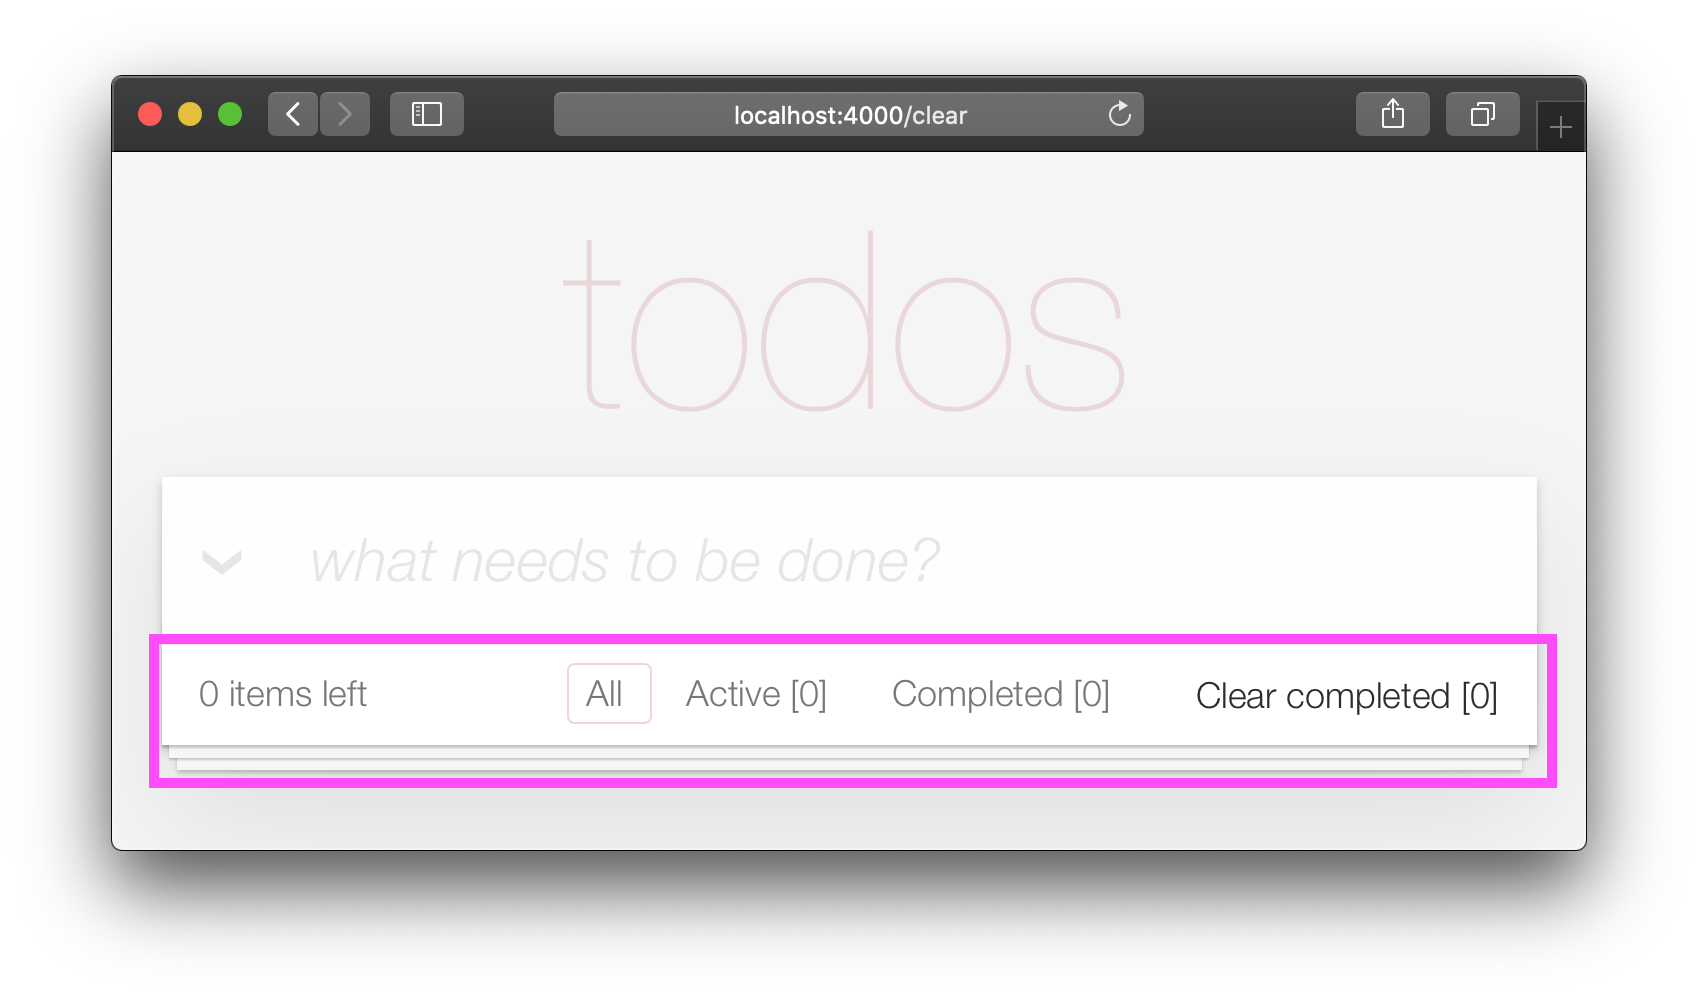
endAt the end of this section your Todo List should have the "Clear completed" function working:
It's useful to have tests cover this feature. Open test/app_web/controllers/item_controller_test.exs . Alongside the constants, on top of the file, add the following line.
@completed_attrs %{person_id: 42, status: 1, text: "some text completed"}
We will use this to create an item that is already completed, so we can test the "clear completed" functionality.
Add the next lines to test the clear_completed/2 function.
  describe "clear completed" do
    setup [ :create_item ]

    test "clears the completed items" , % { conn: conn , item: item } do

      # Creating completed item
      conn = post ( conn , ~p " /items " , item: @ public_completed_attrs )
      # Clearing completed items
      conn = get ( conn , ~p " /items/clear " )

      items = conn . assigns . items
      [ completed_item | _tail ] = conn . assigns . items

      assert conn . assigns . filter == "all"
      assert completed_item . status == 2
    end

    test "clears the completed items in public (person_id=0)" , % { conn: conn , item: item } do

      # Creating completed item
      conn = post ( conn , ~p " /items " , item: @ public_completed_attrs )
      # Clearing completed items
      conn = get ( conn , ~p " /items/clear " )

      items = conn . assigns . items
      [ completed_item | _tail ] = conn . assigns . items

      assert conn . assigns . filter == "all"
      assert completed_item . status == 2
    end
endAt this point we already have a fully functioning Phoenix Todo List. There are a few things we can tidy up to make the App even better!
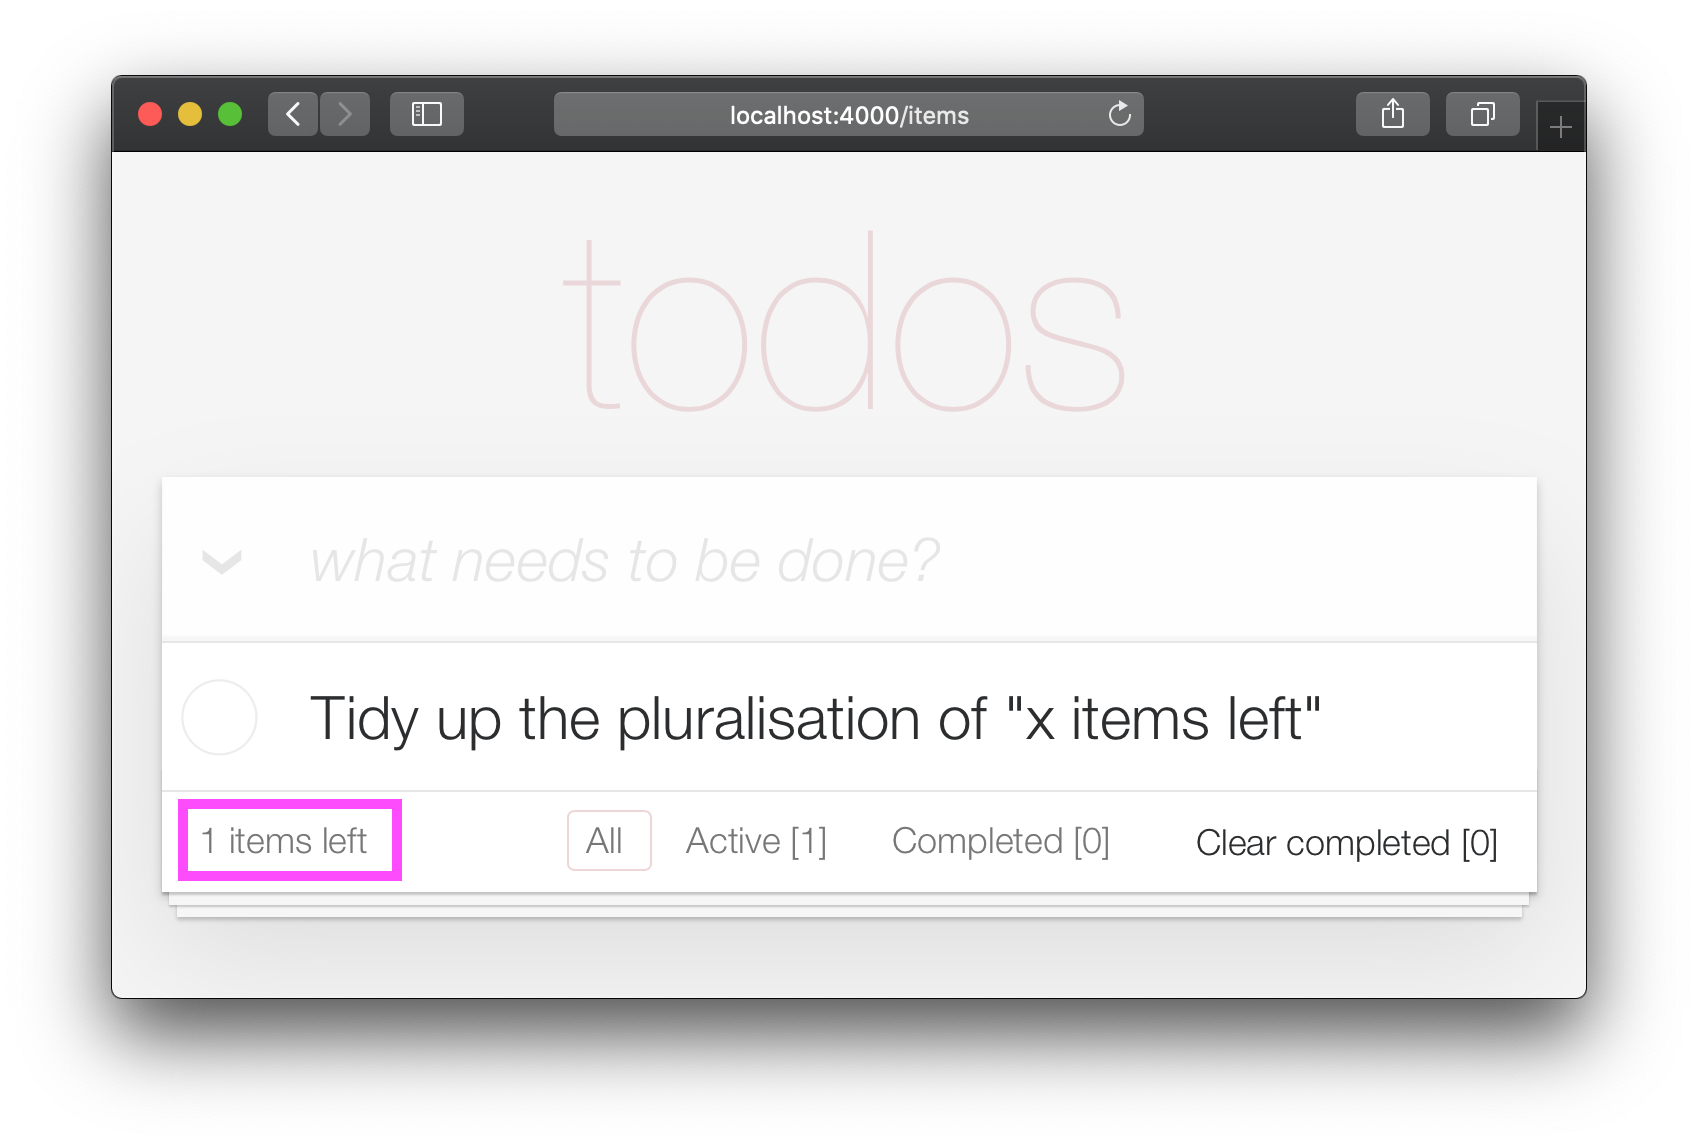
If you are the type of person to notice the tiny details, you would have been itching each time you saw the " 1 items left " in the bottom left corner:
Open your test/app_web/controllers/item_html_test.exs file and add the following test:
 test "pluralise/1 returns item for 1 item and items for < 1 <" do
  assert ItemHTML . pluralise ( [ % { text: "one" , status: 0 } ] ) == "item"
  assert ItemHTML . pluralise ( [
    % { text: "one" , status: 0 } ,
    % { text: "two" , status: 0 }
  ] ) == "items"
  assert ItemHTML . pluralise ( [ % { text: "one" , status: 1 } ] ) == "items"
end
eg: test/app_web/controllers/item_html_test.exs#L28-L35
This test will obviously fail because the AppWeb.ItemHTML.pluralise/1 is undefined. Let's make it pass!
Open your lib/app_web/controllers/item_html.ex file and add the following function definition for pluralise/1 :
 # pluralise the word item when the number of items is greater/less than 1
def pluralise ( items ) do
  # items where status < 1 is equal to Zero or Greater than One:
  case remaining_items ( items ) == 0 || remaining_items ( items ) > 1 do
    true -> "items"
    false -> "item"
  end
end
eg: lib/app_web/controllers/item_html.ex#L28-L35
Note : we are only pluralising one word in our basic Todo App so we are only handling this one case in our
pluralise/1function. In a more advanced app we would use a translation tool to do this kind of pluralising. See: https://hexdocs.pm/gettext/Gettext.Plural.html
Finally, use the pluralise/1 in our template. Open lib/app_web/controllers/item_html/index.html.heex
Locate the line:
< span class = "todo-count" > < % = remaining_items ( @ items ) % > items left < /span>And replace it with the following code:
 < span class = "todo-count" >
  < % = remaining_items ( @ items ) % > < % = pluralise ( @ items ) % > left
< /span>
eg: lib/app_web/controllers/item_html/index.html.heex#L61
At the end of this step you will have a working pluralisation for the word item/items in the bottom left of the UI:
If you visit one of the TodoMVC examples, you will see that no <footer> is displayed when there are no items in the list: http://todomvc.com/examples/vanillajs
At present our App shows the <footer> even if their are Zero items: ?
This is a visual distraction/clutter that creates unnecessary questions in the user's mind.讓我們修復它!
Open your lib/app_web/controllers/item_html.ex file and add the following function definition unarchived_items/1 :
 def got_items? ( items ) do
  Enum . filter ( items , fn i -> i . status < 2 end ) |> Enum . count > 0
end
eg: lib/app_web/controllers/item_html.ex#L37-L39
Now use got_items?/1 in the template.
Wrap the <footer> element in the following if statement:
 < % = if got_items? ( @ items ) do % >

< % end % >
eg: lib/app_web/controllers/item_html/index.html.heex#L58
The convention in Phoenix/Elixir ( which came from Ruby/Rails ) is to have a ? (question mark) in the name of functions that return a Boolean ( true/false ) result.
At the end of this step our <footer> element is hidden when there are no items:
/ to ItemController.index/2 The final piece of tidying up we can do is to change the Controller that gets invoked for the "homepage" ( / ) of our app. Currently when the person viewing the Todo App
visits http://localhost:4000/ they see the lib/app_web/controllers/page_html/home.html.eex template:
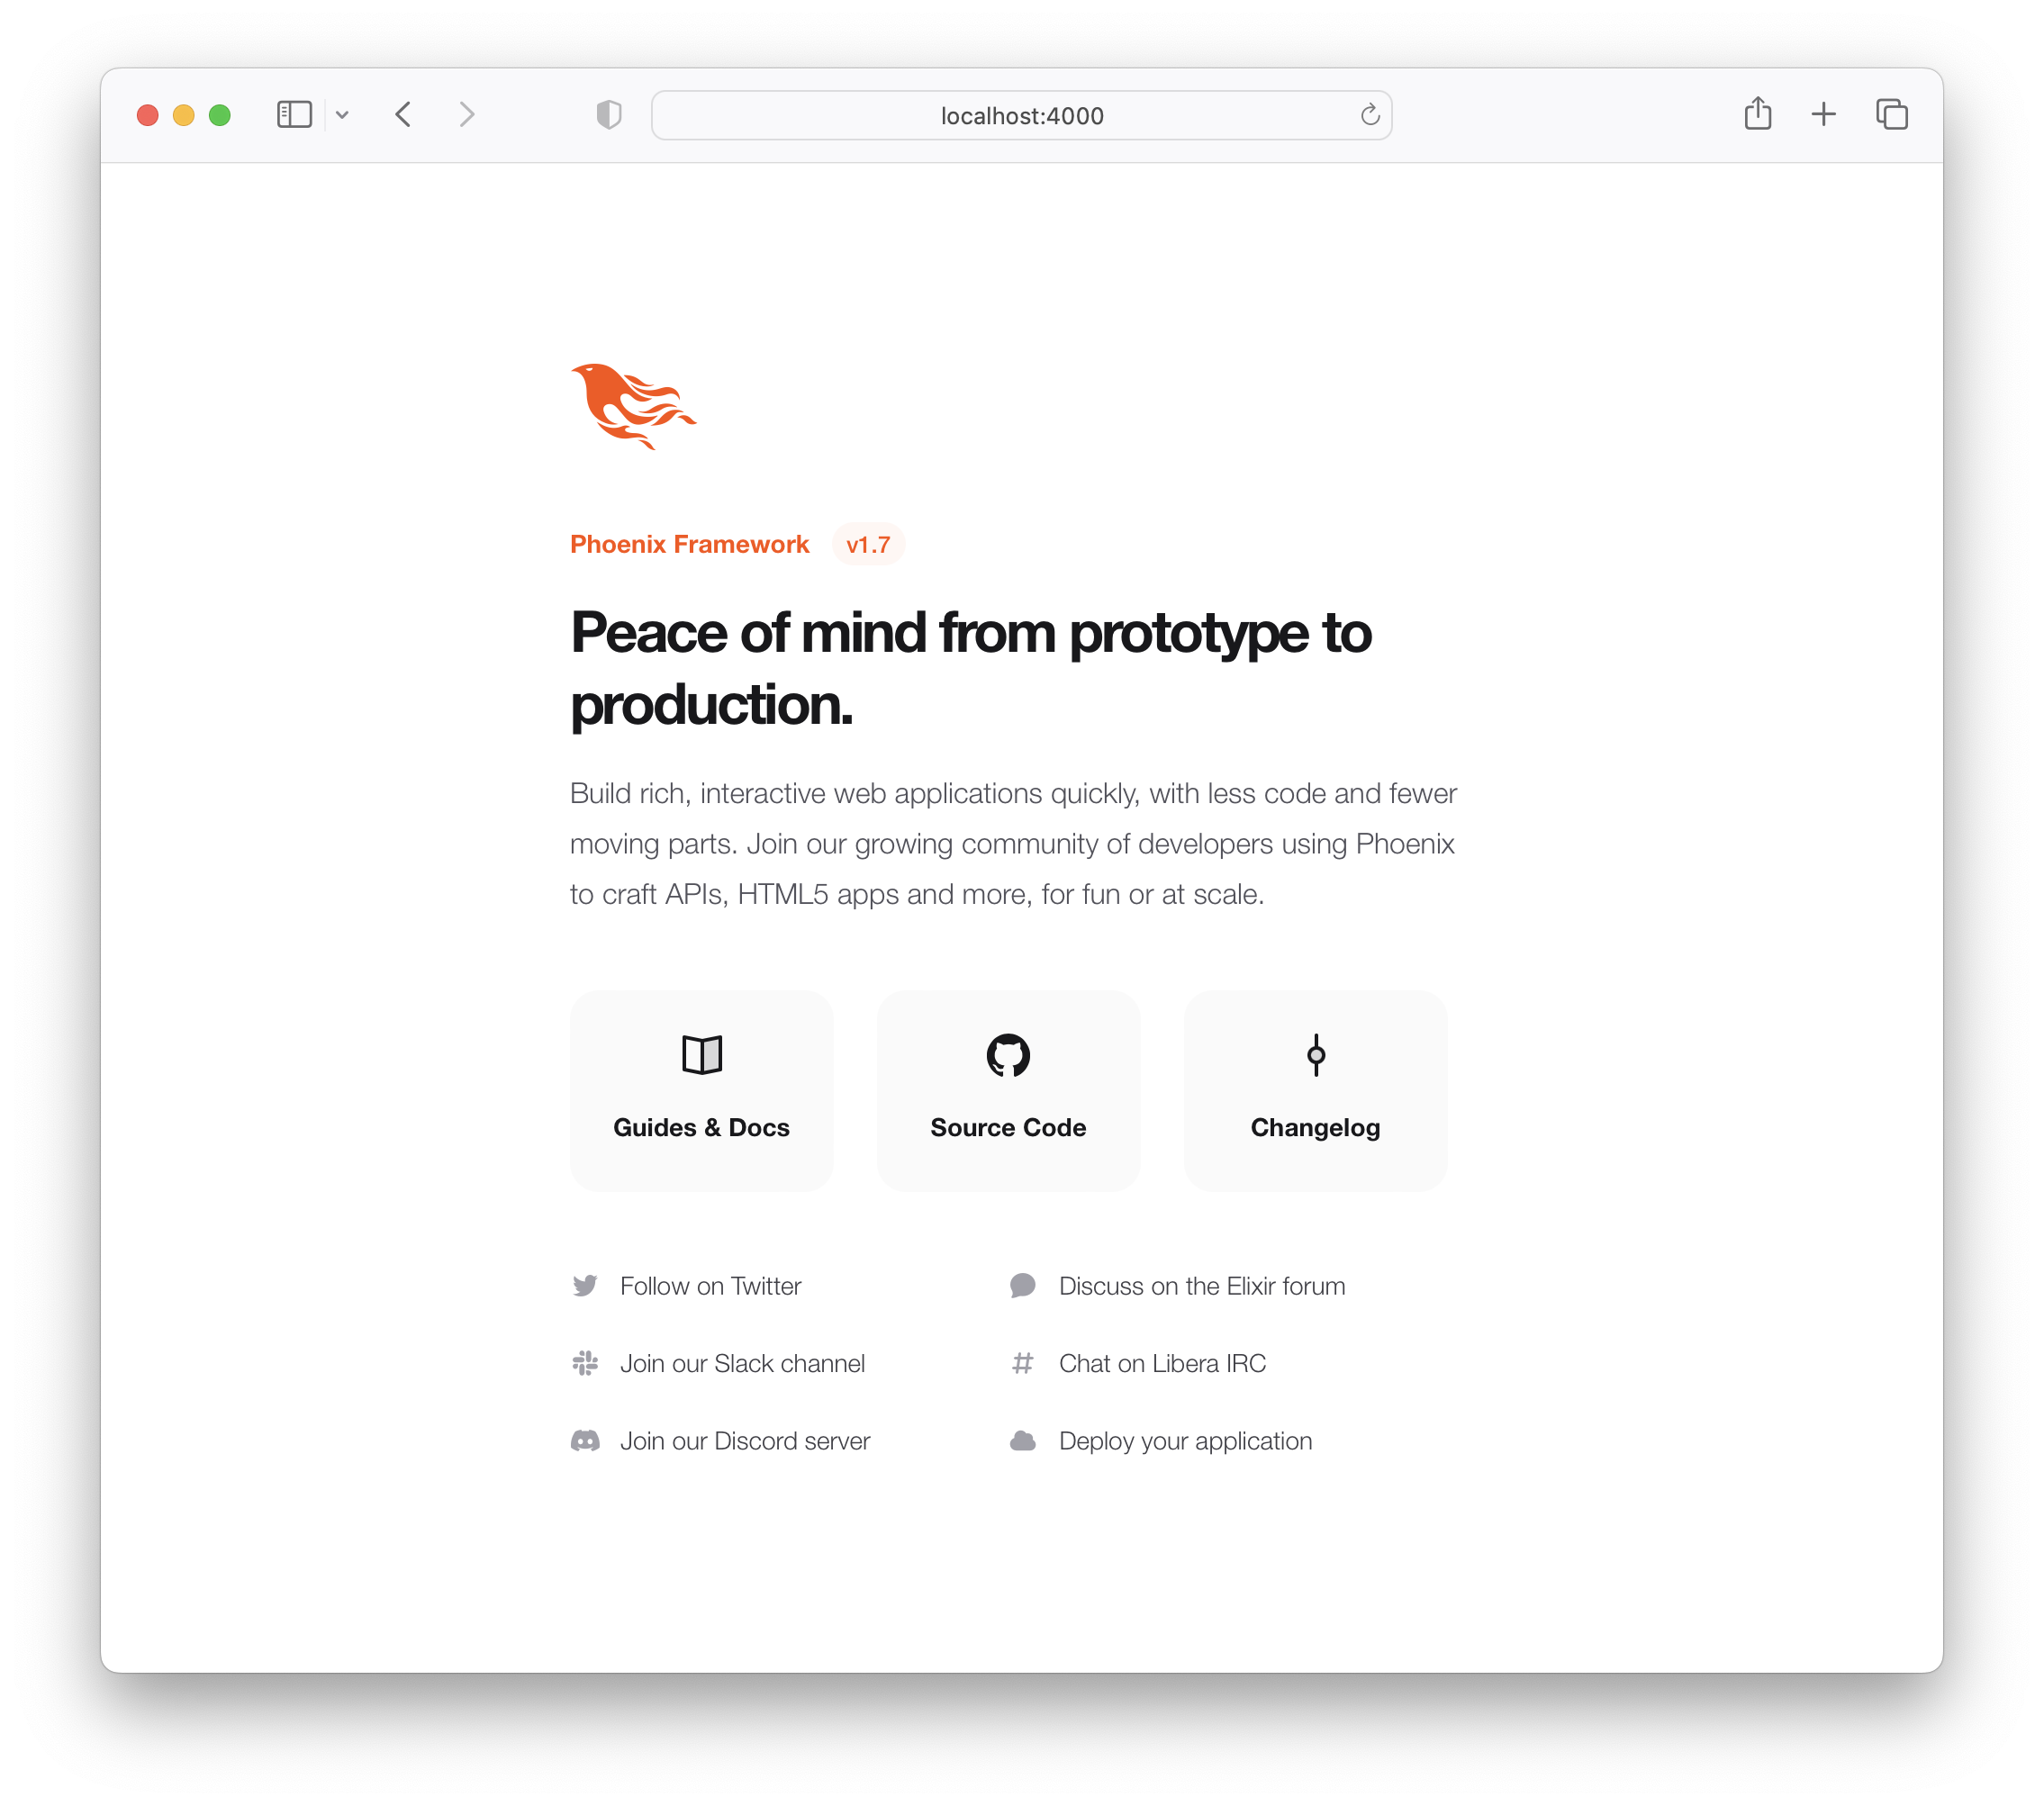
This is the default Phoenix home page ( minus the CSS Styles and images that we removed in step 3.4 above ). It does not tell us anything about the actual app we have built, it doesn't even have a link to the Todo App!讓我們修復它!
Open the lib/app_web/router.ex file and locate the line:
get "/" , PageController , :index Update the controller to ItemController .
get "/" , ItemController , :index eg: lib/app_web/router.ex#L20
Now when you run your App you will see the todo list on the home page:
Unfortunately, this update will "break" the page test. Run the tests and see:
1) test GET / (AppWeb.PageControllerTest)
     test/app_web/controllers/page_controller_test.exs:4
     Assertion with = ~ failed
     code:  assert html_response(conn, 200) = ~ " Welcome to Phoenix! "
     left:  " <!DOCTYPE html>n<html lang= " en " >n  <head>n ... "
Given that we are no longer using the Page Controller, View, Template or Tests, we might as well delete them from our project!
git rm lib/app_web/controllers/page_controller.ex
git rm lib/app_web/controllers/page_html.ex
git rm lib/app_web/page_html/home.html.heex
git rm test/app_web/controllers/page_controller_test.exs
Deleting files is good hygiene in any software project. Don't be afraid to do it, you can always recover files that are in your git history.
Re-run the tests:
mix test
You should see them pass now:
 ...........................

Finished in 0.5 seconds
27 tests, 0 failures
Given that our Phoenix Todo List App is 100% server rendered, older browsers will perform a full page refresh when an action (create/edit/toggle/delete) is performed. This will feel like a "blink" in the page and on really slow connections it will result in a temporary blank page ! Obviously, that's horrible UX and is a big part of why Single Page Apps (SPAs) became popular; to avoid page refresh, use Turbo !
Get the performance benefits of an SPA without the added complexity of a client-side JavaScript framework. When a link is clicked/tapped, Turbolinks automatically fetches the page, swaps in its <body> , and merges its <head> , all without incurring the cost of a full page load.
Luckily, adding Turbo will require just a simple copy and paste! Check the unpkg files to fetch the latest CDN package.
We now need to add the following line to lib/app_web/components/layouts/app.html.heex and lib/app_web/components/layouts/root.html.heex .
< script src =" https://unpkg.com/browse/@hotwired/[email protected]/dist/turbo.es2017-esm.js " > </ script > This will install the UMD builds from Turbo without us needing to install a package using npm .整潔,是嗎?
就是這樣! Now when you deploy your server rendered Phoenix App, it will feel like an SPA! Try the Fly.io demo again: phxtodo.fly.dev Feel that buttery-smooth page transition.
Currently, our application occurs in the same page. However, there is a route that we don't use and is also aesthetically incompatible with the rest of our app.
If we check lib/app_web/controllers/item_controller.ex , you might notice the following function.
  def show ( conn , % { "id" => id } ) do
    item = Todo . get_item! ( id )
    render ( conn , :show , item: item )
  end
This serves the GET /items/:id route. We could do the same as we did with edit and render index . However, let's do something different so we learn a bit more about routes.
If we head on to router.ex , and locate the line:
resources "/items" , ItemControllerWe can change it to this.
resources "/items" , ItemController , except: [ :show ] We are saying that we want to keep all the routes in ItemController except the one related to the show action.
We can now safely delete it from item_controller.ex , as we don't need it any more.
Your files should look like the following.
eg: /lib/router.ex#L19-L29 lib/app_web/controllers/item_controller.ex
Currently, the application allows anyone to access it and manage todo items . Wouldn't it be great if we added authentication so each person could check their own list?
We created a dedicated authentication guide: /auth.md to help you set this up. You will soon find out this is extremely easy ?.
Deployment to Fly.io takes a few minutes, but has a few "steps", we suggest you follow the speed run guide: https://fly.io/docs/elixir/getting-started/
Once you have deployed you will will be able to view/use your app in any Web/Mobile Browser.
eg: https://phxtodo.fly.dev
XS
Our Phoenix server currently only returns HTML pages that are server-side rendered . This is already awesome but we can make use of Phoenix to extend its capabilities.
What if our server also responded with JSON ?你很幸運! We've created small guide for creating a REST API : api.md
If you found this example useful, please ️ the GitHub repository so we ( and others ) know you liked it!
If you want to learn more Phoenix and the magic of LiveView , consider reading our beginner's tutorial: github.com/dwyl/ phoenix-liveview-counter-tutorial
Thank you for learning with us! ☀️


