phoenix todo list tutorial
1.0.0
ผู้เริ่มต้นที่สมบูรณ์แบบทีละขั้นตอนสำหรับการสร้างรายการสิ่งที่ต้องทำในฟีนิกซ์
ใช้งานได้ 100% 0% JavaScript เพียงแค่ HTML , CSS และ Elixir เร็วและบำรุงรักษาได้
รายการสิ่งที่ต้องทำจะคุ้นเคยกับคนส่วนใหญ่ เราทำรายการตลอดเวลา การสร้าง รายการสิ่งที่ต้องทำตั้งแต่เริ่มต้นเป็นวิธีที่ยอดเยี่ยมในการเรียนรู้ Elixir / Phoenix เนื่องจาก UI / UX นั้น ง่ายมาก ดังนั้นเราจึงสามารถมุ่งเน้นไปที่การใช้งาน
สำหรับทีม @dwyl แอพ/บทช่วยสอนนี้เป็นงานแสดงว่าการเรนเดอร์ด้านเซิร์ฟเวอร์ ( พร้อมการเพิ่มประสิทธิภาพของไคลเอ็นต์ด้านความก้าวหน้า ) สามารถให้ความสมดุลที่ยอดเยี่ยมระหว่างประสิทธิภาพของนักพัฒนา ( คุณสมบัติการจัดส่งที่รวดเร็ว ), UX และ การเข้าถึง หน้าเซิร์ฟเวอร์ที่แสดงผลใช้เวลาน้อยกว่า 5ms ในการตอบสนองดังนั้น UX จึง รวดเร็ว On Fly.io: phxtodo.fly.dev เวลาตอบกลับไปกลับเป็นช่วงย่อย 200ms สำหรับการโต้ตอบทั้งหมดดังนั้นจึง รู้สึก เหมือนแอพที่แสดงผลฝั่งไคลเอ็นต์
บทช่วยสอนรายการสิ่งที่ต้องแสดงให้เห็นถึงการเริ่มต้นอย่างสมบูรณ์วิธีการสร้างแอพในน้ำอมฤต/ฟีนิกซ์ตั้งแต่เริ่มต้น
ลองใช้เวอร์ชัน fly.io เพิ่มรายการสองสามรายการในรายการและทดสอบฟังก์ชั่น
แม้จะมีการเดินทางไปกลับ HTTP เต็มรูปแบบสำหรับการโต้ตอบแต่ละครั้งเวลาตอบสนองก็ เร็ว ให้ความสนใจกับวิธีการที่ Chrome | Firefox | Safari รอการตอบกลับจากเซิร์ฟเวอร์ก่อนที่จะแสดงหน้าหน้าใหม่ การรีเฟรชเต็มหน้าแบบเก่าของปีกลาย หายไป เบราว์เซอร์สมัยใหม่ทำให้เกิดการเปลี่ยนแปลงอย่างชาญฉลาด! ดังนั้น UX จึงประมาณ "ดั้งเดิม"! ลองใช้แอพ fly.io บนโทรศัพท์ของคุณอย่างจริงจังและดู!
ในบทช่วยสอนนี้เราใช้ TODOMVC CSS เพื่อทำให้ UI ของเราง่ายขึ้น สิ่งนี้มีข้อดีหลายประการที่ยิ่งใหญ่ที่สุดคือ การลด จำนวน CS ที่เราต้องเขียน! นอกจากนี้ยังหมายความว่าเรามีคำแนะนำเกี่ยวกับ คุณสมบัติ ที่จำเป็นต้องนำไปใช้เพื่อให้ได้ฟังก์ชั่นเต็มรูปแบบ
หมายเหตุ : เรา รัก
CSSสำหรับพลัง/ความยืดหยุ่นที่เหลือเชื่อ แต่เรารู้ว่าไม่ใช่ทุกคนที่ชอบมัน ดู: Learn-Tachyons#ทำไมสิ่ง สุดท้าย ที่เราต้องการคือเสียเวลากับCSSในบทช่วยPhoenix!
บทช่วยสอนนี้มีไว้สำหรับทุกคนที่เรียนรู้ที่จะดื่มด่ำกับยาอายุวัฒนะ/ฟีนิกซ์ ไม่มีประสบการณ์ก่อนหน้านี้เกี่ยวกับฟีนิกซ์/คาดว่าจะคาดหวัง เราได้รวม ทุก ขั้นตอนที่จำเป็นในการสร้างแอพ
หากคุณติดอยู่ในทุกขั้นตอนโปรดเปิดปัญหาเกี่ยวกับ GitHub ที่ซึ่งเรายินดีที่จะช่วยให้คุณได้รับการปลด! หากคุณรู้สึกว่ารหัสใด ๆ สามารถใช้คำอธิบาย/ความชัดเจนเพิ่มเติมได้โปรดอย่าลังเลที่จะ แจ้งให้ เราทราบ! เรา รู้ว่า การเป็นผู้เริ่มต้นเป็นอย่างไรมันอาจจะ น่าหงุดหงิด เมื่อมีบางสิ่งที่ไม่สมเหตุสมผล! การถามคำถามเกี่ยวกับ GitHub ช่วยให้ ทุกคน เรียนรู้!
กรุณาให้ข้อเสนอแนะกับเรา! แสดง repo หากคุณพบว่ามีประโยชน์
ก่อนที่ คุณจะพยายาม สร้าง รายการสิ่งที่ต้องทำให้แน่ใจว่าคุณมีทุกสิ่งที่คุณต้องการติดตั้งบนคอมพิวเตอร์ของคุณ ดู: ข้อกำหนดเบื้องต้น
เมื่อคุณได้รับการยืนยันว่าคุณติดตั้ง Phoenix & PostgreSQL แล้วลองรันแอป เสร็จแล้ว
localhost ของคุณ ก่อนที่ คุณจะเริ่มสร้างแอพ Tode List เวอร์ชันของคุณเองให้เรียกใช้เวอร์ชัน ที่เสร็จแล้ว ใน localhost ของคุณเพื่อยืนยันว่ามันใช้งานได้
โคลนโครงการจาก GitHub:
git clone [email protected]:dwyl/phoenix-todo-list-tutorial.git && cd phoenix-todo-list-tutorialติดตั้งการพึ่งพาและตั้งค่าฐานข้อมูล:
mix setupเริ่มเซิร์ฟเวอร์ฟีนิกซ์:
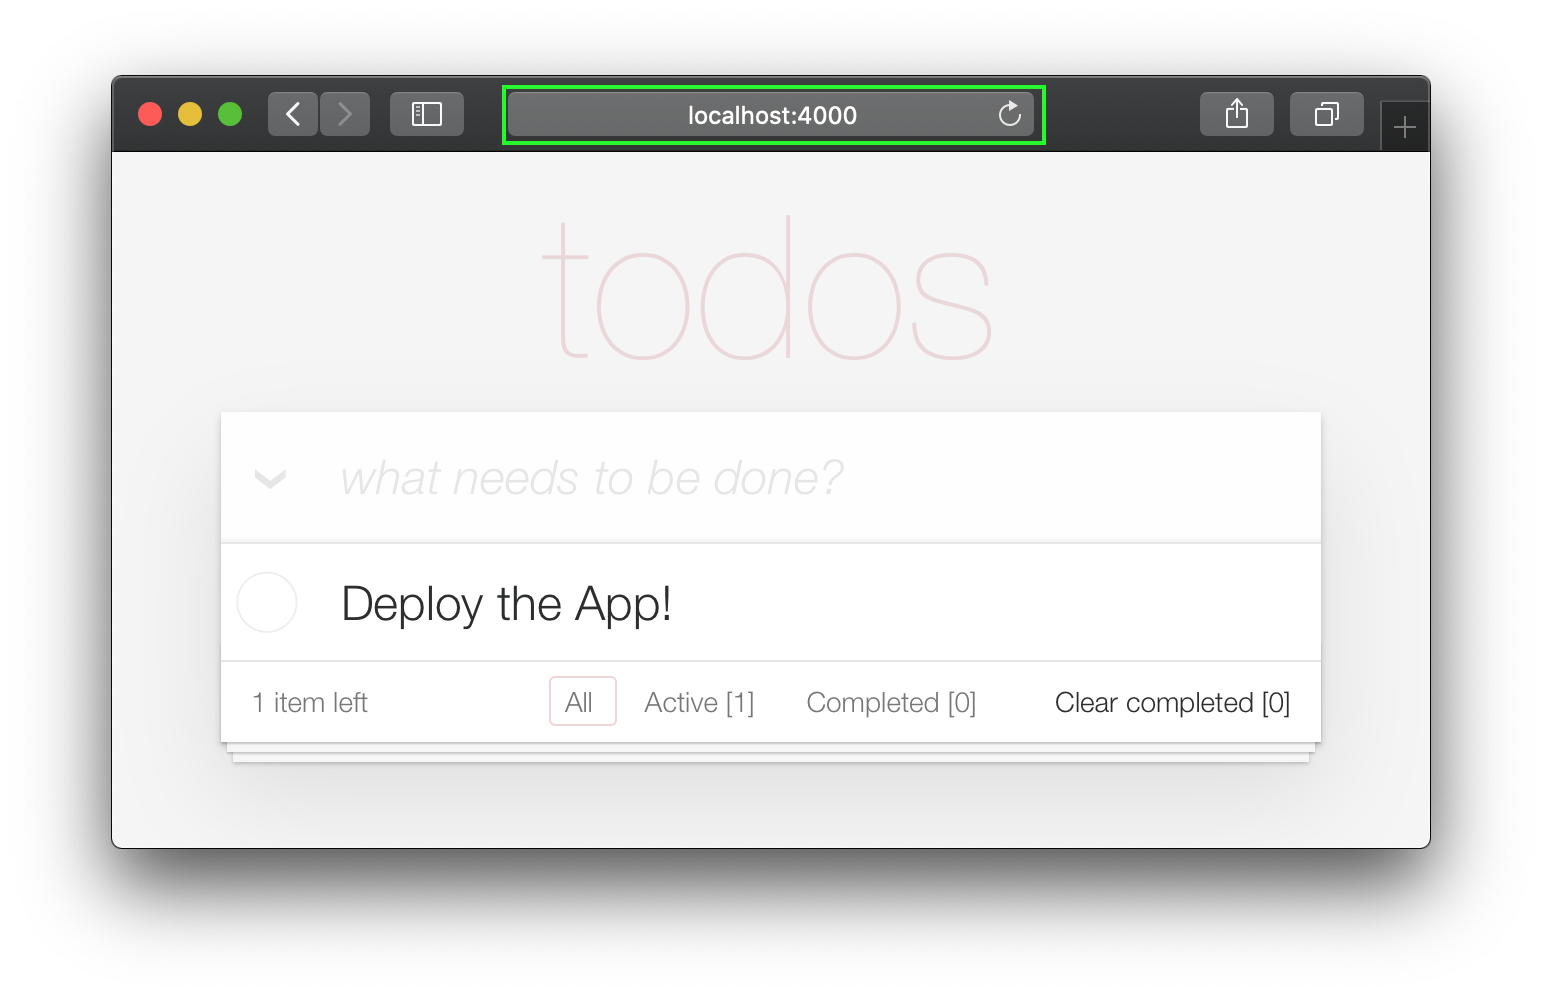
mix phx.server เยี่ยมชม localhost:4000 ในเว็บเบราว์เซอร์ของคุณ
คุณควรเห็น:
ตอนนี้คุณมีแอปตัวอย่าง ที่เสร็จแล้ว ที่ทำงานบน localhost ของคุณแล้ว
มาสร้างมันตั้งแต่เริ่มต้นและเข้าใจทุกขั้นตอน
เมื่อเรียกใช้แอพตัวอย่าง ที่เสร็จแล้ว ใน localhost หากคุณต้องการลองใช้ ปุ่ม login คุณจะต้องได้รับ AUTH_API_KEY [1 นาที] ดู: รับ AUTH_API_KEY ของคุณ
หากคุณใช้แอพที่เสร็จแล้วใน localhost ของคุณ ( และคุณควรจะ! )
คุณจะต้องเปลี่ยนไดเรกทอรีก่อนเริ่มการสอน:
cd ..
ตอนนี้คุณพร้อมที่จะ สร้าง !
ในเทอร์มินัลของคุณสร้างแอพฟีนิกซ์ใหม่โดยใช้คำสั่ง mix ต่อไปนี้:
mix phx.new app --no-dashboard --no-gettext --no-mailer เมื่อได้รับแจ้งให้ติดตั้งการพึ่งพาให้พิมพ์ y ตามด้วย ENTER
หมายเหตุ : ธง เหล่านั้นหลังจากชื่อ
appเพียงเพื่อหลีกเลี่ยงการสร้างไฟล์ที่เราไม่ ต้องการ สำหรับตัวอย่างง่ายๆนี้ ดู: hexdocs.pm/phoenix/mix.tasks.phx.new
เปลี่ยนเป็นไดเรกทอรี app ที่สร้างขึ้นใหม่ ( cd app ) และตรวจสอบให้แน่ใจว่าคุณมีทุกสิ่งที่คุณต้องการ:
mix setupเริ่มเซิร์ฟเวอร์ฟีนิกซ์:
mix phx.server ตอนนี้คุณสามารถเยี่ยมชม localhost:4000 ในเว็บเบราว์เซอร์ของคุณ คุณควรเห็นสิ่งที่คล้ายกับ:
ปิดเซิร์ฟเวอร์ฟีนิกซ์ Ctrl + c
เรียกใช้การทดสอบเพื่อให้แน่ใจว่าทุกอย่างทำงานตามที่คาดไว้:
mix testคุณควรเห็น:
Compiling 16 files (.ex)
Generated app app

17:49:40.111 [info]  Already up
...

Finished in 0.04 seconds
3 tests, 0 failures
เมื่อได้รับการยอมรับว่าแอปฟีนิกซ์ทำงานได้ตามที่คาดไว้เราจะไปสร้างไฟล์บางไฟล์กันเถอะ!
items มารายการ ในการสร้างรายการสิ่งที่ต้องทำพื้นฐานเราต้องการเพียงหนึ่งสคีมา: items หลังจากนั้นเราสามารถเพิ่มรายการและแท็กแยกต่างหากเพื่อจัดระเบียบ/จัดหมวดหมู่ items ของเรา แต่ตอนนี้นี่คือทั้งหมดที่เราต้องการ
เรียกใช้คำสั่ง Generator ต่อไปนี้เพื่อสร้างตารางรายการ:
mix phx.gen.html Todo Item items text:string person_id:integer status:integer การพูดอย่างเคร่งครัดเรา ต้องการ เฉพาะฟิลด์ text และ status แต่เนื่องจากเรารู้ว่าเราต้องการเชื่อมโยงรายการกับผู้คน (_later ในการสอน) เรากำลังเพิ่มฟิลด์ ตอนนี้
คุณจะเห็นผลลัพธ์ต่อไปนี้:
 * creating lib/app_web/controllers/item_controller.ex
* creating lib/app_web/controllers/item_html/edit.html.heex
* creating lib/app_web/controllers/item_html/index.html.heex
* creating lib/app_web/controllers/item_html/new.html.heex
* creating lib/app_web/controllers/item_html/show.html.heex
* creating lib/app_web/controllers/item_html.ex
* creating test/app_web/controllers/item_controller_test.exs
* creating lib/app/todo/item.ex
* creating priv/repo/migrations/20221205102303_create_items.exs
* creating lib/app/todo.ex
* injecting lib/app/todo.ex
* creating test/app/todo_test.exs
* injecting test/app/todo_test.exs
* creating test/support/fixtures/todo_fixtures.ex
* injecting test/support/fixtures/todo_fixtures.ex

Add the resource to your browser scope in lib/app_web/router.ex:

    resources "/items", ItemController


Remember to update your repository by running migrations:

    $ mix ecto.migrate
นั่นสร้างไฟล์ พวง ! บางอย่างที่เราไม่ ต้องการ อย่างเคร่งครัด
เราสามารถสร้างไฟล์ที่เรา ต้องการได้ ด้วย ตนเอง แต่นี่เป็นวิธีการ "เป็นทางการ" ในการสร้างแอพ CRUD ในฟีนิกซ์ดังนั้นเราจึงใช้มันเพื่อความเร็ว
หมายเหตุ : บริบทฟีนิกซ์ที่แสดงในตัวอย่างนี้เป็น
Todoคือ " โมดูลเฉพาะที่เปิดเผยและฟังก์ชั่นที่เกี่ยวข้องกับกลุ่ม " เรารู้สึกว่าพวกเขามีแอพฟีนิกซ์พื้นฐาน ที่ซับซ้อนโดยไม่จำเป็น ด้วยเลเยอร์ของ "อินเทอร์เฟซ" และเรา หวัง ว่าเราจะสามารถหลีกเลี่ยงได้ แต่เนื่องจากพวกเขาถูกอบเข้าไปในเครื่องกำเนิดไฟฟ้าและ ผู้สร้าง เฟรมเวิร์ก ชอบ พวกเขาเรามีทางเลือก: ไม่ว่าจะขึ้นเครื่องด้วยบริบทหรือสร้างไฟล์ทั้งหมดในโครงการฟีนิกซ์ของเรา ด้วยตนเอง เครื่องกำเนิดไฟฟ้าเป็นวิธีที่เร็วกว่า มาก ในการสร้าง! โอบกอด พวกเขาแม้ว่าคุณจะต้องdeleteไฟล์ที่ไม่ได้ใช้สองสามไฟล์ไปพร้อมกัน!
เราจะ ไม่ อธิบายไฟล์เหล่านี้แต่ละไฟล์ในขั้นตอนนี้ในการสอนเพราะมัน ง่ายกว่า ที่จะเข้าใจไฟล์ในขณะที่คุณ กำลังสร้าง แอพ! วัตถุประสงค์ของแต่ละไฟล์จะชัดเจนเมื่อคุณดำเนินการผ่านการแก้ไข
/items ลงใน router.ex ทำตามคำแนะนำที่ระบุไว้โดยเครื่องกำเนิดไฟฟ้าเพื่อเพิ่ม resources "/items", ItemController ไปยัง router.ex .ex
เปิดไฟล์ lib/app_web/router.ex และค้นหาบรรทัด: scope "/", AppWeb do เพิ่มบรรทัดไปที่ส่วนท้ายของบล็อก เช่น:
 scope "/" , AppWeb do
  pipe_through :browser

  get "/" , PageController , :index
  resources "/items" , ItemController # this is the new line
end
ไฟล์ router.ex ของคุณควรมีลักษณะเช่นนี้: router.ex#L20
ตอนนี้ตามที่แนะนำให้เรียกใช้ mix ecto.migrate สิ่งนี้จะเสร็จสิ้นการตั้งค่าตารางฐานข้อมูลและเรียกใช้การโยกย้ายที่จำเป็นเพื่อให้ทุกอย่างทำงานได้อย่างถูกต้อง!
ณ จุดนี้เรามีรายการสิ่งที่ต้องทำหน้าที่ แล้ว ( ถ้าเรายินดีที่จะใช้ฟีนิกซ์ UI เริ่มต้น )
ลองเรียกใช้แอพใน localhost ของคุณ: เรียกใช้การย้ายข้อมูลที่สร้างขึ้นด้วย mix ecto.migrate จากนั้นเซิร์ฟเวอร์ด้วย:
mix phx.server
เยี่ยมชม: http: // localhost: 4000/รายการ/ใหม่และป้อนข้อมูลบางอย่าง
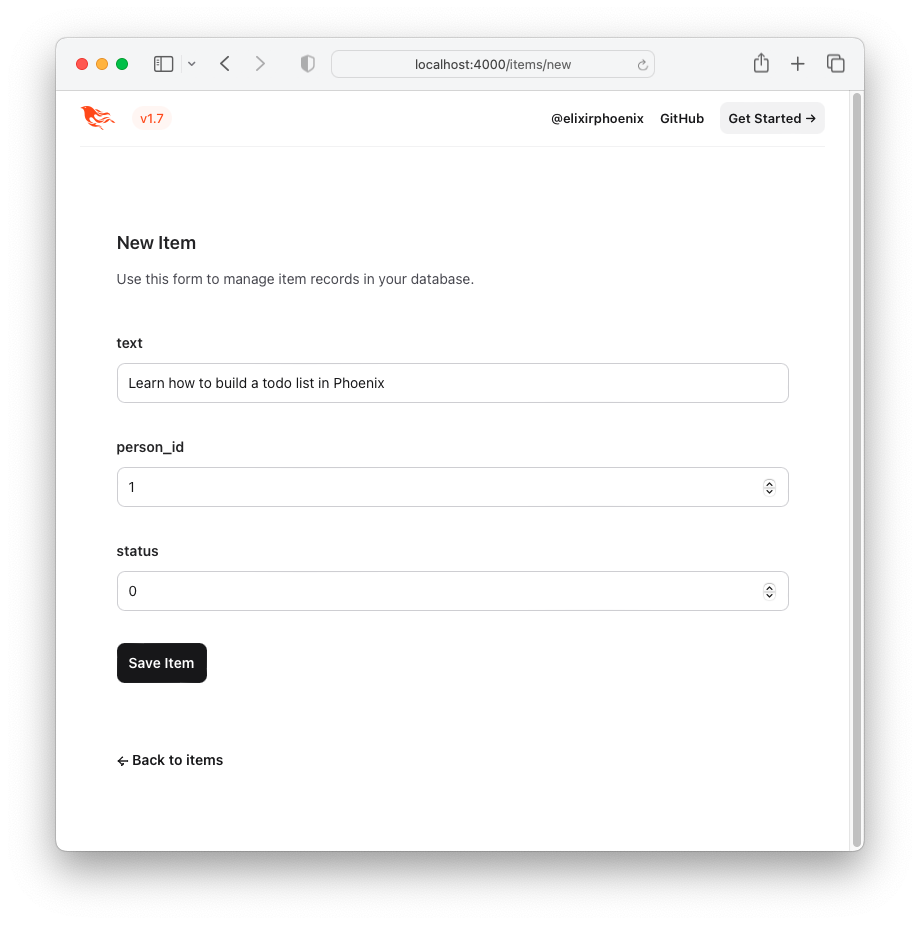
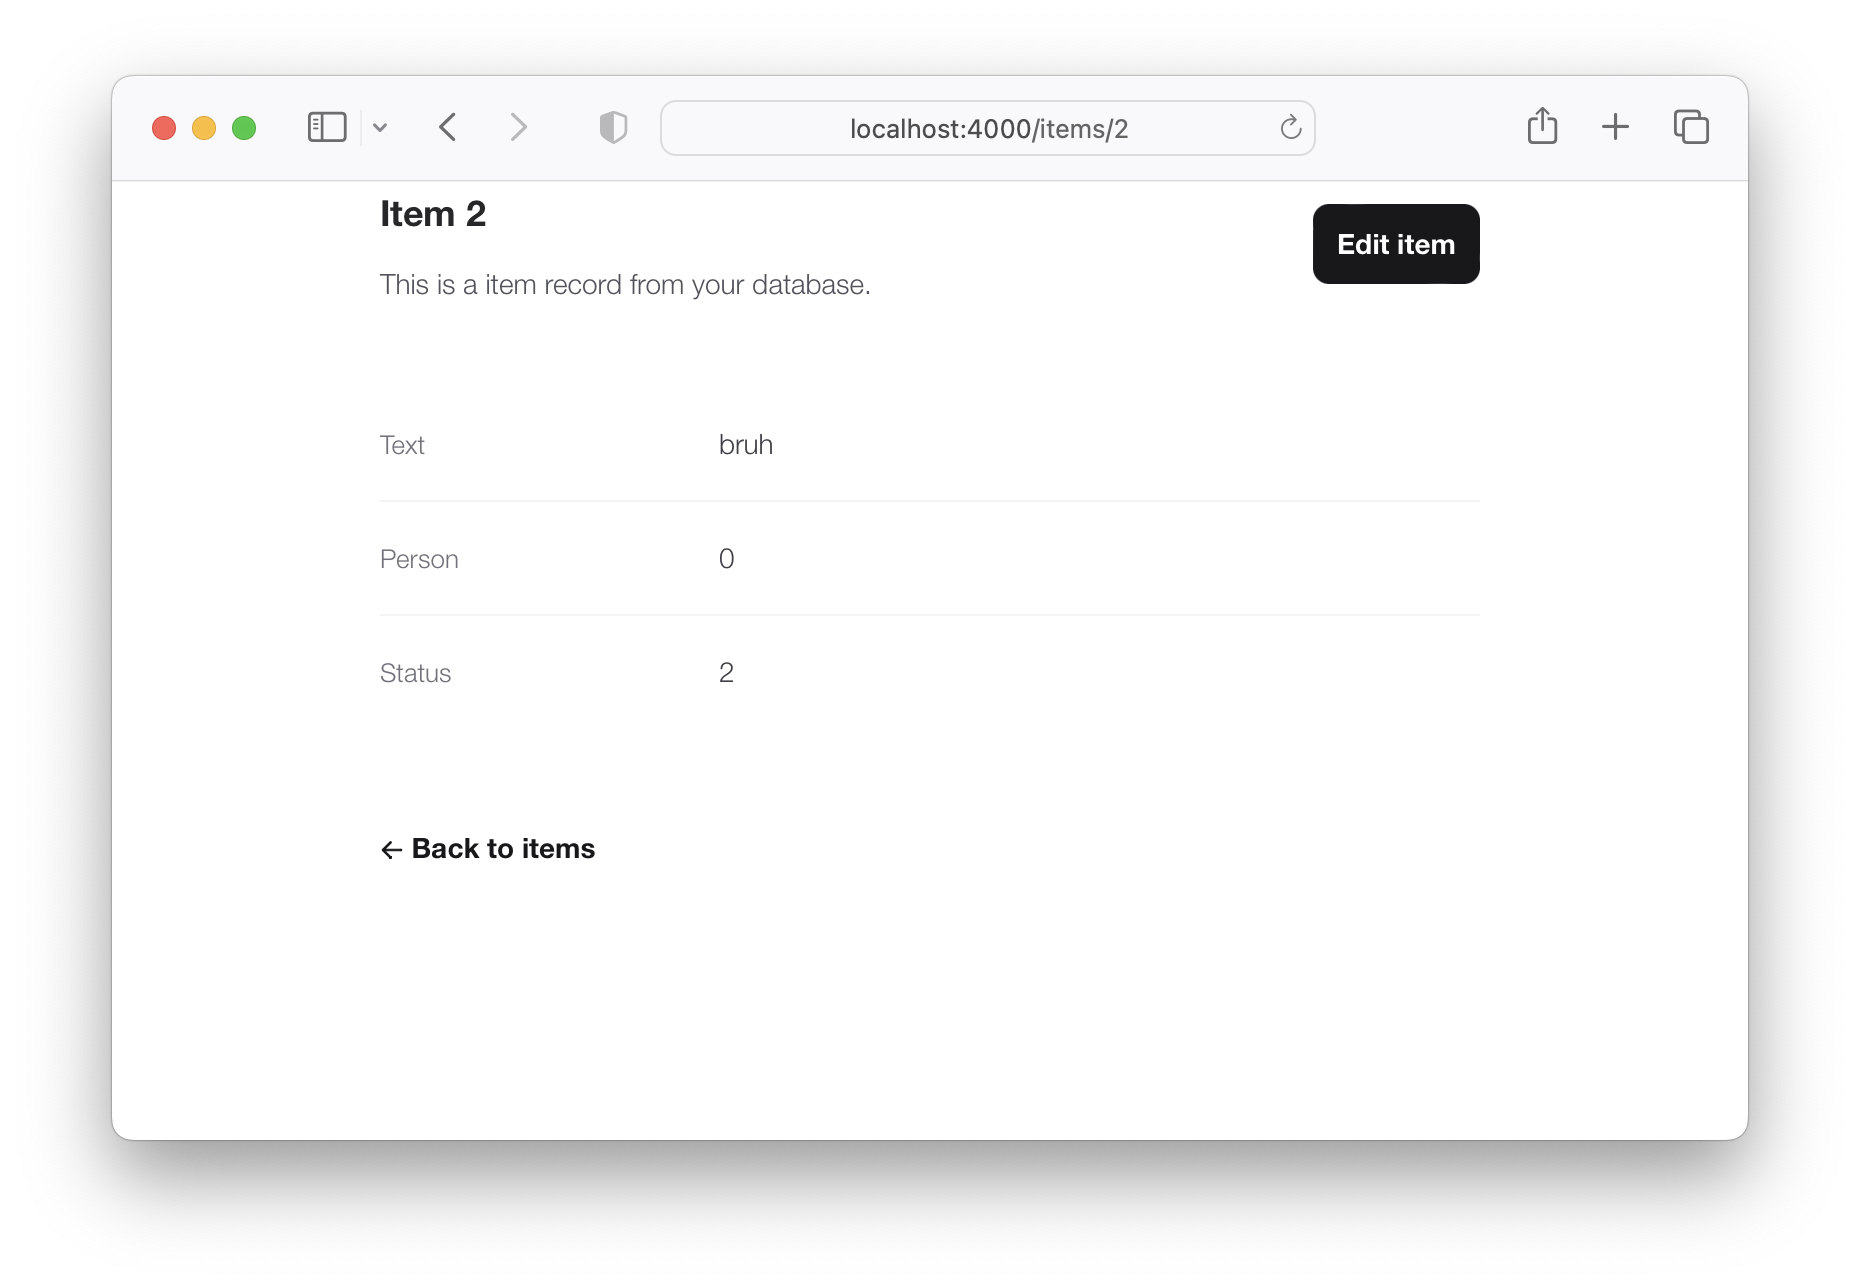
คลิกปุ่ม "บันทึกรายการ" แล้วคุณจะถูกเปลี่ยนเส้นทางไปยังหน้า "แสดง": http: // localhost: 4000/รายการ/1
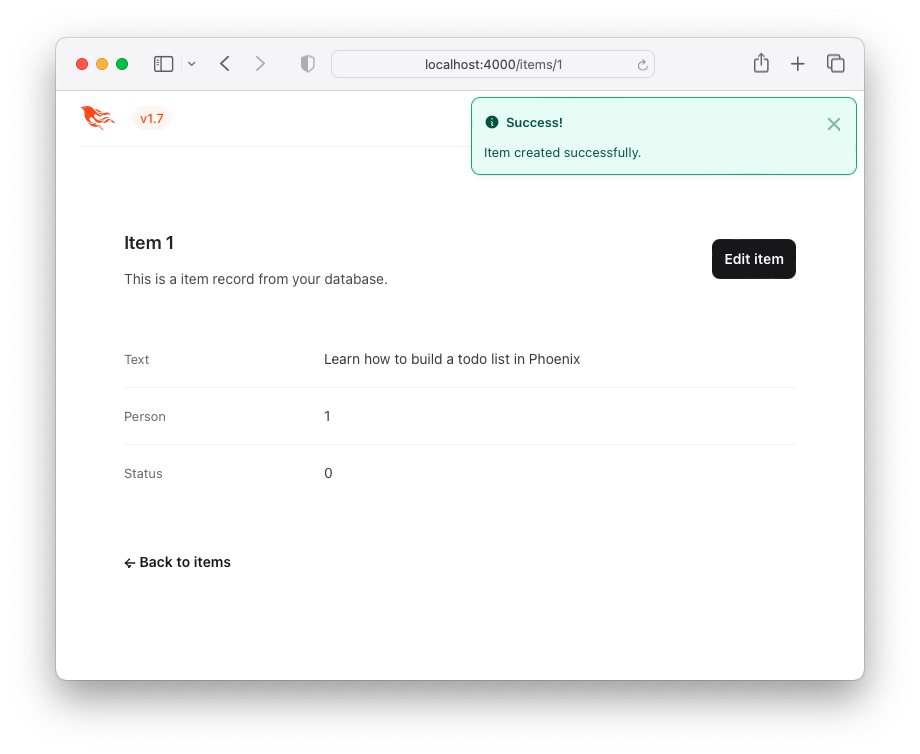
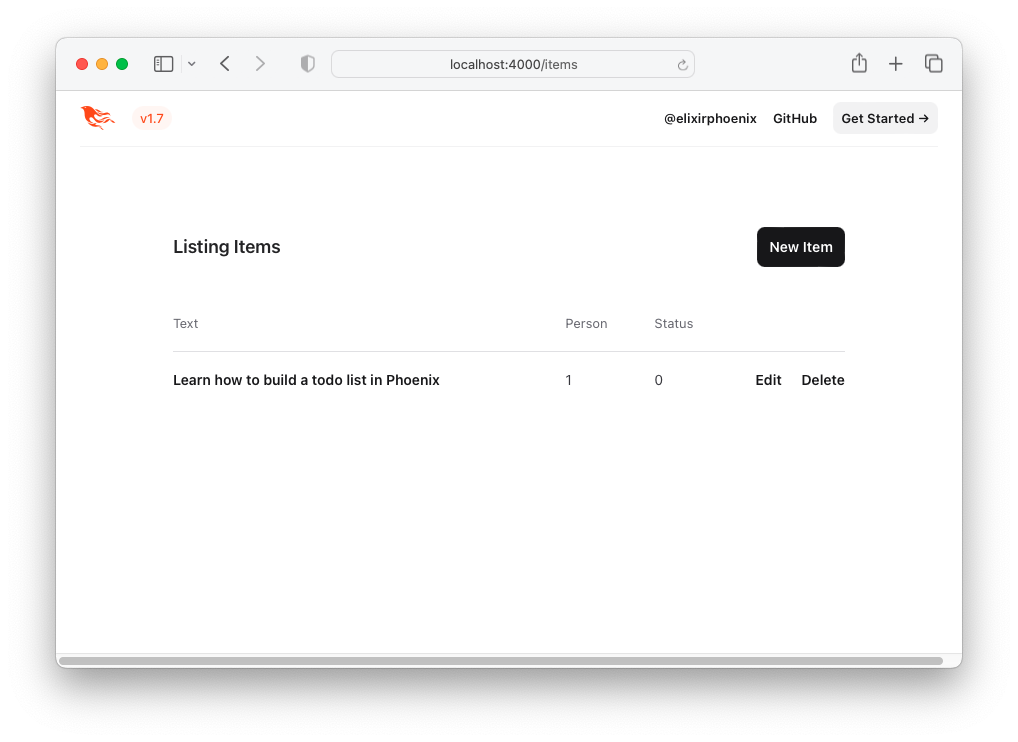
นี่ไม่ใช่ประสบการณ์ผู้ใช้ที่น่าสนใจ (UX) แต่ ใช้งานได้ ! นี่คือ รายการ ของรายการ - "รายการสิ่งที่ต้องทำ" คุณสามารถเยี่ยมชมสิ่งนี้ได้โดยคลิกปุ่ม Back to items หรือโดยการเข้าถึง URL http: // localhost: 4000/รายการ
มาปรับปรุง UX โดยใช้ TODOMVC HTML และ CSS !
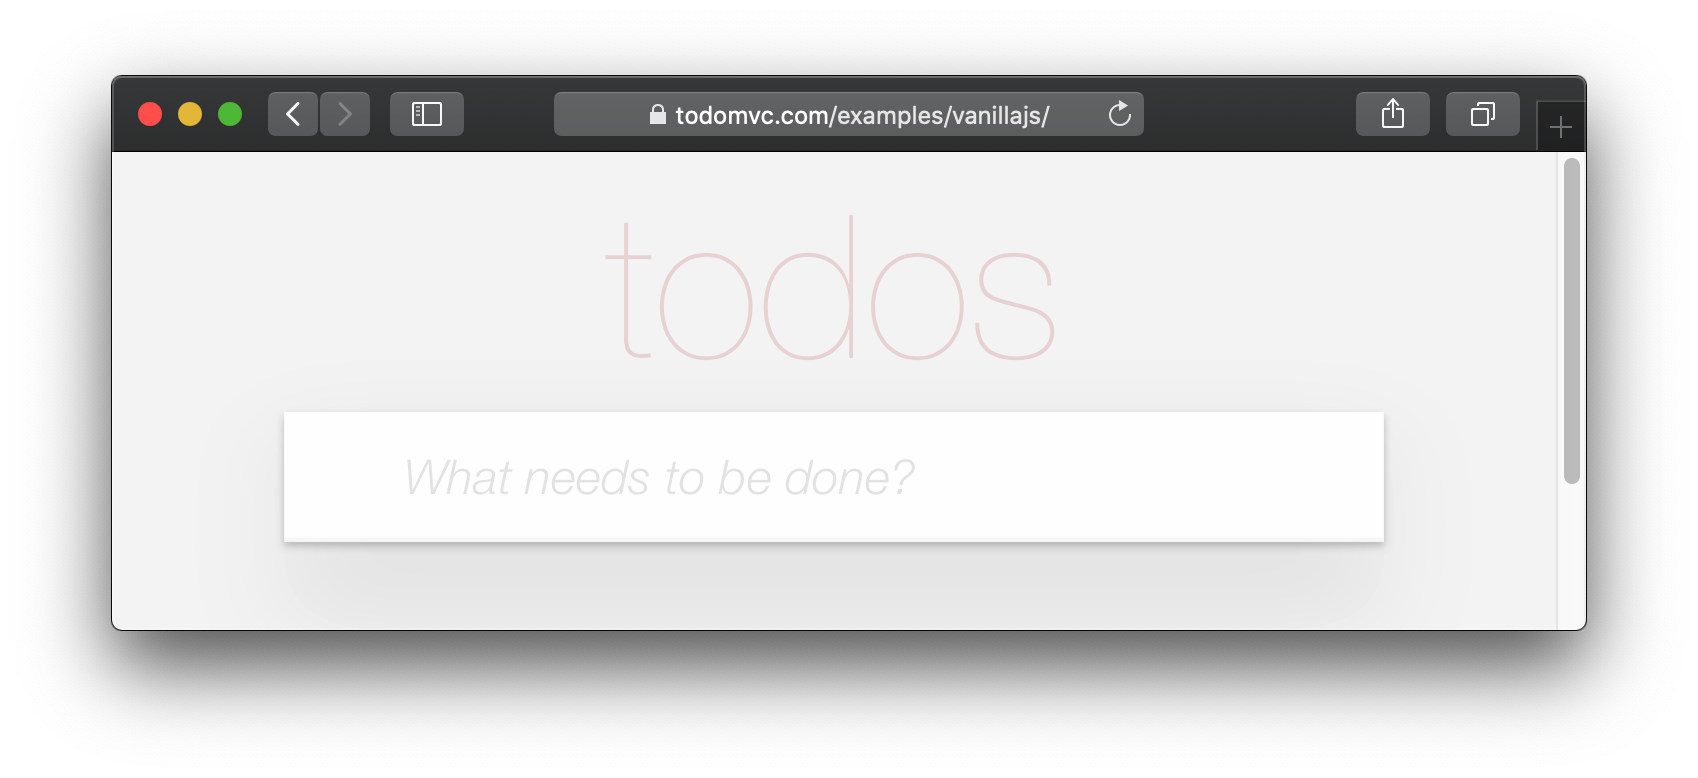
หากต้องการสร้าง TODOMVC UI/UX ใหม่ให้ยืมรหัส HTML โดยตรงจากตัวอย่าง
เยี่ยมชม: http://todomvc.com/examples/vanillajs เพิ่มรายการสองรายการลงในรายการ จากนั้นตรวจสอบแหล่งที่มาโดยใช้เครื่องมือ Dev ของเบราว์เซอร์ เช่น:
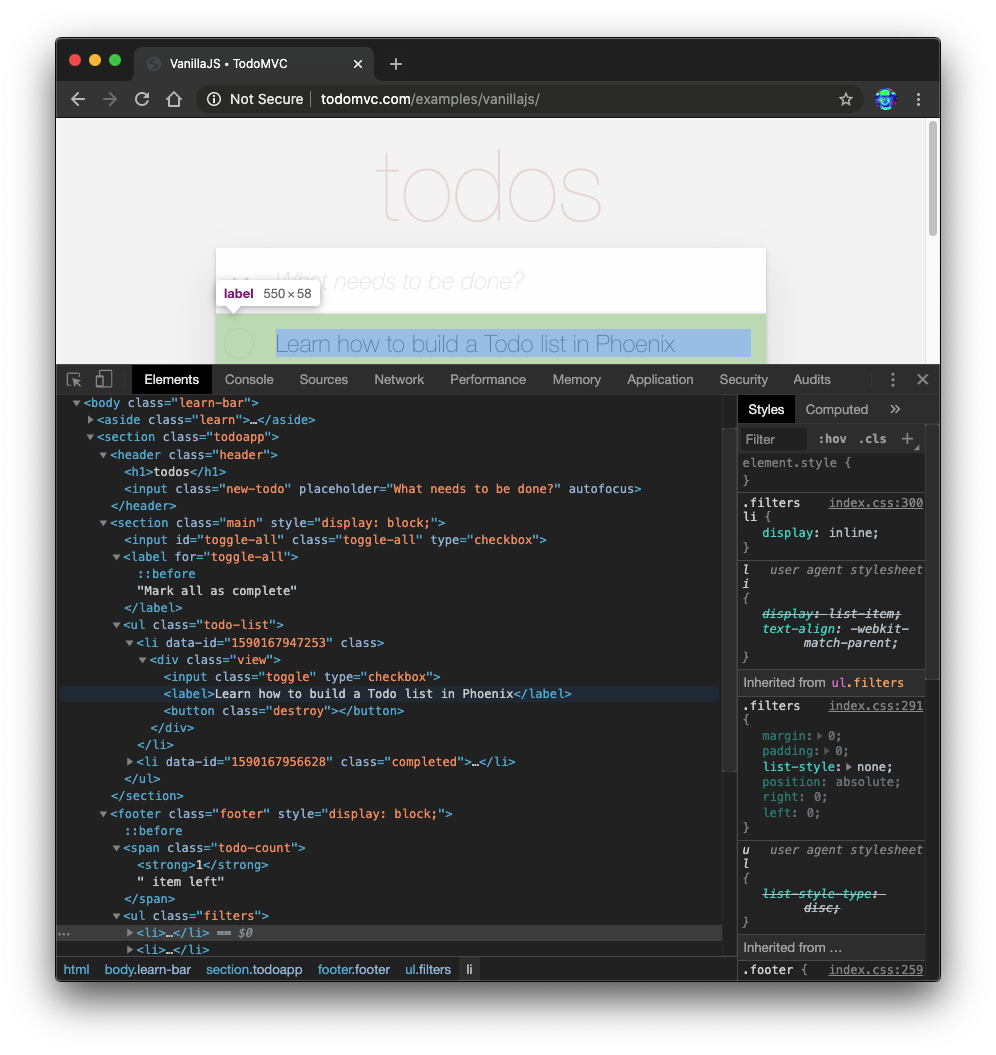
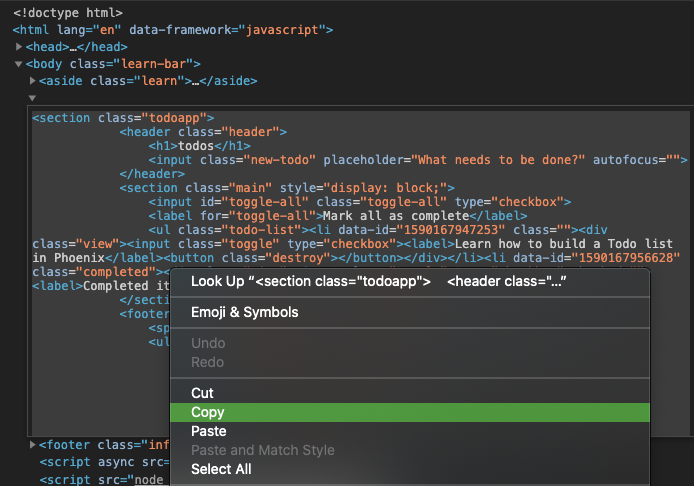
คลิกขวาที่แหล่งที่คุณต้องการ (เช่น: <section class="todoapp"> ) และเลือก "แก้ไขเป็น html":

เมื่อ HTML สำหรับ <section> สามารถแก้ไขได้ให้เลือกและคัดลอก
รหัส HTML คือ:
 < section class =" todoapp " >
  < header class =" header " >
    < h1 > todos </ h1 >
    < input class =" new-todo " placeholder =" What needs to be done? " autofocus ="" />
  </ header >
  < section class =" main " style =" display: block; " >
    < input id =" toggle-all " class =" toggle-all " type =" checkbox " />
    < label for =" toggle-all " > Mark all as complete </ label >
    < ul class =" todo-list " >
      < li data-id =" 1590167947253 " class ="" >
        < div class =" view " >
          < input class =" toggle " type =" checkbox " />
          < label > Learn how to build a Todo list in Phoenix </ label >
          < button class =" destroy " > </ button >
        </ div >
      </ li >
      < li data-id =" 1590167956628 " class =" completed " >
        < div class =" view " >
          < input class =" toggle " type =" checkbox " />
          < label > Completed item </ label >
          < button class =" destroy " > </ button >
        </ div >
      </ li >
    </ ul >
  </ section >
  < footer class =" footer " style =" display: block; " >
    < span class =" todo-count " > < strong > 1 </ strong > item left </ span >
    < ul class =" filters " >
      < li >
        < a href =" #/ " class =" selected " > All </ a >
      </ li >
      < li >
        < a href =" #/active " > Active </ a >
      </ li >
      < li >
        < a href =" #/completed " > Completed </ a >
      </ li >
    </ ul >
    < button class =" clear-completed " style =" display: block; " >
      Clear completed
    </ button >
  </ footer >
</ section >
ลองแปลง HTML นี้เป็นเทมเพลต Elixir ( EEx ) แบบฝังตัว
หมายเหตุ : เหตุผล ที่เรากำลังคัดลอก
HTMLนี้จากผู้ตรวจการองค์ประกอบของเบราว์เซอร์แทนที่จะเป็น โดยตรง จากแหล่งที่มาของ GitHub:examples/vanillajs/index.htmlคือนี่คือ "แอพหน้าเดียว" ดังนั้น<ul class="todo-list"></ul>การคัดลอกจากเครื่องมือเบราว์เซอร์ dev เป็นวิธีที่ง่ายที่สุดในการรับHTMLที่สมบูรณ์
index.html.eex เปิด lib/app_web/controllers/item_html/index.html.eex และเลื่อนไปที่ด้านล่าง
จากนั้น ( โดยไม่ต้องลบรหัสที่มีอยู่แล้ว ) วางรหัส HTML ที่เรามาจาก TODOMVC
เช่น:
/lib/app_web/controllers/item_html/index.html.eex#L27-L73
หากคุณพยายามเรียกใช้แอพตอนนี้และเยี่ยมชม http: // localhost: 4000/items/
คุณจะเห็นสิ่งนี้ ( โดยไม่มี TODOMVC CSS ):
เห็นได้ชัดว่าไม่ใช่สิ่งที่เราต้องการดังนั้นขอให้ TODOMVC CSS และบันทึกไว้ในโครงการของเรา!
/assets/css เยี่ยมชม http://todomvc.com/examples/vanillajs/node_modules/todomvc-app-css/index.css
และบันทึกไฟล์ไปที่ /assets/css/todomvc-app.css
เช่น: /assets/css/todomvc-app.css
todomvc-app.css ใน app.scss เปิดไฟล์ assets/css/app.scss และแทนที่ด้วยสิ่งต่อไปนี้:
 /* This file is for your main application css. */
/* @import "./phoenix.css"; */
@import "./todomvc-app.css" ;
เช่น: /assets/css/app.scss#L4
เปิด lib/app_web/components/layouts/app.html.heex และแทนที่เนื้อหาด้วยรหัสต่อไปนี้:
 <!DOCTYPE html >
< html lang =" en " >
  < head >
    < meta charset =" utf-8 " />
    < meta http-equiv =" X-UA-Compatible " content =" IE=edge " />
    < meta name =" viewport " content =" width=device-width, initial-scale=1.0 " />
    < title > Phoenix Todo List </ title >
    < link rel =" stylesheet " href = {~p "/assets/app.css"} />
    < script defer type =" text/javascript " src = {~p "/assets/app.js"} > </ script >
  </ head >
  < body >
    < main role =" main " class =" container " >
      < %= @inner_content % >
    </ main >
  </ body >
</ html >
ก่อนหน้า:
lib/app_web/components/layouts/app.html.eex
หลังจาก:lib/app_web/components/layouts/app.html.heex
<%= @inner_content %> เป็นที่ที่แอป TODO จะแสดงผล
หมายเหตุ : แท็ก
<script>รวมอยู่ในการประชุม อย่างไรก็ตามเราจะไม่เขียนJavaScriptใด ๆ ในบทช่วยสอนนี้ เราจะได้รับคุณสมบัติที่เท่าเทียมกัน 100% ด้วย TODOMVC โดยไม่ต้องเขียนบรรทัดของJSเราไม่ได้ "เกลียด"JSในความเป็นจริงเรามีบทช่วยสอน "น้องสาว" ที่สร้างแอพ เดียวกัน ในJS: dwyl/JavaScript-todo-list-list-tutorial เราต้องการ เตือน คุณว่าคุณไม่ ต้องการJSใด ๆ ในการสร้างเว็บแอปพลิเคชันที่ใช้งานได้ดี
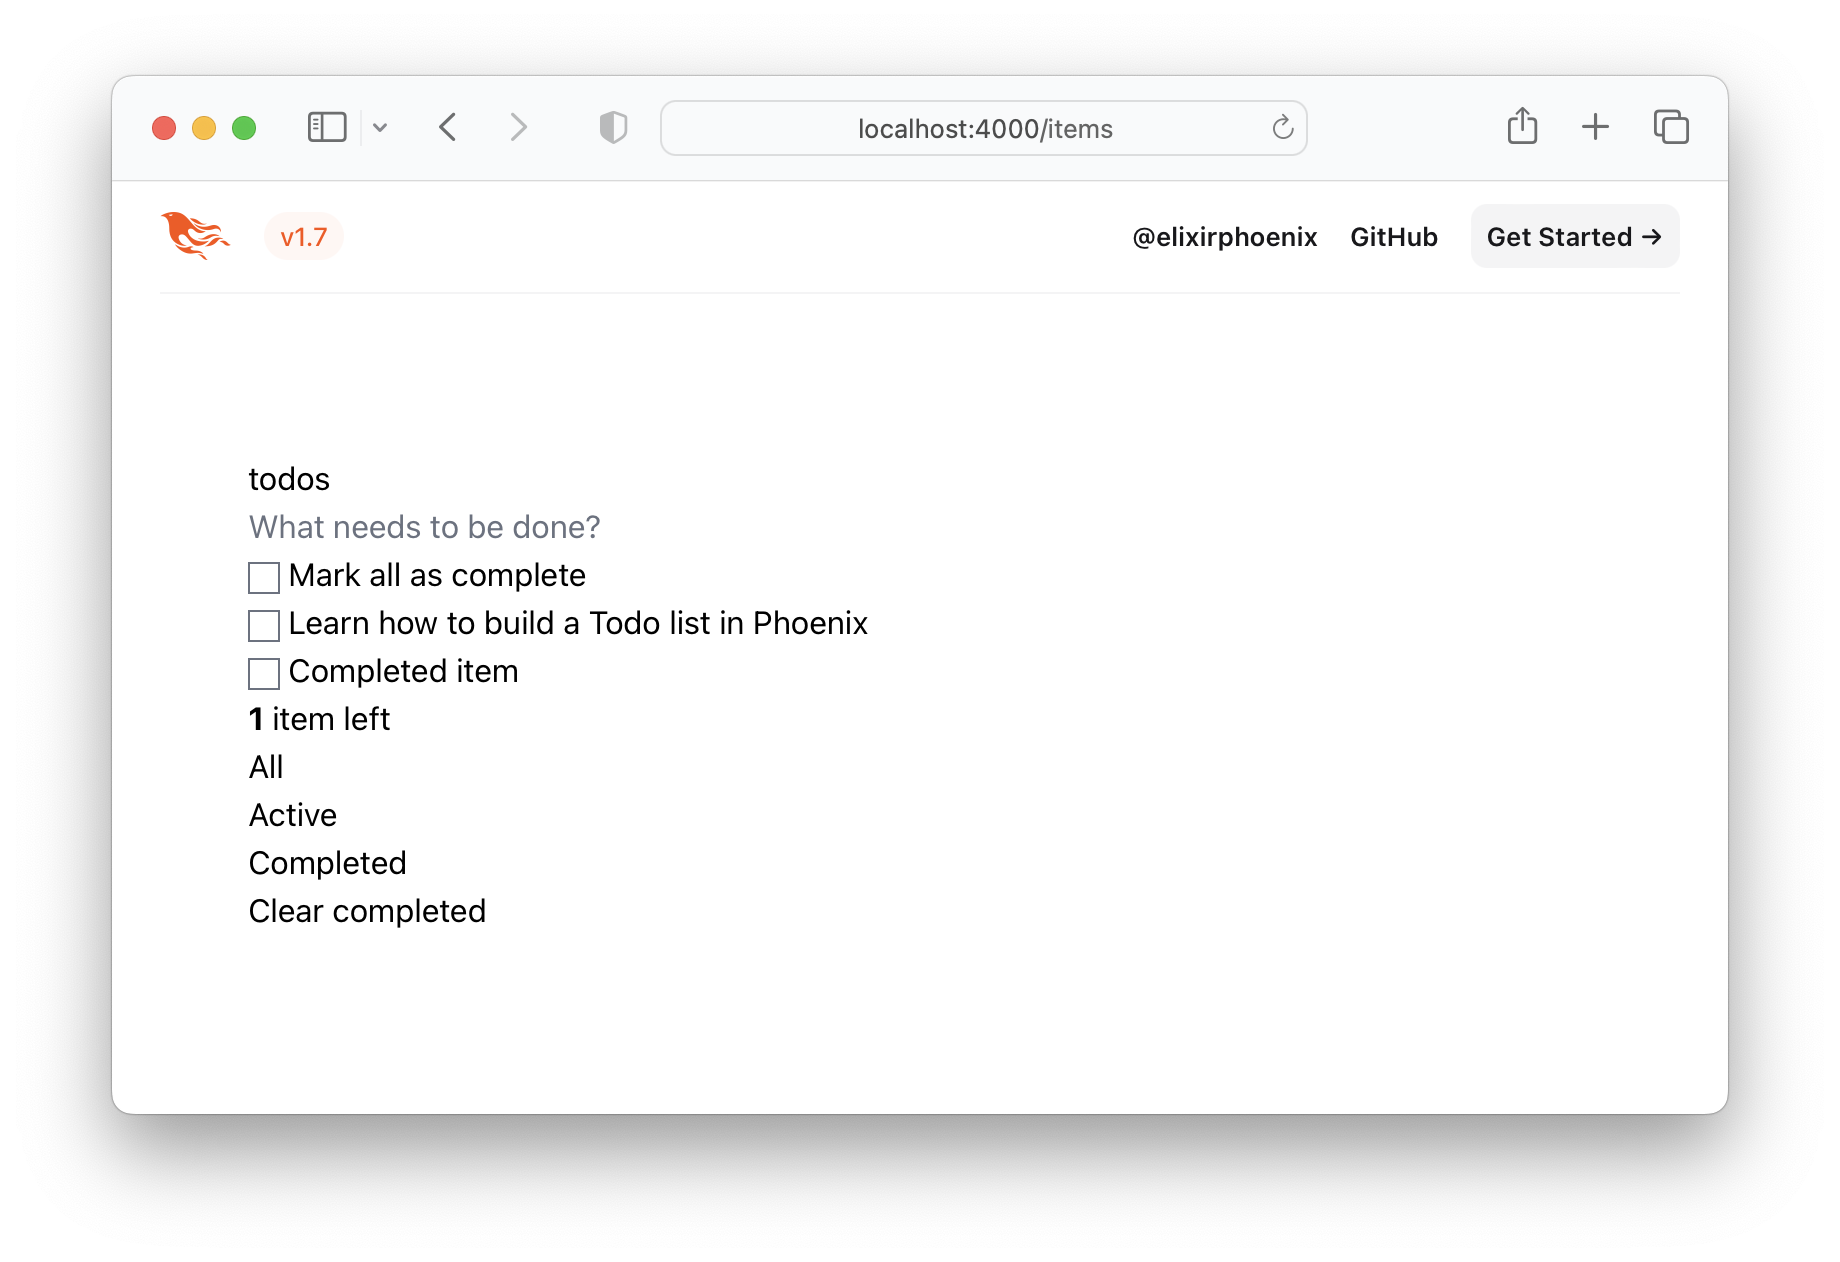
เมื่อบันทึกเทมเพลตเลย์เอาต์ไฟล์ TODOMVC CSS บันทึกไว้ที่ /assets/css/todomvc-app.css และ todomvc-app.css นำเข้าใน app.scss หน้าของคุณ /items ควรมีลักษณะเช่นนี้:
ดังนั้นรายการสิ่งที่ต้องทำของเราจึงเริ่มดูเหมือน TODOMVC แต่มันก็ยังเป็นเพียงรายการจำลอง
ในการแสดงข้อมูล item ในเทมเพลต TODOMVC เราจะต้องเพิ่มฟังก์ชั่นสองสามอย่าง เมื่อเราสร้างโครงการและสร้างโมเดล item ตัวควบคุมถูกสร้างขึ้น (อยู่ใน lib/app_web/controllers/item_controller.ex ) และส่วนประกอบ/มุมมองเช่นกัน (อยู่ใน lib/app_web/controllers/item_html.ex ) ส่วนประกอบ/มุมมอง นี้เป็นสิ่งที่ควบคุมการเรนเดอร์ของเนื้อหาภายในไดเรกทอรี lib/app_web/controllers/item_html ที่เราซ่อมแซมก่อนหน้านี้
เรารู้ว่าเราจำเป็นต้องทำการเปลี่ยนแปลง UI ดังนั้นเราจะเพิ่มฟังก์ชั่นบางอย่างในองค์ประกอบนี้ (ซึ่งคล้ายกับส่วน มุมมอง ของกระบวนทัศน์ MVC)
นี่เป็นโอกาสครั้งแรกของเราที่จะทำการทดสอบแรงผลักดันการทดสอบ (TDD)
สร้างไฟล์ใหม่ด้วย test/app_web/controllers/item_html_test.exs
พิมพ์รหัสต่อไปนี้ลงในไฟล์:
 defmodule AppWeb.ItemHTMLTest do
  use AppWeb.ConnCase , async: true
  alias AppWeb.ItemHTML

  test "complete/1 returns completed if item.status == 1" do
    assert ItemHTML . complete ( % { status: 1 } ) == "completed"
  end

  test "complete/1 returns empty string if item.status == 0" do
    assert ItemHTML . complete ( % { status: 0 } ) == ""
  end
end
เช่น: /test/app_web/controllers/item_html_test.exs
หากคุณพยายามเรียกใช้ไฟล์ทดสอบนี้:
mix test test/app_web/controllers/item_html_test.exsคุณจะเห็นข้อผิดพลาดต่อไปนี้ (เนื่องจากฟังก์ชั่นยังไม่มีอยู่!):
** (UndefinedFunctionError) function AppWeb.ItemHTML.checked/1 is undefined or private
เปิดไฟล์ lib/app_web/controllers/item_html.ex และเขียนฟังก์ชั่นเพื่อให้การทดสอบ ผ่าน
นี่คือวิธีที่เราใช้งานฟังก์ชั่น ไฟล์ item_html.ex ของคุณตอนนี้ควรมีลักษณะดังต่อไปนี้
 defmodule AppWeb.ItemHTML do
  use AppWeb , :html

  embed_templates "item_html/*"

  # add class "completed" to a list item if item.status=1
  def complete ( item ) do
    case item . status do
      1 -> "completed"
      _ -> "" # empty string means empty class so no style applied
    end
  end
end
ดำเนินการทดสอบอีกครั้งและตอนนี้พวกเขาควรผ่านไปแล้ว:
mix test test/app_web/controllers/item_html_test.exsคุณควรเห็น:
....

Finished in 0.1 seconds
4 tests, 0 failures
ตอนนี้เราได้สร้างฟังก์ชั่นมุมมองทั้งสองนี้และการทดสอบของเรากำลังผ่านไปแล้วลอง ใช้ มันในเทมเพลตของเรา!
เปิด lib/app_web/controllers/item_html/index.html.eex และค้นหาบรรทัด:
< ul class =" todo-list " > แทนที่ เนื้อหา ของ <ul> ด้วยสิ่งต่อไปนี้:
 < %= for item < - @items do % >
  < li data-id = {item.id} class = {complete(item)} >
    < div class =" view " >
      < %= if item.status == 1 do % >
        < input class =" toggle " type =" checkbox " checked />
      < % else % >
        < input class =" toggle " type =" checkbox " />
      < % end % >
      < label > < %= item.text % > </ label >
      < .link
        class="destroy"
        href={~p"/items/#{item}"}
        method="delete"
      >
      </ .link >
    </ div >
  </ li >
< % end % >
เช่น: lib/app_web/controllers/item_html/index.html.heex#L43-L53
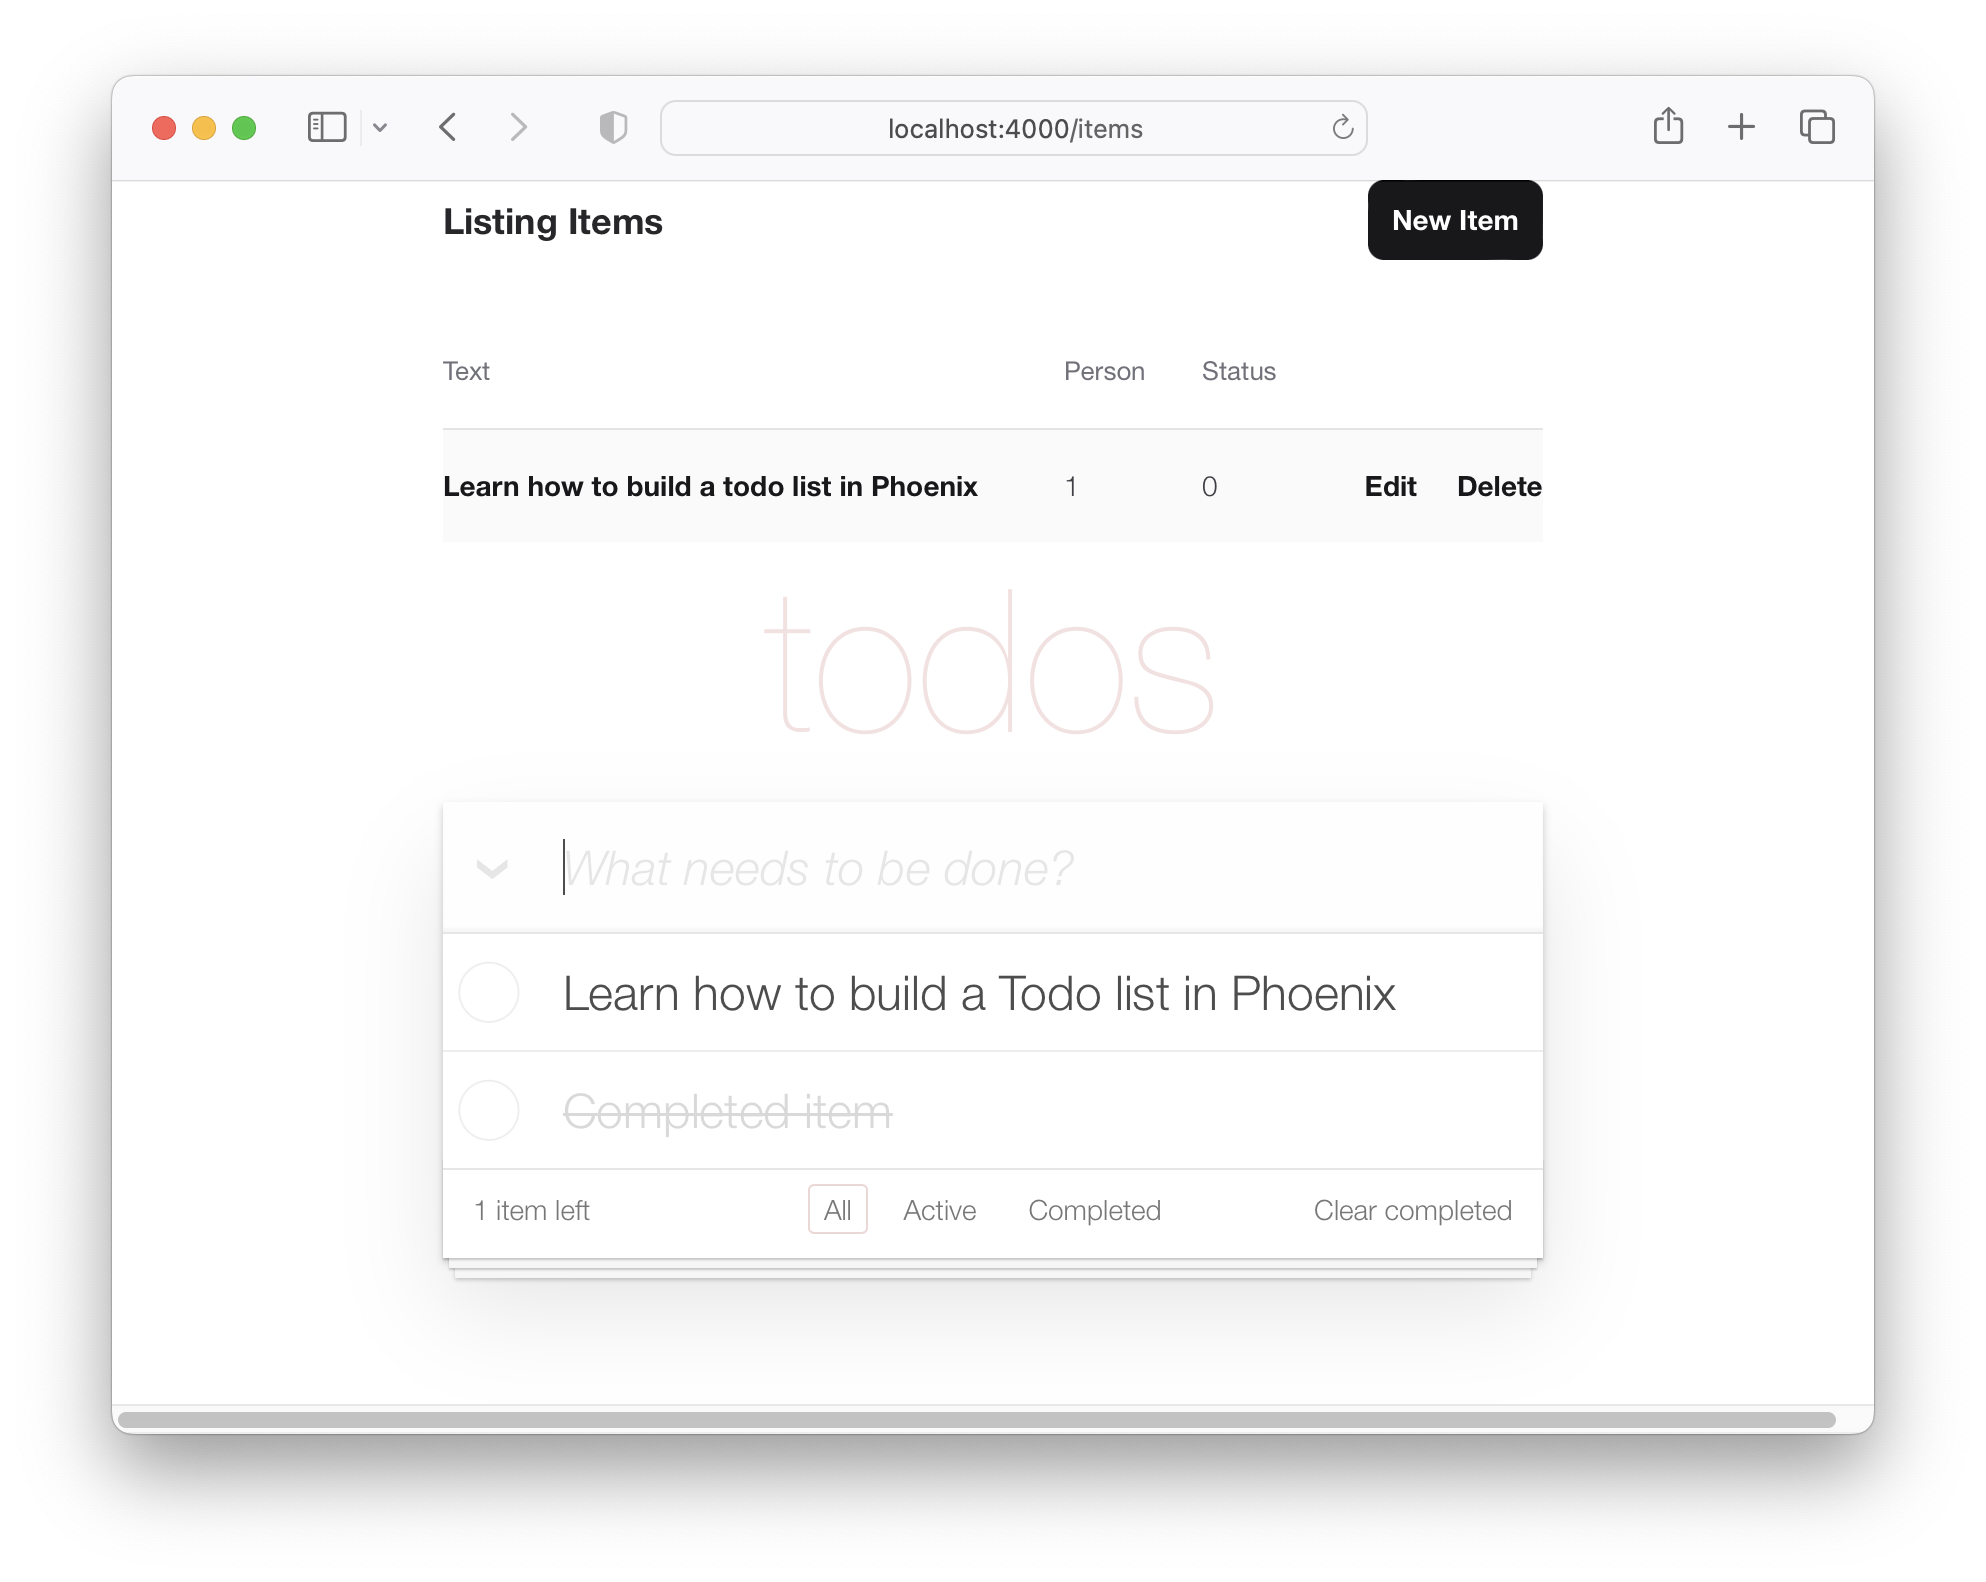
ด้วยไฟล์สองไฟล์ที่บันทึกไว้ถ้าคุณเรียกใช้แอพตอนนี้: mix phx.server และเยี่ยมชม http: // localhost: 4000/รายการ
คุณจะเห็น items จริง ที่คุณสร้างในขั้นตอนที่ 2.2 ด้านบน:

ตอนนี้เรามีรายการของเราที่แสดงในเค้าโครง TODOMVC มาทำงานเพื่อสร้างรายการใหม่ในสไตล์ "แอพหน้าเดียว"
ในปัจจุบันแบบฟอร์ม "รายการใหม่" ของเรามีอยู่ที่: http: // localhost: 4000/items/ใหม่ ( ตามที่ระบุไว้ในขั้นตอนที่ 2 ด้านบน )
เราต้องการให้บุคคลนั้นสามารถสร้างรายการใหม่โดยไม่ต้องไปที่หน้าอื่น เพื่อให้บรรลุเป้าหมายนั้นเราจะรวม lib/app_web/controllers/item_html/new.html.heex เทมเพลต ( บางส่วน ) ภายใน lib/app_web/controllers/item_html/index.html.heex เทมเพลต เช่น:
ก่อนที่เราจะสามารถทำได้เราจำเป็นต้องทำให้เทมเพลต new.html.heex ใหม่เพื่อลบฟิลด์ที่เราไม่ ต้องการ
มาเปิด lib/app_web/controllers/item_html/new.html.heex และทำให้ง่ายขึ้นเพียงแค่ฟิลด์ที่จำเป็น :text :
 < . simple_form :let = { f } for = { @ changeset } action = { ~p " /items " } >
  < . input
    field = { { f , :text } }
    type = "text"
    placeholder = "what needs to be done?"
  / >
  < :actions >
    < . button style = "display:none" > Save Item< / . button >
  < / :actions >
< / . simple_form >
ก่อน:
/lib/app_web/controllers/item_html/new.html.heex
หลังจาก:/lib/app_web/controllers/item_html/new.html.heex
เราจำเป็นต้องเปลี่ยนรูปแบบของแท็ก <.input> เพิ่มเติม ด้วยฟีนิกซ์ภายในไฟล์ lib/app_web/components/core_components.ex รูปแบบจะถูกกำหนดไว้สำหรับส่วนประกอบที่สร้างไว้ล่วงหน้า (ซึ่งเป็นกรณีที่มี <.input> )
หากต้องการเปลี่ยนสิ่งนี้ดังนั้นจึงใช้สไตล์เดียวกับ TODOMVC ให้ค้นหาบรรทัดต่อไปนี้
def input ( assigns ) do
เปลี่ยนแอตทริบิวต์คลาสด้วยคลาส new-todo ฟังก์ชั่นนี้ควรมีลักษณะดังต่อไปนี้
  def input ( assigns ) do
    ~H """
    <div phx-feedback-for={@name}>
      <.label for={@id}><%= @label %></.label>
      <input
        type={@type}
        name={@name}
        id={@id || @name}
        value={@value}
        class={[
          input_border(@errors),
          "new-todo"
        ]}
        {@rest}
      />
      <.error :for={msg <- @errors}><%= msg %></.error>
    </div>
    """
  end
นอกจากนี้เรายังต้องเปลี่ยนรูปแบบ actions ภายใน simple_form ในไฟล์เดียวกันค้นหา def simple_form(assigns) do และเปลี่ยนแปลงดังนั้นจึงดูเหมือนว่า:
  def simple_form ( assigns ) do
    ~H """
    <.form :let={f} for={@for} as={@as} {@rest}>
      <div>
        <%= render_slot(@inner_block, f) %>
        <div :for={action <- @actions}>
          <%= render_slot(action, f) %>
        </div>
      </div>
    </.form>
    """
  end
หากคุณเรียกใช้แอพฟีนิกซ์ตอนนี้และเยี่ยมชม http: // localhost: 4000/items/ใหม่คุณจะเห็นฟิลด์อินพุต :text เดียว และไม่มีปุ่ม "บันทึก":
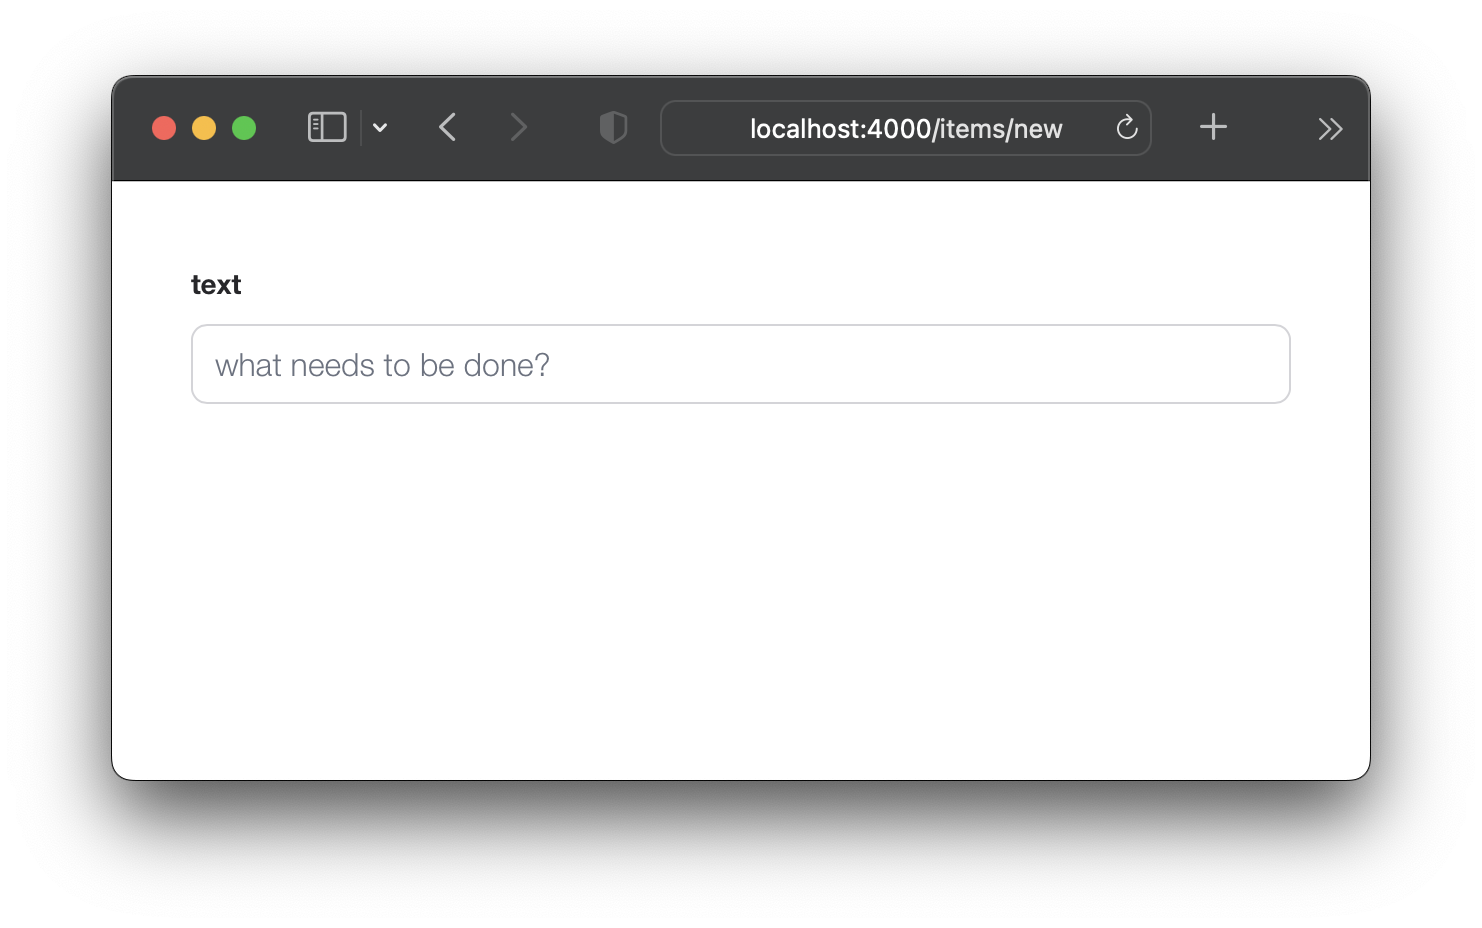
ไม่ต้องกังวลคุณยังสามารถส่งแบบฟอร์มด้วยปุ่ม ENTER (return) อย่างไรก็ตามหากคุณพยายามส่งแบบฟอร์มตอนนี้มันจะไม่ทำงานเพราะเราลบสองฟิลด์ที่กำหนดโดย changeset ! มาแก้ไขกันเถอะ
items สคีมาเพื่อตั้งค่า default เนื่องจากเราได้ลบสองฟิลด์ ( :person_id และ :status ) ออกจาก new.html.eex เราต้องตรวจสอบให้แน่ใจว่ามีค่าเริ่มต้นสำหรับสิ่งเหล่านี้ในสคีมา เปิดไฟล์ lib/app/todo/item.ex และแทนที่เนื้อหาด้วยสิ่งต่อไปนี้:
 defmodule App.Todo.Item do
  use Ecto.Schema
  import Ecto.Changeset

  schema "items" do
    field :person_id , :integer , default: 0
    field :status , :integer , default: 0
    field :text , :string

    timestamps ( )
  end

  @ doc false
  def changeset ( item , attrs ) do
    item
    |> cast ( attrs , [ :text , :person_id , :status ] )
    |> validate_required ( [ :text ] )
  end
end
ที่นี่เรากำลังอัปเด schema มา "รายการ" เพื่อตั้งค่าเริ่มต้นที่ 0 สำหรับทั้ง person_id และ status และใน changeset/2 เรากำลังลบ ข้อกำหนด สำหรับ person_id และ status ด้วยวิธีนี้แบบฟอร์ม item ใหม่ของเราสามารถส่งได้ เพียงแค่ ฟิลด์ text
เช่น: /lib/app/todo/item.ex#L6-L7
ตอนนี้เรามีค่า default สำหรับ person_id และ status หากคุณส่ง /items/new มันจะสำเร็จ
index/2 ใน ItemController เพื่อที่จะออนไลน์แบบฟอร์มรายการใหม่ ( new.html.eex ) ในเทมเพลต index.html.eex เราจำเป็นต้องอัปเดต AppWeb.ItemController.index/2 เพื่อรวมการเปลี่ยนแปลง
เปิดไฟล์ lib/app_web/controllers/item_controller.ex และอัปเดตฟังก์ชัน index/2 เป็นต่อไปนี้:
 def index ( conn , _params ) do
  items = Todo . list_items ( )
  changeset = Todo . change_item ( % Item { } )
  render ( conn , "index.html" , items: items , changeset: changeset )
end
ก่อนหน้า: /lib/app_web/controllers/item_controller.ex
หลังจาก: /lib/app_web/controllers/item_controller.ex#L9-L10
คุณจะไม่ เห็น การเปลี่ยนแปลงใด ๆ ใน UI หรือการทดสอบหลังจากขั้นตอนนี้ เพียงแค่ไปยัง 5.3 ซึ่งช่วงเวลา "AHA" เกิดขึ้น
new.html.eex ภายใน index.html.eex ตอนนี้เราได้ทำการเตรียมงานทั้งหมดแล้วขั้นตอนต่อไปคือการแสดงผล new.html.eex ( บางส่วน ) ภายใน index.html.eex เทมเพลต
เปิดไฟล์ lib/app_web/controllers/item_html/index.html.heex และค้นหาบรรทัด:
< input class =" new-todo " placeholder =" What needs to be done? " autofocus ="" >แทนที่ด้วยสิ่งนี้:
< % = new ( Map . put ( assigns , :action , ~p " /items/new " ) ) % > มาทำลายสิ่งที่เราเพิ่งทำ เรากำลัง ฝัง new.html.heex บางส่วนภายในไฟล์ index.html.heex เรากำลังทำสิ่งนี้โดยเรียกฟังก์ชั่น new/2 ภายใน item_controller.ex ฟังก์ชั่นนี้ เกี่ยวข้อง กับหน้าใน items/new และแสดงผลไฟล์ new.html.heex เหตุใดเราจึงเรียกฟังก์ชั่นนี้ให้ฝังได้สำเร็จ?
ก่อน: /lib/app_web/controllers/item_html/index.html.heex#L36
หลังจาก: /lib/app_web/controllers/item_html/index.html.heex#L36
หากคุณเรียกใช้แอพตอนนี้และเยี่ยมชม: http: // localhost: 4000/รายการ
คุณสามารถสร้างรายการโดยพิมพ์ข้อความของคุณและส่งด้วยปุ่ม ENTER (return)
การเปลี่ยนเส้นทางไปยังเทมเพลต "show" คือ "ตกลง" แต่เราสามารถทำได้ดีกว่า UX โดยเปลี่ยนเส้นทางกลับไปยังเทมเพลต index.html โชคดีที่นี่เป็นเรื่องง่ายเหมือนการอัปเดตบรรทัดเดียวในรหัส
redirect ใน create/2 เปิดไฟล์ lib/app_web/controllers/item_controller.ex และค้นหาฟังก์ชั่น create โดยเฉพาะ บรรทัด:
|> redirect ( to: ~p " /items/ #{ item } " )อัปเดตบรรทัดเป็น:
|> redirect ( to: ~p " /items/ " ) ก่อน: /lib/app_web/controllers/item_controller.ex#L22
หลังจาก: /lib/app_web/controllers/item_controller.ex#L23
ตอนนี้เมื่อเราสร้าง item ใหม่เราจะถูกเปลี่ยนเส้นทางไปยังเทมเพลต index.html :

item_controller_test.exs เพื่อเปลี่ยนเส้นทางไปยัง index การเปลี่ยนแปลงที่เราได้ทำกับไฟล์ new.html.heex และขั้นตอนข้างต้นได้ทำการทดสอบอัตโนมัติบางส่วนของเรา เราควรแก้ไขสิ่งนั้น
เรียกใช้การทดสอบ:
mix testคุณจะเห็นผลลัพธ์ต่อไปนี้:
 Finished in 0.08 seconds (0.03s async, 0.05s sync)
23 tests, 3 failures
เปิดไฟล์ test/app_web/controllers/item_controller_test.exs และค้นหา describe "new item" และ describe "create item" เปลี่ยนสองสิ่งนี้เป็นสิ่งต่อไปนี้
แทนที่การทดสอบ:
 describe "new item" do
  test "renders form" , % { conn: conn } do
    conn = get ( conn , ~p " /items/new " )
    assert html_response ( conn , 200 ) =~ "what needs to be done?"
  end
end

describe "create item" do
  test "redirects to show when data is valid" , % { conn: conn } do
    conn = post ( conn , ~p " /items " , item: @ create_attrs )

    assert % { } = redirected_params ( conn )
    assert redirected_to ( conn ) == ~p " /items/ "
  end

  test "errors when invalid attributes are passed" , % { conn: conn } do
    conn = post ( conn , ~p " /items " , item: @ invalid_attrs )
    assert html_response ( conn , 200 ) =~ "can't be blank"
  end
end
รหัสอัปเดต:
/test/app_web/controllers/item_controller_test.exs#L34-L55
หากคุณเรียกใช้การทดสอบ mix test อีกครั้งตอนนี้จะผ่านไปอีกครั้ง
......................
Finished in 0.2 seconds (0.09s async, 0.1s sync)
22 tests, 0 failuresจนถึงตอนนี้ฟังก์ชั่นหลักของ TODOMVC UI กำลังทำงานเราสามารถสร้างรายการใหม่และปรากฏในรายการของเรา ในขั้นตอนนี้เราจะปรับปรุง UI เพื่อรวมจำนวนรายการที่เหลืออยู่ที่มุมล่างซ้าย
เปิดไฟล์ test/app_web/controllers/item_html_test.exs และสร้างการทดสอบสองครั้งต่อไปนี้:
 test "remaining_items/1 returns count of items where item.status==0" do
  items = [
    % { text: "one" , status: 0 } ,
    % { text: "two" , status: 0 } ,
    % { text: "done" , status: 1 }
  ]
  assert ItemHTML . remaining_items ( items ) == 2
end

test "remaining_items/1 returns 0 (zero) when no items are status==0" do
  items = [ ]
  assert ItemHTML . remaining_items ( items ) == 0
end
เช่น: test/app_web/controllers/item_html_test.exs#L14-L26
การทดสอบเหล่านี้จะล้มเหลวเนื่องจากไม่มีฟังก์ชั่น ItemHTML.remaining_items/1
ทำการทดสอบ ผ่าน โดยการเพิ่มรหัสต่อไปนี้ลงในไฟล์ lib/app_web/controllers/item_html.ex :
 # returns integer value of items where item.status == 0 (not "done")
def remaining_items ( items ) do
  Enum . filter ( items , fn i -> i . status == 0 end ) |> Enum . count
end
เช่น: /lib/app_web/controllers/item_html#L15-L17
ตอนนี้การทดสอบกำลังผ่านให้ ใช้ remaining_items/1 ในเทมเพลต index.html เปิดไฟล์ lib/app_web/controllers/item_html/index.html.eex และค้นหาบรรทัดของรหัส:
< span class =" todo-count " > < strong > 1 </ strong > item left </ span >แทนที่ด้วยบรรทัดนี้:
< span class =" todo-count " > < %= remaining_items(@items) % > items left </ span > สิ่งนี้เพียงแค่เรียกใช้ฟังก์ชัน ItemHTML.remaining_items/1 พร้อมรายการ @items ซึ่งจะส่งคืนจำนวนเต็มของรายการที่เหลือที่ยังไม่ได้ "เสร็จสิ้น"
เช่น: /lib/app_web/controllers/item_html/index.html.eex#L60
ณ จุดนี้รายการ (ที่เหลือ) ตัวนับตัวนับที่ด้านล่างซ้ายของ TODOMVC UI กำลัง ทำงานอยู่ !
เพิ่มรายการ new ในรายการของคุณและดูการเพิ่มจำนวน:
มันง่ายพอลองทำสิ่งที่ก้าวหน้ากว่ากันอีกหน่อย!
หยุดพักและหยิบแก้วน้ำสดให้ตัวเองส่วนต่อไปจะ เข้มข้น !
status ของรายการสิ่งที่ต้องทำเป็น 1 หนึ่งในฟังก์ชั่นหลักของรายการสิ่งที่ต้องทำคือการสลับ status ของ item จาก 0 ถึง 1 ("เสร็จสมบูรณ์")
ในสคีมาของเรา item ที่เสร็จสมบูรณ์มี status 1
เราจะต้องใช้สองฟังก์ชั่นในคอนโทรลเลอร์ของเรา:
toggle_status/1 สลับสถานะของรายการเช่น: 0 ถึง 1 และ 1 ถึง 0toggle/2 ฟังก์ชั่นตัวจัดการสำหรับคำขอ HTTP เพื่อสลับสถานะของรายการ เปิดไฟล์ test/app_web/controllers/item_controller_test.exs เราจะทำการเปลี่ยนแปลงที่นี่เพื่อให้เราสามารถเพิ่มการทดสอบในฟังก์ชั่นที่เรากล่าวถึงก่อนหน้านี้ เราจะนำเข้า App.Todo ภายใน item_controller_test.exs และแก้ไขค่าคงที่สร้างและแอตทริบิวต์เพื่อสร้างรายการจำลอง ตรวจสอบให้แน่ใจว่าจุดเริ่มต้นของไฟล์ดูเหมือน
 defmodule AppWeb.ItemControllerTest do
  use AppWeb.ConnCase
  alias App.Todo

  import App.TodoFixtures

  @ create_attrs % { person_id: 42 , status: 0 , text: "some text" }
  @ public_create_attrs % { person_id: 0 , status: 0 , text: "some public text" }
  @ completed_attrs % { person_id: 42 , status: 1 , text: "some text completed" }
  @ public_completed_attrs % { person_id: 0 , status: 1 , text: "some public text completed" }
  @ update_attrs % { person_id: 43 , status: 1 , text: "some updated text" }
  @ invalid_attrs % { person_id: nil , status: nil , text: nil }
เรากำลังเพิ่มแอตทริบิวต์ Item คงที่ในภายหลังจะใช้ในการทดสอบ เรากำลังระบุ Item public เพราะเราจะเพิ่ม การรับรองความถูกต้อง ในแอพนี้ในภายหลัง
หลังจากนี้ให้ค้นหาฟังก์ชั่ defp create_item()/1 ภายในไฟล์เดียวกัน เปลี่ยนมันให้ดูเหมือน
  defp create_item ( _ ) do
    item = item_fixture ( @ create_attrs )
    % { item: item }
  end
เรากำลังจะใช้ฟังก์ชั่นนี้เพื่อสร้างวัตถุ Item เพื่อใช้ในการทดสอบที่เราจะเพิ่ม พูดถึงสิ่งที่มาทำอย่างนั้นกันเถอะ! เพิ่มตัวอย่างต่อไปนี้ในไฟล์
 describe "toggle updates the status of an item 0 > 1 | 1 > 0" do
  setup [ :create_item ]

  test "toggle_status/1 item.status 1 > 0" , % { item: item } do
    assert item . status == 0
    # first toggle
    toggled_item = % { item | status: AppWeb.ItemController . toggle_status ( item ) }
    assert toggled_item . status == 1
    # second toggle sets status back to 0
    assert AppWeb.ItemController . toggle_status ( toggled_item ) == 0
  end

  test "toggle/2 updates an item.status 0 > 1" , % { conn: conn , item: item } do
    assert item . status == 0
    get ( conn , ~p ' /items/toggle/ #{ item . id } ' )
    toggled_item = Todo . get_item! ( item . id )
    assert toggled_item . status == 1
  end
end
เช่น: /test/app_web/controllers/item_controller_test.exs#L64-L82
เปิดไฟล์ lib/app_web/controllers/item_controller.ex และเพิ่มฟังก์ชั่นต่อไปนี้ลงไป:
  def toggle_status ( item ) do
    case item . status do
      1 -> 0
      0 -> 1
    end
  end

  def toggle ( conn , % { "id" => id } ) do
    item = Todo . get_item! ( id )
    Todo . update_item ( item , % { status: toggle_status ( item ) } )
    conn
    |> redirect ( to: ~p " /items " )
  end
เช่น: /lib/app_web/controllers/item_controller.ex#L64-L76
การทดสอบจะยังคง ล้มเหลว ณ จุดนี้เนื่องจากเส้นทางที่เราเรียกใช้ในการทดสอบของเรายังไม่มีอยู่ มาแก้ไขกันเถอะ!
get /items/toggle/:id เส้นทางที่เรียกใช้ toggle/2 เปิด lib/app_web/router.ex และค้นหา resources "/items", ItemController เพิ่มบรรทัดใหม่:
get "/items/toggle/:id" , ItemController , :toggle เช่น: /lib/app_web/router.ex#L21
ตอนนี้การทดสอบของเราจะผ่าน ไปแล้ว :
mix testคุณควรเห็น:
22:39:42.231 [info]  Already up
...........................

Finished in 0.5 seconds
27 tests, 0 failurestoggle/2 เมื่อมีการคลิกช่องทำเครื่องหมายใน index.html ตอนนี้การทดสอบของเรากำลังผ่านไปแล้วก็ถึงเวลาที่ ใช้ ฟังก์ชั่นทั้งหมดที่เราสร้างขึ้นใน UI เปิด /lib/app_web/controllers/item_html/index.html.heex และค้นหาบรรทัด:
 < %= if item.status == 1 do % >
...
< % else % >
...
< % end % >
แทนที่ด้วยสิ่งต่อไปนี้:
  < %= if item.status == 1 do % >
    < .link href={~p"/items/toggle/#{item.id}"}
        class="toggle checked" >
        type="checkbox"
    </ .link >
  < % else % >
    < .link href={~p"/items/toggle/#{item.id}"}
        type="checkbox"
        class="toggle" >
    </ .link >
  < % end % >
เมื่อลิงค์นี้ถูกคลิกที่จุดสิ้นสุดของ get /items/toggle/:id จะถูกเรียกใช้
ในทางกลับกันทำให้เกิด toggle/2 ตัวจัดการที่เรากำหนดไว้ข้างต้น
ก่อน:
/lib/app_web/controllers/item_html/index.html.heex#L40
หลังจาก:/lib/app_web/controllers/item_html/index.html.heex#L47-L57
.checked ลงใน app.scss น่าเสียดายที่แท็ก <a> (ที่สร้างขึ้นด้วย <.link> ) ไม่สามารถมี :checked ตัวเลือกหลอกดังนั้นรูปแบบ TODOMVC เริ่มต้นที่ทำงานบนแท็ก <input> จะไม่ทำงานสำหรับลิงก์ ดังนั้นเราจำเป็นต้องเพิ่ม CSS สองบรรทัดลงใน app.scss ของเรา
เปิดไฟล์ assets/css/app.scss และเพิ่มบรรทัดต่อไปนี้ลงไป:
. todo-list li . checked + label {
	background-image : url ( 'data:image/svg+xml;utf8,%3Csvg%20xmlns%3D%22http%3A//www.w3.org/2000/svg%22%20width%3D%2240%22%20height%3D%2240%22%20viewBox%3D%22-10%20-18%20100%20135%22%3E%3Ccircle%20cx%3D%2250%22%20cy%3D%2250%22%20r%3D%2250%22%20fill%3D%22none%22%20stroke%3D%22%23bddad5%22%20stroke-width%3D%223%22/%3E%3Cpath%20fill%3D%22%235dc2af%22%20d%3D%22M72%2025L42%2071%2027%2056l-4%204%2020%2020%2034-52z%22/%3E%3C/svg%3E' );
	background-repeat : no-repeat;
}
หลังจากบันทึกไฟล์คุณควรมี: /assets/css/app.scss#L8
และเมื่อคุณดูแอปฟังก์ชั่นการสลับจะทำงานตามที่คาดไว้:

หมายเหตุการใช้งาน : เราจงใจ ไม่ได้ ใช้ JavaScript ในบทช่วยสอนนี้เพราะเราแสดงให้เห็นถึงวิธีการทำแอพที่แสดงผลฝั่งเซิร์ฟเวอร์ 100% สิ่งนี้ใช้งานได้ เสมอ แม้ในขณะที่ JS ถูกปิดใช้งานในเบราว์เซอร์หรืออุปกรณ์นั้นเก่ามากและไม่มีเว็บเบราว์เซอร์ที่ทันสมัย เราสามารถเพิ่มแอตทริบิวต์ onclick ลงในแท็ก <input> ได้อย่างง่ายดายเช่น:
 < input < %= checked(item) % > type="checkbox" class="toggle"
onclick="location.href='
  < %= Routes.item_path(@conn, :toggle, item.id) % > ';" >
แต่ onclick เป็น JavaScript และเราไม่ จำเป็น ต้องหันไปใช้ JS
<a> (ลิงก์) เป็นวิธีการที่ไม่ใช่ความหมายอย่างสมบูรณ์แบบ JS ในการสลับ item.status
todo หากคุณ "เสร็จสมบูรณ์" หรือย้อนกลับการดำเนินการลำดับของ Todos อาจแตกต่างกันระหว่างการดำเนินการเหล่านี้ เพื่อให้สิ่งนี้สอดคล้องกันเรามาดึงรายการสิ่ง todo ทั้งหมดในลำดับเดียวกัน
ภายใน lib/app/todo.ex เปลี่ยน list_items/0 เป็นต่อไปนี้
  def list_items do
    query =
      from (
        i in Item ,
        select: i ,
        order_by: [ asc: i . id ]
      )

    Repo . all ( query )
  end
โดยการดึงรายการสิ่ง todo และสั่งซื้อเรารับประกันว่า UX จะอยู่อย่างสอดคล้องกัน!
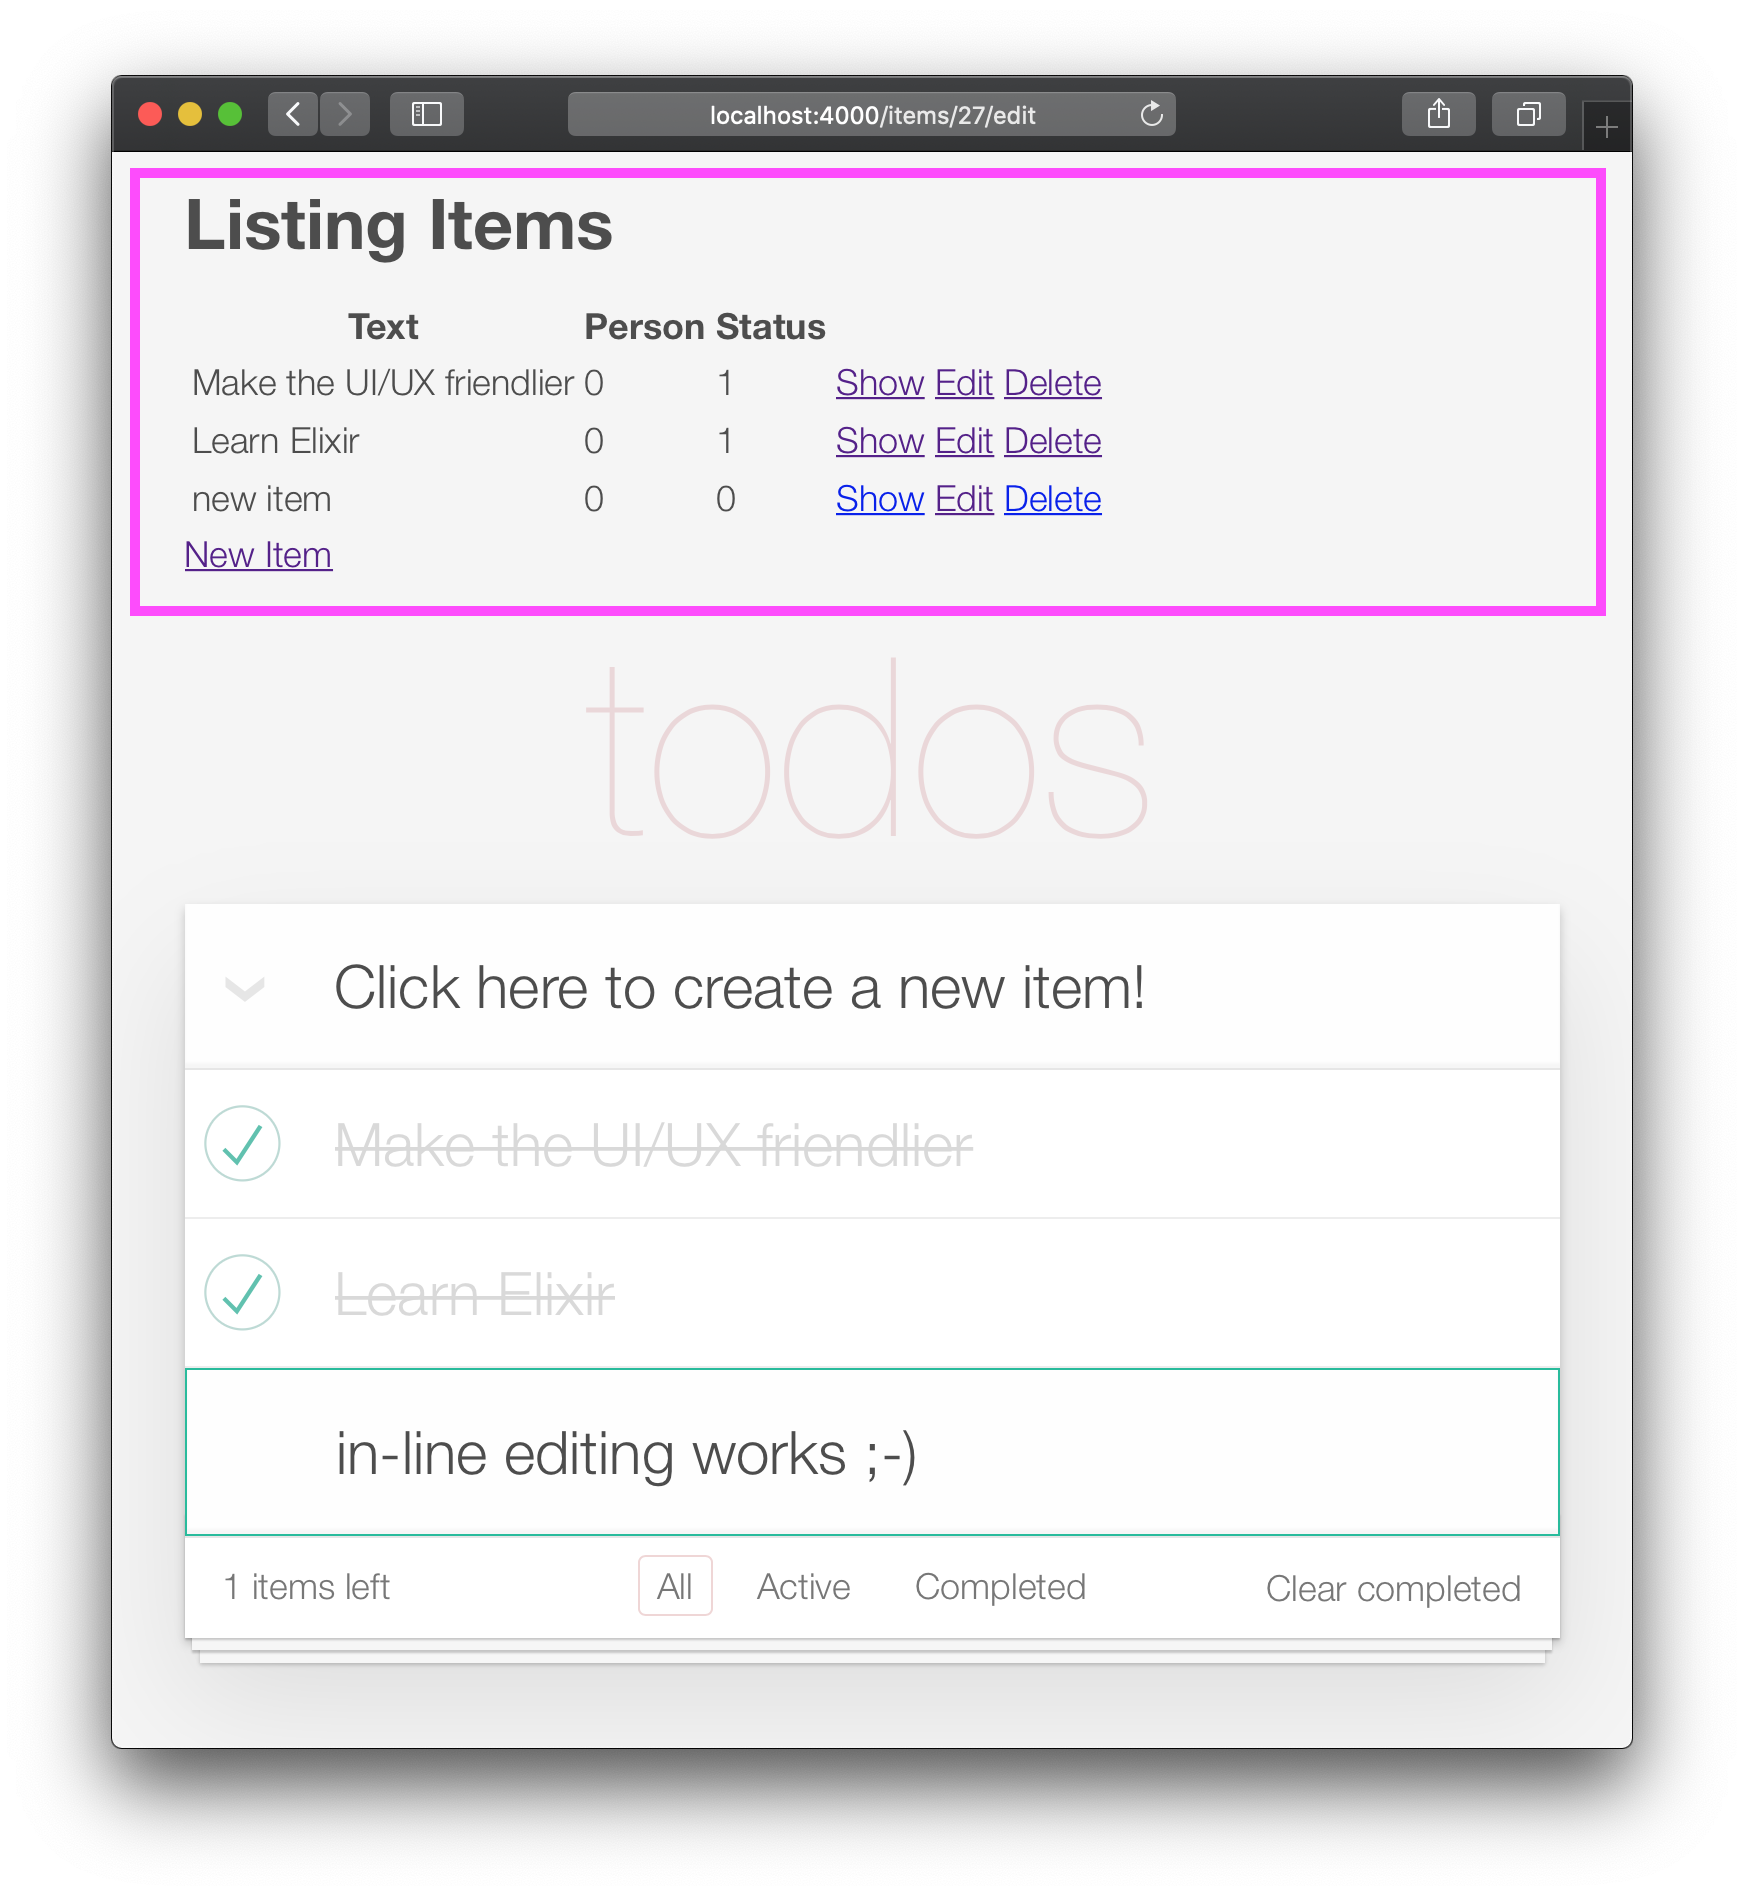
ฟังก์ ชั่นชิ้นสุดท้ายที่เราต้องเพิ่มลงใน UI ของเราคือความสามารถใน การแก้ไข ข้อความของรายการ
ในตอนท้ายของขั้นตอนนี้คุณจะมีการแก้ไขในบรรทัด:

เหตุผล ที่ต้องใช้สองคลิกเพื่อแก้ไขรายการคือเพื่อให้ผู้คนไม่ได้แก้ไขรายการ โดยไม่ตั้งใจ ขณะเลื่อน ดังนั้นพวกเขาจึงต้องคลิก/แตะ สองครั้ง เพื่อแก้ไข
ในข้อมูลจำเพาะ TODOMVC สิ่งนี้สามารถทำได้โดยการสร้างตัวฟังเหตุการณ์สำหรับเหตุการณ์ดับเบิลคลิกและแทนที่องค์ประกอบ <label> ด้วย <input> เราพยายาม หลีกเลี่ยง การใช้ JavaScript ในแอพฟีนิกซ์ที่แสดงผลฝั่งเซิร์ฟเวอร์ของเรา ( สำหรับตอนนี้ ) ดังนั้นเราจึงต้องการใช้วิธีการอื่น โชคดีที่เราสามารถจำลองเหตุการณ์ดับเบิลคลิกโดยใช้ HTML และ CSS ดู: https://css-tricks.com/double-click-in-in-css ( เราขอแนะนำให้อ่านโพสต์นั้นและการสาธิตเพื่อทำความเข้าใจอย่างเต็มที่ว่า CSS นี้ทำงานอย่างไร !)
หมายเหตุ : การใช้งาน CSS ไม่ใช่การคลิกสองครั้ง ที่แท้จริง คำอธิบายที่แม่นยำยิ่งขึ้นจะเป็น "สองคลิก" เนื่องจากการคลิกสองครั้งสามารถเกิดขึ้นได้ด้วยความล่าช้าโดยพลการ IE คลิกแรกตามด้วย 10 วินาทีรอและคลิกที่สองจะมีเอฟเฟกต์เดียวกับการคลิกสองครั้งอย่างต่อเนื่องอย่างรวดเร็ว หากคุณต้องการใช้การคลิกสองครั้งที่แท้จริงให้ดูที่: github.com/dwyl/javascript-todo-list-tutorial#52-double-click
มากับมันกันเถอะ! เปิดไฟล์ lib/app_web/controllers/item_html/index.html.heex และค้นหาบรรทัด:
< % = new ( Map . put ( assigns , :action , ~p " /items/new " ) ) % >แทนที่ด้วย:
 < % = if @ editing . id do % >
  <. link href = { ~p " /items " }
      method = "get"
      class= "new-todo" >
      Click here to create a new item!
  < / . link >
< % else % >
  < % = new ( Map . put ( assigns , :action , ~p " /items/new " ) ) % >
< % end % >
ที่นี่เรากำลังตรวจสอบว่าเรากำลังแก้ไขรายการและแสดงผลลิงค์แทนแบบฟอร์ม เราทำสิ่งนี้เพื่อหลีกเลี่ยงการมีหลายรูปแบบบนหน้า หากเรา ไม่ได้ แก้ไขรายการให้แสดง new.html.heex เหมือนก่อน ด้วยสิ่งนี้หากผู้ใช้แก้ไขรายการเขาสามารถ "ออกจากโหมดแก้ไข" ได้โดยคลิกที่ลิงค์ที่แสดงผล
เช่น: lib/app_web/controllers/item_html/index.html.heex#L30-L38
ถัดไปยังคงอยู่ในไฟล์ index.html.eex ค้นหาบรรทัด:
< %= for item < - @items do % > แทนที่แท็ก <li> ทั้งหมดด้วยรหัสต่อไปนี้
 < li data - id = { item . id } class= { complete ( item ) } >
    < % = if item . status == 1 do % >
      <. link href = { ~p " /items/toggle/ #{ item . id } " }
          class= "toggle checked" >
          type = "checkbox"
      < / . link >
    < % else % >
      < . link href = { ~p " /items/toggle/ #{ item . id } " }
          type = "checkbox"
          class= "toggle" >
      < / . link >
    < % end % >

  < div class = "view" >
    < % = if item . id == @ editing . id do % >
      < % = edit (
        Map . put ( assigns , :action , ~p " /items/ #{ item . id } /edit " )
        |> Map . put ( :item , item )
      ) % >
    < % else % >
      < . link href = { ~p " /items/ #{ item } /edit " } class= "dblclick" >
        < label > < % = item . text % > < / label >
      < / . link >
      < span > < / span > < ! -- used for CSS Double Click -- >
    < % end % >

    < . link
      class = "destroy"
      href = { ~p " /items/ #{ item } " }
      method= "delete"
    >
    < / . link >
  < / div >
< /li>
เช่น: lib/app_web/controllers/item_html/index.html.heex#L46-L79
เราได้ทำบางสิ่งที่นี่ เราเปลี่ยนปุ่มสลับนอก <div class="view> แท็กนอกจากนี้เราได้เปลี่ยนข้อความด้วยคำสั่งบล็อก if else บล็อก
หากผู้ใช้ไม่ได้แก้ไขลิงก์ ( <a> ) จะแสดงผลซึ่งเมื่อคลิกให้ผู้ใช้เข้าสู่โหมด "แก้ไข" ในทางกลับกันหากผู้ใช้ กำลังแก้ไข จะแสดงไฟล์ edit.html.heex
เมื่อพูดถึงสิ่งที่เรามาแก้ไขแก้ไข edit.html.heex ดังนั้นมันจึงแสดงสิ่งที่เราต้องการ: ฟิลด์ข้อความที่เมื่อ Enter ถูกกดแล้วแก้ไขรายการสิ่งที่ต้องอ้างอิง
 < .simple_form :let={f} for={@changeset} method="put" action={~p"/items/#{@item}"} >
  < .input
    field={{f, :text}}
    type="text"
    placeholder="what needs to be done?"
    class="new-todo"
  />
  < :actions >
    < .button
    style="display: none;"
    type="submit" >
      Save
    </ .button >
  </ :actions >
  <!-- submit the form using the Return/Enter key -->
</ .simple_form >CSS สำหรับการแก้ไข ในการเปิดใช้งานเอฟเฟกต์การคลิกสองครั้ง CSS เพื่อเข้าสู่โหมด edit เราจำเป็นต้องเพิ่ม CSS ต่อไปนี้ในไฟล์ assets/css/app.scss ของเรา:
. dblclick {
  position : relative; /* So z-index works later, but no surprises now */
}

. dblclick + span {
  position : absolute;
  top : -1 px ; /* these negative numbers are to ensure */
  left : -1 px ; /* that the <span> covers the <a> */
  width : 103 % ; /* Gotta do this instead of right: 0; */
  bottom : -1 px ;
  z-index : 1 ;
}

. dblclick + span : active {
  left : -9999 px ;
}

. dblclick : hover {
  z-index : 2 ;
}
เช่น: assets/css/app.css#L13-L32
นอกจากนี้เนื่องจากมาร์กอัปของเราแตกต่างจากมาร์กอัป TODOMVC เล็กน้อย เราจึงต้องเพิ่ม CSS เพิ่มขึ้นเล็กน้อยเพื่อให้ UI สอดคล้องกัน:
. todo-list li . toggle + div > a > label {
  background-image : url ( 'data:image/svg+xml;utf8,%3Csvg%20xmlns%3D%22http%3A//www.w3.org/2000/svg%22%20width%3D%2240%22%20height%3D%2240%22%20viewBox%3D%22-10%20-18%20100%20135%22%3E%3Ccircle%20cx%3D%2250%22%20cy%3D%2250%22%20r%3D%2250%22%20fill%3D%22none%22%20stroke%3D%22%23ededed%22%20stroke-width%3D%223%22/%3E%3C/svg%3E' );
  background-repeat : no-repeat;
  background-position : center left;
}

. todo-list li . checked + div > a > label
{
  background-image : url ( 'data:image/svg+xml;utf8,%3Csvg%20xmlns%3D%22http%3A//www.w3.org/2000/svg%22%20width%3D%2240%22%20height%3D%2240%22%20viewBox%3D%22-10%20-18%20100%20135%22%3E%3Ccircle%20cx%3D%2250%22%20cy%3D%2250%22%20r%3D%2250%22%20fill%3D%22none%22%20stroke%3D%22%23bddad5%22%20stroke-width%3D%223%22/%3E%3Cpath%20fill%3D%22%235dc2af%22%20d%3D%22M72%2025L42%2071%2027%2056l-4%204%2020%2020%2034-52z%22/%3E%3C/svg%3E' );
  background-repeat : no-repeat;
  background-position : center left;
}

. toggle {
  width : 10 % ;
  z-index : 3 ; /* keep the toggle checkmark above the rest */
}

a . new-todo {
  display : block;
  text-decoration : none;
}

. todo-list . new-todo {
  border : 1 px # 1abc9c solid;
}

. view a , . view a : visited {
  display : block;
  text-decoration : none;
  color : # 2b2d2f ;
}

. todo-list li . destroy {
  text-decoration : none;
  text-align : center;
  z-index : 3 ; /* keep the delete link above the text */
}
นี่คือสิ่งที่ไฟล์ app.scss ของคุณควรมีลักษณะในตอนท้ายของขั้นตอนนี้: assets/css/app.css#L34-L71
ItemController.edit/2 ฟังก์ชั่น เพื่อที่จะเปิดใช้งานการแก้ไขในบรรทัดเราจำเป็นต้องแก้ไขฟังก์ชั่น edit/2 เปิดไฟล์ lib/app_web/controllers/item_controller.ex และแทนที่ฟังก์ชั่น edit/2 ด้วยสิ่งต่อไปนี้:
 def edit ( conn , params ) do
  index ( conn , params )
end
นอกจากนี้เนื่องจากเรากำลังขอให้ฟังก์ชั่น index/2 ของเราจัดการการแก้ไขเราจำเป็นต้องอัปเดต index/2 :
 def index ( conn , params ) do
  item = if not is_nil ( params ) and Map . has_key? ( params , "id" ) do
    Todo . get_item! ( params [ "id" ] )
  else
    % Item { }
  end
  items = Todo . list_items ( )
  changeset = Todo . change_item ( item )
  render ( conn , "index.html" , items: items , changeset: changeset , editing: item )
end
ในที่สุดเราจำเป็นต้องจัดการการส่งแบบฟอร์มเพื่ออัปเดตรายการ (ที่แสดงใน edit.html.heex ) เมื่อเรากด Enter ตัวจัดการ update/2 จะถูกเรียกภายใน lib/app_web/controllers/item_controller.ex เราต้องการอยู่ในหน้าเดียวกันหลังจากอัปเดตรายการ
ดังนั้นเปลี่ยนมันเพื่อให้เป็นแบบนี้
 def update ( conn , % { "id" => id , "item" => item_params } ) do
  item = Todo . get_item! ( id )

  case Todo . update_item ( item , item_params ) do
    { :ok , _item } ->
      conn
      |> redirect ( to: ~p " /items/ " )

    { :error , % Ecto.Changeset { } = changeset } ->
      render ( conn , :edit , item: item , changeset: changeset )
  end
end
ไฟล์ item_controller.ex ของคุณควรเป็นแบบนี้: lib/app_web/controllers/item_controller.ex
ItemControllerTestในการแสวงหาของเราเพื่อสร้างแอพหน้า เดียว เราทำการทดสอบสองสามครั้ง! ไม่เป็นไร พวกเขาแก้ไขได้ง่าย
เปิดไฟล์ test/app_web/controllers/item_controller_test.exs และค้นหาการทดสอบด้วยข้อความต่อไปนี้
test "renders form for editing chosen item"
และเปลี่ยนมันเพื่อให้ดูเหมือนต่อไปนี้
  test "renders form for editing chosen item" , % { conn: conn , item: item } do
    conn = get ( conn , ~p " /items/ #{ item } /edit " )
    assert html_response ( conn , 200 ) =~ "Click here to create a new item"
  end
เมื่อเราเข้าสู่ "แก้ไขโหมดจับเวลา" เราจะสร้าง <a> ลิงก์เพื่อกลับไปที่ /items ตามที่เราได้นำไปใช้ก่อนหน้านี้ แท็กนี้มีข้อความ "คลิกที่นี่เพื่อสร้างข้อความใหม่" ซึ่งเป็นสิ่งที่เรายืนยัน
เช่น: test/app_web/controllers/item_controller_test.exs#L37-L39
ถัดไปค้นหาการทดสอบด้วยคำอธิบายต่อไปนี้:
describe "update item"อัปเดตบล็อกเป็นรหัสชิ้นส่วนต่อไปนี้
 describe "update item" do
  setup [ :create_item ]

  test "redirects when data is valid" , % { conn: conn , item: item } do
    conn = put ( conn , ~p " /items/ #{ item } " , item: @ update_attrs )
    assert redirected_to ( conn ) == ~p " /items/ "

    conn = get ( conn , ~p " /items/ " )
    assert html_response ( conn , 200 ) =~ "some updated text"
  end

  test "errors when invalid attributes are passed" , % { conn: conn , item: item } do
    conn = put ( conn , ~p " /items/ #{ item } " , item: @ invalid_attrs )
    assert html_response ( conn , 200 ) =~ "can't be blank"
  end
end
เช่น: test/app_web/controllers/item_controller_test.exs#L67-L80
เราได้อัปเดตเส้นทางที่แอปพลิเคชันเปลี่ยนเส้นทางไปหลังจากอัปเดตรายการ เนื่องจากเรากำลังสร้างแอปพลิเคชันหน้าเดียวเส้นทางนั้นเกี่ยวข้องกับเส้นทาง /items/ url
หากคุณทำการทดสอบตอนนี้พวกเขาควรผ่านอีกครั้ง:
 mix test

23:08:01.785 [info]  Already up
...........................

Finished in 0.5 seconds
27 tests, 0 failures

Randomized with seed 956565
index.html ตอนนี้เรามีคุณสมบัติ toggle และ edit การทำงานในที่สุดเราสามารถลบเค้าโครงฟีนิกซ์เริ่มต้น (ตาราง) เริ่มต้นออกจาก lib/app_web/controllers/item_html/index.html.heex เทมเพลต
เปิดไฟล์ lib/app_web/controllers/item_html/index.html.eex และลบรหัสทั้งหมดก่อนบรรทัด:
< section class =" todoapp " > เช่น: lib/app_web/controllers/item_html/index.html.heex
แอพของคุณควรเป็นแบบนี้: 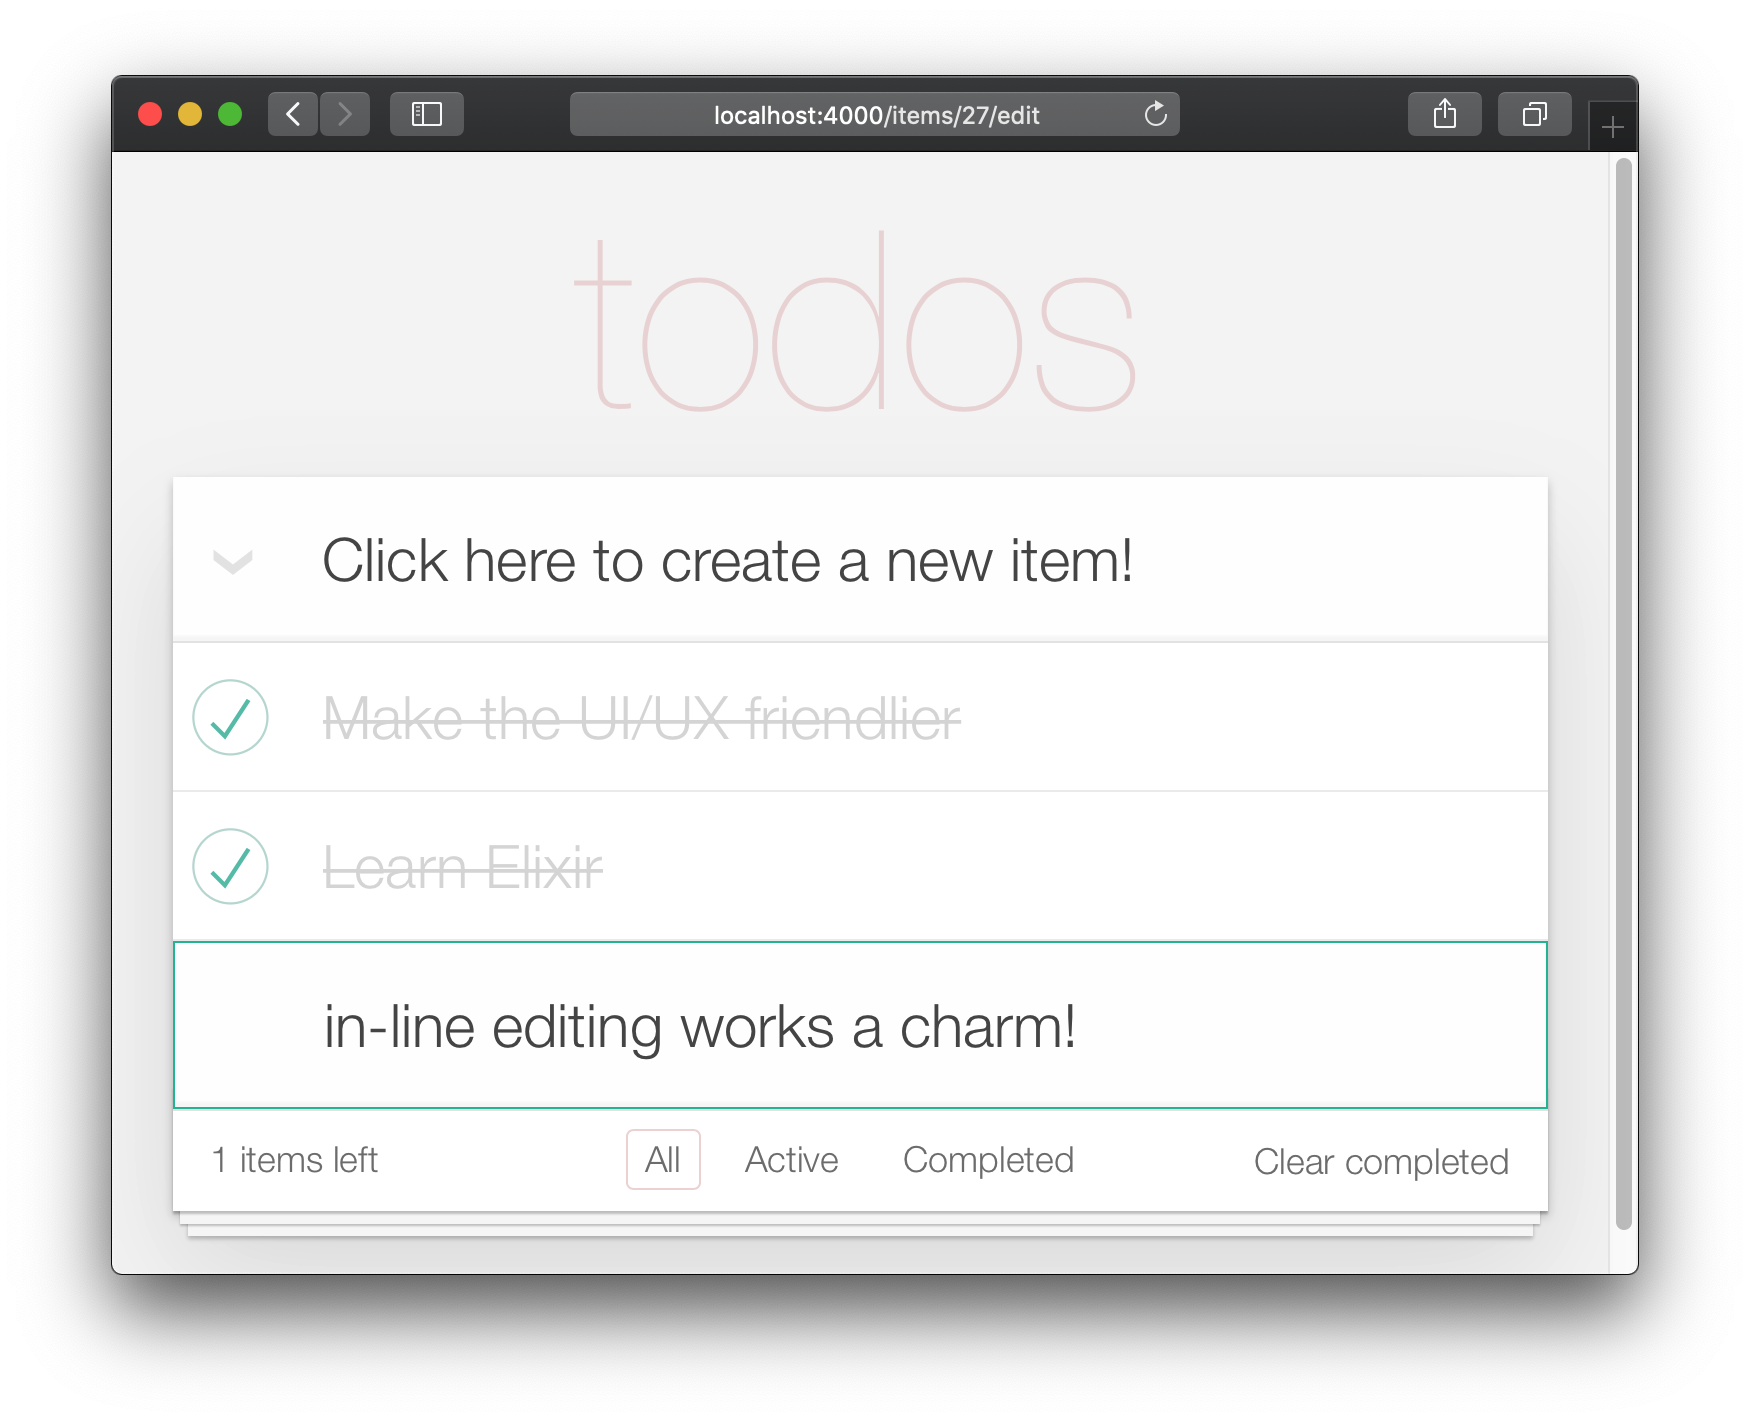
น่าเสียดายที่การลบเค้าโครงเริ่มต้นเรามีการทดสอบ "ทำลาย"
เปิดไฟล์ test/app_web/controllers/item_controller_test.exs และค้นหาการทดสอบที่มีคำอธิบายต่อไปนี้:
test "lists all items"อัปเดตการยืนยันจาก:
assert html_response ( conn , 200 ) =~ "Listing Items"ถึง:
assert html_response ( conn , 200 ) =~ "todos" เช่น: test/app_web/controllers/item_controller_test.exs#L14
ตอนนี้ฟังก์ชั่นหลัก (สร้าง, แก้ไข/อัปเดต, ลบ) ฟังก์ชั่นกำลังทำงานเราสามารถเพิ่มการปรับปรุง UI ขั้นสุดท้าย ในขั้นตอนนี้เราจะเพิ่มการนำทาง/การกรองส่วนท้าย
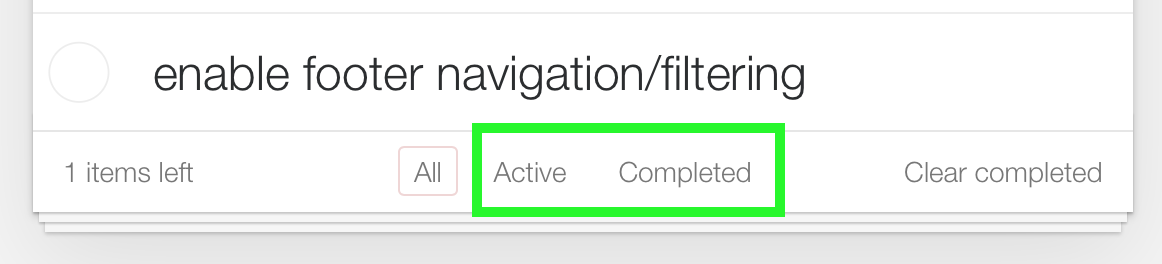
มุมมอง "ทั้งหมด" เป็นค่าเริ่มต้น "แอคทีฟ" เป็นรายการทั้งหมดที่มี status==0 "เสร็จสมบูรณ์" เป็นรายการทั้งหมดที่มี status==1
/:filterก่อนเริ่มต้นให้เพิ่มการทดสอบหน่วย เราต้องการแสดงรายการที่กรองตามตัวกรองที่เลือก
เปิด test/app_web/controllers/item_controller_test.exs และค้นหา describe "index" do ในบล็อกนี้เพิ่มการทดสอบต่อไปนี้ ตรวจสอบว่ารายการนั้นถูกแสดงอย่างถูกต้องเมื่อมีการเปลี่ยนแปลงตัวกรองหรือไม่
  test "lists items in filter" , % { conn: conn } do
    conn = post ( conn , ~p " /items " , item: @ public_create_attrs )

    # After creating item, navigate to 'active' filter page
    conn = get ( conn , ~p " /items/filter/active " )
    assert html_response ( conn , 200 ) =~ @ public_create_attrs . text

    # Navigate to 'completed page'
    conn = get ( conn , ~p " /items/filter/completed " )
    assert ! ( html_response ( conn , 200 ) =~ @ public_create_attrs . text )
  end
เช่น: test/app_web/controllers/item_controller_test.exs#L21-L32
เปิด lib/app_web/router.ex และเพิ่มเส้นทางต่อไปนี้:
get "/items/filter/:filter" , ItemController , :index เช่น: /lib/app_web/router.ex#L23
index/2 เพื่อส่ง filter ไปยังดู/เทมเพลต เปิดไฟล์ lib/app_web/controllers/item_controller.ex และค้นหาฟังก์ชัน index/2 แทนที่การเรียกใช้ render/3 เมื่อสิ้นสุด index/2 ด้วยสิ่งต่อไปนี้:
 render ( conn , "index.html" ,
  items: items ,
  changeset: changeset ,
  editing: item ,
  filter: Map . get ( params , "filter" , "all" )
)
เช่น: lib/app_web/controllers/item_controller.ex#L17-L22
Map.get(params, "filter", "all") ตั้งค่าค่าเริ่มต้นของ filter ของเราเป็น "ทั้งหมด" ดังนั้นเมื่อ index.html ถูกแสดงผลแสดงรายการ "ทั้งหมด"
filter/2 มุมมอง ในการกรองรายการตามสถานะของพวกเขาเราจำเป็นต้องสร้างฟังก์ชั่นใหม่
เปิดไฟล์ lib/app_web/controllers/item_html.ex และสร้างฟังก์ชัน filter/2 ดังนี้:
 def filter ( items , str ) do
  case str do
    "items" -> items
    "active" -> Enum . filter ( items , fn i -> i . status == 0 end )
    "completed" -> Enum . filter ( items , fn i -> i . status == 1 end )
    _ -> items
  end
end
เช่น: lib/app_web/controllers/item_html.ex#L19-L26
สิ่งนี้จะช่วยให้เราสามารถกรองรายการในขั้นตอนถัดไป
index.html ใช้ฟังก์ชั่นตัว filter/2 เพื่อกรองรายการที่แสดง เปิดไฟล์ lib/app_web/controllers/item_html/index.html.heex และค้นหาบรรทัด for การวนซ้ำ:
< % = for item <- @ items do % >แทนที่ด้วย:
< % = for item <- filter ( @ items , @ filter ) do % > เช่น: lib/app_web/controllers/item_html/index.html.heex#L18
สิ่งนี้เรียกใช้ฟังก์ชัน filter/2 ที่เรากำหนดไว้ในขั้นตอนก่อนหน้าผ่านในรายการ @items และ @filter ที่เลือก
ถัดไปค้นหา <footer> และแทนที่ เนื้อหา ของ <ul class="filters"> ด้วยรหัสต่อไปนี้:
  < li >
    < % = if @ filter == "items" do % >
      <a href = "/items/filter/items" class= "selected" >
        All
      < / a >
    < % else % >
      <a href = "/items/filter/items" >
        All
      < / a >
    < % end % >
  < / li >
  < li >
    < % = if @ filter == "active" do % >
      <a href = "/items/filter/active" class= 'selected' >
        Active
        [ < % = Enum . count ( filter ( @ items , "active" ) ) % > ]
      < / a >
    < % else % >
      <a href = "/items/filter/active" >
        Active
        [ < % = Enum . count ( filter ( @ items , "active" ) ) % > ]
      < / a >
    < % end % >
  < / li >
  < li >
    < % = if @ filter == "completed" do % >
      <a href = "/items/filter/completed" class= 'selected' >
        Completed
        [ < % = Enum . count ( filter ( @ items , "completed" ) ) % > ]
      < / a >
    < % else % >
      <a href = "/items/filter/completed" >
        Completed
        [ < % = Enum . count ( filter ( @ items , "completed" ) ) % > ]
      < / a >
    < % end % >
  < / li >
เรากำลังเพิ่มคลาส selected ตามเงื่อนไขตามค่า @filter Assign
เช่น: /lib/app_web/controllers/item_html/index.html.heex#L62-L98
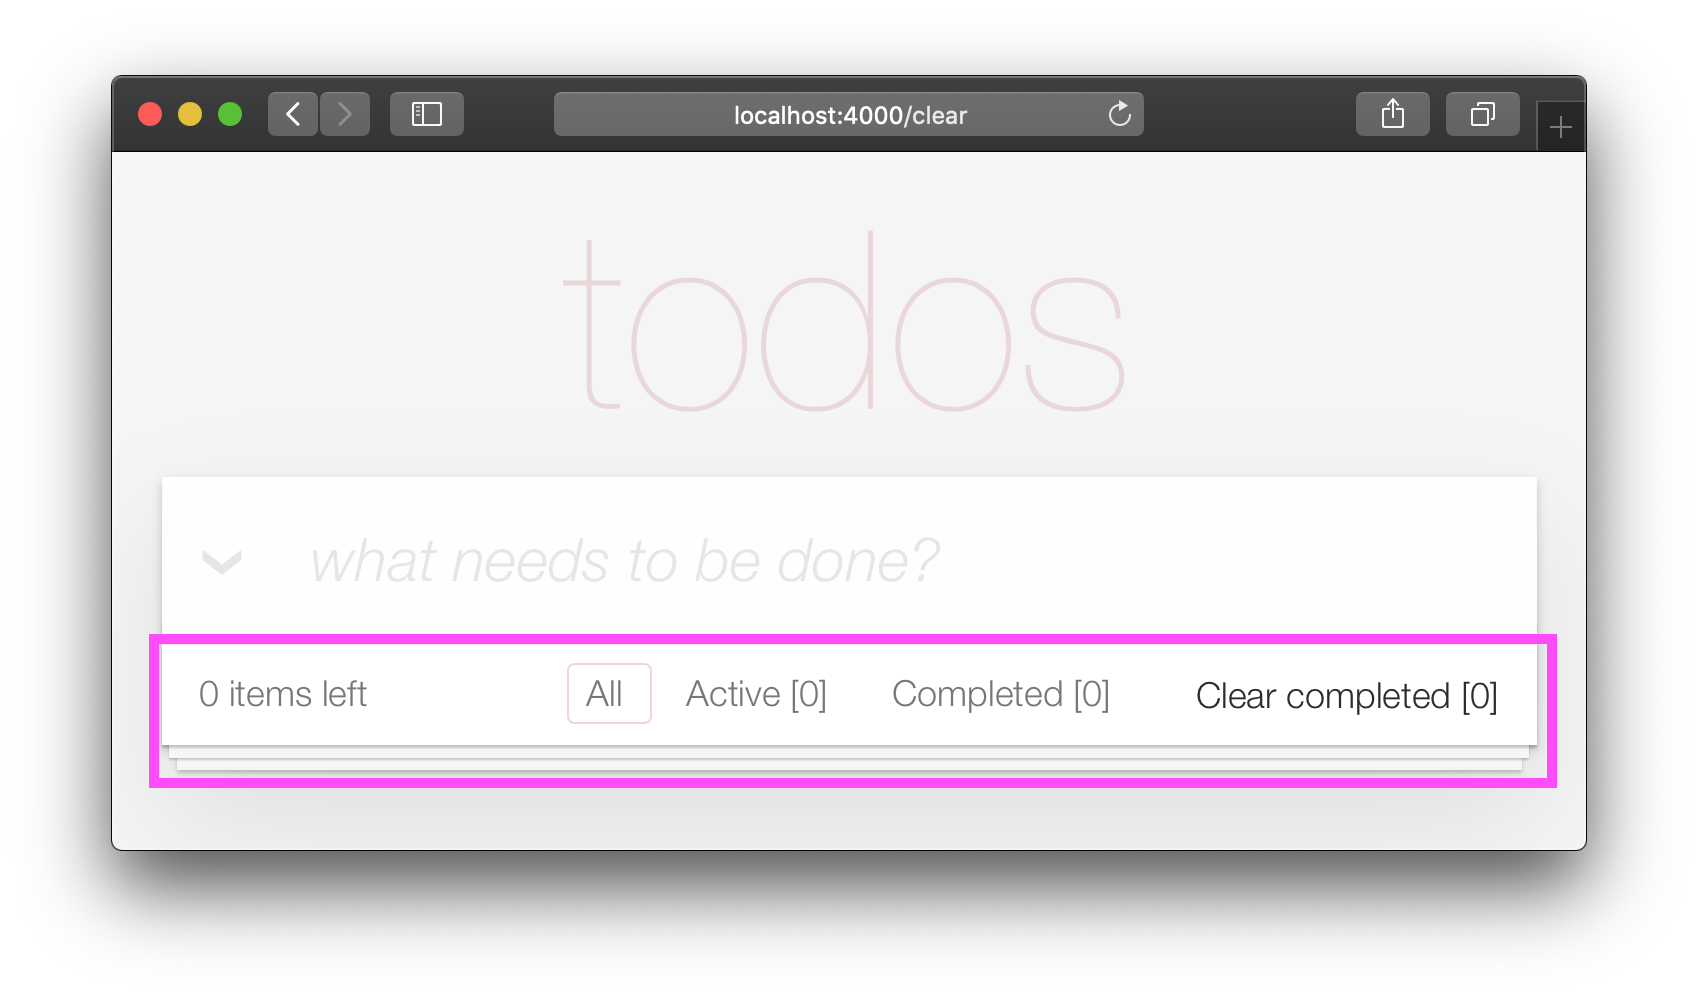
ในตอนท้ายของขั้นตอนนี้คุณจะมีตัวกรองส่วนท้ายที่ทำงานได้อย่างสมบูรณ์:
เราสามารถครอบคลุมฟังก์ชั่นนี้อย่างรวดเร็วที่เราเพิ่มด้วยการทดสอบหน่วยขนาดเล็ก เปิด test/app_web/controllers/item_html_test.exs และเพิ่มสิ่งต่อไปนี้
  test "test filter function" do
    items = [
      % { text: "one" , status: 0 } ,
      % { text: "two" , status: 0 } ,
      % { text: "three" , status: 1 } ,
      % { text: "four" , status: 2 } ,
      % { text: "five" , status: 2 } ,
      % { text: "six" , status: 1 } ,
    ]

    assert length ( ItemHTML . filter ( items , "items" ) ) == 4
    assert length ( ItemHTML . filter ( items , "active" ) ) == 2
    assert length ( ItemHTML . filter ( items , "completed" ) ) == 2
    assert length ( ItemHTML . filter ( items , "any" ) ) == 4
  end
และคุณควรทำกับคุณสมบัตินี้หรือไม่ เยี่ยมมาก!
เรา เกือบ จะเสร็จสิ้นการใช้งานฟีนิกซ์ของ TODOMVC สิ่งสุดท้ายที่จะนำไปใช้คือ "เสร็จสมบูรณ์ชัดเจน"
เปิดไฟล์ lib/app_web/router.ex ของคุณและเพิ่มเส้นทางต่อไปนี้:
get "/items/clear" , ItemController , :clear_completed scope "/" ตอนนี้ควรมีลักษณะดังต่อไปนี้:
  scope "/" , AppWeb do
    pipe_through :browser

    get "/" , PageController , :home
    get "/items/toggle/:id" , ItemController , :toggle
    get "/items/clear" , ItemController , :clear_completed
    get "/items/filter/:filter" , ItemController , :index
    resources "/items" , ItemController
  end
ในไฟล์ lib/app_web/controllers/item_controller.ex เพิ่มรหัสต่อไปนี้:
 import Ecto.Query
alias App.Repo

def clear_completed ( conn , _param ) do
  person_id = 0
  query = from ( i in Item , where: i . person_id == ^ person_id , where: i . status == 1 )
  Repo . update_all ( query , set: [ status: 2 ] )
  # render the main template:
  index ( conn , % { filter: "all" } )
end
เช่น: lib/app_web/controllers/item_controller.ex#L87-L93
สิ่งนี้ใช้ฟังก์ชั่น Handy update_all/3 เพื่ออัปเดตรายการทั้งหมดที่ตรงกับ query ในกรณีของเราเราค้นหา items ทั้งหมดที่เป็นของ person_id==0 และมี status==1
เราไม่ได้ ลบ รายการ แต่เรากำลังอัปเดตสถานะของพวกเขาเป็น 2 ซึ่งเพื่อจุดประสงค์ของตัวอย่างของเราหมายความว่าพวกเขา "เก็บถาวร"
หมายเหตุ : นี่เป็นคู่มือที่มีประโยชน์สำหรับ
update_all: https://adamdelong.com/bulk-update-ecto
สุดท้ายใน lib/app_web/controllers/item_html/index.html.eex เลื่อนไปที่ด้านล่างของไฟล์และแทนที่บรรทัด:
 < button class = "clear-completed" style = "display: block;" >
  Clear completed
< / button >
กับ:
 < a class = "clear-completed" href = "/items/clear" >
  Clear completed
  [ < % = Enum . count ( filter ( @ items , "completed" ) ) % > ]
< / a >
เช่น: lib/app_web/controllers/item_html/index.html.heex#L104-L107
สิ่งสุดท้ายที่เราต้องทำคือการอัปเดตฟังก์ชั่น filter/2 ภายใน lib/app_web/controllers/item_html.ex Since status = 2 now pertains to an archived state, we want to return anything that is not archived.
Change the filter/2 function so it looks like so.
 def filter ( items , str ) do
  case str do
    "items" -> Enum . filter ( items , fn i -> i . status !== 2 end )
    "active" -> Enum . filter ( items , fn i -> i . status == 0 end )
    "completed" -> Enum . filter ( items , fn i -> i . status == 1 end )
    _ -> Enum . filter ( items , fn i -> i . status !== 2 end )
  end
end
At the end of this section your Todo List should have the "Clear completed" function working:
It's useful to have tests cover this feature. Open test/app_web/controllers/item_controller_test.exs . Alongside the constants, on top of the file, add the following line.
@completed_attrs %{person_id: 42, status: 1, text: "some text completed"}
We will use this to create an item that is already completed, so we can test the "clear completed" functionality.
Add the next lines to test the clear_completed/2 function.
  describe "clear completed" do
    setup [ :create_item ]

    test "clears the completed items" , % { conn: conn , item: item } do

      # Creating completed item
      conn = post ( conn , ~p " /items " , item: @ public_completed_attrs )
      # Clearing completed items
      conn = get ( conn , ~p " /items/clear " )

      items = conn . assigns . items
      [ completed_item | _tail ] = conn . assigns . items

      assert conn . assigns . filter == "all"
      assert completed_item . status == 2
    end

    test "clears the completed items in public (person_id=0)" , % { conn: conn , item: item } do

      # Creating completed item
      conn = post ( conn , ~p " /items " , item: @ public_completed_attrs )
      # Clearing completed items
      conn = get ( conn , ~p " /items/clear " )

      items = conn . assigns . items
      [ completed_item | _tail ] = conn . assigns . items

      assert conn . assigns . filter == "all"
      assert completed_item . status == 2
    end
endAt this point we already have a fully functioning Phoenix Todo List. There are a few things we can tidy up to make the App even better!
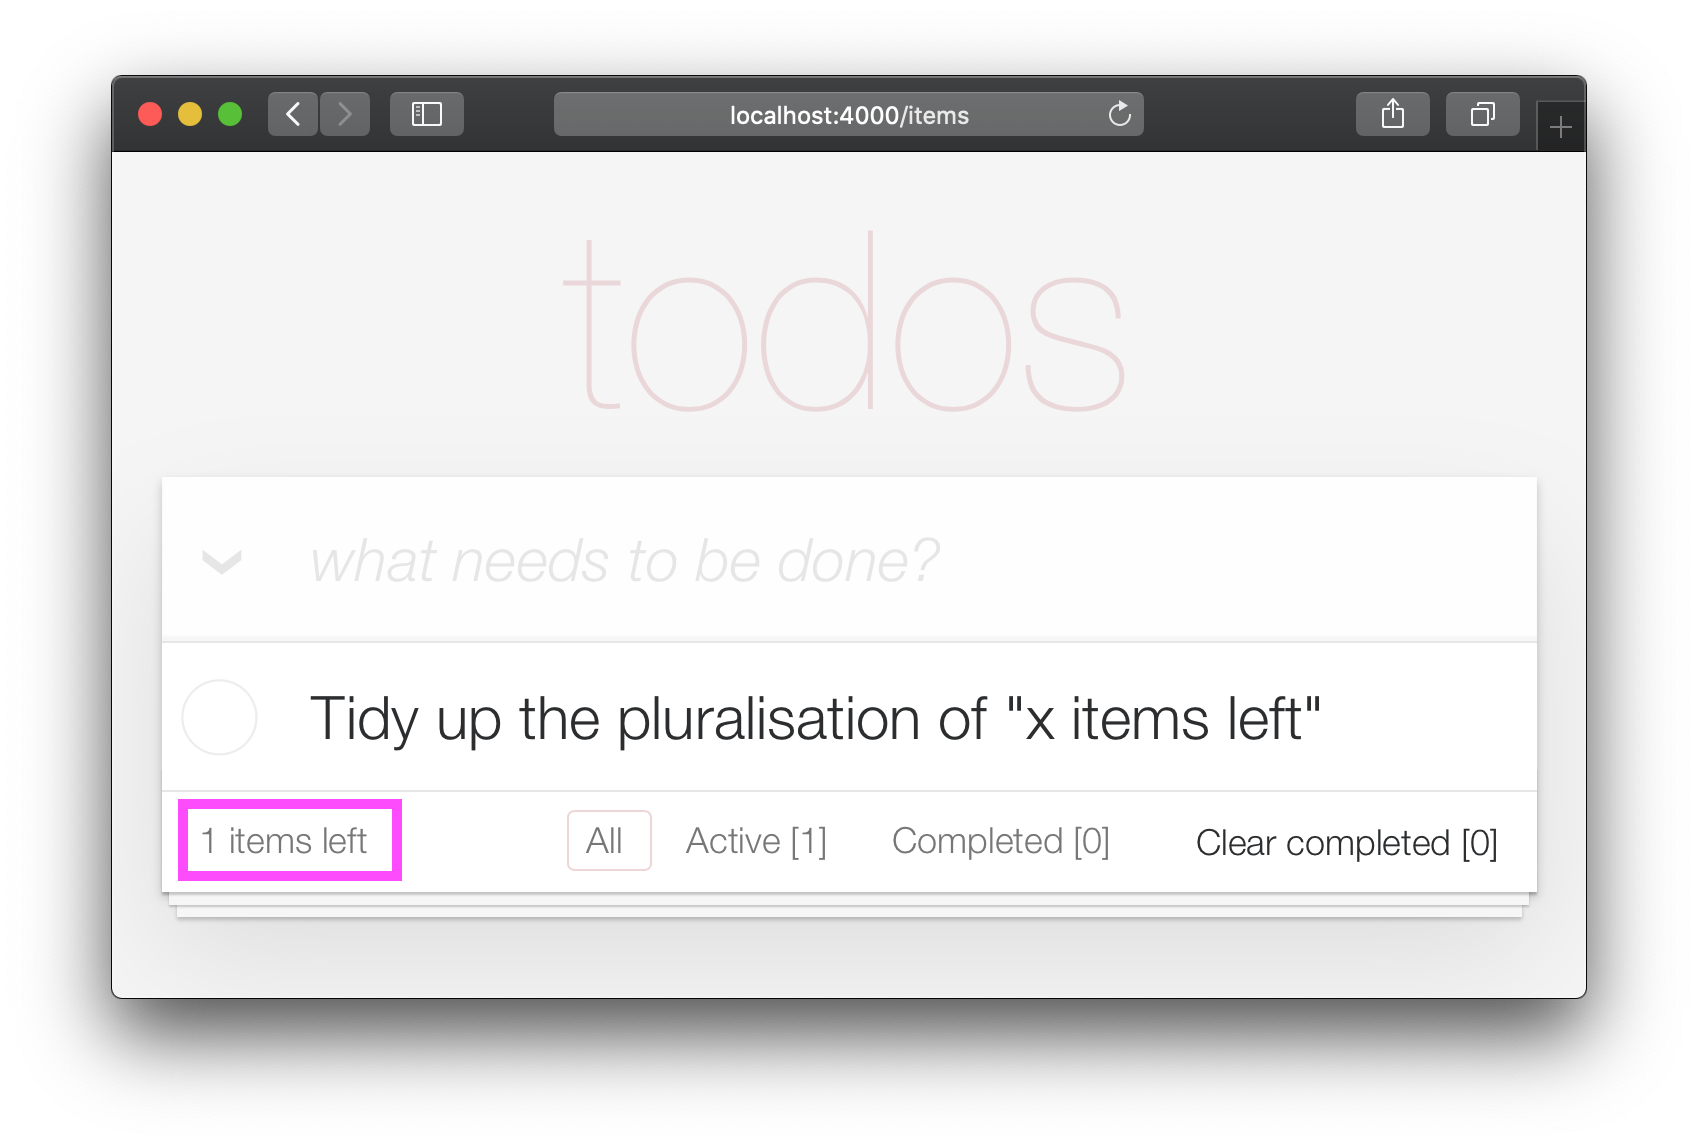
If you are the type of person to notice the tiny details, you would have been itching each time you saw the " 1 items left " in the bottom left corner:
Open your test/app_web/controllers/item_html_test.exs file and add the following test:
 test "pluralise/1 returns item for 1 item and items for < 1 <" do
  assert ItemHTML . pluralise ( [ % { text: "one" , status: 0 } ] ) == "item"
  assert ItemHTML . pluralise ( [
    % { text: "one" , status: 0 } ,
    % { text: "two" , status: 0 }
  ] ) == "items"
  assert ItemHTML . pluralise ( [ % { text: "one" , status: 1 } ] ) == "items"
end
eg: test/app_web/controllers/item_html_test.exs#L28-L35
This test will obviously fail because the AppWeb.ItemHTML.pluralise/1 is undefined. Let's make it pass!
Open your lib/app_web/controllers/item_html.ex file and add the following function definition for pluralise/1 :
 # pluralise the word item when the number of items is greater/less than 1
def pluralise ( items ) do
  # items where status < 1 is equal to Zero or Greater than One:
  case remaining_items ( items ) == 0 || remaining_items ( items ) > 1 do
    true -> "items"
    false -> "item"
  end
end
eg: lib/app_web/controllers/item_html.ex#L28-L35
Note : we are only pluralising one word in our basic Todo App so we are only handling this one case in our
pluralise/1function. In a more advanced app we would use a translation tool to do this kind of pluralising. See: https://hexdocs.pm/gettext/Gettext.Plural.html
Finally, use the pluralise/1 in our template. Open lib/app_web/controllers/item_html/index.html.heex
Locate the line:
< span class = "todo-count" > < % = remaining_items ( @ items ) % > items left < /span>And replace it with the following code:
 < span class = "todo-count" >
  < % = remaining_items ( @ items ) % > < % = pluralise ( @ items ) % > left
< /span>
eg: lib/app_web/controllers/item_html/index.html.heex#L61
At the end of this step you will have a working pluralisation for the word item/items in the bottom left of the UI:
If you visit one of the TodoMVC examples, you will see that no <footer> is displayed when there are no items in the list: http://todomvc.com/examples/vanillajs
At present our App shows the <footer> even if their are Zero items: ?
This is a visual distraction/clutter that creates unnecessary questions in the user's mind. Let's fix it!
Open your lib/app_web/controllers/item_html.ex file and add the following function definition unarchived_items/1 :
 def got_items? ( items ) do
  Enum . filter ( items , fn i -> i . status < 2 end ) |> Enum . count > 0
end
eg: lib/app_web/controllers/item_html.ex#L37-L39
Now use got_items?/1 in the template.
Wrap the <footer> element in the following if statement:
 < % = if got_items? ( @ items ) do % >

< % end % >
eg: lib/app_web/controllers/item_html/index.html.heex#L58
The convention in Phoenix/Elixir ( which came from Ruby/Rails ) is to have a ? (question mark) in the name of functions that return a Boolean ( true/false ) result.
At the end of this step our <footer> element is hidden when there are no items:
/ to ItemController.index/2 The final piece of tidying up we can do is to change the Controller that gets invoked for the "homepage" ( / ) of our app. Currently when the person viewing the Todo App
visits http://localhost:4000/ they see the lib/app_web/controllers/page_html/home.html.eex template:
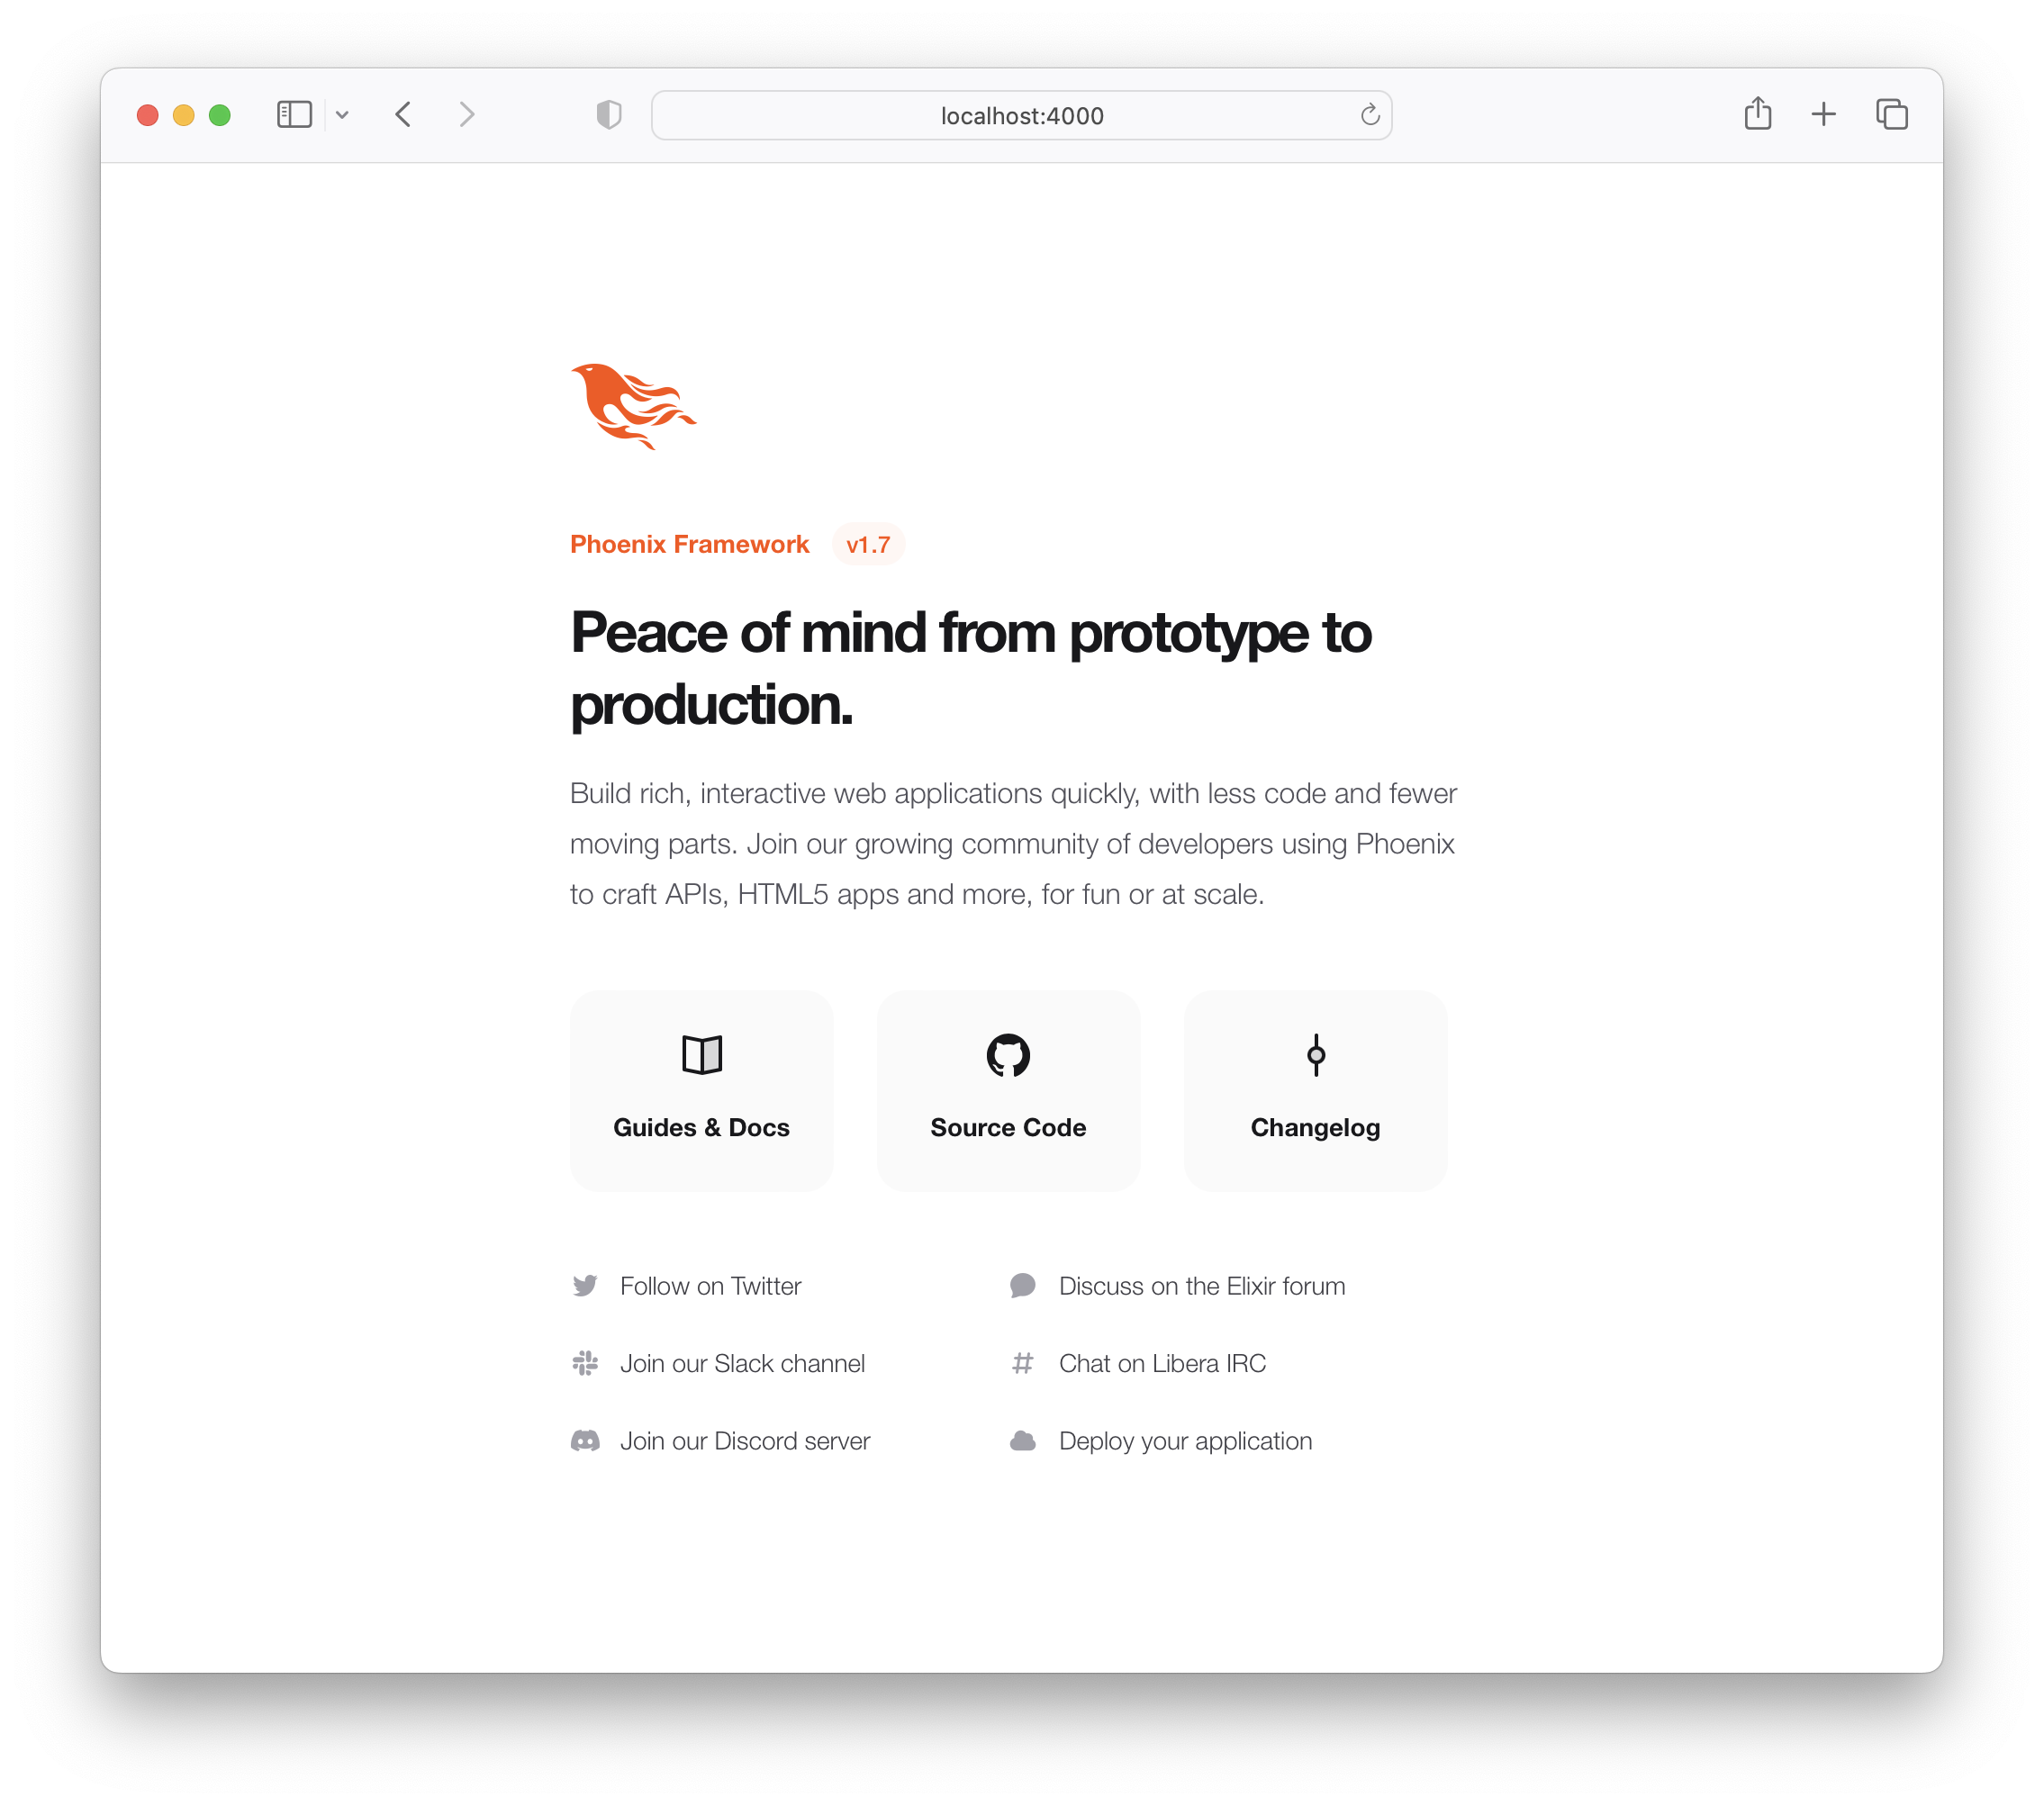
This is the default Phoenix home page ( minus the CSS Styles and images that we removed in step 3.4 above ). It does not tell us anything about the actual app we have built, it doesn't even have a link to the Todo App! Let's fix it!
Open the lib/app_web/router.ex file and locate the line:
get "/" , PageController , :index Update the controller to ItemController .
get "/" , ItemController , :index eg: lib/app_web/router.ex#L20
Now when you run your App you will see the todo list on the home page:
Unfortunately, this update will "break" the page test. Run the tests and see:
1) test GET / (AppWeb.PageControllerTest)
     test/app_web/controllers/page_controller_test.exs:4
     Assertion with = ~ failed
     code:  assert html_response(conn, 200) = ~ " Welcome to Phoenix! "
     left:  " <!DOCTYPE html>n<html lang= " en " >n  <head>n ... "
Given that we are no longer using the Page Controller, View, Template or Tests, we might as well delete them from our project!
git rm lib/app_web/controllers/page_controller.ex
git rm lib/app_web/controllers/page_html.ex
git rm lib/app_web/page_html/home.html.heex
git rm test/app_web/controllers/page_controller_test.exs
Deleting files is good hygiene in any software project. Don't be afraid to do it, you can always recover files that are in your git history.
Re-run the tests:
mix test
You should see them pass now:
 ...........................

Finished in 0.5 seconds
27 tests, 0 failures
Given that our Phoenix Todo List App is 100% server rendered, older browsers will perform a full page refresh when an action (create/edit/toggle/delete) is performed. This will feel like a "blink" in the page and on really slow connections it will result in a temporary blank page ! Obviously, that's horrible UX and is a big part of why Single Page Apps (SPAs) became popular; to avoid page refresh, use Turbo !
Get the performance benefits of an SPA without the added complexity of a client-side JavaScript framework. When a link is clicked/tapped, Turbolinks automatically fetches the page, swaps in its <body> , and merges its <head> , all without incurring the cost of a full page load.
Luckily, adding Turbo will require just a simple copy and paste! Check the unpkg files to fetch the latest CDN package.
We now need to add the following line to lib/app_web/components/layouts/app.html.heex and lib/app_web/components/layouts/root.html.heex .
< script src =" https://unpkg.com/browse/@hotwired/[email protected]/dist/turbo.es2017-esm.js " > </ script > This will install the UMD builds from Turbo without us needing to install a package using npm . Neat, huh?
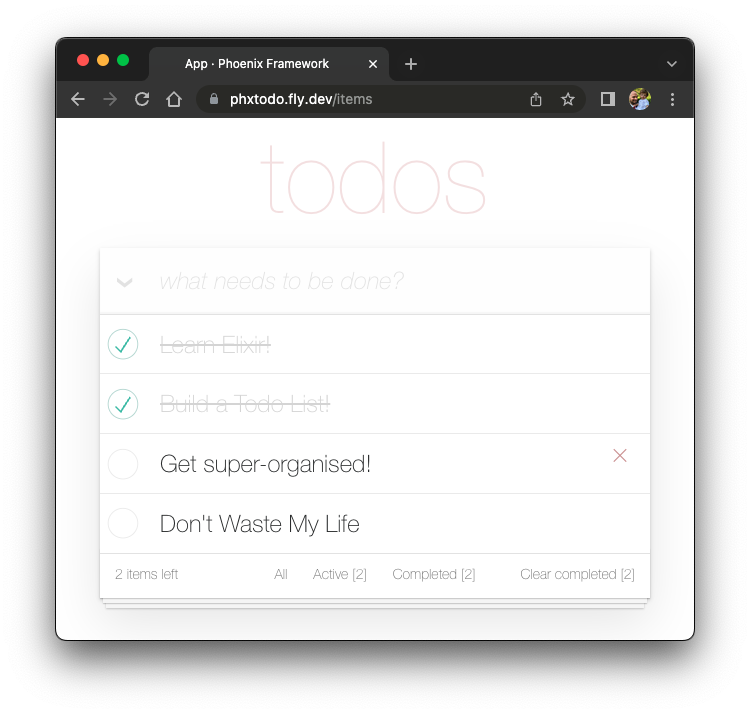
And that's it! Now when you deploy your server rendered Phoenix App, it will feel like an SPA! Try the Fly.io demo again: phxtodo.fly.dev Feel that buttery-smooth page transition.
Currently, our application occurs in the same page. However, there is a route that we don't use and is also aesthetically incompatible with the rest of our app.
If we check lib/app_web/controllers/item_controller.ex , you might notice the following function.
  def show ( conn , % { "id" => id } ) do
    item = Todo . get_item! ( id )
    render ( conn , :show , item: item )
  end
This serves the GET /items/:id route. We could do the same as we did with edit and render index . However, let's do something different so we learn a bit more about routes.
If we head on to router.ex , and locate the line:
resources "/items" , ItemControllerWe can change it to this.
resources "/items" , ItemController , except: [ :show ] We are saying that we want to keep all the routes in ItemController except the one related to the show action.
We can now safely delete it from item_controller.ex , as we don't need it any more.
Your files should look like the following.
eg: /lib/router.ex#L19-L29 lib/app_web/controllers/item_controller.ex
Currently, the application allows anyone to access it and manage todo items . Wouldn't it be great if we added authentication so each person could check their own list?
We created a dedicated authentication guide: /auth.md to help you set this up. You will soon find out this is extremely easy ?.
Deployment to Fly.io takes a few minutes, but has a few "steps", we suggest you follow the speed run guide: https://fly.io/docs/elixir/getting-started/
Once you have deployed you will will be able to view/use your app in any Web/Mobile Browser.
eg: https://phxtodo.fly.dev
Xs
Our Phoenix server currently only returns HTML pages that are server-side rendered . This is already awesome but we can make use of Phoenix to extend its capabilities.
What if our server also responded with JSON ? You're in luck! We've created small guide for creating a REST API : api.md
If you found this example useful, please ️ the GitHub repository so we ( and others ) know you liked it!
If you want to learn more Phoenix and the magic of LiveView , consider reading our beginner's tutorial: github.com/dwyl/ phoenix-liveview-counter-tutorial
Thank you for learning with us!


