phoenix todo list tutorial
1.0.0
フェニックスにTODOリストを構築するための完全な初心者の段階的なチュートリアル。
100%機能。 0%JavaScript。 HTML 、 CSS 、 Elixirだけです。高速で保守可能。
TODOリストはほとんどの人に馴染みがあります。常にリストを作成します。ゼロからTODOリストを構築することは、 UI / UXがシンプルであるため、 Elixir / Phoenixを学ぶのに最適な方法です。そのため、実装に集中できます。
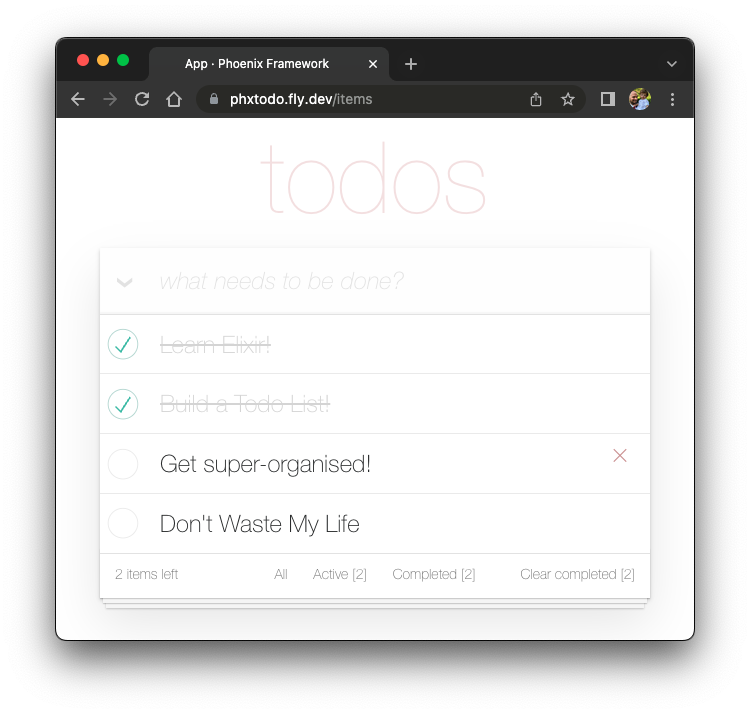
Team @dwylの場合、このアプリ/チュートリアルは、サーバーサイドレンダリング(クライアントサイドのプログレッシブエンハンスメントを使用)が、開発者の有効性(速い配送)、UX、およびアクセシビリティの間の優れたバランスを提供する方法のショーケースです。サーバーのレンダリングされたページは、5ms未満の時間がかかり、応答するため、UXが高速になります。 fly.io:phxtodo.fly.devラウンドトリップ応答時間は、すべてのインタラクションで200msサブであるため、クライアント側のレンダリングされたアプリのように感じられます。
Elixir/Phoenixでアプリをゼロから構築する方法を完全に初心者に示すTODOリストチュートリアル。
fly.ioバージョンをお試しください。リストにいくつかのアイテムを追加し、機能をテストします。
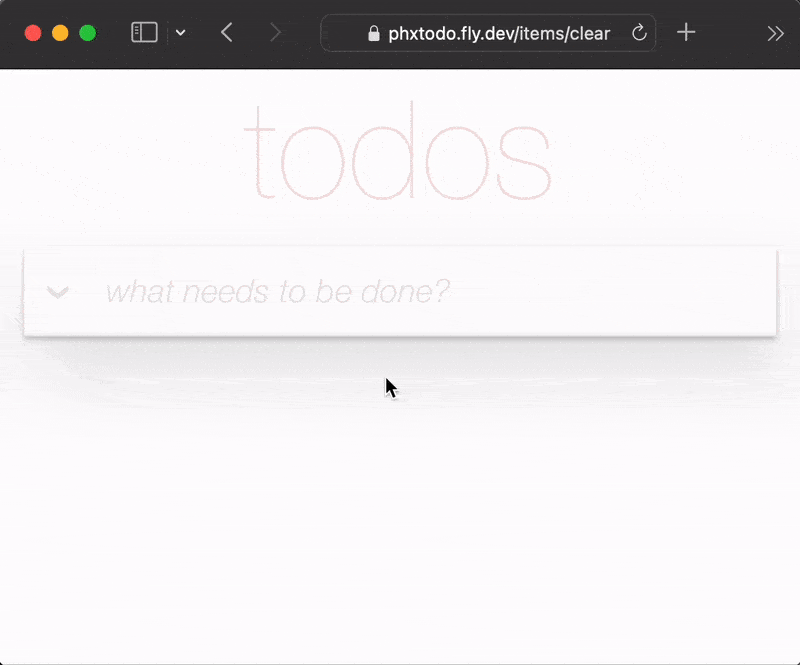
相互作用ごとに完全なHTTPラウンドトリップがあっても、応答時間は高速です。 Chrome | Firefox | Safariが、ページを再レンダリングする前にサーバーからの応答を待つ方法に注意してください。昨年の古いフルページの更新はなくなりました。最新のブラウザは、変更だけをインテリジェントにレンダリングします!したがって、UXは「ネイティブ」に近似します!真剣に、携帯電話でfly.ioアプリを試してみてください!
このチュートリアルでは、TODOMVC CSSを使用してUIを簡素化しています。これにはいくつかの利点がありますが、私たちが書く必要があるCSの量を最小限に抑えることです!また、完全な機能を達成するために機能を実装する必要があるガイドがあることを意味します。
注:
CSS信じられないほどのパワー/柔軟性が大好きですが、誰もがそれを好むわけではないことを知っています。参照:Learn-Tachyons#私たちが望む最後のことは、PhoenixチュートリアルでCSSで大量の時間を無駄にすることなのか!
このチュートリアルは、Elixir/Phoenixを学んでいる人向けです。フェニックスの事前の経験は想定されていません/予想されています。アプリの構築に必要なすべての手順を含めました。
ステップで立ち往生している場合は、GitHubで問題を開き、停滞しておらずに喜んでお手伝いします。コードの行がもう少し説明/明確さを使用できると感じたら、お知らせください。私たちは初心者になるのがどんなものかを知っています。何かが意味をなさないときはイライラする可能性があります! Githubで質問するのに役立ちます!
フィードバックをお願いします!あなたがそれが役立つとわかった場合は、レポを主演してください。
TODOリストを作成しようとする前に、コンピューターにインストールする必要があるすべてを確認してください。参照:前提条件
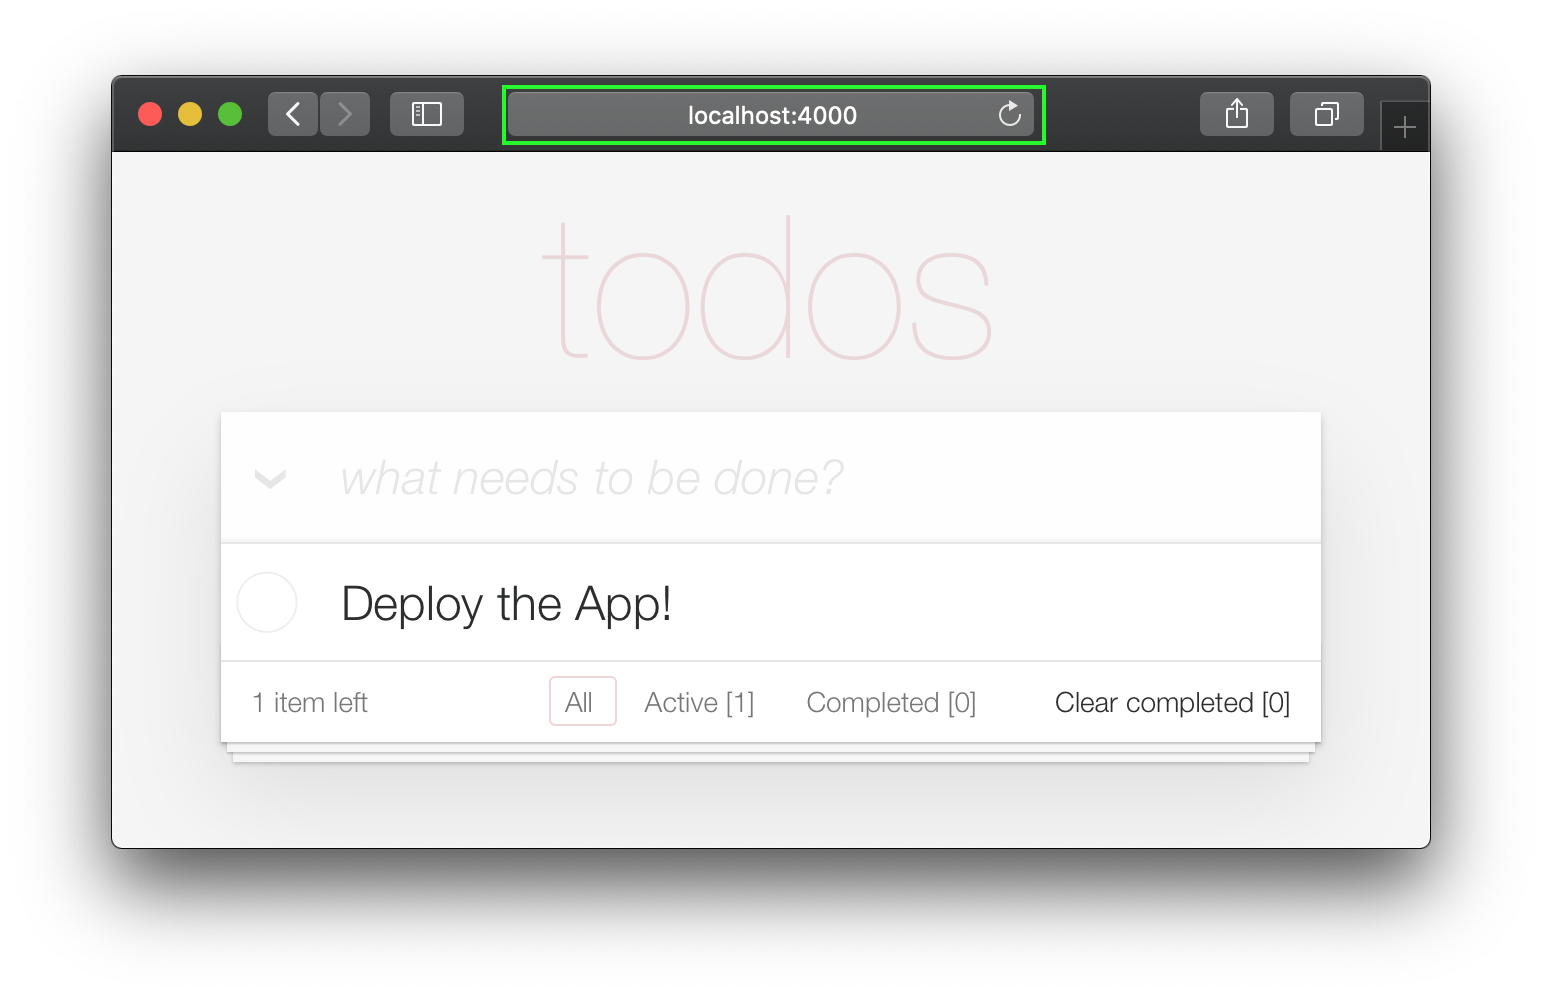
PhoenixとPostgreSQLがインストールされていることを確認したら、完成したアプリを実行してみてください。
localhost完成したアプリを実行します独自のバージョンのTODOリストアプリの構築を開始する前に、 localhostで完成したバージョンを実行して、機能することを確認します。
Githubからプロジェクトをクローンします:
git clone [email protected]:dwyl/phoenix-todo-list-tutorial.git && cd phoenix-todo-list-tutorial依存関係をインストールし、データベースをセットアップします。
mix setupPhoenixサーバーを開始します。
mix phx.server Webブラウザでlocalhost:4000アクセスしてください。
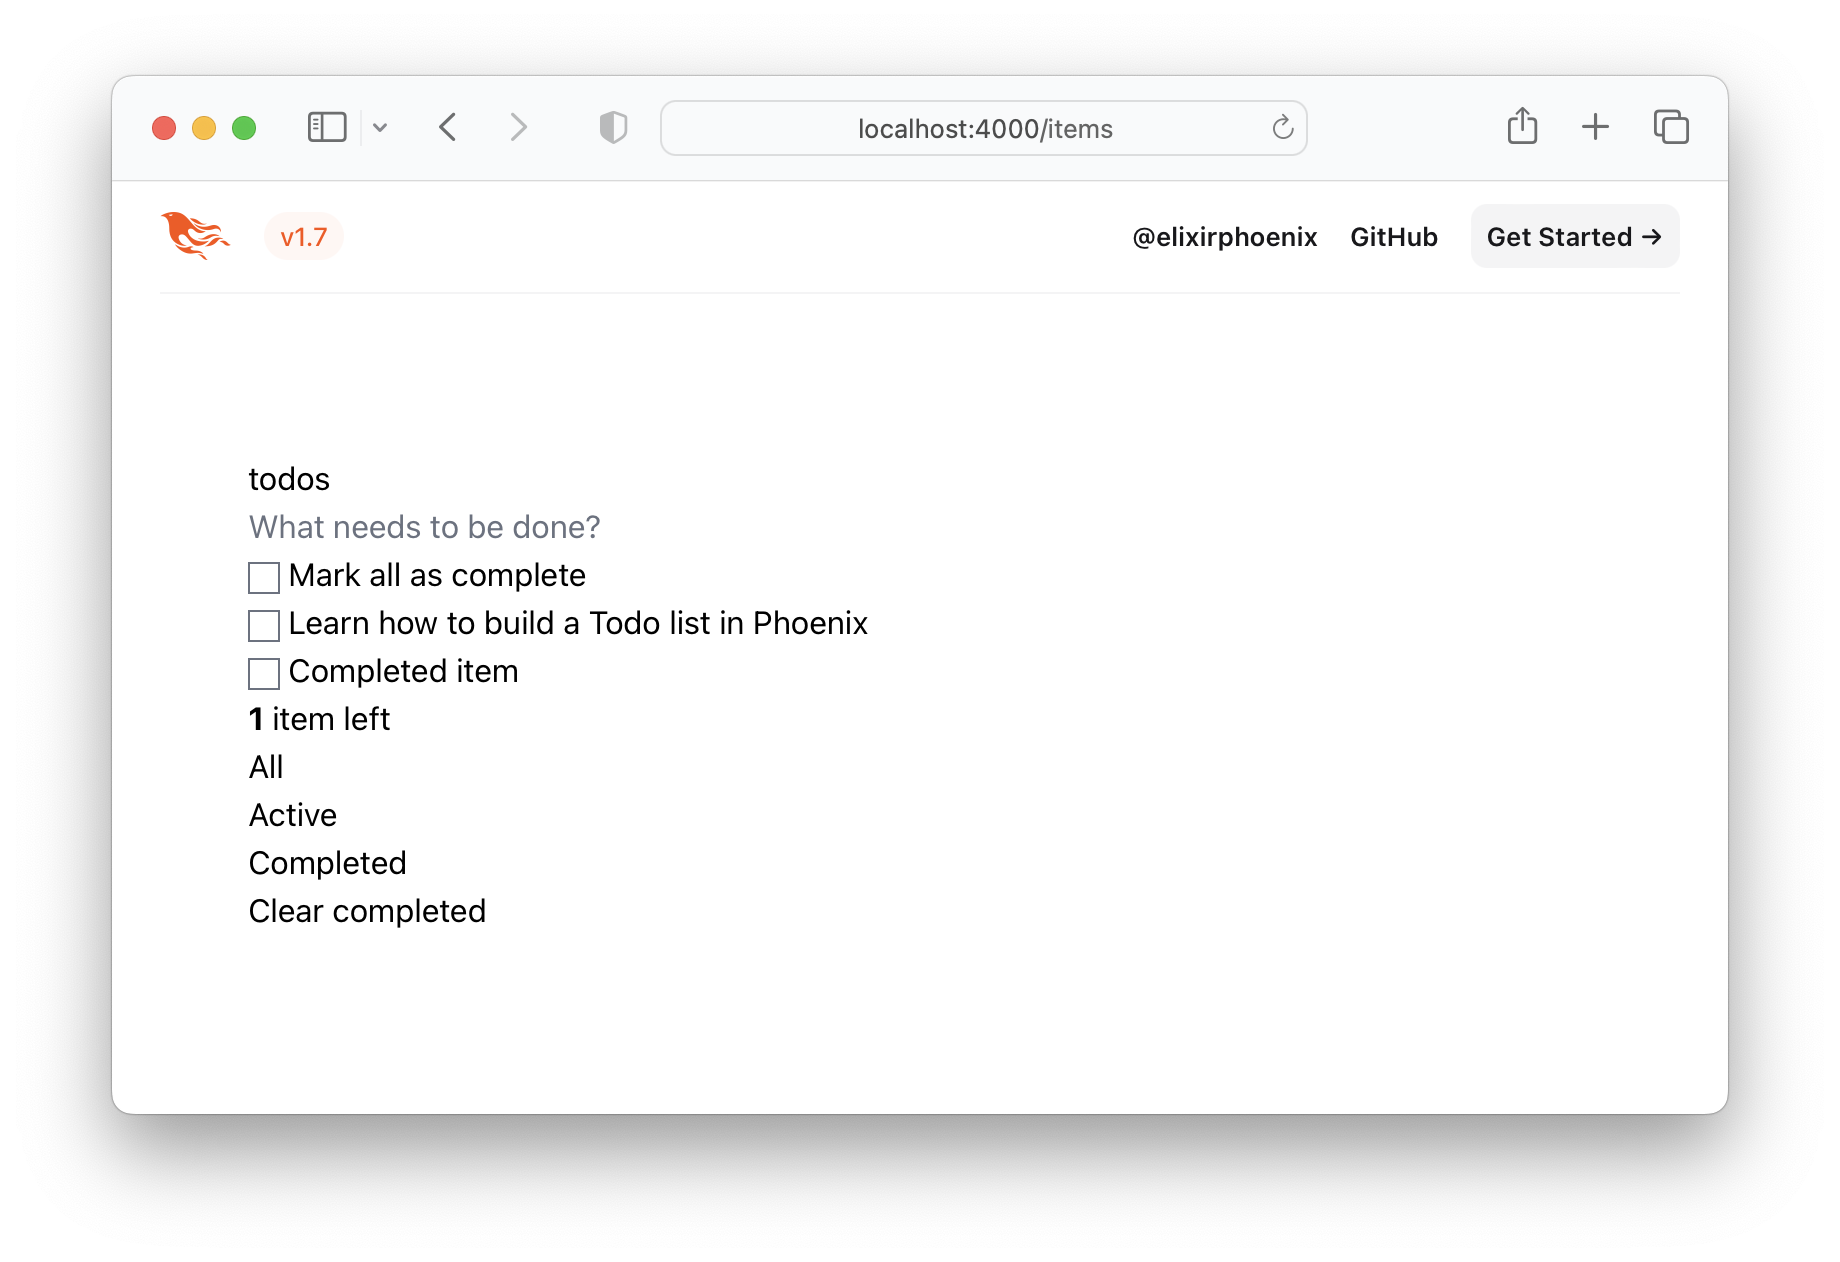
あなたは見るべきです:
localhostで実行されている完成したサンプルアプリがあるので、
それをゼロから構築し、すべての手順を理解しましょう。
localhostで完成した例アプリを実行するときは、 loginボタンを試してみたい場合は、 AUTH_API_KEYを取得する必要があります。 [1分]参照: AUTH_API_KEYを入手してください
あなたがあなたのlocalhostで完成したアプリを実行した場合(そしてあなたは本当にすべきです! )、
チュートリアルを開始する前に、ディレクトリを変更する必要があります。
cd ..
今、あなたは構築する準備ができています!
ターミナルで、次のmixコマンドを使用して新しいフェニックスアプリを作成します。
mix phx.new app --no-dashboard --no-gettext --no-mailer 依存関係をインストールするように求められたら、 yと入力した後に入力します。
注:
app名の後のこれらのフラグは、この簡単な例には必要ないファイルの作成を避けるためだけです。参照:hexdocs.pm/phoenix/mix.tasks.phx.new
新しく作成されたappディレクトリ( cd app )に変更し、必要なものがすべて揃っていることを確認してください。
mix setupPhoenixサーバーを開始します。
mix phx.serverこれで、Webブラウザのlocalhost:4000アクセスできます。次のようなものが表示されます。
Phoenix Server Ctrl + cをシャットダウンします。
テストを実行して、すべてが期待どおりに機能するようにします。
mix testあなたは見るべきです:
Compiling 16 files (.ex)
Generated app app

17:49:40.111 [info]  Already up
...

Finished in 0.04 seconds
3 tests, 0 failures
Phoenixアプリが期待どおりに機能することを確立したので、いくつかのファイルの作成に進みましょう!
itemsスキーマを作成します基本的なTODOリストを作成する際には、1つのスキーマのみが必要です。 items 。後でitems整理/分類するために個別のリストとタグを追加できますが、今のところこれが必要なすべてです。
次のジェネレーターコマンドを実行して、アイテムテーブルを作成します。
mix phx.gen.html Todo Item items text:string person_id:integer status:integer厳密に言えば、 textとstatusフィールドのみが必要ですが、アイテムを人々(_ later in the Tutorial)に関連付けたいと思うので、今フィールドを追加しています。
次の出力が表示されます。
 * creating lib/app_web/controllers/item_controller.ex
* creating lib/app_web/controllers/item_html/edit.html.heex
* creating lib/app_web/controllers/item_html/index.html.heex
* creating lib/app_web/controllers/item_html/new.html.heex
* creating lib/app_web/controllers/item_html/show.html.heex
* creating lib/app_web/controllers/item_html.ex
* creating test/app_web/controllers/item_controller_test.exs
* creating lib/app/todo/item.ex
* creating priv/repo/migrations/20221205102303_create_items.exs
* creating lib/app/todo.ex
* injecting lib/app/todo.ex
* creating test/app/todo_test.exs
* injecting test/app/todo_test.exs
* creating test/support/fixtures/todo_fixtures.ex
* injecting test/support/fixtures/todo_fixtures.ex

Add the resource to your browser scope in lib/app_web/router.ex:

    resources "/items", ItemController


Remember to update your repository by running migrations:

    $ mix ecto.migrate
それがたくさんのファイルを作成しました!そのうちのいくつかは、私たちが厳密に必要としません。
必要なファイルのみを手動で作成できますが、これはPhoenixでCRUDアプリを作成する「公式」の方法であるため、速度に使用しています。
注:この例では
Todoとして示されているフェニックスのコンテキストは、「関連する機能を公開およびグループ化する専用モジュール」です。 「インターフェイス」のレイヤーを備えた基本的なフェニックスアプリを不必要に複雑にしていると感じています。しかし、それらがジェネレーターに焼き付けられており、フレームワークの作成者がそれらを好むことを考えると、私たちには選択肢があります。コンテキストで乗船するか、Phoenixプロジェクトのすべてのファイルを手動で作成します。ジェネレーターは、はるかに高速化する方法です!途中でいくつかの未使用ファイルをdelete必要がある場合でも、それらを受け入れます!
チュートリアルのこの段階でこれらの各ファイルを説明するつもりはありません。アプリを構築しているときにファイルを理解しやすいためです。各ファイルの目的は、それらを編集することを進めるにつれて明らかになります。
/itemsリソースをrouter.exに追加しますジェネレーターが指摘した指示に従って、 router.exにresources "/items", ItemControllerを追加します。
lib/app_web/router.exファイルを開き、ラインを見つけます: scope "/", AppWeb do 。ブロックの端にラインを追加します。例えば:
 scope "/" , AppWeb do
  pipe_through :browser

  get "/" , PageController , :index
  resources "/items" , ItemController # this is the new line
end router.exファイルは次のようになります: router.ex#L20
ターミナルが示唆したように、 mix ecto.migrate 。これにより、データベーステーブルのセットアップが終了し、必要な移行が実行され、すべてが適切に機能するようになります。
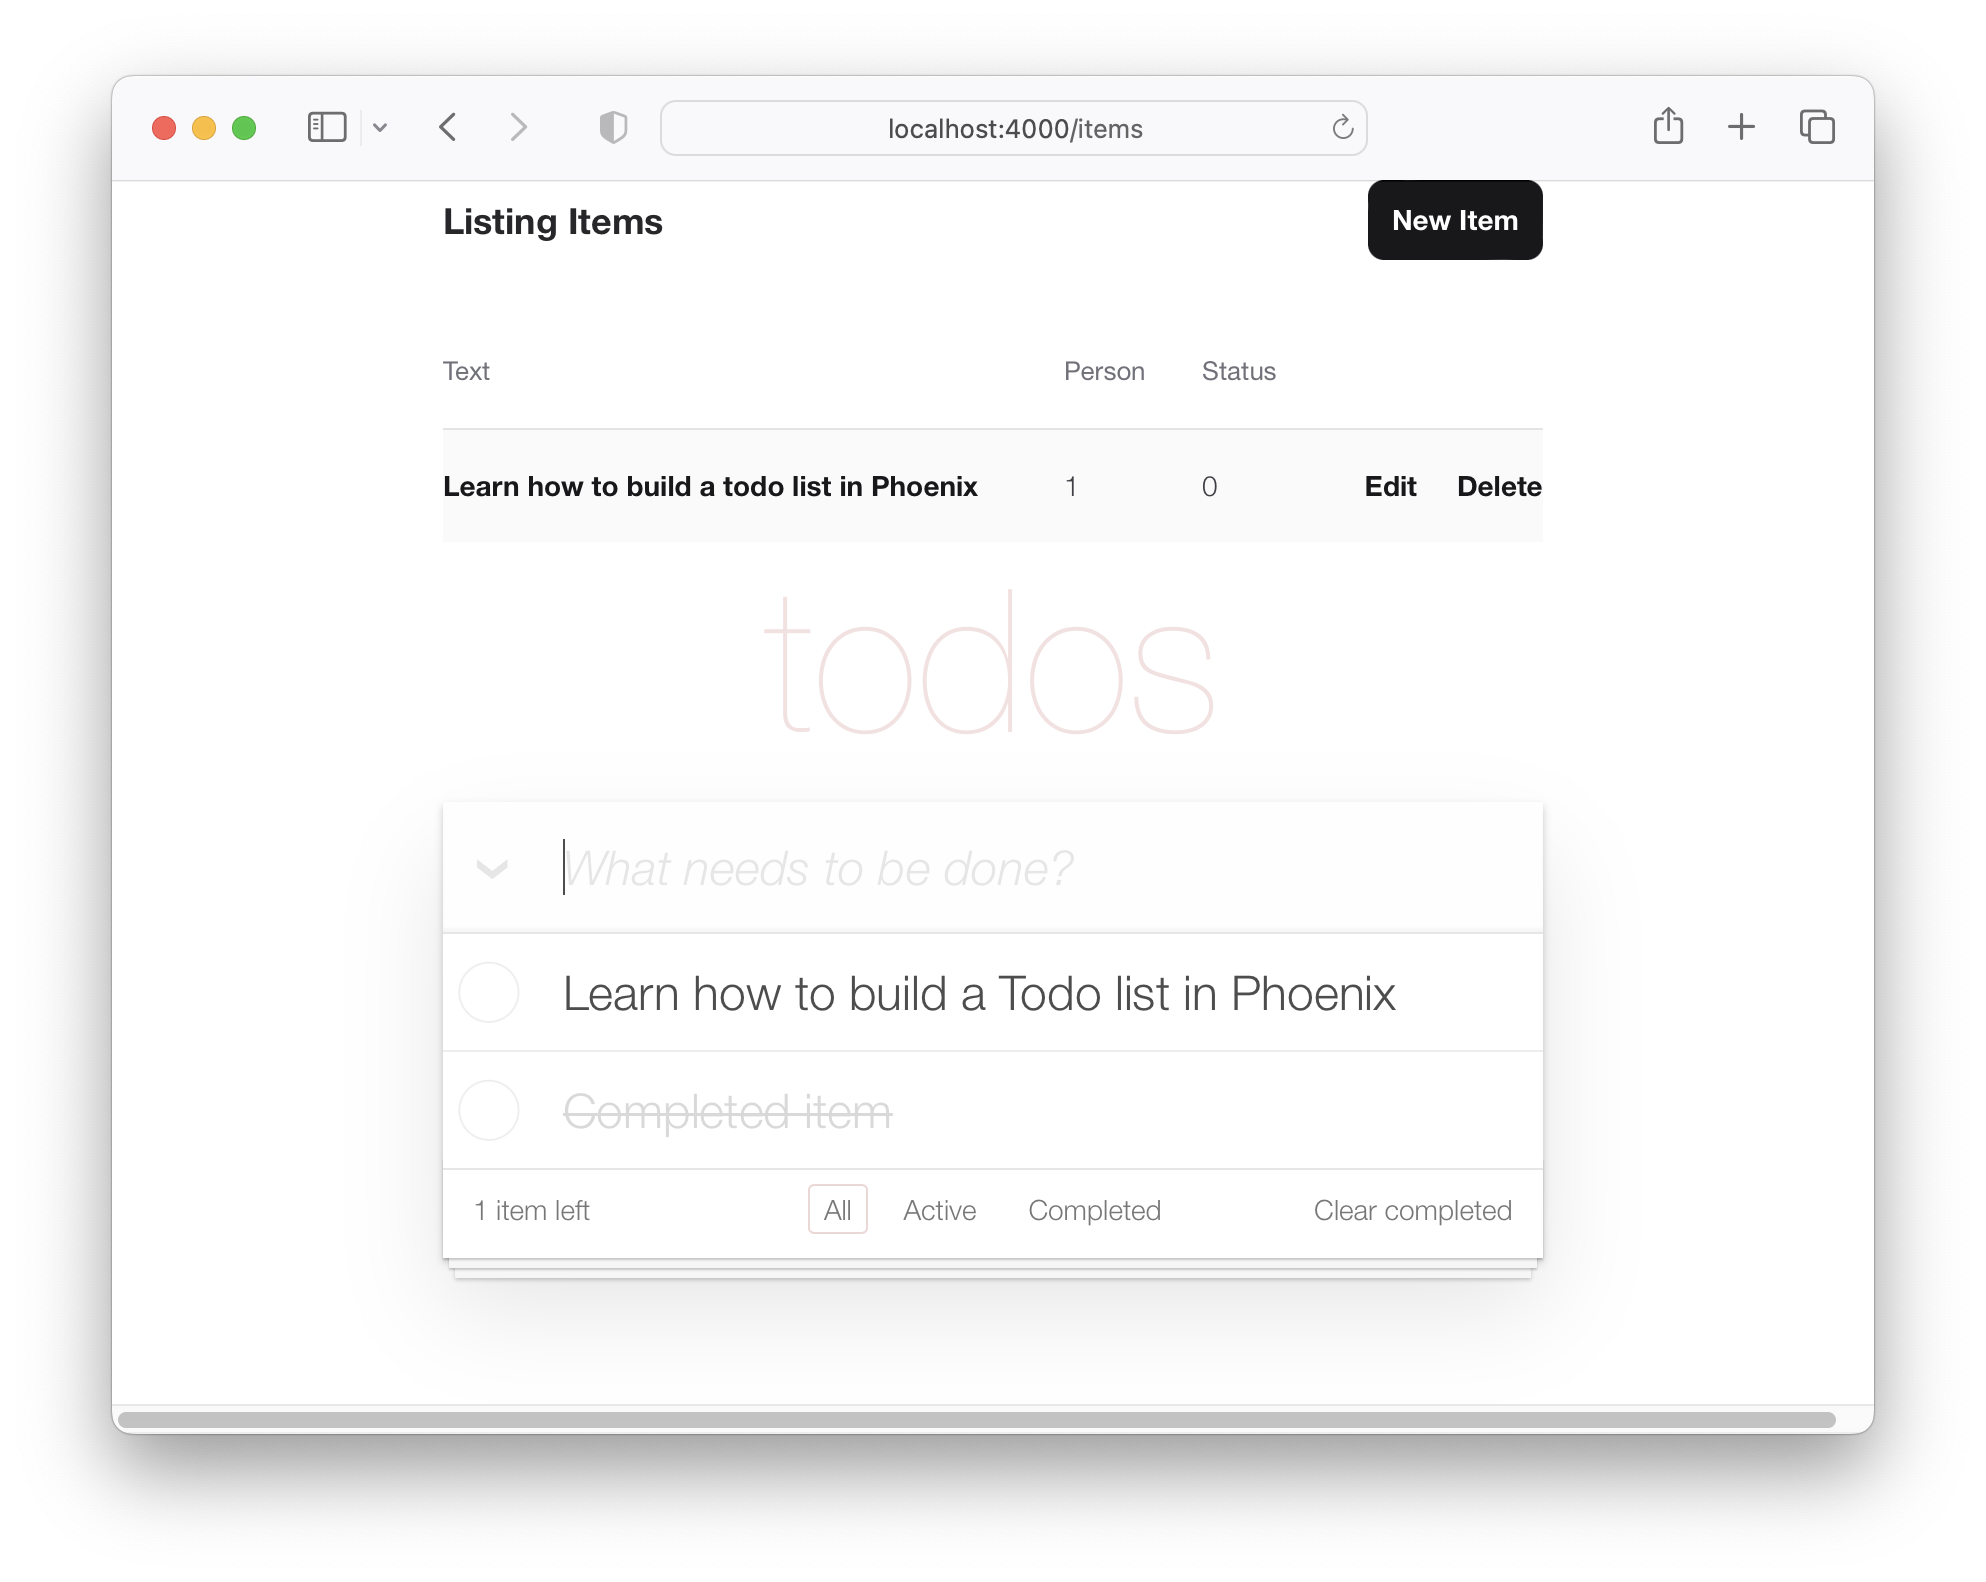
この時点で、機能的なTODOリストが既にあります(デフォルトのフェニックスUIを使用する意思がある場合)。
localhostでアプリを実行してみてください: mix ecto.migrateを使用して生成された移行を実行してください。
mix phx.server
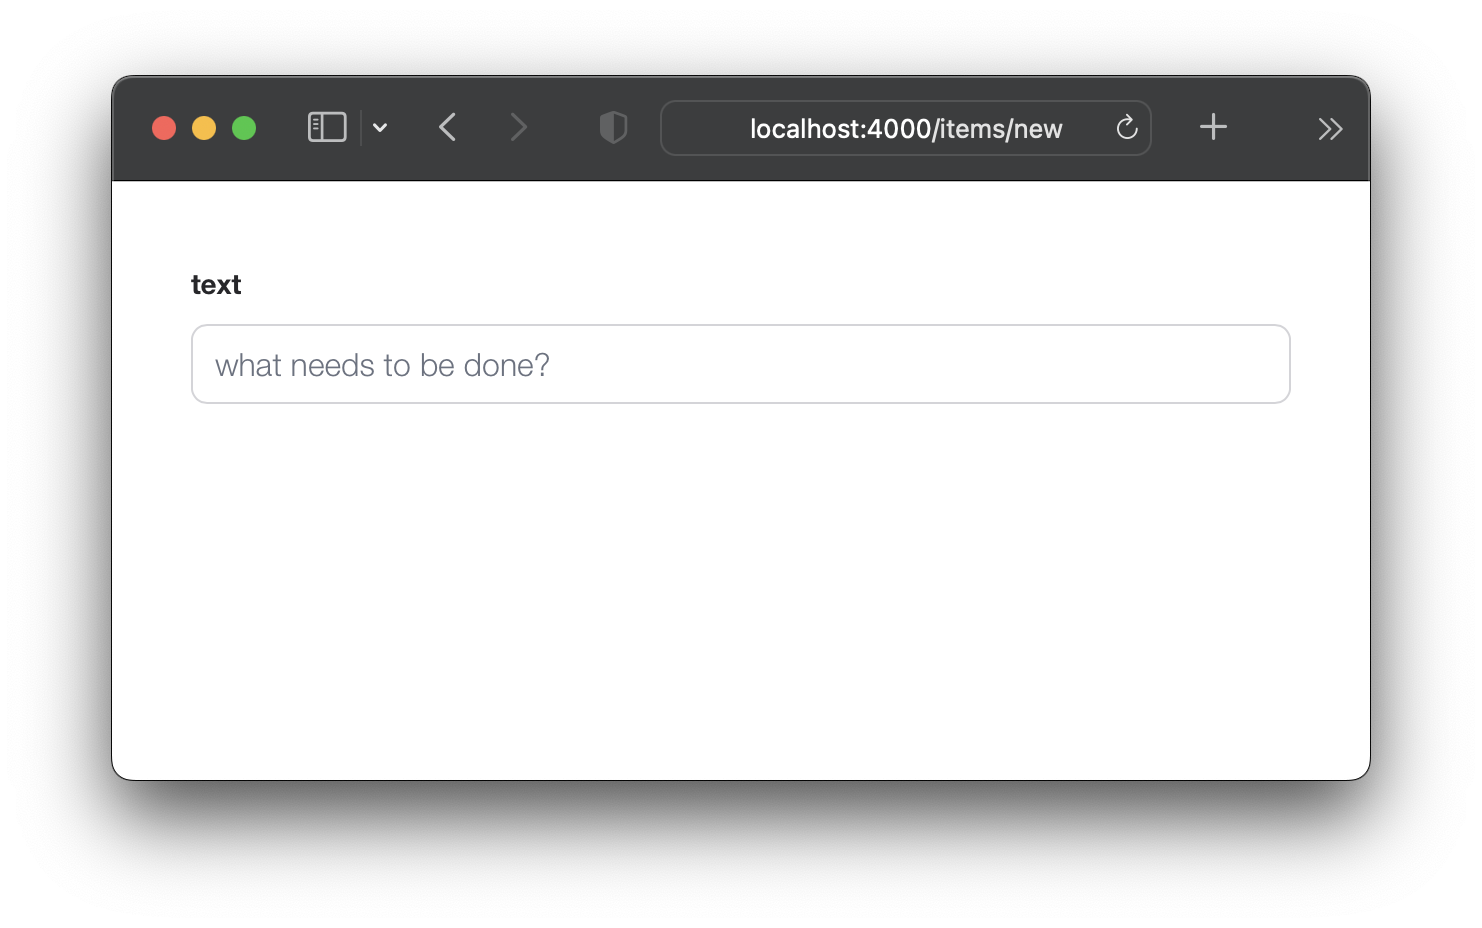
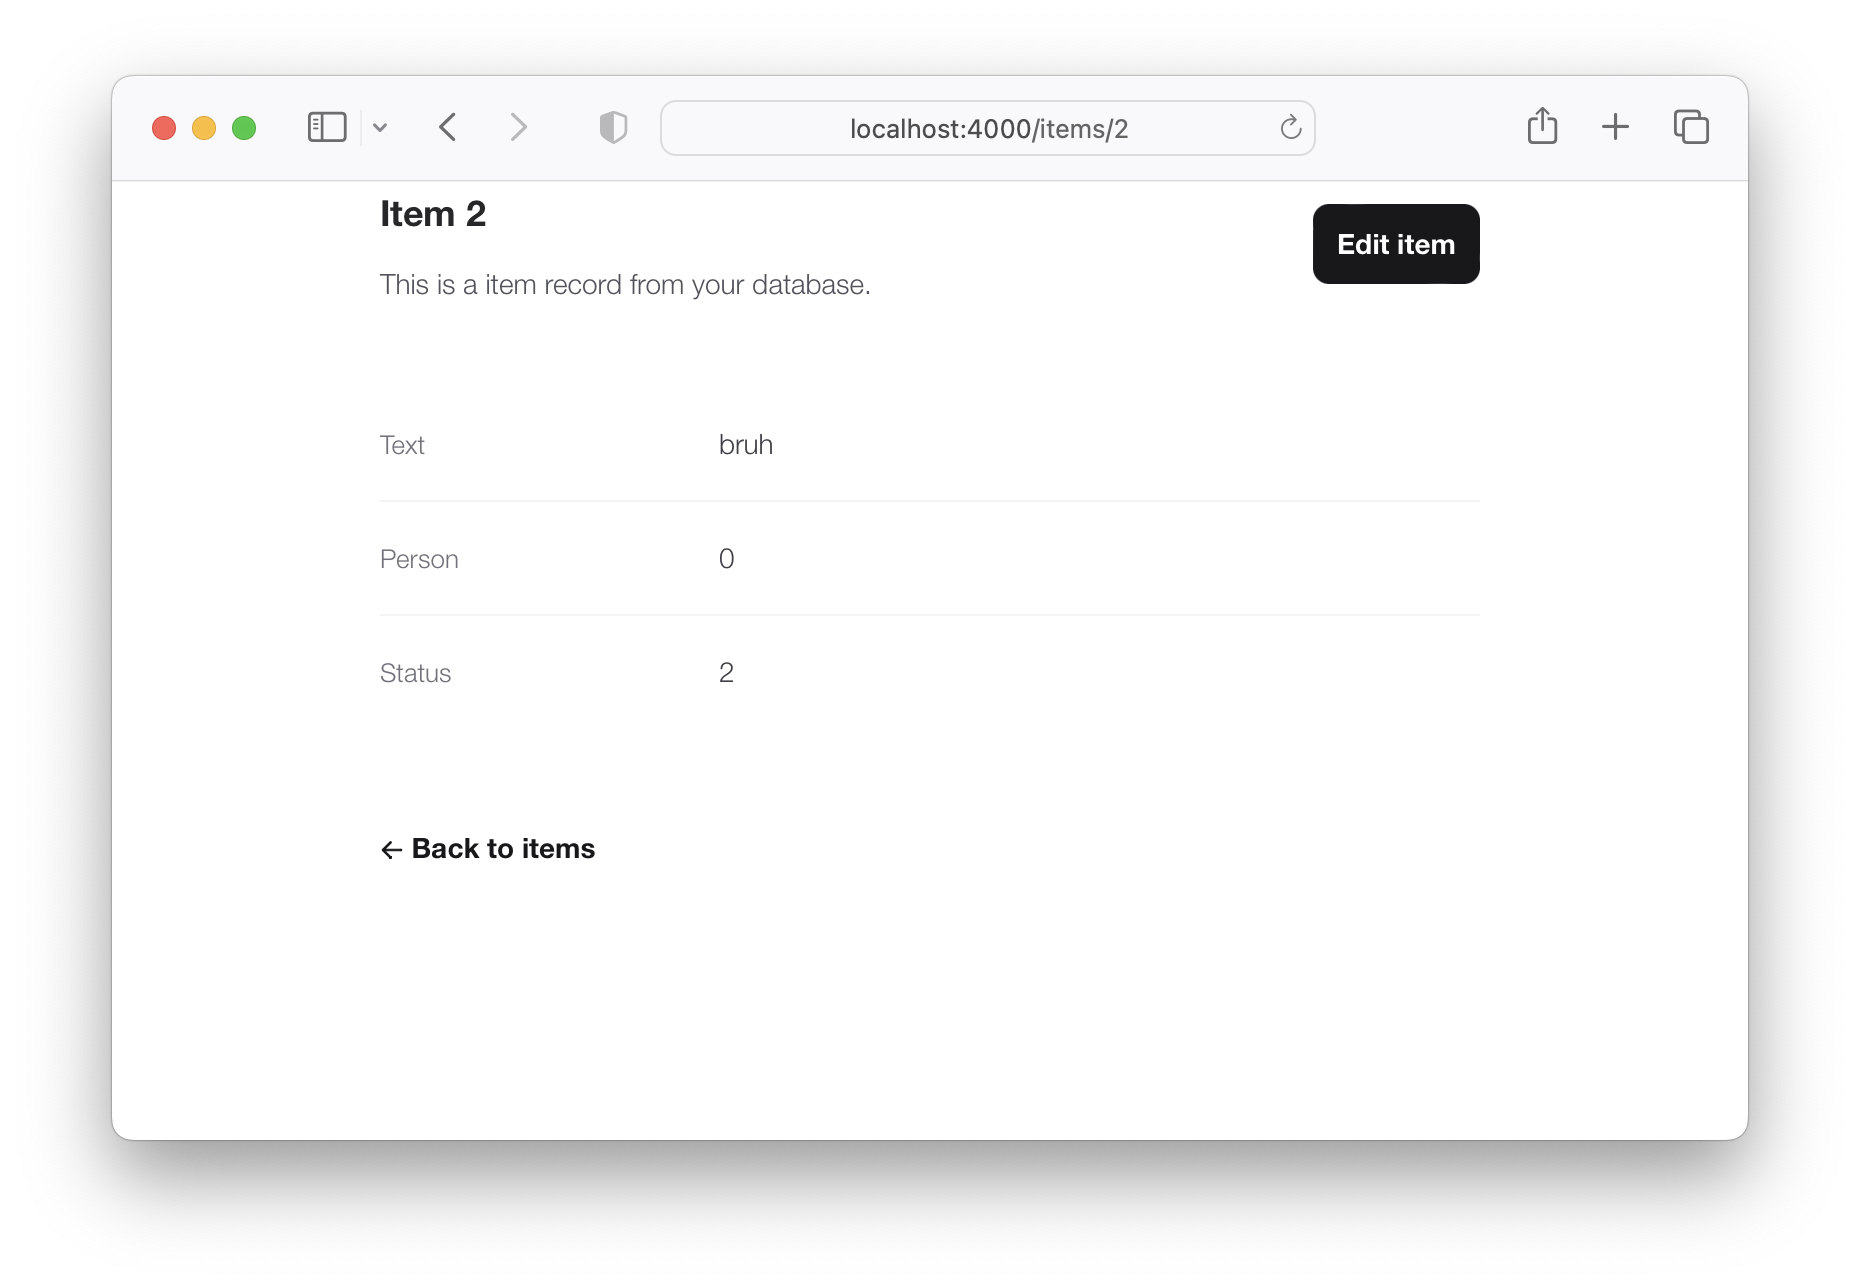
アクセス:http:// localhost:4000/item/newといくつかのデータを入力してください。
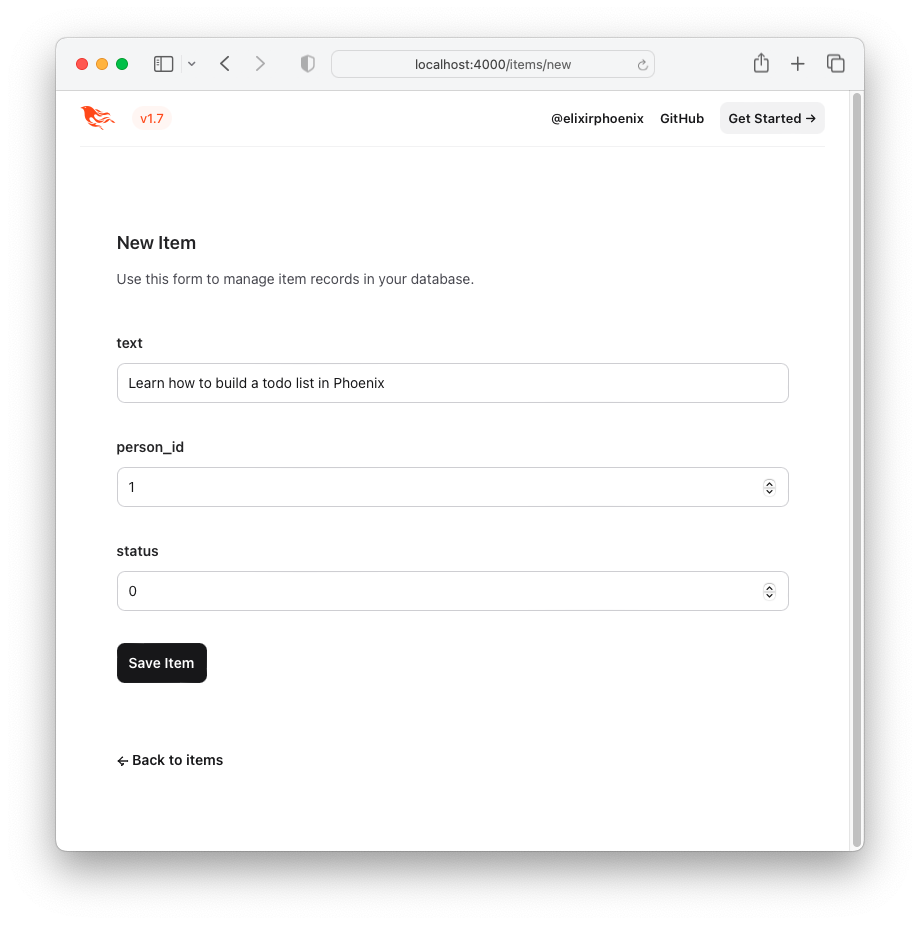
[アイテムの保存]ボタンをクリックすると、「show」ページにリダイレクトされます:http:// localhost:4000/items/1
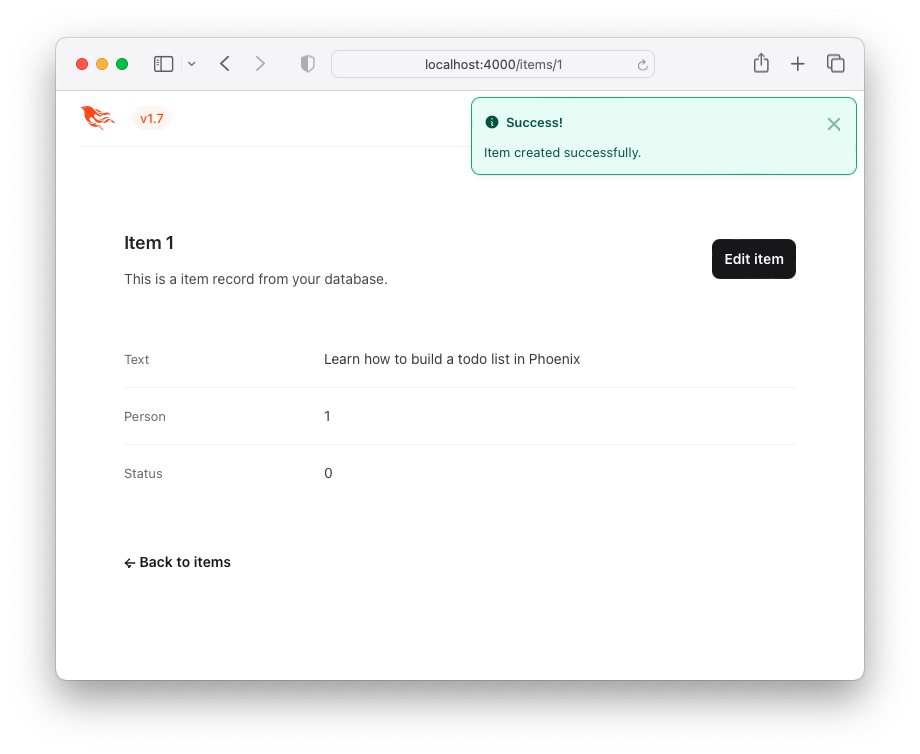
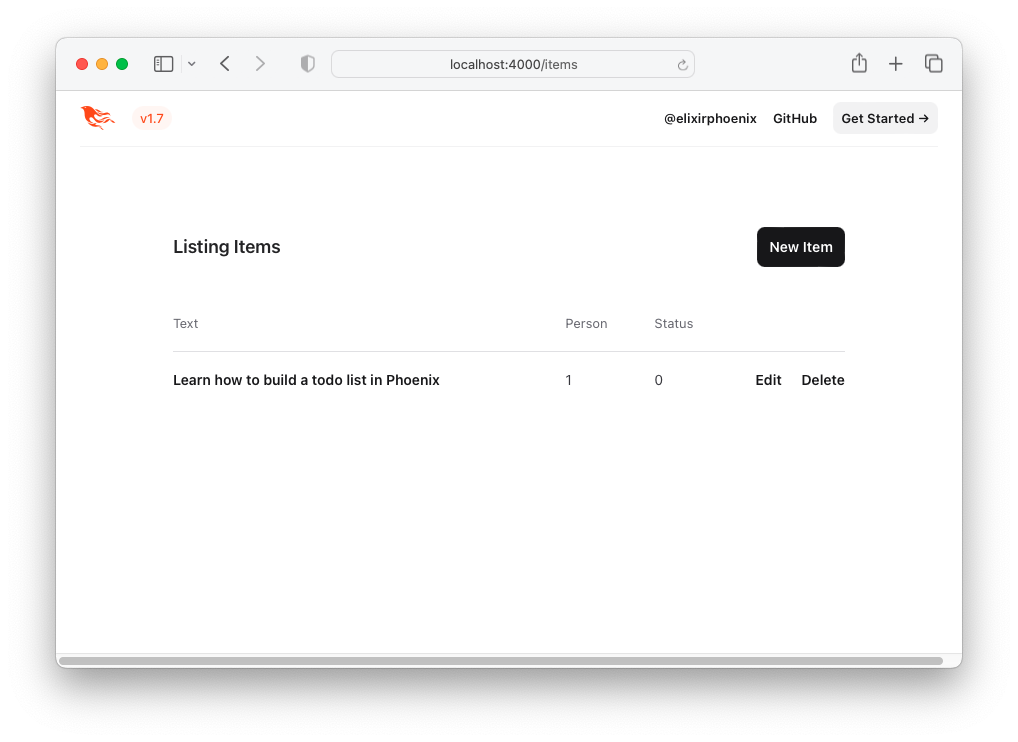
これは魅力的なユーザーエクスペリエンス(UX)ではありませんが、機能します!これがアイテムのリストです - 「TODOリスト」。これにアクセスするには、バックをBack to itemsクリックするか、次のURL http:// localhost:4000/itemにアクセスしてアクセスできます。
TODOMVC HTMLとCSSを使用して、UXを改善しましょう!
TODOMVC UI/UXを再現するには、例からHTMLコードを直接借りましょう。
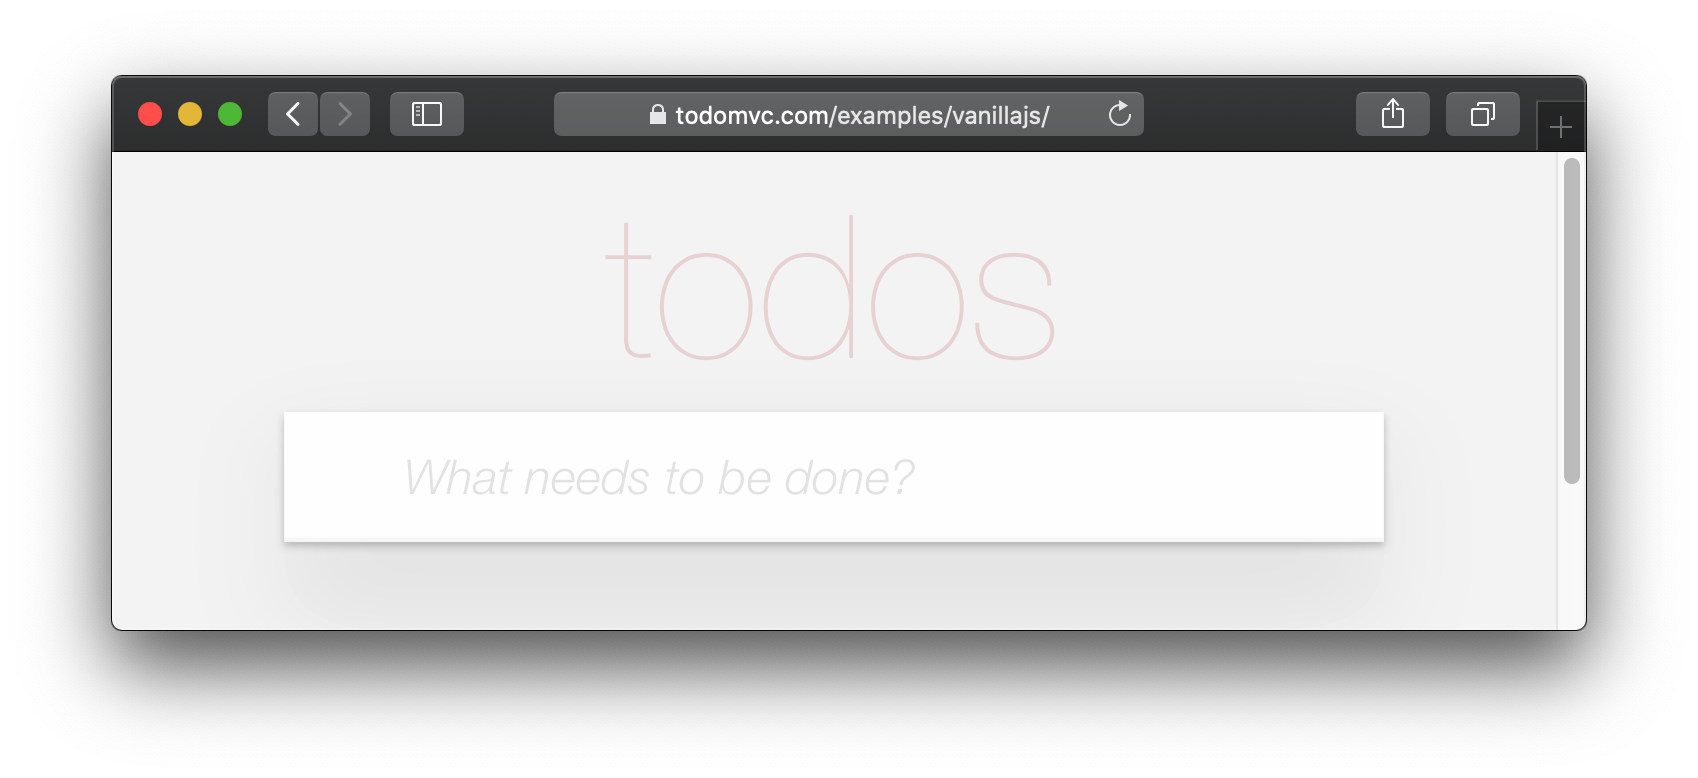
http://todomvc.com/examples/vanillajsリストにいくつかのアイテムを追加します。次に、ブラウザの開発ツールを使用してソースを検査します。例えば:
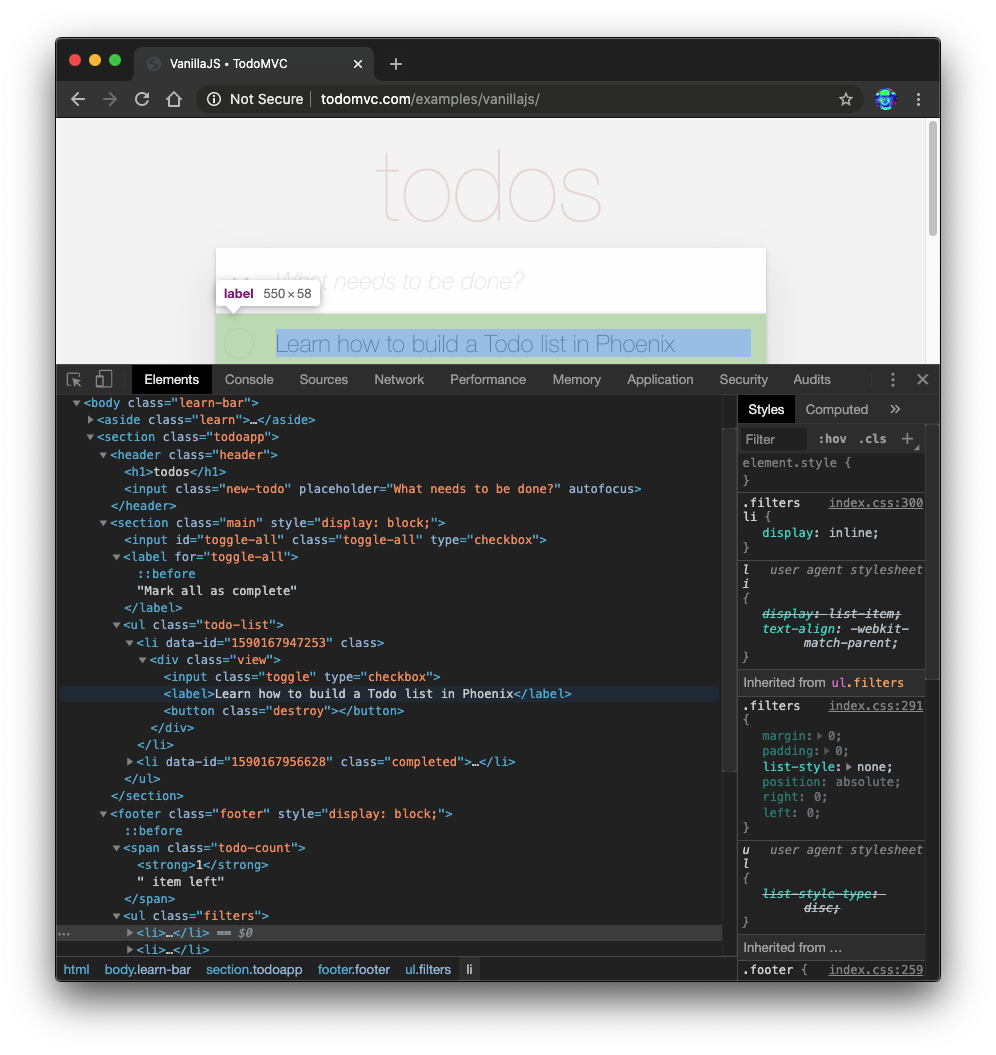
必要なソースを右クリックします(例: <section class="todoapp"> )。

<section>のHTMLが編集可能になったら、選択してコピーします。
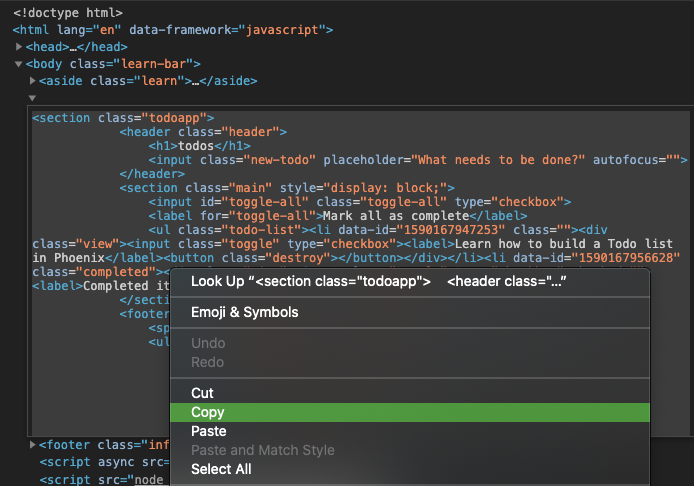
HTMLコードは次のとおりです。
 < section class =" todoapp " >
  < header class =" header " >
    < h1 > todos </ h1 >
    < input class =" new-todo " placeholder =" What needs to be done? " autofocus ="" />
  </ header >
  < section class =" main " style =" display: block; " >
    < input id =" toggle-all " class =" toggle-all " type =" checkbox " />
    < label for =" toggle-all " > Mark all as complete </ label >
    < ul class =" todo-list " >
      < li data-id =" 1590167947253 " class ="" >
        < div class =" view " >
          < input class =" toggle " type =" checkbox " />
          < label > Learn how to build a Todo list in Phoenix </ label >
          < button class =" destroy " > </ button >
        </ div >
      </ li >
      < li data-id =" 1590167956628 " class =" completed " >
        < div class =" view " >
          < input class =" toggle " type =" checkbox " />
          < label > Completed item </ label >
          < button class =" destroy " > </ button >
        </ div >
      </ li >
    </ ul >
  </ section >
  < footer class =" footer " style =" display: block; " >
    < span class =" todo-count " > < strong > 1 </ strong > item left </ span >
    < ul class =" filters " >
      < li >
        < a href =" #/ " class =" selected " > All </ a >
      </ li >
      < li >
        < a href =" #/active " > Active </ a >
      </ li >
      < li >
        < a href =" #/completed " > Completed </ a >
      </ li >
    </ ul >
    < button class =" clear-completed " style =" display: block; " >
      Clear completed
    </ button >
  </ footer >
</ section >このHTMLを埋め込みエリキシル( EEx )テンプレートに変換しましょう。
注:GitHubのソースから直接ではなく、ブラウザの要素インスペクターからこの
HTMLをコピーしている理由:examples/vanillajs/index.htmlは、これが「シングルページアプリ」であるため、<ul class="todo-list"></ul>ブラウザーに人口のみになります。ブラウザ開発ツールからコピーすることは、完全なHTMLを取得する最も簡単な方法です。
index.html.eexに貼り付けますlib/app_web/controllers/item_html/index.html.eexファイルを開き、下にスクロールします。
次に、(既にそこにあるコードを削除せずに)TODOMVCから調達したHTMLコードを貼り付けます。
例:
/lib/app_web/controllers/item_html/index.html.eex#L27-L73
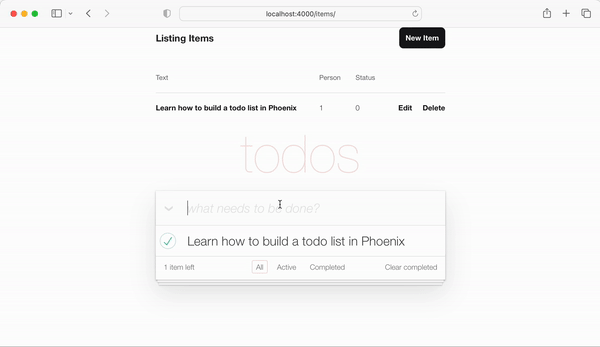
今すぐアプリを実行しようとして、http:// localhost:4000/items/にアクセスしようとした場合
あなたはこれを見るでしょう( TODOMVC CSSなし):
それは明らかに私たちが望むものではないので、Todomvc CSSを取得してプロジェクトに保存しましょう!
/assets/cssに保存しますhttp://todomvc.com/examples/vanillajs/node_modules/todomvc-app-css/index.cssにアクセスしてください
ファイルを/assets/css/todomvc-app.cssに保存します。
例: /assets/css/todomvc-app.css
app.scssにtodomvc-app.cssをインポートしますassets/css/app.scssファイルを開き、次のように置き換えます。
 /* This file is for your main application css. */
/* @import "./phoenix.css"; */
@import "./todomvc-app.css" ;
例: /assets/css/app.scss#L4
lib/app_web/components/layouts/app.html.heexファイルを開き、内容を次のコードに置き換えます。
 <!DOCTYPE html >
< html lang =" en " >
  < head >
    < meta charset =" utf-8 " />
    < meta http-equiv =" X-UA-Compatible " content =" IE=edge " />
    < meta name =" viewport " content =" width=device-width, initial-scale=1.0 " />
    < title > Phoenix Todo List </ title >
    < link rel =" stylesheet " href = {~p "/assets/app.css"} />
    < script defer type =" text/javascript " src = {~p "/assets/app.js"} > </ script >
  </ head >
  < body >
    < main role =" main " class =" container " >
      < %= @inner_content % >
    </ main >
  </ body >
</ html >
前:
lib/app_web/components/layouts/app.html.eex
後:lib/app_web/components/layouts/app.html.heex
<%= @inner_content %>は、TODOアプリがレンダリングされる場所です。
注:
<script>タグは慣習から含まれています。ただし、このチュートリアルではJavaScriptJavaScript書くことはありません。JSのラインを書くことなく、TODOMVCとの100%の特徴パリティを達成します。JS「嫌い」ではありません。実際、JSで同じアプリを構築する「Sister」チュートリアルがあります。Dwyl/JavaScript-Todo-List-Tutorialは、Great UXで完全に機能するWebアプリケーションを構築するためにJSが必要ないことを思い出させたいだけです。
レイアウトテンプレートを保存すると、TODOMVC CSSファイルは/assets/css/todomvc-app.cssに保存され、 app.scssにインポートされたtodomvc-app.css 、あなたの/itemsページが次のようになります。
したがって、私たちのTODOリストはTodomvcのように見え始めていますが、それでもそれは単なるダミーリストです。
TODOMVCテンプレートでitemデータをレンダリングするには、いくつかの関数を追加する必要があります。プロジェクトを作成してitemモデルを生成すると、コントローラーが作成されました( lib/app_web/controllers/item_controller.exにあります)とコンポーネント/ビュー( lib/app_web/controllers/item_html.exにあります)。このコンポーネント/ビューは、 lib/app_web/controllers/item_htmlディレクトリ内のコンテンツのレンダリングを効果的に制御するものです。
UIに変更を加える必要があることがわかっているため、このコンポーネントにいくつかの関数を追加します(これはMVCパラダイムのビュー部分に似ています)。
これは、テスト駆動型開発(TDD)を少し行う最初のチャンスです。
パスtest/app_web/controllers/item_html_test.exsを使用して新しいファイルを作成します。
次のコードをファイルに入力します。
 defmodule AppWeb.ItemHTMLTest do
  use AppWeb.ConnCase , async: true
  alias AppWeb.ItemHTML

  test "complete/1 returns completed if item.status == 1" do
    assert ItemHTML . complete ( % { status: 1 } ) == "completed"
  end

  test "complete/1 returns empty string if item.status == 0" do
    assert ItemHTML . complete ( % { status: 0 } ) == ""
  end
end
例: /test/app_web/controllers/item_html_test.exs
このテストファイルを実行しようとした場合:
mix test test/app_web/controllers/item_html_test.exs次のエラーが表示されます(関数がまだ存在しないためです!):
** (UndefinedFunctionError) function AppWeb.ItemHTML.checked/1 is undefined or private
lib/app_web/controllers/item_html.exファイルを開き、機能を書き込み、テストをパスします。
これが機能の実装方法です。 item_html.exファイルは、次のようになりました。
 defmodule AppWeb.ItemHTML do
  use AppWeb , :html

  embed_templates "item_html/*"

  # add class "completed" to a list item if item.status=1
  def complete ( item ) do
    case item . status do
      1 -> "completed"
      _ -> "" # empty string means empty class so no style applied
    end
  end
end
テストを再実行すると、渡す必要があります。
mix test test/app_web/controllers/item_html_test.exsあなたは見るべきです:
....

Finished in 0.1 seconds
4 tests, 0 failuresこれらの2つのビュー関数を作成し、テストが合格しているので、それらをテンプレートで使用しましょう!
lib/app_web/controllers/item_html/index.html.eexファイルを開き、行を見つけます。
< ul class =" todo-list " > <ul>の内容を次のものに置き換えます。
 < %= for item < - @items do % >
  < li data-id = {item.id} class = {complete(item)} >
    < div class =" view " >
      < %= if item.status == 1 do % >
        < input class =" toggle " type =" checkbox " checked />
      < % else % >
        < input class =" toggle " type =" checkbox " />
      < % end % >
      < label > < %= item.text % > </ label >
      < .link
        class="destroy"
        href={~p"/items/#{item}"}
        method="delete"
      >
      </ .link >
    </ div >
  </ li >
< % end % >
例: lib/app_web/controllers/item_html/index.html.heex#L43-L53
これらの2つのファイルが保存されていると、アプリを今すぐ実行する場合は、 mix phx.server http:// localhost:4000/itemsにアクセスします。
上記のステップ2.2で作成した実際のitemsが表示されます。

TodomVCレイアウトでアイテムをレンダリングするようになったので、「シングルページアプリ」スタイルで新しいアイテムの作成に取り組みましょう。
現在、「新しいアイテム」フォームは、http:// localhost:4000/item/new(上記のステップ2に記載されています)で入手できます。
別のページに移動することなく、その人に新しいアイテムを作成できるようにしたいと考えています。その目標を達成するために、 lib/app_web/controllers/item_html/new.html.heexテンプレート(部分)をlib/app_web/controllers/item_html/index.html.heexテンプレート内に含めます。例えば:
それを行う前に、必要ないフィールドを削除するには、 new.html.heexテンプレートを整理する必要があります。
lib/app_web/controllers/item_html/new.html.heexを開いて、それを単純化して、必須フィールドだけに簡素化します:text :
 < . simple_form :let = { f } for = { @ changeset } action = { ~p " /items " } >
  < . input
    field = { { f , :text } }
    type = "text"
    placeholder = "what needs to be done?"
  / >
  < :actions >
    < . button style = "display:none" > Save Item< / . button >
  < / :actions >
< / . simple_form >
前:
/lib/app_web/controllers/item_html/new.html.heex
後:/lib/app_web/controllers/item_html/new.html.heex
さらに、 <.input>タグのスタイルを変更する必要があります。 Phoenixを使用すると、 lib/app_web/components/core_components.exファイル内で、スタイルは事前に構築されたコンポーネントの場合に定義されます( <.input>の場合)。
これを変更するには、TODOMVCと同じスタイルを使用して、次の行を見つけます。
def input ( assigns ) do
new-todoクラスでクラス属性を変更します。この関数は次のように見えるはずです。
  def input ( assigns ) do
    ~H """
    <div phx-feedback-for={@name}>
      <.label for={@id}><%= @label %></.label>
      <input
        type={@type}
        name={@name}
        id={@id || @name}
        value={@value}
        class={[
          input_border(@errors),
          "new-todo"
        ]}
        {@rest}
      />
      <.error :for={msg <- @errors}><%= msg %></.error>
    </div>
    """
  end
また、 simple_form内のactionsスタイルを変更する必要があります。同じファイルで、 def simple_form(assigns) doを検索して変更してください。
  def simple_form ( assigns ) do
    ~H """
    <.form :let={f} for={@for} as={@as} {@rest}>
      <div>
        <%= render_slot(@inner_block, f) %>
        <div :for={action <- @actions}>
          <%= render_slot(action, f) %>
        </div>
      </div>
    </.form>
    """
  end
Phoenixアプリを今すぐ実行してhttp:// localhost:4000/item/newにアクセスすると、シングル:text入力フィールドと「保存」ボタンが表示されます。
心配しないでください、あなたはまだEnter (return)キーでフォームを送信することができます。ただし、今すぐフォームを送信しようとすると、 changesetが必要とする2つのフィールドを削除したため、機能しません。それを修正しましょう。
default値を設定するためにitemsスキーマを更新しますnew.html.eexから2つのフィールド( :person_id and :status )を削除したことを考えると、スキーマにこれらのデフォルト値があることを確認する必要があります。 lib/app/todo/item.exファイルを開き、内容を次のものに置き換えます。
 defmodule App.Todo.Item do
  use Ecto.Schema
  import Ecto.Changeset

  schema "items" do
    field :person_id , :integer , default: 0
    field :status , :integer , default: 0
    field :text , :string

    timestamps ( )
  end

  @ doc false
  def changeset ( item , attrs ) do
    item
    |> cast ( attrs , [ :text , :person_id , :status ] )
    |> validate_required ( [ :text ] )
  end
end
ここでは、「アイテム」 schemaを更新して、 person_idとstatusの両方でデフォルト値0を設定します。そして、 changeset/2では、 person_idとstatusの要件を削除しています。そうすれば、新しいitemフォームをtextフィールドのみで送信できます。
例: /lib/app/todo/item.ex#L6-L7
/items/newフォームを送信する場合、 person_idとstatusのdefault値があるため、成功します。
ItemControllerのindex/2を更新しますindex.html.eexテンプレートで新しいアイテムフォーム( new.html.eex )をインライン化するには、 AppWeb.ItemController.index/2を更新して、変更を含める必要があります。
lib/app_web/controllers/item_controller.exファイルを開き、 index/2関数を次のように更新します。
 def index ( conn , _params ) do
  items = Todo . list_items ( )
  changeset = Todo . change_item ( % Item { } )
  render ( conn , "index.html" , items: items , changeset: changeset )
end
前: /lib/app_web/controllers/item_controller.ex
後: /lib/app_web/controllers/item_controller.ex#L9-L10
このステップの後、UIやテストに変更は表示されません。 「aha」の瞬間が起こる5.3に移動するだけです。
new.html.eex内部index.html.eexをrenderしますすべての準備作業を行ったので、次のステップは、 new.html.eex ( partial )内のindex.html.eexテンプレートをレンダリングすることです。
lib/app_web/controllers/item_html/index.html.heexファイルを開き、行を見つけます。
< input class =" new-todo " placeholder =" What needs to be done? " autofocus ="" >これに置き換えます:
< % = new ( Map . put ( assigns , :action , ~p " /items/new " ) ) % >私たちが今したことを分解しましょう。 index.html.heexファイル内にnew.html.heexの部分的な部分を埋め込みます。これを行って、 item_controller.ex内のnew/2関数を呼び出します。この関数は、URL items/newのページに関係し、 new.html.heexファイルをレンダリングします。したがって、なぜ私たちはこの関数を正常に埋め込むために呼び出すのですか?
前: /lib/app_web/controllers/item_html/index.html.heex#L36
後: /lib/app_web/controllers/item_html/index.html.heex#L36
今すぐアプリを実行して、http:// localhost:4000/itemsにアクセスした場合
テキストを入力してアイテムを作成し、 Enter (return)キーでテキストを送信できます。
「show」テンプレートへのリダイレクトは「OK」ですが、 index.htmlテンプレートに戻るためにリダイレクトすることでより良いUXを行うことができます。ありがたいことに、これはコードの単一行を更新するのと同じくらい簡単です。
create/2のredirectを更新しますlib/app_web/controllers/item_controller.exファイルを開き、 create機能を見つけます。具体的には行:
|> redirect ( to: ~p " /items/ #{ item } " )行を更新します:
|> redirect ( to: ~p " /items/ " )前: /lib/app_web/controllers/item_controller.ex#L22
後: /lib/app_web/controllers/item_controller.ex#L23
新しいitemを作成すると、 index.htmlテンプレートにリダイレクトされます。

item_controller_test.exsを更新して、 indexにリダイレクトしますnew.html.heexファイルと上記の手順に加えた変更により、自動化されたテストの一部が破られています。それを修正する必要があります。
テストを実行します:
mix test次の出力が表示されます。
 Finished in 0.08 seconds (0.03s async, 0.05s sync)
23 tests, 3 failures
test/app_web/controllers/item_controller_test.exsファイルを開き、 describe "new item" 、 describe "create item" 。これら2つを次のように変更します。
テストを交換してください:
 describe "new item" do
  test "renders form" , % { conn: conn } do
    conn = get ( conn , ~p " /items/new " )
    assert html_response ( conn , 200 ) =~ "what needs to be done?"
  end
end

describe "create item" do
  test "redirects to show when data is valid" , % { conn: conn } do
    conn = post ( conn , ~p " /items " , item: @ create_attrs )

    assert % { } = redirected_params ( conn )
    assert redirected_to ( conn ) == ~p " /items/ "
  end

  test "errors when invalid attributes are passed" , % { conn: conn } do
    conn = post ( conn , ~p " /items " , item: @ invalid_attrs )
    assert html_response ( conn , 200 ) =~ "can't be blank"
  end
end
更新コード:
/test/app_web/controllers/item_controller_test.exs#L34-L55
テストを再実行すると、 mix testた場合、Willすべてが再び渡されます。
......................
Finished in 0.2 seconds (0.09s async, 0.1s sync)
22 tests, 0 failuresこれまでのところ、TODOMVC UIの主な機能が機能しています。新しいアイテムを作成でき、リストに表示されます。このステップでは、UIを強化して、左下隅に残っているアイテムの数を含めることにします。
test/app_web/controllers/item_html_test.exsファイルを開き、次の2つのテストを作成します。
 test "remaining_items/1 returns count of items where item.status==0" do
  items = [
    % { text: "one" , status: 0 } ,
    % { text: "two" , status: 0 } ,
    % { text: "done" , status: 1 }
  ]
  assert ItemHTML . remaining_items ( items ) == 2
end

test "remaining_items/1 returns 0 (zero) when no items are status==0" do
  items = [ ]
  assert ItemHTML . remaining_items ( items ) == 0
end
例: test/app_web/controllers/item_html_test.exs#L14-L26
ItemHTML.remaining_items/1関数が存在しないため、これらのテストは失敗します。
次のコードをlib/app_web/controllers/item_html.exファイルに追加して、テストをパスします。
 # returns integer value of items where item.status == 0 (not "done")
def remaining_items ( items ) do
  Enum . filter ( items , fn i -> i . status == 0 end ) |> Enum . count
end
例: /lib/app_web/controllers/item_html#L15-L17
テストが渡されたので、 index.htmlテンプレートでremaining_items/1を使用します。 lib/app_web/controllers/item_html/index.html.eexファイルを開き、コードの行を見つけます。
< span class =" todo-count " > < strong > 1 </ strong > item left </ span >この行に置き換えます:
< span class =" todo-count " > < %= remaining_items(@items) % > items left </ span >これにより、まだ「完了」されていない残りのアイテムの整数カウントを返す@itemsのリストを使用してItemHTML.remaining_items/1関数を呼び出すだけです。
例: /lib/app_web/controllers/item_html/index.html.eex#L60
この時点で、TODOMVC UIの左下にある(残りの)アイテムが機能しています!
リストにnewアイテムを追加し、カウントの増加を視聴してください。
それは十分に簡単でした。もう少し高度な何かを試してみましょう!
休憩を取り、新鮮なコップ一杯の水をつかんでください。次のセクションは激しくなります!
statusを1に切り替えますTODOリストのコア関数の1つは、 itemのstatusを0から1 (「完全」)に切り替えることです。
スキーマでは、完成したitemのstatusは1です。
コントローラーには2つの機能が必要になります。
toggle_status/1アイテムのステータスを切り替える例:0から1、1〜0。toggle/2 HTTP要求のハンドラー関数は、アイテムのステータスを切り替えます。 test/app_web/controllers/item_controller_test.exsファイルを開きます。ここでいくつかの変更を加えて、以前に言及した機能にテストを追加できるようにします。 item_controller_test.exs内にApp.Todoをインポートし、作成と属性定数を修正してモックアイテムを作成します。ファイルの開始がそうにあることを確認してください。
 defmodule AppWeb.ItemControllerTest do
  use AppWeb.ConnCase
  alias App.Todo

  import App.TodoFixtures

  @ create_attrs % { person_id: 42 , status: 0 , text: "some text" }
  @ public_create_attrs % { person_id: 0 , status: 0 , text: "some public text" }
  @ completed_attrs % { person_id: 42 , status: 1 , text: "some text completed" }
  @ public_completed_attrs % { person_id: 0 , status: 1 , text: "some public text completed" }
  @ update_attrs % { person_id: 43 , status: 1 , text: "some updated text" }
  @ invalid_attrs % { person_id: nil , status: nil , text: nil }
後でテストで使用するために固定Item属性を追加しています。後でこのアプリに認証を追加するため、 public Itemを指定しています。
この後、同じファイル内にdefp create_item()/1関数を見つけます。そうするように変更してください。
  defp create_item ( _ ) do
    item = item_fixture ( @ create_attrs )
    % { item: item }
endこの関数を使用して、追加するテストで使用するItemオブジェクトを作成する予定です。そういえば、それをしましょう!次のスニペットをファイルに追加します。
 describe "toggle updates the status of an item 0 > 1 | 1 > 0" do
  setup [ :create_item ]

  test "toggle_status/1 item.status 1 > 0" , % { item: item } do
    assert item . status == 0
    # first toggle
    toggled_item = % { item | status: AppWeb.ItemController . toggle_status ( item ) }
    assert toggled_item . status == 1
    # second toggle sets status back to 0
    assert AppWeb.ItemController . toggle_status ( toggled_item ) == 0
  end

  test "toggle/2 updates an item.status 0 > 1" , % { conn: conn , item: item } do
    assert item . status == 0
    get ( conn , ~p ' /items/toggle/ #{ item . id } ' )
    toggled_item = Todo . get_item! ( item . id )
    assert toggled_item . status == 1
  end
end
例: /test/app_web/controllers/item_controller_test.exs#L64-L82
lib/app_web/controllers/item_controller.exファイルを開き、次の機能を追加します。
  def toggle_status ( item ) do
    case item . status do
      1 -> 0
      0 -> 1
    end
  end

  def toggle ( conn , % { "id" => id } ) do
    item = Todo . get_item! ( id )
    Todo . update_item ( item , % { status: toggle_status ( item ) } )
    conn
    |> redirect ( to: ~p " /items " )
  end
例: /lib/app_web/controllers/item_controller.ex#L64-L76
テストで呼び出しているルートはまだ存在しないため、この時点ではまだテストが失敗します。それを修正しましょう!
get /items/toggle/:id toggle/2を呼び出すIDルートを作成しますlib/app_web/router.exを開き、Line resources "/items", ItemController見つけます。新しい行を追加します:
get "/items/toggle/:id" , ItemController , :toggle例: /lib/app_web/router.ex#L21
今、私たちのテストは最終的に渡されます:
mix testあなたは見るべきです:
22:39:42.231 [info]  Already up
...........................

Finished in 0.5 seconds
27 tests, 0 failuresindex.htmlでチェックボックスがクリックされたときにtoggle/2を呼び出します私たちのテストが合格したので、今度はUIで構築してきたこのすべての機能を実際に使用します。 /lib/app_web/controllers/item_html/index.html.heexファイルを開き、行を見つけます。
 < %= if item.status == 1 do % >
...
< % else % >
...
< % end % >
以下に置き換えます。
  < %= if item.status == 1 do % >
    < .link href={~p"/items/toggle/#{item.id}"}
        class="toggle checked" >
        type="checkbox"
    </ .link >
  < % else % >
    < .link href={~p"/items/toggle/#{item.id}"}
        type="checkbox"
        class="toggle" >
    </ .link >
< % end % >このリンクがクリックされるとget /items/toggle/:id endpointが呼び出されます。
これにより、上記で定義したtoggle/2ハンドラーがトリガーされます。
前:
/lib/app_web/controllers/item_html/index.html.heex#L40
後:/lib/app_web/controllers/item_html/index.html.heex#L47-L57
app.scssに.checked CSSを追加します残念ながら、 <a>タグ( <.link>で生成されます)は、 :checked擬似セレクターを持つことができないため、 <input>タグで動作するデフォルトのdoMVCスタイルはリンクでは機能しません。そのため、 app.scssにCSSの数行を追加する必要があります。
assets/css/app.scssファイルを開き、次の行を追加します。
. todo-list li . checked + label {
	background-image : url ( 'data:image/svg+xml;utf8,%3Csvg%20xmlns%3D%22http%3A//www.w3.org/2000/svg%22%20width%3D%2240%22%20height%3D%2240%22%20viewBox%3D%22-10%20-18%20100%20135%22%3E%3Ccircle%20cx%3D%2250%22%20cy%3D%2250%22%20r%3D%2250%22%20fill%3D%22none%22%20stroke%3D%22%23bddad5%22%20stroke-width%3D%223%22/%3E%3Cpath%20fill%3D%22%235dc2af%22%20d%3D%22M72%2025L42%2071%2027%2056l-4%204%2020%2020%2034-52z%22/%3E%3C/svg%3E' );
	background-repeat : no-repeat;
}
ファイルを保存した後、 /assets/css/app.scss#L8 app.scss#l8を持っている必要があります
また、アプリを表示すると、トグル機能は予想どおりに機能しています。

実装注:このチュートリアルでは、100%のサーバー側のレンダリングアプリの実行方法を実証しているため、このチュートリアルではJavaScript非常に意図的に使用していません。これは、 JSがブラウザで無効になっている場合でも、デバイスが非常に古く、最新のWebブラウザーがない場合でも、常に機能します。 <input>タグにonclick属性を簡単に追加できたはずです。
 < input < %= checked(item) % > type="checkbox" class="toggle"
onclick="location.href='
  < %= Routes.item_path(@conn, :toggle, item.id) % > ';" >
しかし、 onclick JavaScriptであり、 JSに頼る必要はありません。
<a> (link)は、 item.statusを切り替えるための完全なセマンティックな非JSアプローチです。
todoアイテムの正しい注文の維持操作を「完了」または元に戻すと、TODOの順序はこれらの操作間で異なる場合があります。これを一貫性に保つために、すべてのtodoアイテムを同じ順序で取得しましょう。
内部lib/app/todo.ex 、 list_items/0以下に変更します。
  def list_items do
    query =
      from (
        i in Item ,
        select: i ,
        order_by: [ asc: i . id ]
      )

    Repo . all ( query )
end todoアイテムを取得し、注文することにより、UXが一貫したままであることを保証します!
UIに追加する必要がある機能の最後の部分は、アイテムのテキストを編集する機能です。
このステップの最後に、インラインの編集作業があります。

アイテムを編集するために2回クリックする必要がある理由は、スクロール中に人々が誤ってアイテムを編集しないようにするためです。したがって、編集するには、意図的に2回クリック/タップする必要があります。
TODOMVCスペックでは、これはダブルクリックイベントのイベントリスナーを作成し、 <label>要素を<input>に置き換えることで実現されます。サーバー側のレンダリングされたPhoenixアプリ(今のところ)でJavaScriptの使用を避けようとしているため、代替アプローチを使用したいと考えています。ありがたいことに、 HTMLとCSSのみを使用してダブルクリックイベントをシミュレートできます。参照:https://css-tricks.com/double-click-in-css(このCSSの仕組みを完全に理解するために、その投稿とデモを読むことをお勧めします!)
注:CSSの実装は真のダブルクリックではありません。任意の遅延で2つのクリックが発生する可能性があるため、より正確な説明は「2つのクリック」になります。 IE最初のクリックに続いて10秒待機し、2回目のクリックは2回のクリックと同じ効果をもたらします。真のダブルクリックを実装する場合は、github.com/dwyl/javascript-todo-list-tutorial#52-double-clickを参照してください
それに取り組みましょう! lib/app_web/controllers/item_html/index.html.heexファイルを開き、行を見つけます。
< % = new ( Map . put ( assigns , :action , ~p " /items/new " ) ) % >それを置き換えます:
 < % = if @ editing . id do % >
  <. link href = { ~p " /items " }
      method = "get"
      class= "new-todo" >
      Click here to create a new item!
  < / . link >
< % else % >
  < % = new ( Map . put ( assigns , :action , ~p " /items/new " ) ) % >
< % end % >ここでは、アイテムを編集しているかどうかを確認し、フォームの代わりにリンクをレンダリングしています。これを行い、ページに複数のフォームがあることを避けます。アイテムを編集していない場合は、以前と同じようにnew.html.heexをレンダリングしてください。これにより、ユーザーがアイテムを編集している場合、レンダリングされているリンクをクリックして「編集モードから抜け出す」ことができます。
EG: lib/app_web/controllers/item_html/index.html.heex#L30-L38
次に、まだindex.html.eexファイルで、行を見つけます。
< %= for item < - @items do % > <li>タグ全体を次のコードに置き換えます。
 < li data - id = { item . id } class= { complete ( item ) } >
    < % = if item . status == 1 do % >
      <. link href = { ~p " /items/toggle/ #{ item . id } " }
          class= "toggle checked" >
          type = "checkbox"
      < / . link >
    < % else % >
      < . link href = { ~p " /items/toggle/ #{ item . id } " }
          type = "checkbox"
          class= "toggle" >
      < / . link >
    < % end % >

  < div class = "view" >
    < % = if item . id == @ editing . id do % >
      < % = edit (
        Map . put ( assigns , :action , ~p " /items/ #{ item . id } /edit " )
        |> Map . put ( :item , item )
      ) % >
    < % else % >
      < . link href = { ~p " /items/ #{ item } /edit " } class= "dblclick" >
        < label > < % = item . text % > < / label >
      < / . link >
      < span > < / span > < ! -- used for CSS Double Click -- >
    < % end % >

    < . link
      class = "destroy"
      href = { ~p " /items/ #{ item } " }
      method= "delete"
    >
    < / . link >
  < / div >
< /li>
例: lib/app_web/controllers/item_html/index.html.heex#L46-L79
ここでいくつかのことをしました。 <div class="view>タグの外側のトグルボタンを変更しました。さらに、テキストはif else blockステートメントで変更されました。
ユーザーが編集していない場合、リンク( <a> )がレンダリングされます。これにより、クリックすると、ユーザーが「編集」モードを入力できます。一方、ユーザーが編集している場合、 edit.html.heexファイルをレンダリングします。
そういえば、編集edit.html.heexを編集しましょうEnterこれにより、必要なものをレンダリングします。
 < .simple_form :let={f} for={@changeset} method="put" action={~p"/items/#{@item}"} >
  < .input
    field={{f, :text}}
    type="text"
    placeholder="what needs to be done?"
    class="new-todo"
  />
  < :actions >
    < .button
    style="display: none;"
    type="submit" >
      Save
    </ .button >
  </ :actions >
  <!-- submit the form using the Return/Enter key -->
</ .simple_form >CSSを更新しますCSSのダブルクリック効果を有効にしてeditモードを入力するには、次のCSSをassets/css/app.scssファイルに追加する必要があります。
. dblclick {
  position : relative; /* So z-index works later, but no surprises now */
}

. dblclick + span {
  position : absolute;
  top : -1 px ; /* these negative numbers are to ensure */
  left : -1 px ; /* that the <span> covers the <a> */
  width : 103 % ; /* Gotta do this instead of right: 0; */
  bottom : -1 px ;
  z-index : 1 ;
}

. dblclick + span : active {
  left : -9999 px ;
}

. dblclick : hover {
  z-index : 2 ;
}
EG: assets/css/app.css#L13-L32
さらに、マークアップはTODOMVCマークアップとわずかに異なるため、UIを一貫性に保つためにもう少しCSSを追加する必要があります。
. todo-list li . toggle + div > a > label {
  background-image : url ( 'data:image/svg+xml;utf8,%3Csvg%20xmlns%3D%22http%3A//www.w3.org/2000/svg%22%20width%3D%2240%22%20height%3D%2240%22%20viewBox%3D%22-10%20-18%20100%20135%22%3E%3Ccircle%20cx%3D%2250%22%20cy%3D%2250%22%20r%3D%2250%22%20fill%3D%22none%22%20stroke%3D%22%23ededed%22%20stroke-width%3D%223%22/%3E%3C/svg%3E' );
  background-repeat : no-repeat;
  background-position : center left;
}

. todo-list li . checked + div > a > label
{
  background-image : url ( 'data:image/svg+xml;utf8,%3Csvg%20xmlns%3D%22http%3A//www.w3.org/2000/svg%22%20width%3D%2240%22%20height%3D%2240%22%20viewBox%3D%22-10%20-18%20100%20135%22%3E%3Ccircle%20cx%3D%2250%22%20cy%3D%2250%22%20r%3D%2250%22%20fill%3D%22none%22%20stroke%3D%22%23bddad5%22%20stroke-width%3D%223%22/%3E%3Cpath%20fill%3D%22%235dc2af%22%20d%3D%22M72%2025L42%2071%2027%2056l-4%204%2020%2020%2034-52z%22/%3E%3C/svg%3E' );
  background-repeat : no-repeat;
  background-position : center left;
}

. toggle {
  width : 10 % ;
  z-index : 3 ; /* keep the toggle checkmark above the rest */
}

a . new-todo {
  display : block;
  text-decoration : none;
}

. todo-list . new-todo {
  border : 1 px # 1abc9c solid;
}

. view a , . view a : visited {
  display : block;
  text-decoration : none;
  color : # 2b2d2f ;
}

. todo-list li . destroy {
  text-decoration : none;
  text-align : center;
  z-index : 3 ; /* keep the delete link above the text */
}これは、このステップの最後にapp.scssファイルが表示されるものです: assets/css/app.css#L34-L71
ItemController.edit/2関数を更新しますインライン編集を有効にするには、 edit/2関数を変更する必要があります。 lib/app_web/controllers/item_controller.exファイルを開き、 edit/2関数を次のように置き換えます。
 def edit ( conn , params ) do
  index ( conn , params )
end
さらに、 index/2関数に編集を処理するように依頼していることを考えると、 index/2を更新する必要があります。
 def index ( conn , params ) do
  item = if not is_nil ( params ) and Map . has_key? ( params , "id" ) do
    Todo . get_item! ( params [ "id" ] )
  else
    % Item { }
  end
  items = Todo . list_items ( )
  changeset = Todo . change_item ( item )
  render ( conn , "index.html" , items: items , changeset: changeset , editing: item )
end
最後に、アイテムを更新するためのフォームの送信を処理する必要があります( edit.html.heexでレンダリングされます)。 Enter押すと、 update/2ハンドラーが内部lib/app_web/controllers/item_controller.exと呼ばれます。アイテムを更新した後、同じページにとどまりたいです。
だから、このように見えるように変更してください。
 def update ( conn , % { "id" => id , "item" => item_params } ) do
  item = Todo . get_item! ( id )

  case Todo . update_item ( item , item_params ) do
    { :ok , _item } ->
      conn
      |> redirect ( to: ~p " /items/ " )

    { :error , % Ecto.Changeset { } = changeset } ->
      render ( conn , :edit , item: item , changeset: changeset )
  end
end item_controller.exファイルは次のようになりました: lib/app_web/controllers/item_controller.ex
ItemControllerTestでテストを更新します単一のページアプリを作成するための探求で、いくつかのテストを記録しました!それで大丈夫です。簡単に修正できます。
test/app_web/controllers/item_controller_test.exsファイルを開き、次のテキストでテストを見つけます。
test "renders form for editing chosen item"
そして、それを変更して、次のように見えます。
  test "renders form for editing chosen item" , % { conn: conn , item: item } do
    conn = get ( conn , ~p " /items/ #{ item } /edit " )
    assert html_response ( conn , 200 ) =~ "Click here to create a new item"
  end
「タイマーモードの編集」を入力すると、以前に実装したように、 /itemsに戻る<a>を作成します。このタグには、「ここをクリックして新しいアイテムを作成する」テキストがあります。これは私たちが主張しているものです。
例: test/app_web/controllers/item_controller_test.exs#L37-L39
次に、次の説明でテストを見つけます。
describe "update item"ブロックを次のコードに更新します。
 describe "update item" do
  setup [ :create_item ]

  test "redirects when data is valid" , % { conn: conn , item: item } do
    conn = put ( conn , ~p " /items/ #{ item } " , item: @ update_attrs )
    assert redirected_to ( conn ) == ~p " /items/ "

    conn = get ( conn , ~p " /items/ " )
    assert html_response ( conn , 200 ) =~ "some updated text"
  end

  test "errors when invalid attributes are passed" , % { conn: conn , item: item } do
    conn = put ( conn , ~p " /items/ #{ item } " , item: @ invalid_attrs )
    assert html_response ( conn , 200 ) =~ "can't be blank"
  end
end
例: test/app_web/controllers/item_controller_test.exs#L67-L80
アイテムを更新した後、アプリケーションがリダイレクトするパスを更新しました。単一ページのアプリケーションを構築しているため、そのパスは/items/ urlパスに関係しています。
今すぐテストを実行した場合、再び合格する必要があります。
 mix test

23:08:01.785 [info]  Already up
...........................

Finished in 0.5 seconds
27 tests, 0 failures

Randomized with seed 956565
index.htmlから古いテンプレートを削除しますtoggle editが機能しているので、最終的にlib/app_web/controllers/item_html/index.html.heexテンプレートからデフォルトのphoenix(テーブル)レイアウトを削除できます。
lib/app_web/controllers/item_html/index.html.eexファイルを開き、行の前にすべてのコードを削除します。
< section class =" todoapp " >例: lib/app_web/controllers/item_html/index.html.heex
これでアプリは次のようになります。 
残念ながら、デフォルトのレイアウトを削除することにより、テストを「破壊」しました。
test/app_web/controllers/item_controller_test.exsファイルを開き、次の説明があるテストを見つけます。
test "lists all items"からのアサーションを更新します:
assert html_response ( conn , 200 ) =~ "Listing Items"に:
assert html_response ( conn , 200 ) =~ "todos"例: test/app_web/controllers/item_controller_test.exs#L14
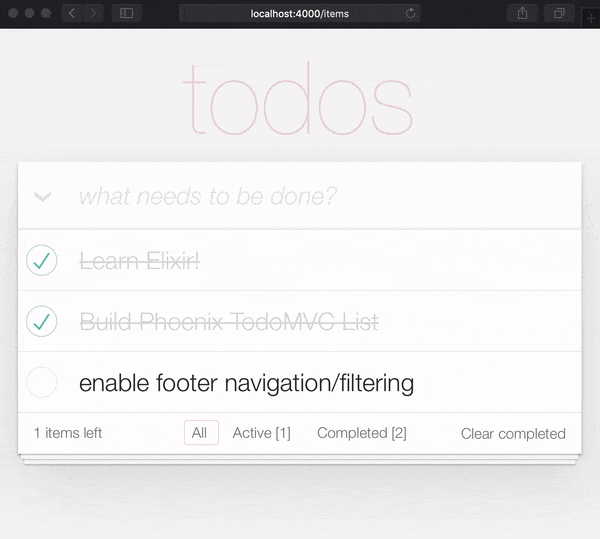
Core(Create、Edit/Update、Delete)機能が機能しているので、最終的なUI拡張機能を追加できます。このステップでは、フッターナビゲーション/フィルタリングを追加します。
「すべて」ビューはデフォルトです。 「アクティブ」はstatus==0のすべてのアイテムです。 「完了」は、すべてのアイテムをstatus==1です。
/:filterルート開始する前に、ユニットテストを追加しましょう。選択したフィルターに従ってフィルタリングされたアイテムを表示したいと思います。
Open test/app_web/controllers/item_controller_test.exsとdescribe "index" do見つけます。このブロックで、次のテストを追加します。フィルターが変更されたときにアイテムが適切に表示されているかどうかを確認します。
  test "lists items in filter" , % { conn: conn } do
    conn = post ( conn , ~p " /items " , item: @ public_create_attrs )

    # After creating item, navigate to 'active' filter page
    conn = get ( conn , ~p " /items/filter/active " )
    assert html_response ( conn , 200 ) =~ @ public_create_attrs . text

    # Navigate to 'completed page'
    conn = get ( conn , ~p " /items/filter/completed " )
    assert ! ( html_response ( conn , 200 ) =~ @ public_create_attrs . text )
  end
例: test/app_web/controllers/item_controller_test.exs#L21-L32
lib/app_web/router.exを開き、次のルートを追加します。
get "/items/filter/:filter" , ItemController , :index例: /lib/app_web/router.ex#L23
index/2を更新して、ビュー/テンプレートにfilterを送信しますlib/app_web/controllers/item_controller.exファイルを開き、 index/2関数を見つけます。 index/2の終了時のrender/3の呼び出しを次のものに置き換えます。
 render ( conn , "index.html" ,
  items: items ,
  changeset: changeset ,
  editing: item ,
  filter: Map . get ( params , "filter" , "all" )
)
EG: lib/app_web/controllers/item_controller.ex#L17-L22
Map.get(params, "filter", "all") filterのデフォルト値を「all」に設定するため、 index.htmlがレンダリングされたら、「すべて」アイテムを表示します。
filter/2ビュー関数を作成しますアイテムをステータスでフィルタリングするには、新しい関数を作成する必要があります。
lib/app_web/controllers/item_html.exファイルを開き、次のようにfilter/2機能を作成します。
 def filter ( items , str ) do
  case str do
    "items" -> items
    "active" -> Enum . filter ( items , fn i -> i . status == 0 end )
    "completed" -> Enum . filter ( items , fn i -> i . status == 1 end )
    _ -> items
  end
end
例: lib/app_web/controllers/item_html.ex#L19-L26
これにより、次のステップでアイテムをフィルタリングできます。
index.htmlテンプレートのフッターを更新しますfilter/2関数を使用して、表示されるアイテムをフィルタリングします。 lib/app_web/controllers/item_html/index.html.heexファイルを開き、 forループラインを見つけます。
< % = for item <- @ items do % >それを置き換えます:
< % = for item <- filter ( @ items , @ filter ) do % >例: lib/app_web/controllers/item_html/index.html.heex#L18
これにより、 @itemsと選択した@filterのリストを渡す前のステップで定義したfilter/2関数を呼び出します。
次に、 <footer>を見つけて、 <ul class="filters">の内容を次のコードに置き換えます。
  < li >
    < % = if @ filter == "items" do % >
      <a href = "/items/filter/items" class= "selected" >
        All
      < / a >
    < % else % >
      <a href = "/items/filter/items" >
        All
      < / a >
    < % end % >
  < / li >
  < li >
    < % = if @ filter == "active" do % >
      <a href = "/items/filter/active" class= 'selected' >
        Active
        [ < % = Enum . count ( filter ( @ items , "active" ) ) % > ]
      < / a >
    < % else % >
      <a href = "/items/filter/active" >
        Active
        [ < % = Enum . count ( filter ( @ items , "active" ) ) % > ]
      < / a >
    < % end % >
  < / li >
  < li >
    < % = if @ filter == "completed" do % >
      <a href = "/items/filter/completed" class= 'selected' >
        Completed
        [ < % = Enum . count ( filter ( @ items , "completed" ) ) % > ]
      < / a >
    < % else % >
      <a href = "/items/filter/completed" >
        Completed
        [ < % = Enum . count ( filter ( @ items , "completed" ) ) % > ]
      < / a >
    < % end % >
< / li > @filterの割り当て値に従って、 selectedクラスを条件付きで追加しています。
例: /lib/app_web/controllers/item_html/index.html.heex#L62-L98
このステップの最後に、完全に機能するフッターフィルターがあります。
追加したこの機能を小さなユニットテストですばやくカバーできます。 Open test/app_web/controllers/item_html_test.exsと以下を追加します。
  test "test filter function" do
    items = [
      % { text: "one" , status: 0 } ,
      % { text: "two" , status: 0 } ,
      % { text: "three" , status: 1 } ,
      % { text: "four" , status: 2 } ,
      % { text: "five" , status: 2 } ,
      % { text: "six" , status: 1 } ,
    ]

    assert length ( ItemHTML . filter ( items , "items" ) ) == 4
    assert length ( ItemHTML . filter ( items , "active" ) ) == 2
    assert length ( ItemHTML . filter ( items , "completed" ) ) == 2
    assert length ( ItemHTML . filter ( items , "any" ) ) == 4
  end
そして、あなたはこの機能を完了する必要がありますか?素晴らしい仕事!
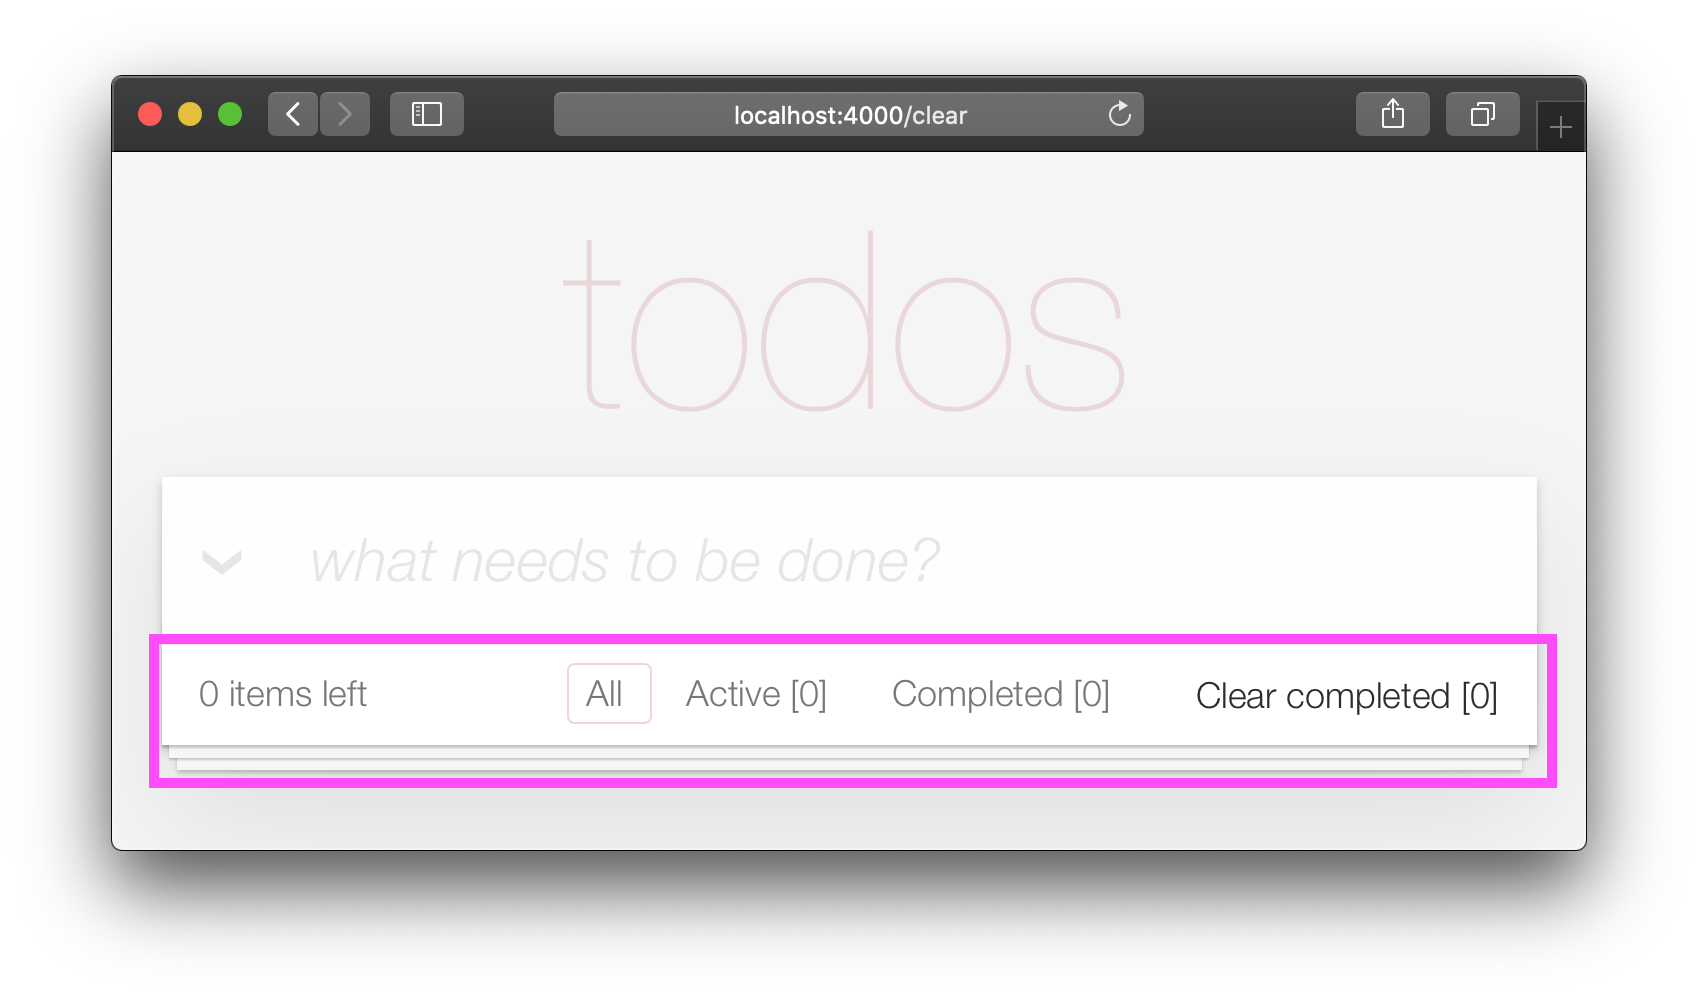
PhoenixのTODOMVCの実装はほぼ完了しています。最後に実装するのは「Clear Complete」です。
lib/app_web/router.exファイルを開き、次のルートを追加します。
get "/items/clear" , ItemController , :clear_completed scope "/"次のようになります。
  scope "/" , AppWeb do
    pipe_through :browser

    get "/" , PageController , :home
    get "/items/toggle/:id" , ItemController , :toggle
    get "/items/clear" , ItemController , :clear_completed
    get "/items/filter/:filter" , ItemController , :index
    resources "/items" , ItemController
end lib/app_web/controllers/item_controller.exファイルに次のコードを追加します。
 import Ecto.Query
alias App.Repo

def clear_completed ( conn , _param ) do
  person_id = 0
  query = from ( i in Item , where: i . person_id == ^ person_id , where: i . status == 1 )
  Repo . update_all ( query , set: [ status: 2 ] )
  # render the main template:
  index ( conn , % { filter: "all" } )
end
例: lib/app_web/controllers/item_controller.ex#L87-L93
これにより、Handy update_all/3関数を使用して、 queryに一致するすべてのアイテムを更新します。私たちの場合person_id==0に属するすべてのitemsを検索し、 status==1を持っています。
アイテムを削除しているわけではありません。むしろ、そのステータスを2に更新しています。これは、例の目的で「アーカイブ」されることを意味します。
注:これは、
update_all:https://adamdelong.com/bulk-update-ectoの便利なガイドです
最後に、 lib/app_web/controllers/item_html/index.html.eexで、ファイルの下部までスクロールして行を置き換えます。
 < button class = "clear-completed" style = "display: block;" >
  Clear completed
< / button >
と:
 < a class = "clear-completed" href = "/items/clear" >
  Clear completed
  [ < % = Enum . count ( filter ( @ items , "completed" ) ) % > ]
< / a >
例: lib/app_web/controllers/item_html/index.html.heex#L104-L107
最後に行う必要があるのはlib/app_web/controllers/item_html.ex内のfilter/2機能を更新することです。 status = 2アーカイブされた状態に関係しているため、アーカイブされていないものを返したいと思います。
Change the filter/2 function so it looks like so.
 def filter ( items , str ) do
  case str do
    "items" -> Enum . filter ( items , fn i -> i . status !== 2 end )
    "active" -> Enum . filter ( items , fn i -> i . status == 0 end )
    "completed" -> Enum . filter ( items , fn i -> i . status == 1 end )
    _ -> Enum . filter ( items , fn i -> i . status !== 2 end )
  end
end
At the end of this section your Todo List should have the "Clear completed" function working:
It's useful to have tests cover this feature. Open test/app_web/controllers/item_controller_test.exs . Alongside the constants, on top of the file, add the following line.
@completed_attrs %{person_id: 42, status: 1, text: "some text completed"}
We will use this to create an item that is already completed, so we can test the "clear completed" functionality.
Add the next lines to test the clear_completed/2 function.
  describe "clear completed" do
    setup [ :create_item ]

    test "clears the completed items" , % { conn: conn , item: item } do

      # Creating completed item
      conn = post ( conn , ~p " /items " , item: @ public_completed_attrs )
      # Clearing completed items
      conn = get ( conn , ~p " /items/clear " )

      items = conn . assigns . items
      [ completed_item | _tail ] = conn . assigns . items

      assert conn . assigns . filter == "all"
      assert completed_item . status == 2
    end

    test "clears the completed items in public (person_id=0)" , % { conn: conn , item: item } do

      # Creating completed item
      conn = post ( conn , ~p " /items " , item: @ public_completed_attrs )
      # Clearing completed items
      conn = get ( conn , ~p " /items/clear " )

      items = conn . assigns . items
      [ completed_item | _tail ] = conn . assigns . items

      assert conn . assigns . filter == "all"
      assert completed_item . status == 2
    end
endAt this point we already have a fully functioning Phoenix Todo List. There are a few things we can tidy up to make the App even better!
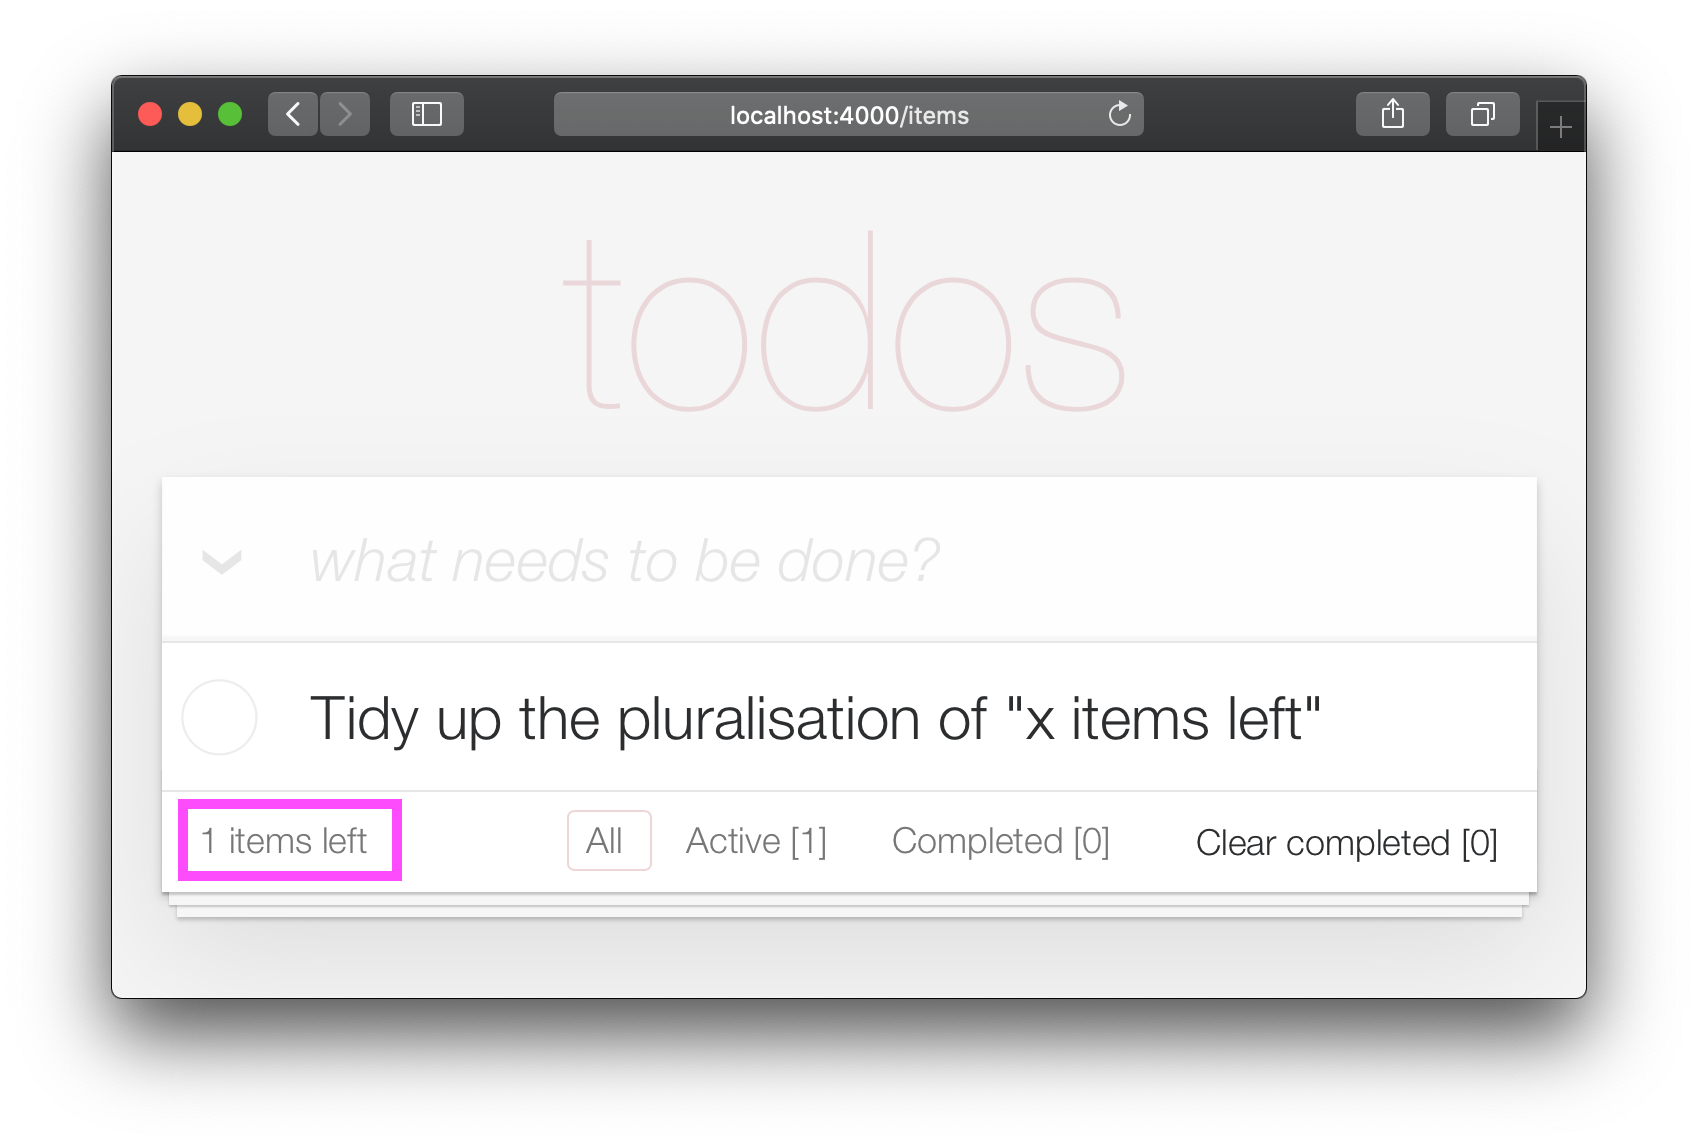
If you are the type of person to notice the tiny details, you would have been itching each time you saw the " 1 items left " in the bottom left corner:
Open your test/app_web/controllers/item_html_test.exs file and add the following test:
 test "pluralise/1 returns item for 1 item and items for < 1 <" do
  assert ItemHTML . pluralise ( [ % { text: "one" , status: 0 } ] ) == "item"
  assert ItemHTML . pluralise ( [
    % { text: "one" , status: 0 } ,
    % { text: "two" , status: 0 }
  ] ) == "items"
  assert ItemHTML . pluralise ( [ % { text: "one" , status: 1 } ] ) == "items"
end
eg: test/app_web/controllers/item_html_test.exs#L28-L35
This test will obviously fail because the AppWeb.ItemHTML.pluralise/1 is undefined. Let's make it pass!
Open your lib/app_web/controllers/item_html.ex file and add the following function definition for pluralise/1 :
 # pluralise the word item when the number of items is greater/less than 1
def pluralise ( items ) do
  # items where status < 1 is equal to Zero or Greater than One:
  case remaining_items ( items ) == 0 || remaining_items ( items ) > 1 do
    true -> "items"
    false -> "item"
  end
end
eg: lib/app_web/controllers/item_html.ex#L28-L35
Note : we are only pluralising one word in our basic Todo App so we are only handling this one case in our
pluralise/1function. In a more advanced app we would use a translation tool to do this kind of pluralising. See: https://hexdocs.pm/gettext/Gettext.Plural.html
Finally, use the pluralise/1 in our template. Open lib/app_web/controllers/item_html/index.html.heex
Locate the line:
< span class = "todo-count" > < % = remaining_items ( @ items ) % > items left < /span>And replace it with the following code:
 < span class = "todo-count" >
  < % = remaining_items ( @ items ) % > < % = pluralise ( @ items ) % > left
< /span>
eg: lib/app_web/controllers/item_html/index.html.heex#L61
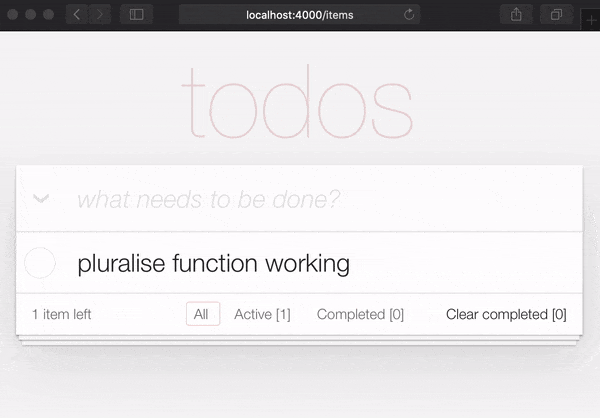
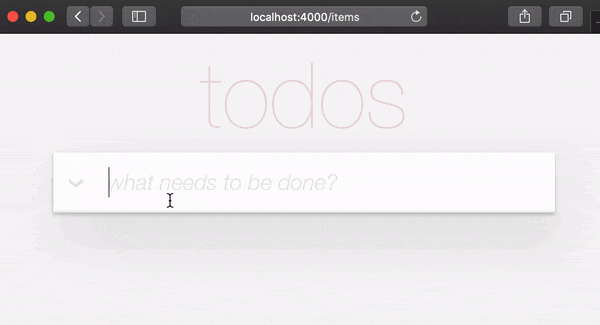
At the end of this step you will have a working pluralisation for the word item/items in the bottom left of the UI:
If you visit one of the TodoMVC examples, you will see that no <footer> is displayed when there are no items in the list: http://todomvc.com/examples/vanillajs
At present our App shows the <footer> even if their are Zero items: ?
This is a visual distraction/clutter that creates unnecessary questions in the user's mind. Let's fix it!
Open your lib/app_web/controllers/item_html.ex file and add the following function definition unarchived_items/1 :
 def got_items? ( items ) do
  Enum . filter ( items , fn i -> i . status < 2 end ) |> Enum . count > 0
end
eg: lib/app_web/controllers/item_html.ex#L37-L39
Now use got_items?/1 in the template.
Wrap the <footer> element in the following if statement:
 < % = if got_items? ( @ items ) do % >

< % end % >
eg: lib/app_web/controllers/item_html/index.html.heex#L58
The convention in Phoenix/Elixir ( which came from Ruby/Rails ) is to have a ? (question mark) in the name of functions that return a Boolean ( true/false ) result.
At the end of this step our <footer> element is hidden when there are no items:
/ to ItemController.index/2 The final piece of tidying up we can do is to change the Controller that gets invoked for the "homepage" ( / ) of our app. Currently when the person viewing the Todo App
visits http://localhost:4000/ they see the lib/app_web/controllers/page_html/home.html.eex template:
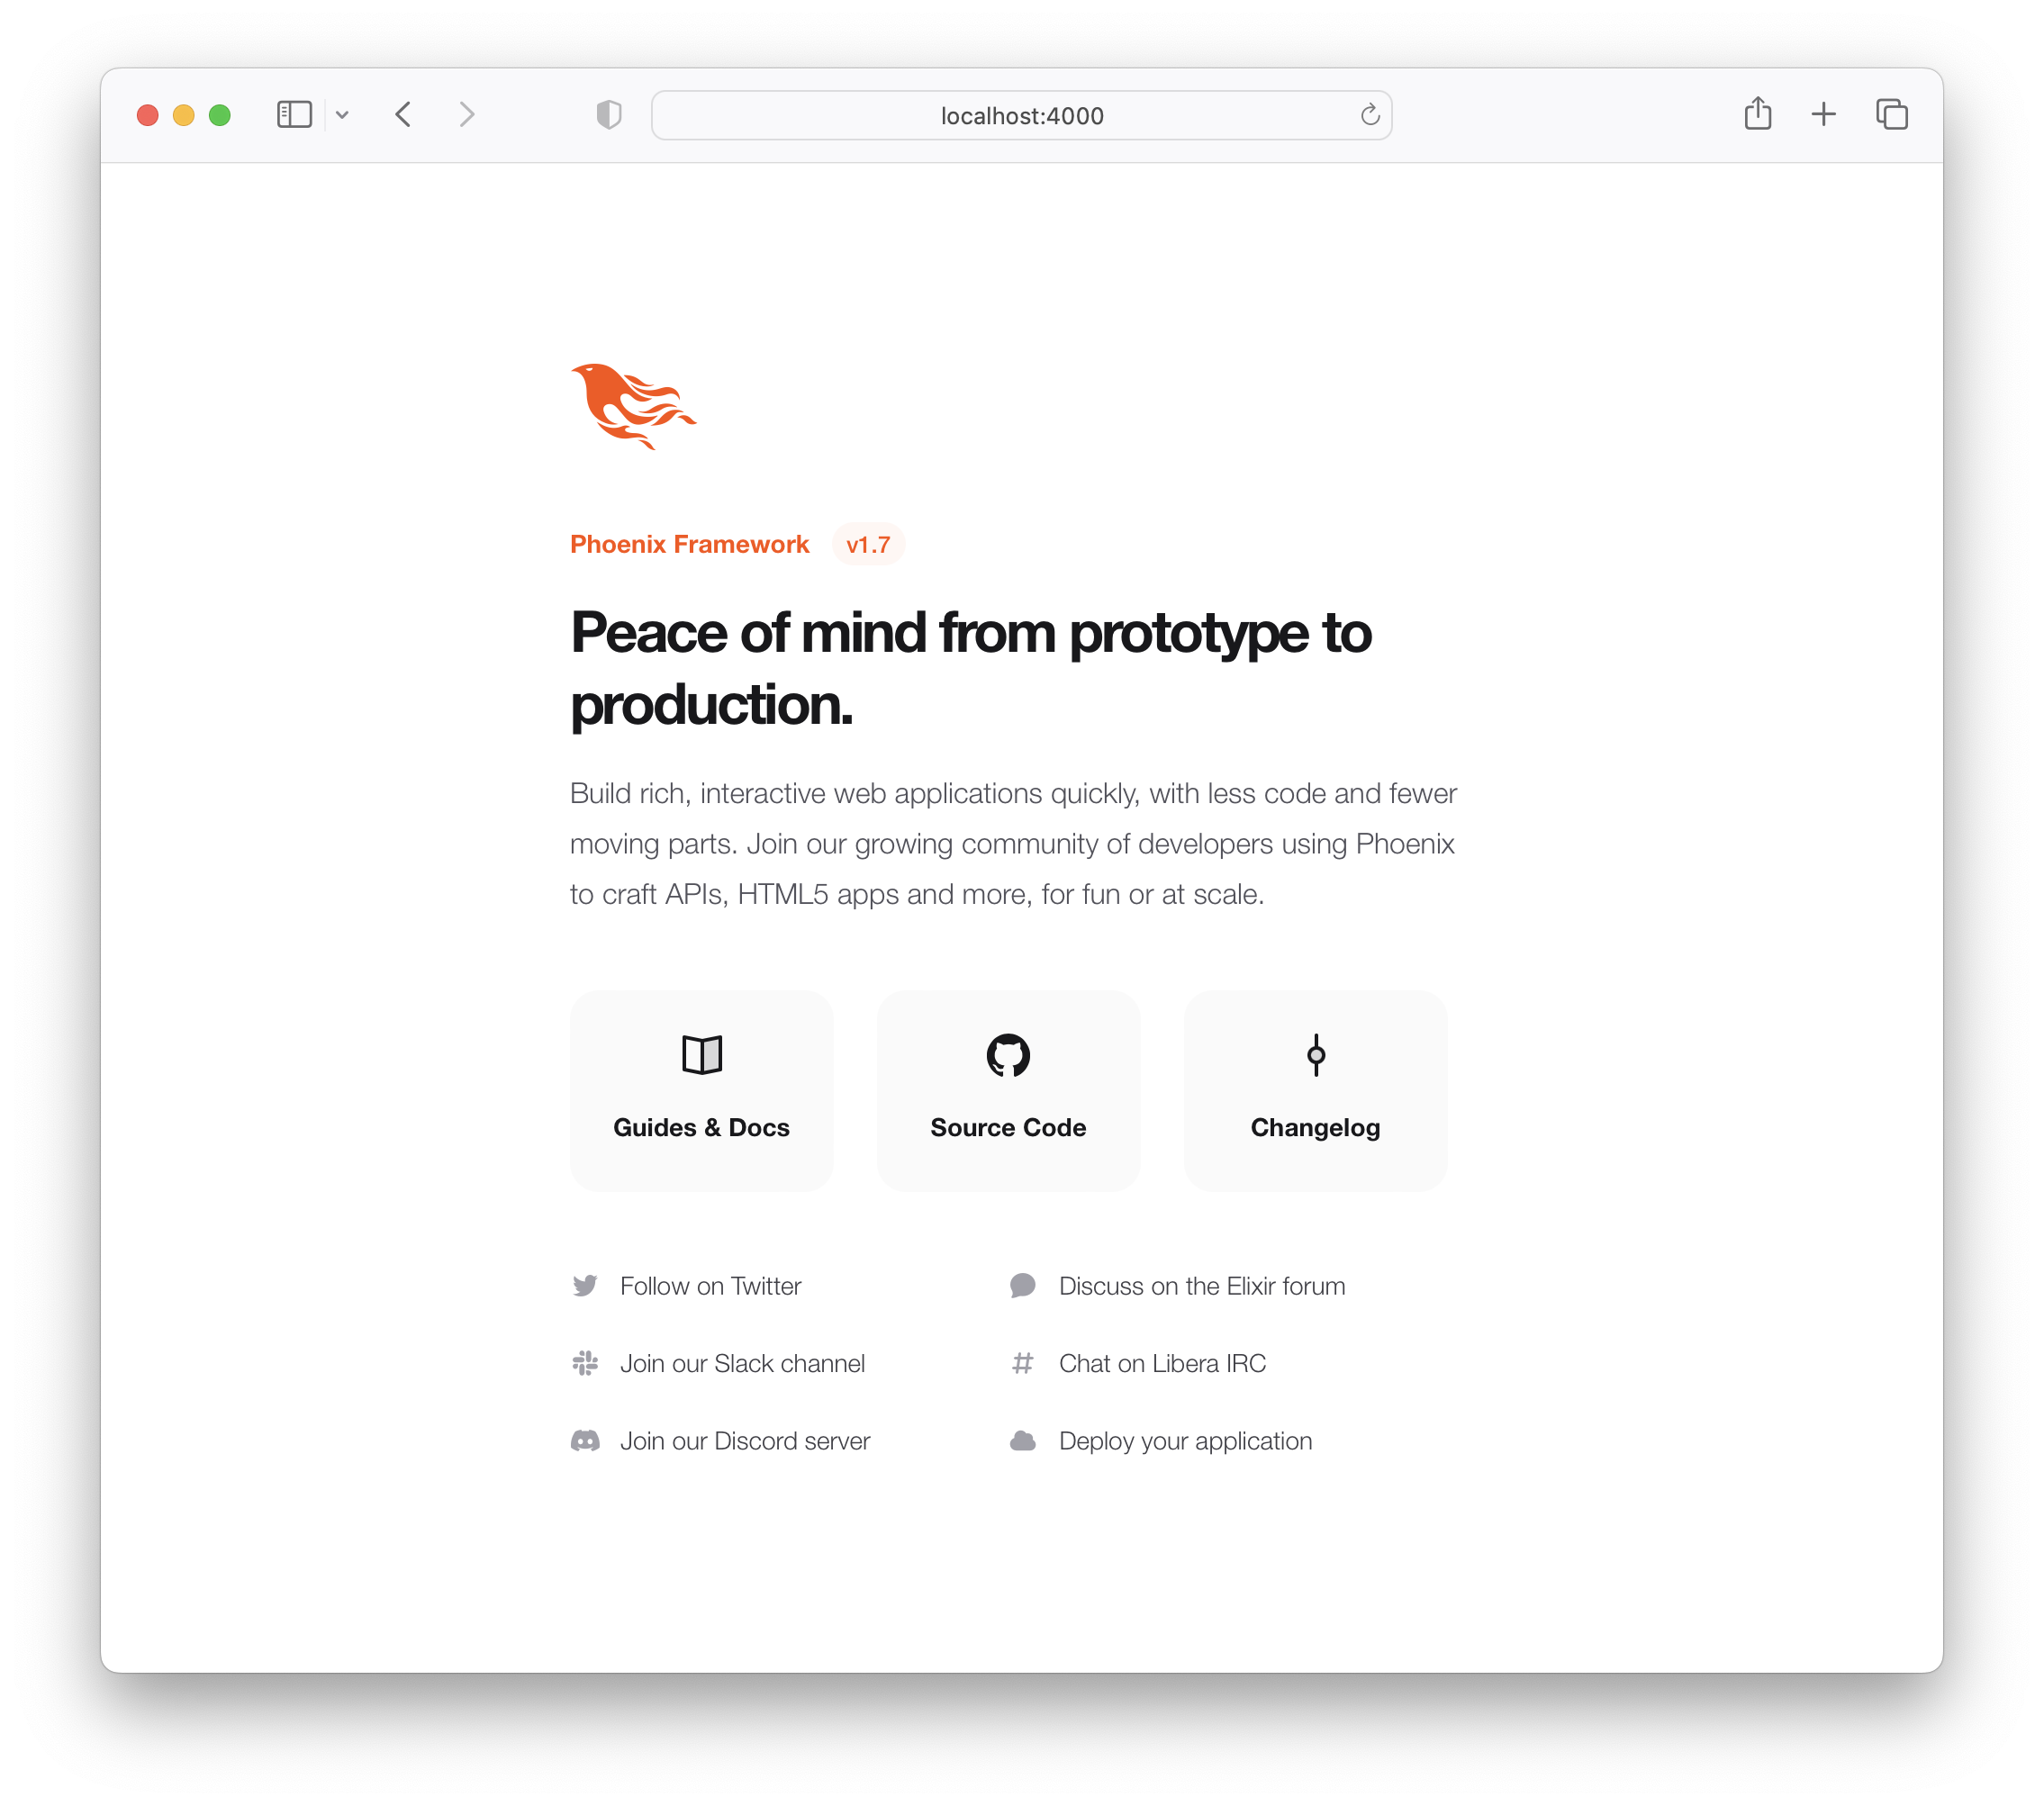
This is the default Phoenix home page ( minus the CSS Styles and images that we removed in step 3.4 above ). It does not tell us anything about the actual app we have built, it doesn't even have a link to the Todo App! Let's fix it!
Open the lib/app_web/router.ex file and locate the line:
get "/" , PageController , :index Update the controller to ItemController .
get "/" , ItemController , :index eg: lib/app_web/router.ex#L20
Now when you run your App you will see the todo list on the home page:
Unfortunately, this update will "break" the page test. Run the tests and see:
1) test GET / (AppWeb.PageControllerTest)
     test/app_web/controllers/page_controller_test.exs:4
     Assertion with = ~ failed
     code:  assert html_response(conn, 200) = ~ " Welcome to Phoenix! "
     left:  " <!DOCTYPE html>n<html lang= " en " >n  <head>n ... "
Given that we are no longer using the Page Controller, View, Template or Tests, we might as well delete them from our project!
git rm lib/app_web/controllers/page_controller.ex
git rm lib/app_web/controllers/page_html.ex
git rm lib/app_web/page_html/home.html.heex
git rm test/app_web/controllers/page_controller_test.exs
Deleting files is good hygiene in any software project. Don't be afraid to do it, you can always recover files that are in your git history.
Re-run the tests:
mix test
You should see them pass now:
 ...........................

Finished in 0.5 seconds
27 tests, 0 failures
Given that our Phoenix Todo List App is 100% server rendered, older browsers will perform a full page refresh when an action (create/edit/toggle/delete) is performed. This will feel like a "blink" in the page and on really slow connections it will result in a temporary blank page ! Obviously, that's horrible UX and is a big part of why Single Page Apps (SPAs) became popular; to avoid page refresh, use Turbo !
Get the performance benefits of an SPA without the added complexity of a client-side JavaScript framework. When a link is clicked/tapped, Turbolinks automatically fetches the page, swaps in its <body> , and merges its <head> , all without incurring the cost of a full page load.
Luckily, adding Turbo will require just a simple copy and paste! Check the unpkg files to fetch the latest CDN package.
We now need to add the following line to lib/app_web/components/layouts/app.html.heex and lib/app_web/components/layouts/root.html.heex .
< script src =" https://unpkg.com/browse/@hotwired/[email protected]/dist/turbo.es2017-esm.js " > </ script > This will install the UMD builds from Turbo without us needing to install a package using npm . Neat, huh?
And that's it! Now when you deploy your server rendered Phoenix App, it will feel like an SPA! Try the Fly.io demo again: phxtodo.fly.dev Feel that buttery-smooth page transition.
Currently, our application occurs in the same page. However, there is a route that we don't use and is also aesthetically incompatible with the rest of our app.
If we check lib/app_web/controllers/item_controller.ex , you might notice the following function.
  def show ( conn , % { "id" => id } ) do
    item = Todo . get_item! ( id )
    render ( conn , :show , item: item )
  end
This serves the GET /items/:id route. We could do the same as we did with edit and render index . However, let's do something different so we learn a bit more about routes.
If we head on to router.ex , and locate the line:
resources "/items" , ItemControllerWe can change it to this.
resources "/items" , ItemController , except: [ :show ] We are saying that we want to keep all the routes in ItemController except the one related to the show action.
We can now safely delete it from item_controller.ex , as we don't need it any more.
Your files should look like the following.
eg: /lib/router.ex#L19-L29 lib/app_web/controllers/item_controller.ex
Currently, the application allows anyone to access it and manage todo items . Wouldn't it be great if we added authentication so each person could check their own list?
We created a dedicated authentication guide: /auth.md to help you set this up. You will soon find out this is extremely easy ?.
Deployment to Fly.io takes a few minutes, but has a few "steps", we suggest you follow the speed run guide: https://fly.io/docs/elixir/getting-started/
Once you have deployed you will will be able to view/use your app in any Web/Mobile Browser.
eg: https://phxtodo.fly.dev
XS
Our Phoenix server currently only returns HTML pages that are server-side rendered . This is already awesome but we can make use of Phoenix to extend its capabilities.
What if our server also responded with JSON ? You're in luck! We've created small guide for creating a REST API : api.md
If you found this example useful, please ️ the GitHub repository so we ( and others ) know you liked it!
If you want to learn more Phoenix and the magic of LiveView , consider reading our beginner's tutorial: github.com/dwyl/ phoenix-liveview-counter-tutorial
Thank you for learning with us! ☀☀️


