phoenix todo list tutorial
1.0.0
피닉스에서 Todo 목록을 작성하기위한 완전한 초보자 자습서.
100% 기능. 0% JavaScript. 그냥 HTML , CSS 및 Elixir . 빠르고 유지 가능합니다.
TODO 목록은 대부분의 사람들에게 친숙합니다. 우리는 항상 목록을 만듭니다. UI / UX가 간단 하기 때문에 Elixir / Phoenix 배우는 좋은 방법입니다. 따라서 구현에 집중할 수 있습니다.
@dwyl 팀의 경우이 앱/튜토리얼은 서버 사이드 렌더링 ( 클라이언트 측면 프로그레시브 향상 포함 )이 개발자 효과 ( 배송 기능 ), UX 및 접근성 사이의 균형 균형을 제공 할 수있는 방법을 보여줍니다. 서버 렌더링 된 페이지는 응답하는 데 5ms 미만이 걸리므로 UX가 빠릅니다 . ON FLY.IO : phxtodo.fly.dev 왕복 응답 시간은 모든 상호 작용에 대해 200ms 미만이므로 클라이언트 측 렌더링 앱처럼 느껴집니다 .
Elixir/Phoenix에서 처음부터 처음부터 앱을 구축하는 방법을 보여주는 TODO 목록 자습서.
fly.io 버전을 사용해보십시오. 목록에 몇 가지 항목을 추가하고 기능을 테스트하십시오.
각 상호 작용에 대한 전체 HTTP 왕복이 있더라도 응답 시간이 빠릅니다 . Chrome | Firefox | Safari가 페이지를 다시 렌더링하기 전에 서버의 응답을 기다리는 방법에주의하십시오. 어제의 오래된 전체 페이지 새로 고침이 사라졌습니다 . 현대식 브라우저는 지능적으로 변화 만 렌더링합니다! 따라서 UX는 "기본"입니다! 진지하게, 휴대 전화에서 fly.io 앱을 시도하고보십시오!
이 튜토리얼에서는 TODOMVC CSS를 사용하여 UI를 단순화합니다. 이것은 우리가 얼마나 많은 CS를 작성 해야하는지 최소화 하는 가장 큰 장점이 있습니다! 또한 전체 기능을 달성하기 위해 기능 을 구현 해야하는 가이드가 있음을 의미합니다.
참고 : 우리는
CSS놀라운 힘/유연성으로 좋아 하지만 모든 사람이 좋아하는 것은 아니라는 것을 알고 있습니다. 참조 : Learn-Tachyons#우리가 원하는 마지막 일은Phoenix튜토리얼에서CSS와 함께 많은 시간을 낭비하는 것입니다!
이 튜토리얼은 Elixir/Phoenix를 배우는 사람을위한 것입니다. 피닉스에 대한 사전 경험은 가정/예상되지 않습니다. 우리는 앱을 구축하는 데 필요한 모든 단계를 포함 시켰습니다.
당신이 어떤 단계에 갇혀 있다면, 우리가 당신이 당신이 멈추지 않도록 도와 드리겠습니다. 모든 코드 라인이 조금 더 설명/명확성을 사용할 수 있다고 생각되면 주저하지 말고 알려 주십시오! 우리는 초보자가되는 것이 어떤 것인지 알고 있습니다 . 무언가가 의미가 없을 때 실망 스러울 수 있습니다! Github에 대한 질문을하면 모든 사람이 배우는 데 도움이됩니다!
피드백을주세요! 도움이된다면 저장소를별로 표시하십시오.
TODO 목록을 작성 하려고 시도하기 전에 컴퓨터에 필요한 모든 것을 설치해야합니다. 참조 : 전제 조건
Phoenix & PostgreSQL이 설치되어 있음을 확인한 후 완성 된 앱을 실행해보십시오.
localhost 에서 완성 된 앱을 실행하십시오 자신만의 버전의 Todo List 앱을 구축하기 전에 localhost 에서 완성 된 버전을 실행하여 작동하는지 확인하십시오.
Github에서 프로젝트를 복제하십시오.
git clone [email protected]:dwyl/phoenix-todo-list-tutorial.git && cd phoenix-todo-list-tutorial종속성을 설치하고 데이터베이스 설정 :
mix setup피닉스 서버 시작 :
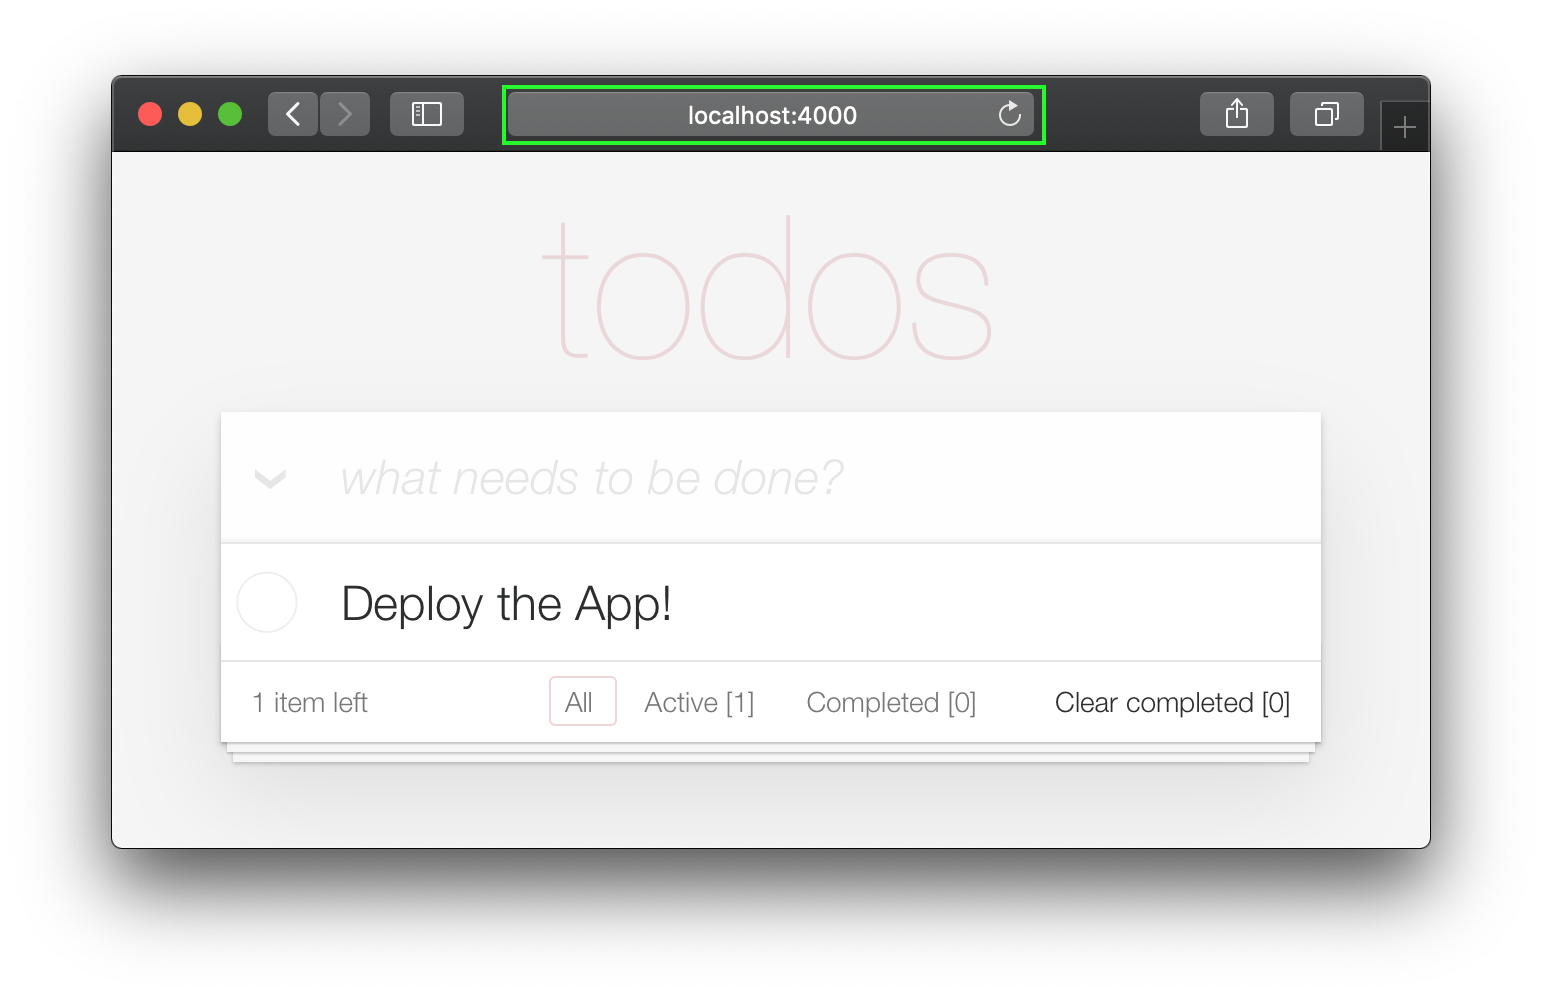
mix phx.server 웹 브라우저에서 localhost:4000 방문하십시오.
당신은 볼 수 있어야합니다 :
이제 localhost 에서 완성 된 예제 앱이 실행되었으므로
처음부터 그것을 만들고 모든 단계를 이해합시다.
localhost 에서 완성 된 예제 앱을 실행할 때 login 버튼을 시도하려면 AUTH_API_KEY 가져와야합니다. [1 분] 참조 : AUTH_API_KEY 받으십시오
localhost 에서 완성 된 앱을 실행했다면
자습서를 시작하기 전에 디렉토리를 변경해야합니다.
cd ..
이제 당신은 만들 준비가되었습니다!
터미널에서 다음 mix 명령을 사용하여 새 Phoenix 앱을 만듭니다.
mix phx.new app --no-dashboard --no-gettext --no-mailer 종속성을 설치하라는 메시지가 표시되면 Y를 입력 한 다음 Enter를 입력하십시오.
참고 :
app이름의 깃발 은이 간단한 예제에 필요 하지 않은 파일을 만드는 것을 피하기위한 것입니다. hexdocs.pm/phoenix/mix.tasks.phx.new를 참조하십시오
새로 생성 된 app 디렉토리 ( cd app )로 변경하고 필요한 모든 것을 갖추고 있는지 확인하십시오.
mix setup피닉스 서버 시작 :
mix phx.server 이제 웹 브라우저에서 localhost:4000 방문 할 수 있습니다. 당신은 다음과 비슷한 것을 볼 수 있어야합니다.
Phoenix 서버 Ctrl + c 를 종료하십시오. c.
모든 것이 예상대로 작동하는지 확인하기 위해 테스트를 실행하십시오.
mix test당신은 볼 수 있어야합니다 :
Compiling 16 files (.ex)
Generated app app

17:49:40.111 [info]  Already up
...

Finished in 0.04 seconds
3 tests, 0 failures
피닉스 앱이 예상대로 작동한다는 것을 확립 한 후 파일을 만들어 봅시다!
items 스키마를 만듭니다 기본 TODO 목록을 작성하려면 하나 items 스키마 만 있으면됩니다. 나중에 우리는 items 구성/분류하기 위해 별도의 목록과 태그를 추가 할 수 있지만 지금은 이것이 필요한 전부입니다.
항목 테이블을 작성하려면 다음 생성기 명령을 실행하십시오.
mix phx.gen.html Todo Item items text:string person_id:integer status:integer 엄밀히 말하면 우리는 text 와 status 필드 만 필요 하지만, 우리는 항목을 사람들과 연관시키고 싶다는 것을 알고 있기 때문에 (튜토리얼의 _later), 우리는 지금 필드를 추가하고 있습니다.
다음 출력이 표시됩니다.
 * creating lib/app_web/controllers/item_controller.ex
* creating lib/app_web/controllers/item_html/edit.html.heex
* creating lib/app_web/controllers/item_html/index.html.heex
* creating lib/app_web/controllers/item_html/new.html.heex
* creating lib/app_web/controllers/item_html/show.html.heex
* creating lib/app_web/controllers/item_html.ex
* creating test/app_web/controllers/item_controller_test.exs
* creating lib/app/todo/item.ex
* creating priv/repo/migrations/20221205102303_create_items.exs
* creating lib/app/todo.ex
* injecting lib/app/todo.ex
* creating test/app/todo_test.exs
* injecting test/app/todo_test.exs
* creating test/support/fixtures/todo_fixtures.ex
* injecting test/support/fixtures/todo_fixtures.ex

Add the resource to your browser scope in lib/app_web/router.ex:

    resources "/items", ItemController


Remember to update your repository by running migrations:

    $ mix ecto.migrate
그것은 많은 파일을 만들었습니다! 우리는 엄격 하게 필요 하지 않습니다.
우리는 필요한 파일 만 수동으로 만들 수 있지만 피닉스에서 CRUD 앱을 만드는 "공식적인"방법이므로 속도를 위해 사용하고 있습니다.
참고 :이 예에서
Todo로 표시된 Phoenix Contex은 " 노출 및 그룹 관련 기능을 노출시키는 전용 모듈 "입니다. 우리는 그들이 "인터페이스"레이어로 기본 피닉스 앱을 불필요하게 복잡하게 생각하며 우리는 그것들을 피할 수 있기를 정말로 원합니다. 그러나 그들이 발전기에 구워졌고 프레임 워크의 제작자가 좋아한다는 점을 감안할 때, 우리는 선택의 여지가 있습니다. 우리는 선택의 여지가 있습니다. 우리는 선택의 여지가 있습니다. 우리는 컨텍스트를 타거나 피닉스 프로젝트에서 모든 파일을 수동으로 생성합니다. 발전기는 훨씬 빠른 구축 방법입니다! 결국 사용되지 않은 파일 몇 개를delete해야하더라도 수용하십시오 !
앱을 구축 할 때 파일을 이해하기 가 더 쉽기 때문에이 단계 에서이 단계에서 이러한 각 파일을 설명하지 않을 것입니다! 편집을 통해 발전함에 따라 각 파일의 목적이 명확 해집니다.
/items 리소스를 router.ex 에 추가하십시오 생성기가 언급 한 지침을 따라 router.ex 에 resources "/items", ItemController 추가하십시오.
lib/app_web/router.ex 파일을 열고 줄을 찾으십시오 : scope "/", AppWeb do . 블록 끝에 선을 추가하십시오. 예 : :
 scope "/" , AppWeb do
  pipe_through :browser

  get "/" , PageController , :index
  resources "/items" , ItemController # this is the new line
end
router.ex 파일은 다음과 같아야합니다. router.ex#L20
이제 터미널이 제안한 것처럼 mix ecto.migrate 실행하십시오. 데이터베이스 테이블 설정을 마치고 필요한 마이그레이션을 실행하여 모든 것이 제대로 작동합니다!
이 시점에서 우리는 이미 기능적 TODO 목록을 가지고 있습니다 ( 기본 Phoenix UI를 기꺼이 사용하려는 경우 ).
localhost 에서 앱을 실행해보십시오 : mix ecto.migrate 사용하여 생성 된 마이그레이션을 실행 한 다음 서버를 사용하십시오.
mix phx.server
방문 : http : // localhost : 4000/items/new 및 일부 데이터를 입력하십시오.
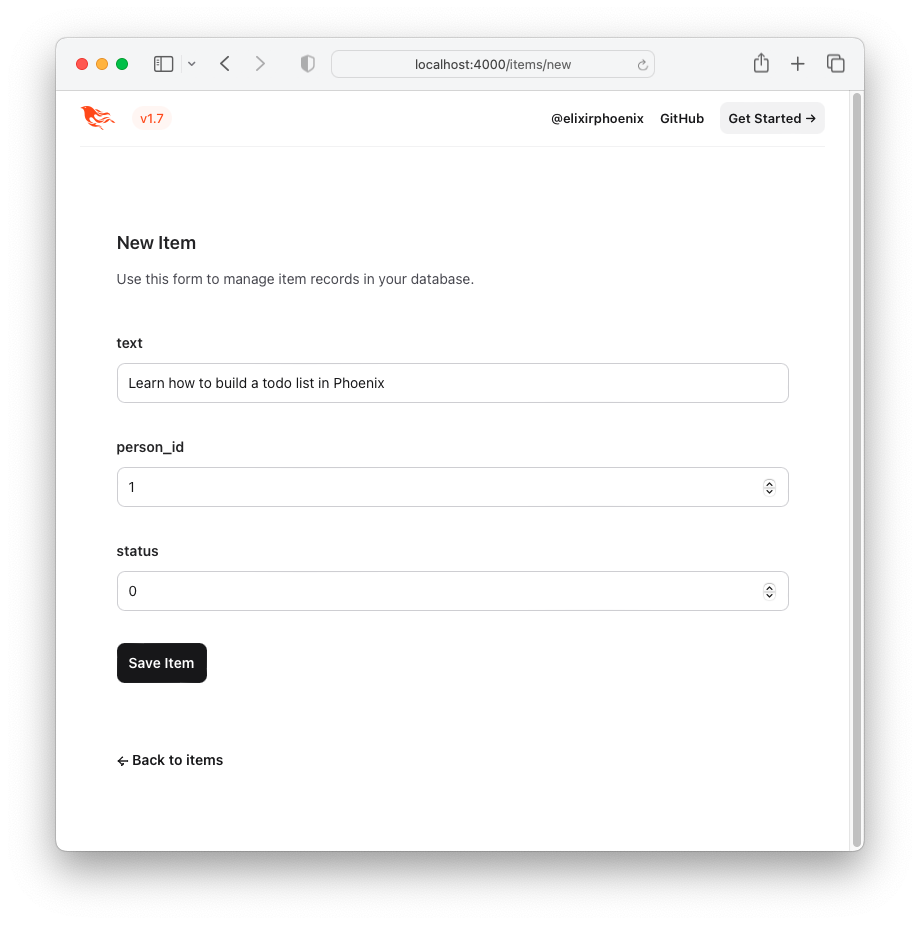
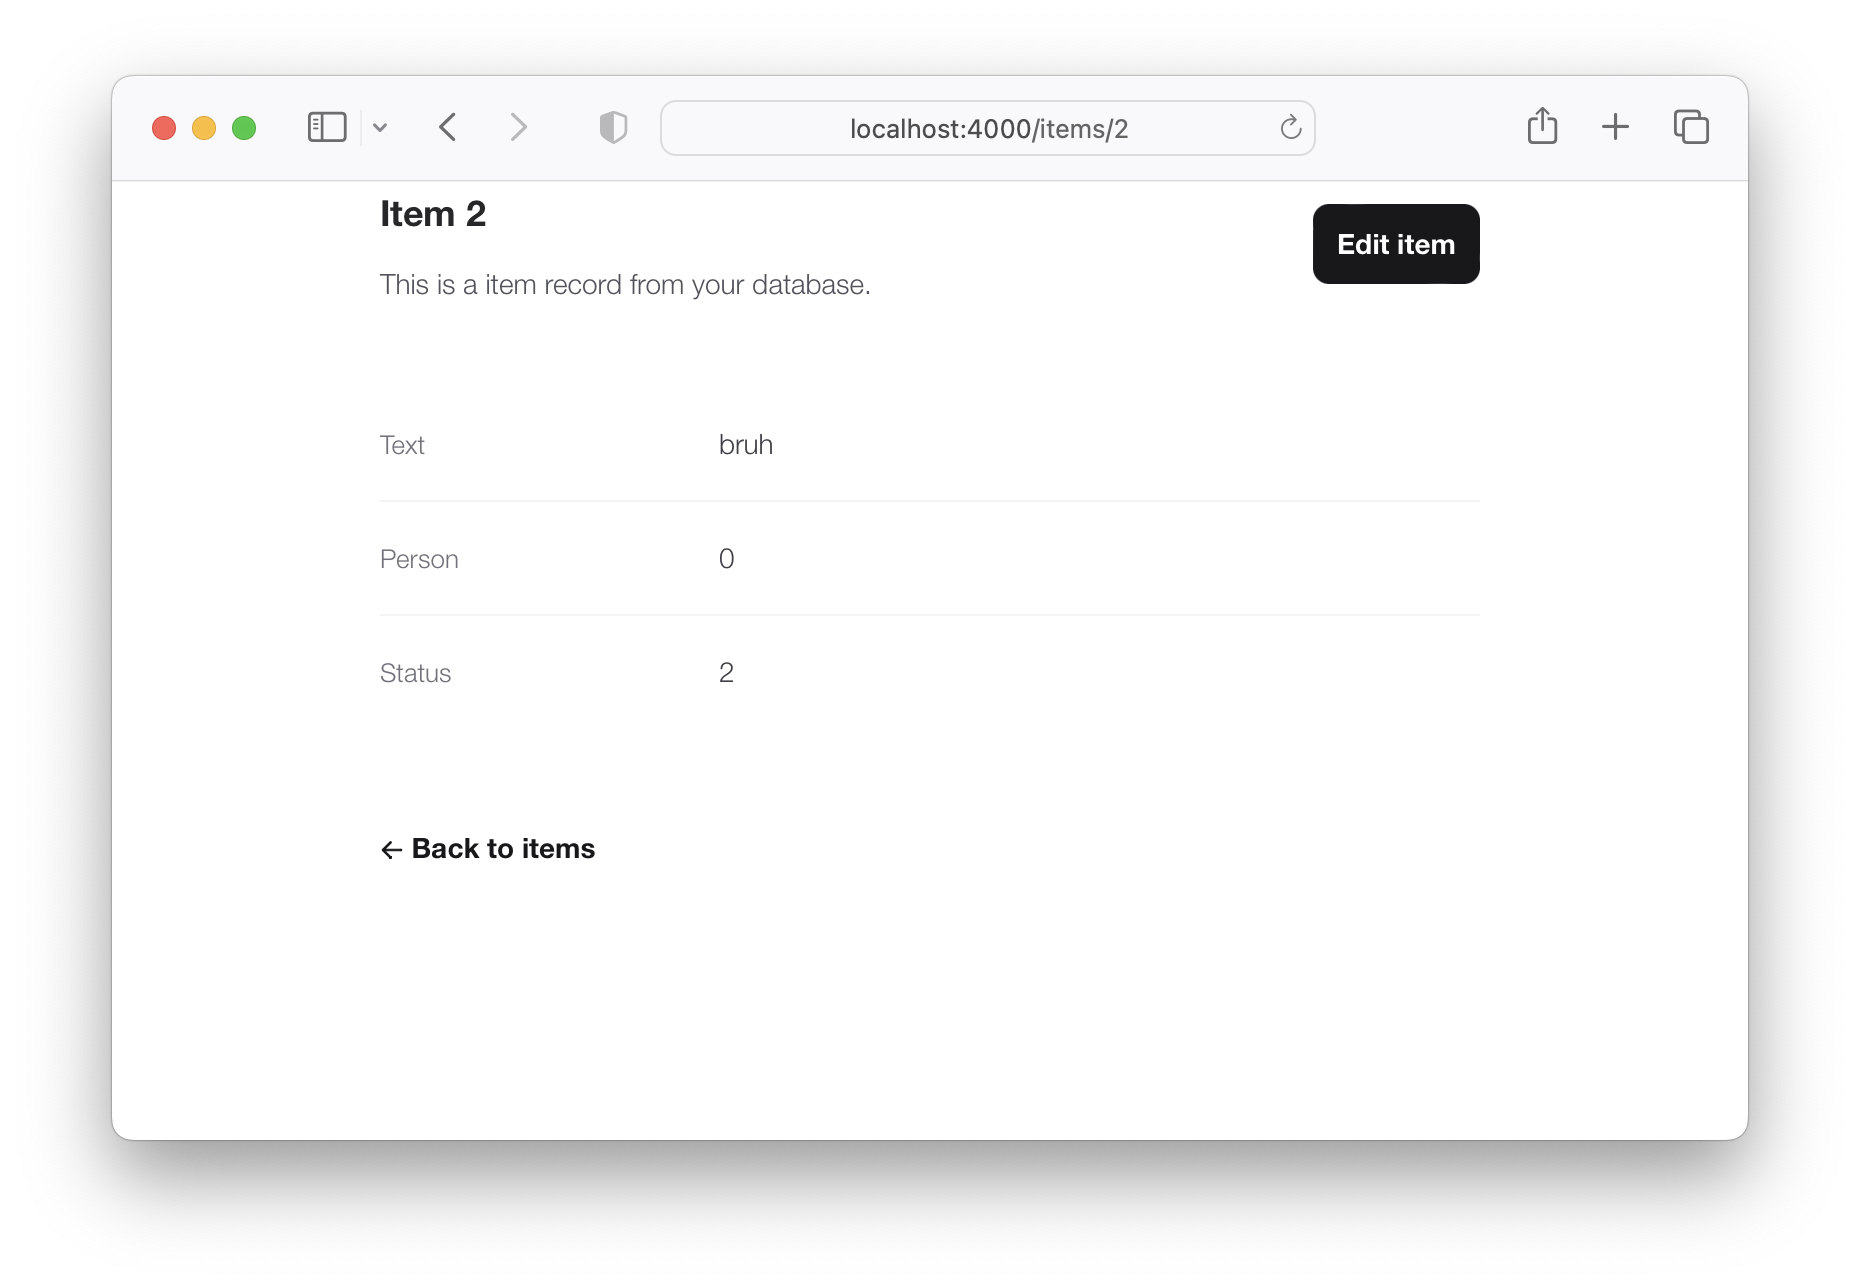
"항목 저장"버튼을 클릭하면 "쇼"페이지로 리디렉션됩니다. http : // localhost : 4000/items/1
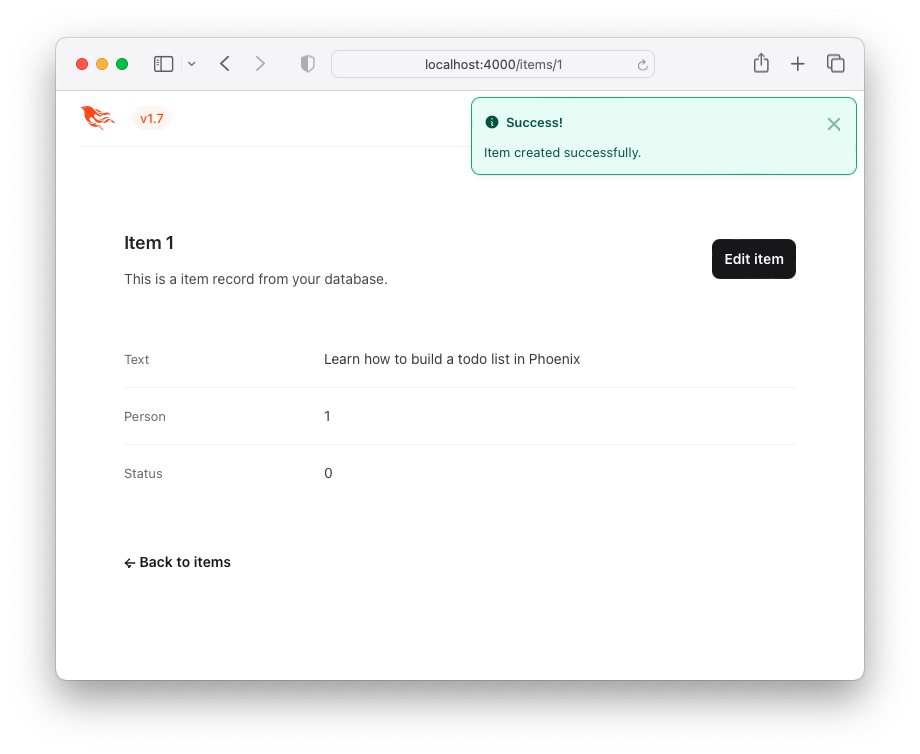
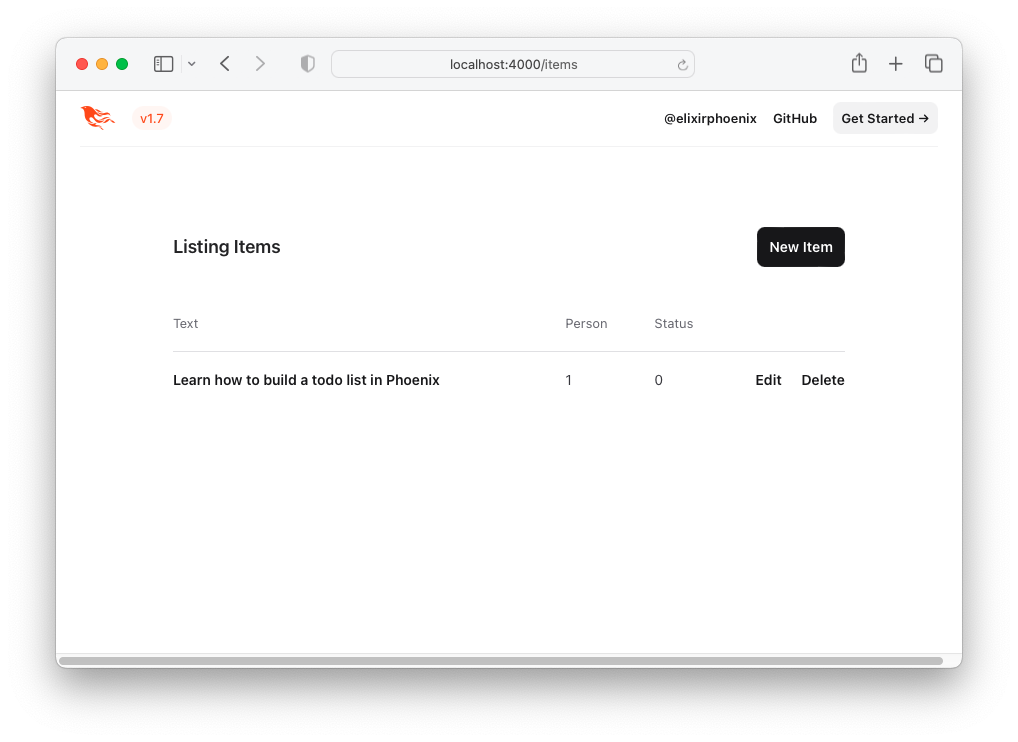
이것은 매력적인 사용자 경험 (UX)은 아니지만 작동합니다 ! 다음은 항목 목록 입니다 - "Todo List". Back to items 버튼을 클릭하거나 다음 URL http : // localhost : 4000/items에 액세스 하여이를 방문 할 수 있습니다.
TODOMVC HTML 및 CSS 사용하여 UX를 개선합시다!
TODOMVC UI/UX를 재현하려면 예제에서 직접 HTML 코드를 빌리 봅시다.
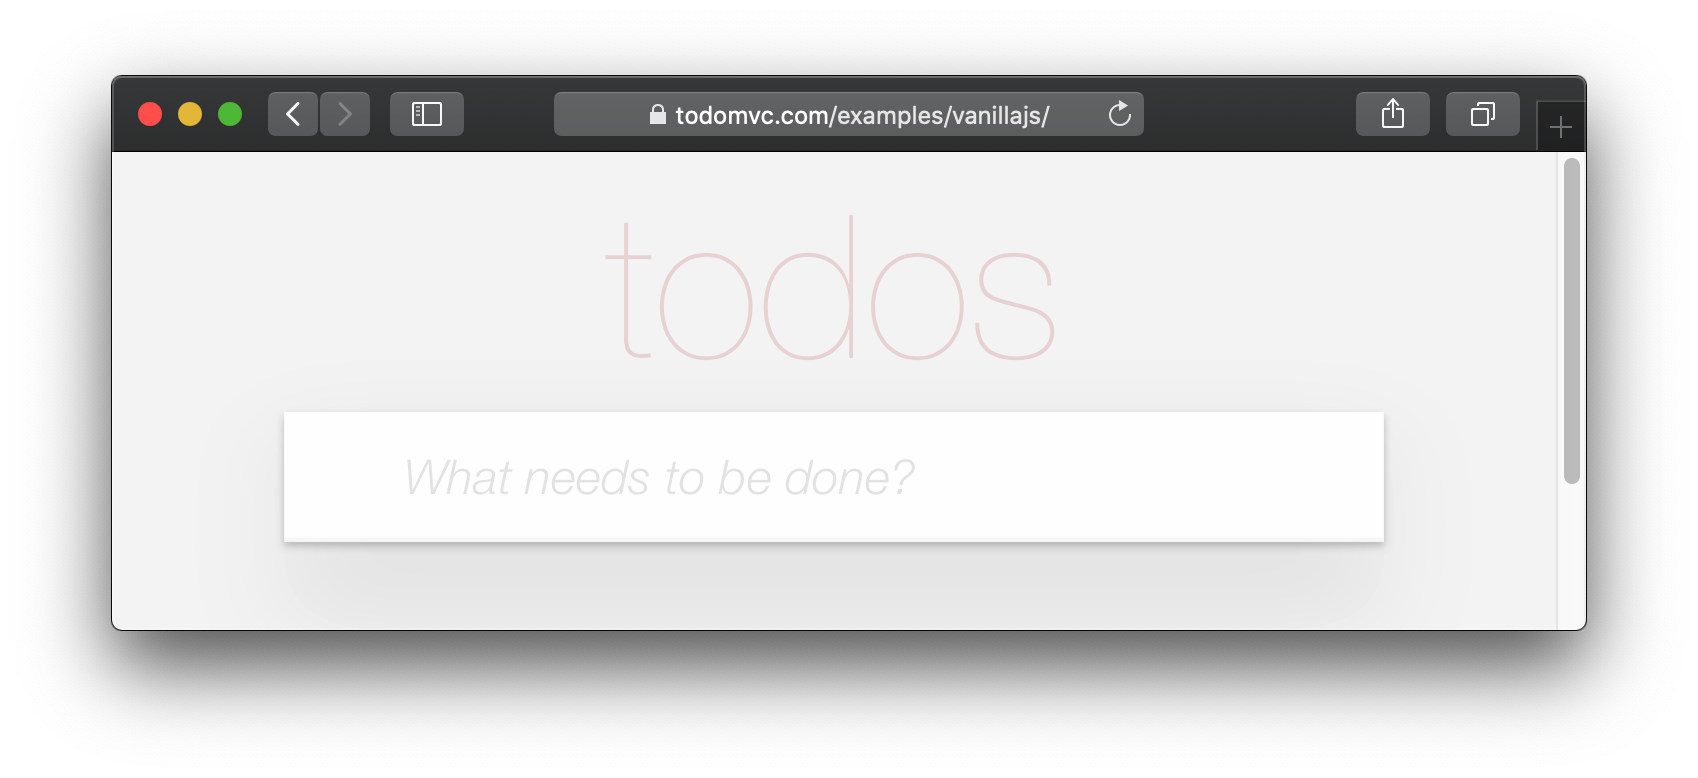
방문 : http://todomvc.com/examples/vanillajs 목록에 몇 가지 항목을 추가하십시오. 그런 다음 브라우저의 개발 도구를 사용하여 소스를 검사하십시오. 예 : :
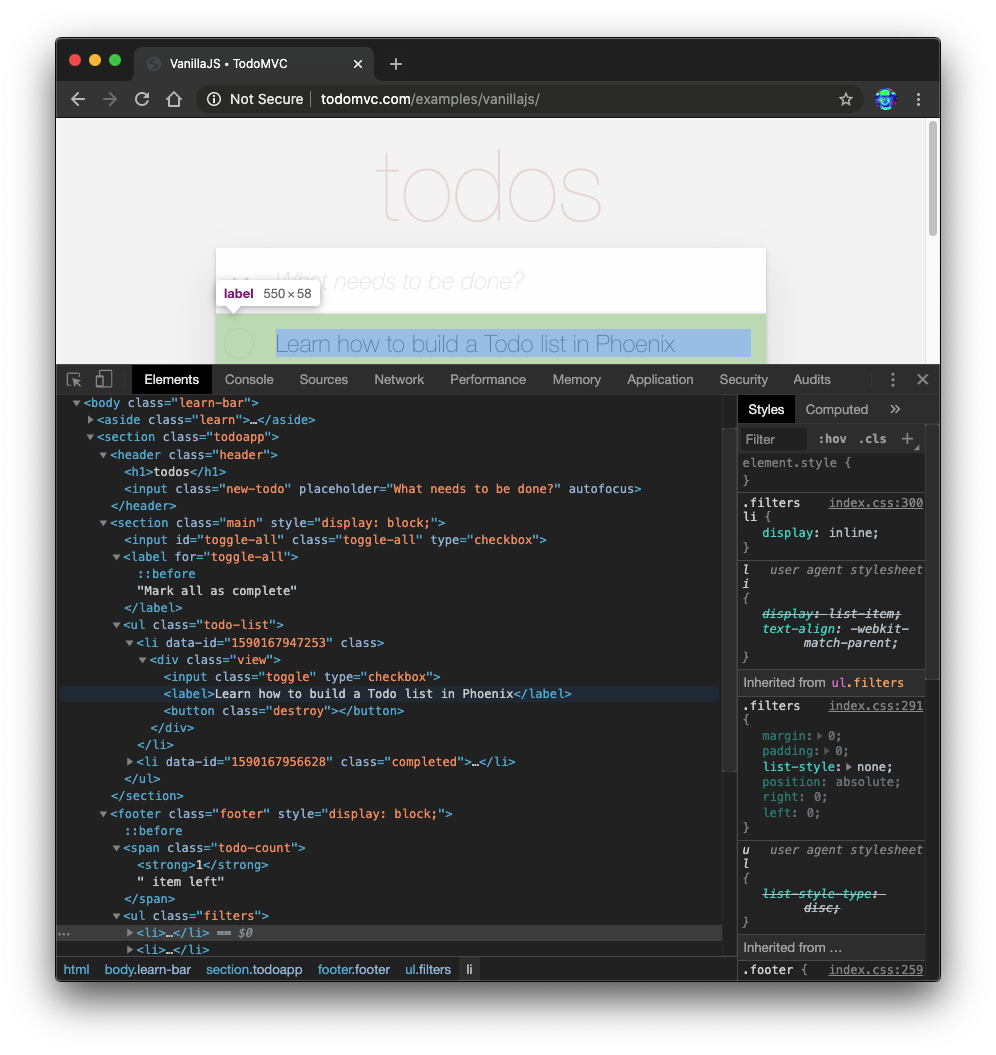
원하는 소스를 마우스 오른쪽 버튼으로 클릭하십시오 (예 : <section class="todoapp"> ) "html로 편집"을 선택하십시오.

<section> 의 HTML 편집 가능하면 선택하고 복사하십시오.
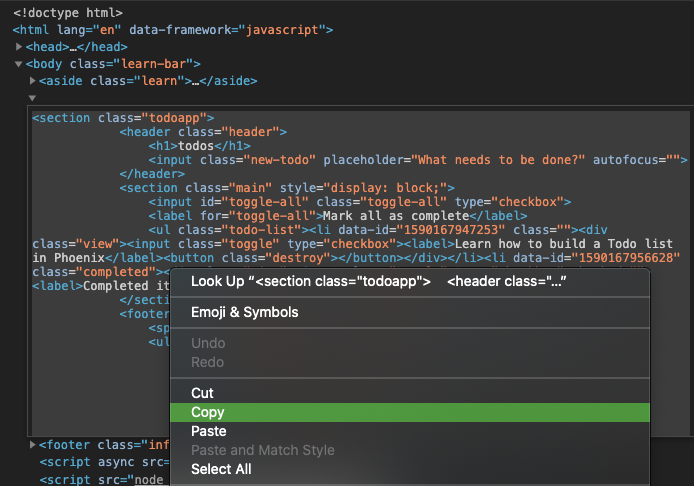
HTML 코드는 다음과 같습니다.
 < section class =" todoapp " >
  < header class =" header " >
    < h1 > todos </ h1 >
    < input class =" new-todo " placeholder =" What needs to be done? " autofocus ="" />
  </ header >
  < section class =" main " style =" display: block; " >
    < input id =" toggle-all " class =" toggle-all " type =" checkbox " />
    < label for =" toggle-all " > Mark all as complete </ label >
    < ul class =" todo-list " >
      < li data-id =" 1590167947253 " class ="" >
        < div class =" view " >
          < input class =" toggle " type =" checkbox " />
          < label > Learn how to build a Todo list in Phoenix </ label >
          < button class =" destroy " > </ button >
        </ div >
      </ li >
      < li data-id =" 1590167956628 " class =" completed " >
        < div class =" view " >
          < input class =" toggle " type =" checkbox " />
          < label > Completed item </ label >
          < button class =" destroy " > </ button >
        </ div >
      </ li >
    </ ul >
  </ section >
  < footer class =" footer " style =" display: block; " >
    < span class =" todo-count " > < strong > 1 </ strong > item left </ span >
    < ul class =" filters " >
      < li >
        < a href =" #/ " class =" selected " > All </ a >
      </ li >
      < li >
        < a href =" #/active " > Active </ a >
      </ li >
      < li >
        < a href =" #/completed " > Completed </ a >
      </ li >
    </ ul >
    < button class =" clear-completed " style =" display: block; " >
      Clear completed
    </ button >
  </ footer >
</ section >
이 HTML EEx (Embedded Elixir) 템플릿으로 변환합시다.
참고 : GitHub의 소스가 아닌 브라우저의 요소 검사관 에서이
HTML복사하는 이유 는examples/vanillajs/index.html이 "단일 페이지 앱"이므로<ul class="todo-list"></ul>브라우저에서만 채워집니다. 브라우저 개발 도구에서 복사하는 것은 완전한HTML얻는 가장 쉬운 방법입니다.
index.html.eex 에 붙여 넣습니다 lib/app_web/controllers/item_html/index.html.eex 파일을 열고 하단으로 스크롤하십시오.
그런 다음 ( 이미 존재하는 코드를 제거하지 않고 ) Todomvc에서 우리가 제공 한 HTML 코드를 붙여 넣습니다.
예 :
/lib/app_web/controllers/item_html/index.html.eex#L27-L73
지금 앱을 실행하고 http : // localhost : 4000/items/를 방문하는 경우/
당신은 이것을 볼 것입니다 ( todomvc CSS 없이 ) :
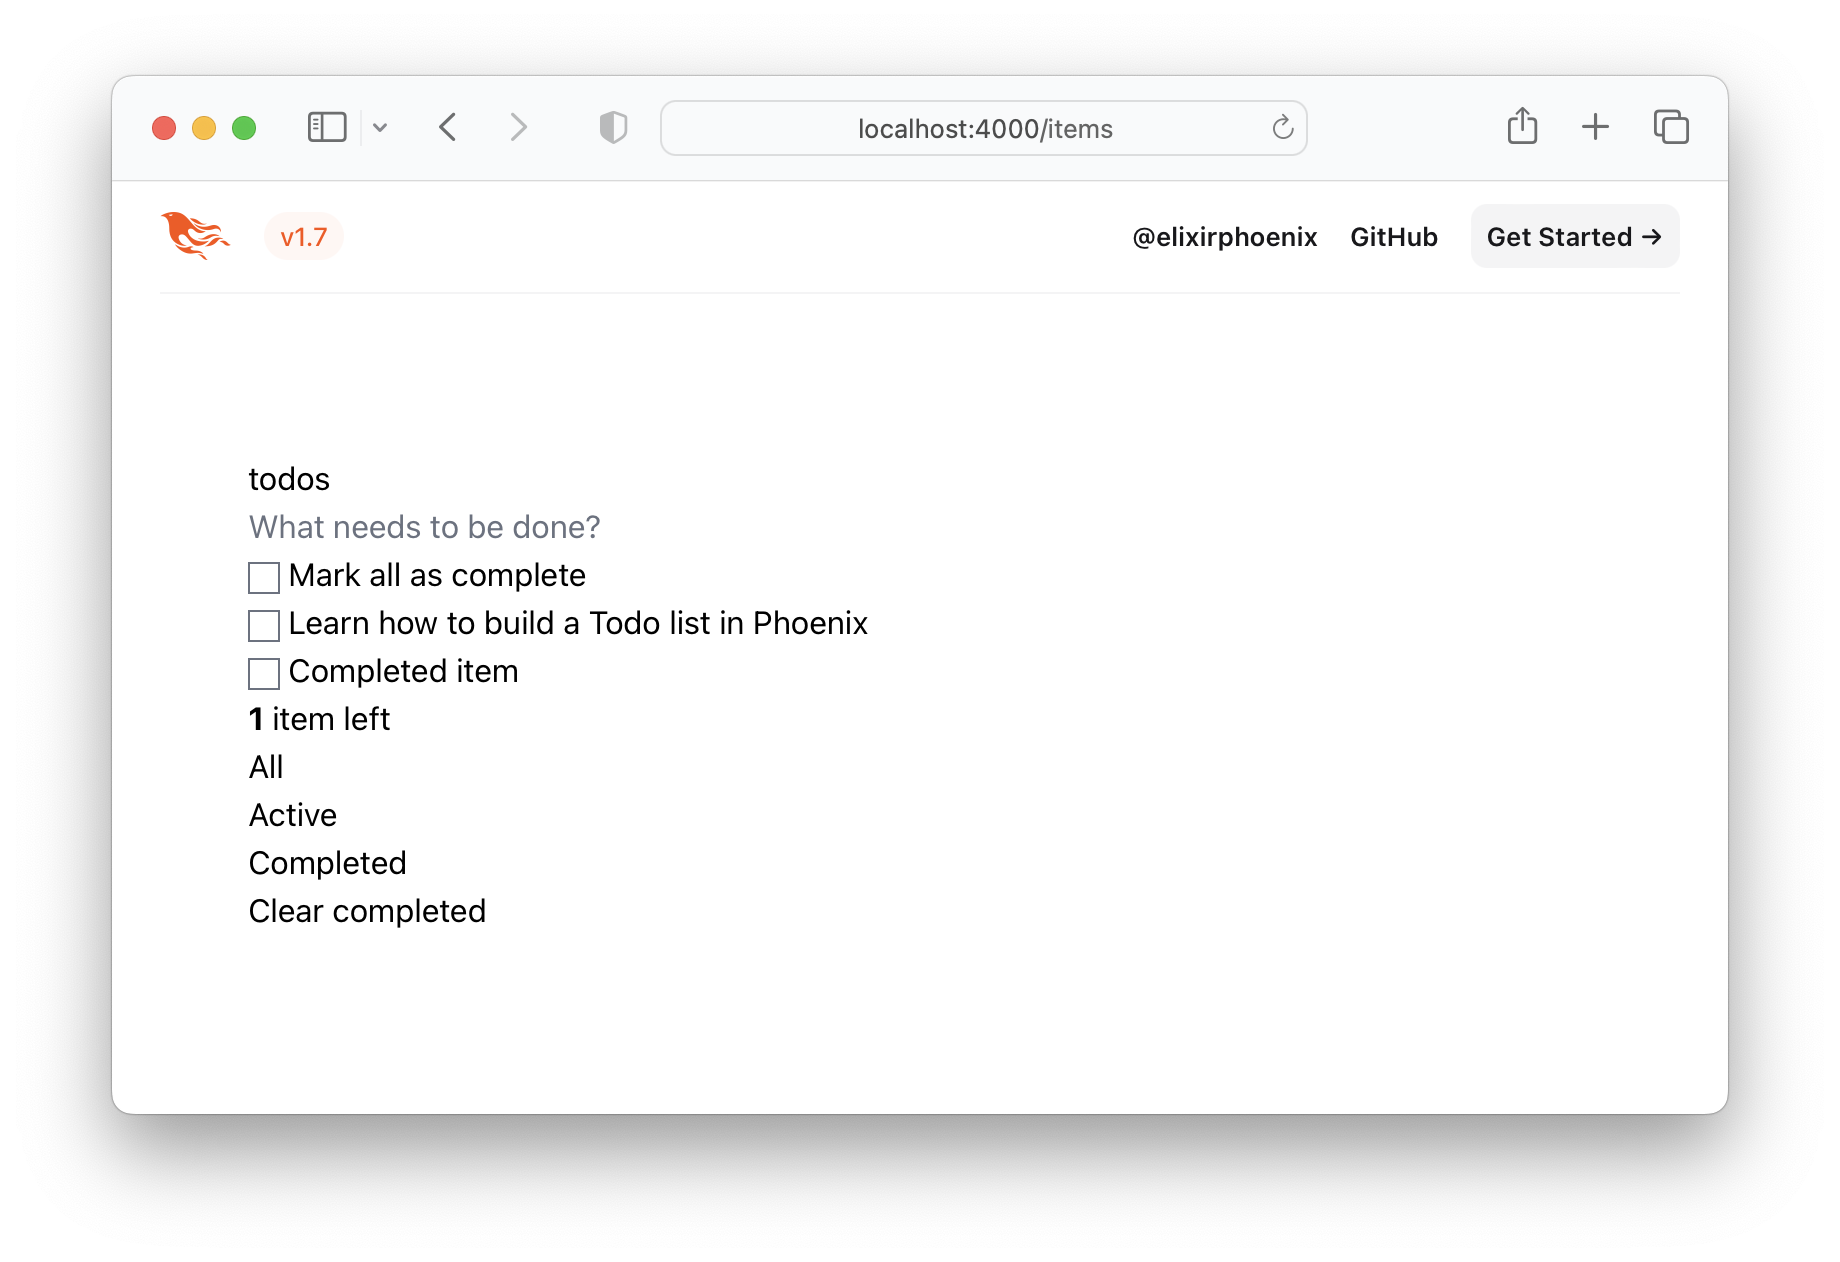
그것은 분명히 우리가 원하는 것이 아니므로 Todomvc CSS 가져 와서 프로젝트에 저장합시다!
/assets/css 에 저장하십시오 http://todomvc.com/examples/vanillajs/node_modules/todomvc-app-css/index.css를 방문하십시오
파일을 /assets/css/todomvc-app.css 에 저장하십시오.
예 : /assets/css/todomvc-app.css
app.scss 에서 todomvc-app.css 가져옵니다 assets/css/app.scss 파일을 열고 다음으로 바꾸십시오.
 /* This file is for your main application css. */
/* @import "./phoenix.css"; */
@import "./todomvc-app.css" ;
예 : /assets/css/app.scss#L4
lib/app_web/components/layouts/app.html.heex 파일을 열고 다음 코드로 내용을 바꾸십시오.
 <!DOCTYPE html >
< html lang =" en " >
  < head >
    < meta charset =" utf-8 " />
    < meta http-equiv =" X-UA-Compatible " content =" IE=edge " />
    < meta name =" viewport " content =" width=device-width, initial-scale=1.0 " />
    < title > Phoenix Todo List </ title >
    < link rel =" stylesheet " href = {~p "/assets/app.css"} />
    < script defer type =" text/javascript " src = {~p "/assets/app.js"} > </ script >
  </ head >
  < body >
    < main role =" main " class =" container " >
      < %= @inner_content % >
    </ main >
  </ body >
</ html >
전 :
lib/app_web/components/layouts/app.html.eex
후 :lib/app_web/components/layouts/app.html.heex
<%= @inner_content %> 는 TODO 앱이 렌더링되는 위치입니다.
참고 :
<script>태그는 컨벤션에서 포함됩니다. 그러나이 튜토리얼에서는 JavaScriptJavaScript작성하지 않을 것입니다. 우리는JS라인을 쓰지 않고 Todomvc로 100% 기능 패리티를 달성 할 것입니다. 우리는JS"증오"하지 않습니다. 실제로JS에서 동일한 앱을 빌드하는 "자매"자습서가 있습니다. Dwyl/JavaScript-Todo-List-Tutorial은 UX가있는 완전히 기능적인 웹 애플리케이션을 구축하기 위해JS가 필요 하지 않다는 것을 상기 시키고 싶습니다!
레이아웃 템플릿이 저장되면 TODOVC CSS 파일이 /assets/css/todomvc-app.css 에 저장되고 app.scss 에서 가져온 todomvc-app.css 에 저장된 /items 페이지는 다음과 같습니다.
따라서 우리의 TODO 목록은 TODOMVC처럼 보이기 시작했지만 여전히 더미 목록 일뿐입니다.
TODOMVC 템플릿에서 item 데이터를 렌더링하려면 몇 가지 기능을 추가해야합니다. 프로젝트를 만들고 item 모델을 생성하면 컨트롤러가 만들어졌습니다 ( lib/app_web/controllers/item_controller.ex 에 위치) 및 구성 요소/보기 ( lib/app_web/controllers/item_html.ex 에 위치). 이 구성 요소/보기는 이전에 땜질 한 lib/app_web/controllers/item_html 디렉토리 내의 내용의 렌더링을 효과적으로 제어하는 것입니다.
우리는 UI를 변경해야한다는 것을 알고 있으므로이 구성 요소에 몇 가지 기능을 추가 할 것입니다 (MVC 패러다임의 시야 와 유사 함).
이것은 약간의 테스트 중심 개발 (TDD)을 수행 할 수있는 첫 번째 기회입니다.
경로 test/app_web/controllers/item_html_test.exs 로 새 파일을 만듭니다.
다음 코드를 파일에 입력하십시오.
 defmodule AppWeb.ItemHTMLTest do
  use AppWeb.ConnCase , async: true
  alias AppWeb.ItemHTML

  test "complete/1 returns completed if item.status == 1" do
    assert ItemHTML . complete ( % { status: 1 } ) == "completed"
  end

  test "complete/1 returns empty string if item.status == 0" do
    assert ItemHTML . complete ( % { status: 0 } ) == ""
  end
end
예 : /test/app_web/controllers/item_html_test.exs
이 테스트 파일을 실행하려는 경우 :
mix test test/app_web/controllers/item_html_test.exs다음 오류가 표시됩니다 (함수가 아직 존재하지 않기 때문에!) :
** (UndefinedFunctionError) function AppWeb.ItemHTML.checked/1 is undefined or private
lib/app_web/controllers/item_html.ex 파일을 열고 테스트를 통과 하기 위해 함수를 작성하십시오.
이것이 우리가 함수를 구현 한 방법입니다. item_html.ex 파일은 이제 다음과 같아야합니다.
 defmodule AppWeb.ItemHTML do
  use AppWeb , :html

  embed_templates "item_html/*"

  # add class "completed" to a list item if item.status=1
  def complete ( item ) do
    case item . status do
      1 -> "completed"
      _ -> "" # empty string means empty class so no style applied
    end
  end
end
테스트를 다시 실행하면 이제 통과해야합니다.
mix test test/app_web/controllers/item_html_test.exs당신은 볼 수 있어야합니다 :
....

Finished in 0.1 seconds
4 tests, 0 failures
이제이 두 뷰 함수를 만들었고 테스트가 통과되었으므로 템플릿에서 사용해 보겠습니다!
lib/app_web/controllers/item_html/index.html.eex 파일을 열고 줄을 찾으십시오.
< ul class =" todo-list " > <ul> 의 내용을 다음으로 바꾸십시오.
 < %= for item < - @items do % >
  < li data-id = {item.id} class = {complete(item)} >
    < div class =" view " >
      < %= if item.status == 1 do % >
        < input class =" toggle " type =" checkbox " checked />
      < % else % >
        < input class =" toggle " type =" checkbox " />
      < % end % >
      < label > < %= item.text % > </ label >
      < .link
        class="destroy"
        href={~p"/items/#{item}"}
        method="delete"
      >
      </ .link >
    </ div >
  </ li >
< % end % >
EG : lib/app_web/controllers/item_html/index.html.heex#L43-L53
이 두 파일을 저장 한 상태에서 지금 앱을 실행하면 mix phx.server http : // localhost : 4000/items를 방문하십시오.
위의 2.2 단계에서 만든 실제 items 볼 수 있습니다.

이제 우리는 TODOMVC 레이아웃에서 항목 렌더링을 얻었으므로 "단일 페이지 앱"스타일로 새로운 항목을 만드는 작업을 수행합시다.
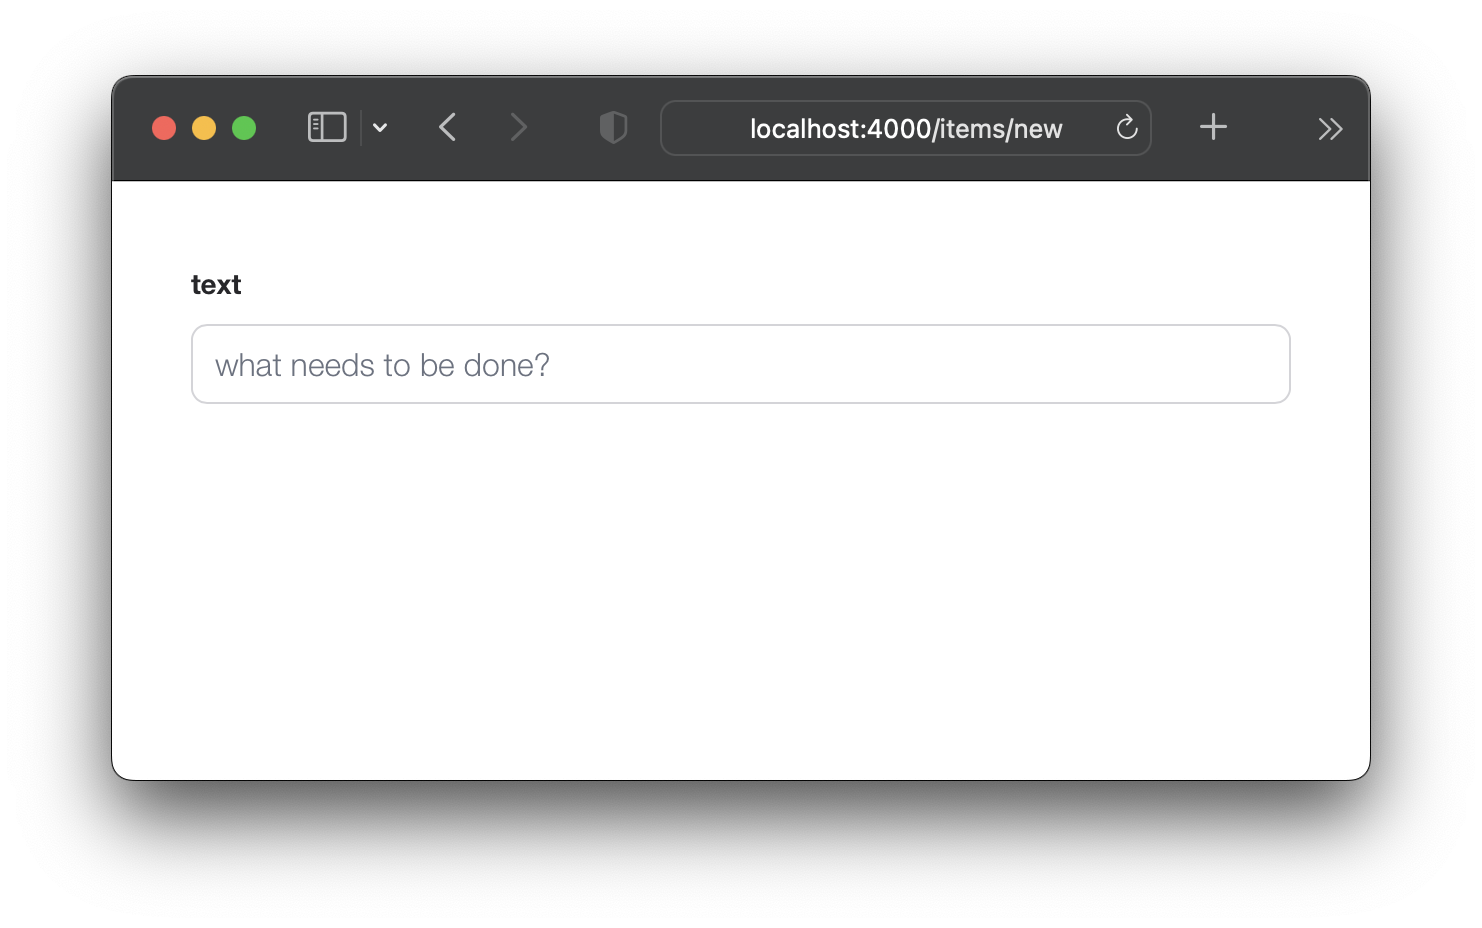
현재 우리의 "새 항목"양식은 다음 과 같습니다.
우리는 그 사람이 다른 페이지로 이동하지 않고도 새 항목을 만들 수 있기를 원합니다. 해당 목표를 달성하기 위해 lib/app_web/controllers/item_html/new.html.heex 템플릿 ( 부분 )을 lib/app_web/controllers/item_html/index.html.heex 템플릿에 포함시킵니다. 예 : :
그렇게하기 전에 필요 하지 않은 필드를 제거하려면 new.html.heex 템플릿을 정리해야합니다.
lib/app_web/controllers/item_html/new.html.heex 열고 필수 필드로 단순화합시다 :text :
 < . simple_form :let = { f } for = { @ changeset } action = { ~p " /items " } >
  < . input
    field = { { f , :text } }
    type = "text"
    placeholder = "what needs to be done?"
  / >
  < :actions >
    < . button style = "display:none" > Save Item< / . button >
  < / :actions >
< / . simple_form >
전 :
/lib/app_web/controllers/item_html/new.html.heex
후 :/lib/app_web/controllers/item_html/new.html.heex
<.input> 태그의 스타일을 추가로 변경해야합니다. Phoenix를 사용하면 lib/app_web/components/core_components.ex 파일 내부에 스타일은 사전 구축 된 구성 요소에 대해 정의됩니다 ( <.input> 의 경우).
이것을 변경하려면 todomvc와 동일한 스타일을 사용하려면 다음 줄을 찾으십시오.
def input ( assigns ) do
new-todo 클래스로 클래스 속성을 변경하십시오. 이 기능은 다음과 같아야합니다.
  def input ( assigns ) do
    ~H """
    <div phx-feedback-for={@name}>
      <.label for={@id}><%= @label %></.label>
      <input
        type={@type}
        name={@name}
        id={@id || @name}
        value={@value}
        class={[
          input_border(@errors),
          "new-todo"
        ]}
        {@rest}
      />
      <.error :for={msg <- @errors}><%= msg %></.error>
    </div>
    """
  end
또한 simple_form 내부의 actions 스타일을 변경해야합니다. 동일한 파일에서 def simple_form(assigns) do .
  def simple_form ( assigns ) do
    ~H """
    <.form :let={f} for={@for} as={@as} {@rest}>
      <div>
        <%= render_slot(@inner_block, f) %>
        <div :for={action <- @actions}>
          <%= render_slot(action, f) %>
        </div>
      </div>
    </.form>
    """
  end
지금 Phoenix 앱을 실행하고 http : // localhost : 4000/items/new를 방문하면 단일 :text 입력 필드 및 "저장"버튼이 표시됩니다.
걱정하지 마십시오. Enter (return) 키를 사용하여 양식을 제출할 수 있습니다. 그러나 지금 양식을 제출하려고하면 changeset 에 필요한 두 필드를 제거했기 때문에 작동하지 않습니다! 그것을 고치겠습니다.
default 을 설정하려면 items 스키마를 업데이트하십시오 new.html.eex 에서 두 개의 필드 ( :person_id and :status )를 제거했다면 스키마에 기본값이 있는지 확인해야합니다. lib/app/todo/item.ex 파일을 열고 내용을 다음으로 바꾸십시오.
 defmodule App.Todo.Item do
  use Ecto.Schema
  import Ecto.Changeset

  schema "items" do
    field :person_id , :integer , default: 0
    field :status , :integer , default: 0
    field :text , :string

    timestamps ( )
  end

  @ doc false
  def changeset ( item , attrs ) do
    item
    |> cast ( attrs , [ :text , :person_id , :status ] )
    |> validate_required ( [ :text ] )
  end
end
여기서는 "항목" schema 업데이트하여 person_id 와 status 모두에 대해 기본값 0 설정합니다. 그리고 changeset/2 에서 우리는 person_id 와 status 대한 요구 사항을 제거하고 있습니다. 이렇게하면 새 item 양식을 텍스트 필드 text 제출할 수 있습니다.
예 : /lib/app/todo/item.ex#L6-L7
이제 우리는 person_id 에 대한 default status 가지고 있으므로 /items/new 양식을 제출하면 성공할 것입니다.
ItemController 의 업데이트 index/2 index.html.eex 템플릿에서 새 항목 양식 ( new.html.eex )을 인라인으로 표시하려면 변경 사항을 포함하려면 AppWeb.ItemController.index/2 를 업데이트해야합니다.
lib/app_web/controllers/item_controller.ex 파일을 열고 다음과 같은 index/2 함수를 업데이트하십시오.
 def index ( conn , _params ) do
  items = Todo . list_items ( )
  changeset = Todo . change_item ( % Item { } )
  render ( conn , "index.html" , items: items , changeset: changeset )
end
전 : /lib/app_web/controllers/item_controller.ex
후 : /lib/app_web/controllers/item_controller.ex#L9-L10
이 단계 후에 UI 또는 테스트의 변경 사항이 표시 되지 않습니다. "아하"순간이 발생하는 5.3으로 이동하십시오.
index.html.eex 내부에 new.html.eex 렌더링합니다 이제 우리는 모든 준비 작업을 수행 했으므로 다음 단계는 index.html.eex 템플릿 내부에서 new.html.eex ( 부분 )를 렌더링하는 것입니다.
lib/app_web/controllers/item_html/index.html.heex 파일을 열고 줄을 찾으십시오.
< input class =" new-todo " placeholder =" What needs to be done? " autofocus ="" >이것으로 바꾸십시오 :
< % = new ( Map . put ( assigns , :action , ~p " /items/new " ) ) % > 우리가 방금 한 일을 분해합시다. index.html.heex 파일 내부에 new.html.heex 부분을 포함하고 있습니다. 우리는 item_controller.ex 내부의 new/2 함수를 호출 하여이 작업을 수행하고 있습니다. 이 기능은 URL items/new 의 페이지와 관련이 있으며 new.html.heex 파일을 렌더링합니다. 따라서 왜 우리는이 기능을 성공적으로 포함시키기 위해이 기능을 부릅니다.
전 : /lib/app_web/controllers/item_html/index.html.heex#L36
후 : /lib/app_web/controllers/item_html/index.html.heex#L36
지금 앱을 실행하고 방문하면 http : // localhost : 4000/items
텍스트를 입력하여 항목을 만들어 Enter (return) 키로 제출할 수 있습니다.
"show"템플릿으로 리디렉션하는 것은 "OK"이지만 index.html 템플릿으로 되돌아서 리디렉션하여 더 나은 UX를 수행 할 수 있습니다. 고맙게도 이것은 코드에서 한 줄을 업데이트하는 것만 큼 쉽습니다.
create/2 에서 redirect 업데이트하십시오 lib/app_web/controllers/item_controller.ex create 을 엽니 다. 특히 라인 :
|> redirect ( to: ~p " /items/ #{ item } " )라인을 다음으로 업데이트합니다.
|> redirect ( to: ~p " /items/ " ) 전 : /lib/app_web/controllers/item_controller.ex#L22
후 : /lib/app_web/controllers/item_controller.ex#L23
이제 새 item 만들 때 index.html 템플릿으로 리디렉션됩니다.

item_controller_test.exs index 로 리디렉션합니다 우리가 new.html.heex 파일에 대한 변경 사항과 위의 단계는 자동화 된 테스트 중 일부를 위반했습니다. 우리는 그것을 고쳐야합니다.
테스트 실행 :
mix test다음 출력이 표시됩니다.
 Finished in 0.08 seconds (0.03s async, 0.05s sync)
23 tests, 3 failures
test/app_web/controllers/item_controller_test.exs 파일을 열고 describe "new item" 하고 describe "create item" . 이 두 가지를 다음으로 변경하십시오.
테스트 교체 :
 describe "new item" do
  test "renders form" , % { conn: conn } do
    conn = get ( conn , ~p " /items/new " )
    assert html_response ( conn , 200 ) =~ "what needs to be done?"
  end
end

describe "create item" do
  test "redirects to show when data is valid" , % { conn: conn } do
    conn = post ( conn , ~p " /items " , item: @ create_attrs )

    assert % { } = redirected_params ( conn )
    assert redirected_to ( conn ) == ~p " /items/ "
  end

  test "errors when invalid attributes are passed" , % { conn: conn } do
    conn = post ( conn , ~p " /items " , item: @ invalid_attrs )
    assert html_response ( conn , 200 ) =~ "can't be blank"
  end
end
업데이트 된 코드 :
/test/app_web/controllers/item_controller_test.exs#L34-L55
테스트 mix test 다시 실행하면 이제 다시 통과됩니다.
......................
Finished in 0.2 seconds (0.09s async, 0.1s sync)
22 tests, 0 failures지금까지 TODOMVC UI의 주요 기능이 작동하고 있으며 새 항목을 만들 수 있으며 목록에 나타납니다. 이 단계에서는 왼쪽 하단에 남아있는 항목 수를 포함하도록 UI를 향상시킬 것입니다.
test/app_web/controllers/item_html_test.exs 파일을 열고 다음 두 가지 테스트를 만듭니다.
 test "remaining_items/1 returns count of items where item.status==0" do
  items = [
    % { text: "one" , status: 0 } ,
    % { text: "two" , status: 0 } ,
    % { text: "done" , status: 1 }
  ]
  assert ItemHTML . remaining_items ( items ) == 2
end

test "remaining_items/1 returns 0 (zero) when no items are status==0" do
  items = [ ]
  assert ItemHTML . remaining_items ( items ) == 0
end
EG : test/app_web/controllers/item_html_test.exs#L14-L26
ItemHTML.remaining_items/1 함수가 존재하지 않기 때문에 이러한 테스트는 실패합니다.
lib/app_web/controllers/item_html.ex 파일에 다음 코드를 추가하여 테스트를 통과 하십시오.
 # returns integer value of items where item.status == 0 (not "done")
def remaining_items ( items ) do
  Enum . filter ( items , fn i -> i . status == 0 end ) |> Enum . count
end
예 : /lib/app_web/controllers/item_html#L15-L17
테스트가 전달되었으므로 index.html 템플릿에서 remaining_items/1 사용하십시오 . lib/app_web/controllers/item_html/index.html.eex 파일을 열고 코드 줄을 찾으십시오.
< span class =" todo-count " > < strong > 1 </ strong > item left </ span >이 줄로 바꾸십시오.
< span class =" todo-count " > < %= remaining_items(@items) % > items left </ span > 이것은 단지 @items 목록을 사용하여 ItemHTML.remaining_items/1 함수를 호출하여 아직 "완료되지 않은"남은 항목의 정수 수를 반환합니다.
예 : /lib/app_web/controllers/item_html/index.html.eex#L60
이 시점에서 TODOMVC UI의 왼쪽 하단에있는 (나머지) 항목 카운터가 작동합니다 !
목록에 new 항목을 추가하고 카운트 증가를보십시오.
그것은 충분히 쉬웠습니다. 좀 더 발전한 것을 시도해 봅시다!
휴식을 취하고 신선한 물 한 잔을 마시십시오. 다음 섹션은 강렬 해집니다!
status 1 로 전환합니다 TODO 목록의 핵심 기능 중 하나는 item 의 status 0 에서 1 까지 토글하는 것입니다 ( "완료").
우리 스키마에서 완성 된 item 의 status 는 1 .
컨트롤러에는 두 가지 기능이 필요합니다.
toggle_status/1 항목의 상태를 전환합니다. 예를 들어 : 0 ~ 1 및 1 ~ 0.toggle/2 HTTP 요청에 대한 핸들러 기능은 항목의 상태를 전환하도록합니다. test/app_web/controllers/item_controller_test.exs 파일을 엽니 다. 이전에 언급 한 기능에 테스트를 추가 할 수 있도록 여기서 몇 가지 변경을 할 것입니다. 우리는 item_controller_test.exs 내부의 App.Todo 가져오고 Mock 항목을 만들기 위해 Create and Attribution 상수를 수정하려고합니다. 파일의 시작이 그렇게 보이는지 확인하십시오.
 defmodule AppWeb.ItemControllerTest do
  use AppWeb.ConnCase
  alias App.Todo

  import App.TodoFixtures

  @ create_attrs % { person_id: 42 , status: 0 , text: "some text" }
  @ public_create_attrs % { person_id: 0 , status: 0 , text: "some public text" }
  @ completed_attrs % { person_id: 42 , status: 1 , text: "some text completed" }
  @ public_completed_attrs % { person_id: 0 , status: 1 , text: "some public text completed" }
  @ update_attrs % { person_id: 43 , status: 1 , text: "some updated text" }
  @ invalid_attrs % { person_id: nil , status: nil , text: nil }
우리는 나중에 테스트에 사용하기 위해 고정 Item 속성을 추가하고 있습니다. 우리는 나중에이 앱에 인증을 추가하기 때문에 public Item 을 지정하고 있습니다.
그런 다음 동일한 파일 내에서 defp create_item()/1 함수를 찾으십시오. 그렇게 보이도록 변경하십시오.
  defp create_item ( _ ) do
    item = item_fixture ( @ create_attrs )
    % { item: item }
  end
우리는이 기능을 사용하여 추가 할 테스트에서 사용할 Item 객체를 만들 것입니다. 말하자면, 그렇게합시다! 다음 스 니펫을 파일에 추가하십시오.
 describe "toggle updates the status of an item 0 > 1 | 1 > 0" do
  setup [ :create_item ]

  test "toggle_status/1 item.status 1 > 0" , % { item: item } do
    assert item . status == 0
    # first toggle
    toggled_item = % { item | status: AppWeb.ItemController . toggle_status ( item ) }
    assert toggled_item . status == 1
    # second toggle sets status back to 0
    assert AppWeb.ItemController . toggle_status ( toggled_item ) == 0
  end

  test "toggle/2 updates an item.status 0 > 1" , % { conn: conn , item: item } do
    assert item . status == 0
    get ( conn , ~p ' /items/toggle/ #{ item . id } ' )
    toggled_item = Todo . get_item! ( item . id )
    assert toggled_item . status == 1
  end
end
예 : /test/app_web/controllers/item_controller_test.exs#L64-L82
lib/app_web/controllers/item_controller.ex 파일을 열고 다음 기능을 추가하십시오.
  def toggle_status ( item ) do
    case item . status do
      1 -> 0
      0 -> 1
    end
  end

  def toggle ( conn , % { "id" => id } ) do
    item = Todo . get_item! ( id )
    Todo . update_item ( item , % { status: toggle_status ( item ) } )
    conn
    |> redirect ( to: ~p " /items " )
  end
예 : /lib/app_web/controllers/item_controller.ex#L64-L76
테스트에서 호출하는 경로가 아직 존재하지 않기 때문에이 시점에서 테스트는 여전히 실패합니다 . 고칠 봅시다!
toggle/2 호출하는 get /items/toggle/:id 경로를 만듭니다 lib/app_web/router.ex 열고 라인 resources "/items", ItemController 찾으십시오. 새 라인 추가 :
get "/items/toggle/:id" , ItemController , :toggle 예 : /lib/app_web/router.ex#L21
이제 우리의 테스트가 마침내 통과 될 것입니다.
mix test당신은 볼 수 있어야합니다 :
22:39:42.231 [info]  Already up
...........................

Finished in 0.5 seconds
27 tests, 0 failuresindex.html 에서 클릭하면 toggle/2 호출합니다. 우리의 테스트가 통과되었으므로 이제 우리가 UI에서 구축 한이 모든 기능을 실제로 사용하는 시간입니다. /lib/app_web/controllers/item_html/index.html.heex 파일을 열고 줄을 찾으십시오.
 < %= if item.status == 1 do % >
...
< % else % >
...
< % end % >
다음으로 바꾸십시오.
  < %= if item.status == 1 do % >
    < .link href={~p"/items/toggle/#{item.id}"}
        class="toggle checked" >
        type="checkbox"
    </ .link >
  < % else % >
    < .link href={~p"/items/toggle/#{item.id}"}
        type="checkbox"
        class="toggle" >
    </ .link >
  < % end % >
이 링크가 클릭되면 get /items/toggle/:id endpoint가 호출됩니다.
그로 인해 위에서 정의한 toggle/2 핸들러가 트리거됩니다.
전 :
/lib/app_web/controllers/item_html/index.html.heex#L40
후 :/lib/app_web/controllers/item_html/index.html.heex#L47-L57
app.scss 에 .checked css를 추가하십시오 불행히도, <a> 태그 ( <.link> 로 생성)는 a :checked pseudo selector를 가질 수 없으므로 <input> 태그에서 작동하는 기본 todomvc 스타일은 링크에 작동하지 않습니다. 따라서 app.scss 에 몇 줄의 CSS 라인을 추가해야합니다.
assets/css/app.scss 파일을 열고 다음 줄을 추가하십시오.
. todo-list li . checked + label {
	background-image : url ( 'data:image/svg+xml;utf8,%3Csvg%20xmlns%3D%22http%3A//www.w3.org/2000/svg%22%20width%3D%2240%22%20height%3D%2240%22%20viewBox%3D%22-10%20-18%20100%20135%22%3E%3Ccircle%20cx%3D%2250%22%20cy%3D%2250%22%20r%3D%2250%22%20fill%3D%22none%22%20stroke%3D%22%23bddad5%22%20stroke-width%3D%223%22/%3E%3Cpath%20fill%3D%22%235dc2af%22%20d%3D%22M72%2025L42%2071%2027%2056l-4%204%2020%2020%2034-52z%22/%3E%3C/svg%3E' );
	background-repeat : no-repeat;
}
파일을 저장 한 후 : /assets/css/app.scss#L8 있어야합니다
앱을 볼 때 토글 기능이 예상대로 작동합니다.

구현 참고 : 100% 서버 측 렌더링 앱을 수행하는 방법을 보여주기 때문에이 튜토리얼에서 JavaScript 매우 고의적으로 사용 하지 않습니다 . 브라우저에서 JS 비활성화되거나 장치가 매우 오래된 경우에도 항상 작동하며 최신 웹 브라우저가 없습니다. <input> 태그에 onclick 속성을 쉽게 추가 할 수 있습니다.
 < input < %= checked(item) % > type="checkbox" class="toggle"
onclick="location.href='
  < %= Routes.item_path(@conn, :toggle, item.id) % > ';" >
그러나 onclick 은 JavaScript 이며 JS 에 의지 할 필요가 없습니다.
<a> (링크)는 item.status 토글하는 완벽하게 시맨틱 비 JS 접근법입니다.
todo 항목의 순서 유지 "완료"하거나 작업을 되돌리면 Todos의 순서가 이러한 작업마다 다를 수 있습니다. 이 일관성을 유지하려면 모든 todo 항목을 동일한 순서로 가져 오겠습니다.
lib/app/todo.ex 내부에서 list_items/0 다음으로 변경하십시오.
  def list_items do
    query =
      from (
        i in Item ,
        select: i ,
        order_by: [ asc: i . id ]
      )

    Repo . all ( query )
  end
todo 항목을 가져와 주문함으로써 UX Stay가 일관성을 유지하도록 보장합니다!
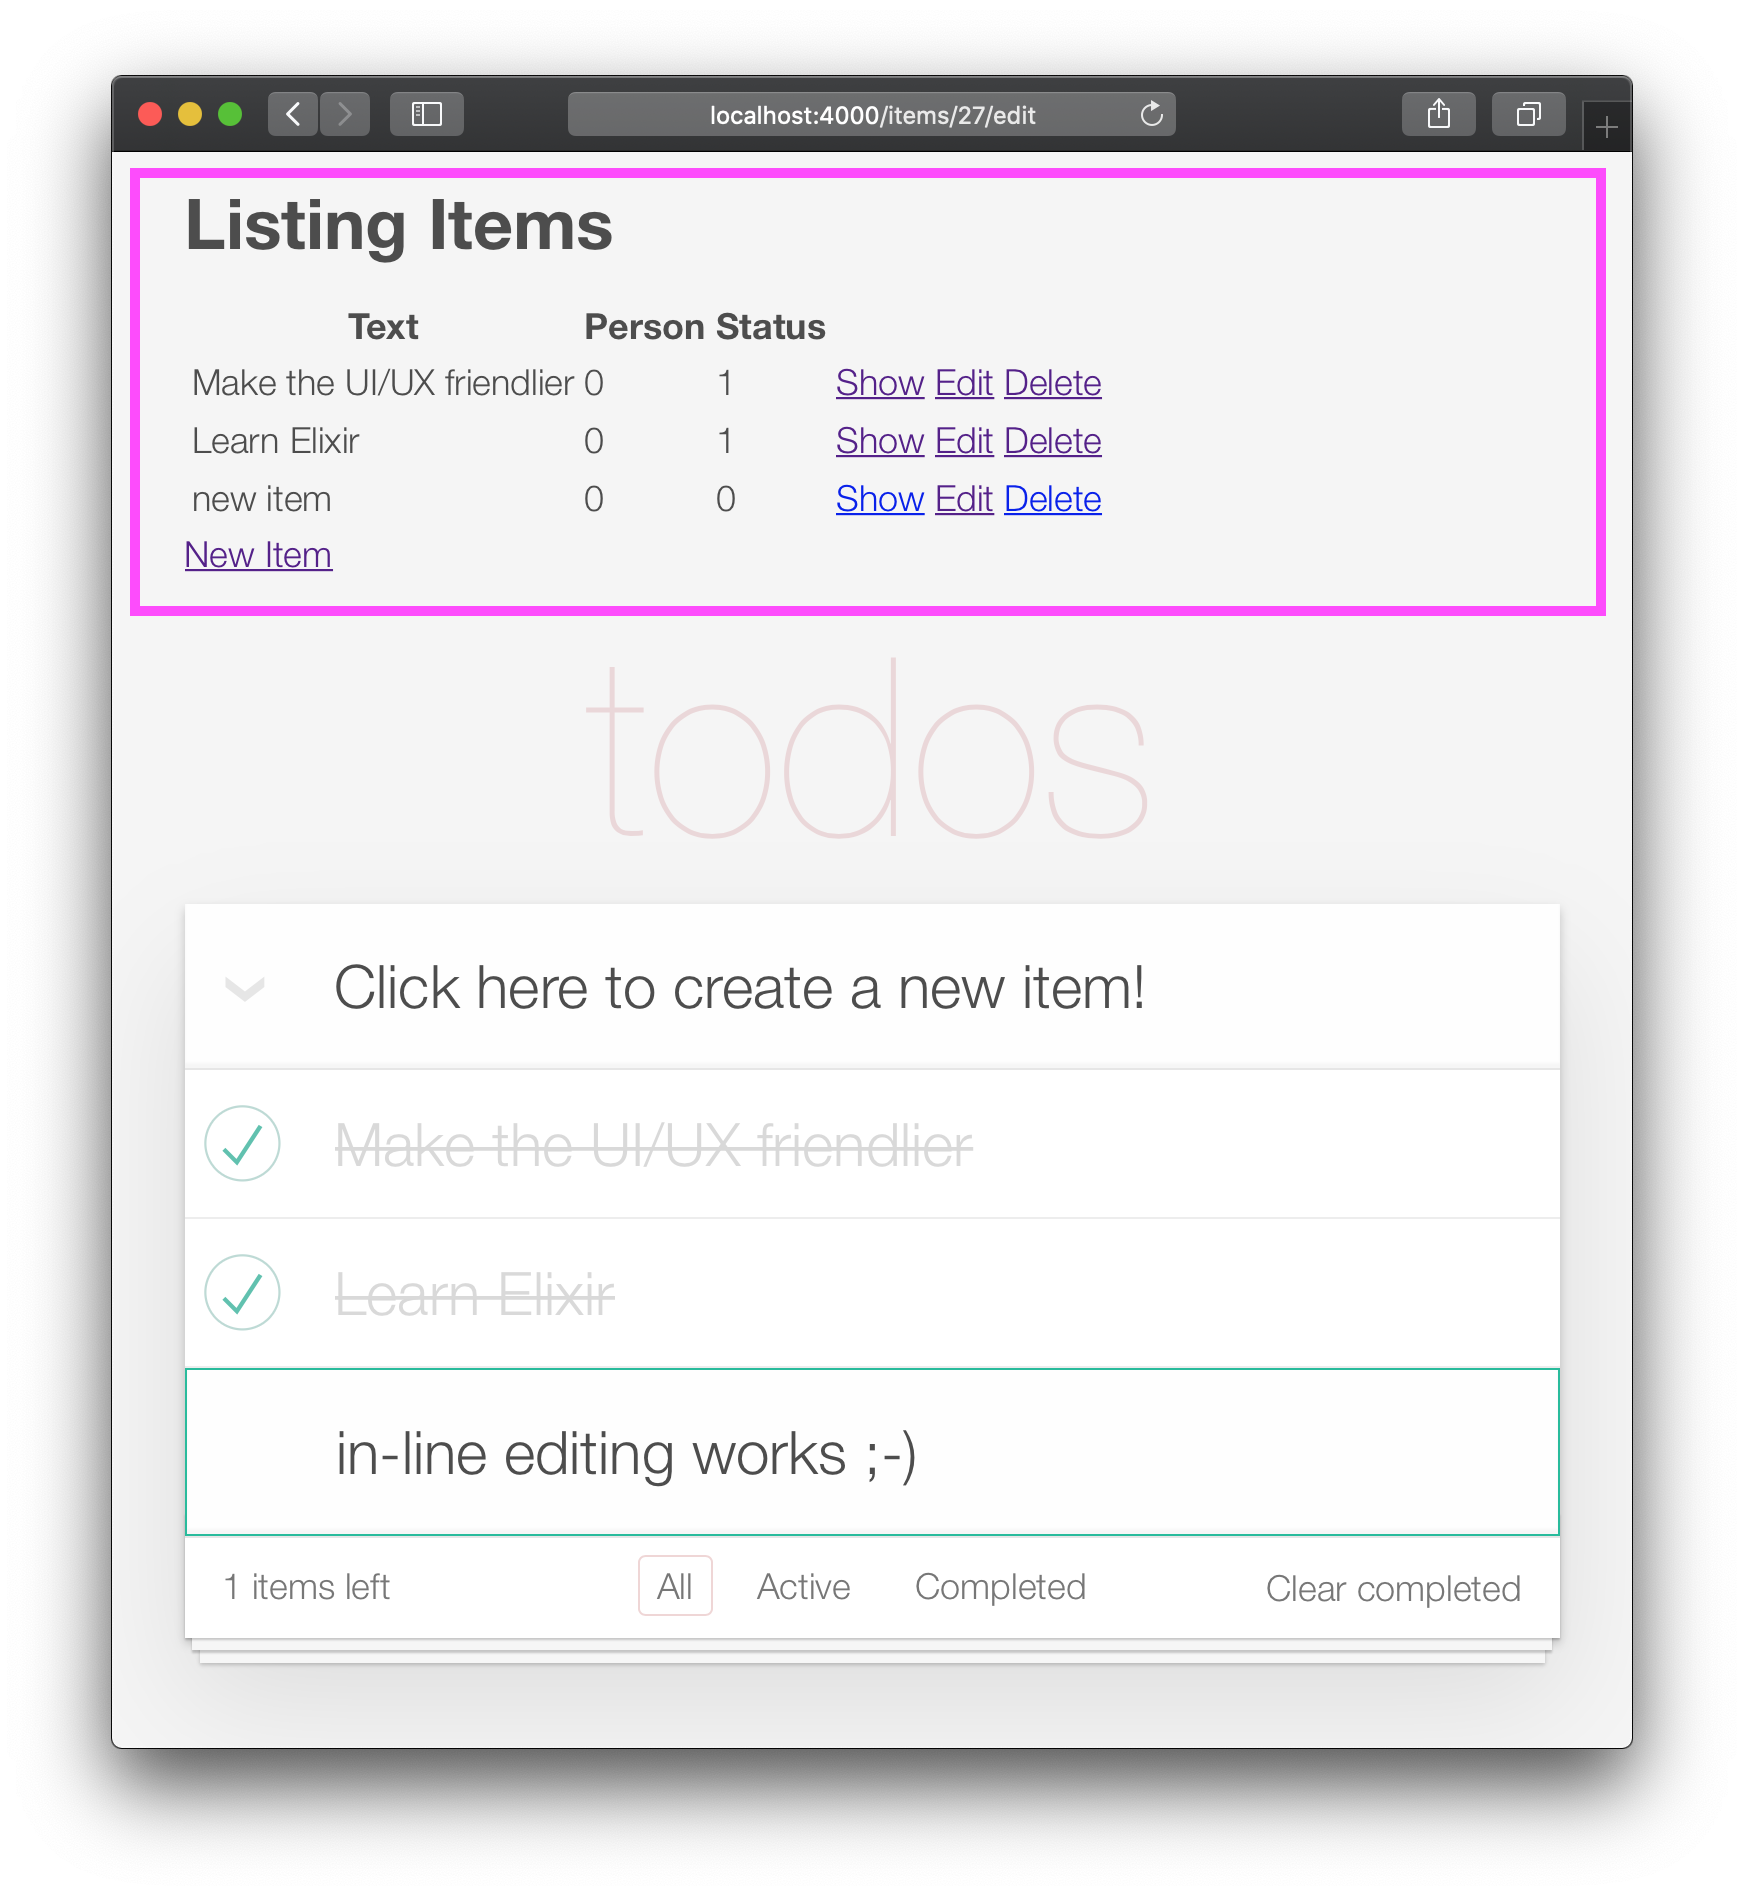
UI에 추가 해야하는 마지막 기능은 항목의 텍스트를 편집하는 기능입니다.
이 단계가 끝나면 인라인 편집 작업이 있습니다.

항목을 편집하기 위해 두 번의 클릭이 필요한 이유는 사람들이 스크롤하는 동안 실수로 항목을 편집하지 않기 때문입니다. 따라서 편집하려면 의도적으로 두 번 클릭/탭해야합니다.
TODOMVC 사양에서는 이중 클릭 이벤트를위한 이벤트 리스너를 만들고 <label> 요소를 <input> 로 바꾸면 달성됩니다. 우리는 서버 측 Phoenix 앱 ( 현재 )에서 JavaScript 사용 하지 않으려 고 노력하고 있으므로 대체 접근 방식을 사용하고자합니다. 고맙게도 HTML 및 CSS 만 사용하여 더블 클릭 이벤트를 시뮬레이션 할 수 있습니다. 참조 : https://css-tricks.com/double-click-in-css ( 이 CSS의 작동 방식을 완전히 이해하려면 해당 게시물과 데모를 읽는 것이 좋습니다 !)
참고 : CSS 구현은 진정한 두 번 클릭이 아니며, 더 정확한 설명은 "2 번의 클릭"입니다. 두 번의 클릭이 임의의 지연으로 발생할 수 있기 때문입니다. 즉, 첫 번째 클릭 후 10 초 대기 및 두 번째 클릭은 빠른 연속으로 두 번의 클릭과 동일한 영향을 미칩니다. True Double Click을 구현하려면 github.com/dwyl/javaScript-todo-list-tutorial#52-double-click을 참조하십시오
그것으로 가자! lib/app_web/controllers/item_html/index.html.heex 파일을 열고 줄을 찾으십시오.
< % = new ( Map . put ( assigns , :action , ~p " /items/new " ) ) % >대체 : :
 < % = if @ editing . id do % >
  <. link href = { ~p " /items " }
      method = "get"
      class= "new-todo" >
      Click here to create a new item!
  < / . link >
< % else % >
  < % = new ( Map . put ( assigns , :action , ~p " /items/new " ) ) % >
< % end % >
여기에서 우리는 항목을 편집하고 있는지 확인하고 양식 대신 링크를 렌더링하고 있습니다. 우리는 페이지에 여러 형식이없는 것을 피하기 위해이 작업을 수행합니다. 항목을 편집 하지 않으면 이전과 같이 new.html.heex 를 렌더링하십시오. 이를 통해 사용자가 항목을 편집하는 경우 렌더링 된 링크를 클릭하여 "편집 모드에서 벗어날 수 있습니다".
EG : lib/app_web/controllers/item_html/index.html.heex#L30-L38
다음으로, 여전히 index.html.eex 파일에서 줄을 찾으십시오.
< %= for item < - @items do % > 전체 <li> 태그를 다음 코드로 바꾸십시오.
 < li data - id = { item . id } class= { complete ( item ) } >
    < % = if item . status == 1 do % >
      <. link href = { ~p " /items/toggle/ #{ item . id } " }
          class= "toggle checked" >
          type = "checkbox"
      < / . link >
    < % else % >
      < . link href = { ~p " /items/toggle/ #{ item . id } " }
          type = "checkbox"
          class= "toggle" >
      < / . link >
    < % end % >

  < div class = "view" >
    < % = if item . id == @ editing . id do % >
      < % = edit (
        Map . put ( assigns , :action , ~p " /items/ #{ item . id } /edit " )
        |> Map . put ( :item , item )
      ) % >
    < % else % >
      < . link href = { ~p " /items/ #{ item } /edit " } class= "dblclick" >
        < label > < % = item . text % > < / label >
      < / . link >
      < span > < / span > < ! -- used for CSS Double Click -- >
    < % end % >

    < . link
      class = "destroy"
      href = { ~p " /items/ #{ item } " }
      method= "delete"
    >
    < / . link >
  < / div >
< /li>
EG : lib/app_web/controllers/item_html/index.html.heex#L46-L79
우리는 여기서 몇 가지 일을했습니다. <div class="view> tag 외부에서 토글 버튼을 변경했습니다. 또한 텍스트를 if else 블록 문으로 변경했습니다.
사용자가 편집하지 않으면 링크 ( <a> )가 렌더링되어 클릭하면 사용자가 "편집"모드를 입력 할 수 있습니다. 반면에, 사용자가 편집하는 경우 edit.html.heex 파일을 렌더링합니다.
말하자면, edit.html.heex Enter 하겠습니다.
 < .simple_form :let={f} for={@changeset} method="put" action={~p"/items/#{@item}"} >
  < .input
    field={{f, :text}}
    type="text"
    placeholder="what needs to be done?"
    class="new-todo"
  />
  < :actions >
    < .button
    style="display: none;"
    type="submit" >
      Save
    </ .button >
  </ :actions >
  <!-- submit the form using the Return/Enter key -->
</ .simple_form >CSS 업데이트 CSS의 두 번 클릭 효과가 edit 모드로 들어가려면 다음 CSS를 assets/css/app.scss 파일에 추가해야합니다.
. dblclick {
  position : relative; /* So z-index works later, but no surprises now */
}

. dblclick + span {
  position : absolute;
  top : -1 px ; /* these negative numbers are to ensure */
  left : -1 px ; /* that the <span> covers the <a> */
  width : 103 % ; /* Gotta do this instead of right: 0; */
  bottom : -1 px ;
  z-index : 1 ;
}

. dblclick + span : active {
  left : -9999 px ;
}

. dblclick : hover {
  z-index : 2 ;
}
EG : assets/css/app.css#L13-L32
또한 마크 업은 TODOMVC 마크 업과 약간 다르므로 UI를 일관성있게 유지하려면 조금 더 CSS를 추가해야합니다.
. todo-list li . toggle + div > a > label {
  background-image : url ( 'data:image/svg+xml;utf8,%3Csvg%20xmlns%3D%22http%3A//www.w3.org/2000/svg%22%20width%3D%2240%22%20height%3D%2240%22%20viewBox%3D%22-10%20-18%20100%20135%22%3E%3Ccircle%20cx%3D%2250%22%20cy%3D%2250%22%20r%3D%2250%22%20fill%3D%22none%22%20stroke%3D%22%23ededed%22%20stroke-width%3D%223%22/%3E%3C/svg%3E' );
  background-repeat : no-repeat;
  background-position : center left;
}

. todo-list li . checked + div > a > label
{
  background-image : url ( 'data:image/svg+xml;utf8,%3Csvg%20xmlns%3D%22http%3A//www.w3.org/2000/svg%22%20width%3D%2240%22%20height%3D%2240%22%20viewBox%3D%22-10%20-18%20100%20135%22%3E%3Ccircle%20cx%3D%2250%22%20cy%3D%2250%22%20r%3D%2250%22%20fill%3D%22none%22%20stroke%3D%22%23bddad5%22%20stroke-width%3D%223%22/%3E%3Cpath%20fill%3D%22%235dc2af%22%20d%3D%22M72%2025L42%2071%2027%2056l-4%204%2020%2020%2034-52z%22/%3E%3C/svg%3E' );
  background-repeat : no-repeat;
  background-position : center left;
}

. toggle {
  width : 10 % ;
  z-index : 3 ; /* keep the toggle checkmark above the rest */
}

a . new-todo {
  display : block;
  text-decoration : none;
}

. todo-list . new-todo {
  border : 1 px # 1abc9c solid;
}

. view a , . view a : visited {
  display : block;
  text-decoration : none;
  color : # 2b2d2f ;
}

. todo-list li . destroy {
  text-decoration : none;
  text-align : center;
  z-index : 3 ; /* keep the delete link above the text */
}
이것은이 단계의 끝 부분에서 app.scss 파일처럼 보이는 것입니다 : assets/css/app.css#L34-L71
ItemController.edit/2 함수를 업데이트하십시오 인라인 편집을 활성화하려면 edit/2 기능을 수정해야합니다. lib/app_web/controllers/item_controller.ex 파일을 열고 edit/2 함수를 다음으로 바꾸십시오.
 def edit ( conn , params ) do
  index ( conn , params )
end
또한 index/2 기능을 편집하기 위해 요청한다면 index/2 업데이트해야합니다.
 def index ( conn , params ) do
  item = if not is_nil ( params ) and Map . has_key? ( params , "id" ) do
    Todo . get_item! ( params [ "id" ] )
  else
    % Item { }
  end
  items = Todo . list_items ( )
  changeset = Todo . change_item ( item )
  render ( conn , "index.html" , items: items , changeset: changeset , editing: item )
end
마지막으로, 우리는 항목을 업데이트하기 위해 양식 제출을 처리해야합니다 ( edit.html.heex 로 렌더링). Enter 누르면 update/2 핸들러가 lib/app_web/controllers/item_controller.ex 내부에서 호출됩니다. 항목을 업데이트 한 후 같은 페이지에 머물기를 원합니다.
따라서 이렇게 보이도록 변경하십시오.
 def update ( conn , % { "id" => id , "item" => item_params } ) do
  item = Todo . get_item! ( id )

  case Todo . update_item ( item , item_params ) do
    { :ok , _item } ->
      conn
      |> redirect ( to: ~p " /items/ " )

    { :error , % Ecto.Changeset { } = changeset } ->
      render ( conn , :edit , item: item , changeset: changeset )
  end
end
item_controller.ex 파일은 이제 다음과 같습니다. lib/app_web/controllers/item_controller.ex
ItemControllerTest 에서 테스트를 업데이트하십시오단일 페이지 앱을 구축하기 위해 몇 가지 테스트를 중단했습니다! 괜찮아요. 그들은 고치기 쉽습니다.
test/app_web/controllers/item_controller_test.exs 파일을 열고 다음 텍스트로 테스트를 찾으십시오.
test "renders form for editing chosen item"
다음과 같이 보이도록 변경하십시오.
  test "renders form for editing chosen item" , % { conn: conn , item: item } do
    conn = get ( conn , ~p " /items/ #{ item } /edit " )
    assert html_response ( conn , 200 ) =~ "Click here to create a new item"
  end
"타이머 모드 편집"을 입력하면 이전에 구현 한 것처럼 /items 으로 돌아갈 수있는 링크 <a> 만듭니다. 이 태그에는 "새 항목을 만들려면 여기를 클릭하십시오"텍스트가 있습니다.
EG : test/app_web/controllers/item_controller_test.exs#L37-L39
다음으로 다음 설명으로 테스트를 찾으십시오.
describe "update item"블록을 다음 코드로 업데이트하십시오.
 describe "update item" do
  setup [ :create_item ]

  test "redirects when data is valid" , % { conn: conn , item: item } do
    conn = put ( conn , ~p " /items/ #{ item } " , item: @ update_attrs )
    assert redirected_to ( conn ) == ~p " /items/ "

    conn = get ( conn , ~p " /items/ " )
    assert html_response ( conn , 200 ) =~ "some updated text"
  end

  test "errors when invalid attributes are passed" , % { conn: conn , item: item } do
    conn = put ( conn , ~p " /items/ #{ item } " , item: @ invalid_attrs )
    assert html_response ( conn , 200 ) =~ "can't be blank"
  end
end
예 : test/app_web/controllers/item_controller_test.exs#L67-L80
항목을 업데이트 한 후 응용 프로그램이 리디렉션되는 경로를 업데이트했습니다. 단일 페이지 응용 프로그램을 구축하기 때문에 해당 경로는 /items/ URL 경로와 관련이 있습니다.
지금 테스트를 실행하면 다시 통과해야합니다.
 mix test

23:08:01.785 [info]  Already up
...........................

Finished in 0.5 seconds
27 tests, 0 failures

Randomized with seed 956565
index.html 에서 오래된 템플릿을 제거하십시오 이제 toggle 및 edit 기능이 작동하므로 최종적으로 lib/app_web/controllers/item_html/index.html.heex 템플릿에서 기본 Phoenix (테이블) 레이아웃을 제거 할 수 있습니다.
lib/app_web/controllers/item_html/index.html.eex 파일을 열고 모든 코드를 라인 전에 제거하십시오.
< section class =" todoapp " > 예 : lib/app_web/controllers/item_html/index.html.heex
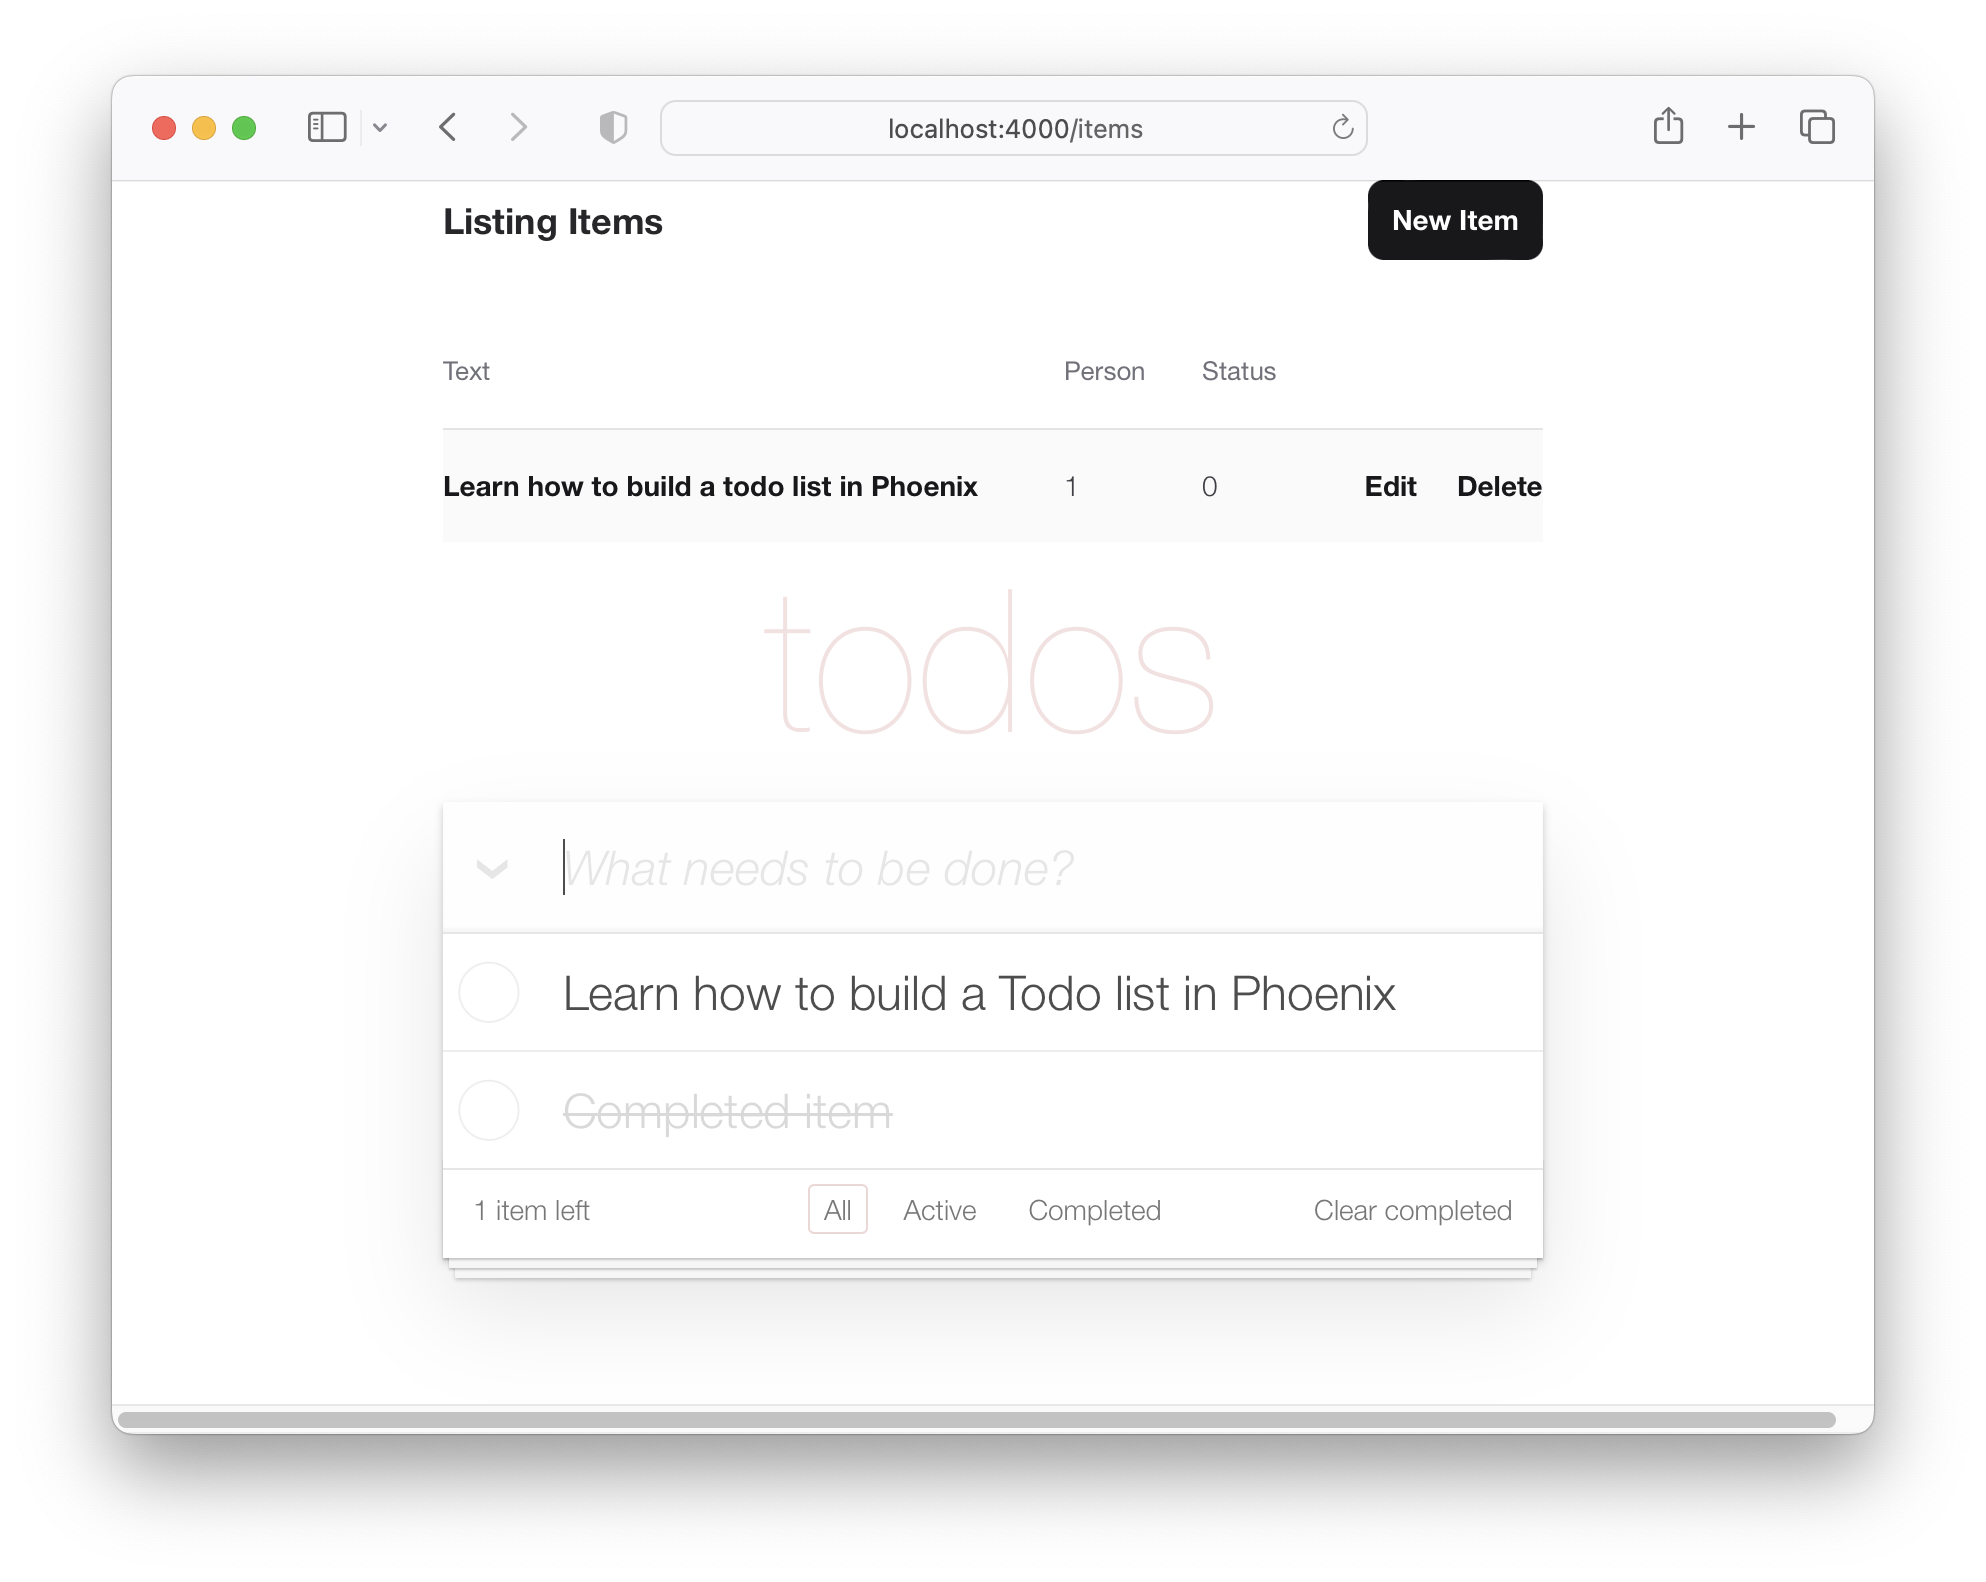
앱은 이제 다음과 같습니다. 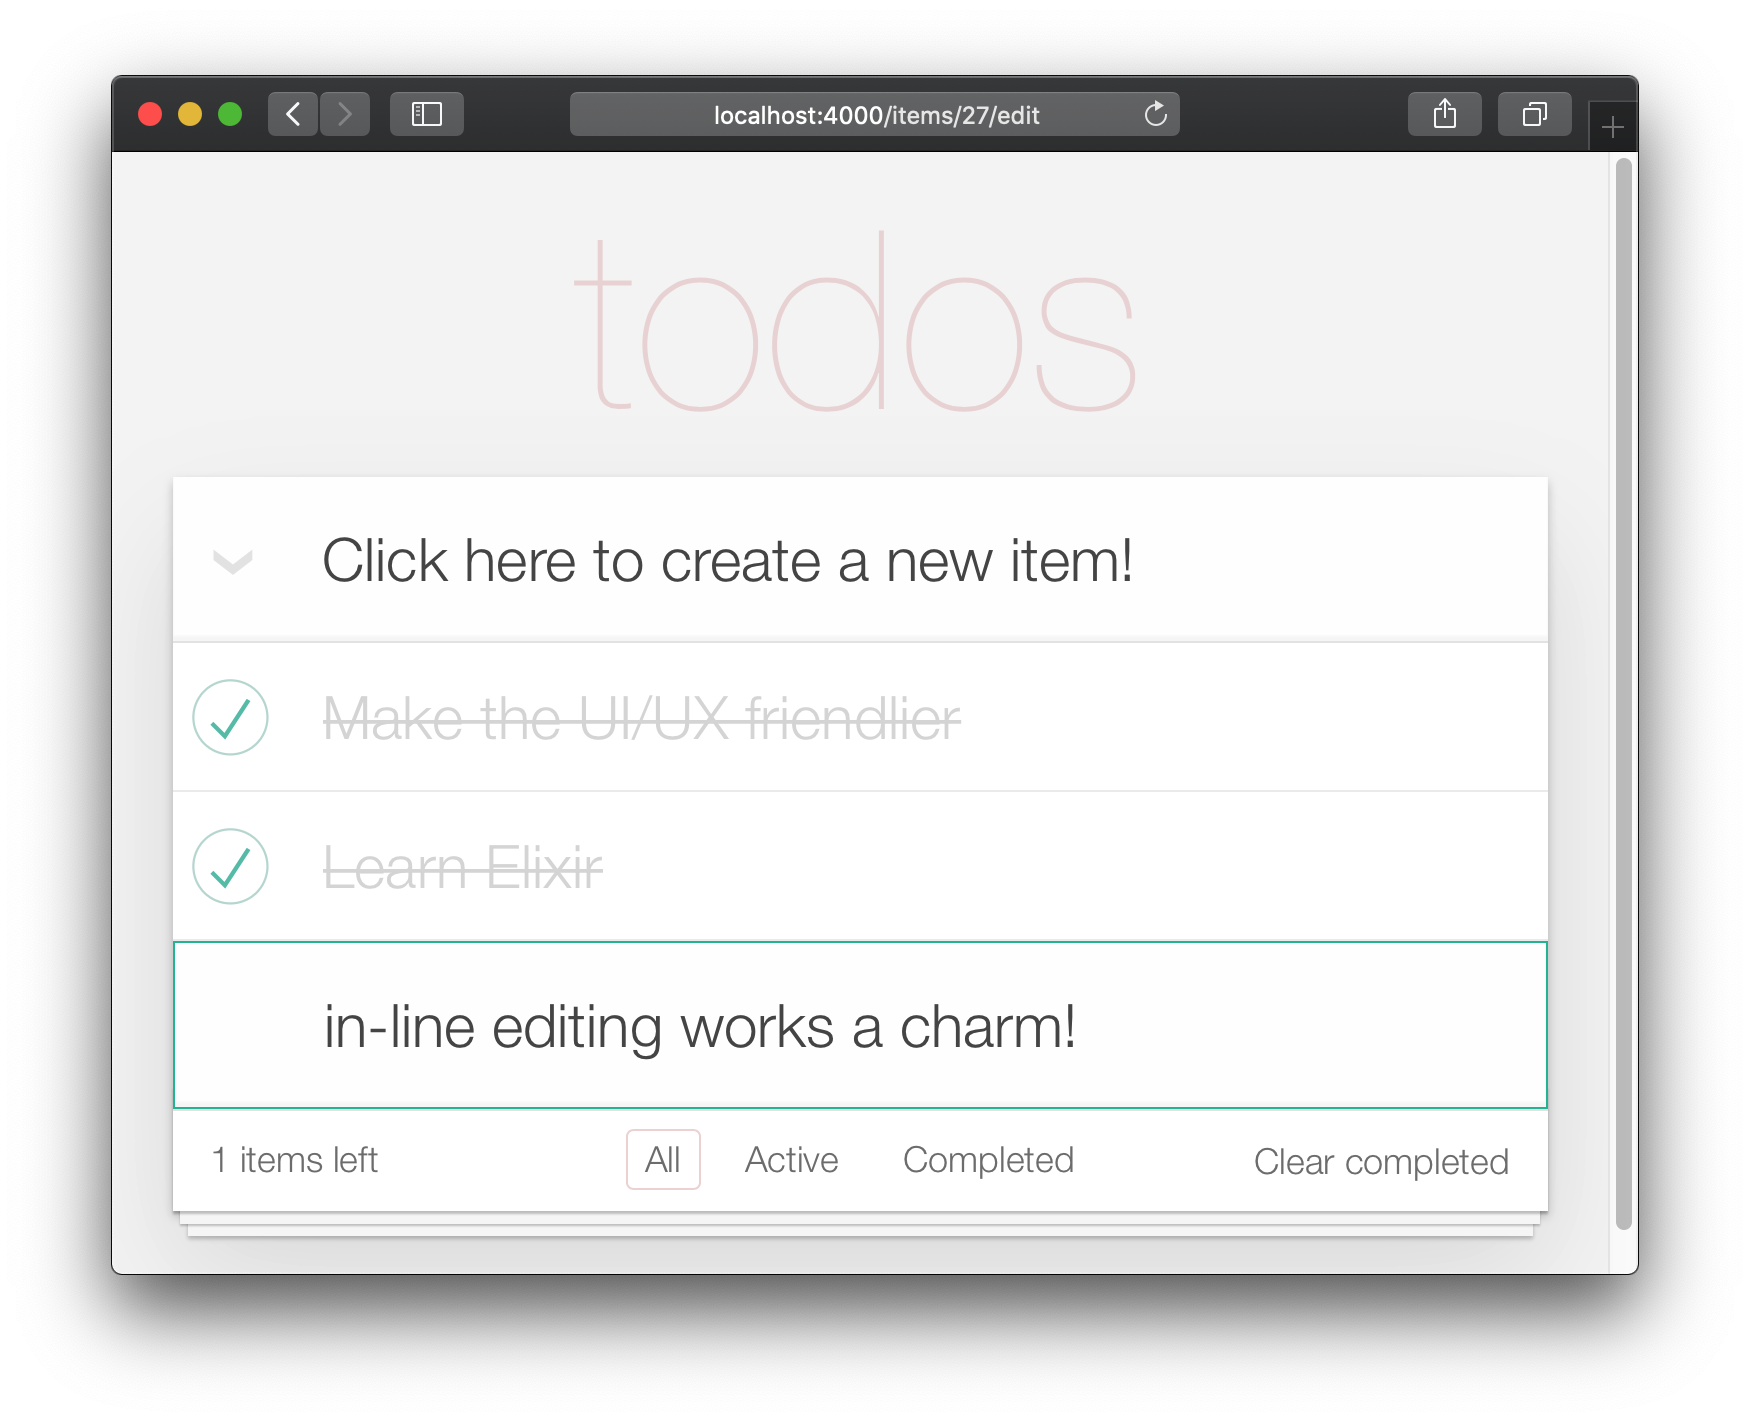
불행히도, 기본 레이아웃을 제거함으로써 테스트를 "파손"했습니다.
test/app_web/controllers/item_controller_test.exs 파일을 열고 다음 설명이있는 테스트를 찾으십시오.
test "lists all items"어설 션 업데이트 :
assert html_response ( conn , 200 ) =~ "Listing Items"에게:
assert html_response ( conn , 200 ) =~ "todos" 예 : test/app_web/controllers/item_controller_test.exs#L14
이제 Core (작성, 편집/업데이트, 삭제) 기능이 작동하므로 최종 UI 향상을 추가 할 수 있습니다. 이 단계에서는 바닥 글로 탐색/필터링을 추가 할 것입니다.
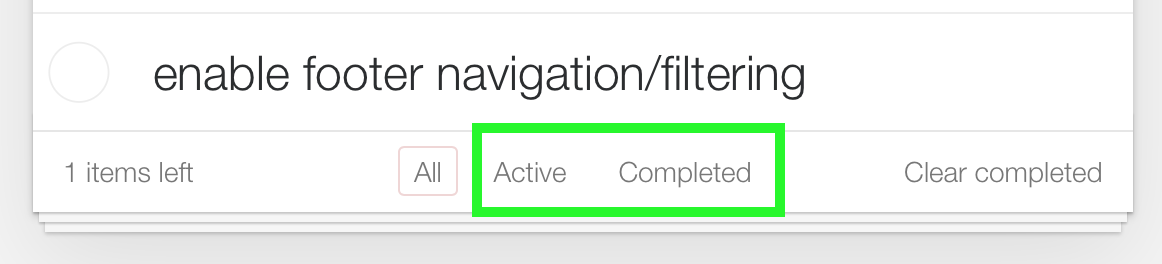
"모든"보기는 기본값입니다. "Active"는 status==0 있는 모든 항목입니다. "완료된"은 status==1 있는 모든 항목입니다.
/:filter 경로시작하기 전에 단위 테스트를 추가하겠습니다. 선택한 필터에 따라 필터링 된 항목을 보여주고 싶습니다.
열린 test/app_web/controllers/item_controller_test.exs 찾아 describe "index" do . 이 블록에서 다음 테스트를 추가하십시오. 필터가 변경되면 항목이 제대로 표시되는지 확인합니다.
  test "lists items in filter" , % { conn: conn } do
    conn = post ( conn , ~p " /items " , item: @ public_create_attrs )

    # After creating item, navigate to 'active' filter page
    conn = get ( conn , ~p " /items/filter/active " )
    assert html_response ( conn , 200 ) =~ @ public_create_attrs . text

    # Navigate to 'completed page'
    conn = get ( conn , ~p " /items/filter/completed " )
    assert ! ( html_response ( conn , 200 ) =~ @ public_create_attrs . text )
  end
예 : test/app_web/controllers/item_controller_test.exs#L21-L32
lib/app_web/router.ex 열고 다음 경로를 추가하십시오.
get "/items/filter/:filter" , ItemController , :index 예 : /lib/app_web/router.ex#L23
index/2 를 업데이트하여보고/템플릿으로 filter 보냅니다. lib/app_web/controllers/item_controller.ex 파일을 열고 index/2 함수를 찾으십시오. index/2 끝에서 render/3 의 호출을 다음과 같이 바꾸십시오.
 render ( conn , "index.html" ,
  items: items ,
  changeset: changeset ,
  editing: item ,
  filter: Map . get ( params , "filter" , "all" )
)
예 : lib/app_web/controllers/item_controller.ex#L17-L22
Map.get(params, "filter", "all") filter 의 기본값을 "All"으로 설정하여 index.html 이 렌더링되면 "All"항목을 표시합니다.
filter/2 보기 기능을 만듭니다 항목을 해당 상태로 필터링하려면 새 기능을 만들어야합니다.
lib/app_web/controllers/item_html.ex 파일을 열고 다음과 같이 filter/2 함수를 만듭니다.
 def filter ( items , str ) do
  case str do
    "items" -> items
    "active" -> Enum . filter ( items , fn i -> i . status == 0 end )
    "completed" -> Enum . filter ( items , fn i -> i . status == 1 end )
    _ -> items
  end
end
예 : lib/app_web/controllers/item_html.ex#L19-L26
이를 통해 다음 단계에서 항목을 필터링 할 수 있습니다.
index.html 템플릿에서 바닥 글을 업데이트하십시오 filter/2 함수를 사용하여 표시된 항목을 필터링하십시오. lib/app_web/controllers/item_html/index.html.heex 파일을 열고 for 루프 라인을 찾으십시오.
< % = for item <- @ items do % >대체 : :
< % = for item <- filter ( @ items , @ filter ) do % > EG : lib/app_web/controllers/item_html/index.html.heex#L18
@items 목록과 선택한 @filter 목록을 전달하는 이전 단계에서 정의한 filter/2 함수를 호출합니다.
다음으로 <footer> 을 찾아 <ul class="filters"> 의 내용을 다음 코드로 바꿉니다.
  < li >
    < % = if @ filter == "items" do % >
      <a href = "/items/filter/items" class= "selected" >
        All
      < / a >
    < % else % >
      <a href = "/items/filter/items" >
        All
      < / a >
    < % end % >
  < / li >
  < li >
    < % = if @ filter == "active" do % >
      <a href = "/items/filter/active" class= 'selected' >
        Active
        [ < % = Enum . count ( filter ( @ items , "active" ) ) % > ]
      < / a >
    < % else % >
      <a href = "/items/filter/active" >
        Active
        [ < % = Enum . count ( filter ( @ items , "active" ) ) % > ]
      < / a >
    < % end % >
  < / li >
  < li >
    < % = if @ filter == "completed" do % >
      <a href = "/items/filter/completed" class= 'selected' >
        Completed
        [ < % = Enum . count ( filter ( @ items , "completed" ) ) % > ]
      < / a >
    < % else % >
      <a href = "/items/filter/completed" >
        Completed
        [ < % = Enum . count ( filter ( @ items , "completed" ) ) % > ]
      < / a >
    < % end % >
  < / li >
@filter 지정 값에 따라 selected 클래스를 조건부로 추가하고 있습니다.
예 : /lib/app_web/controllers/item_html/index.html.heex#L62-L98
이 단계가 끝나면 완전히 작동하는 바닥 글 필터가 있습니다.
소규모 단위 테스트로 추가 한이 기능을 신속하게 다룰 수 있습니다. test/app_web/controllers/item_html_test.exs 열고 다음을 추가하십시오.
  test "test filter function" do
    items = [
      % { text: "one" , status: 0 } ,
      % { text: "two" , status: 0 } ,
      % { text: "three" , status: 1 } ,
      % { text: "four" , status: 2 } ,
      % { text: "five" , status: 2 } ,
      % { text: "six" , status: 1 } ,
    ]

    assert length ( ItemHTML . filter ( items , "items" ) ) == 4
    assert length ( ItemHTML . filter ( items , "active" ) ) == 2
    assert length ( ItemHTML . filter ( items , "completed" ) ) == 2
    assert length ( ItemHTML . filter ( items , "any" ) ) == 4
  end
그리고이 기능으로 완료해야합니까?. 멋진 직업!
우리는 TODOMVC의 피닉스 구현으로 거의 끝났습니다. 마지막으로 구현해야 할 것은 "정리 된 완료"입니다.
lib/app_web/router.ex 파일을 열고 다음 경로를 추가하십시오.
get "/items/clear" , ItemController , :clear_completed scope "/" 는 이제 다음과 같아야합니다.
  scope "/" , AppWeb do
    pipe_through :browser

    get "/" , PageController , :home
    get "/items/toggle/:id" , ItemController , :toggle
    get "/items/clear" , ItemController , :clear_completed
    get "/items/filter/:filter" , ItemController , :index
    resources "/items" , ItemController
  end
lib/app_web/controllers/item_controller.ex 파일에서 다음 코드를 추가합니다.
 import Ecto.Query
alias App.Repo

def clear_completed ( conn , _param ) do
  person_id = 0
  query = from ( i in Item , where: i . person_id == ^ person_id , where: i . status == 1 )
  Repo . update_all ( query , set: [ status: 2 ] )
  # render the main template:
  index ( conn , % { filter: "all" } )
end
EG : lib/app_web/controllers/item_controller.ex#L87-L93
이렇게하면 Handy update_all/3 기능을 사용하여 query 와 일치하는 모든 항목을 업데이트합니다. 우리의 경우 우리는 person_id==0 에 속하는 모든 items 검색하고 status==1 입니다.
우리는 항목을 삭제 하지 않고 오히려 그들의 상태를 2 로 업데이트하고 있습니다.이 예제의 목적 상 "보관"이라는 것을 의미합니다.
참고 : 이것은
update_all: https://adamdelong.com/bulk-update-ecto에 대한 유용한 안내서입니다.
마지막으로, lib/app_web/controllers/item_html/index.html.eex 파일 하단으로 스크롤하여 선을 바꾸십시오.
 < button class = "clear-completed" style = "display: block;" >
  Clear completed
< / button >
와 함께:
 < a class = "clear-completed" href = "/items/clear" >
  Clear completed
  [ < % = Enum . count ( filter ( @ items , "completed" ) ) % > ]
< / a >
EG : lib/app_web/controllers/item_html/index.html.heex#L104-L107
마지막으로해야 할 일은 lib/app_web/controllers/item_html.ex 내에서 filter/2 기능을 업데이트하는 것입니다. status = 2 이제 보관 된 상태와 관련이 있으므로 보관되지 않은 것을 반환하려고합니다.
filter/2 함수를 변경하여 그렇게 보이도록합니다.
def filter ( items , str ) do
case str do
"items" -> Enum . filter ( items , fn i -> i . status !== 2 end )
"active" -> Enum . filter ( items , fn i -> i . status == 0 end )
"completed" -> Enum . filter ( items , fn i -> i . status == 1 end )
_ -> Enum . filter ( items , fn i -> i . status !== 2 end )
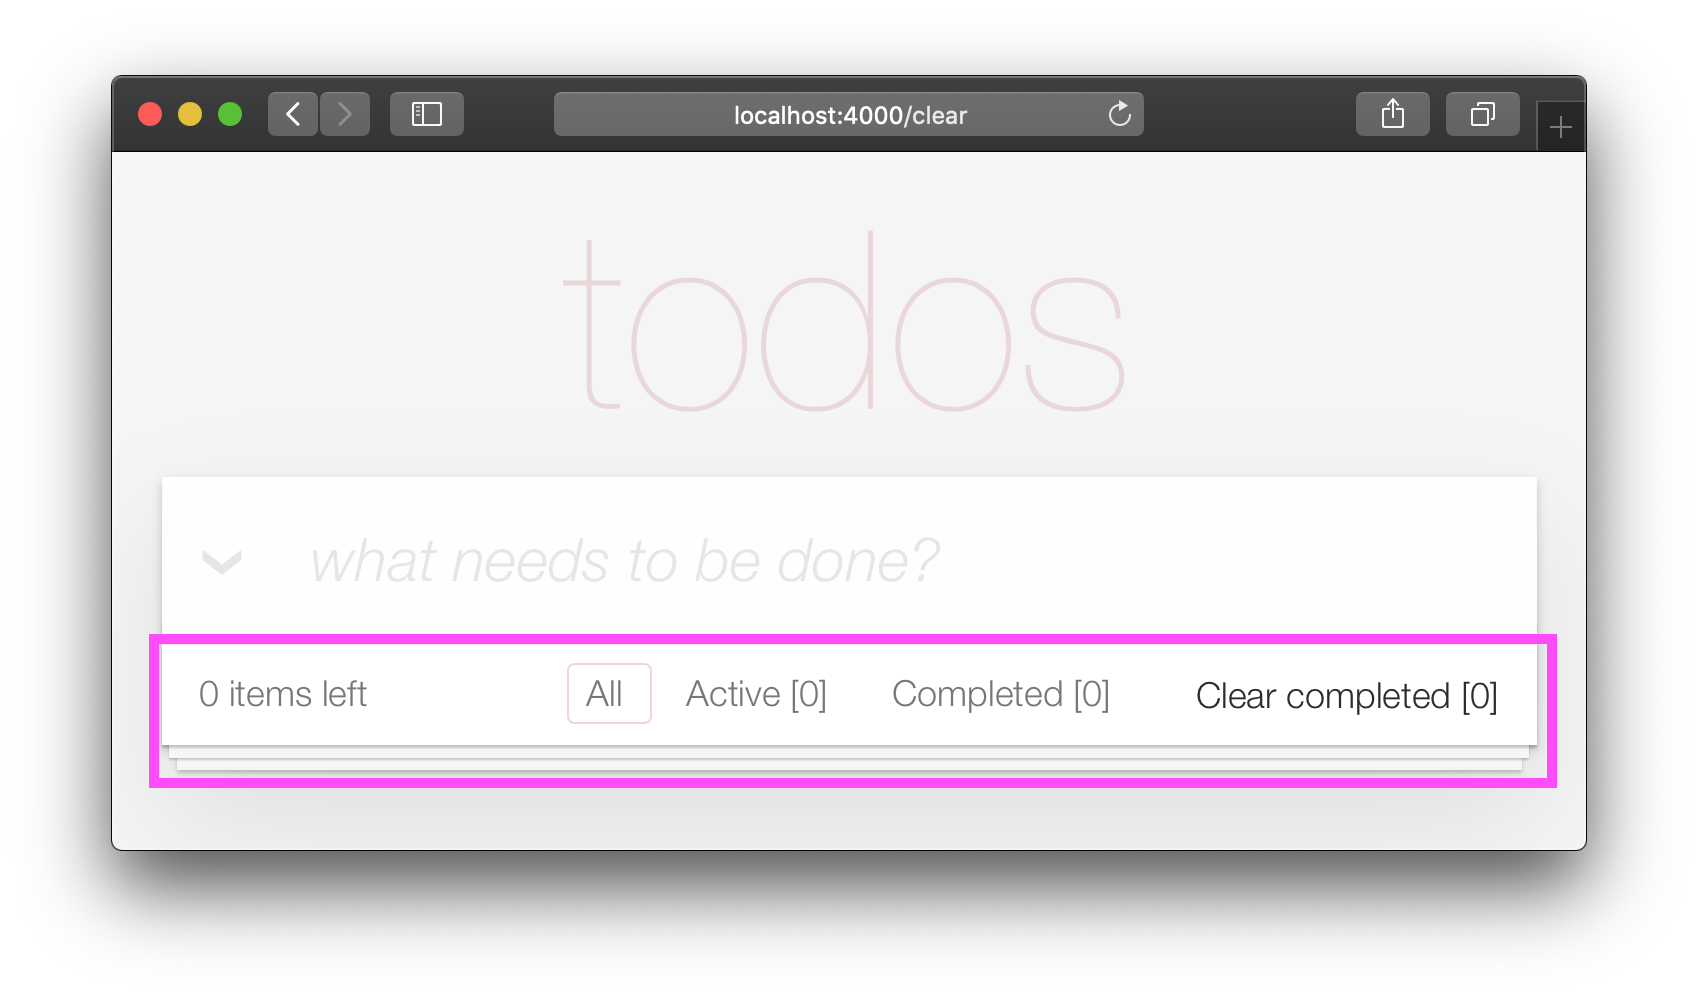
end
end이 섹션의 끝에서 귀하의 TODO 목록에는 "Clear Compled"기능이 작동해야합니다.
It's useful to have tests cover this feature. Open test/app_web/controllers/item_controller_test.exs . Alongside the constants, on top of the file, add the following line.
@completed_attrs %{person_id: 42, status: 1, text: "some text completed"}
We will use this to create an item that is already completed, so we can test the "clear completed" functionality.
Add the next lines to test the clear_completed/2 function.
  describe "clear completed" do
    setup [ :create_item ]

    test "clears the completed items" , % { conn: conn , item: item } do

      # Creating completed item
      conn = post ( conn , ~p " /items " , item: @ public_completed_attrs )
      # Clearing completed items
      conn = get ( conn , ~p " /items/clear " )

      items = conn . assigns . items
      [ completed_item | _tail ] = conn . assigns . items

      assert conn . assigns . filter == "all"
      assert completed_item . status == 2
    end

    test "clears the completed items in public (person_id=0)" , % { conn: conn , item: item } do

      # Creating completed item
      conn = post ( conn , ~p " /items " , item: @ public_completed_attrs )
      # Clearing completed items
      conn = get ( conn , ~p " /items/clear " )

      items = conn . assigns . items
      [ completed_item | _tail ] = conn . assigns . items

      assert conn . assigns . filter == "all"
      assert completed_item . status == 2
    end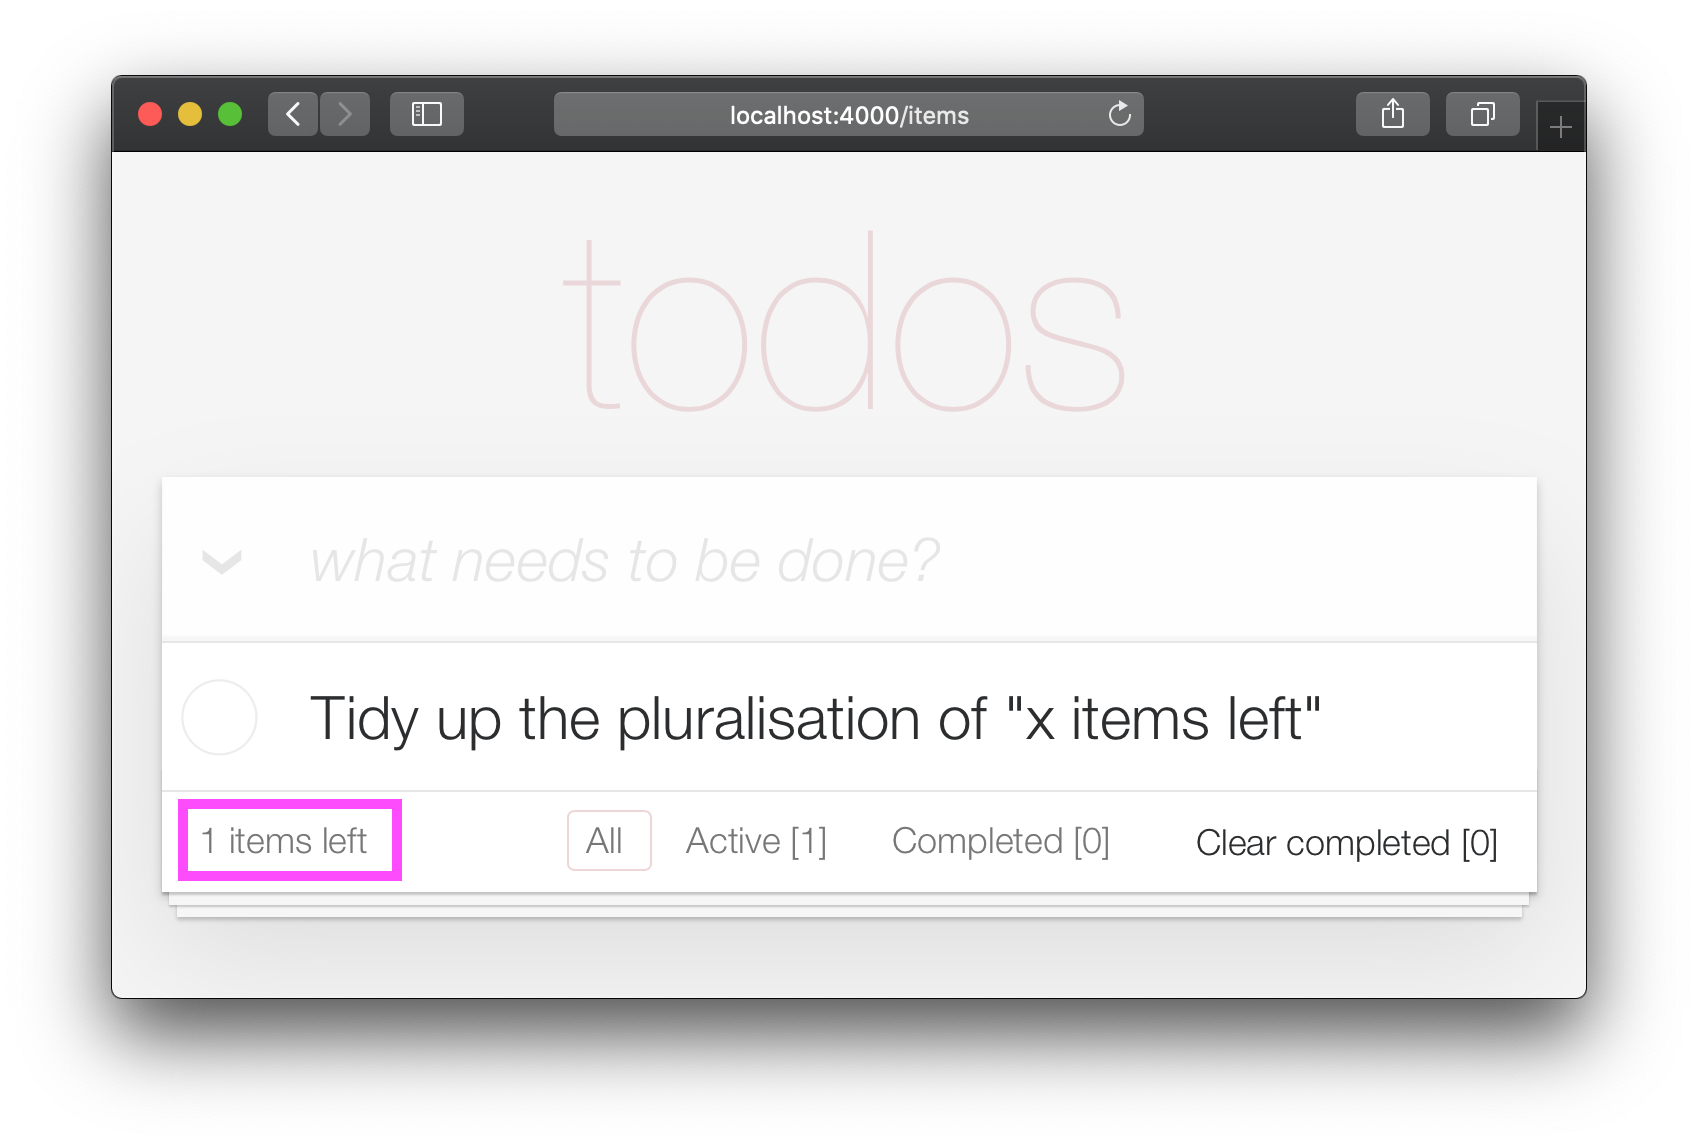
endAt this point we already have a fully functioning Phoenix Todo List. There are a few things we can tidy up to make the App even better!
If you are the type of person to notice the tiny details, you would have been itching each time you saw the " 1 items left " in the bottom left corner:
Open your test/app_web/controllers/item_html_test.exs file and add the following test:
 test "pluralise/1 returns item for 1 item and items for < 1 <" do
  assert ItemHTML . pluralise ( [ % { text: "one" , status: 0 } ] ) == "item"
  assert ItemHTML . pluralise ( [
    % { text: "one" , status: 0 } ,
    % { text: "two" , status: 0 }
  ] ) == "items"
  assert ItemHTML . pluralise ( [ % { text: "one" , status: 1 } ] ) == "items"
end
eg: test/app_web/controllers/item_html_test.exs#L28-L35
This test will obviously fail because the AppWeb.ItemHTML.pluralise/1 is undefined. Let's make it pass!
Open your lib/app_web/controllers/item_html.ex file and add the following function definition for pluralise/1 :
 # pluralise the word item when the number of items is greater/less than 1
def pluralise ( items ) do
  # items where status < 1 is equal to Zero or Greater than One:
  case remaining_items ( items ) == 0 || remaining_items ( items ) > 1 do
    true -> "items"
    false -> "item"
  end
end
eg: lib/app_web/controllers/item_html.ex#L28-L35
Note : we are only pluralising one word in our basic Todo App so we are only handling this one case in our
pluralise/1function. In a more advanced app we would use a translation tool to do this kind of pluralising. See: https://hexdocs.pm/gettext/Gettext.Plural.html
Finally, use the pluralise/1 in our template. Open lib/app_web/controllers/item_html/index.html.heex
Locate the line:
< span class = "todo-count" > < % = remaining_items ( @ items ) % > items left < /span>다음 코드로 바꾸십시오.
 < span class = "todo-count" >
  < % = remaining_items ( @ items ) % > < % = pluralise ( @ items ) % > left
< /span>
eg: lib/app_web/controllers/item_html/index.html.heex#L61
At the end of this step you will have a working pluralisation for the word item/items in the bottom left of the UI:
If you visit one of the TodoMVC examples, you will see that no <footer> is displayed when there are no items in the list: http://todomvc.com/examples/vanillajs
At present our App shows the <footer> even if their are Zero items: ?
This is a visual distraction/clutter that creates unnecessary questions in the user's mind. 고치합시다!
Open your lib/app_web/controllers/item_html.ex file and add the following function definition unarchived_items/1 :
 def got_items? ( items ) do
  Enum . filter ( items , fn i -> i . status < 2 end ) |> Enum . count > 0
end
eg: lib/app_web/controllers/item_html.ex#L37-L39
Now use got_items?/1 in the template.
Wrap the <footer> element in the following if statement:
 < % = if got_items? ( @ items ) do % >

< % end % >
eg: lib/app_web/controllers/item_html/index.html.heex#L58
The convention in Phoenix/Elixir ( which came from Ruby/Rails ) is to have a ? (question mark) in the name of functions that return a Boolean ( true/false ) result.
At the end of this step our <footer> element is hidden when there are no items:
/ to ItemController.index/2 The final piece of tidying up we can do is to change the Controller that gets invoked for the "homepage" ( / ) of our app. Currently when the person viewing the Todo App
visits http://localhost:4000/ they see the lib/app_web/controllers/page_html/home.html.eex template:
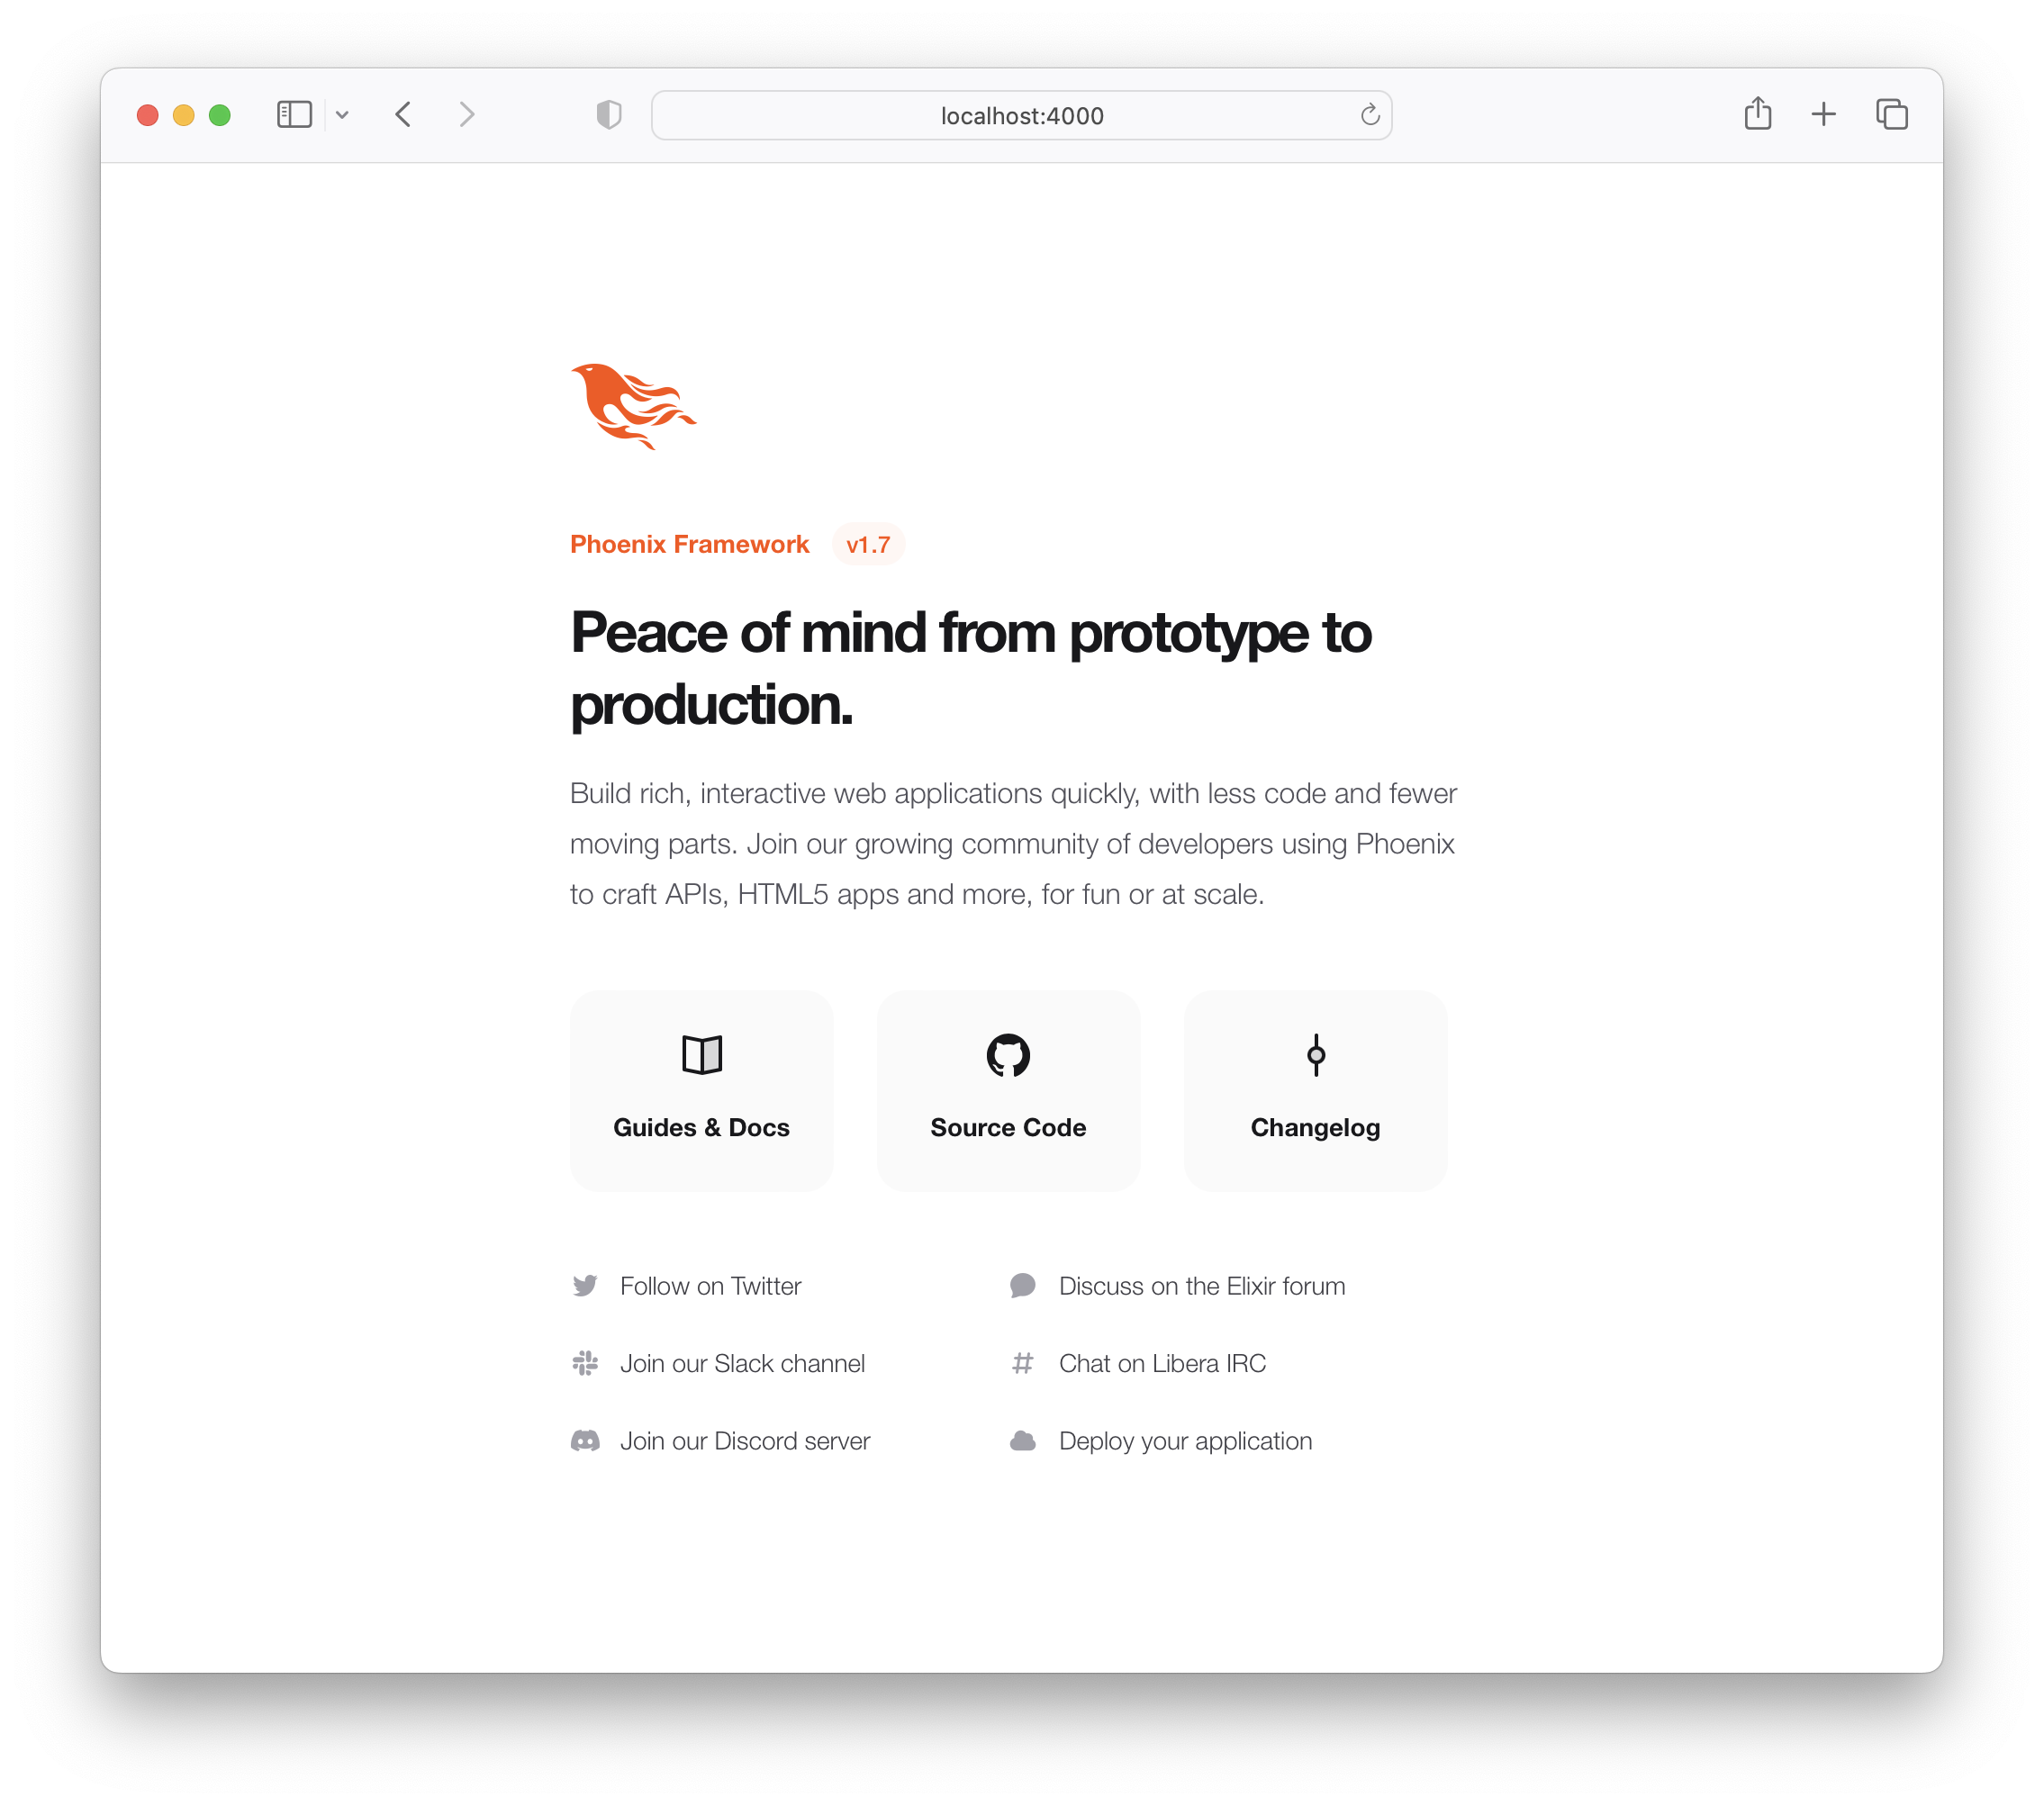
This is the default Phoenix home page ( minus the CSS Styles and images that we removed in step 3.4 above ). It does not tell us anything about the actual app we have built, it doesn't even have a link to the Todo App! 고치합시다!
Open the lib/app_web/router.ex file and locate the line:
get "/" , PageController , :index Update the controller to ItemController .
get "/" , ItemController , :index eg: lib/app_web/router.ex#L20
Now when you run your App you will see the todo list on the home page:
Unfortunately, this update will "break" the page test. Run the tests and see:
1) test GET / (AppWeb.PageControllerTest)
     test/app_web/controllers/page_controller_test.exs:4
     Assertion with = ~ failed
     code:  assert html_response(conn, 200) = ~ " Welcome to Phoenix! "
     left:  " <!DOCTYPE html>n<html lang= " en " >n  <head>n ... "
Given that we are no longer using the Page Controller, View, Template or Tests, we might as well delete them from our project!
git rm lib/app_web/controllers/page_controller.ex
git rm lib/app_web/controllers/page_html.ex
git rm lib/app_web/page_html/home.html.heex
git rm test/app_web/controllers/page_controller_test.exs
Deleting files is good hygiene in any software project. Don't be afraid to do it, you can always recover files that are in your git history.
Re-run the tests:
mix test
You should see them pass now:
 ...........................

Finished in 0.5 seconds
27 tests, 0 failures
Given that our Phoenix Todo List App is 100% server rendered, older browsers will perform a full page refresh when an action (create/edit/toggle/delete) is performed. This will feel like a "blink" in the page and on really slow connections it will result in a temporary blank page ! Obviously, that's horrible UX and is a big part of why Single Page Apps (SPAs) became popular; to avoid page refresh, use Turbo !
Get the performance benefits of an SPA without the added complexity of a client-side JavaScript framework. When a link is clicked/tapped, Turbolinks automatically fetches the page, swaps in its <body> , and merges its <head> , all without incurring the cost of a full page load.
Luckily, adding Turbo will require just a simple copy and paste! Check the unpkg files to fetch the latest CDN package.
We now need to add the following line to lib/app_web/components/layouts/app.html.heex and lib/app_web/components/layouts/root.html.heex .
< script src =" https://unpkg.com/browse/@hotwired/[email protected]/dist/turbo.es2017-esm.js " > </ script > This will install the UMD builds from Turbo without us needing to install a package using npm . 깔끔 했어?
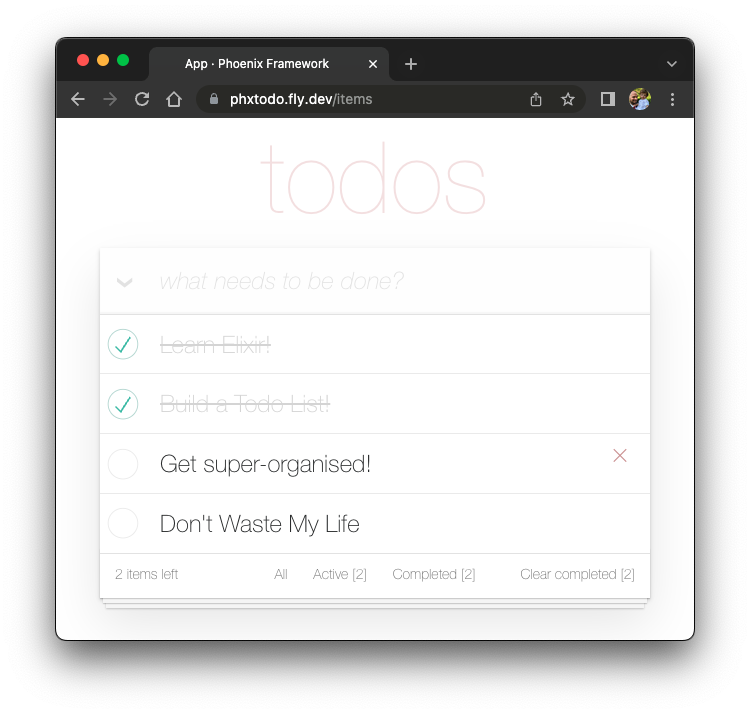
그리고 그게 다야! Now when you deploy your server rendered Phoenix App, it will feel like an SPA! Try the Fly.io demo again: phxtodo.fly.dev Feel that buttery-smooth page transition.
Currently, our application occurs in the same page. However, there is a route that we don't use and is also aesthetically incompatible with the rest of our app.
If we check lib/app_web/controllers/item_controller.ex , you might notice the following function.
  def show ( conn , % { "id" => id } ) do
    item = Todo . get_item! ( id )
    render ( conn , :show , item: item )
  end
This serves the GET /items/:id route. We could do the same as we did with edit and render index . However, let's do something different so we learn a bit more about routes.
If we head on to router.ex , and locate the line:
resources "/items" , ItemControllerWe can change it to this.
resources "/items" , ItemController , except: [ :show ] We are saying that we want to keep all the routes in ItemController except the one related to the show action.
We can now safely delete it from item_controller.ex , as we don't need it any more.
Your files should look like the following.
eg: /lib/router.ex#L19-L29 lib/app_web/controllers/item_controller.ex
Currently, the application allows anyone to access it and manage todo items . Wouldn't it be great if we added authentication so each person could check their own list?
We created a dedicated authentication guide: /auth.md to help you set this up. You will soon find out this is extremely easy ?.
Deployment to Fly.io takes a few minutes, but has a few "steps", we suggest you follow the speed run guide: https://fly.io/docs/elixir/getting-started/
Once you have deployed you will will be able to view/use your app in any Web/Mobile Browser.
eg: https://phxtodo.fly.dev
xs
Our Phoenix server currently only returns HTML pages that are server-side rendered . This is already awesome but we can make use of Phoenix to extend its capabilities.
What if our server also responded with JSON ? You're in luck! We've created small guide for creating a REST API : api.md
If you found this example useful, please ️ the GitHub repository so we ( and others ) know you liked it!
If you want to learn more Phoenix and the magic of LiveView , consider reading our beginner's tutorial: github.com/dwyl/ phoenix-liveview-counter-tutorial
Thank you for learning with us! ☀️


