docsify this
v1.9.16: Merge pull request #161 from hibbitts-design
แอปพลิเคชันเว็บโอเพนซอร์ซนี้สร้างขึ้นด้วยเอกสารสร้างเว็บไซต์เอกสารมหัศจรรย์ docsify ช่วยให้คุณเผยแพร่ไฟล์ markdown ออนไลน์เป็นเว็บเพจโดยไม่ต้องตั้งค่าเว็บไซต์ของคุณเอง
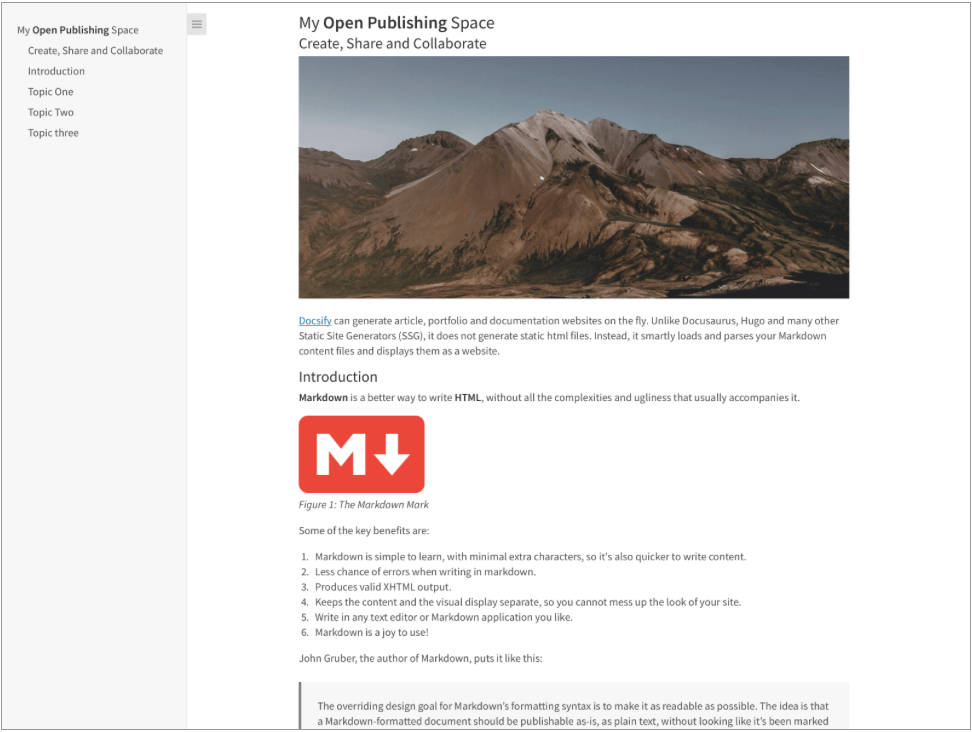
ตรวจสอบสิ่งที่ docsify-สิ่งนี้สามารถทำได้โดยการดูไฟล์ readme นี้เป็นหน้าเว็บที่มีแถบด้านข้างเสริมที่มีส่วนหัวสูงสุด 4 ระดับ!
รูปที่ 1. docsify- this.net builder builder
คุณเคยลองใช้เอกสารนี้แล้วหรือยัง? แบ่งปันความคิดเห็นของคุณเกี่ยวกับ docsify-นี่
Docsify- นี่เป็นวิธีที่ง่ายในการแสดงและแบ่งปันเนื้อหา Markdown ในบริบทต่าง ๆ โดยไม่ต้องติดตั้งเว็บไซต์หรือกระบวนการสร้าง ด้วยการโฮสต์ไฟล์ Markdown ของคุณใน GitHub หรือ Codeberg คุณยังสามารถใช้ประโยชน์จากการควบคุมเวอร์ชัน (ความสามารถในการติดตามและย้อนกลับการเปลี่ยนแปลง) และเปิดใช้งานการทำงานร่วมกัน
ด้วย docsify- สิ่งนี้คุณสามารถ:
docsify- นี่เป็น docsify docsify open publishing starter kit ไซต์ที่กำหนดค่าให้แสดงไฟล์ Markdown ระยะไกลผ่านพารามิเตอร์ URL ในรูปแบบต่อไปนี้:
https://docsify-this.net?basePath=URLpath&homepage=filename.md
พารามิเตอร์ basepath docsify คือเส้นทาง URL ที่มีไฟล์ markdown ต้นฉบับ RAW เพื่อแสดงผล หากไฟล์มีชื่อว่า readme.md เริ่มต้นที่คาดหวังจะไม่จำเป็นต้องใช้พารามิเตอร์อื่น ๆ มิฉะนั้นจะต้องรวมพารามิเตอร์ homepage docsify พารามิเตอร์ไว้ที่ชื่อของไฟล์ที่จะแสดงผล ตัวอย่าง docsify- url นี่คือ: https://docsify-this.net/?basepath=https://raw.githubusercontent.com/hibbitts-design/docsify-this-one-page-article/main&homepage=home.md
docsify-สิ่งนี้สามารถแสดงไฟล์ได้จากทุกที่ที่เนื้อหาของไฟล์ markdown สามารถดูได้ภายในเว็บเบราว์เซอร์รวมถึง:
ในการแสดงไฟล์ที่เก็บไว้ในที่เก็บ GitHub สาธารณะโดยตรงเมื่อไม่ได้ใช้ตัวสร้างเว็บเพจด้านบนคุณต้องใช้ URL แหล่งที่มาของไฟล์นั้น (เช่น RAW.githubusercontent.com) โดยแตะปุ่ม RAW เมื่อดูไฟล์ นอกจากนี้ยังเป็นไปได้ที่จะแสดงไฟล์ที่เก็บไว้ในพื้นที่เก็บข้อมูลส่วนตัว GitHub โดยการเปิดใช้งานหน้า gitHub ภายในที่เก็บนั้นจากนั้นใช้ URL หน้า gitHub ของไฟล์นั้น (เช่นชื่อผู้ใช้. github.io)
การปรากฏตัวของไฟล์ Markdown ที่แสดงผลสามารถปรับแต่งได้โดยพารามิเตอร์ URL เสริมและชุดคลาส CSS ขนาดเล็กที่มีอยู่ภายในไฟล์ Markdown ต้นฉบับ นอกเหนือจากการรองรับ markdown มาตรฐาน, Embed.ly, H5P, LaTex และ Mermaid Diagrams สามารถเปิดใช้งานคำอธิบายประกอบหน้าด้วยสมมติฐานได้
กำลังมองหาการแนะนำโดยรวมเกี่ยวกับการเผยแพร่ด้วย docsify-this หรือไม่? ตรวจสอบการเผยแพร่ Markdown ด้วย docsify-this
ฉันปลิวไปตามความจริงที่ว่าคุณใส่ URL (markdown) ลงใน docsify-this แล้วคุณจะได้รับ URL กลับมาสำหรับหน้าเว็บ…เสร็จแล้ว! ใช้ URL และไป มันราบรื่นมาก
-J. Groom, Reclaim วันนี้ตอนที่ 39 (ผู้ร่วมก่อตั้ง, Reclaim Hosting)
ฉันใช้ docsify-นี่สำหรับหลักสูตรการผลิตการเผยแพร่บัณฑิตของฉันส่วนหนึ่งเพื่อสำรวจโมเดลใหม่ในการเผยแพร่ Markdown แต่ส่วนหนึ่งก็เป็น Canvas ที่ทำให้เชื่องซึ่งฉันพบว่าน่าอึดอัดใจและยุ่งยาก การเก็บบันทึกหลักสูตรทั้งหมดของฉันเป็นไฟล์ข้อความธรรมดาและปรับใช้พวกเขาผ่าน gitHub และ docsify-นี่เป็นเรื่องง่ายและทำให้การพัฒนาหลักสูตรของฉันเป็นเรื่องง่าย นอกจากนี้ฉันเก็บวัสดุทั้งหมดของฉันไว้ในพื้นที่และสามารถใช้ซ้ำได้โดยไม่ต้องพึ่งพาผืนผ้าใบ
- J. Maxwell (ผู้อำนวยการและศาสตราจารย์ในโครงการสำนักพิมพ์ที่ Simon Fraser University)
เครื่องมือที่ดีที่สุดที่ฉันพบมาหลายปี - นี่เป็นหนึ่งในการสร้างสรรค์ที่ทำถูกต้องไปจนถึงแกนกลาง
- D. Malawey (ผู้ประสานงานห้องปฏิบัติการสหสาขาวิชาชีพ, มหาวิทยาลัยเท็กซัส A&M)
Docsify- นี่ได้ปรับปรุงธีม WordPress ของฉันอย่างมีนัยสำคัญโดยความสามารถในการฝังลงในอินเทอร์เฟซได้อย่างราบรื่นในเอกสารเดียวกันที่ฉันใช้ในที่เก็บ GitHub สิ่งนี้ทำให้ฉันเขียนเอกสารที่ดีกว่า! ฉันแทบจะไม่เกาพื้นผิวของสิ่งที่เอกสาร-สิ่งนี้สามารถทำได้เป็นเครื่องมือเผยแพร่เว็บที่ใช้งานง่าย
- A. Levine aka Cogdog (นักเทคโนโลยีการศึกษาอิสระ)
Docsify- นี้ได้รับการยอมรับว่าเป็นผู้เข้ารอบสุดท้ายในหมวดโครงสร้างพื้นฐานแบบเปิดสำหรับรางวัล Open Education Awards เพื่อความเป็นเลิศ-ขอขอบคุณ Docsify.js.org ผู้ดูแลและผู้มีส่วนร่วมทั้งหมด
ลักษณะที่ปรากฏของไฟล์ markdown ออนไลน์ที่แสดงเป็นหน้าเว็บโดย docsify- นี้สามารถเปลี่ยนแปลงได้สองวิธี:
ตัวอย่างเช่นในการแสดงไฟล์ markdown ที่ https://raw.githubusercontent.com/hibbitts-design/docsify-this-one-page-article/main/home.md พร้อม docsify sidebar รวมถึงหัวเรื่องสูงสุด 3 ระดับ
https://docsify-this.net/?basePath=https://raw.githubusercontent.com/hibbitts-design/docsify-this-one-page-article/main&homepage=home.md&sidebar=true&maxLevel=3และนี่คือวิธีที่ docsify- this.net แสดง URL เดียวกัน:
 หน้าเว็บที่แสดงโดย docsify- this.net แสดงไฟล์ markdown ด้วยแถบด้านข้างที่มีส่วนหัวสูงสุด 3 ระดับตามที่ระบุโดย URL docsify-this
เรียนรู้เพิ่มเติมเกี่ยวกับพารามิเตอร์ URL Docsify พื้นฐานแต่ละตัวด้านล่างและค้นพบสิ่งที่เป็นไปได้เมื่อรวมพารามิเตอร์ URL และไฟล์ markdown ออนไลน์กับชุดของ docsify-templates markdown ที่พร้อมใช้งานนี้
พารามิเตอร์ URL พื้นฐาน (รวมอยู่ในตัวสร้างเว็บเพจมาตรฐาน)
ตั้งค่าชื่อเรื่องที่กำหนดเองบนแท็บเบราว์เซอร์สำหรับหน้าเว็บของคุณด้วยพารามิเตอร์ เบราว์เซอร์-tab-title ที่เป็นตัวเลือกเช่น:
https://docsify-this.net?basepath=https://raw.githubusercontent.com/paulhibbitts/demo-grav-open-matter-course-hub/master/pages/04.resources เข้ารหัสดังนั้น "หน้าของฉัน" จะเป็น "%20 หน้าของฉัน"
แสดงลิงค์ "แก้ไขหน้านี้" (ตำแหน่งเริ่มต้นคือด้านล่างของหน้า) ด้วยพารามิเตอร์ แก้ไขการเชื่อมโยง ทางเลือกเช่น:
https://docsify-this.net?basepath=https://raw.githubusercontent.com/hibbitts-design/docsify-open-course-starte r-kit/main & edit-link = https: //github.com/hibbitts-design/docsify-open-publishing-starter-kit/blob/main/readme.md
เปลี่ยนข้อความเริ่มต้นสำหรับลิงก์ "แก้ไขหน้านี้" ด้วยพารามิเตอร์ Edit-Link-text แบบเลือกเช่น:
https://docsify-this.net?basepath=https://raw.githubusercontent.com/hibbitts-design/docsify-open-course-starter-kit/main&edit-li nk = https: //github.com/hibbitts-design/docsify-open-publishing-starter-kit/blob/main/readme.md&edit-link-text=view%20as%20markdown โปรดทราบว่าจะใช้ข้อความที่มีช่องว่างที่ต้องเข้ารหัสดังนั้น "ดูเป็น markdown" จะเป็น "ดู%20as%20 มาร์คดาวน์"
เปลี่ยนตำแหน่งของลิงค์ "แก้ไขหน้านี้" จากด้านล่างของหน้าเป็นด้านบนของหน้าด้วยพารามิเตอร์ แก้ไข-ลิงก์-ลิงก์เพิ่มเติม ตัวอย่างเช่น:
https://docsify-this.net?basepath=https://raw.githubusercontent.com/hibbitts-design/docsify-open-course-starter-kit/main&toc = true & edit-link = https: //github.com/hibbitts-design/docsify-open-publishing-starter-kit/blob/main/readme.md&edit-link-top=true
ตั้งค่าฟอนต์ที่กำหนดเองสำหรับหน้าเว็บของคุณด้วยพารามิเตอร์ แบบอักษรครอบครัว เสริมเช่น:
https://docsify-this.net?basepath=https://raw.githubusercontent.com/hibbitts-design/docsify-open-course-starter-kit/main/docs&homepage พารามิเตอร์นี้มีค่าเป็นพิเศษเมื่อพยายามจับคู่การนำเสนอภาพของเนื้อหาที่ฝังอยู่กับแพลตฟอร์มปลายทางของคุณได้ดีขึ้น โปรดทราบว่าการใช้แบบอักษรที่มีช่องว่างในชื่อของพวกเขาจะต้องเข้ารหัสดังนั้น "Courier ใหม่" จะเป็น "Courier%20New"
ตั้งค่าขนาดตัวอักษรที่กำหนดเองสำหรับหน้าเว็บของคุณด้วยพารามิเตอร์ ตัวอักษรขนาด เสริมเช่น:
https://docsify-this.net?basepath=https://raw.githubusercontent.com/hibbitts-design/docsify-open-course-starter-kit/main/docs&homepage=resources.md&font-size พารามิเตอร์นี้มีค่าเป็นพิเศษเมื่อพยายามจับคู่การนำเสนอภาพของเนื้อหาที่ฝังอยู่กับแพลตฟอร์มปลายทางของคุณได้ดีขึ้น โปรดทราบว่าขนาดตัวอักษรถูกตั้งค่าในหน่วย REM
ตั้งค่าน้ำหนักตัวอักษรส่วนหัวที่กำหนดเอง (ค่าเริ่มต้นคือ 400 - ปกติ) สำหรับหน้าเว็บของคุณด้วยพารามิเตอร์ ส่วนหัว ส่วนเสริมเช่น:
https://docsify-this.net?basepath=https://raw.githubusercontent.com/hibbitts-design/docsify-open-course-starter-kit/main/docs&homepage=resources.md&header-weight=600
ซ่อนเครดิตโดยปกติจะแสดงที่ด้านล่างของหน้าเอกสารที่แสดงทุกหน้าด้วยพารามิเตอร์ hide-credits เสริมเช่น: ตัวอย่างเช่น:
https://docsify-this.net?basepath=https://raw.githubusercontent.com/hibbitts-design/docsify-open-course-starter-kit/main/docs&homepage=resources.md&hide-credited
เปิดใช้งานคำอธิบายประกอบหน้าด้วยสมมติฐานด้วยพารามิเตอร์ สมมติฐาน เสริมเช่น:
https://docsify-this.net?basepath=https://raw.githubusercontent.com/hibbitts-design/docsify-open-course-starter-kit/main/docs&homepage=resources.md&hypothesis
ตั้งค่าความสูงของบรรทัดที่กำหนดเองสำหรับหน้าเว็บของคุณด้วยพารามิเตอร์ ความสูงบรรทัด ที่เป็นตัวเลือกตัวอย่างเช่น:
https://docsify-this.net?basepath=https://raw.githubusercontent.com/hibbitts-design/docsify-open-course-starter-kit/main/docs&homepage=resources
ตั้งค่าสีที่กำหนดเองสำหรับลิงก์ทั้งหมดที่กำหนดโดยใช้รูปแบบ hexadecimal มาตรฐาน โดยไม่มีสัญลักษณ์ '#' พร้อมพารามิเตอร์ ลิงก์สี เสริมเช่น:
https://docsify-this.net?basepath=https://raw.githubusercontent.com/hibbitts-design/docsify-open-course-starter-kit/main/docs&homepage=resources.md&link-color
ตั้งค่าระดับส่วนหัวสูงสุดของ Docsify sidearbar ด้วยพารามิเตอร์ maxlevel docsify ที่เป็นตัวเลือกเช่น:
https://docsify-this.net?basepath=https://raw.githubusercontent.com/hibbitts-design/docsify-open-publishing-starter-kit/main/docs&homepage=introduction
แสดงแถบด้านข้าง docsify ด้วยพารามิเตอร์ แถบด้านข้าง เสริมเช่น:
https://docsify-this.net?basepath=https://raw.githubusercontent.com/hibbitts-design/docsify-open-course-starter-kit/main&sidebar=true
แสดงสารบัญหน้าด้วยพารามิเตอร์ TOC เสริมเช่น:
https://docsify-this.net?basepath=https://raw.githubusercontent.com/hibbitts-design/docsify-open-publishing-starter-kit/main/docs&homepage=introduction
ตั้งค่าระดับส่วนหัวของหน้า (เช่น H1, H2 ฯลฯ ) ที่จะรวมอยู่ในสารบัญหน้าด้วยพารามิเตอร์ TOC-Headings เสริมเช่น:
https://docsify-this.net?basepath=https://raw.githubusercontent.com/hibbitts-design/docsify-open-publishing-starter-kit/main/docs&homepage=introduction
ใช้สารบัญหน้ากว้างน้อยกว่าด้วยพารามิเตอร์ TOC-Narrow เสริมเช่น:
https://docsify-this.net?basepath=https://raw.githubusercontent.com/hibbitts-design/docsify-open-publishing-starter-kit/main/docs&homepage=introduction พารามิเตอร์นี้มีค่าเป็นพิเศษเมื่อฝังเนื้อหาที่มีพื้นที่หน้าจอขนาดเล็ก
เปิดใช้งานการซูมภาพ (แตะที่ภาพหน้าเพื่อขยาย) ด้วยพารามิเตอร์เอกสาร ซูม-ภาพ เสริมเช่น: ตัวอย่างเช่น:
https://docsify-this.net?basepath=https://raw.githubusercontent.com/paulhibbitts/docsify-this-markdown-content-demo/main&zoom-images=true หากต้องการยกเว้นรูปภาพให้ใช้ 
พารามิเตอร์ URL เพิ่มเติมต่อไปนี้มีให้ใช้ใน URL docsify-this และรวมอยู่ในตัวสร้างเว็บเพจขั้นสูงเว้นแต่จะระบุไว้เป็นอย่างอื่น
พารามิเตอร์ URL เพิ่มเติม (รวมอยู่ในตัวสร้างเว็บเพจขั้นสูง)
แสดงเอกสารหน้าปกที่กำหนดเองด้วยพารามิเตอร์ หน้าปก เพิ่มเติมตัวอย่างเช่น:
https://docsify-this.net?basepath=https://raw.githubusercontent.com/hibbitts-design/docsify-open-publishing-starter-kit/main/docs&homepage
ตั้งค่าสีที่กำหนดเองสำหรับหน้าปกด้วยพารามิเตอร์ หน้าปก เพิ่มเติมตัวอย่างเช่น:
https://docsify-this.net?basepath=https://raw.githubusercontent.com/hibbitts-design/docsify-open-publishing-starter-kit/main/docs&homepage=home.md&coverpage=_coverpage.mdol
ตั้งค่าสีที่กำหนดเองสำหรับหน้าปกในโหมดมืดด้วยพารามิเตอร์ Coverpage-dark-dark-dark-mode เช่น:
https://docsify-this.net?basepath=https://raw.githubusercontent.com/hibbitts-design/docsify-open-publishing-starter-kit/main/docs&homepage=home .MD & DARK-MODE = TRUE & LINK-COLOR = CC0000 & LINK-COLOR-DARK-MODE = FF9E9E & COVERPAGE = _CoverPage.MD & CoverPage-Color = CC0000 & Coverpage-Color-Dark-Mode = 4D0000
สลับธีมแสง/มืดโดยอัตโนมัติตามการตั้งค่าระดับระบบปฏิบัติการเช่น:
https://docsify-this.net?basepath=https://raw.githubusercontent.com/hibbitts-design/docsify-open-publishing-starter-kit/main/docs&homepage=introduction.md&dark-mode
เปลี่ยนอีโมจิเริ่มต้นสำหรับลิงค์ "แก้ไขหน้านี้" ด้วยพารามิเตอร์ Edit-Link-Emoji ที่เป็นตัวเลือก (ไม่รวมอยู่ในตัวสร้างเว็บเพจขั้นสูง) ตัวอย่างเช่น:
https://docsify-this.net?basepath=https://raw.githubusercontent.com/hibbitts-design/docsify-open-course-starter-kit/main&edit-link=https://git hub.com/hibbitts-design/docsify-open-publishing-starter-kit/blob/main/readme.md&edit-link-text=view%20on%20github&edit-link-emoji=:file_folder:
เปิดใช้งานการโหลดภาพขี้เกียจโดยเบราว์เซอร์ด้วยพารามิเตอร์ Lazy-Load-Images เสริม (ไม่รวมอยู่ในตัวสร้างหน้าเว็บขั้นสูง) ตัวอย่างเช่น:
https://docsify-this.net?basepath=https://raw.githubusercontent.com/hibbitts-design/docsify-open-publishing-starter-kit/main/docs&homepage ตัวอย่างเช่นโดย Docsify sidear ฯลฯ
ตั้งค่าสีที่กำหนดเองสำหรับลิงก์ทั้งหมดในโหมดมืดที่กำหนดโดยใช้รูปแบบ hexadecimal มาตรฐาน โดยไม่ต้องใช้สัญลักษณ์ '#' พร้อมพารามิเตอร์ ลิงค์-สี--ดาร์ก-ดาร์
https://docsify-this.net?basepath=https://raw.githubusercontent.com/hibbitts-design/docsify-open-course- starter-kit/main/docs & homepage = resources.md & link-color = cc0000 & dark-mode = true & link-color-dark-mode = ff9e9e
ตั้งค่าสีโฮเวอร์แบบกำหนดเองสำหรับลิงก์ทั้งหมดที่กำหนดโดยใช้รูปแบบ hexadecimal มาตรฐาน โดยไม่มีสัญลักษณ์ '#' พร้อมพารามิเตอร์ ลิงค์ฮอร์-สีเทียน ที่เป็นตัวเลือกตัวอย่างเช่น:
https://docsify-this.net?basepath=https://raw.githubusercontent.com/hibbitts-design/docsify-open-course-starter-kit/main/docs&homepage=resources.md&link-hover-color
ตั้งค่าสีโฮเวอร์แบบกำหนดเองสำหรับลิงก์ทั้งหมดในโหมดมืดที่กำหนดโดยใช้รูปแบบ hexadecimal มาตรฐาน โดยไม่มีสัญลักษณ์ '#' พร้อมพารามิเตอร์ ลิงค์--สี--สี---โหมดโหมด เป็นตัวเลือกเช่น:
https://docsify-this.net?basepath=https://raw.githubusercontent.com/hibbitts-design/docsify-open-course-sta rter-kit/main/docs & homepage = resources.md & link-color = cc0000 & dark-mode = true & link-hover-color-dark-mode = ff9e9e
ตั้งค่าการตกแต่งข้อความที่กำหนดเองสำหรับลิงก์ทั้งหมดด้วยพารามิเตอร์ การกำหนดค่าข้อความเชื่อมโยงข้อความ เสริมเช่น:
https://docsify-this.net?basepath=https://raw.githubusercontent.com/hibbitts-design/docsify-open-course-starter-kit/main/docs&homepage
ตั้งค่าการตกแต่งข้อความแบบโฮเวอร์แบบกำหนดเองสำหรับลิงก์ทั้งหมดด้วยพารามิเตอร์ การปรับแต่งข้อความเชื่อมโยงการกำหนดค่าเท็กซัส เป็นตัวเลือกตัวอย่างเช่น:
https://docsify-this.net?basepath=https://raw.githubusercontent.com/hibbitts-design/docsify-open-course-starter-kit/main/docs&homepage=resources.md&link-text
คุณสามารถตั้งค่า favicon ที่กำหนดเองจากไฟล์ภาพที่ส่งผ่านจากพารามิเตอร์ loadfavicon เสริมเช่น:
https://docsify-this.net?basepath=https://raw.githubusercontent.com/paulhibbitts/docsify-this-markdown-content-demo/main&loadfavicon=open-access.png
โหลดส่วนท้าย docsify จากไฟล์ markdown ในไดเรกทอรีปัจจุบันที่ผ่านด้วยพารามิเตอร์เอกสาร loadfooter ที่เป็นตัวเลือกเช่น: https://docsify-this.net?basepath=https://raw.githubusercontent.com/hibbitts-design/docsify-open-publishing-starter-kit/main/docs&homepage=introduction
โหลด docsify navbar ที่กำหนดเองจากไฟล์ markdown ที่ส่งผ่านด้วยพารามิเตอร์ docsify loadnavbar ที่เป็นตัวเลือกเช่น:
https://docsify-this.net?basepath=https://raw.githubusercontent.com/hibbitts-design/docsify-open-publishing-starter-kit/main/docs&homepage=introduction
โหลดแถบด้านข้างที่กำหนดเองจากไฟล์ markdown ที่ส่งผ่านด้วยพารามิเตอร์ docsify loadsidebar ที่เป็นตัวเลือกเช่น:
https://docsify-this.net/?basepath=https://raw.githubusercontent.com/paulhibbitts/docsify-this-cmpt-363-22222222222222222222222222222222222222222222222222222222222222222222222
แสดงภาพโลโก้สำหรับเว็บไซต์ใน Docsify Custom Sidebar (เช่น File 'Logo.png) พร้อมพารามิเตอร์ Docsify โลโก้ ที่เป็นตัวเลือกตัวอย่างเช่น:
https://docsify-this.net/?basepath=https://raw.githubusercontent.com/hibbitts-design/docsify-this-multiple-page-course- ไซต์/หลัก & โฮมเพจ = home.md & sidebar = true & loadsidebar = _sidesbar.md & loadnavbar = _navbar.md & name = cpt-363 & Logo =/images/logo.png ต้องมีเส้นทางโฟลเดอร์เต็มรูปแบบและชื่อไฟล์ จะต้องมีชื่อเว็บไซต์และจะถูกใช้เป็นข้อความ alt สำหรับโลโก้
รวมรายการ Navbar เข้ากับด้านบนของแถบด้านข้างบนหน้าจอขนาดเล็กกับพารามิเตอร์ Mergenavbar Docsify เสริมเช่น: ตัวอย่างเช่น: https://docsify-this.net/?basepath=https://raw.githubusercontent.com/hibbitts-design/docsify-this-ultiple-cours-cours e-site/main & homepage = home.md & sidebar = true & loadsidebar = _sidebar.md & loadnavbar = _navbar.md & mergenavbar = true & name = cpt-363
แสดงชื่อสำหรับเว็บไซต์ในแถบด้านข้างที่กำหนดเอง (เช่นไฟล์ '_sidesbar.md) พร้อมพารามิเตอร์ ชื่อ เอกสารเสริมเช่น: ตัวอย่างเช่น:
https://docsify-this.net/?basepath=https://raw.githubusercontent.com/hibbitts-design/docsify-this-multiple-page-co urse-site/main & homepage = home.md & sidebar = true & loadsidebar = _sidebar.md & loadnavbar = _navbar.md & search = true & name = cpt-363 เมื่อพารามิเตอร์นี้มีให้มันจะถูกใช้โดยอัตโนมัติเป็นชื่อแท็บเบราว์เซอร์เช่นกัน
ตั้งค่าชื่อหน้าแบบกำหนดเองที่ด้านบนของหน้าเว็บของคุณด้วยพารามิเตอร์ หน้าตัวเลือกหน้า เช่น:
https://docsify-this.net?basepath=https://raw.githubusercontent.com/paulhibbitts/demo-grav-open-matter-course-hub/master/pages/04.resources "หน้าของฉัน" จะเป็น "%20 หน้าของฉัน"
แสดงปุ่มการปนเปื้อนในพื้นที่เนื้อหาของหน้า (DOCSIFY แถบด้านข้างที่กำหนดเอง) ด้วยพารามิเตอร์ การปนเปื้อน เสริมเช่น:
https://docsify-this.net?basepath=https://raw.githubusercontent.com/hibbitts-design/docsify-his-his-multiple-cour-cour se-site/main & homepage = home.md & sidebar = true & loadsidebar = _sidesbar.md & loadnavbar = _navbar.md & search = true & pagination = true
เปิดใช้งานปลั๊กอินการค้นหา docsify (ซึ่งปัจจุบันมีการจับคู่สำหรับข้อความและมาร์กอัป) บนเว็บไซต์หลายหน้ารวมถึงแถบด้านข้างที่กำหนดเองพร้อมพารามิเตอร์ searchbox docsify เสริมเช่น: ตัวอย่างเช่น:
https://docsify-this.net?basepath=https://raw.githubusercontent.com/hibbitts-design/docsify-this-ultiple-pag e-course-site/main & homepage = home.md & sidebar = true & loadsidebar = _sidesbar.md & loadnavbar = _navbar.md & searchbox = true
ตั้งค่าระดับส่วนหัวของสารบัญอัตโนมัติสูงสุดใน docsify แถบด้านข้างที่กำหนดเอง (เช่นไฟล์ '_sidesbar.md) ด้วยพารามิเตอร์ docsify submaxlevel ที่เป็นตัวเลือกเช่น: ตัวอย่างเช่น:
https://docsify-this.net/?basepath=https://raw.githubusercontent.com/paulhibbitts/docsify-this-cmpt-363-22222222222222222222222222222222222222222222222222222222222222222222222222222222222222222
ใช้ไอคอน Font Awesome เวอร์ชัน SVG แทน Web Fonts กับพารามิเตอร์ SVG-ICONS เสริม (ไม่รวมอยู่ในตัวสร้างเว็บเพจขั้นสูง) ตัวอย่างเช่น:
https://v2.preview.docsify-this.net/?basepath=https://raw.githubusercontent.com/hibbitts-design/docsify-this-lms-content-pages/main&homepage=schedule.md&svg-icons
ฝังเนื้อหาในผืนผ้าใบ
ตัวอย่างรหัส IFRAME รวมถึงพารามิเตอร์ URL เพื่อจับคู่ Docsify-ental กับเนื้อหานี้กับ Canvas:
< p > < iframe style =" overflow: hidden; border: 0px #ffffff none; background: #ffffff; " src =" https://docsify-this.net?basePath=https://raw.githubusercontent.com/paulhibbitts/cmpt-363-222-pages/main&homepage=home.md&font-family=Lato%20Extended,Lato,Helvetica%20Neue,Helvetica,Arial,sans-serif&font-size=1&hide-credits=true " width =" 800px " height =" 1400px " allowfullscreen =" allowfullscreen " > </ iframe > </ p >หากมีแถบเลื่อนคุณอาจต้องการแก้ไขรหัส IFRAME ของคุณอีกครั้งและปรับค่า "ความสูง"
ฉันจะเพิ่ม URL ภายนอกเป็นรายการโมดูลได้อย่างไร
โมดูลตัวอย่างลิงก์ภายนอกพร้อมหน้าสารบัญหน้า:
https://docsify-this.net?basePath=https://raw.githubusercontent.com/paulhibbitts/cmpt-363/main/docs/222&homepage=week-02.md&toc-narrow=true&font-family=Lato%20Extended,Lato,Helvetica%20Neue,Helvetica,Arial,sans-serif&font-size=1&hide-credits=true การสร้างลิงค์ที่กำหนดเองในการนำทางของคุณโดยใช้เครื่องมือเปลี่ยนเส้นทาง
เปลี่ยนเส้นทางฟิลด์ URL ตัวอย่าง:
https://docsify-this.net/?basePath=https://raw.githubusercontent.com/paulhibbitts/cmpt-363-222-pages/main&homepage=resources.md&edit-link=https://github.com/paulhibbitts/cmpt-363-222-pages/blob/main/resources.md&font-family=Lato%20Extended,Lato,Helvetica%20Neue,Helvetica,Arial,sans-serif&font-size=1&hide-credits=trueiframe (สำหรับการฝังเนื้อหาภายในหน้า)
เครื่องมือภายนอก (สำหรับการเพิ่มลิงก์ไปยังการนำทางหรือองค์ประกอบ)
ในขณะที่สิ่งที่คุณต้องใช้กับ docsify-นี่คือไฟล์ markdown พื้นฐานด้านล่างเป็นเทมเพลตบางอย่างที่คุณสามารถใช้สิ่งที่แสดงได้ว่าเป็นไปได้กับ markdown, รูปภาพ, พารามิเตอร์ URL และแม้แต่ตัวอย่าง HTML สองสามตัว!
ในการใช้เทมเพลตเหล่านี้โดยทั่วไปคุณจะทำสิ่งต่อไปนี้ (คำแนะนำเฉพาะของแม่แบบจะรวมอยู่ในแต่ละเทมเพลต):
ลงชื่อเข้าใช้ GitHub หรือสร้างบัญชีหากคุณยังไม่มี
แตะ ใช้เทมเพลตนี้ ในที่เก็บแม่แบบที่เลือก (ปุ่มสีเขียวบนขวา) จากนั้นเลือก สร้างที่เก็บใหม่
เลือกชื่อสำหรับที่เก็บใหม่ของคุณเพื่อเก็บไฟล์แล้วแตะ สร้างที่เก็บ เพื่อคัดลอกไฟล์เทมเพลตไปยังบัญชี GitHub ของคุณเอง
ดูไฟล์ Markdown ที่รวมอยู่เช่น home.md และคัดลอก URL
ไปที่ https://docsify-this.net และวาง URL ที่คัดลอกลงในฟิลด์ URL ไฟล์ Markdown
เลือกตัวเลือกหน้าตัวเลือกที่คุณต้องการ (เช่น docsify แถบด้านข้าง) และแตะ การเผยแพร่เป็นปุ่มหน้าเว็บ เพื่อดูไฟล์ markdown ของคุณเป็นหน้าเว็บสำหรับการแบ่งปันหรือฝัง
ในการแก้ไขไฟล์ใน GitHub ให้แตะไอคอน ดินสอ (แก้ไขไฟล์) ในด้านบนขวาเมื่อดูไฟล์ทำการเปลี่ยนแปลงของคุณจากนั้นแตะปุ่ม การเปลี่ยนแปลงที่กระทำ ... เพื่อบันทึกการเปลี่ยนแปลงเหล่านั้น
หนึ่งหน้าบทความ home.md แสดงโดย docsify- นี่เป็น::
ไฟล์หนึ่งหน้า home.md แสดงโดย docsify- นี่เป็น::
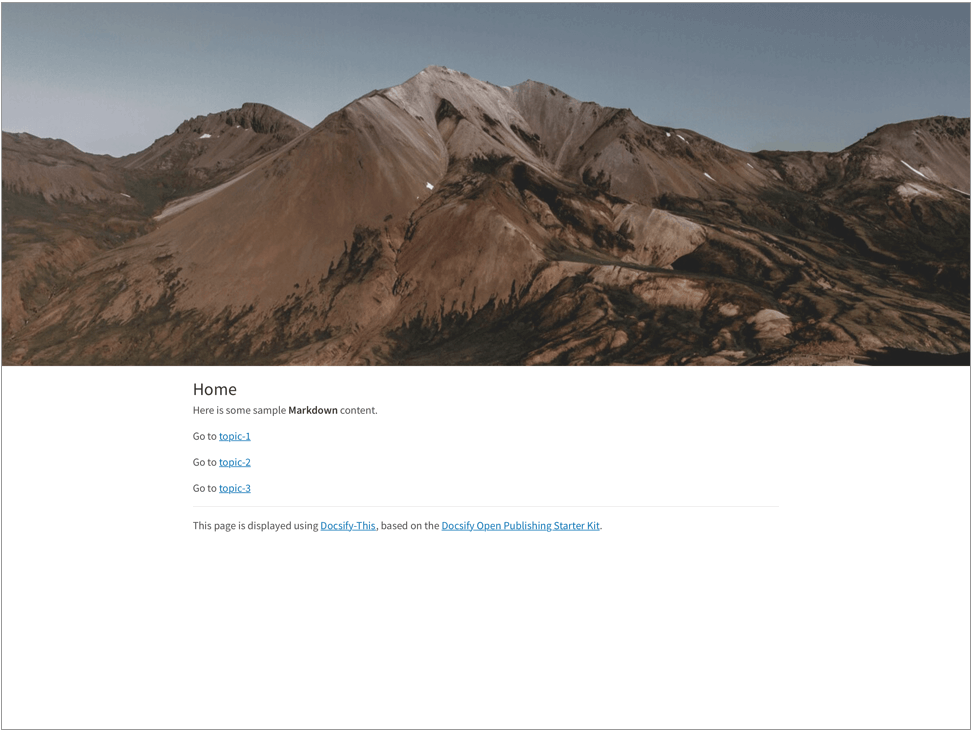
ไฟล์หลาย ๆ หน้า home.md รวมถึงการใช้ header-image-full-width แบบแสดงโดย docsify-this เป็น:

หลายหน้าเปิดไซต์การเผยแพร่ home.md ไฟล์รวมถึงการใช้ไฟล์แถบด้านข้าง docsify ที่กำหนดเองซึ่งแสดงโดย docsify-this เป็น:

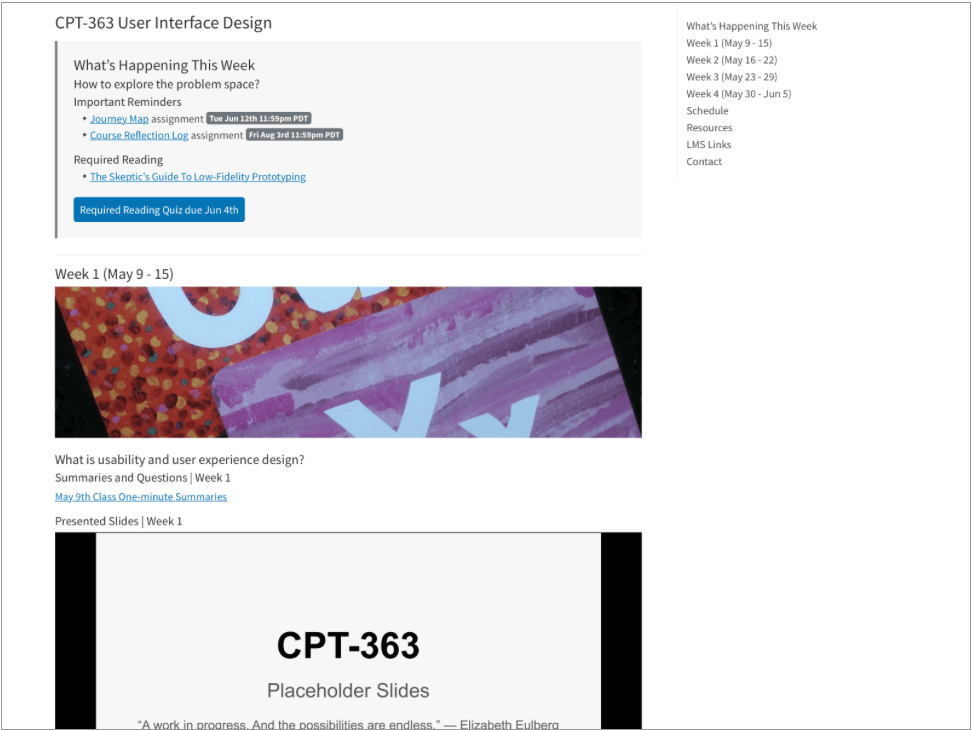
ไฟล์หลายหน้าหลักสูตร home.md รวมถึงการใช้ไฟล์แถบด้านข้างที่กำหนดเองและไฟล์ docsify custom navbar ที่แสดงโดย docsify-this เป็น:

หน้าตัวอย่างรวมถึงการใช้พารามิเตอร์ URL ของ font-family , font-size และ hide-credits สำหรับการฝังเนื้อหาที่ไร้รอยต่อภายในผืนผ้าใบ LM
ดูตัวอย่างไซต์ Canvas LMS โดยใช้เนื้อหา docsify- นี่ที่ https://canvas.sfu.ca/courses/76692

docsify- this.net เปิดและเวิร์กโฟลว์การทำงานร่วมกันโดยใช้ไฟล์ markdown gitHub
 docsify- this.net Workflow โดยใช้ไฟล์ Markdown ของเว็บเซิร์ฟเวอร์
เมื่อใช้ docsify- นี้เพื่อแสดงไฟล์ markdown ที่อยู่บนบริการที่ใช้ GIT เช่น GitHub หรือ Codeberg คุณสามารถดาวน์โหลดไฟล์ (โคลน) ไปยังเดสก์ท็อปของคุณสำหรับการแก้ไขท้องถิ่นจากนั้นอัปโหลด (พุช) เปลี่ยนกลับไปเป็นไฟล์ออนไลน์
ตัวอย่างเช่นในการแก้ไขไฟล์ Markdown GitHub บนเดสก์ท็อปของคุณคุณจะทำสิ่งต่อไปนี้:
เรียนรู้เพิ่มเติมเกี่ยวกับการเริ่มต้นใช้งานเดสก์ท็อป GitHub
คลาส CSS ต่อไปนี้มีให้เมื่อเขียนเนื้อหา markdown ของคุณเอง
 < div class =" accordion " >

< details >
  < summary > Topic One </ summary >

  Topic one details here.

</ details >

< details >
  < summary > Topic Two </ summary >

  Topic two details here.

</ details >

</ div > < span class =' badge ' > Tue Jun 12th 11:59pm PDT </ span > < span class =' badge ' style =' --badge-bg-color: #0164db; ' > Tue Jun 12th 11:59pm PDT </ span > < span class =' badge ' style =' --badge-bg-color: #e7c500; --badge-text-color: #000; ' > Tue Jun 12th 11:59pm PDT </ span > < span class =' badge ' > [Tue May 16 2:30pm PT](https://www.timeanddate.com/worldclock/fixedtime.html?msg=CMPT-363+Blackboard+Mini-lectures+and+Activities&iso=20220516T1430&p1=256&ah=1&am=50) </ span > ถูกครอบตัดเป็นความสูง 250px บนหน้าจอขนาดใหญ่ 125px บนหน้าจอขนาดเล็ก
![ UX - User Experience ] ( images/12650723674_d5c85af332_k.jpg ' :class=banner-image ') ถูกครอบตัดเป็นความสูง 350px บนหน้าจอขนาดใหญ่ 175px บนหน้าจอขนาดเล็ก
![ UX - User Experience ] ( images/12650723674_d5c85af332_k.jpg ' :class=banner-tall-image ') [ Required Reading Quiz due Jun 4th ] ( https://canvas.sfu.ca/courses/44038/quizzes/166553 ' :class=button ') [ : fa fa-download fa-fw : Download ] ( https://creativecommons.org/wp-content/uploads/2019/02/ccheart_black.svg_.zip ' :class=button ') < a class =" button " href =" https://creativecommons.org/wp-content/uploads/2019/02/ccheart_black.svg_.zip " target =" _blank " > < i class =" fa fa-download fa-fw " > </ i > Download </ a > [ Required Reading Quiz due Jun 4th ] ( https://canvas.sfu.ca/courses/44038/quizzes/166553 ' :class=button-rounded ') [ : fa fa-download fa-fw : Download ] ( https://creativecommons.org/wp-content/uploads/2019/02/ccheart_black.svg_.zip ' :class=button-rounded ') < a class =" button-rounded " href =" https://creativecommons.org/wp-content/uploads/2019/02/ccheart_black.svg_.zip " target =" _blank " > < i class =" fa fa-download fa-fw " > </ i > Download </ a > [ Required Reading Quiz due Jun 4th ] ( https://canvas.sfu.ca/courses/44038/quizzes/166553 ' :class=button-secondary ') [ : fa fa-download fa-fw : Download ] ( https://creativecommons.org/wp-content/uploads/2019/02/ccheart_black.svg_.zip ' :class=button ') < a class =" button-secondary " href =" https://creativecommons.org/wp-content/uploads/2019/02/ccheart_black.svg_.zip " target =" _blank " > < i class =" fa fa-download fa-fw " > </ i > Download </ a > [ Required Reading Quiz due Jun 4th ] ( https://canvas.sfu.ca/courses/44038/quizzes/166553 ' :class=button-secondary-rounded ') [ : fa fa-download fa-fw : Download ] ( https://creativecommons.org/wp-content/uploads/2019/02/ccheart_black.svg_.zip ' :class=button-secondary-rounded ') < a class =" button-secondary-rounded " href =" https://creativecommons.org/wp-content/uploads/2019/02/ccheart_black.svg_.zip " target =" _blank " > < i class =" fa fa-download fa-fw " > </ i > Download </ a > สำหรับตัวอย่างบทความที่เชื่อมโยงสไลด์/วิดีโอที่ฝังอยู่ ฯลฯ
< a class =" embedly-card " data-card-controls =" 0 " data-card-align =" left " href =" https://blog.prototypr.io/defining-usability-e7bf42e8abd0 " > Defining usability </ a > ความกว้างที่แนะนำ 1200px ถึง 2000px
![ Photo of Mountain ] ( images/mountain.jpg ' :class=header-image-fade ') ความกว้างที่แนะนำของ 1200px ถึง 2000px และไม่สามารถแสดงสารบัญ
![ Photo of Mountain ] ( images/mountain.jpg ' :class=header-image-fade-full-width ') ขนาดที่แนะนำของความกว้าง 1200px ถึง 2000px และความสูง 400px ถึง 600px และการแสดงผลของสารบัญไม่สามารถใช้ได้
![ Photo of Mountain ] ( images/mountain.jpg ' :class=header-image ') สเกลอิมเมจเป็น %
![ Photo of Mountain ] ( images/mountain.jpg ' :class=image-75 ') สเกลภาพที่มีเส้นขอบเป็น %
![ Photo of Mountain ] ( images/mountain.jpg ' :class=image-75-border ') ![ Photo of Mountain ] ( images/mountain.jpg ' :class=image-border ') ![ Photo of Mountain ] ( images/mountain.jpg ' :class=image-border-rounded ') [ GitHub ] ( https://github.com/hibbitts-design/docsify-this ' :class=navpill ') [ : fab fa-github fa-fw : GitHub ] ( https://github.com/hibbitts-design/docsify-this ' :class=navpill ') < a class =" navpill " href =" https://github.com " target =" _blank " > < i class =" fab fa-github fa-fw " > </ i > GitHub </ a > ทำให้ภาพ HTML ดิบซึ่งรวมถึงขนาดขนาดตอบสนอง
< img src =" https://raw.githubusercontent.com/hibbitts-design/publishing-with-docsify-this/main/images/docsify-this-web-page-builder.jpg " width =" 910 " height =" 682 " class =" responsive image-border " alt =" Docsify-This Web Page Builder " > < div class =" row " >
< div class =" column " >
Lorem ipsum dolor sit amet, consectetur adipiscing elit.
</ div >
< div class =" column " >
Lorem ipsum dolor sit amet, consectetur adipiscing elit.
</ div >
</ div > < div class =" row reverse-columns " >
< div class =" column " >
Lorem ipsum dolor sit amet, consectetur adipiscing elit.
</ div >
< div class =" column " >
Lorem ipsum dolor sit amet, consectetur adipiscing elit.
</ div >
</ div > < div class =" row " >
< div class =" column " >
Lorem ipsum dolor sit amet, consectetur adipiscing elit.
</ div >
< div class =" column-right " >
Lorem ipsum dolor sit amet, consectetur adipiscing elit.
</ div >
</ div > < div class =" video-container-4by3 " > < div class =" video-container-16by9 " > < iframe width =" 560 " height =" 315 " src =" https://www.youtube.com/embed/lJIrF4YjHfQ " > </ iframe > </ div > เพิ่มไปยัง iframes ทั้งหมดโดยอัตโนมัติด้วยโดเมนต้นทาง 'youtube.com' หรือ 'docs.google.com'
< div class =" video-container-16by9 " > < iframe width =" 560 " height =" 315 " src =" https://www.youtube.com/embed/lJIrF4YjHfQ " > </ iframe > </ div > นอกเหนือจากคลาส MARKDOWN CSS ที่รองรับโดย DocSify- นี่คุณยังสามารถกำหนดคลาสที่กำหนดเองของคุณเองภายในไฟล์ markdown ที่แสดงของคุณเช่น:
CSS ในไฟล์ Markdown:
<style >
. markdown-section . mybutton , . markdown-section . mybutton : hover {
  cursor : pointer;
  color : # CC0000 ;
  height : auto;
  display : inline-block;
  border : 2 px solid # CC0000 ;
  border-radius : 4 rem ;
  margin : 2 px 0 px 2 px 0 px ;
  padding : 8 px 18 px 8 px 18 px ;
  line-height : 1.2 rem ;
  background-color : white;
  font-family : -apple-system , "Segoe UI" , "Helvetica Neue" , sans-serif;
  font-weight : bold;
  text-decoration : none;
}
< / style >
Markdown:
[ Required Reading Quiz due Jun 4th ] ( https://canvas.sfu.ca/courses/44038/quizzes/166553 ' :class=mybutton ') Docsify-this ได้รับการออกแบบมาเพื่อแสดงไฟล์ Markdown ที่โฮสต์จากระยะไกลอย่างรวดเร็วและง่ายดาย สำหรับการปรับแต่งที่มากขึ้นของการเรนเดอร์ไฟล์และเพื่อให้แน่ใจว่ามีความพร้อมใช้งานที่สอดคล้องกันแม้ว่าอินสแตนซ์สาธารณะ-นี่คืออินสแตนซ์ที่ไม่สามารถใช้งานได้อีกต่อไปคุณสามารถโฮสต์อินสแตนซ์ของคุณเอง
To host your own instance on GitHub Pages, which also supports the option of a custom domain, fork or clone the Docsify-This repository to your GitHub account. Then, enable GitHub Pages using the /docs folder.
You can also have an instance of Docsify-This run on Codeberg such as https://docsify-this.codeberg.page by creating a new repository called pages , then choosing paulhibbitts/docsify-this-app in the template dropdown menu, choosing the Git Content (Default Branch) option and then tapping the Create Repository button.
Alternatively, you can upload the files in the Docsify-This /docs folder into a newly created Codeberg repository and then manually enable Codeberg Pages. An example Docsify-This instance running on Codeberg is available at https://codeberg.org/paulhibbitts/docsify-this-app, which uses a Branch renamed to pages .
If you want to run Docsify-This on your own Websever, create a destination folder on your server and then copy the files within the Docsify-This folder /docs to your newly created server folder. You could also use this docs folder as a custom domain root.
A more future-friendly setup would be to fork the Docsify-This repository (to support getting upstream updates) and use a GitHub Action such as FTP-Deploy to deploy all changed repository files to a webserver.
You can limit the domains which remote files can be rendered from by locating the line var allowedDomains = ''; within the index.html file and include your list of allowed domains separated by commas, for example var allowedDomains = 'codeberg.org,raw.githubusercontent.com,hibbittsdesign.org'; -
If you want to further customize and control the presentation of your Markdown content, especially when rendering multiple page sites, you can install your own Docsify Open Publishing Starter Kit (that this hosted web app is based on) and store all Markdown files within that site. You can learn more about the capabilities of Docsify itself at Docsify.js.org.
Looking for some help with getting a Docsify custom-This instance up and running for your organization? Paul provides a range of professional services related to Docsify-This - contact him to learn more.
The display of Font Awesome Free icons within Markdown content is supported with the following format:
: fas fa-home fa-fw :
The above Markdown is equivalent to the HTML markup <i class="fas fa-home fa-fw" aria-hidden="true"></i> .
When using the above shortcode for Font Awesome icons, it is assumed to be for decorative purposes, and so for improved accessibility an aria-hidden="true" attribute is automatically added to the icon. For semantic purposes, it is recommended you refer to the Font Awesome Icons and Accessibility guidelines.
The following style prefixes are available with Docsify-This:
GitHub Training Manual Working Locally with Git Markdown file, displayed by Docsify-This as a:
Easy Markdown to Github Pages linked set of Markdown files, displayed by Docsify-This as:
A Collection of GitHub Markdown files used as course content within an SFU CMPT-363 Canvas LMS site.
A Collection of GitHub Markdown files with inline CSS used as a multiple page SFU CMPT-363 course site with SFU visual branding and the Docsify Search plugin enabled, multiple page SFU CMPT-363 course site with SFU visual branding and website logo, and an example single Markdown file with default visual styling for embeddeding.
GitHub Markdown Content Demo file, displayed by Docsify-This as a Web Page with 'Edit this Page' link using the new GitHub.dev web editor (currently in Beta).
GitHub Markdown Content Demo file, displayed by Docsify-This as a Web Page with 'View raw Markdown' link.
Codeberg Markdown Content Demo file, displayed by Docsify-This as a Web Page with 'View raw Markdown' link.
GitHub's LaTeX Support Examples Markdown file, displayed by Docsify-This as a Web Page with an 'Edit this Page' link.
Mermaid-Docsify Example GitHub Markdown file, displayed by Docsify-This as a Web Page with an 'Edit this Page' link.
Docsify-This Multi-language Site Template, displayed by Docsify-This as a:
Docsify-This Simple Visual Portfolio Template (based on Notion Portfolio Template), displayed by Docsify-This as a:
Docsify-This Visual Portfolio Template (based on Notion Portfolio Template), displayed by Docsify-This as a:
A simple Markdown Student Portfolio Starter Template (based on Markdown Student Portfolio Template by Justin Thoreson) which is viewable on both GitHub and with Docsify-This.net, displayed by Docsify-This as:
Introduction to Docsify–This
Introductory, beginner to intermediate.
An introduction of Markdown publishing using the open source project Docsify–This.
Self-Publishing with Docsify–This
Intermediate, with a mix of basic and advanced aspects.
An overview to self-publishing with Markdown using the open source project Docsify–This, with a focus on digital literacy.
Use a page inspector to identify the font family and font size used in the platform you are embedding Docsify-This content in, and then pass that font family using the font-family (encoded, where spaces are replaced with '%20') and font-size (REM units) URL parameters to Docsify-This. For example, to match fonts with the Canvas LMS:
https://docsify-this.net?basePath=https://raw.githubusercontent.com/paulhibbitts/cmpt-363-222-pages/main&homepage=topics.md&font-family=Lato%20Extended,Lato,Helvetica%20Neue,Helvetica,Arial,sans-serif&font-size=1
If you want to include a Page Table of Contents with embedded Docsify-This content, but the destination platform screen area is not very wide, you might want to try the optional toc-narrow display option. For example, to use a narrower Table of Contents area that includes a smaller screen breakpoint: https://docsify-this.net?basePath=https://raw.githubusercontent.com/paulhibbitts/cmpt-363/main/docs/222&homepage=week-01.md&toc-narrow=true
Using Prismjs code blocks with syntax highlighting is supported for the languages included with Docsify and as well Bash, Go, Java, Kotlin, PHP, Python and Swift. To embed a code block use the Markdown standard of triple backticks and start the block with the name of the language, for example to embed a block of Javascript code with syntax highlight the following would be used:
 ```javascript
function test() {
  console.log("Hello world!");
-
-
Which would then appear as:
 function test ( ) {
  console . log ( "Hello world!" ) ;
} The content of external Markdown files can be embedded into Docisfy-This web pages with the following:
[ included Markdown from same source location ] ( example.md ' :include ') [ included Markdown from URL ] ( https://raw.githubusercontent.com/paulhibbitts/Markdown-File-Tests/main/itworks.md ' :include ')For additional examples of including external content, view Docsify Embeded Files.
WikiLinks format for links and images are supported, as also found in the desktop editor Obsidian and other platforms.
The display of AsciiDoc files ('.adoc' extension) via DownDoc is possible by manually passing the relevant filenames within a Docsify-This URL (not available in the Docisfy-This.net Web Page Builder), for example: https://docsify-this.net/?basePath=https://raw.githubusercontent.com/asciidoctor/asciidoctor-pdf/main/examples&homepage=basic-example.adoc&edit-link=https://github.com/asciidoctor/asciidoctor-pdf/blob/main/examples/basic-example.adoc
You can support the display of AsciiDoc files in the Web Page Builder of your own instance of Docsify-This by locating the function getAllowedFileExtensions() within the index.html file and add the file extension '.adoc' to the return statement, for example return ".md,.adoc"; -
The display of HedgeDoc files containing basic Markdown (as well as Mermaid and MathJax elements) is possible by manually using 'download' for the homepage URL parameter within a Docsify-This URL (not available in the Docisfy-This.net Web Page Builder), for example: https://docsify-this.net/?basePath=https://demo.hedgedoc.org/crN3ispNQdejWkUXXIXYQA&homepage=download
Here is an additional example, using the HedgeDoc file https://demo.hedgedoc.org/oisWMy9ZS36PE6TvYhJC4A?both (seen in split-screen view) and and rendered as a web page by Docsify-This https://docsify-this.net/?basePath=https://demo.hedgedoc.org&homepage=oisWMy9ZS36PE6TvYhJC4A/download&edit-link=https://demo.hedgedoc.org/oisWMy9ZS36PE6TvYhJC4A?both&toc=true&edit-link-text=Edit%20this%20Page%20in%20HedgeDoc
You can support HedgeDoc URLs (eg https://demo.hedgedoc.org/ip4SRxZYTEKa6JHr62XTiA) in the Web Page Builder of your own instance of Docsify-This by locating the line var hedgedocInstances = ''; within the index.html file and include your HedgeDoc instances separated by commas, for example var hedgedocInstances = 'demo.hedgedoc.org'; - Try out a demo instance of Docsify-This with support for demo.hedgedoc.org files at https://hibbitts-design.github.io/hedgedoc-docsify-this.
You can use camel case instead of hyphens for the names of Docsify-This URL parameters if prefered. ตัวอย่างเช่น, https://docsify-this.net?basePath=https://raw.githubusercontent.com/hibbitts-design/docsify-this-one-page-article/main&homepage= home.md&toc=true&toc-headings=h2,h3&edit-link=https://github.com/hibbitts-design/docsify-this-one-page-article/blob/main/home.md และ https://docsify-this.net?basePath=https://raw.githubusercontent.com/hibbitts-design/docsify-this-one-page-article/main&homepage =home.md&toc=true&tocHeadings=h2,h3&editLink=https://github.com/hibbitts-design/docsify-this-one-page-article/blob/main/home.md are equilivent.
To use the new GitHub.dev web editor (currently in Beta) for 'Edit this Page' links, change github.com to github.dev for GitHub.com files entered into the Web Page Builder Markdown File URL field.
There are multiple ways to get a raw Markdown file available online, here are three options to help you get started:
GitHub or Codeberg:
Gist (GitHub Gists):
.md (eg myfile.md )Personal or Organizational Website:
Some text editors, such as Microsoft Visual Studio (including the online GitHub.dev web editor), have the ability to link your own CSS so Markdown previews are more visually accurate. If your editor supports this ability, the below CSS files can be used.
Docsify-This (based on the Docsify Open Publishing Starter Kit) CSS:
https://docsify-this.net/assets/css/editor.css
FontAwesome CSS:
https://cdnjs.cloudflare.com/ajax/libs/font-awesome/4.7.0/css/font-awesome.css
Enhanced Previews with Microsoft Visual Studio
For an even closer visual representation of your Docsify-This pages in Microsoft Visual Studio, do the following:
docs folderTIP: If you change the VSCode setting for Workbench › Editor: Show Tabs to single then the docsify preview area will remain in place as you edit multiple Markdown files.
You can load custom default settings in the Docsify-This Web Page Builder using URL parameters. This ability is especially helpful for Docsify-This online sessions, workshops, or when users collaborate and assist one another. Along with the standard Docsify-This URL parameters, the Web Page Builder also offers the following specific parameters:
https://docsify-this.net/?url-field=https://codeberg.org/paulhibbitts/docsify-this-one-page-course/src/branch/main/home.mdhttps://docsify-this.net/?url-field=empty You can even just type docsify-this.net? in front of an online Markdown file URL that you are viewing (such as files hosted on GitHub, Codeberg, or raw source files) to instantly set up the Docsify-This Web Page Builder with that file. Once the Web Page Builder loads, press the Return key — no need to leave the keyboard — to see Docsify-This display the Markdown file as a web page! For example, https://docsify-this.net?https://github.com/hibbitts-design/docsify-this-one-page-course/blob/main/home.md .
https://docsify-this.net/?url-field=https://codeberg.org/paulhibbitts/docsify-this-one-page-course/src/branch/main/home.md&edit-link-checkbox=truehttps://docsify-this.net/?show-page-options=truehttps://docsify-this.net/?advanced=true For example, the following URL will display the Advanced Web Page Builder, with the Markdown file URL set to https://github.com/hibbitts-design/docsify-this-multiple-page-course-site/blob/main/home.md , the site name 'CPT-363' along with a Docsify custom Sidebar and Navbar to be included: https://docsify-this.net/?url-field=https://github.com/hibbitts-design/docsify-this-multiple-page-course-site/blob/main/home.md&sidebar=true&loadSidebar=true&loadNavbar=true&name=CPT-363
The quickest way to create such a shareable URL is to use the Docsify-This Web Page Builder to generate a Docisfy-This web page URL, and then replace the URL parameter basepath with url-field using the full path of the source Markdown file URL. For example, the URL https://docsify-this.net/?basePath=https://raw.githubusercontent.com/hibbitts-design/docsify-this-one-page-article/main&homepage=home.md&sidebar=true&maxLevel=3 would be changed to https://docsify-this.net/?url-field=https://github.com/hibbitts-design/docsify-this-one-page-article/blob/main/home.md&homepage=home.md&sidebar=true&maxLevel=3.
The provided basePath parameter and/or optional homepage parameter may not be correct, verify that these items lead to accessible content. This error message may also result from a Cross-Origin Resource Sharing (CORS) policy, which restricts resources on a web page to be requested from another domain. If possible, relocate files to a domain that supports cross-origin requests or alternatively if the domain in question is under your control explore re-configuring CORS related settings. You can confirm the cause of the 404 message by viewing the errors displayed in the Browser Javascript Console.
When displaying GitHub Markdown files, the branch name is assumed to be main , and other paths will likely cause a 404 file not found message. When displaying Codeberg Markdown files, the path is assumed to contain /src/branch/main and other paths will likely cause a 404 file not found message.
Due to not being able to update Navbar or custom Sidebar links before page rendering, 'Edit this Page' links cannot be automatically updated to their correct target pages. Manually pass a URL pointing to the Git Repository using the URL parameter edit-link as a workaround, for example https://docsify-this.net?basePath=https://raw.githubusercontent.com/hibbitts-design/docsify-this-multiple-page-site/main&homepage=home .md&loadNavbar=_navbar&edit-link=https://github.com/hibbitts-design/docsify-this-multiple-page-site&edit-link-text=GitHub%20Repository และ https://docsify-this.net/?basePath=https://raw.githubusercontent.com/paulhibbitts/docsify-this-cmpt-363-222-site/main&homepage=home.md&loadNavbar=_navbar.m d&sidebar=true&loadSidebar=_sidebar.md&edit-link=https://github.com/paulhibbitts/docsify-this-cmpt-363-222-site/tree/main&edit-link-text=GitHub%20Repository
Docsify is likely displaying the last cached version. To ensure the most recent version of a file is loaded, do a hard refresh of your Browser cache.
The most likely cause for embedded images in Markdown not being displayed as expected is the use of relative paths (ie  ) - review image paths and ensure the full path to each image is used (ie  ). Likewise, if images in HTML are not being displayed as expected the likely cause is again the use of relative paths (ie <img src="images/filename.jpg" alt="Alt Text"> ) - use absolute URLs for HTML image sources (ie <img src="https://raw.githubusercontent.com/user/repository/main/images/filename.jpg" alt="Alt Text"> ).
Due to iframe cross-domain issues embedded content may not be able to be displayed. Use the included rich media embed service embed.ly as a workaround.
For example, the following iFrame HTML:
< iframe src =" https://docs.google.com/presentation/d/e/2PACX-1vRnnRFelgw1ksq_p8Eryg3dnyLCRRLPf5fBgdwdv9p-tCIwcxqWvzDGrGbjxGHL7HqEJVpmV26ntk3a/embed?start=false&loop=false&delayms=3000 " frameborder =" 0 " width = 780 " height="585" allowfullscreen="true" mozallowfullscreen="true" webkitallowfullscreen="true" > </ iframe >Would be changed to:
< a class =" embedly-card " data-card-controls =" 0 " data-card-align =" left " data-card-width =" 100% " href =" https://docs.google.com/presentation/d/1BLaaOTsGxDmNcAhg6pdx3hl9IvI8NErg8Oe5ceh83fw/edit?usp=sharing " > Grav and Docsify Slides Placeholder </ a > When displaying a Docsify Sidebar or custom Sidebar, it is expected that page header levels start with a H1 level header.
When the search field is enabled in a Docsify custom Sidebar, only pages listed and linked in the Sidebar will be indexed for the search. Any pages linked in an optional Navbar will not be included in searches.
Docsify-This (as with Docsify itself) will only execute the first script included in a Markdown page, as described in the Docsify documentation.
Have you tried out Docsify-This? Share your feedback about Docsify-This
By leveraging his extensive UX design expertise and systems-oriented approach, Paul helps teams and individuals utilize open content in a range of education and publication settings, especially in connection with his Markdown-based Docsify and Grav CMS open-source projects. Professional services include user experience and workflow consulting, premium support subscriptions, workshops, and custom development. Sound of interest? Send a note to [email protected].
This open source project is by Paul Hibbitts of HibbittsDesign.org.
??♂️Special Thanks
Beau Shaw for his Remote Docsify example.
Alan Levine for the inspiration of a consolidated ReadMe collection.


