superflows
1.0.0

? Demo · Website · Docs · Slack · ? React Components
Superflows makes it easy to add an AI assistant to a software product. This lets users ask questions in natural language and the assistant makes calls to the software's API to answer them.
E.g. a CRM user could ask:
Have we closed any deals with publishing companies? If so, who was involved in those deals?
or:
Eve is ill today. Move her calls to the rest of the team - prioritise those who have had contact with the prospect before.
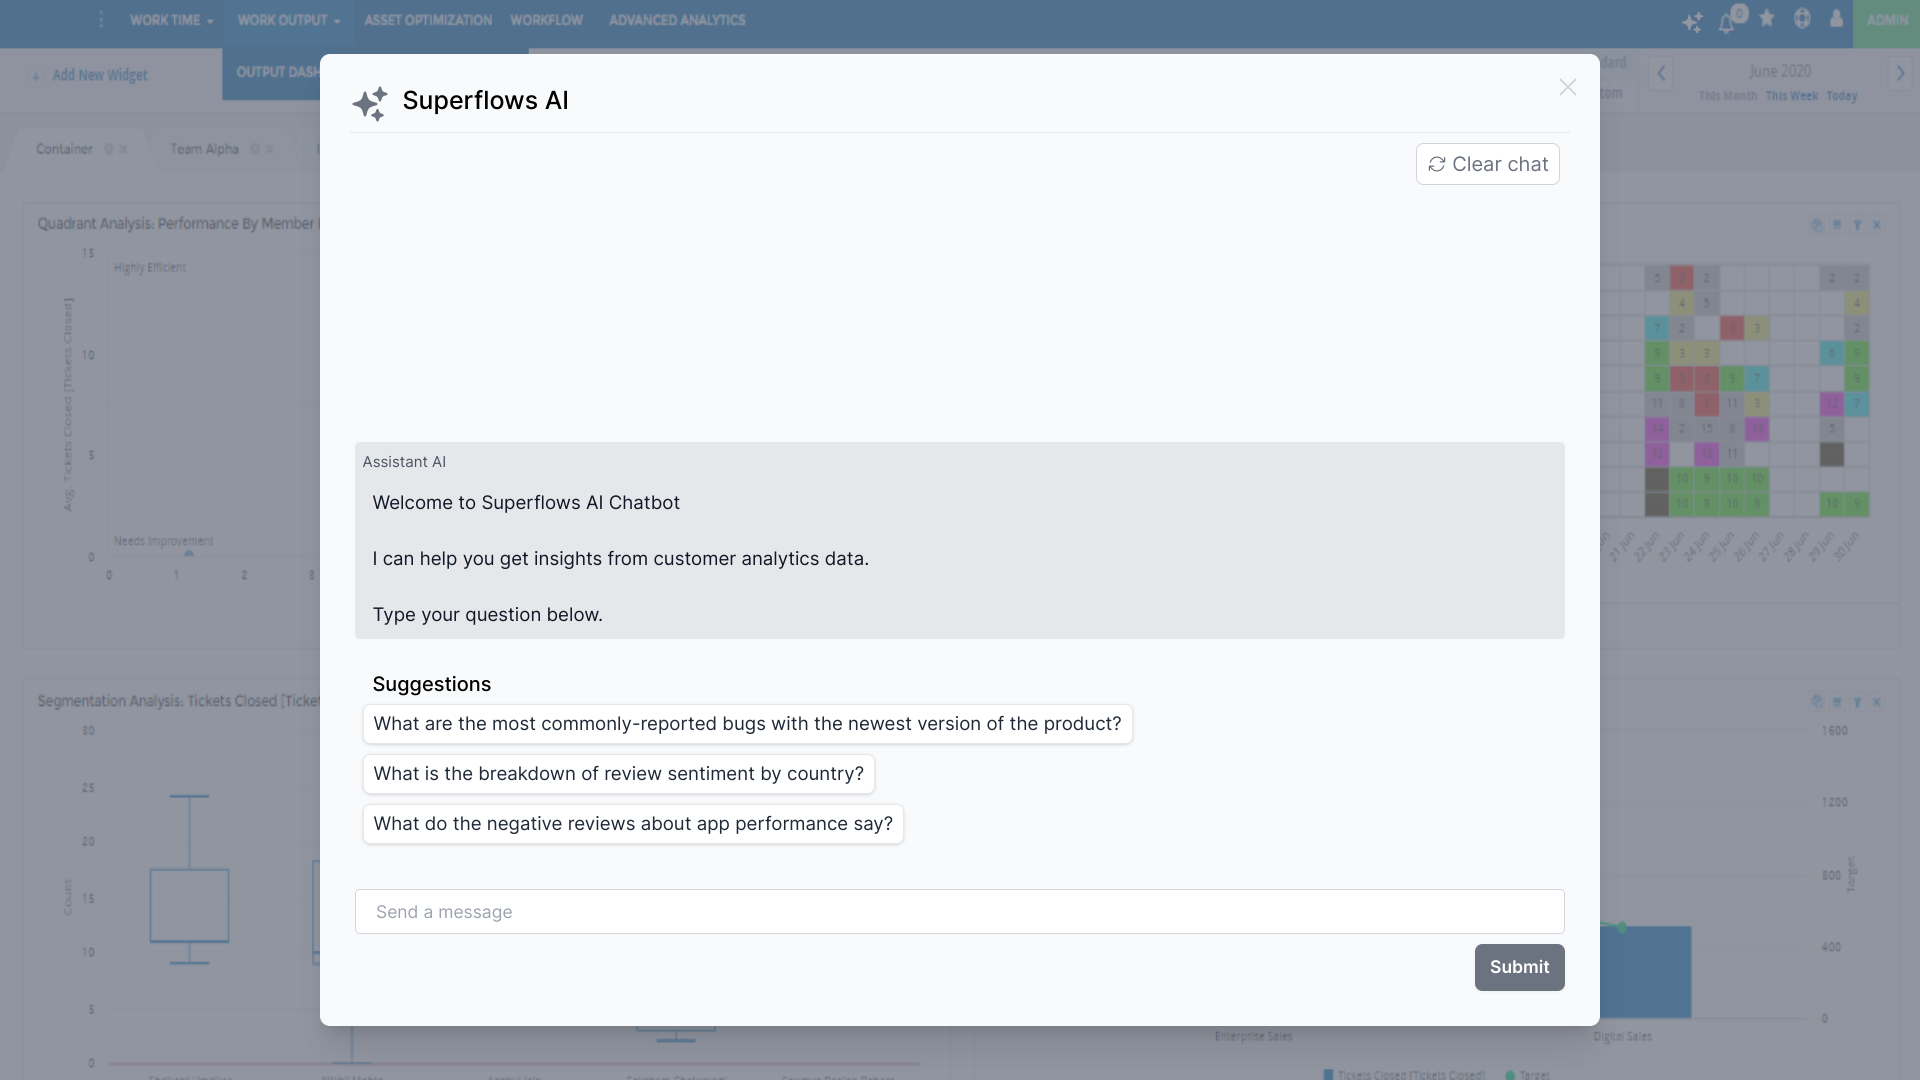
A user could ask their analytics assistant:
Did the Google Ads campaign we ran last month have a positive ROI? How many conversions did it generate?
Superflows will make API calls to answer these questions or complete tasks, and write code to analyse and plot data.
Check out a demo of Superflows in a CRM here.
You can try out the cloud version for free here or self-host. You can learn more on the docs pages.
Setting up an AI Assistant in Superflows Cloud is simple:
Superflows has a developer dashboard where you can configure, evaluate and debug your AI assistant before putting it into production.
You can interact with your assistant on the 'Playground'. 'Developer mode' shows you under the hood of what the assistant is thinking and planning. 'Mock API responses' enables you to check the behaviour of the assistant without connecting it to an API.
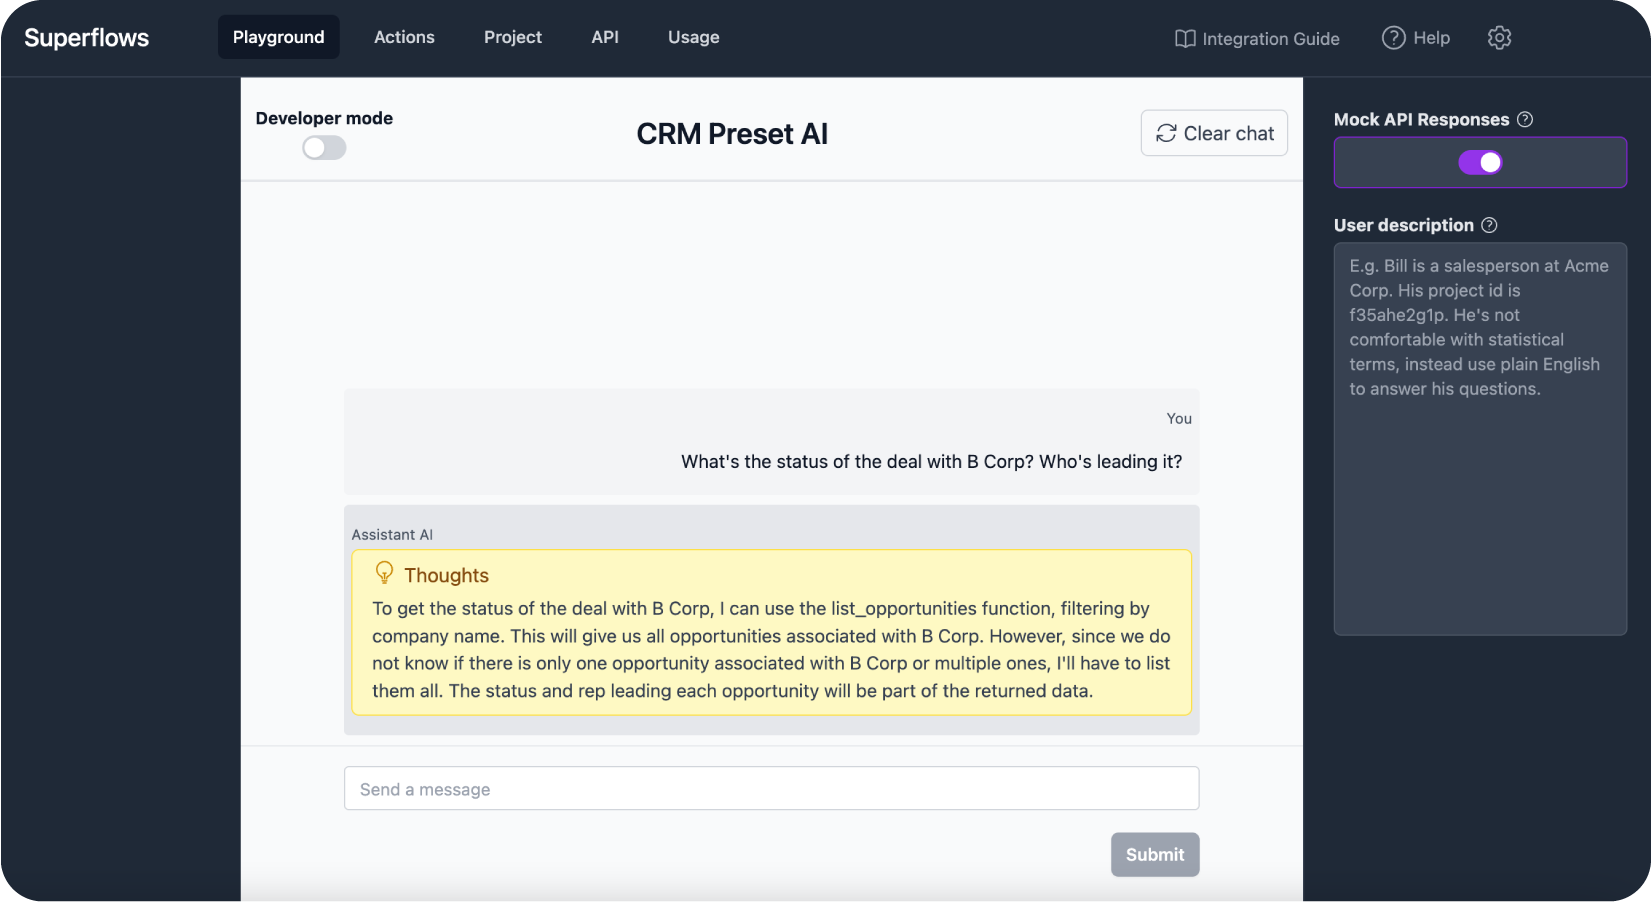
The 'Actions' page lets you control which API endpoints your assistant can call to answer user queries in a simple dashboard.
These endpoints can easily be uploaded via an Open API Specification, or entered manually.

Superflows comes with out-of-the-box React UI components. These components let you integrate Superflows into your product in 1 line of code (integration guide).
The API specification can be found in the docs.
We haven't written a self-hosting guide for Superflows yet. If you're interested in self-hosting, please reach out to us on Slack or email.
Available here.
You need to be running a local version of Supabase to develop this project locally.
Here are comprehensive instructions on using the Supabase CLI
(note: if you have used Supabase in other projects before, you may have to supabase stop before running supabase start)
If using npm
npm i
npm install supabase --save-dev
npx supabase start
The 2nd command should give you an anon_api_key and a service_role key.
You'll need to enter these into the .env file. Check out .env.example for the format and variables required.
Once you fill in .env.example, rename it .env.
To run in development mode:
make run(Alternatively, if you don't have make, use npm run dev)
Locate the init.sh file in the docker/development directory after cloning the project.
If you are running on windows, preferably use the git bash cli or WSL, you might need sudo permissions
Make the Script Executable Before using the script for the first time, ensure it is executable then run it:
chmod +x init.sh
./init.sh
This script is designed to facilitate the process of setting up and managing the Superflows development environment with Supabase and also to setup the base environment configuration in your project. It ensures that the Supabase repository is either cloned or updated, and it also checks and manages the .env file, merging the existing .env.example files if necessary.
By default the script runs docker compose to run start the containers and build (where required)
The script should have created the supabase folder and also a .env file.
Review the env variables and correct or change to suit your environment - the env should already contain sensible defaults (however)
OPENAI_API_KEY] (reach out to self-host our fine-tuned LLM)Run the compose file (depending on what version of compose you have installed)
docker compose up -d build
or
docker-compose up -d build


