Stylesheet.NET
v1.2.0
Stylesheet.net é uma biblioteca .NET cruzada projetada para desenvolvedores C#, VB.NET e F#. Ele permite que os desenvolvedores escrevam estilos CSS diretamente em seu código, eliminando a necessidade de arquivos de folha de estilo externos. O Stylesheet.net fornece implementações pré-escritas para todas as propriedades do CSS, AT-Rules, Palavras-chave e outros elementos, eliminando a necessidade de dependências adicionais.
Ele permite que você exporte CSS minificado e não atribuído.
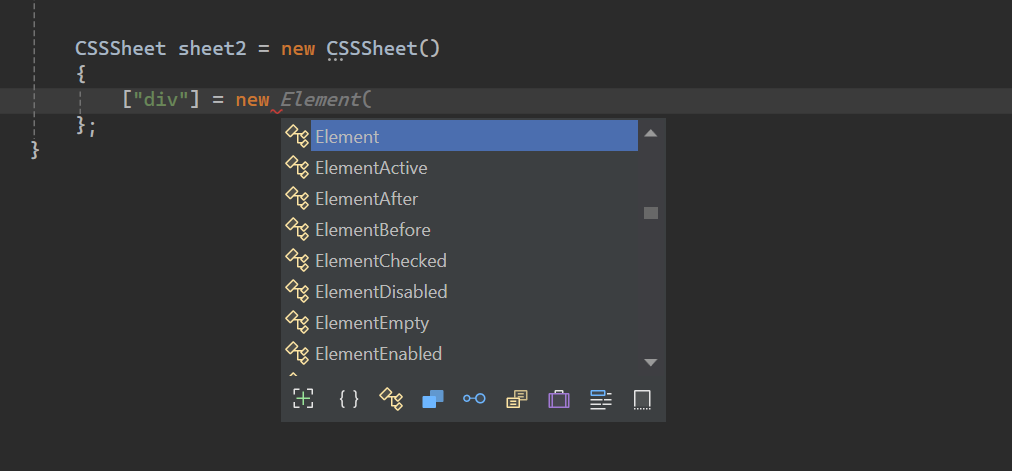
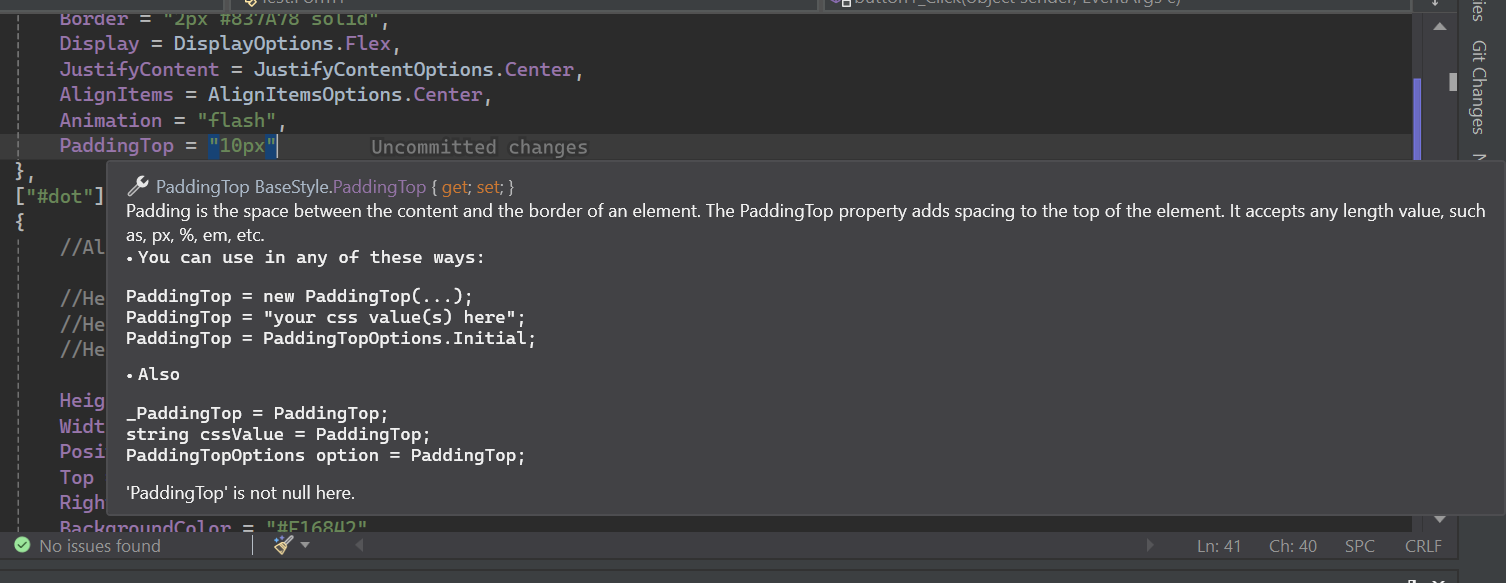
Stylesheet.net possui extensas documentações Intellisense.
Install-Package Stylesheet.NET -Version 1.2.0
Podemos implementar a seguinte lógica de estilo CSS em nosso código C# usando o Stylesheet.net .
 @charset "UTF-8" ;
@font-face {
    font-family : 'lilitaone-regular' ;
    src : url ( 'font/lilitaone-regular.ttf' );
}
: root {
        all : unset;
        --color : blue;
}
. head . account {
        height : 40 px !important ;
        width : 40 px !important ;
        position : absolute;
        top : 12 px ;
        left : 15 px ;
        border-radius : 20 px ;
        border : 2 px # 837A78 solid;
        display : flex;
        justify-content : center;
        align-items : center;
        -webkit-animation : flash;
        -moz-animation : flash;
        animation : flash;
}
# dot : hover {
        height : 10 px ;
        width : 10 px ;
        position : absolute;
        top : 16 px ;
        right : 13 px ;
        background-color : # F16842 ;
        border-radius : 5 px ;
        display : block;
}
@Keyframes flash{
0% , 50% , to   {
        opacity : 1 ;

}
55%   {
        opacity : 0.5;

}
25% , 75%   {
        opacity : 0;

}
}
@media ( min-width : 0 px ) and ( max-width : 319 px ){
a [ target = "_blank" ]{
        position : absolute;
        top : 20 px ;
        left : 0 ;
        z-index : 99 ;
}
} using StylesheetNET ;
CSSSheet sheet1 = new CSSSheet ( )
{
Charset = "UTF-8" ,
Root = new Root ( )
{
All = AllOptions . Unset ,
[ "--color" ] = "blue"
} ,
[ ".head .account" ] = new Element ( )
{
//Also u can write them this way too
//Height = new Height("10px"),
//Height = new Height(HeightOptions.Auto)
//Height = HeightOptions.Auto;
Height = "40px !important" ,
Width = "40px !important" ,
Position = PositionOptions . Absolute ,
Top = "12px" ,
Left = "15px" ,
BorderRadius = "20px" ,
Border = "2px #837A78 solid" ,
Display = DisplayOptions . Flex ,
JustifyContent = JustifyContentOptions . Center ,
AlignItems = AlignItemsOptions . Center ,
Animation = "flash"
} ,
[ "#dot" ] = new ElementHover ( )
{
Height = "10px" ,
Width = "10px" ,
Position = PositionOptions . Absolute ,
Top = "16px" ,
Right = "13px" ,
BackgroundColor = "#F16842" ,
BorderRadius = "5px" ,
Display = DisplayOptions . Block
} ,
[ AtRuleType . MediaQuery ] = new MediaQuery ( new AtRule ( ) . MinWidth ( "0px" ) . And . MaxWidth ( "319px" ) )
{
[ "a[target= " _blank " ]" ] = new Element ( )
{
Position = PositionOptions . Absolute ,
Top = "20px" ,
Left = "0" ,
ZIndex = "99"
}
} ,
[ AtRuleType . Keyframes ] = new Keyframes ( "flash" )
{
[ "0%, 50%, to" ] = new Keyframe ( )
{
Opacity = "1"
} ,
[ "55%" ] = new Keyframe ( )
{
Opacity = "0.5"
} ,
[ "25%, 75%" ] = new Keyframe ( )
{
Opacity = "0"
}
}
} ;
sheet . AddFontFace ( "lilitaone-regular" , "font/lilitaone-regular.ttf" ) ; Existem várias maneiras de exportar seu CSS do Stylesheet.net .
  string unminified_css = sheet1 ;
  //or
  string unminified_css = sheet1 . ToString ( ) ;
  string minified_css = sheet1 . ToString ( true ) ;
  //or
  string unminified_css = sheet1 . GenerateCss ( ) ;
string minified_css = sheet1 . GenerateCss ( true ) ; O Stylesheet.net é organizado em vários componentes principais, cada um fornecendo funcionalidades específicas para elementos de estilo em seus requisitos.
div , span , h1 , id , class , Attribute etc.:hover , :focus e pseudo-elementos como ::before e ::after . Todos os pseudos de elemento e classe estão incluídos .@keyframes for Animations, @media para layouts responsivos e @import e @layer para incluir estilos externos e outros. Representa o seletor de estilo de elemento HTML que você deseja estilizar, como div , span , h1 , id , class , Attribute etc. Ele abriga todas as propriedades de seletor de elementos.
 div {
    height : 10 px ;
    width : 10 px ;
    position : absolute;
    top : 16 px ;
    right : 13 px ;
    background-color : # F16842 ;
    border-radius : 5 px ;
    display : block;
} CSSSheet sheet = new CSSSheet ( )
{
[ "div" ] = new Element ( )
{
Height = "10px" ,
Width = "10px" ,
Position = PositionOptions . Absolute ,
Top = "16px" ,
Right = "13px" ,
BackgroundColor = "#F16842" ,
BorderRadius = "5px" ,
Display = DisplayOptions . Block
}
}Styleysheet.net também permite adicionar propriedades personalizadas.
 CSSSheet sheet = new CSSSheet ( )
  {
   [ "div" ] = new Element ( )
   {
      Height = "10px" ,
      //Width = "10px",

      [ "width" ] = "10px" ,
      [ "my_custom_property" ] = "some css values"
   }
  }
Quase todas as propriedades são na verdade objetos de classe que aceitam implicitamente as opções de string e enumes específicas.
Cada propriedade pode ser escrita de quatro maneiras.
Exemplo:
 Height = new Height ( "10px" )
 Height = "10px"
 Height = new Height ( HeightOptions . Auto )
 Height = HeightOptions . Auto ;
Todas as opções de enum da propriedade começam com o nome de sua propriedade e seguindo por
Options. Por exemplo,Height + Options = HeightOptions.Todas as propriedades possuem opções de enumeração que representam as palavras -chave CSS predefinidas.
O Stylesheet.net fornece suporte extensivo para pseudo-classes e pseudo-elementos do CSS, permitindo definir estilos para elementos com base em seu estado ou interação.
Todos os pseudos começam com elemento e folheado pelo tipo pseudo .
Exemplo:
ElementHover,ElementAfter,ElementNthChildetc.
Exemplo
 div : hover {
        color : red;
}
p :: after {
        content : "Some contents" ;
        width : 50 px ;
        height : 75 px ;
}
. list : nth-child ( 3 ){
        background-color : blue;
}
. text : not (. sup , p ){
        text-align
: right;
} CSSSheet sheet1 = new CSSSheet ( )
{
[ "div" ] = new ElementHover ( )
{
Color = "red"
} ,
[ "p" ] = new ElementAfter ( )
{
Content = " " Some contents " " ,
Width = "50px" ,
Height = "75px"
} ,
[ ".list" ] = new ElementNthChild ( 3 )
{
BackgroundColor = "blue"
} ,
[ ".text" ] = new ElementNot ( ".sup, p" )
{
TextAlign = TextAlignOptions . Right
}
} ; O AT-Rules permite definir estilos ou comportamentos personalizados usando diretivas como @keyframes for Animations, @media para layouts responsivos e @import e @layer para incluir estilos externos e outros.
As consultas de mídia são um componente essencial do design da web responsivo. Eles permitem a criação de layouts dinâmicos que se adaptam a diferentes tamanhos de viewport, garantindo uma experiência ideal para o usuário em vários dispositivos.
No Stylesheet.net, você pode definir a consulta de mídia de duas maneiras:
AT-Rule Builder
O AT-Rule Builder ajuda você a definir regras personalizadas usando o padrão da cadeia de código.
A implicação do construtor de re-regra se converte em string, para que você não precise lançar ou converter em string.
 string condition = new AtRule ( ) . Screen . And . MinWidth ( "0px" ) . And . MaxWidth ( "319px" ) ;

//Will give you:
// screen and (min-width: 0px) and (max-width: 319px)
Vamos criar uma consulta de mídia com o AT-Rule Builder :
 @media only screen and ( max-width : 600 px ){
 div {
 width : 100 % ;
 height : 100 % ;
 display : grid;
 }
}
CSSSheet sheet1 = new CSSSheet ( )
{
[ AtRuleType . MediaQuery ] = new MediaQuery ( new AtRule ( ) . Only . Screen . And . MaxWidth ( "600px" ) )
{
[ "div" ] = new Element ( )
{
Width = "100%" ,
Height = "100%" ,
Display = DisplayOptions . Grid
}
}
} ;A AT-Rule Builder tem todas as regras CSS implementadas. Você pode acorrentá -los como deseja sem limite de comprimento.
Se você não deseja usar o construtor de re-regra , basta colocar suas próprias regras/condições CSS como string.
 @media only screen and ( max-width : 600 px ){
  div {
        width : 100 % ;
        height : 100 % ;
        display : grid;
    }
} CSSSheet sheet1 = new CSSSheet ( )
{
[ AtRuleType . MediaQuery ] = new MediaQuery ( "only screen and (max-width: 600px)" )
{
[ "div" ] = new Element ( )
{
Width = "100%" ,
Height = "100%" ,
Display = DisplayOptions . Grid
}
}
} ;Não adicione
@media, pois a biblioteca acrescenta isso para você.
O @keyframes CSS AT-Rule capacita os desenvolvedores a criar animações complexas, definindo estilos para pontos específicos na sequência de animação.
Stylesheet.net divide isso em dois, Keyframes e Keyframe .
Um objeto Keyframes é class que contém waypoints. Um waypoint é um único objeto Keyframe .
Um keyframe em outras mãos é um único waypoint. Um waypoint pode ser de qualquer valor que seja percent ou from e ou to a combinação destes.
 @Keyframes flash{
0% , 50% , to   {
        opacity : 1 ;

}
55%   {
        opacity : 0.5;

}
25% , 75%   {
        opacity : 0;

}
} CSSSheet sheet1 = new CSSSheet ( )
{
[ AtRuleType . Keyframes ] = new Keyframes ( "flash" )
{
[ "0%, 50%, to" ] = new Keyframe ( )
{
Opacity = "1"
} ,
[ "55%" ] = new Keyframe ( )
{
Opacity = "0.5"
} ,
[ "25%, 75%" ] = new Keyframe ( )
{
Opacity = "0"
}
}
} ; O @import at-re-rule no CSS permite a inclusão de estilos de folhas de estilo externas na folha de estilo atual.
O estilo pode ser importado do local ou da URL.
 @import 'path/file.css' ;
@import url ( 'someurl/file.css' ) ;

. head {
        height : 40 px !important ;
        width : 40 px !important ;
} CSSSheet sheet1 = new CSSSheet ( ) ;
sheet1 [ ".head" ] = new Element ( )
{
Height = "40px !important" ,
Width = "40px !important" ,
} ;
Import from_Path = new Import ( "path/file.css" ) ;
sheet1 . Import ( from_Path ) ;
Import from_url = new Import ( new Url ( "someurl/file.css" ) ) ;
sheet1 . Import ( from_url ) ;Você pode remover uma importação ou limpar todas as importações.
 sheet . RemoveImport ( import_to_remove ) ; //remove an import
sheet . ClearImport ( ) ; //remove all imports O @layer AT-RUL no CSS apresenta o conceito de camadas em cascata, permitindo que os desenvolvedores defina a ordem de precedência para estilos nos casos em que várias regras CSS podem se aplicar ao mesmo elemento.
Stylesheet.net oferece recursos avançados como:
 @layer layer1 {
    @layer layer2 {

        . head {
            display : flex;
        }
    }

    . head {
        height : 100 % ;
        width : 100 % ;
    }
}

@layer layer3 {

    . head {
        display : block;
    }
}

. head {
    height : 40 px !important ;
    width : 40 px !important ;
} CSSSheet sheet1 = new CSSSheet ( ) ;
sheet1 [ ".head" ] = new Element ( )
{
Height = "40px !important" ,
Width = "40px !important" ,
} ;
Layer layer1 = new Layer ( )
{
[ ".head" ] = new Element ( )
{
Height = "100%" ,
Width = "100%" ,
}
} ;
Layer layer2 = new Layer ( )
{
[ ".head" ] = new Element ( )
{
Display = DisplayOptions . Flex
}
} ;
Layer layer3 = new Layer ( )
{
[ ".head" ] = new Element ( )
{
Display = DisplayOptions . Block
}
} ;
layer1 . AddLayer ( "layer2" , layer2 ) ; //nest layer2 in layer1
sheet1 . AddLayer ( "layer1" , layer1 ) ; //add layer1 to sheet1
sheet1 . AddLayer ( "layer3" , layer3 ) ; //add layer3 to sheet1Você pode remover uma camada ou limpar todas as camadas em uma folha ou camada. Você pode remover uma camada pela camada subjacente ou pelo nome da camada.
 layer1 . RemoveLayer ( "layer2" ) ;

sheet . RemoveLayer ( "layer1" ) ;
sheet . RemoveLayer ( "layer3" ) ; O @font-face css at-rule permite que os desenvolvedores adicionem fontes personalizadas em suas páginas da web. Essas fontes podem ser carregadas de um servidor remoto ou de uma fonte instalada localmente no dispositivo do usuário.
Stylesheet.net permite adicionar fontes personalizadas de duas maneiras.
 @font-face {
    font-family : "lilitaone-regular" ;
    src : url ( 'font/lilitaone-regular.ttf' );
}
@font-face {
    font-family : "NoyhR-Black" ;
    src : url ( "font/Noyh R Bold/NoyhR-Black.ttf" ) format ( "truetype" );
}

. head {
    height : 40 px !important ;
    width : 40 px !important ;
} CSSSheet sheet1 = new CSSSheet ( ) ;
sheet1 [ ".head" ] = new Element ( )
{
Height = "40px !important" ,
Width = "40px !important" ,
} ;
sheet1 . AddFontFace ( "lilitaone-regular" , "font/lilitaone-regular.ttf" ) ;
Dictionary < string , string > _font = new Dictionary < string , string > ( )
{
{ "font-family" , " " NoyhR-Black " " } ,
{ "src" , "url( " font/Noyh R Bold/NoyhR-Black.ttf " ) format( " truetype " )" }
} ;
sheet1 . AddFontFace ( _font ) ;Você pode remover um fontface pela FontFamily ou pode limpar tudo.
 sheet1 . RemoveFontFace ( "lilitaone-regular" ) ;

sheet1 . ClearFontFace ( ) ; Este guia abrange o básico do Stylesheet.net . Para saber mais e descobrir suas capacidades completas, sinta -se à vontade para experimentar e explorar seus diferentes recursos.