MemeAppFlutter
1.0.0
여기에 코드 : home_page.dart
Memesapi에서 데이터를 구문 분석합니다
 Future < MemesModel > getMemesApi () async {
  final response =
      await http. get ( Uri . parse ( "https://api.imgflip.com/get_memes" ));
  var data = jsonDecode (response.body);
  if (response.statusCode == 200 ) {
    return MemesModel . fromJson (data);
  } else {
    return MemesModel . fromJson (data);
  }
} class _HomePageState extends State < HomePage > {
late Future < MemesModel > memes;
@override
void initState () {
super . initState ();
memes = getMemesApi ();
}body : FutureBuilder < MemesModel >(
future : memes,
builder : (context, snapshot) {snapshot.hasData , snapshot.harError )snapshot.hasData 인 경우 UI를 렌더링하면 snapshot.hasError 오류를 표시하면 데이터를 가져 오기를 기다리는 동안 원형 프로그램 인디케이터를 렌더링합니다. DynamicHeightGridView (
crossAxisCount : 2 ,
mainAxisSpacing : 10 ,
crossAxisSpacing : 25 ,
itemCount :
//nullcheck operator
snapshot.hasData ? snapshot.data ! .data ! .memes ! .length : 1 ,
builder : (context, index) {
//data fetched successfully
if (snapshot.hasData) {
//render UI here
} //data couldn't be fetched due to some error
else if (snapshot.hasError) {
return Center (
child : Text ( "Error Occured : ${ snapshot . error }" ),
); //waiting for data to be fetched (just the way youtube videos show circular progressor while buffering)
else {
return const Center (
child : CircularProgressIndicator (
color : Colors .teal,
));
}제공자는 주정부 관리 도구입니다. 여기에서 더 자세히 참조 할 수 있습니다.
참고 : 제공자를 이해하는 데 언젠가는 필요할 수 있습니다. 제 사례는 다르지 않았습니다. (기억하십시오 : 밤새 아무것도 오지 않고 좋은 일이 시간이 걸립니다!)
제공자를 사용하여 2 가지 기본 요구 사항이 있습니다.
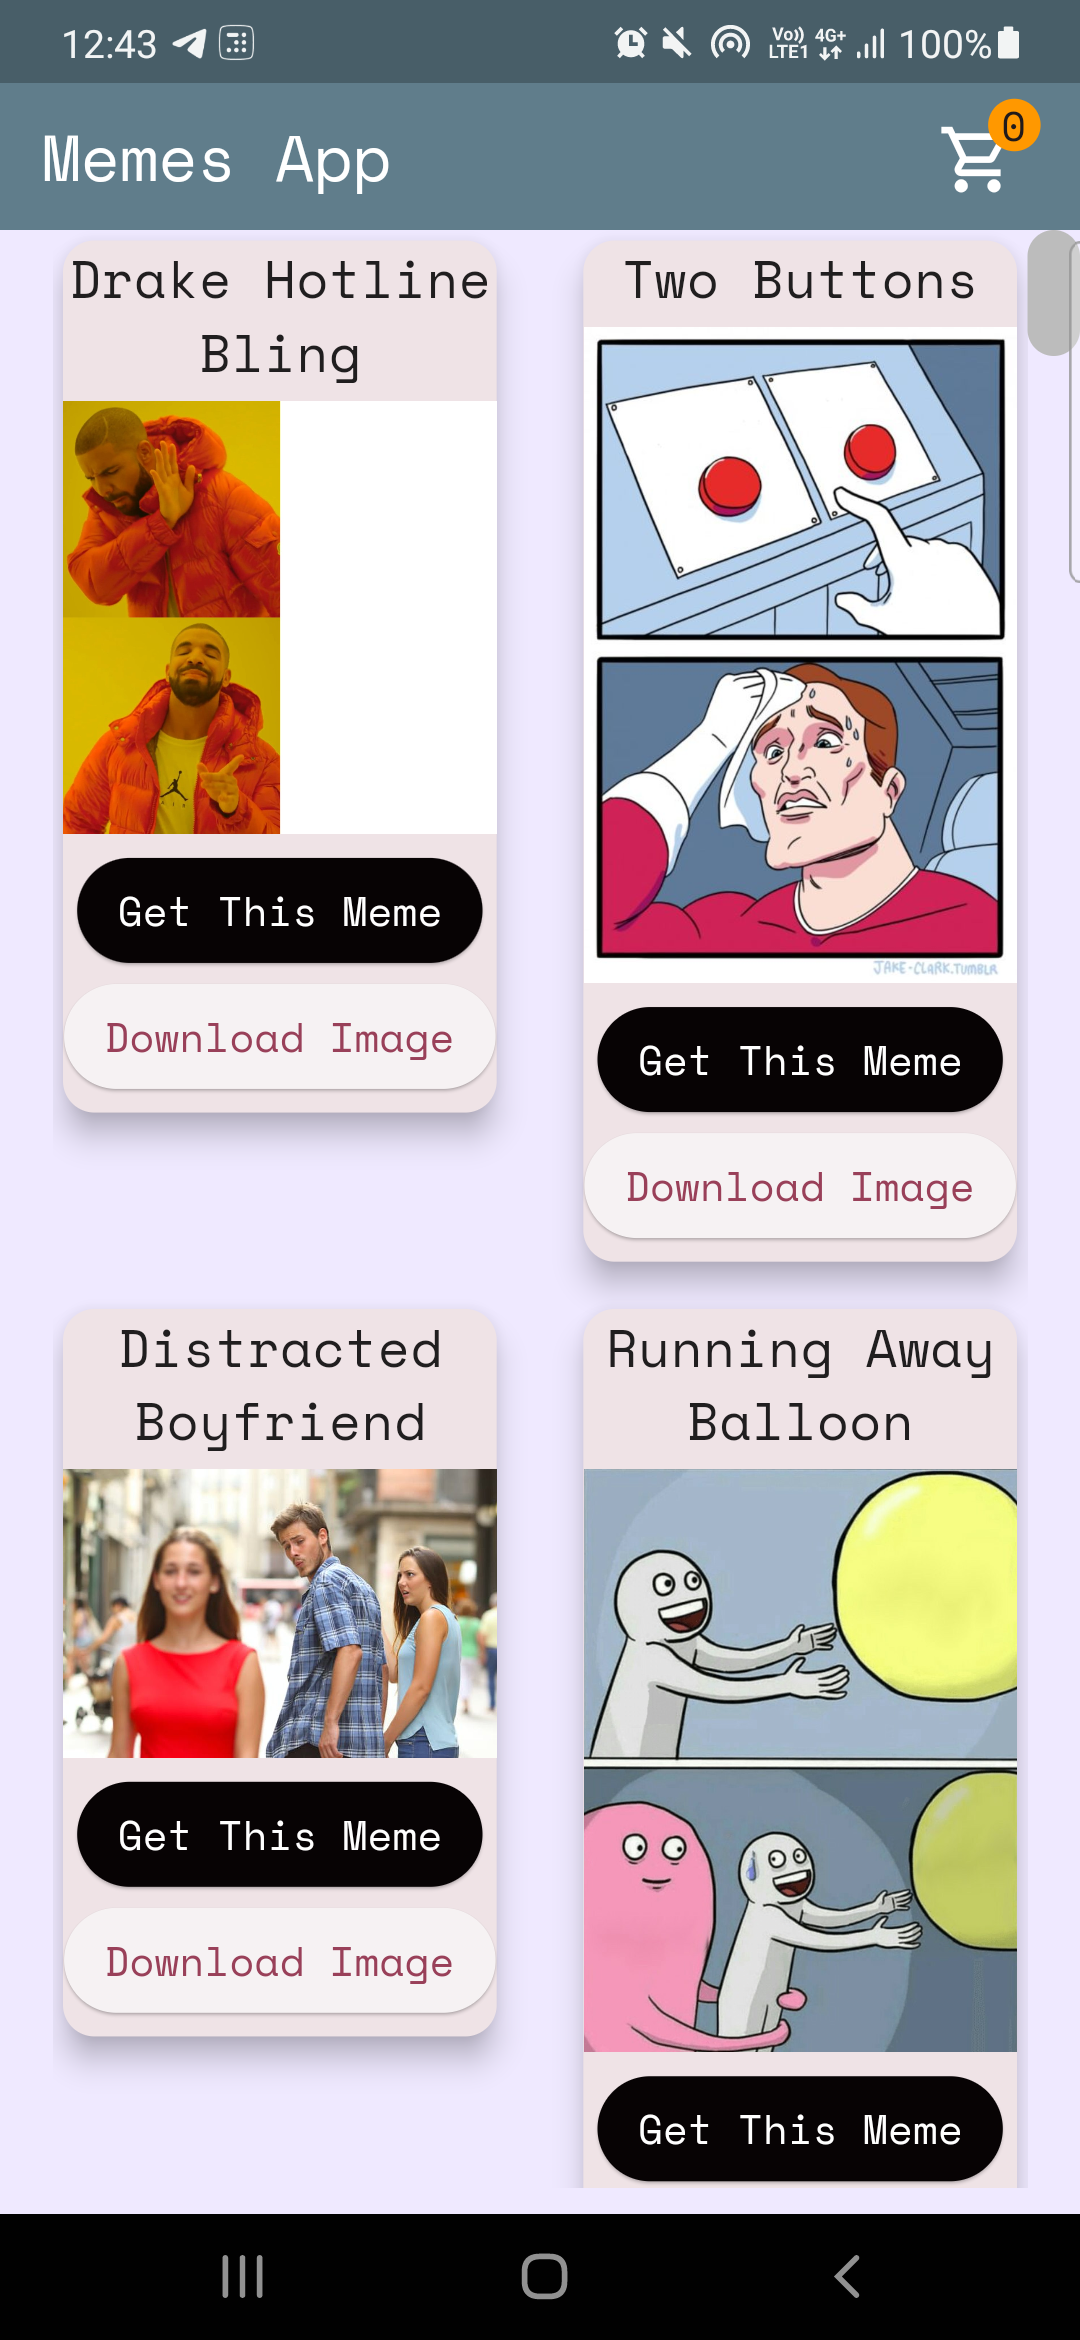
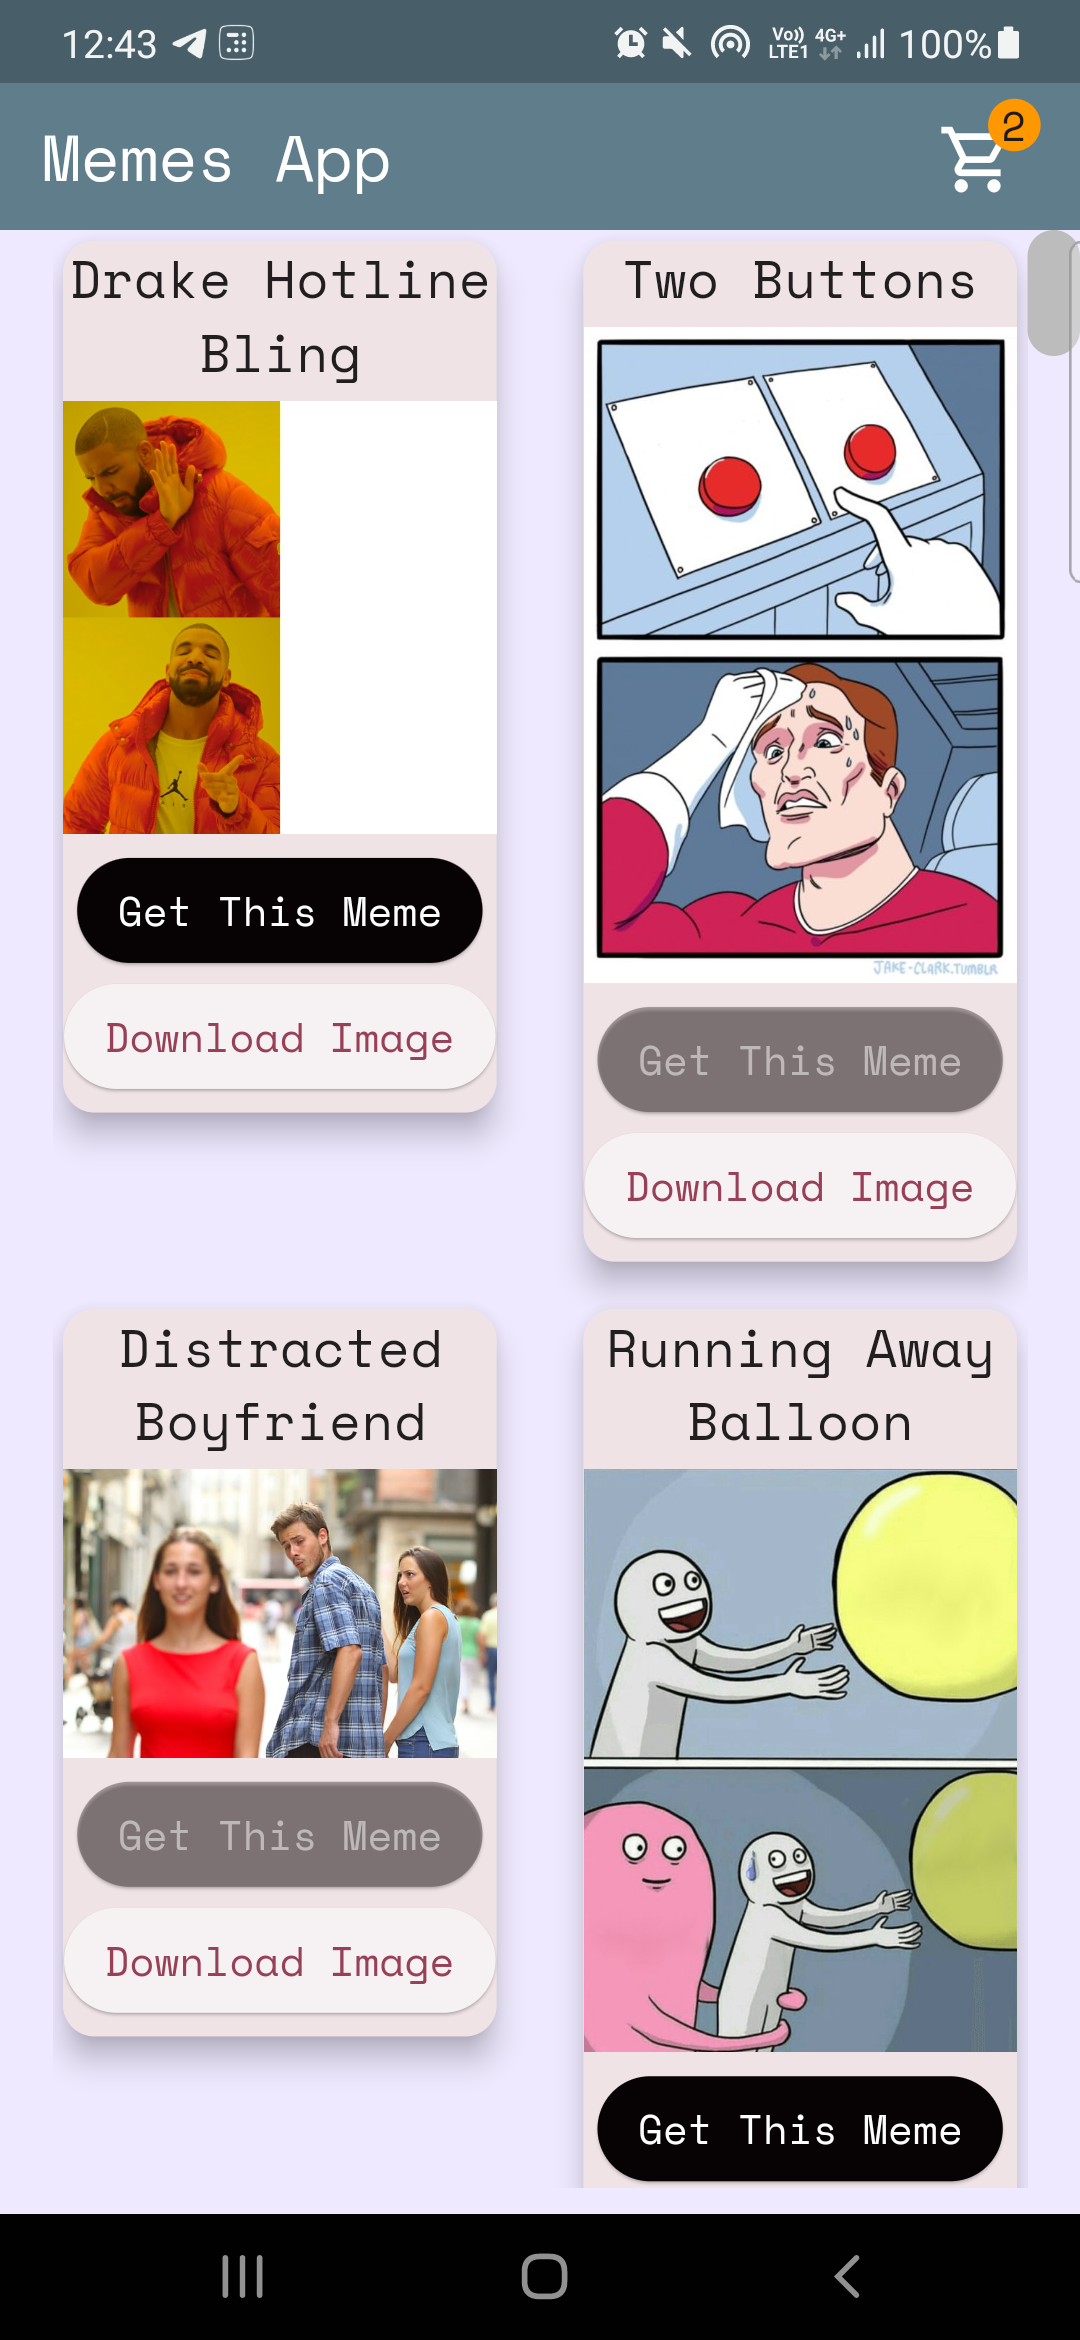
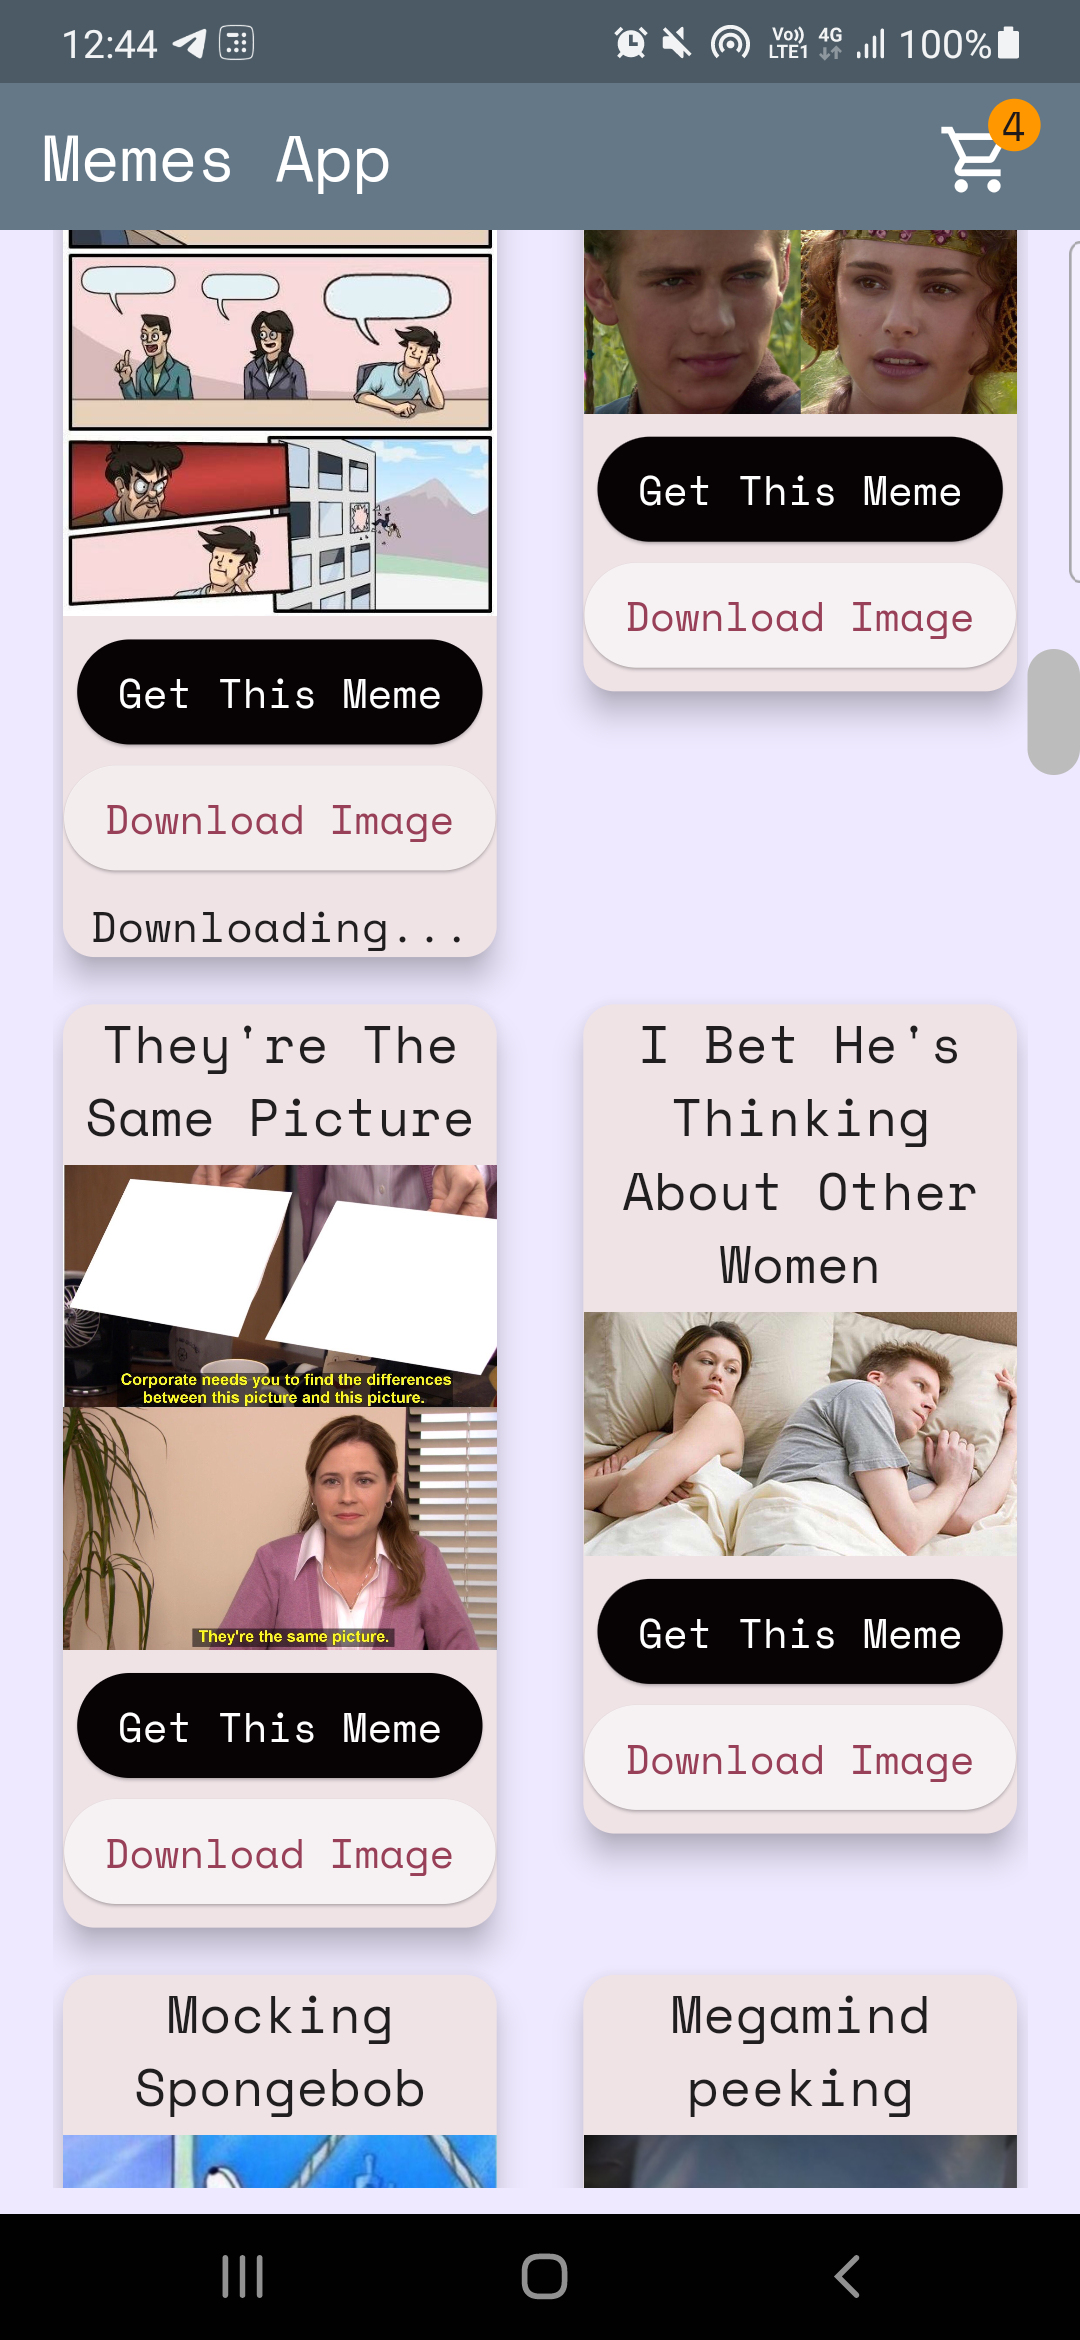
CASE-1 : 증분/감소 홈페이지의 카트 아이콘의 카운터 값 (위의 이미지 참조).
사례 -2 : 카트 페이지 구축.
CASE-1 : 증분/감소 카운터 코드 여기 : CART_COUNTER_PROVIDER.DART
 import 'package:flutter/cupertino.dart' ;

class CartCounterProvider extends ChangeNotifier {
  int cartCount;
  CartCounterProvider ({ this .cartCount = 0 });

  int get getCartCount => cartCount;

  void increment () {
    cartCount += 1 ;
    notifyListeners ();
  }

  void decrement () {
    cartCount -= 1 ;
    notifyListeners ();
  }
}
다음으로, 우리는 언제 제공자가 필요합니까?, 버튼을 누르면!
여기에 코드
context. read < CartCounterProvider >(). increment ();여기에 코드
 //just inside the build method this cartCounter will watch the value of the counter
//button pressed -> increment() method called using provider -> cartCounter watches the value and updates accordingly
int cartCounter = context. watch < CartCounterProvider >().getCartCount;
읽기와 시계를 사용하는 것은 그것을하는 한 가지 방법입니다. 다른 하나는 귀하가 만든 공급자 클래스의 인스턴스를 사용하는 것입니다. Case-2에 대한이 접근법에 대해 논의하겠습니다.
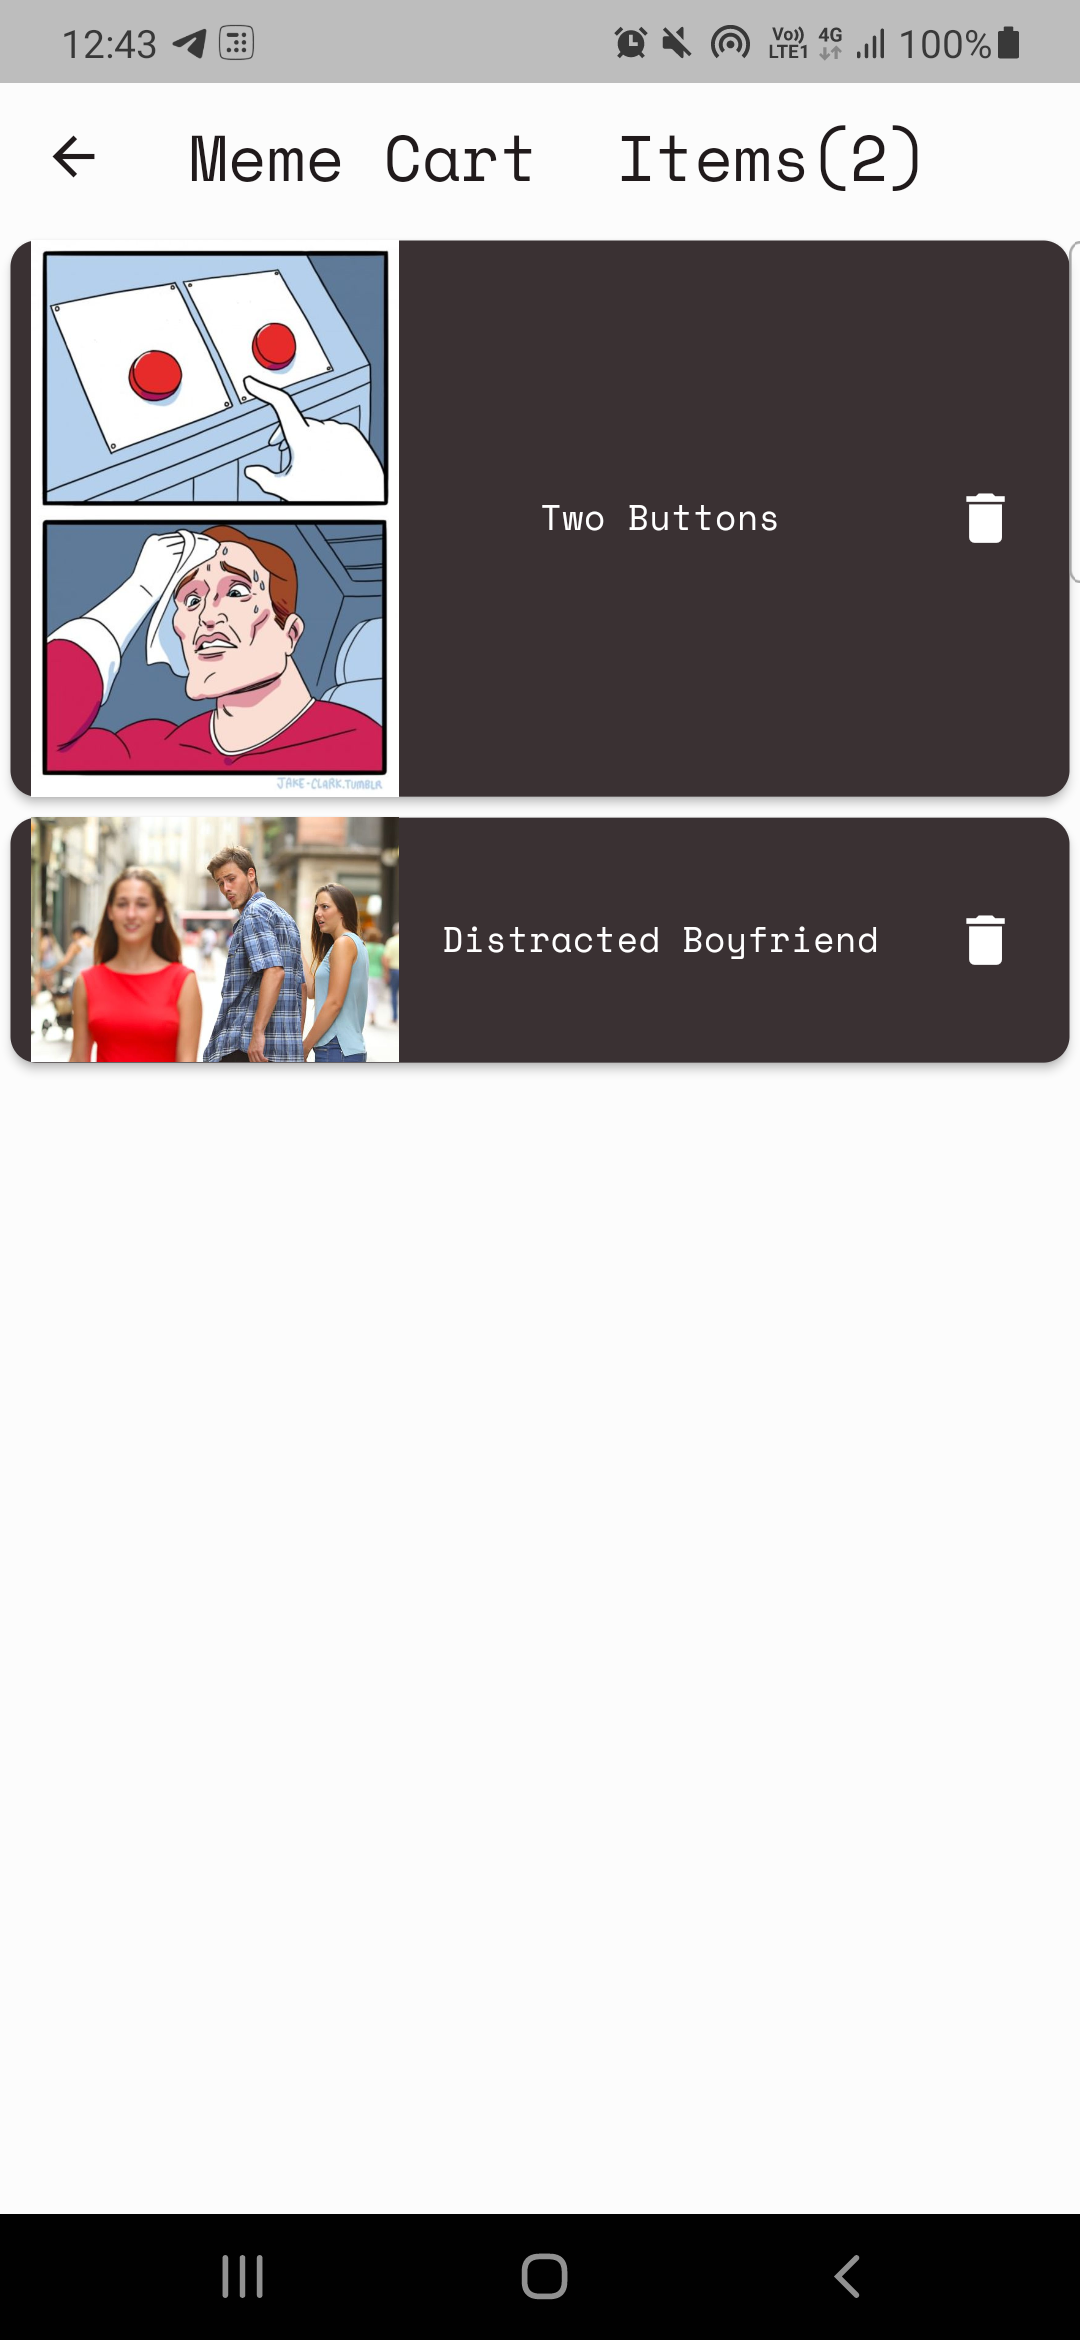
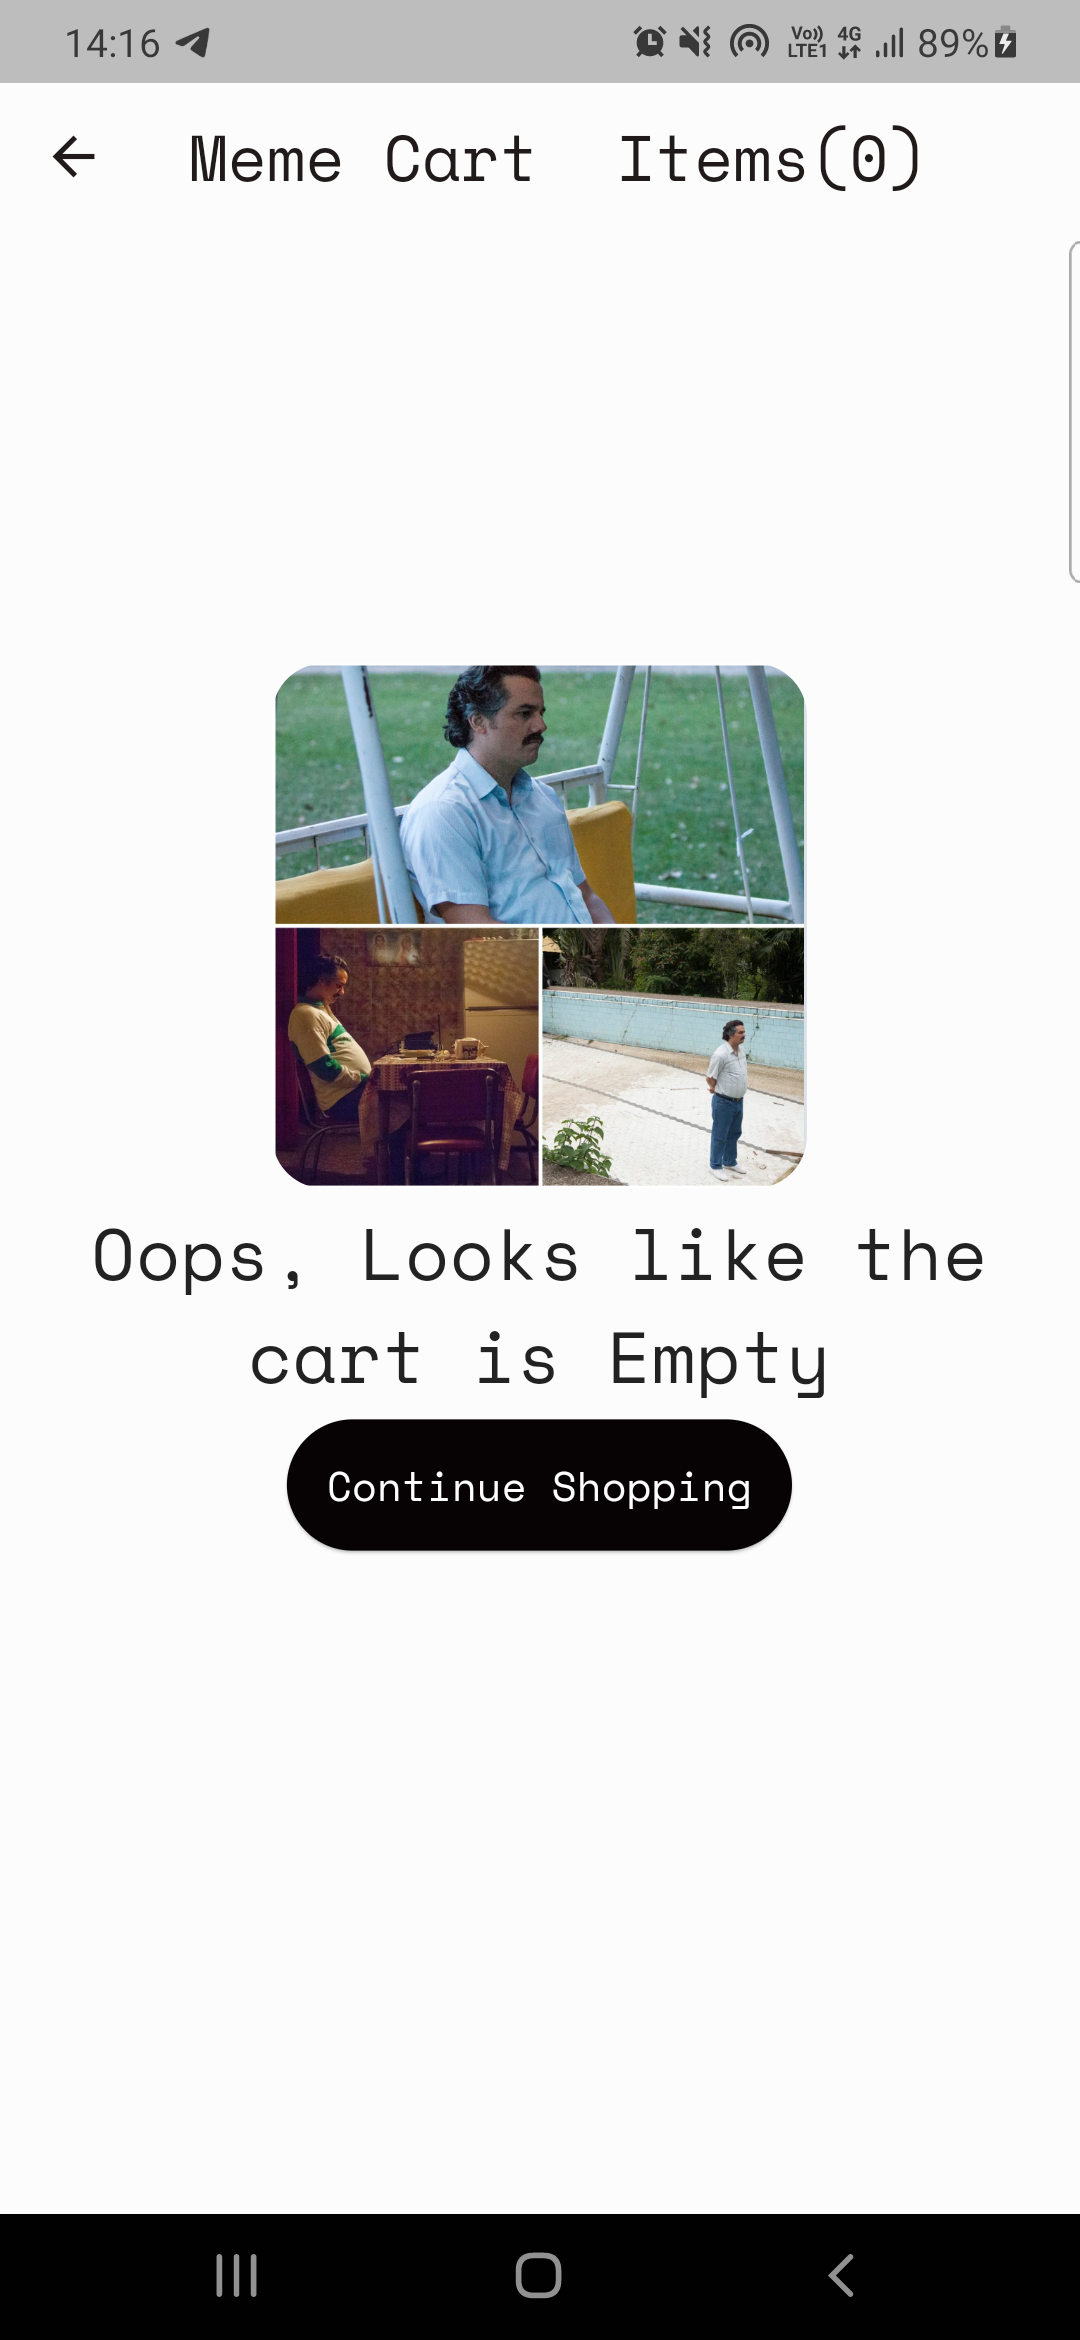
사례 -2 : 카트 페이지 구축.
참고 : 구현하기 전에 항상 기능을 정의하십시오.
카트 페이지 계획은 간단합니다.
카트 표시를위한 제공자 클래스 (memecartProvider)
코드 meme_cart_provider.dart
 //read below about CartCardModel first

import 'package:memeapp/models/cart_card_model.dart' ;
import 'package:flutter/cupertino.dart' ;

class MemeCartProvider extends ChangeNotifier {

  //now it's convenient for us to display the memes, we just need a list of CartCardModel!
  //each instance of this class will have the respective id, imageURL, and name of the meme.
  //We just need to traverse and display this list in the cart page, thats it!


  //_cartList will have the id, imageURL, name of only those memes that are added to cart by user
  final List < CartCardModel > _cartList = < CartCardModel > [];

  //memesIdList will only contain the meme ID's which will be used to add/remove memes from the cart
  //also used to prevent duplicates
  List < String > ? memesIdList = < String > [];

  List < CartCardModel > get getCartList => _cartList;
  List < String > ? get getMemesIdList => memesIdList;

  void addItem ( CartCardModel addThisItem) {
    _cartList. add (addThisItem);
    notifyListeners ();
  }

  void removeItem ( String memeId) {
    _cartList. removeWhere ((element) => element.id == memeId);
    memesIdList ! . remove (memeId);
    notifyListeners ();
  }
}CartcardModel cart_card_model.dart
 //each instance of this class (CartCardModel) will have the info of id, imageURL, and name.
//it will now be easier to display the memes in the cart page
class CartCardModel {
  String id;
  String ? nameCart;
  String ? imageUrlCart;
  CartCardModel ({
    required this .id,
    this .nameCart,
    this .imageUrlCart,
  });
}
이제 카트 페이지에서 밈을 렌더링하는 것이 편리합니다. 우리는 단순히 목록을 가로 지르고 그에 따라 항목을 표시합니다.
그러나 사용자가 추가 한 항목 만 어떻게 렌더링되도록 하는가? 제공자는 다시!.
코드 cart_page.dart
  //define an instance of MemeCartProvider class like this inside the build method
   Widget build ( BuildContext context) {
    var memeCartProvider = Provider . of < MemeCartProvider >(context);
여기에 코드
 //wrap the Listview.builder with CONSUMER<MemeCartProvider>
Consumer < MemeCartProvider >(
              builder : (context, value, child) {
                //ListView will traverse CartCardModel list and render memes accordingly
                return ListView . builder (
                  //itemCount is simply the length of the list.
                  itemCount : value.getMemesIdList ! .length,
                  itemBuilder : ((context, index) {
                    object / instance of CartCardModel class using MemeCartProvider
                    CartCardModel cartObject = value.getCartList[index];
여기에 코드
 //render the image using cartObject
 Image . network (
                "${ cartObject . imageUrlCart }" ,
                     width : 140 ,
              ),

 //render the name using cartObject
 Text (
                  //limiting name to 20 characters
                  cartObject.nameCart ! .length > 20
                   ? "${ cartObject . nameCart !. substring ( 0 , 20 )}..."
                   : "${ cartObject . nameCart }" ,
마지막으로 삭제 기능을 구현해야합니다.
 onPressed : () {
                   //we will remove the item from the list
                   value. removeItem (cartObject.id);

                   //why this line? you might've guessed it already, if not, dont worry
                   //remember we incrementes the counter value when user added items to the cart
                   //now user is deleting items, hence we need to decreament that counter value too!, right?
                   context. read < CartCounterProvider >(). decrement ();
               },
그리고 ... 그것은 랩입니다! 이것이 당신이 도움이 되었기를 바랍니다. 그리고 당신은 새로운 것을 배웠습니다. 원한다면이 repo를 제공하는 것을 고려하십시오. 질문이 있으면 내 소셜을 통해 저에게 연락 할 수 있습니다.
모두 제일 좋다?


