react native font demo
1.0.0
Dapat menggunakan pengubah jenis huruf font seperti fontWeight dan fontStyle dalam kombinasi dengan keluarga font khusus, baik di iOS dan Android.
 < Text style = { {
  fontFamily : "Raleway" ,
  fontWeight : "100" ,
  style : "italic"
} } >
  Hello world!
</ Text >
< Text style = { {
  fontFamily : "Raleway" ,
  fontWeight : "bold" ,
  style : "normal"
} } >
  Hello world !
< / Text >
Untuk contoh ini, kami akan mendaftarkan keluarga font Raleway . Tentu saja, metode ini akan bekerja dengan font TTF apa pun.
Anda membutuhkan seluruh keluarga font Raleway, diekstraksi dalam folder sementara. Yaitu:
Raleway-Thin.ttf (100)Raleway-ThinItalic.ttfRaleway-ExtraLight.ttf (200)Raleway-ExtraLightItalic.ttfRaleway-Light.ttf (300)Raleway-LightItalic.ttfRaleway-Regular.ttf (400)Raleway-Italic.ttfRaleway-Medium.ttf (500)Raleway-MediumItalic.ttfRaleway-SemiBold.ttf (600)Raleway-SemiBoldItalic.ttfRaleway-Bold.ttf (700)Raleway-BoldItalic.ttfRaleway-ExtraBold.ttf (800)Raleway-ExtraBoldItalic.ttfRaleway-Black.ttf (900)Raleway-BlackItalic.ttf Kami akan menganggap file -file itu sekarang disimpan di /tmp/raleway/ .
Anda perlu OTFINFO terpasang di sistem Anda untuk melakukan langkah ini. Ini dikirim dengan banyak distribusi Linux. Pada macOS, instal melalui paket minuman LCDF-Typetools .
otfinfo --family Raleway-Regular.ttf Harus mencetak "raleway". Nilai ini harus dipertahankan untuk pengaturan Android. Nama ini akan digunakan dalam gaya reaksi fontFamily .
react-native init FontDemo
cd FontDemoUntuk Android, kami akan menggunakan font XML untuk mendefinisikan varian keluarga font dasar.
Komentar : Prosedur ini tersedia di React Native karena komit FD6386A07EB75A8EC16B1384A3E5827DEA520B64 (7 Mei 2019), dengan penambahan
ReactFontManager::addCustomFontMETODE.
mkdir android/app/src/main/res/font
cp /tmp/raleway/ * .ttf android/app/src/main/res/font
Kita harus mengganti nama file font yang mengikuti aturan ini untuk mematuhi pembatasan nama aset Android:
- dengan _ ;Anda dapat menggunakan skrip bash di bawah ini (pastikan Anda memberikan folder font sebagai argumen pertama):
 #! /bin/bash
# fixfonts.sh

typeset folder= " $1 "
if [[ -d " $folder " && ! -z " $folder " ]] ; then
  pushd " $folder " ;
  for file in * .ttf ; do
    typeset normalized= " ${file // - / _} " ;
    normalized= " ${normalized,,} " ;
    mv " $file " " $normalized "
  done
  popd
fi
./fixfonts.sh /path/to/root/FontDemo/android/app/src/main/res/font Buat file android/app/src/main/res/font/raleway.xml dengan konten di bawah ini. Pada dasarnya, kami harus membuat satu entri per kombinasi fontStyle / fontWeight yang ingin kami dukung, dan mendaftarkan nama aset yang sesuai.
<? xml version = " 1.0 " encoding = " utf-8 " ?>
< font-family xmlns : app = " http://schemas.android.com/apk/res-auto " >
    < font app : fontStyle = " normal " app : fontWeight = " 100 " app : font = " @font/raleway_thin " />
    < font app : fontStyle = " italic " app : fontWeight = " 100 " app : font = " @font/raleway_thinitalic " />
    < font app : fontStyle = " normal " app : fontWeight = " 200 " app : font = " @font/raleway_extralight " />
    < font app : fontStyle = " italic " app : fontWeight = " 200 " app : font = " @font/raleway_extralightitalic " />
    < font app : fontStyle = " normal " app : fontWeight = " 300 " app : font = " @font/raleway_light " />
    < font app : fontStyle = " italic " app : fontWeight = " 300 " app : font = " @font/raleway_lightitalic " />
    < font app : fontStyle = " normal " app : fontWeight = " 400 " app : font = " @font/raleway_regular " />
    < font app : fontStyle = " italic " app : fontWeight = " 400 " app : font = " @font/raleway_italic " />
    < font app : fontStyle = " normal " app : fontWeight = " 500 " app : font = " @font/raleway_medium " />
    < font app : fontStyle = " italic " app : fontWeight = " 500 " app : font = " @font/raleway_mediumitalic " />
    < font app : fontStyle = " normal " app : fontWeight = " 600 " app : font = " @font/raleway_semibold " />
    < font app : fontStyle = " italic " app : fontWeight = " 600 " app : font = " @font/raleway_semibolditalic " />
    < font app : fontStyle = " normal " app : fontWeight = " 700 " app : font = " @font/raleway_bold " />
    < font app : fontStyle = " italic " app : fontWeight = " 700 " app : font = " @font/raleway_bolditalic " />
    < font app : fontStyle = " normal " app : fontWeight = " 800 " app : font = " @font/raleway_extrabold " />
    < font app : fontStyle = " italic " app : fontWeight = " 800 " app : font = " @font/raleway_extrabolditalic " />
    < font app : fontStyle = " normal " app : fontWeight = " 900 " app : font = " @font/raleway_black " />
    < font app : fontStyle = " italic " app : fontWeight = " 900 " app : font = " @font/raleway_blackitalic " />
</ font-family > Di android/app/src/main/java/com/fontdemo/MainApplication.java , ikat nama keluarga font dengan aset yang baru saja kita buat di dalam metode onCreate .
️ Jika Anda mendaftarkan font yang berbeda, pastikan Anda mengganti "Raleway" dengan nama yang ditemukan di langkah sebelumnya (temukan nama keluarga font).
 --- a/android/app/src/main/java/com/fontdemo/MainApplication.java
+++ b/android/app/src/main/java/com/fontdemo/MainApplication.java
@@ -7,6 +7,7 @@ import com.facebook.react.ReactApplication;
 import com.facebook.react.ReactInstanceManager;
 import com.facebook.react.ReactNativeHost;
 import com.facebook.react.ReactPackage;
+ import com.facebook.react.views.text.ReactFontManager;
 import com.facebook.soloader.SoLoader;
 import java.lang.reflect.InvocationTargetException;
 import java.util.List;
@@ -43,6 +44,7 @@ public class MainApplication extends Application implements ReactApplication {
   @Override
   public void onCreate() {
     super.onCreate();
+    ReactFontManager.getInstance().addCustomFont(this, "Raleway", R.font.raleway);
     SoLoader.init(this, /* native exopackage */ false);
     initializeFlipper(this, getReactNativeHost().getReactInstanceManager());
   }
Pada react asli 0,73+
 --- a/android/app/src/main/java/com/fontdemo/MainApplication.kt
+++ b/android/app/src/main/java/com/fontdemo/MainApplication.kt
import com.facebook.react.ReactApplication
import com.facebook.react.ReactHost
import com.facebook.react.ReactNativeHost
import com.facebook.react.ReactPackage
+ import com.facebook.react.common.assets.ReactFontManager
import com.facebook.react.defaults.DefaultNewArchitectureEntryPoint.load
import com.facebook.react.defaults.DefaultReactHost.getDefaultReactHost
import com.facebook.react.defaults.DefaultReactNativeHost


  override fun onCreate() {
    super.onCreate()
+    ReactFontManager.getInstance().addCustomFont(this, "Raleway", R.font.raleway);
    SoLoader.init(this, false)
    if (BuildConfig.IS_NEW_ARCHITECTURE_ENABLED) {
      // If you opted-in for the New Architecture, we load the native entry point for this app.
      load()
    }
    ReactNativeFlipper.initializeFlipper(this, reactNativeHost.reactInstanceManager)
  }
Di iOS, segalanya akan menjadi lebih mudah. Kami pada dasarnya hanya perlu menggunakan fungsionalitas tautan aset asli React. Metode ini mengharuskan kami menggunakan nama keluarga font yang diambil pada langkah pertama sebagai atribut gaya fontFamily .
mkdir -p assets/fonts
cp /tmp/raleway/ * .ttf assets/fontsreact-native.config.js module . exports = {
project : {
ios : { } ,
android : { } ,
} ,
iosAssets : [ './assets/fonts' ] ,
} ; # react-native >= 0.69
npx react-native-asset
# otherwise
react-native link| iOS | Android |
|---|---|
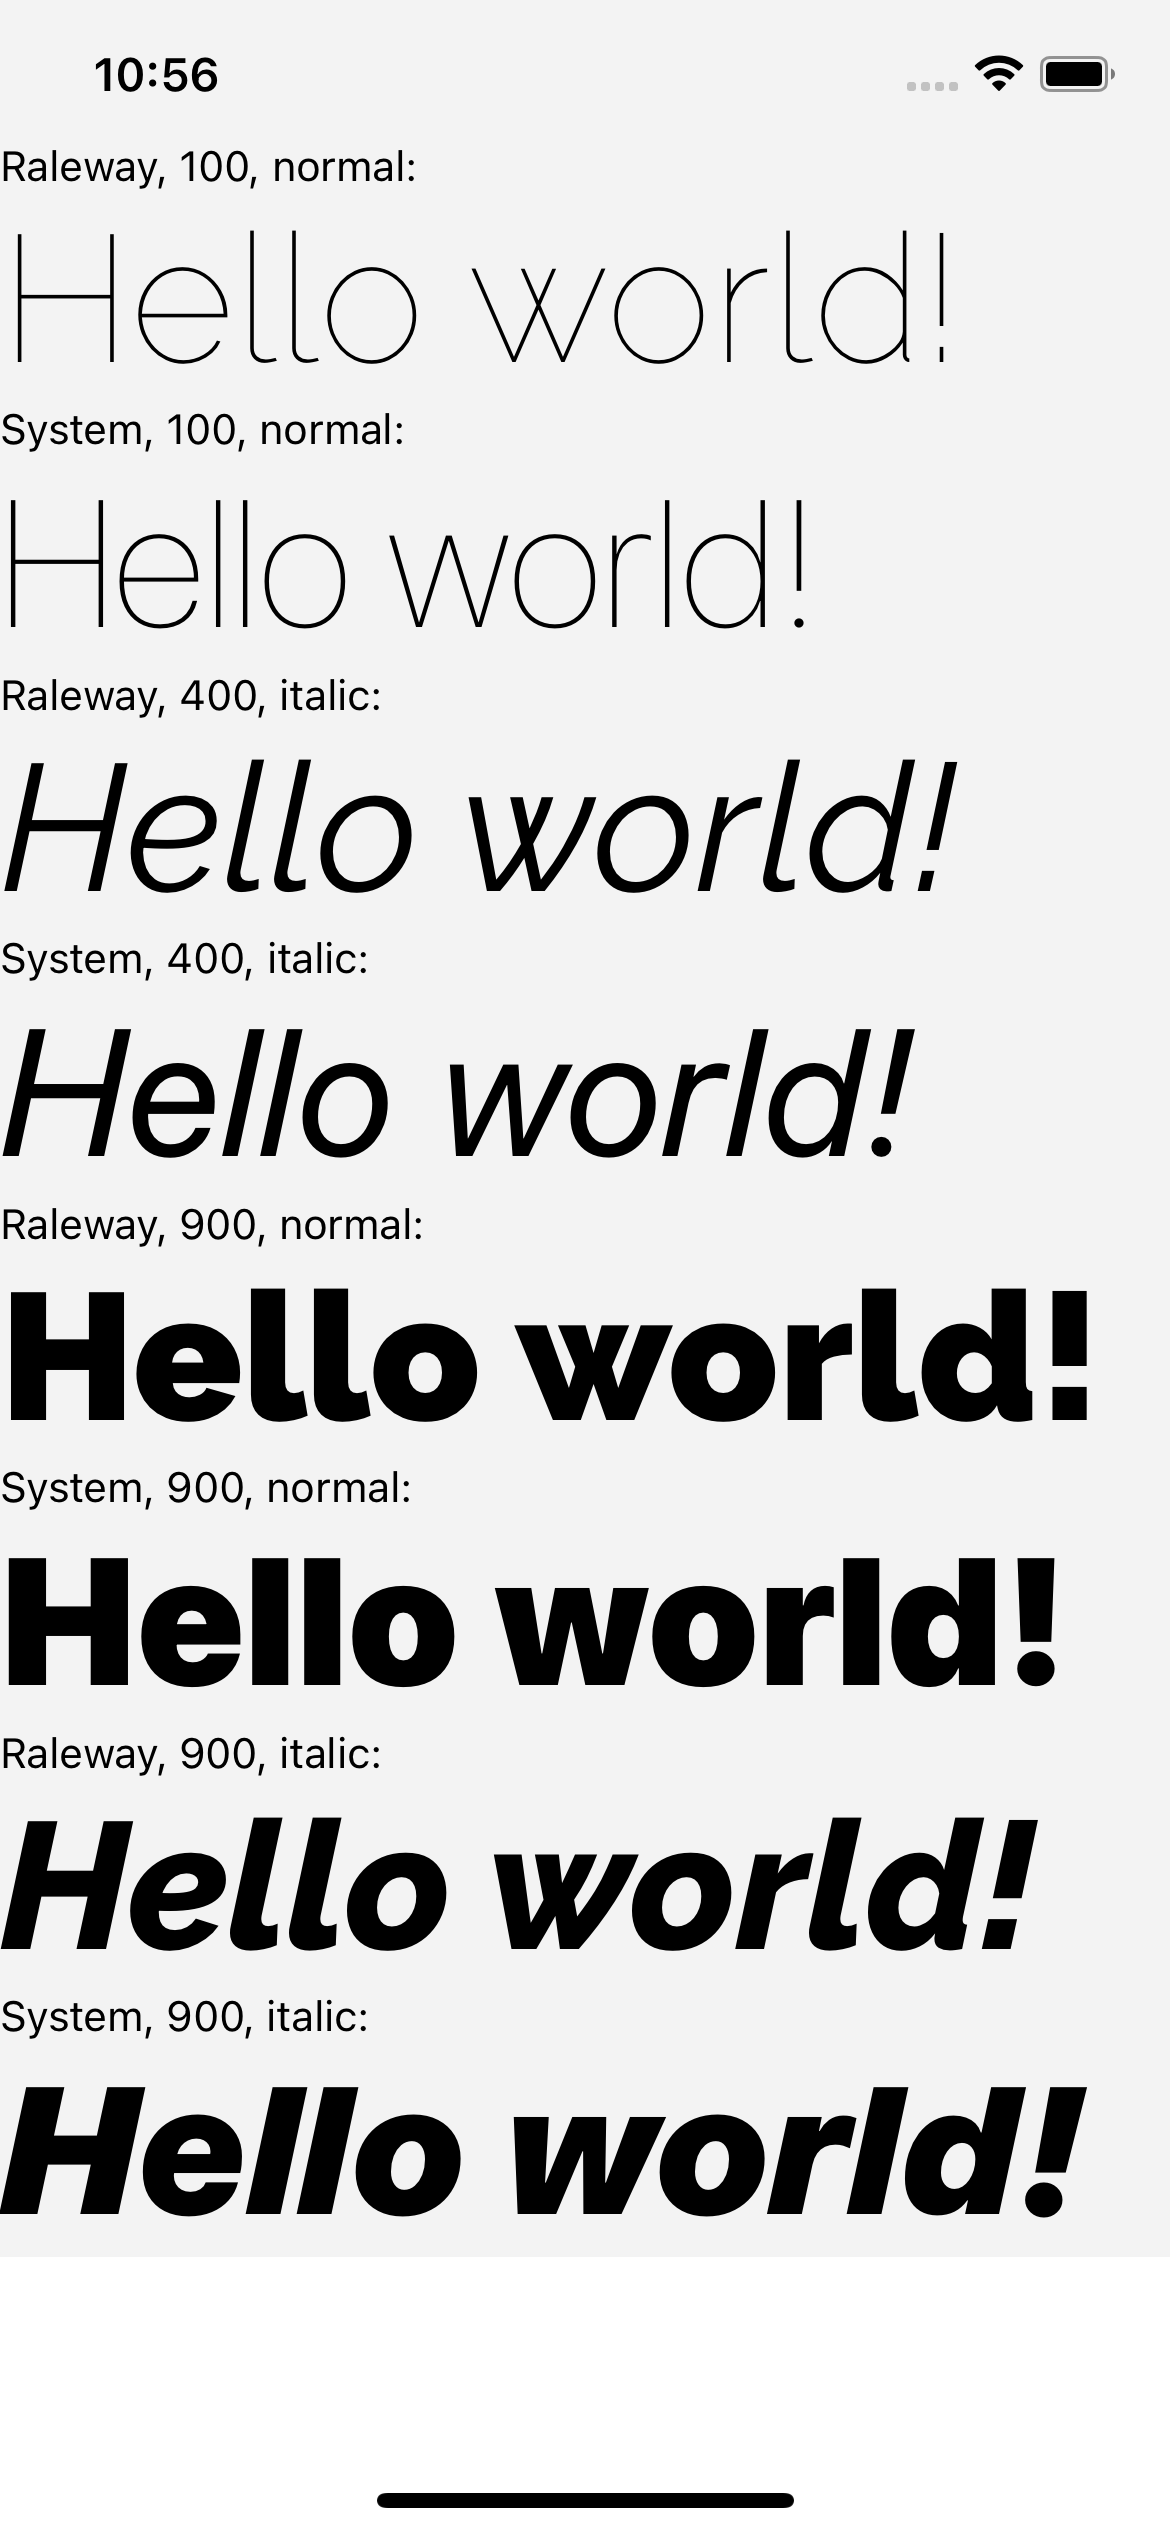 | 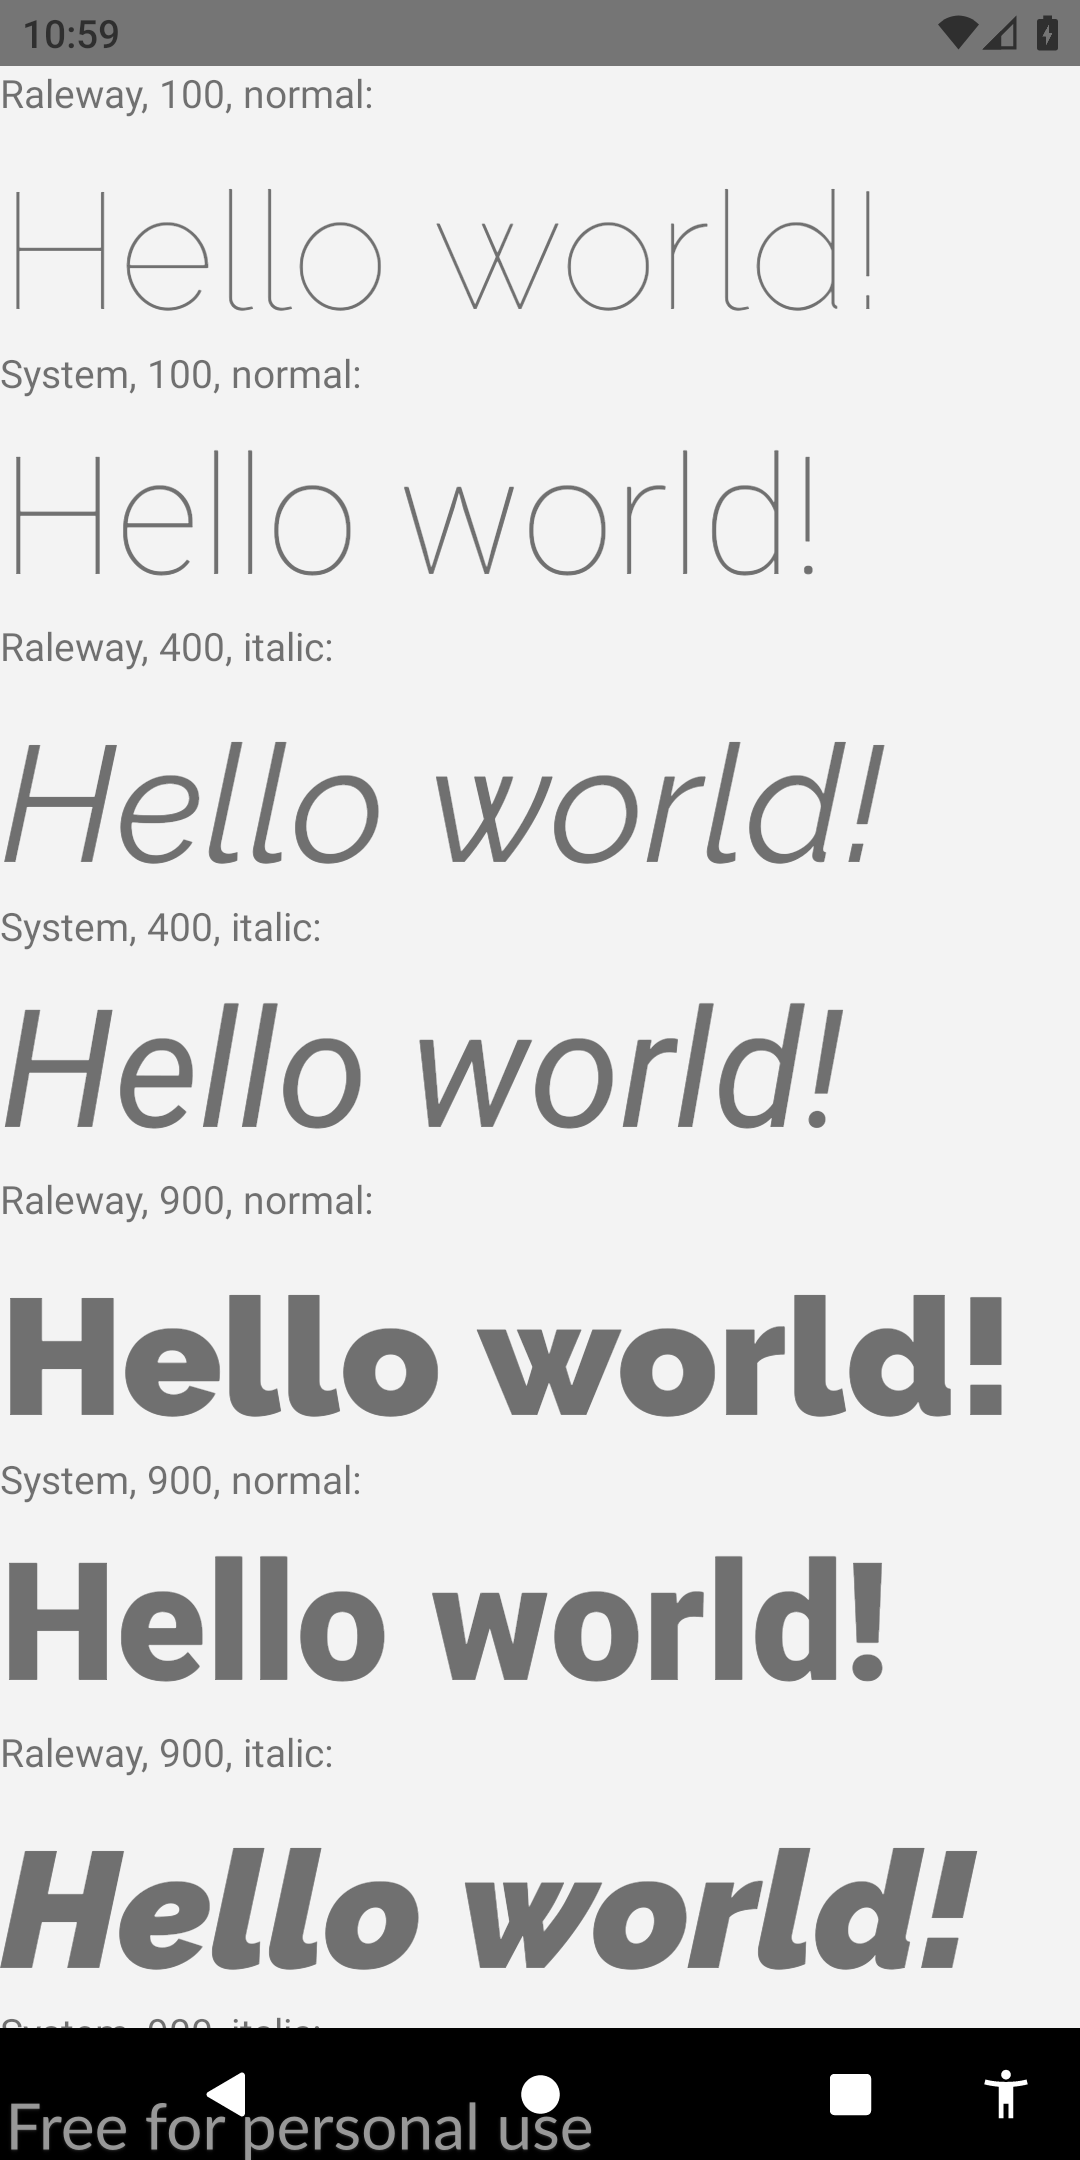 |
Jika Anda menemukan panduan ini yang relevan, saya akan sangat menghargai bahwa Anda meningkatkan jawaban stackoverflow ini. Ini juga akan membantu masyarakat mengetahui solusi ini. Bersulang!


