react native font demo
1.0.0
Être capable d'utiliser des modificateurs de police de police tels que fontWeight et fontStyle en combinaison avec une famille de polices personnalisée, dans iOS et Android.
 < Text style = { {
  fontFamily : "Raleway" ,
  fontWeight : "100" ,
  style : "italic"
} } >
  Hello world!
</ Text >
< Text style = { {
  fontFamily : "Raleway" ,
  fontWeight : "bold" ,
  style : "normal"
} } >
  Hello world !
< / Text >
Pour cet exemple, nous allons enregistrer la famille Raleway . Bien sûr, cette méthode fonctionnera avec n'importe quelle police TTF.
Vous avez besoin de toute la famille Raleway, extrait dans un dossier temporaire. C'est-à-dire:
Raleway-Thin.ttf (100)Raleway-ThinItalic.ttfRaleway-ExtraLight.ttf (200)Raleway-ExtraLightItalic.ttfRaleway-Light.ttf (300)Raleway-LightItalic.ttfRaleway-Regular.ttf (400)Raleway-Italic.ttfRaleway-Medium.ttf (500)Raleway-MediumItalic.ttfRaleway-SemiBold.ttf (600)Raleway-SemiBoldItalic.ttfRaleway-Bold.ttf (700)Raleway-BoldItalic.ttfRaleway-ExtraBold.ttf (800)Raleway-ExtraBoldItalic.ttfRaleway-Black.ttf (900)Raleway-BlackItalic.ttf Nous supposerons que ces fichiers sont maintenant stockés dans /tmp/raleway/ .
Vous aurez besoin d'OtFinfo installé dans votre système pour effectuer cette étape. Il est expédié avec de nombreuses distributions Linux. Sur MacOS, installez-le via le package Brew LCDF-Typeools .
otfinfo --family Raleway-Regular.ttf Devrait imprimer "raleway". Cette valeur doit être conservée pour la configuration Android. Ce nom sera utilisé dans le style fontFamily React.
react-native init FontDemo
cd FontDemoPour Android, nous allons utiliser des polices XML pour définir les variantes d'une famille de polices de base.
Remarque : Cette procédure est disponible dans React Native depuis commettre FD6386A07EB75A8EC16B1384A3E5827DEA520B64 (7 mai 2019), avec l'ajout de
ReactFontManager::addCustomFontMethod.
mkdir android/app/src/main/res/font
cp /tmp/raleway/ * .ttf android/app/src/main/res/font
Nous devons renommer les fichiers de police en suivant ces règles pour se conformer aux restrictions des noms d'actifs Android:
- par _ ;Vous pouvez utiliser le script ci-dessous (assurez-vous de donner le dossier de police comme premier argument):
 #! /bin/bash
# fixfonts.sh

typeset folder= " $1 "
if [[ -d " $folder " && ! -z " $folder " ]] ; then
  pushd " $folder " ;
  for file in * .ttf ; do
    typeset normalized= " ${file // - / _} " ;
    normalized= " ${normalized,,} " ;
    mv " $file " " $normalized "
  done
  popd
fi
./fixfonts.sh /path/to/root/FontDemo/android/app/src/main/res/font Créez le fichier android/app/src/main/res/font/raleway.xml avec le contenu ci-dessous. Fondamentalement, nous devons créer une entrée par combinaison fontStyle / fontWeight que nous souhaitons prendre en charge et enregistrer le nom de l'actif correspondant.
<? xml version = " 1.0 " encoding = " utf-8 " ?>
< font-family xmlns : app = " http://schemas.android.com/apk/res-auto " >
    < font app : fontStyle = " normal " app : fontWeight = " 100 " app : font = " @font/raleway_thin " />
    < font app : fontStyle = " italic " app : fontWeight = " 100 " app : font = " @font/raleway_thinitalic " />
    < font app : fontStyle = " normal " app : fontWeight = " 200 " app : font = " @font/raleway_extralight " />
    < font app : fontStyle = " italic " app : fontWeight = " 200 " app : font = " @font/raleway_extralightitalic " />
    < font app : fontStyle = " normal " app : fontWeight = " 300 " app : font = " @font/raleway_light " />
    < font app : fontStyle = " italic " app : fontWeight = " 300 " app : font = " @font/raleway_lightitalic " />
    < font app : fontStyle = " normal " app : fontWeight = " 400 " app : font = " @font/raleway_regular " />
    < font app : fontStyle = " italic " app : fontWeight = " 400 " app : font = " @font/raleway_italic " />
    < font app : fontStyle = " normal " app : fontWeight = " 500 " app : font = " @font/raleway_medium " />
    < font app : fontStyle = " italic " app : fontWeight = " 500 " app : font = " @font/raleway_mediumitalic " />
    < font app : fontStyle = " normal " app : fontWeight = " 600 " app : font = " @font/raleway_semibold " />
    < font app : fontStyle = " italic " app : fontWeight = " 600 " app : font = " @font/raleway_semibolditalic " />
    < font app : fontStyle = " normal " app : fontWeight = " 700 " app : font = " @font/raleway_bold " />
    < font app : fontStyle = " italic " app : fontWeight = " 700 " app : font = " @font/raleway_bolditalic " />
    < font app : fontStyle = " normal " app : fontWeight = " 800 " app : font = " @font/raleway_extrabold " />
    < font app : fontStyle = " italic " app : fontWeight = " 800 " app : font = " @font/raleway_extrabolditalic " />
    < font app : fontStyle = " normal " app : fontWeight = " 900 " app : font = " @font/raleway_black " />
    < font app : fontStyle = " italic " app : fontWeight = " 900 " app : font = " @font/raleway_blackitalic " />
</ font-family > Dans android/app/src/main/java/com/fontdemo/MainApplication.java , liez le nom de famille de police avec l'atout que nous venons de créer à l'intérieur de la méthode onCreate .
️ Si vous enregistrez une police différente, assurez-vous de remplacer "Raleway" par le nom trouvé dans l'ancienne étape (trouver le nom de famille de police).
 --- a/android/app/src/main/java/com/fontdemo/MainApplication.java
+++ b/android/app/src/main/java/com/fontdemo/MainApplication.java
@@ -7,6 +7,7 @@ import com.facebook.react.ReactApplication;
 import com.facebook.react.ReactInstanceManager;
 import com.facebook.react.ReactNativeHost;
 import com.facebook.react.ReactPackage;
+ import com.facebook.react.views.text.ReactFontManager;
 import com.facebook.soloader.SoLoader;
 import java.lang.reflect.InvocationTargetException;
 import java.util.List;
@@ -43,6 +44,7 @@ public class MainApplication extends Application implements ReactApplication {
   @Override
   public void onCreate() {
     super.onCreate();
+    ReactFontManager.getInstance().addCustomFont(this, "Raleway", R.font.raleway);
     SoLoader.init(this, /* native exopackage */ false);
     initializeFlipper(this, getReactNativeHost().getReactInstanceManager());
   }
Sur React Native 0.73+
 --- a/android/app/src/main/java/com/fontdemo/MainApplication.kt
+++ b/android/app/src/main/java/com/fontdemo/MainApplication.kt
import com.facebook.react.ReactApplication
import com.facebook.react.ReactHost
import com.facebook.react.ReactNativeHost
import com.facebook.react.ReactPackage
+ import com.facebook.react.common.assets.ReactFontManager
import com.facebook.react.defaults.DefaultNewArchitectureEntryPoint.load
import com.facebook.react.defaults.DefaultReactHost.getDefaultReactHost
import com.facebook.react.defaults.DefaultReactNativeHost


  override fun onCreate() {
    super.onCreate()
+    ReactFontManager.getInstance().addCustomFont(this, "Raleway", R.font.raleway);
    SoLoader.init(this, false)
    if (BuildConfig.IS_NEW_ARCHITECTURE_ENABLED) {
      // If you opted-in for the New Architecture, we load the native entry point for this app.
      load()
    }
    ReactNativeFlipper.initializeFlipper(this, reactNativeHost.reactInstanceManager)
  }
Sur iOS, les choses seront beaucoup plus faciles. Nous aurons essentiellement besoin d'utiliser la fonctionnalité React Native Asset Link. Cette méthode nécessite que nous utilisons le nom de famille de police récupéré dans la première étape comme attribut de style fontFamily .
mkdir -p assets/fonts
cp /tmp/raleway/ * .ttf assets/fontsreact-native.config.js module . exports = {
project : {
ios : { } ,
android : { } ,
} ,
iosAssets : [ './assets/fonts' ] ,
} ; # react-native >= 0.69
npx react-native-asset
# otherwise
react-native link| ios | Androïde |
|---|---|
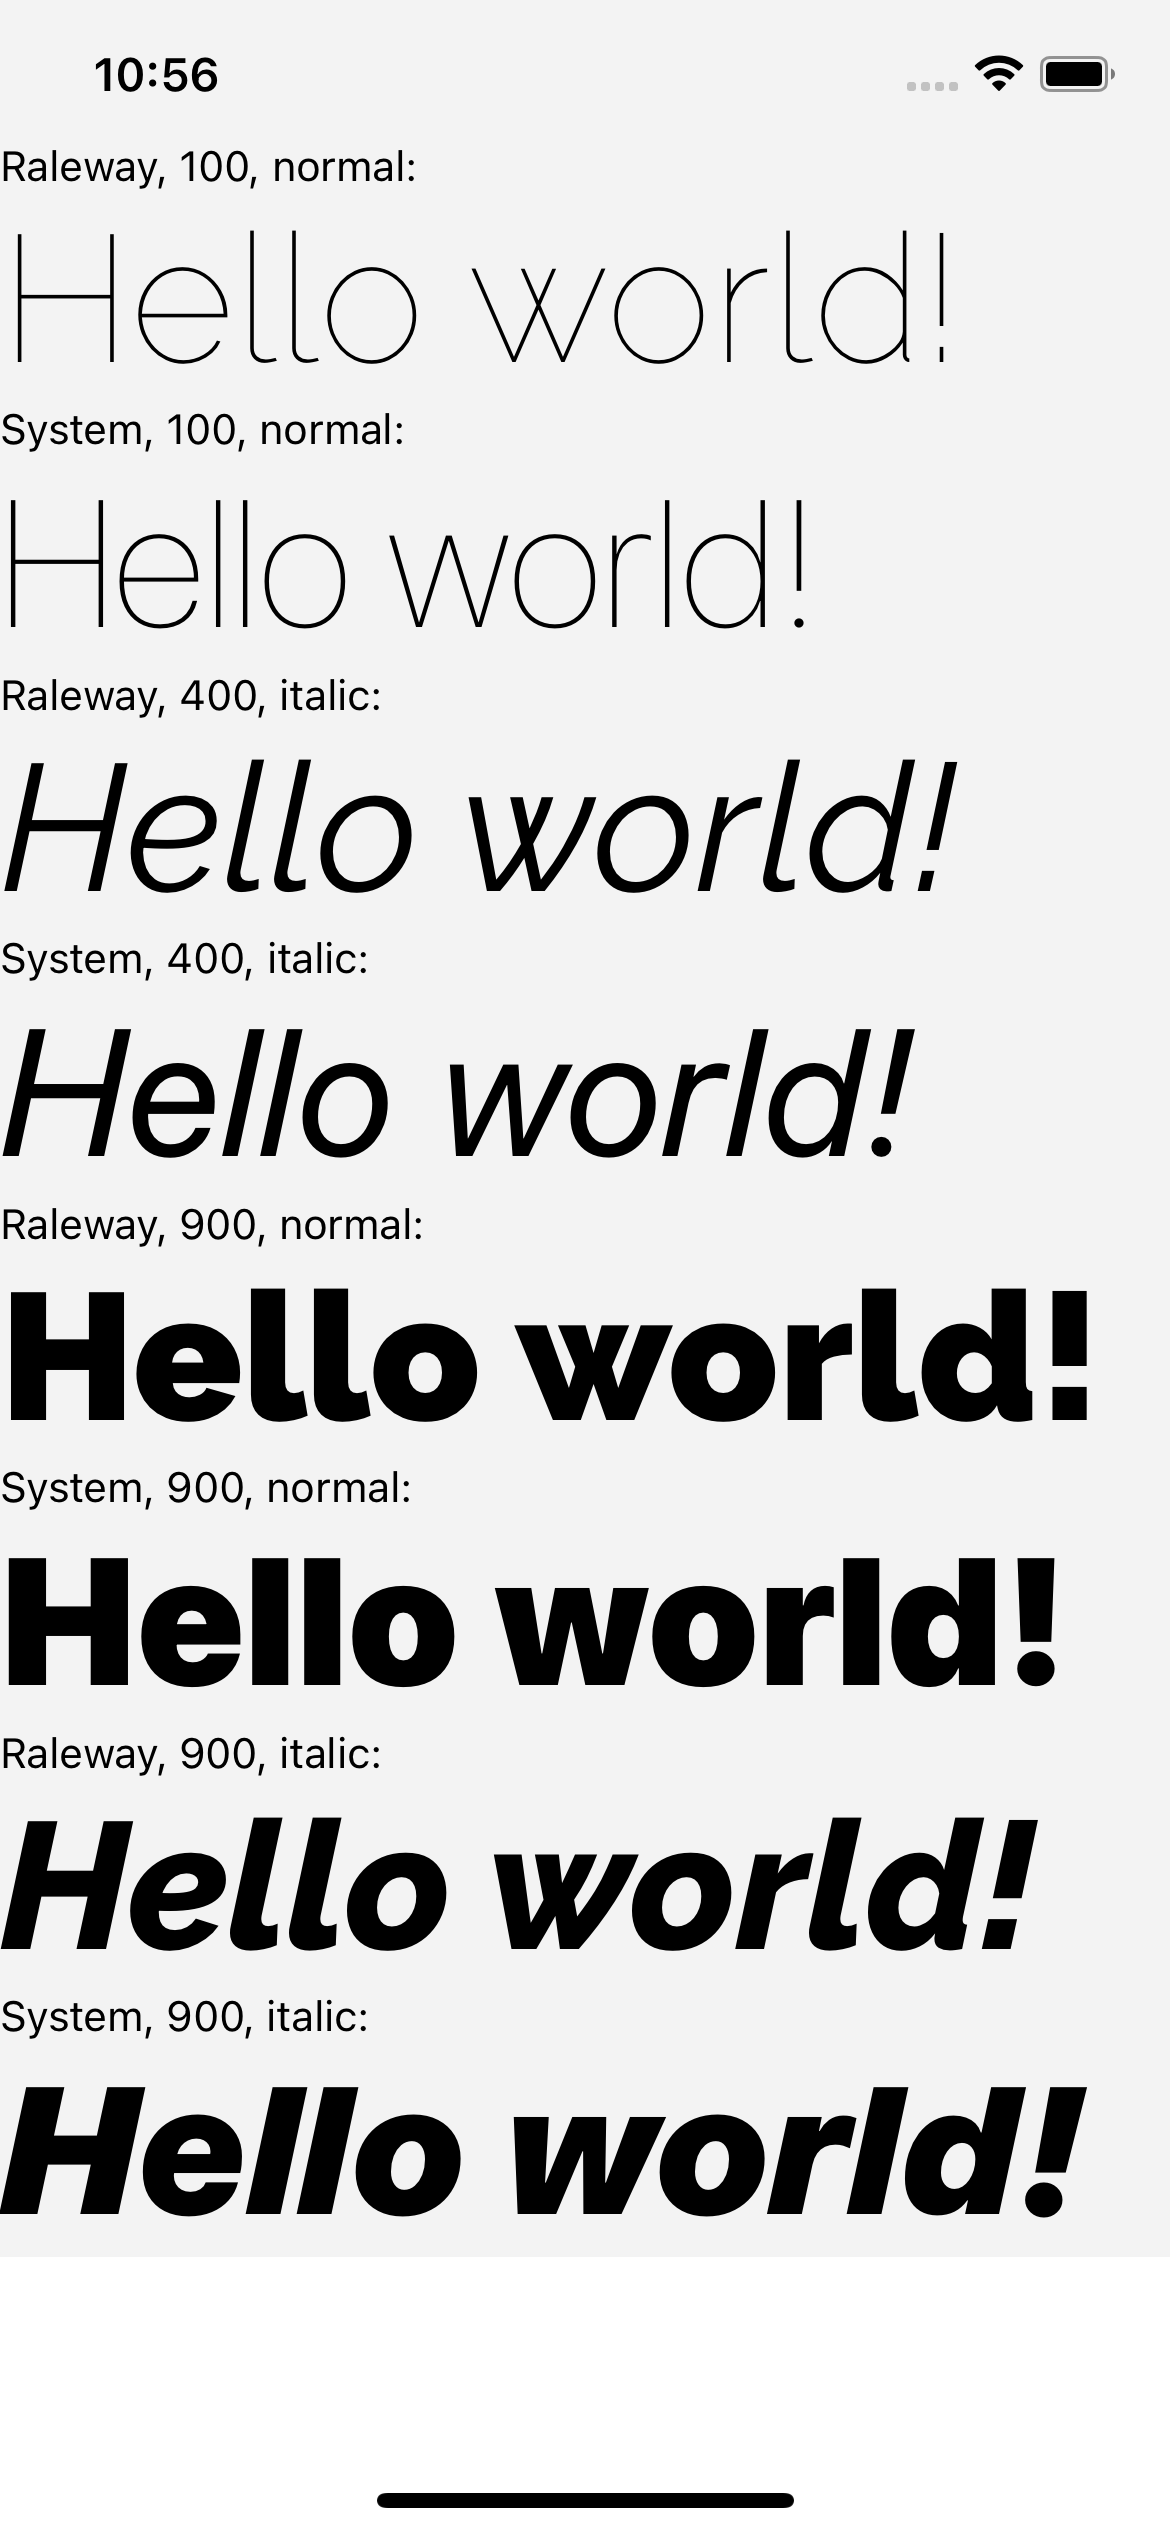 | 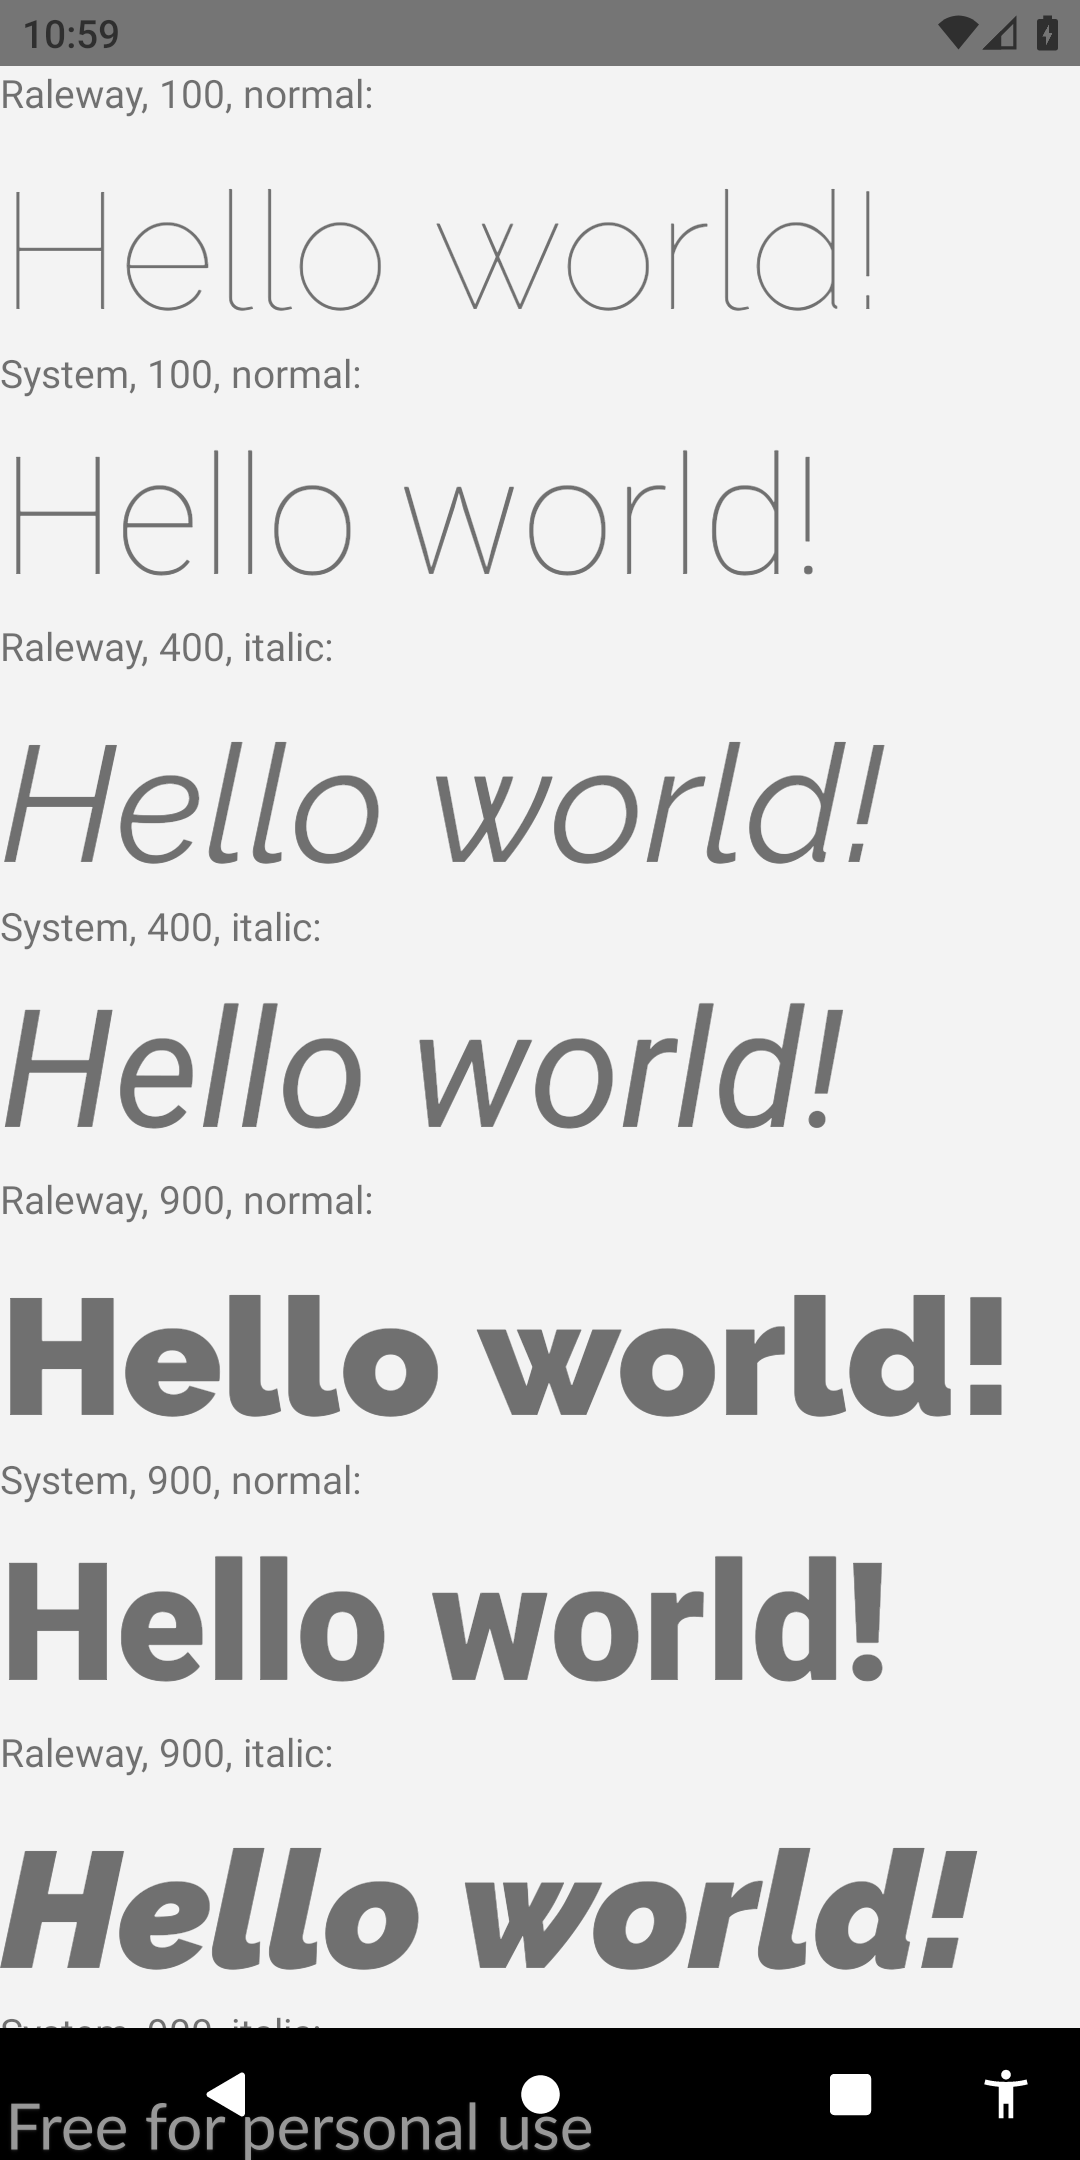 |
Si vous trouviez ce guide pertinent, j'apprécierais grandement que vous votez cette réponse Stackoverflow. Cela aiderait également la communauté à découvrir cette solution. Acclamations!


