Vidly_MVCProject
1.0.0
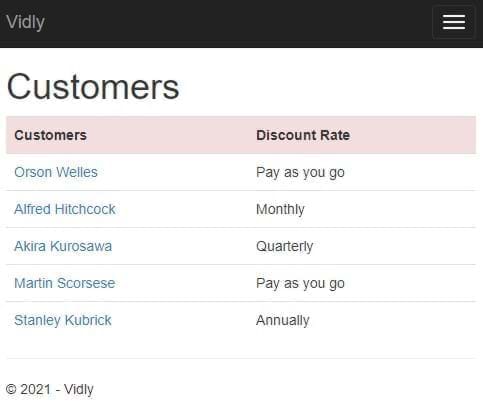
นี่คือแอพ MVC ที่พัฒนาด้วย. NET Framework 4.8 เพื่อการเรียนรู้
ผลการดำเนินการ
| พิมพ์ | วิธีผู้ช่วย |
|---|---|
| ViewResult | ดู() |
| PartialViewResult | partialView () |
| contentResult | เนื้อหา() |
| นำกลับมาใช้ใหม่ | เปลี่ยนเส้นทาง () |
| redirecttorouteresult | refirecttoAction () |
| jsonresult | JSON () |
| fileresult | ไฟล์() |
| httpnotfoundresult | httpnotfound () |
| emptyresult | - |
ตัวอย่างบางส่วน
 public ActionResult Test ( )
	{
		return View ( data ) ;
		return Content ( "Hello World!" ) ;
		return HttpNotFound ( ) ;
		return new EmptyResult ( ) ;
		return RedirectToAction ( "Index" , "Home" , new { page = "1" , sortBy = "name" } ) ;
} การกำหนดเส้นทางตามการประชุม: ใน RoutEconfig.cs
 routes . MapRoute (
  		 "MoviesByReleaseDate" , //name of route
  		"movies/released/{year}/{month}" , //route url
  		new { controller = "Movies" , action = "ByReleaseDate" } , //default corresponding controller and actions
  		new { year = @"2020|2021" , month = @"d{2}" } ) ; //constraints for parameters
การกำหนดเส้นทางแอตทริบิวต์ : ใน RoutEconfig.cs เพิ่ม routes.MapMvcAttributeRoutes(); ก่อนที่คอนโทรลเลอร์จะใช้แอตทริบิวต์ [Route("url template")] ข้อ จำกัด เช่นขั้นต่ำ, สูงสุด, minlength, maxlength, int, float, guid สามารถใช้
 [ Route ( "movies/released/{year:regex( \ d{4}:range(1800,2021))}/{month:regex( \ d{2}:range(1,12))}" ) ]
public ActionResult ByReleaseDate ( int year , int month )
  {
  	return Content ( year + "/" + month ) ;
} public ActionResult Test ( )
{
var movie = new Movie ( ) { Name = "Shrek!" } ;
ViewData [ "Movie" ] = movie ;
ViewBag . Movie = movie ;
return View ( movie ) ;
} < h2 > @Model.Name </ h2 > <!-- preffered way -->
< h2 > @( ((Movie) ViewData["Movie"]).Name) </ h2 > <!-- ugly way / dont use -->
< h2 > @ViewBag.Movie.Name </ h2 > <!-- casted at runtime / not safe --> public class RandomMovieViewModel
{
public Movie Movie { get ; set ; }
public List < Customer > Customers { get ; set ; }
} public class MoviesController : Controller
{
// GET: Movies
public ActionResult Random ( )
{
//adding data
var movie = new Movie ( ) { Name = "Shrek!" } ;
var customers = new List < Customer >
{
new Customer { Name = "cust1" } ,
new Customer { Name = "cust2" }
} ;
//filing viewmodel with data
var viewModel = new RandomMovieViewModel ( )
{
Movie = movie ,
Customers = customers
} ;
return View ( viewModel ) ;
}@ *
this is a razor comment
* @
@ {
//multiple lines
//when razor sees html prints it and when razor sees csharp interprets it
}
@ {
var className = Model . Customers . Count > 0 ? "popular" : null ;
}
< h2 class = "@className" > @Model . Movie . Name < / h2 > < ! -- preferred way -- >
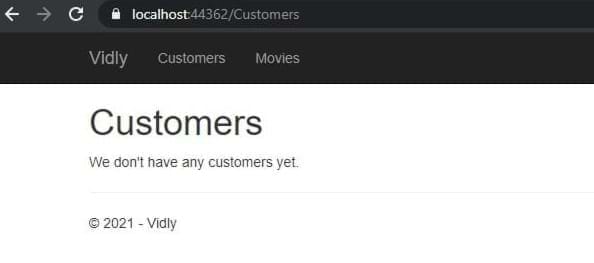
@if ( Model . Customers . Count == 0 )
{
< p > No one has rented this movie before . < / p >
}
< ul >
@foreach ( var customer in Model . Customers )
{
< li > @customer . Name < / li >
}
< / ul > สร้างมุมมองในมุมมองเป็นมุมมองและเลือกมุมมองบางส่วน การใช้งานในมุมมองอื่น @Html.Partial("_PartialView", Model.Data)
Entity Framework: ORM ที่แมปข้อมูลในฐานข้อมูลเชิงสัมพันธ์กับวัตถุของเราโดยใช้ไฟล์บริบท
LINQ: วิธีการเช่น Queries SQL
เวิร์กโฟลว์: ฐานข้อมูลก่อนรหัสก่อน
DB First: ตารางฐานข้อมูลการออกแบบก่อนหลังจากนั้นให้ EF สร้างคลาสโดเมนตามตาราง
รหัสก่อน: สร้างคลาสโดเมนก่อนหลังจากนั้นให้ EF สร้างตารางฐานข้อมูลสำหรับเรา
DBSET PM > enable-migrations PM> update-database ตาราง PM> add-migration migrationName บริบท: คลาส DBContex
การเพาะ DB: ใส่คำสั่ง SQL ในวิธีการย้ายถิ่น ()
ในคอนโทรลเลอร์
private Context _context ;
public CustomersController ( )
{
_context = new Context ( ) ;
}
//...
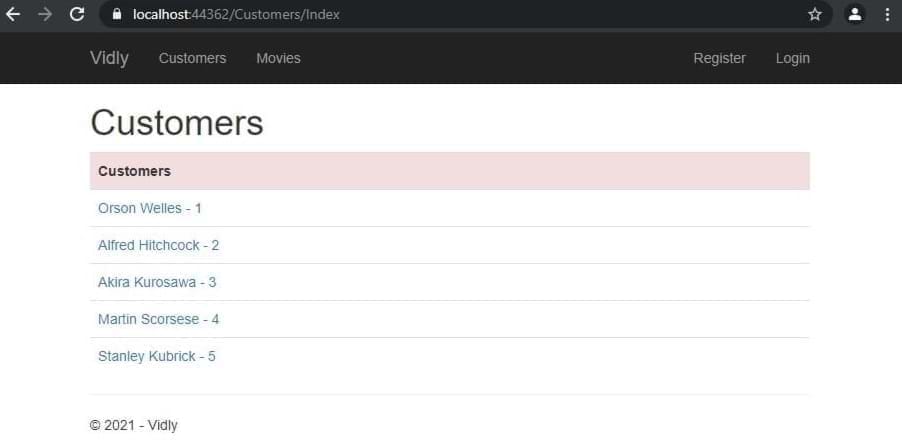
public ActionResult Index ( )
{
var customers = _context . Customers . ToList ( ) ;
return View ( customers ) ;
}
//...
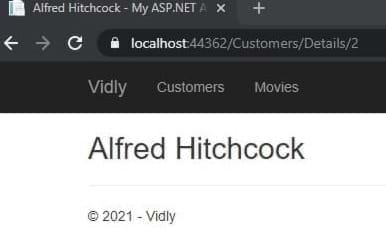
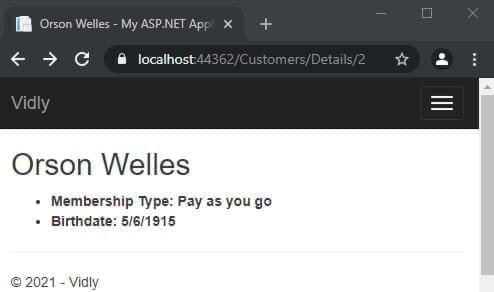
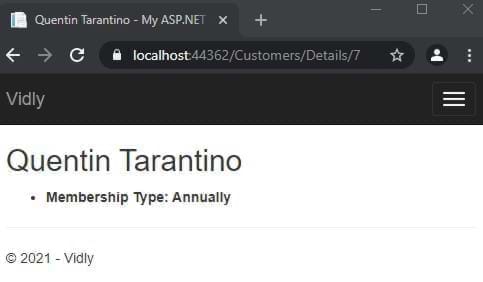
public ActionResult Details ( int id )
{
var customer = _context . Customers . Single ( c => c . Id == id ) ;
return View ( customer ) ;
} โหลดตารางต่างประเทศเชิงสัมพันธ์ : _context.Customer.Include(c=>c.MembershipType).ToList();
ในมุมมอง:
 @using ( Html . BeginForm ( actionName : "Create" , controllerName : "Customers" ) )
{
	< div class = "form-group" >
		@Html . LabelFor ( m => m . Name )
		@Html . TextBoxFor ( m => m . Name , new { @class = "form-control" } )
	< / div >
} ในรูปแบบที่มีคำอธิบายประกอบข้อมูล:
 [ Display ( Name = "Date of Birth" ) ]
public DateTime ? Birthdate { get ; set ; }
หรือในมุมมองด้วย <label for="Birthdate">Date of Birth</label>
สร้าง ViewModel:
 public class NewCustomerViewModel
{
	public IEnumerable < MembershipType > MembershipTypes { get ; set ; }
	public Customer Customer { get ; set ; }
}
ในคอนโทรลเลอร์:
 var membershipTypes = _context . MembershipTypes . ToList ( ) ;

var viewModel = new NewCustomerViewModel ( )
{
	MembershipTypes = membershipTypes
} ;
ในมุมมอง:
 < div class =" form-group " >
	@Html.LabelFor(m = > m.Customer.MembershipTypeId)
	@Html.DropDownListFor(m = > m.Customer.MembershipTypeId, new SelectList(Model.MembershipTypes,"Id","Name"),"Select Membership Type", new { @class = "form-control" })
</ div > ในคอนโทรลเลอร์:
 [ HttpPost ]
public ActionResult Create ( Customer customer )
{
	//...
	return View ( ) ;
}
ในมุมมองตรวจสอบให้แน่ใจว่าชื่อแอ็คชั่นและชื่อคอนโทรลเลอร์
 ( Html . BeginForm ( actionName : "Create" , controllerName : "Customers" ) )
//... [ HttpPost ]
public ActionResult Create ( Customer customer )
{
_context . Customers . Add ( customer ) ;
_context . SaveChanges ( ) ;
return RedirectToAction ( "Index" , "Customers" ) ;
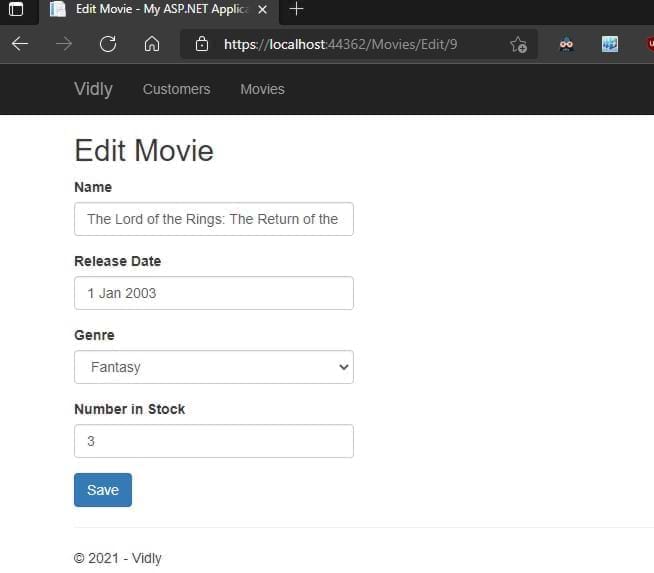
} กรอกข้อมูลด้วยรายการที่เกี่ยวข้องจาก ID ในคอนโทรลเลอร์:
	 public ActionResult Edit ( int id )
	{
		var customer = _context . Customers . SingleOrDefault ( c => c . Id == id ) ;

		if ( customer == null )
			return HttpNotFound ( ) ;

		var viewModel = new CustomerFormViewModel ( )
		{
			Customer = customer ,
			MembershipTypes = _context . MembershipTypes . ToList ( )
		} ;
		return View ( "CustomerForm" , viewModel ) ;
	}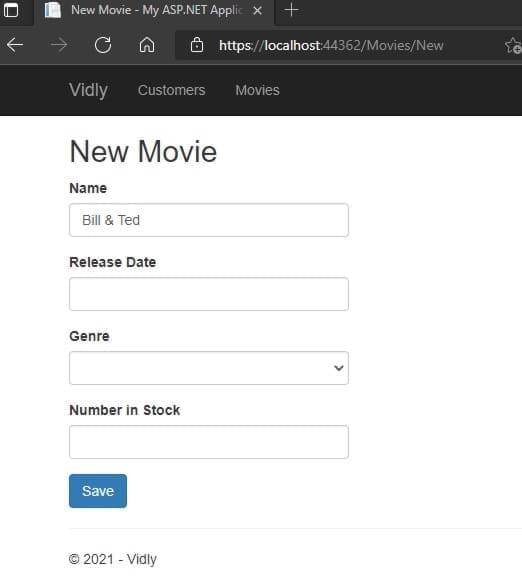
} หากไม่มีอยู่เพิ่มหากมีการอัปเดต ในแผนที่คอนโทรลเลอร์แอตทริบิวต์
 public ActionResult Save ( Customer customer )
{
	if ( customer . Id == 0 )
		_context . Customers . Add ( customer ) ;
	else
	{
		var customerInDb = _context . Customers . Single ( c => c . Id == customer . Id ) ;


		customerInDb . Name = customer . Name ;
		customerInDb . Birthdate = customer . Birthdate ;
		customerInDb . MembershipTypeId = customer . MembershipTypeId ;
		customerInDb . IsSubscribedToNewsletter = customer . IsSubscribedToNewsletter ;
	}

	_context . SaveChanges ( ) ;

	return RedirectToAction ( "Index" , "Customers" ) ;
}
เพิ่มฟิลด์ ID ที่พึ่งพาในมุมมองที่ซ่อนอยู่:
@Html.HiddenFor(m= > m.Customer.Id)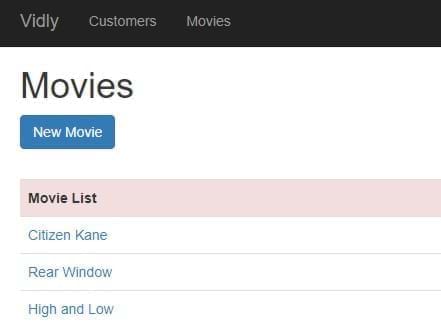
ขั้นตอนที่ 1: เพิ่มคำอธิบายประกอบในโมเดล, ขั้นตอนที่ 2: เพิ่มการควบคุมการตรวจสอบความถูกต้องในคอนโทรลเลอร์ เมื่อไม่ถูกต้องแบบฟอร์มการส่งคืนด้วยข้อมูลผู้ใช้
 if ( ! ModelState . IsValid )
{
    var viewModel = new CustomerFormViewModel
    {
    Customer = customer ,
    MembershipTypes = _context . MembershipTypes . ToList ( )
    } ;
    return View ( "CustomerForm" , viewModel ) ;
}
ขั้นตอนที่ 3: เพิ่มข้อความการตรวจสอบเพื่อดู:
@Html.ValidationMessageFor(m= > m.Customer.Name)การตรวจสอบสไตล์การตรวจสอบข้อผิดพลาด การเข้าถึงคลาสและสไตล์เหล่านี้:
. field-validation-error {
    color : red;
}
. input-validation-error {
    border : 2 px red;
}
ข้อความการตรวจสอบความถูกต้อง ในโมเดลเพิ่มสิ่งนี้ลงในคำอธิบายประกอบข้อมูลที่ต้องการ
 [ Required ( ErrorMessage = "Please enter customer's name." ) ]
 [ StringLength ( 255 ) ]

public string Name { get ; set ; } ขั้นตอนที่ 1: สร้างคลาสที่สืบทอด ValidationAttribute (ใช้ System.ComponentModel.Dataannotations)
 public class Min18YearsIfAMember : ValidationAttribute
   {
       protected override ValidationResult IsValid ( object value , ValidationContext validationContext )
       {
           var customer = ( Customer ) validationContext . ObjectInstance ;

           if ( customer . MembershipTypeId == 0 || customer . MembershipTypeId == 1 )
           {
               return ValidationResult . Success ;
           }
           if ( customer . Birthdate == null )
           {
               return new ValidationResult ( "Birthdate is required." ) ;
           }

           var age = DateTime . Today . Year - customer . Birthdate . Value . Year ;

           return ( age >= 18 )
               ? ValidationResult . Success
               : new ValidationResult ( "Customer should be at least 18 years old to go on a membership." )
       }
   }
ขั้นตอนที่ 2: เพิ่มคำอธิบายประกอบข้อมูลลงในแบบจำลอง
 [ Display ( Name = "Membership Type" ) ]
[ Min18YearsIfAMember ]
public byte MembershipTypeId { get ; set ; }
ขั้นตอนที่ 3: เพิ่มข้อความเพื่อดู
@Html.ValidationMessageFor(m= > m.Customer.MembershipTypeId)@Html.ValidationSummary(true, "Please fix the following errors.")ExcludeProperTyerrors: True Hides ข้อผิดพลาดรายชื่อรายการข้อความ: ข้อความที่แสดงถึงผู้ใช้ (อาจมีสไตล์)
เพิ่มสิ่งนี้ในแบบฟอร์มในมุมมอง
 @section scripts {
    @Scripts . Render ( "~/bundles/jqueryval" )
} ในการดูใช้ตัวช่วย HTML นี้:
@Html . AntiForgeryToken ( )และในการดำเนินการคอนโทรลเลอร์เพิ่มคำอธิบายประกอบข้อมูลนี้:
ในคอนโทรลเลอร์สร้างเว็บ API เพิ่มสิ่งนี้ไปยัง global.asax.js:
GlobalConfiguration . Configure ( WebApiConfig . Register ) ;ในคอนโทรลเลอร์เริ่มต้นบริบท:
 private Context _context ;

  public CustomersController ( )
  {
      _context = new Context ( ) ;
  }
สร้างวิธีการรับ/โพสต์/ใส่เช่น: รับทั้งหมด:
 //GET /api/customers
[ HttpGet ]
public IEnumerable < Customer > GetCustomers ( )
{
    return _context . Customers . ToList ( ) ;
}
รับหนึ่ง:
 //GET /api/customers/1
[ HttpGet ]
public Customer GetCustomer ( int id )
{
    var customer = _context . Customers . SingleOrDefault ( c => c . Id == id ) ;

    if ( customer == null )
        throw new HttpResponseException ( HttpStatusCode . NotFound ) ;

    return customer ;
}
สร้าง:
 //POST /api/customers
[ HttpPost ]
public Customer CreateCustomer ( Customer customer )
{
    if ( ! ModelState . IsValid )
        throw new HttpResponseException ( HttpStatusCode . BadRequest ) ;

    _context . Customers . Add ( customer ) ;
    _context . SaveChanges ( ) ;

    return customer ;
}
อัปเดต:
 //PUT /api/customers/1
        [ HttpPut ]
        public void UpdateCustomer ( int id , Customer customer )
        {
            if ( ! ModelState . IsValid )
                throw new HttpResponseException ( HttpStatusCode . BadRequest ) ;

            var customerInDb = _context . Customers . SingleOrDefault ( c => c . Id == id ) ;

            if ( customerInDb == null )
                throw new HttpResponseException ( HttpStatusCode . NotFound ) ;

            customerInDb . Name = customer . Name ;
            customerInDb . Birthdate = customer . Birthdate ;
            customerInDb . IsSubscribedToNewsletter = customer . IsSubscribedToNewsletter ;
            customerInDb . MembershipTypeId = customer . MembershipTypeId ;

            _context . SaveChanges ( ) ;
        }
ลบ:
 //DELETE /api/customers/1
[ HttpDelete ]
public void DeleteCustomer ( int id )
{
    var customerInDb = _context . Customers . SingleOrDefault ( c => c . Id == id ) ;

    if ( customerInDb == null )
        throw new 	HttpResponseException ( HttpStatusCode . NotFound ) ;

    _context . Customers . Remove ( customerInDb ) ;
    _context . SaveChanges ( ) ;
}
ทดสอบกับบุรุษไปรษณีย์
วัตถุโดเมนที่เราลบข้อมูลที่เราไม่ต้องการเปลี่ยนแปลงหรือแสดง รูปร่างสำหรับความต้องการของเรา เก็บในโฟลเดอร์ DTOS
ใน app_start สร้าง mappingprofile.cs:
 public class MappingProfile : Profile
{
    public MappingProfile ( )
    {
        Mapper . CreateMap < Customer , CustomerDto > ( ) ;
        Mapper . CreateMap < CustomerDto , Customer > ( ) ;
    }
}
เพิ่ม Mapper ลงใน global.asax.cs
 protected void Application_Start ( )
{
    Mapper . Initialize ( c => c . AddProfile < MappingProfile > ( ) ) ;
    //..
}
อัปเดตการดำเนินการคอนโทรลเลอร์:
 //GET /api/customers
[ HttpGet ]
public IEnumerable < CustomerDto > GetCustomers ( )
{
    return _context . Customers . ToList ( ) . Select ( Mapper . Map < Customer , CustomerDto > ) ;
}
//GET /api/customers/1
[ HttpGet ]
public CustomerDto GetCustomer ( int id )
{
var customer = _context . Customers . SingleOrDefault ( c => c . Id == id ) ;
if ( customer == null )
throw new HttpResponseException ( HttpStatusCode . NotFound ) ;
return Mapper . Map < Customer , CustomerDto > ( customer ) ;
} //POST /api/customers
[ HttpPost ]
public CustomerDto CreateCustomer ( CustomerDto customerDto )
{
if ( ! ModelState . IsValid )
throw new HttpResponseException ( HttpStatusCode . BadRequest ) ;
var customer = Mapper . Map < CustomerDto , Customer > ( customerDto ) ;
_context . Customers . Add ( customer ) ;
_context . SaveChanges ( ) ;
customerDto . Id = customer . Id ;
return customerDto ;
} //PUT /api/customers/1
[ HttpPut ]
public void UpdateCustomer ( int id , CustomerDto customerDto )
{
if ( ! ModelState . IsValid )
throw new HttpResponseException ( HttpStatusCode . BadRequest ) ;
var customerInDb = _context . Customers . SingleOrDefault ( c => c . Id == id ) ;
if ( customerInDb == null )
throw new HttpResponseException ( HttpStatusCode . NotFound ) ;
Mapper . Map ( customerDto , customerInDb ) ;
_context . SaveChanges ( ) ;
} ใน app_start webapiconfig.cs เพิ่มในการลงทะเบียน
 var settings = config . Formatters . JsonFormatter . SerializerSettings ;
         settings . ContractResolver = new CamelCasePropertyNamesContractResolver ( ) ;
settings . Formatting = Formatting . Indented ; แก้ไขผลลัพธ์ HTTP สำหรับการกระทำของเรา:
 //GET /api/customers/1
[ HttpGet ]
public IHttpActionResult GetCustomer ( int id )
{
    var customer = _context . Customers . SingleOrDefault ( c => c . Id == id ) ;

    if ( customer == null )
        return NotFound ( ) ;

    return Ok ( Mapper . Map < Customer , CustomerDto > ( customer ) ) ;
}
//POST /api/customers
[ HttpPost ]
public IHttpActionResult CreateCustomer ( CustomerDto customerDto )
{
if ( ! ModelState . IsValid )
return BadRequest ( ) ;
var customer = Mapper . Map < CustomerDto , Customer > ( customerDto ) ;
_context . Customers . Add ( customer ) ;
_context . SaveChanges ( ) ;
customerDto . Id = customer . Id ;
return Created ( new Uri ( Request . RequestUri + "/" + customer . Id ) , customerDto ) ;
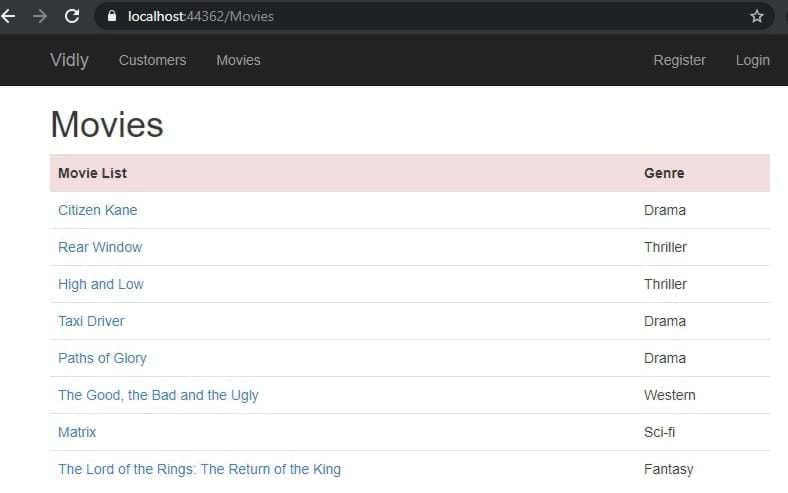
} บุรุษไปรษณีย์: รับ: https: // localhost: 44362/api/ภาพยนตร์ 200 ตกลง
[
{
"id" : 1 ,
"name" : " Citizen Kane " ,
"genreId" : 3 ,
"dateAdded" : " 1900-01-01T00:00:00 " ,
"releaseDate" : " 1941-01-01T00:00:00 " ,
"numberInStock" : 4
},
{
"id" : 3 ,
"name" : " Rear Window " ,
"genreId" : 10 ,
"dateAdded" : " 1900-01-01T00:00:00 " ,
"releaseDate" : " 1954-01-01T00:00:00 " ,
"numberInStock" : 3
},
//.......
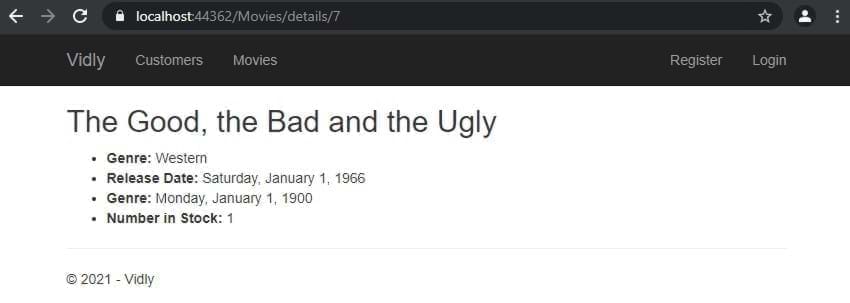
]รับ: https: // localhost: 44362/api/ภาพยนตร์/7 200 ตกลง
{
    "id" : 7 ,
    "name" : " The Good, the Bad and the Ugly " ,
    "genreId" : 6 ,
    "dateAdded" : " 1900-01-01T00:00:00 " ,
    "releaseDate" : " 1966-01-01T00:00:00 " ,
    "numberInStock" : 1
}
โพสต์: https: // localhost: 44362/api/ภาพยนตร์ 201 สร้างขึ้น
{
  "name" : " Life Is Beautiful " ,
  "genreId" : 3 ,
  "dateAdded" : " 1900-01-01T00:00:00 " ,
  "releaseDate" : " 1997-01-01T00:00:00 " ,
  "numberInStock" : 1
}
ใส่: https: // localhost: 44362/api/ภาพยนตร์/11 204 ไม่มีเนื้อหา
{
  "name" : " Life Is Beautiful " ,
  "genreId" : 3 ,
  "dateAdded" : " 1900-01-01T00:00:00 " ,
  "releaseDate" : " 1997-01-01T00:00:00 " ,
  "numberInStock" : 5
}
ลบ: https: // localhost: 44362/api/ภาพยนตร์/12 204 ไม่มีเนื้อหา
ในมุมมองเพิ่มคลาสข้อมูลและ ID ไปยังรายการ และในตอนท้ายสคริปต์:
 < table id =" customers " < ---
       class =" table table-borderless " >
           < tr class =" danger " >
               < th > Customers </ th >
....
....
< td >
    < button data-customer-id =" @item.Id " < ---
            class =" btn-link js-delete " < ---
            >
        Delete
    </ button >
</ td >
.....
@section scripts{
    < script >
        $ ( document ) . ready ( function ( ) {
            $ ( "#customers .js-delete" ) . on ( "click" , function ( ) {
                var button = $ ( this ) ;
                if ( confirm ( "sure to delete?" ) ) {
                    $ . ajax ( {
                        url : "/api/customers/" + button . attr ( "data-customer-id" ) ,
                        method : "DELETE" ,
                        success : function ( ) {
                            alert ( "success" ) ;
                            button . parents ( "tr" ) . remove ( ) ;
                        }
                    } ) ;
                }
            } ) ;
        } ) ;
    </ script >
} เพิ่มใน bundleconfig.cs:
 bundles . Add ( new ScriptBundle ( "~/bundles/bootstrap" ) . Include (
          "~/Scripts/bootstrap.js" ,
          "~/Scripts/bootbox.js" , //<--- here
          "~/Scripts/respond.js"
          ) ) ;
นำไปใช้ในมุมมอง:
@section scripts{
< script >
    $ ( document ) . ready ( function ( ) {
        $ ( "#customers .js-delete" ) . on ( "click" , function ( ) {
            var button = $ ( this ) ;
            bootbox . confirm ( "sure to delete?" , function ( result ) {
                if ( result ) {
                    $ . ajax ( {
                        url : "/api/customers/" + button . attr ( "data-customer-id" ) ,
                        method : "DELETE" ,
                        success : function ( ) {
                            alert ( "success" ) ;
                            button . parents ( "tr" ) . remove ( ) ;
                        }
                    } ) ;
                }
            } ) ;
        } ) ;
    } ) ;
</ script >
} เพิ่มไปยัง Bundles: (และเรารวมกลุ่มบุคคลที่สามเข้ากับ lib. ใน _layout.cshtml -> @Scripts.Render("~/bundles/lib") ))
         bundles . Add ( new ScriptBundle ( "~/bundles/lib" ) . Include (
                        "~/Scripts/jquery-{version}.js" ,
                        "~/Scripts/bootstrap.js" ,
                        "~/Scripts/bootbox.js" ,
                        "~/Scripts/respond.js" ,
                        "~/Scripts/DataTables/jquery.dataTables.js" , //<--
                        "~/Scripts/DataTables/dataTables.bootstrap.js" //<--
                        ) ) ;
bundles . Add ( new StyleBundle ( "~/Content/css" ) . Include (
"~/Content/bootstrap.css" ,
"~/content/datatables/css/dataTables.bootstrap.css" , //<-- style
"~/Content/site.css" ) ) ;ในตารางมุมมองควรมี ID และ thead, แท็ก tbody สุดท้ายในส่วนสคริปต์เมื่อเอกสารพร้อม:
 $ ( document ) . ready ( function ( ) {
            $ ( "#customers" ) . DataTable ( ) ;
    //...
} ใน jQuery dataTable call:
 $ ( document ) . ready ( function ( ) {
        $ ( "#customers" ) . DataTable ( {
            ajax : {
                url : "/api/customers" ,
                dataSrc : ""
            } ,
            columns : [
                {
                    data : "name" ,
                    render : function ( data , type , customer ) {
                        return "<a href='/customers/edit/'" + customer . id + "'>" + customer . name ;
                    }
                } ,
                {
                    data : "membershipType.name"
                } ,
                {
                    data : "id" ,
                    render : function ( data ) {
                        return "<button class='btn-link js-delete' data-customer-id=" + data + ">Delete</button>" ;
                    }
                }
            ]
} ) ; ขั้นตอนที่ 1: สร้าง DTO, ขั้นตอนที่ 2: เพิ่ม DTO ไปยัง Parent DTO ขั้นตอนที่ 3.MAP ในการแมปโปรไฟล์ขั้นตอนที่ 4: เพิ่มลงในคอนโทรลเลอร์ (._AppDBContext.customers.include (C => C.MembershipType) .tolist () .. ) ขั้นตอนที่ 5: เพิ่มในคอลัมน์ดู:
 {
    data : "membershipType.name"
} , กำหนดตารางให้กับตัวแปรและใช้ในวิธีการลบ:
    < script >
        $ ( document ) . ready ( function ( ) {
            var table //<--
            = $ ( "#customers" ) . DataTable ( {
                ajax : {
                    url : "/api/customers" ,
                    dataSrc : ""
                } ,
                columns : [
                    {
                        data : "name" ,
                        render : function ( data , type , customer ) {
                            return "<a href='/customers/edit/'" + customer . id + "'>" + customer . name ;
                        }
                    } ,
                    {
                        data : "membershipType.name"
                    } ,
                    {
                        data : "id" ,
                        render : function ( data ) {
                            return "<button class='btn-link js-delete' data-customer-id=" + data + ">Delete</button>" ;
                        }
                    }
                ]
            } ) ;


            $ ( "#customers" ) . on ( "click" , ".js-delete" , function ( ) {
                var button = $ ( this ) ;
                bootbox . confirm ( "Are you sure you want to delete this customer?" , function ( result ) {
                    if ( result ) {
                        $ . ajax ( {
                            url : "/api/customers/" + button . attr ( "data-customer-id" ) ,
                            method : "DELETE" ,
                            success : function ( ) {
                                ///<--- here
                                table . row ( button . parents ( "tr" ) )
                                    . remove ( ) . draw ( ) ;
                            }
                        } ) ;
                    }
                } ) ;
            } ) ;
        } ) ;
</ script > 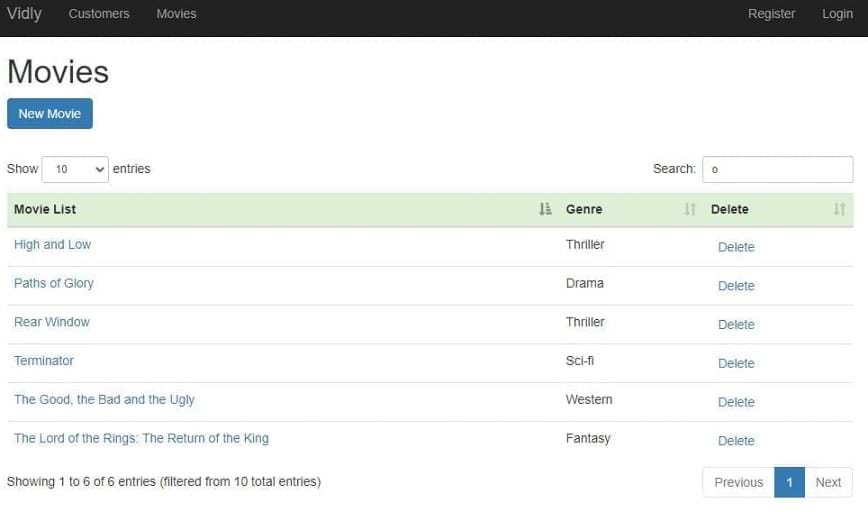
ตรรกะทั้งหมดมาในตัว (ดูที่ commit สำหรับไฟล์และรายละเอียด)
เพิ่มแอตทริบิวต์ [อนุญาต] ในการกระทำของคอนโทรลเลอร์หรือด้านบนของคอนโทรลเลอร์เพื่อ จำกัด การกระทำทั้งหมด
FilterConfig.cs:
filters . Add ( new AuthorizeAttribute ( ) ) ;สิ่งนี้จะปิดใช้งานตัวควบคุมทั้งหมดสำหรับผู้ใช้ที่ไม่ได้รับอนุญาต แต่คุณสามารถเพิ่ม [lewnanymous] ลงในคอนโทรลเลอร์หรือการกระทำเพื่อเปิดใช้งานการเข้าถึง
การเพาะฐานข้อมูล : เพื่อรักษาความสอดคล้องของโครงการในสถานการณ์การทำงานที่แตกต่างกัน
สร้างมุมมองแยกต่างหากสำหรับแขกและผู้ใช้ที่ได้รับอนุญาต
ในคอนโทรลเลอร์:
 public ViewResult Index ( int ? pageIndex , string sortBy )
 {
     if ( User . IsInRole ( RoleName . CanManageMovies ) )
         return View ( "List" ) ;
     return View ( "ReadOnlyList" ) ;
}
เพื่อปิดการใช้งานการดำเนินการอื่น ๆ เพิ่มแอตทริบิวต์นี้: [Authorize(Roles = RoleName.CanManageMovies)]
สร้างแบบจำลองสำหรับการรักษาบทบาท rolename.cs:
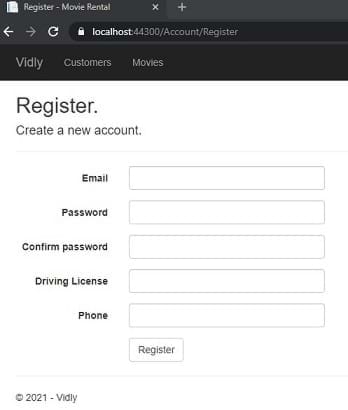
public const string CanManageMovies = "CanManageMovies" ; ในการเพิ่มฟิลด์ที่กำหนดเองให้กับผู้ใช้: เพิ่มเสาให้กับทั้งคลาสผู้ใช้แอปพลิเคชันและ ViewModel ของมุมมอง เพิ่มส่วนเสาใหม่เพื่อลงทะเบียนส่วนการกำหนดการกระทำ
เปิดใช้งาน SSL ในคุณสมบัติเพิ่มตัวกรอง
filters . Add ( new RequireHttpsAttribute ( ) ) ;รับ AppId และ AppSecret จาก Facebook, Google ... แทรกใน startup.auth.cs
 app . UseFacebookAuthentication (
   appId : "id" ,
   appSecret : "secret" ) ;
เพิ่มอุปกรณ์ประกอบฉากที่กำหนดเองใด ๆ ในแบบฟอร์มการเข้าสู่ระบบภายนอกและ ViewModel เริ่มต้นในตัวควบคุมการเข้าสู่ระบบภายนอก
ใน nuget ติดตั้ง glimpse.mvc5 และ glimpse.ef6 ไปที่ /glimse.axd และเปิดใช้งาน
ปิดการแคช: [OutputCache(Duration = 0, VaryByParam = "*", NoStore = true)]
เปิดใช้งานการแคช:
[OutputCache(Duration=50,Location=OutputCacheLocation.Server,VaryByParam="genre")]
ในการดำเนินการควบคุม
 if ( MemoryCache . Default [ "Genres" ] == null )
        {
            MemoryCache . Default [ "Genres" ] = _appDbContext . Genres . ToList ( ) ;
        }

var genres = MemoryCache . Default [ "Genres" ] as IEnumerable < Genre > ; ใน web.config ใน system.web
เราจะเพิ่มคุณสมบัติการเช่าในแอปของเราสร้าง DTO: NewRentalDTO:
 public class NewRentalDto
{
    public int CustomerId { get ; set ; }
    public List < int > MovieIds { get ; set ; }
}
สร้างโมเดล: การเช่าเพิ่มลงในบริบทและเรียกใช้การย้ายถิ่นฐาน
 public class Rental
{
    public int Id { get ; set ; }
    [ Required ]
    public Customer Customer { get ; set ; }
    [ Required ]
    public Movie Movie { get ; set ; }
    public DateTime DateRented { get ; set ; }
    public DateTime ? DateReturned { get ; set ; }
}
รายละเอียดเพิ่มเติมเกี่ยวกับการกระทำ (ใช้ typeahead, bloodhound สำหรับการเติมอัตโนมัติ)
คลิกขวาและเผยแพร่
PM> update-database -script -SourceMigration:SeedUsers
กำหนดเป้าหมาย MIG ให้สุดท้าย คุณมีการสืบค้น SQL ของฐานข้อมูลของคุณตอนนี้
ใน web.config <appSettings key="value"></appSettings> หรือสร้างไฟล์กำหนดค่าอื่น ๆ จากภายนอก <appSettings configSource="AppSettings.config"></appSettings> ใช้ในรหัสเช่น: configurationManager.AppSettings ConfigurationManager.AppSettings["Key"] คุณต้องแปลงตามความต้องการของคุณด้วยตนเอง
ใน web.config เพิ่มเป็น <system.web>
<customErrors mode="On"></customErrors>
ON: เปิดใช้งาน Everywhere Remote: ปิดการใช้งานบน localhost
ปรับแต่งในมุมมอง> ข้อผิดพลาดที่ใช้ร่วมกัน cshtml
ใน web.config เพิ่มไปที่ <system.web> >> <customErrors>
  < system .web>
    < customErrors mode = " On " >
      < error statusCode = " 404 " redirect = " ~/404.html " />
    </ customErrors >
      <!-- ..... -->
</ system .web> n web.config เพิ่มเป็น <system.webServer>
    < httpErrors errorMode = " Custom " >
      < remove statusCode = " 404 " />
      < error statusCode = " 404 " path = " 404.html " responseMode = " File " />
    </ httpErrors >
กำหนดเอง: เปิดใช้งานทุกที่ DetailedLocalonly: ปิดการใช้งานบน localhost
Nuget> Elmah
Exception Logger เข้าถึง BY /ELMAH.AXD
โดยค่าเริ่มต้นจะบันทึกบันทึกไปยังหน่วยความจำ แต่ด้วยการกำหนดค่าขนาดเล็กเราอาจมีข้อยกเว้นเหล่านี้ในฐานข้อมูลทุกประเภท
สำหรับการเข้าถึงจากระยะไกลเพิ่มสิ่งนี้ลงใน Elmah
      < authorization >
        < allow roles = " admin,user2,user3,... " />
        < deny users = " * " />
      </ authorization >
ขอบคุณ!!!


