state driven game template
1.0.0
웹에서 현대적인 게임 개발을 시작하는 템플릿 저장소.
node > = 14npm > = 6종속성을 설치하십시오.
npm i개발 서버를 시작하십시오.
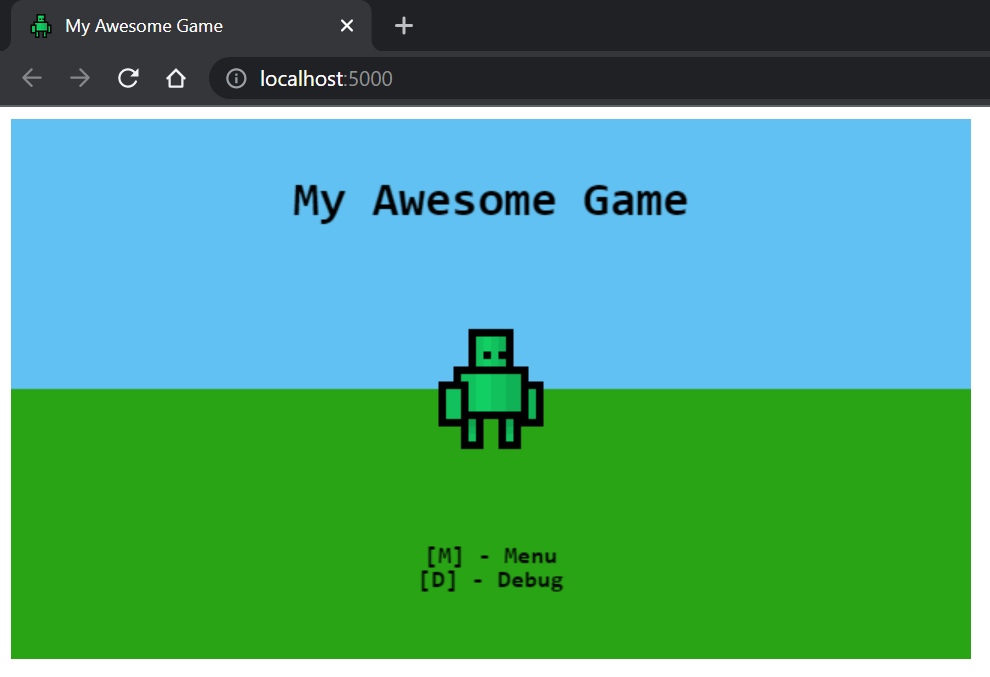
npm run start localhost:5000 에서 브라우저를 열어 게임을 참조하십시오.
소스 파일에 대한 변경 사항은 재 컴파일이 트리거됩니다. 브라우저를 새로 고쳐서 변경 사항을 확인하십시오.
프로젝트 구축.
npm run build 출력은 /dist 에 위치합니다.
 dist                          [Build output]
src                           [Source root]
  /assets                     [Web assets]
  /icons                      [Web icons]
  /lib                        [Game libraries]
    /core                     [Core libraries - @core]
    /models                   [Game models - @models]
    /sprites                  [Sprite definitions - @sprites]
    /state                    [State definitions - @state]
    /utils                    [Utility libraries - @utils]
    /game.ts                  [Game entry point - @game]
  /index.html                 [Web index page]
  /main.ts                    [App entry point]
  /manifest.webmanifest       [PWA manifest]
  /service-worker.js          [PWA service worker]
dev-server.js                 [Development express server]
tsconfig.json                 [TypeScript configuration]
tslint.json                   [tslint configuration]
webpack.config.js             [Webpack configuration]
게임 상태는 게임에 프레임 별 기능을 제공합니다.
 import { OnEnter , OnExit , OnRender , OnUpdate } from '@core' ;

export class MyGameState implements OnEnter , OnExit , OnRender , OnUpdate {
  enter ( ) : void {
    console . log ( 'Pushed to the stack!' ) ;
  }

  exit ( ) : void {
    console . log ( 'Popped from the stack!' ) ;
  }

  render ( ctx : CanvasRenderingContext2D ) : void {
    console . log ( 'Rendering frame!' ) ;
  }

  update ( { time , delta } ) : void {
    console . log ( 'Updating frame!' ) ;
  }
} 게임을 다음 상태로 발전 시키려면 상태의 인스턴스를 게임 스택으로 push 십시오.
 import { push } from '@core' ;

// Push a new state to the stack
push ( new MyGameState ( ) ) ;
상태가 pop 상태가있는 한 스택에서 주를 튀어 나올 수도 있습니다.
 import { pop } from '@core' ;

// Remove top-most state
pop ( ) ; 스프라이트는 HTMLCanvasContext2D 에서 이미지를 렌더링하는 객체입니다.
스프라이트는 다음과 같은 방식으로 만들 수 있습니다.
 import { Sprite } from '@core' ;

// Create and load the image to be rendered.
const image = new Image ( ) ;
image . src = 'path/to/image.png' ;

// Create a sprite using the image and parameters.
const sprite = new Sprite ( image , {
  // Source width
  w : 16 ,
  // Source height
  h : 16 ,
  // Origin x position
  ox : 0 ,
  // Origin y position
  oy : 0 ,
} ) ;
스프라이트는 캔버스 컨텍스트로 렌더링 될 수 있습니다.
 sprite . render ( ctx , {
  // Rendering x position
  x : 100 ,
  // Rendering y position
  y : 50 ,
} ) ;
선택적으로 스프라이트는 양방향으로 조정될 수 있습니다.
 sprite . render ( ctx , {
  x : 100 ,
  y : 50 ,
  // Scale the sprite by 3
  scaleX : 3 ,
  scaleY : 3 ,
} ) ; SpriteSheet 단일 이미지에서 여러 Sprite 객체를 정의하는 데 사용됩니다.
SpriteSheet 다음과 같이 정의됩니다.
const sprites = new SpriteSheet ( '/path/to/image.png' ) ;스프라이트 시트에 스프라이트를 직접 정의하여 동일한 이미지에서 여러 스프라이트를 구축하십시오.
 sprites
  . define ( 'idle_1' , { w : 16 , h : 16 , ox : 0 , oy : 0 } )
  . define ( 'idle_2' , { w : 16 , h : 16 , ox : 16 , oy : 16 } ) ;
그런 다음 스프라이트 시트에서 스프라이트를 검색 할 수 있습니다.
 /**
 * Note that, the `.get` method can return undefined.
 * Accommodate for this by optionally calling render
 * when doing so.
 *
 * `sprite?.render(ctx, config)`
 * */
const sprite = sprites . get ( 'idle_1' ) ; 

