tinybuild
1.0.0

npm i -g tinybuildまたはnpm i tinybuildのローカルプロジェクト。
独自のワークフローオートメーションについてこれに興味がある場合は、現在、私たち自身の開発に基づいてこれを編集および破損し、修正してください。ソースコントロールはまったくありませんが、可能な限り汎用性を高めるために最善を尽くしています。
 |  |  |  |  |
これは、あなたがいつも望んでいたバンドラーと開発サーバーのコンボです。さようなら難解な指示、さようなら扱いにくい依存関係、そしてあなたのコンパイラランニングを見つめているさようならの時間が無駄になりました! Webpack、小包、Viteの上を移動すると、町に新しいゲームがあります。
前提条件:最新のnodejs lts
npm i -g tinybuild
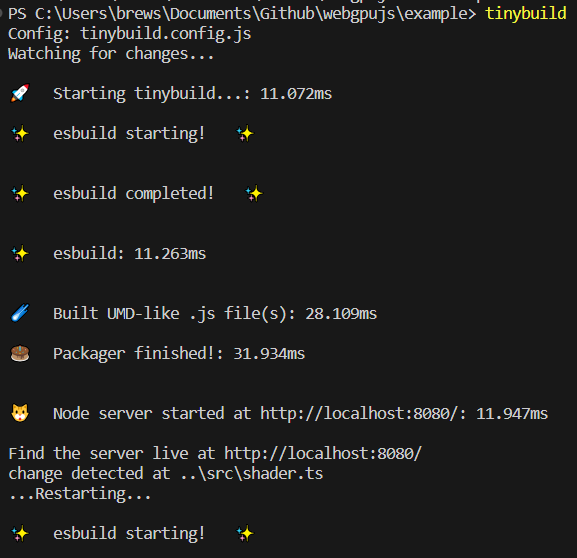
tinybuild
アプリケーションまたはライブラリを開発する準備ができました!
Tinybuild.config.jsとpackage.jsonをニーズに変更します。 build:trueまたはset server:false in the configでは、開発サーバーを無効にします。
TinyBuildは、カスタムスクリプトでnode.jsを介してPackagerスクリプトをnpx tinybuildなどのローカル依存関係としても機能します。詳細については、ドキュメントを参照して、ソースコードをご覧ください。
バンドラーとサーバーのプリセットには、ESBUILDおよびサーバーのカスタマイズのための完全なCLI、構成ファイル、または機能的な(inScript)ラッパー、および単一の構成(ブラウザー、ESM、ノードの場合)から複数の分布を作成するためのラッパーが含まれます。複雑なライブラリとプログラムをミリ秒単位で提供し、ホットなリロードテスト環境を備えており、生産の拡大を容易にします。
package.jsonを備えたプロジェクトフォルダー(初めてnpm initを実行した後)、
so(copy/pasteまたはtinybuildが実行するだけで1つを生成できます)のように、 tinybuild.config.jsファイルを作成します。
 //import {defaultBundler, defaultServer, packager} from 'tinybuild'

const config = {
    //build:true, //enable this to skip serve step (same as cli)
    //serve:true //or enable this to skip build step (same as cli)
    bundler : { //esbuild settings, set false to skip build step or add bundle:true to config object to only bundle (alt methods)
        entryPoints : [ //entry point file(s). These can include .js, .mjs, .ts, .jsx, .tsx, or other javascript files. Make sure your entry point is a ts file if you want to generate types
        "index.js"
        ] ,
        outfile : "dist/index" , //exit point file, will append .js as well as indicators like .esm.js, .node.js for other build flags
        //outdir:'dist'               //exit point folder, define for multiple entryPoints
        bundleBrowser : true , //create plain js build? Can include globals and init scripts
        bundleESM : false , //create esm module js files // { platform:'node' } //etc you can also supply an object here to add more specific esbuild settings
        bundleTypes : false , //create .d.ts files, //you need a .tsconfig for this to work, tinybuild will create one for you when you set this true, however, and has typescript support built in
        bundleNode : false , //create node platform plain js build, specify platform:'node' to do the rest of the files
        bundleHTML : false , //wrap the first entry point file as a plain js script in a boilerplate html file, frontend scripts can be run standalone like a .exe! Server serves this as start page if set to true.
        //bundleIIFE:false,   //create an iife build, this is compiled temporarily to create the types files and only saved with bundleIIFE:true
        //bundleCommonJS:false, //cjs format outputted as .cjs
        minify : true ,
        sourcemap : false ,
        //plugins:[] //custom esbuild plugins? e.g. esbuild-sass-plugin for scss support
        //includeDefaultPlugins:true //true by default, includes the presets for the streaming imports, worker bundling, and auto npm install
        //blobWorkers:true, //package workers as blobs or files? blobs are faster but inflate the main package size
        //workerBundler:{minifyWhitespace:true} //bundler settings specific to the worker. e.g. apply platform:'node' when bundling node workers, default is minifyWhitespace:true as full minifying may cause unforeseen errors
        //globalThis:null //'mymodule'
        //globals:{'index.js':['Graph']}
        //init:{'index.js':function(bundle) { console.log('prepackaged bundle script!', bundle); }.toString(); }
        //  outputs:{ //overwrites main config settings for specific use cases
        //     node:{ //e.g. for bundleNode
        //     // external:[] //externals for node environment builds
        //     },
        //     //commonjs:{} //bundleCommonJS
        //     //browser:{}
        //     //esm:{}
        //     iife:{
        //     // external:[] //we only use the iife for types so it doesn't really matter if it bundles node, just note otherwise if you need iife for some obscure reason
        //     }
        // },
        //refer to esbuild docs for more settings
     } ,
    server : {  //node server settings, set false to skip server step or add serve:true to config object to only serve (alt methods)
        debug : false ,
        protocol : "http" ,  //'http' or 'https'. HTTPS required for Nodejs <---> Python sockets. If using http, set production to False in python/server.py as well
        host : "localhost" , //'localhost' or '127.0.0.1' etc.
        port : 8080 , //e.g. port 80, 443, 8000
        //redirect: 'http://localhost:8082' //instead of serving the default content, redirect ot another url
        //headers: { 'Content-Security-Policy': '*'  }, //global header overrides
        startpage : 'index.html' ,  //default home page/app entry point
        /*
        routes:{ //set additional page routes (for sites instead of single page applications)
            '/page2': 'mypage.html',
            '/custom':{ //e.g. custom page template
                headers: { 'Content-Security-Policy': '*' }, //page specific headers
                template:'<html><head></head><body><div>Hello World!</div></body></html>'
                //path: 'mypage.html' //or a file path (e.g. plus specific headers)
            },
            '/redirect':{ //e.g. custom redirect
                redirect:'https://google.com'
            },
            '/other':(request,response) => {}, //custom request/response handling
            '/': 'index.html', //alt start page declaration
            '/404':'packager/node_server/other/404.html', //e.g. custom error page
        },
        */
        socket_protocol : "ws" , //frontend socket protocol, wss for served, ws for localhost
        hotreload : 5000 ,  //hotreload websocket server port
        //reloadscripts: false, //hot swap scripts, can break things if script handles initializations, otherwise css, link, srcs all hot swap without page reloading fairly intelligently
        //delay: 50, //millisecond delay on the watch command for hot reloading
        //pwa: "service-worker.js",  //pwa mode? Injects service worker webpage code to live site, will create a service worker and webmanifest for you if not existent
        //watch: ['../'], //watch additional directories other than the current working directory
        //python: false,//7000,  //quart server port (configured via the python server script file still)
        //python_node:7001, //websocket relay port (relays messages to client from nodejs that were sent to it by python)
        errpage : 'node_modules/tinybuild/tinybuild/node_server/other/404.html' , //default error page, etc.
        certpath : 'node_modules/tinybuild/tinybuild/node_server/ssl/cert.pem' , //if using https, this is required. See cert.pfx.md for instructions
        keypath : 'node_modules/tinybuild/tinybuild/node_server/ssl/key.pem' //if using https, this is required. See cert.pfx.md for instructions
    } ,
    // electron:true //desktop apps as a full chromium bundle, not small and needs some customization for things like bluetooth menus. Better for full featured applications. Can trigger backend runtimes on local machines.
    /*mobile:{ //this will copy the dist and index.html to capacitor builds that can create small interoperable javascript webview + native functionality (e.g. bluetooth) mobile apps (~2Mb at minimum).
        //android:'open', //'open'//true //Requires Android Studio, it will be launched
        //ios:false //'open'//true //Requires XCode
    }, */
    //tauri:true, //alternative tauri build options for very minimal native engine desktop apps that generally lack the latest web APIs. Good for simple apps, you can bundle it with backend runtimes on local machines.
    /*
    assets:[ //for the mobile/desktop bundlers to copy into their respective folders
        './assets',
        './favicon.ico'
    ]
    */
}

export default config ;
次に、 tinybuildを実行してこれをPackagerに提供して、プロジェクトを構築して実行します。たとえば、さまざまなエントリポイントやユースケースについて、ニーズに合わせてカスタマイズします。 JSXやTSXを含むTypeScriptは自動的に認識されます。 CSSは、どこかにスクリプトにインポートすると自動的にコンパイルされます。詳細については、例をご覧ください。
TinyBuildをローカル( npm install対npm install -g )を使用するには、TinyBuildライブラリからpackager(config)をインポートおよび実行し、スクリプトファイルで実行する必要があります。
プロジェクトディレクトリのルートでtinybuild.jsを作成します
 import { packager } from 'tinybuild'
import config from './tinybuild.config.js'

packager ( config ) ;次に、そのプロジェクトディレクトリのコンソールでnode tinybuild.js実行します
たとえば、 tinybuild buildまたはtinybuild serve
tinybuild helpの受け入れられた引数、新しいリポジトリで作成されたボイラープレートを参照してください。 tinybuildコマンドは、編集されたtinybuild.config.jsまたはtinybuild.js (ライブラリを含み、バンドラーおよび/またはサーバー自体をよりコントロールのためにpackage.jsonジャー自体を実行する)を初期化後に使用します。
グローバルコマンド:
tinybuild現在の作業ディレクトリで、ボイラープレートTinyBuild Bundler +サーバー設定を実行します。不足しているindex.js、package.json(auto npm/yarnインストール)、tinybuild.jsを作成し、ホットリロードのためにワーキングディレクトリ(遅くなるためにnode_modulesを除く)で監視されたフォルダーを使用します。ローカルコマンド:
node path/to/tinybuild.js現在の作業ディレクトリを使用して、このパッケーガー構成を実行するための参照として使用しますstart現在の作業ディレクトリでnode tinybuild.jsに相当するものを実行します。build / bundle esbuild bundlerを実行し、jsonifiedオブジェクトを介してconfig={"bundler":{}}でconfigを指定できますserveノード開発サーバーを実行し、jsonifiedオブジェクトとオブジェクトを介してconfig={"server":{}}でconfig = {server ":{}}を指定できますmode=python開発サーバーとPythonを実行します。Pythonは、DISTを別のポート(デフォルトで7000)から提供します。mode=dev for the dev serverモード(デフォルトで使用するボイラープレートにtinybuildを入力するだけで使用)path=custom.jsカスタム等価Tinybuild.jsエントリファイル(PackagerまたはBundler/Serverを実行するため)ST`-サーバーのホスト名、デフォルトでローカルホストentryPoints=index.jsスクリプトのエントリポイントを設定すると、文字列のjsonified配列でもあります。outfile=dist/index出力ディレクトリとファイル名を設定します(拡張機能名を差し引いて)outdir=dist複数のエントリポイントを使用する場合は、代わりにoututdirを使用しますbundleBrowser=trueブラウザに優しい、デフォルトでは真のプレーン.JSバンドルを作成します。bundleESM=false -ESMモジュールバンドルを作成し、デフォルトではfalse、.esm.jsによって識別されますbundleTypes=false -.d.tsファイルを生成、false、デフォルトでは、エントリポイントはタイプスクリプトファイルで必要ですが、それ以外の場合はリポジトリ内のJSファイルのタイプを生成しようとします。ファイルは、使用されているDISTフォルダーのレポのように整理されています。bundleNode=falseノード依存関係を含む別のバンドルセットを作成します。 .node.jsによって識別されますbundleHTML=trueクイックテストとしてブラウザバンドルをラップおよび実行するHTMLボイラープレートをバンドルします。 Trueの場合、PackagerコマンドはこのファイルをStartPageとして設定します。それ以外の場合は、index.htmlがあり、同じベースボイラープレートを持つカスタマイズおよび使用できます。 distのindex.build.htmlを見つけます。external=['node-fetch'] - リポジトリのマークexternals、ノードフェッチは多くの作業で使用されているため、デフォルトではノードバンドルには独自の除外があります(readmeのesbuildオプションを参照)platform=browser - 非ノードバンドルはデフォルトでブラウザを使用し、すべてのバンドルがノードプラットフォームをターゲットにするようにノードに設定します。外部は適切に設定する必要があります。globalThis=myCustomBundleブラウザー設定のエントリポイントのエクスポートをグローバル変数としてアクセスできるように設定できます。デフォルトで設定されていません。globals={[entryPoint]:['myFunction']} - 追加の機能、クラス、変数などを指定できます。host=localhostデフォルトでは、サーバーのホスト名を設定し、localhostを設定します。サーバーのURLまたはIPアドレスに設定できます。通常、サービングするときはポート80を使用します。port=8080サーバー用のポート、デフォルトでは8080protocol=http -httpまたはhttps? HTTPSを実行するには、SSL CERTとキーが必要ですpython=7000 -pythonサーバー用のポートノードサーバーは、デフォルトで7000のキル信号を送信できるようにします。 Pythonサーバーを同時に実行するか、 mode=pythonを使用しますhotreload=5000ノードサーバー用のhotreloadポート、デフォルトで5000watch=../../path/to/other/srcまたはwatch=['path/to/src1','src2','.xml'] - 追加のフォルダーと拡張機能を視聴しますextensions=xml,3dsまたはextensions=['xml','3ds']変更のための特定の拡張機能を視聴しますignore=../../path/to/other/src,path2/src2またはignore=['path/to/src1','../path2/src2'] - ファイルとフォルダーを無視しますstartpage=index.htmlホームのエントリHTMLページ '/'ページ、index.htmlデフォルトでindex.htmlcertpath=tinybuild/node_server/ssl/cert.pem -httpsのcertファイルkeypath=tinybuild/node_server/ssl/key.pem httpsのキーファイルpwa=tinybuild/pwa/workbox-config.js workbox-cli(package.json経由で個別にインストール)を使用したPWAのサービスワーカー構成、サーバーは、発見されていない場合はメインフォルダーにmanifest.jsonをインストールします。config="{"server":{},"bundler":{}}" - パッケーガーのjSsonified configオブジェクトを渡します。ドキュメントのバンドラーとサーバーの設定を参照してください。init必要なファイルを使用して新しいTinyBuildリポジトリとしてフォルダを初期化すると、以下のコマンドを使用してソースを含めることができますcore=true適切なpackage.jsonを含む新しいリポジトリにTinyBuildソースを含めるentry=index.js - 作成するエントリポイントファイル、デフォルトはindex.jsにデフォルトですscript=console.log("Hello%20World!") - jssonifiedとuri-encoded(スペースなど)を渡します。electron -distおよび指定された資産をコピーして、ボイラープレートで電子アプリを起動します。電子ドキュメントを参照してくださいmobile={android:'open',ios:false} - コンデンサを使用してバンドルされたモバイルアプリを作成し、「Open」を使用してAndroid StudioまたはXcodeを実行するか、依存関係がインストールされていると仮定してCLIを使用するように設定します。コンデンサドキュメントを参照してください。tauri - タウリ経由の代替最小デスクトップランタイム。タウリのドキュメントを参照してください。assets=['./assets','favicon.ico'] - ネイティブディストリビューションにコピーする追加の資産を指定しますこれらのタイプのアプリケーションの操作方法についての詳細については、各サブフォルダーのreadme.mdファイルを参照してください。
MacにTinyBuildをインストールしていて、機能していない場合は、このStackOverFlow Postに基づいて端末に次のコマンドを実行してみてください。
 brew install dos2unix
sudo dos2unix node_modules/tinybuild/tinybuild/bin/global.js
また、Windowsはグローバルパッケージのアクセス許可のエラーをスローすることもあります。Googleに入力したエラーをコピーして、見つけたコマンドラインソリューションを使用するだけで、うまくいくでしょう。
お気軽に変更または変更を行い、問題を介してバグを報告したり、ジョシュアブリュースターに直接連絡したりして、開発システム全体がモジュール式であり、いくつかの簡素化された開発ツールに加えてシンプルな自動化です。これを毎日の開発ワークフローで使用するので、バトルテストされていますが、サンプルサイズが小さくなります。


