garage cerberus
1.0.0
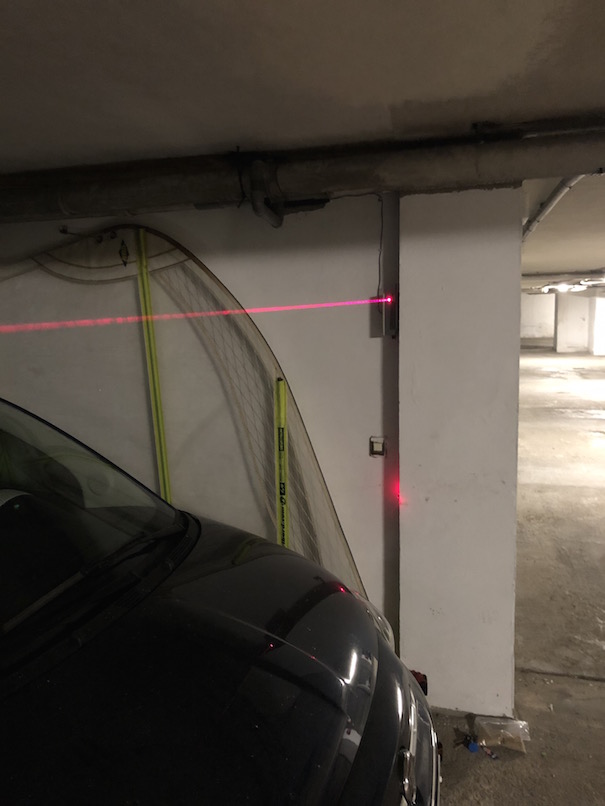
It occurred to me that alternative to protect access to the community garage square without having to install physical separations. It is about making visible a virtual barrier that detects and notifies intrusions.
In this first iteration, the device only has a light sensor to detect the interruption of a laser beam in order to warn of a person's passage. Later we could include other movements such as a PIR (Passive Infrared Sensor). Or the connection are an image recording system, for example.
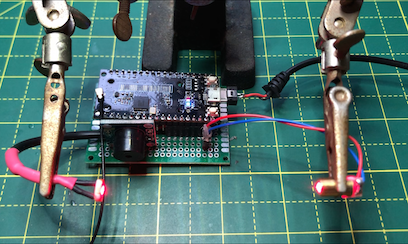
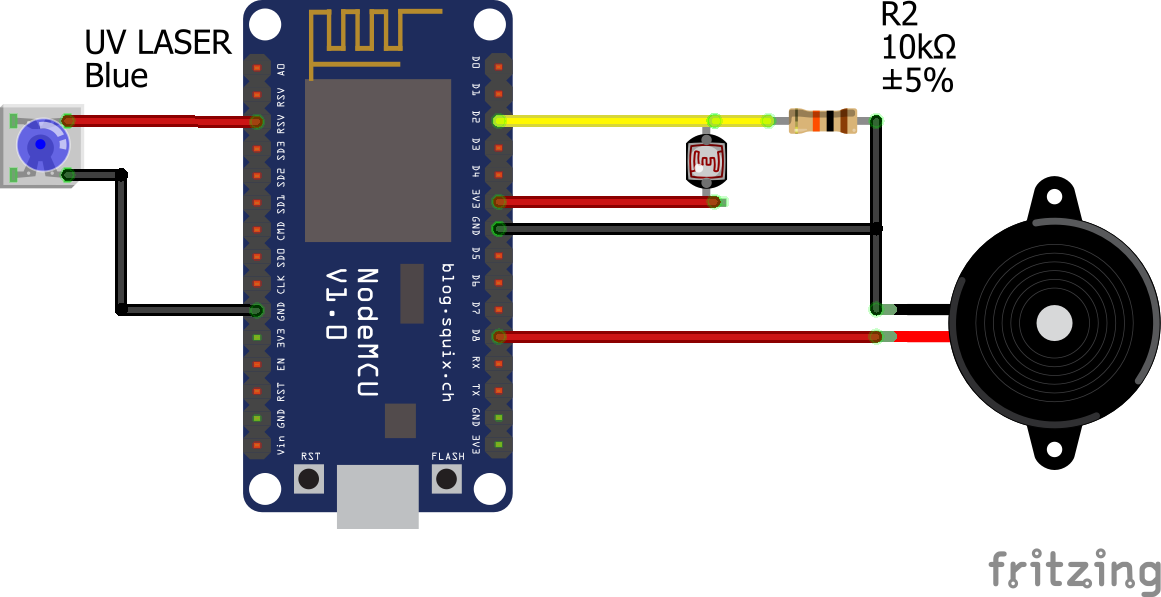
The sensor is based on a laser LED and a photo-resistance that reads an analog/digital conversion port. The program adjusts the threshold light levels when the plate starts. So if the light is blocked, the acoustic warning process and alert message by Lora are triggered.
The backffice part is supported by The Thing Networs (AKA TTN) and IFTTT. The information is finally processed in flows of a program in Node-Rred that runs in a Docker container on a Raspberry Pi 3B+ with the Raspbian operating system. The photo of this architecture would be this: 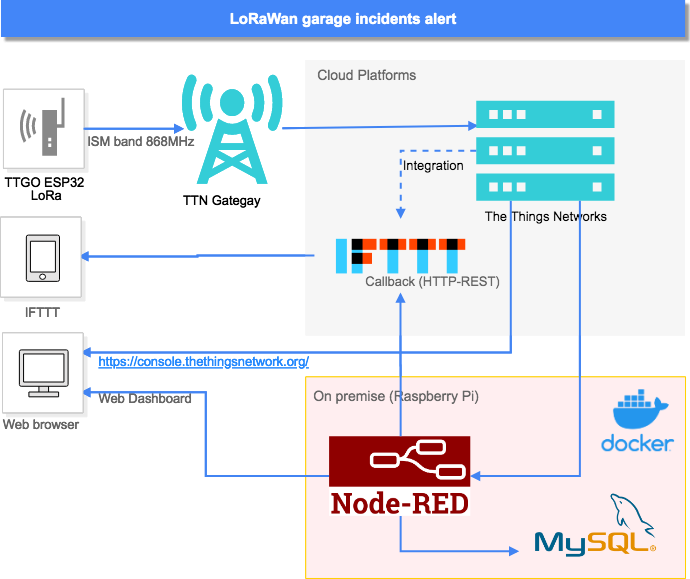
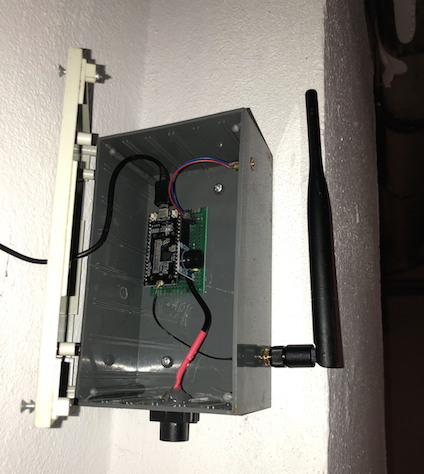
Demonstration of the complete process: detection and notification:
We are going to use the TTN services that will enrutar the message from the gateway that the data package to the Endpoint that will consume the application that takes action with the information contained in the plot gives data.
This device is of the ABP type (Activation-by-Personalisation) which means that it will be identified on the network with a return and a preconfigured Key session . For this we have to complete the registration of an application and a device. These are the steps to follow:
Devices such as this sensor communicate with the application in which they have been registered. For you register a device, you must first add an application.
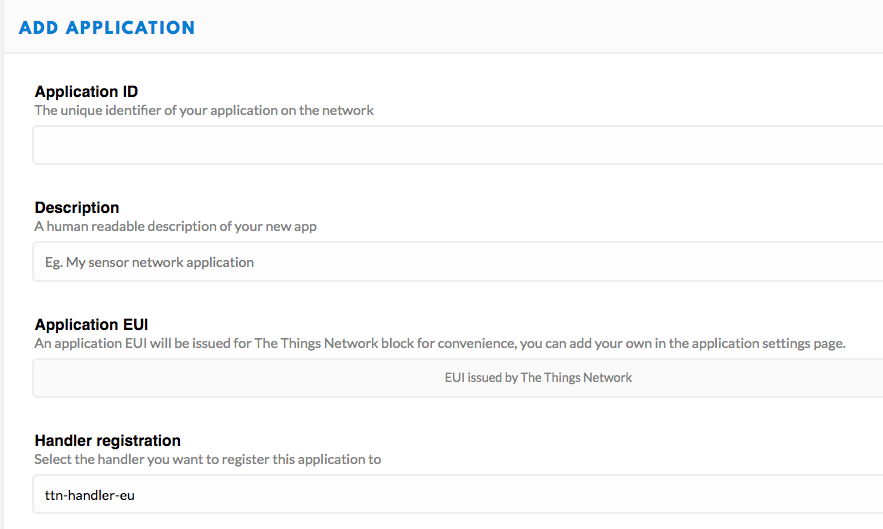
In the console, select Application and click Add Application on the following screen.
Now we will be redirected to the page with the new added application where you can find the EUI app and the access keys generated. 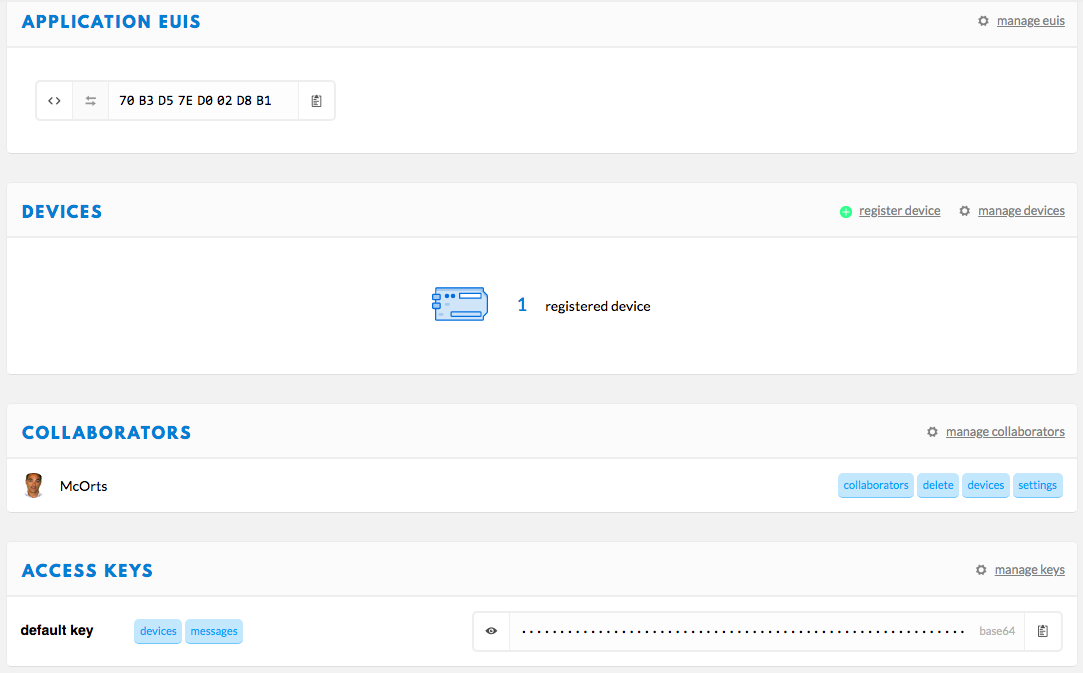
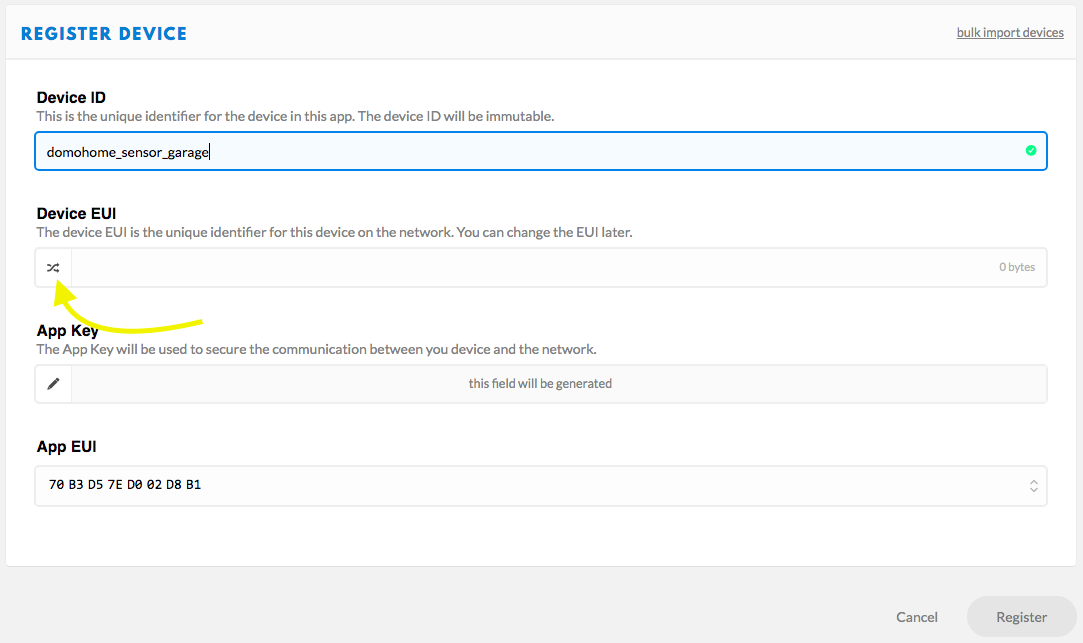
In TTN a device (Devide) represents the configuration of what also calls node (node) that is ultimately our circuit. When accessing the registration form, we only have to fill in the device ID that will be the unique name of this node. It is preferable to press the icon marked in the image so that the eui device is automatically generated.
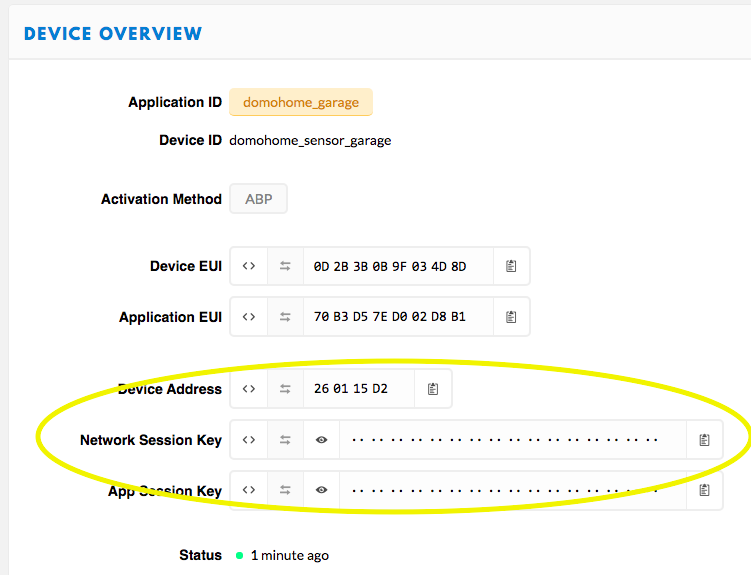
Finally, we will press Register and press the icon with the name of our new device to see your configuration data. Here we will find the parameters we need to be an ABP type device. And that we will have to move to the settings.H configuration file that will be loaded in the Sketch of the Arduino IDE. But the format for Keys is different. You will find an Excel sheet (Encode_eui.xlsx) that will facilitate this task.
 // TTN Configuration
// LoRaWAN NwkSKey, network session key provided by TTN Console (https://console.thethingsnetwork.org) in Device settings form:
static const PROGMEM u1_t NWKSKEY[16] = {0x8F,0xDA,......};
// LoRaWAN AppSKey, application session key provided by TTN Console (https://console.thethingsnetwork.org) in Device settings form:
static const u1_t PROGMEM APPSKEY[16] = {0xE5,0x0A,......};
// LoRaWAN end-device address (DevAddr)
static const u4_t DEVADDR = 0x12345678 ; // <-- Change this address for every node!

// Other params
const int update_time_alive = 150000;
const int PhotoCell = 2;
const int Buzzer = 15;
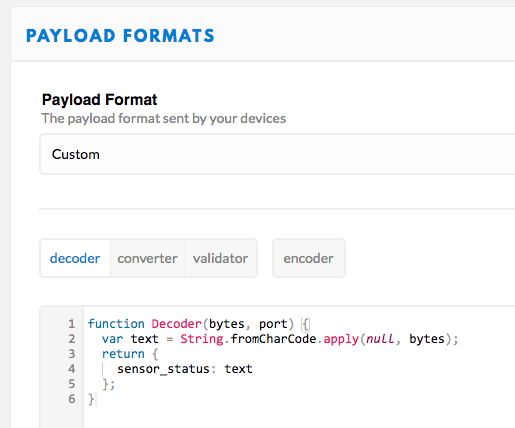
We will have to return to the Application Overbiew screen to make a last configuration. Pressing on the Payload Formats tab we access the form where a script is allowed to decode the data plot of our Lora message. In our case this is the format:
The architecture chosen for the back and front is designed to have minimal operating costs and scalable. The use of containers will allow us to add new devices (TTN nodes) quickly with its own Dashboard Node -red executed on the same server.
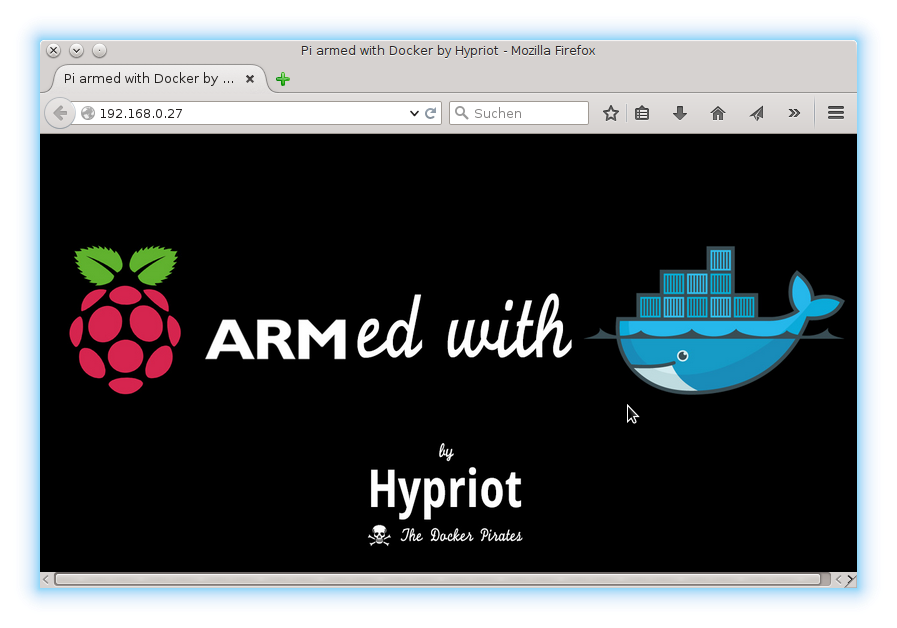
The server used has been a Raspberry Pi 3B+. It is currently not the most powerful but sufficient model to execute several containers. Initial configuration tasks to install the Raspbian operating system, and MySQL can be easily found and standard. Docker and Node -red containers with all their necessary accessories so that the complete flow can be executed. I describe them below.
For these configurations I have based on the document: The Easy Way To Set Up Docker on A Raspberry Pi. Here I summarize the steps to follow:
 sudo groupadd docker
sudo gpasswd -a $USER docker newgrp docker
docker run hello-world
docker run -d -it -p 1881:1880 --name domohome-garage nodered/node-red
The Node -red application does not include by default the nodes that we will need to integrate with TTN, with MYSQL or to show a user interface, the Dashboard . In principle, all could be installed from the Manage Palette option of the administration application that we should access in the type address: http://192.168.1. ????:1881
Dashboard nodes
Standard installation. Looking for the module ¨NODE-RED-DASHBOARD¨ in Install from the Manage Palette Menu option of the application.
Integration with TTN nodes
We will need to access the container with a more info SSH session here
docker exec -it domohome-garage /bin/bash
We will now install the nodes with the NPM package manager:
npm install node-red-contrib-ttn
MySQL nodes
From the previous SSH session we execute:
npm install node-red-node-mysql
To expand information about the use and examples, the TTN website has this page: https://www.thethingsnetwork.org/docs/applications/nodered/
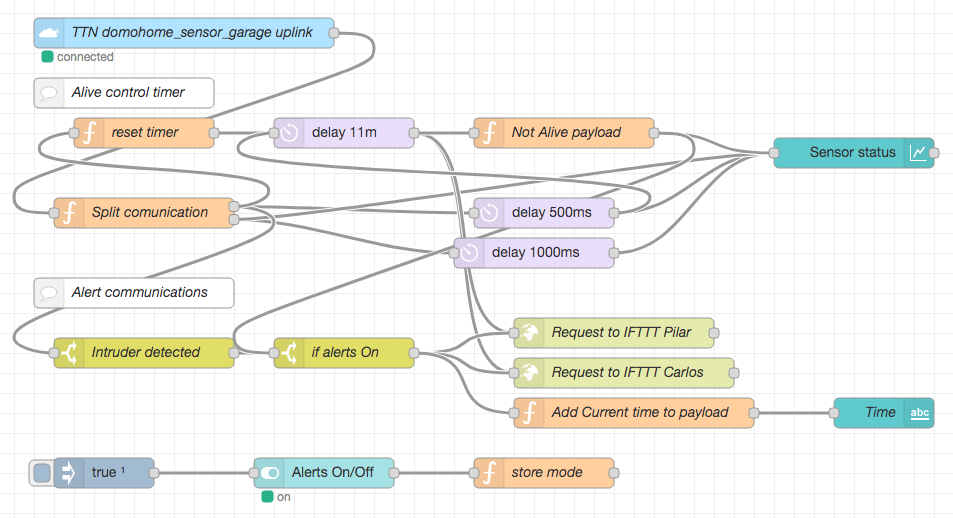
In the flow of Node-Rred, the messages delivered by the TTN service are treated and graphically show. The message payload contains two different values: ¨Alert¨ when the laser beam is interrupted and ¨Alive¨ every 10 minutes. In addition, a logic is included to show a state of not available when in 11 minutes no message has arrived.
To import the flow we must access the Node-RED application that we have torn in the Docker in a direction of the type http://192.168.1. ????:1881. We will find the import option by pressing the hamburger type menu button. The easiest thing is to copy to the team clipboard the content of the Garage-Cerberus_flows.json file and paste it on the screen: 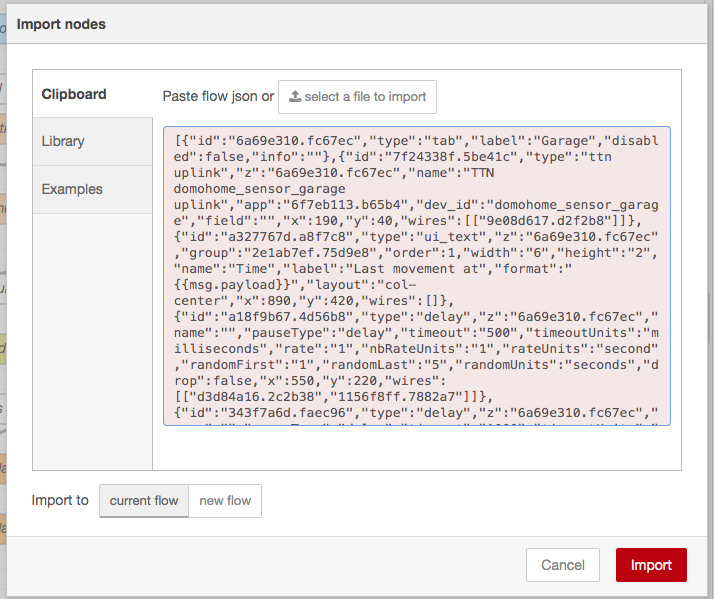
After pressing the "Import" button you will have the view of the nodes and flows. But there are three of them that are not correctly configured.
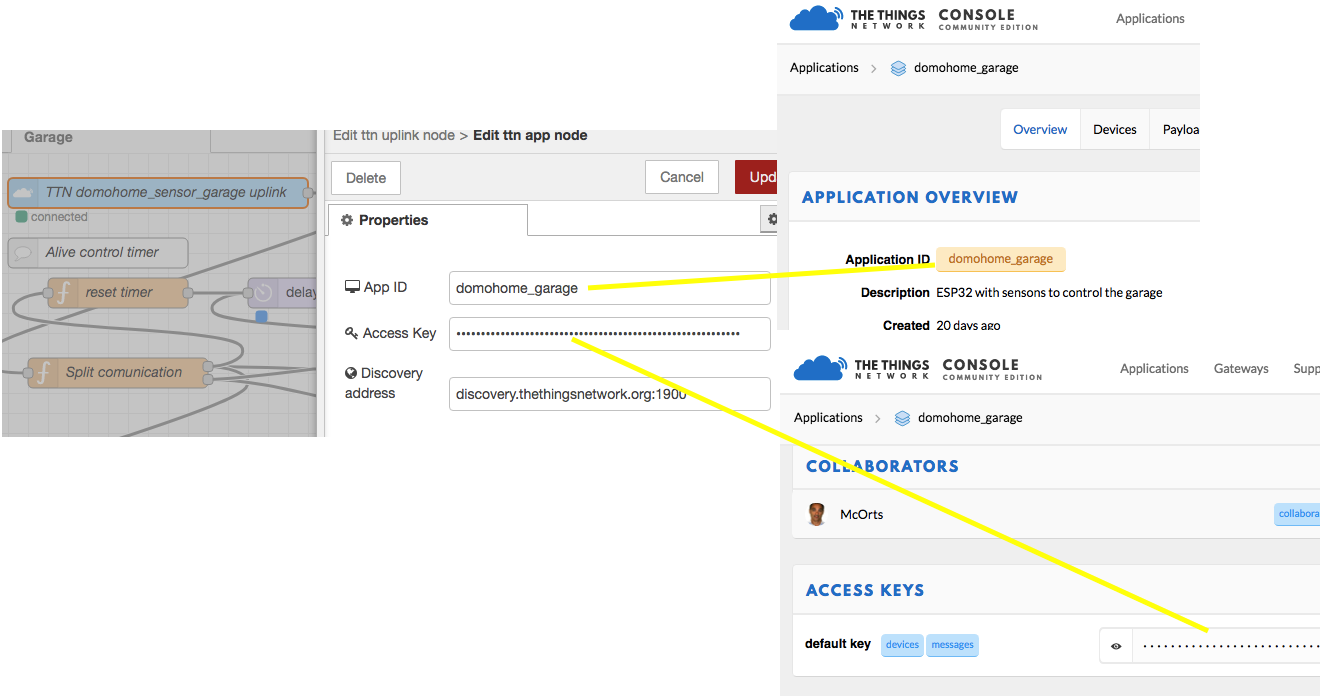
Open the properties of the TTN Domehome_Sensor_Garage Uplink node and look for names and the key on the TTN console according to the following correspondences: 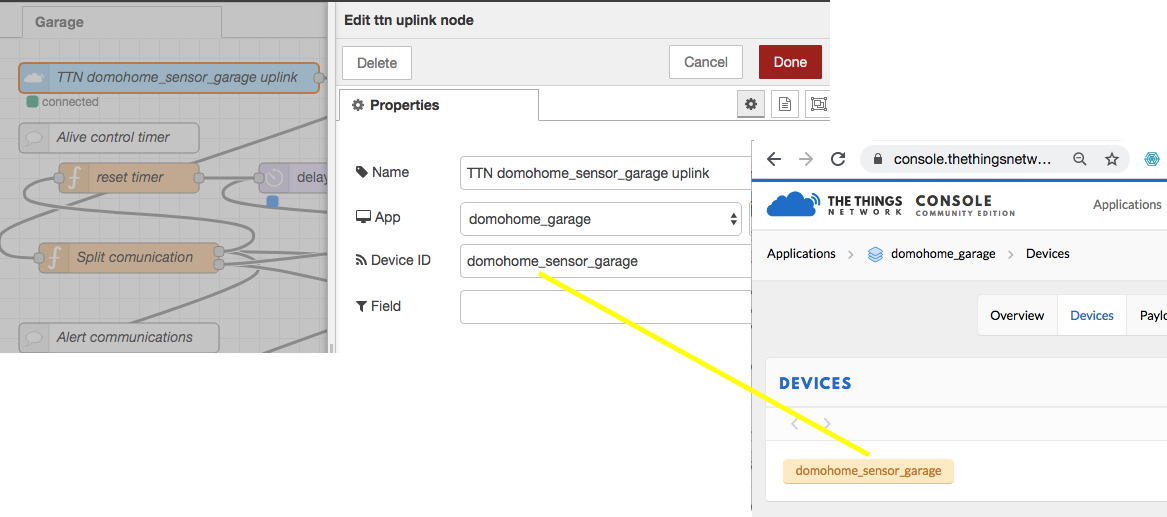
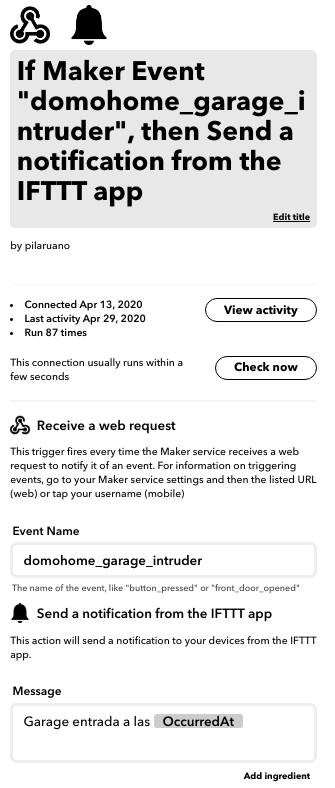
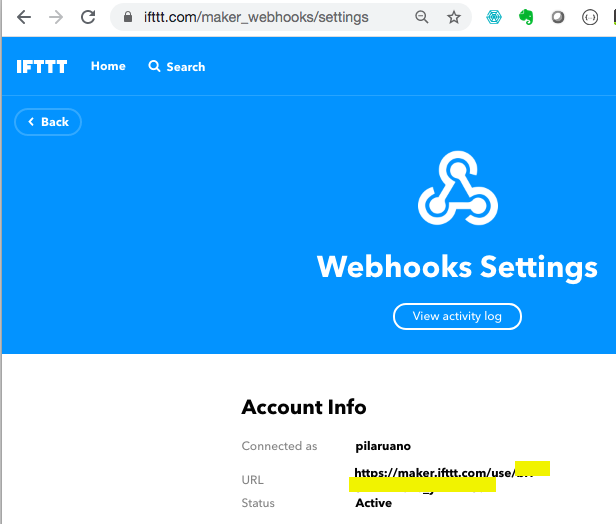
Integration with IFTTT (IF This The That) is mounted with a simple call to its endpoint rest using HTTP Request type node with the following format.
https://maker.ifttt.com/trigger/domohome_garage_intruder/with/key/???????????
We must collect all the information on the connection chain to our BBDD MYSQL external to RPI server. User, password, port, host ... and complete the configuration of the Mysql node database .
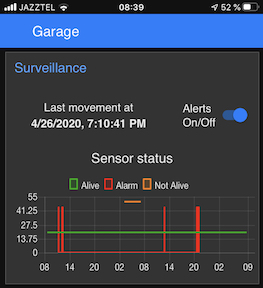
The final result is a responsive screen where we are shown the last event, the historical and the possibility of deactivating the notices. We will access the same URL as for the administration but with the suffix/UI: http://192.168.1.???:1881/ui
https://blog.squix.org/2021/07/ttgo-lora32-v1-0-with-ttn-v3-and-otaa.html


