Eureka
5.5.0

由Xmartlabs用❤️制成。这是Swift中Xlform的重新创建。
简体中文
 |  |  |
|---|
有关更多信息,请查看我们介绍Eureka的博客文章。
您可以克隆并运行示例项目,以查看尤里卡大多数功能的示例。
 |  |
|---|
通过扩展FormViewController您可以只需将部分和行添加到form变量即可。
import Eureka

class MyFormViewController : FormViewController {

    override func viewDidLoad ( ) {
        super . viewDidLoad ( )
        form +++ Section ( " Section1 " )
            <<< TextRow ( ) { row in
                row . title = " Text Row "
                row . placeholder = " Enter text here "
            }
            <<< PhoneRow ( ) {
                $0 . title = " Phone Row "
                $0 . placeholder = " And numbers here "
            }
        +++ Section ( " Section2 " )
            <<< DateRow ( ) {
                $0 . title = " Date Row "
                $0 . value = Date ( timeIntervalSinceReferenceDate : 0 )
            }
    }
}
在示例中,我们创建两个具有标准行的部分,结果是:
您可以通过自己设置form属性而无需从FormViewController延伸而创建表单,但是此方法通常更方便。
要更改此行为,您应该设置控制器的导航选项。 FormViewController具有一个navigationOptions ,可以具有以下值:
canBecomeFirstResponder()默认值已enabled & skipCanNotBecomeFirstResponderRow
要使光滑的滚动滚动到屏幕外行,请通过animateScroll属性启用它。默认情况下,当用户键入键盘导航附件中的下一个或上一个按钮时,包括下一个行屏幕上的下一个或上一个按钮时, FormViewController会立即跳到行之间。
要设置导航事件后键盘和突出显示的行之间的空间数量,请设置rowKeyboardSpacing属性。默认情况下,当形式滚动到屏幕外视图时,键盘顶部和行底部之间不会留出空间。
 class MyFormViewController : FormViewController {

    override func viewDidLoad ( ) {
        super . viewDidLoad ( )
        form = ...

	// Enables the navigation accessory and stops navigation when a disabled row is encountered
	navigationOptions = RowNavigationOptions . Enabled . union ( . StopDisabledRow )
	// Enables smooth scrolling on navigation to off-screen rows
	animateScroll = true
	// Leaves 20pt of space between the keyboard and the highlighted row after scrolling to an off screen row
	rowKeyboardSpacing = 20
    }
}如果要更改整个导航附件视图,则必须在FormViewController子类中覆盖navigationAccessoryView变量。
Row对象具有特定类型的值。例如, SwitchRow具有Bool值,而TextRow保持String值。
// Get the value of a single row
let row : TextRow ? = form . rowBy ( tag : " MyRowTag " )
let value = row . value

// Get the value of all rows which have a Tag assigned
// The dictionary contains the 'rowTag':value pairs.
let valuesDictionary = form . values ( )尤里卡(Eureka)包括自定义操作员,使形式创建变得容易:
form +++ Section ( )

// Chain it to add multiple Sections
form +++ Section ( " First Section " ) +++ Section ( " Another Section " )

// Or use it with rows and get a blank section for free
form +++ TextRow ( )
+++ TextRow ( ) // Each row will be on a separate sectionform +++ Section ( )
<<< TextRow ( )
<<< DateRow ( )
// Or implicitly create the Section
form +++ TextRow ( )
<<< DateRow ( ) // Append Sections into a Form
form += [ Section ( " A " ) , Section ( " B " ) , Section ( " C " ) ]
// Append Rows into a Section
section += [ TextRow ( ) , DateRow ( ) ]尤里卡(Eureka)包括结果建造者,使形式创建变得容易:
// Section + Section
form = ( Section ( " A " ) +++ {
    URLRow ( " UrlRow_f1 " ) { $0 . title = " Url " }
    if something {
        TwitterRow ( " TwitterRow_f2 " ) { $0 . title = " Twitter " }
    } else {
        TwitterRow ( " TwitterRow_f1 " ) { $0 . title = " Twitter " }
    }
    AccountRow ( " AccountRow_f1 " ) { $0 . title = " Account " }
} )

// Form + Section
form +++ {
    if something {
        PhoneRow ( " PhoneRow_f1 " ) { $0 . title = " Phone " }
    } else {
        PhoneRow ( " PhoneRow_f2 " ) { $0 . title = " Phone " }
    }
    PasswordRow ( " PasswordRow_f1 " ) { $0 . title = " Password " }
} @ FormBuilder
var form : Form {
Section ( " Section A " ) { section in
section . tag = " Section_A "
}
if true {
Section ( " Section B " ) { section in
section . tag = " Section_B "
}
}
NameRow ( " NameRow_f1 " ) { $0 . title = " Name " }
}尤里卡(Eureka)包括回调以更改行的外观和行为。
Row是eureka的抽象用途,该用途容纳一个值并包含视图Cell 。该Cell管理视图并子类UITableViewCell 。
这是一个示例:
 let row  = SwitchRow ( " SwitchRow " ) { row in      // initializer
                        row . title = " The title "
                    } . onChange { row in
                        row . title = ( row . value ?? false ) ? " The title expands when on " : " The title "
                        row . updateCell ( )
                    } . cellSetup { cell , row in
                        cell . backgroundColor = . lightGray
                    } . cellUpdate { cell , row in
                        cell . textLabel ? . font = . italicSystemFont ( ofSize : 18.0 )
} 
onChange()
当一行的值更改时调用。您可能有兴趣在此处调整一些参数,甚至使其他一些行出现或消失。
OnCellSelection()
每次用户点击行上的用户都会选择。请注意,这也将被召唤为禁用行,因此您应该使用guard !row.isDisabled else { return }之类的内容在此回调中启动代码
CellSetup()
首先配置单元格时仅调用一次。在此处设置永久设置。
callupdate()
每当单元出现在屏幕上时,请调用。您可以使用CellSetup()上可能不存在的变量更改此处的外观。
oncellhighlightchanged()
每当单元或任何子视图变成或辞职时,都会称呼第一响应者。
OnrowValidationChanged()
每当与行关联的验证错误更改时,请致电。
Onexpandinlinerow()
在扩展内联行之前调用。适用于符合InlineRowType协议的行。
OnCollapseInlinerow()
在倒线行之前打电话。适用于符合InlineRowType协议的行。
onPresent()
在展示另一个视图控制器之前,由一排调用。适用于符合PresenterRowType协议的行。使用它来设置呈现的控制器。
您可以将标题String或自定义View设置为Section的标题或页脚。
 Section ( " Title " )

Section ( header : " Title " , footer : " Footer Title " )

Section ( footer : " Footer Title " ) 您可以从.xib文件使用自定义视图:
 Section ( ) { section in
    var header = HeaderFooterView < MyHeaderNibFile > ( . nibFile ( name : " MyHeaderNibFile " , bundle : nil ) )

    // Will be called every time the header appears on screen
    header . onSetupView = { view , _ in
        // Commonly used to setup texts inside the view
        // Don't change the view hierarchy or size here!
    }
    section . header = header
}或自定义UIView编程创建的
 Section ( ) { section in
    var header = HeaderFooterView < MyCustomUIView > ( . class )
    header . height = { 100 }
    header . onSetupView = { view , _ in
        view . backgroundColor = . red
    }
    section . header = header
}
或者只是用回调构建视图
 Section ( ) { section in
    section . header = {
          var header = HeaderFooterView < UIView > ( . callback ( {
              let view = UIView ( frame : CGRect ( x : 0 , y : 0 , width : 100 , height : 100 ) )
              view . backgroundColor = . red
              return view
          } ) )
          header . height = { 100 }
          return header
        } ( )
}
在这种情况下,我们正在隐藏并显示整个部分。
为了完成此操作,每行都有一个可选类型Condition的hidden变量,可以使用函数或NSPredicate设置该变量。
使用Condition的function情况:
Condition . function ( [ String ] , ( Form ) - > Bool )要通过的String数组应包含该行的行的标签。每次这些行的值更改时,函数都会重新评估。然后,该功能采用Form并返回一个Bool ,指示该行是否应隐藏。这是设置hidden属性的最强大方法,因为它没有明确的限制。
form +++ Section ( )
            <<< SwitchRow ( " switchRowTag " ) {
                $0 . title = " Show message "
            }
            <<< LabelRow ( ) {

                $0 . hidden = Condition . function ( [ " switchRowTag " ] , { form in
                    return ! ( ( form . rowBy ( tag : " switchRowTag " ) as? SwitchRow ) ? . value ?? false )
                } )
                $0 . title = " Switch is on! "
} 
 public enum Condition {
    case function ( [ String ] , ( Form ) -> Bool )
    case predicate ( NSPredicate )
} hidden变量也可以使用NSPRedicate设置。在谓词字符串中,您可以通过标签引用其他行的值,以确定是否应该隐藏或可见一行。这只有在谓词必须检查的行值是nsobject的情况下(字符串和int将在其桥接到其OBJC对应物时起作用,但枚举将无法正常工作,这才能起作用。为什么在更有限的情况下使用谓词会很有用?好吧,它们比功能要简单得多,更短和可读。看看这个示例:
$0 . hidden = Condition . predicate ( NSPredicate ( format : " $switchTag == false " ) )而且我们可以将其写得更短,因为Condition符合ExpressibleByStringLiteral文字:
$0 . hidden = " $switchTag == false "注意:我们将替换标签为'switchtag'而不是“ $ switchtag”的行的值
对于所有这些工作,所有隐含的行都必须具有标签,因为标签将标识它们。
我们还可以通过这样做来隐藏一行:
$0 . hidden = true作为Condition符合ExpressibleByBooleanLiteral 。
不设置hidden变量将使行总是可见。
如果显示表格后,请手动设置隐藏的(或禁用)条件,则可能必须调用row.evaluateHidden()迫使Eureka重新评估新条件。有关更多信息,请参见此常见问题解答部分。
对于部分,这也是如此。这意味着我们可以设置hidden属性以动态显示/隐藏它。
为了禁用行,每行都有一个disabled变量,它也是可选Condition类型属性。该变量也与hidden变量相同,因此它需要行具有标签。
请注意,如果要永久禁用行,也可以将disabled变量设置为true 。
要显示选项列表,尤里卡(Eureka)包括一个特殊的部分,称为SelectableSection 。创建一个时,您需要传递在选项和selectionType中使用的行类型。 selectionType是一个枚举,可以是multipleSelection或singleSelection(enableDeselection: Bool)其中enableDeselection参数可以确定是否可以取消选择所选行。
form +++ SelectableSection < ListCheckRow < String > > ( " Where do you live " , selectionType : . singleSelection ( enableDeselection : true ) )

let continents = [ " Africa " , " Antarctica " , " Asia " , " Australia " , " Europe " , " North America " , " South America " ]
for option in continents {
    form . last! <<< ListCheckRow < String > ( option ) { listRow in
        listRow . title = option
        listRow . selectableValue = option
        listRow . value = nil
    }
} 要创建这样的部分,您必须创建一个符合SelectableRowType协议的行。
 public protocol SelectableRowType : RowType {
    var selectableValue : Value ? { get set }
}此selectableValue是该行值永久存储的位置。 value变量将用于确定是否选择该行,如果选择或否则为“选择”。 Eureka包括使用的ListCheckRow ,例如使用。在示例项目的自定义行中,您还可以找到ImageCheckRow 。
为了轻松获取SelectableSection的选定行/s,有两种方法: selectedRow()和selectedRows() ,可以调用这些方法以获取所选行,以防万一它是SingleSelection部分或所有选定行(如果是MultipleSelection部分)。
此外,您可以使用SelectorViewController的以下属性来设置要按部分进行分组的选项列表:
sectionKeyForValue封闭,应返回特定行值的键。此键后来通过各节破坏选项。
sectionHeaderTitleForKey截止返回特定键的部分标题。默认情况下,返回密钥本身。
sectionFooterTitleForKey封闭式返回特定密钥部分的页脚标题。
尤里卡(Eureka)使用多相位部分支持特定字段(例如触点中的电话号码)的多个值。它使我们可以轻松地创建可插入,可删除和可重新排序的部分。
为了创建一个多价部分,我们必须使用MultivaluedSection类型而不是常规Section类型。 MultivaluedSection扩展了Section ,并具有一些其他属性来配置多相截面行为。
让我们研究一个代码示例...
form +++
    MultivaluedSection ( multivaluedOptions : [ . Reorder , . Insert , . Delete ] ,
                       header : " Multivalued TextField " ,
                       footer : " .Insert adds a 'Add Item' (Add New Tag) button row as last cell. " ) {
        $0 . addButtonProvider = { section in
            return ButtonRow ( ) {
                $0 . title = " Add New Tag "
            }
        }
        $0 . multivaluedRowToInsertAt = { index in
            return NameRow ( ) {
                $0 . placeholder = " Tag Name "
            }
        }
        $0 <<< NameRow ( ) {
            $0 . placeholder = " Tag Name "
        }
    }
以前的代码片段显示了如何创建多估面部分。在这种情况下,我们希望按照多杂志参数指示插入,删除和重新排序行。
addButtonProvider允许我们自定义按钮行,该按钮行插入新行,而multivaluedOptions包含.Insert值。
每当需要插入新的行时,尤里卡(Eureka)调用了multivaluedRowToInsertAt封闭属性。为了提供以添加到多相关部分的行,我们应该设置此属性。尤里卡(Eureka)将索引作为闭合参数传递。请注意,即使在大多数情况下,多相度的部分行是相同的类型,我们也可以返回任何类型的行,甚至是自定义行。
当我们创建一个可插入的多值部分时,Eureka会自动添加一个按钮行。我们可以自定义此按钮行的外观,如我们之前所述。 showInsertIconInAddButton属性指示是否应在按钮的左侧出现Plus按钮(插入样式),默认情况下为true。
在创建可插入部分时,我们需要考虑一些考虑因素。添加到可插入的多价部分中的任何行都应放在尤里卡自动添加以插入新行的行上方。可以通过将这些附加行添加到部分内部的初始化器闭合(截面初始化器的最后一个参数)中来轻松实现这一点,然后Eureka在部分末尾添加了添加插入按钮。
默认情况下,Eureka只有在形式中有多估计分类时,将将表观isEditing设置为true。这将在第一次提出表格时在viewWillAppear中完成。
有关如何使用多相关部分的更多信息,请查看包含几个用法示例的Eureka示例项目。
如果要使用不是ButtonRow添加按钮,则可以使用GenericMultivaluedSection<AddButtonType> ,其中AddButtonType是您要用作添加按钮的行的类型。如果您想使用自定义行更改按钮的UI,这将很有用。
例子:
 GenericMultivaluedSection < LabelRow > ( multivaluedOptions : [ . Reorder , . Insert , . Delete ] , {
    $0 . addButtonProvider = { section in
        return LabelRow ( ) {
            $0 . title = " A Label row as add button "
        }
    }
    // ...
}Eureka 2.0.0介绍了备受要求的内置验证功能。
一排具有Rules的集合和特定配置,该规则确定何时应评估验证规则。
默认情况下有一些规则,但您也可以自己创建新规则。
提供的规则是:
让我们看看如何设置验证规则。
 override func viewDidLoad ( ) {
        super . viewDidLoad ( )
        form
          +++ Section ( header : " Required Rule " , footer : " Options: Validates on change " )

            <<< TextRow ( ) {
                $0 . title = " Required Rule "
                $0 . add ( rule : RuleRequired ( ) )

		// This could also have been achieved using a closure that returns nil if valid, or a ValidationError otherwise.
		/*
		let ruleRequiredViaClosure = RuleClosure<String> { rowValue in
		return (rowValue == nil || rowValue!.isEmpty) ? ValidationError(msg: "Field required!") : nil
		}
		$0.add(rule: ruleRequiredViaClosure)
		*/

                $0 . validationOptions = . validatesOnChange
            }
            . cellUpdate { cell , row in
                if !row . isValid {
                    cell . titleLabel ? . textColor = . systemRed
                }
            }

          +++ Section ( header : " Email Rule, Required Rule " , footer : " Options: Validates on change after blurred " )

            <<< TextRow ( ) {
                $0 . title = " Email Rule "
                $0 . add ( rule : RuleRequired ( ) )
                $0 . add ( rule : RuleEmail ( ) )
                $0 . validationOptions = . validatesOnChangeAfterBlurred
            }
            . cellUpdate { cell , row in
                if !row . isValid {
                    cell . titleLabel ? . textColor = . systemRed
                }
}如您在上一个代码段中所看到的,我们可以通过调用ROW的add(rule:)函数来设置与行相同的规则。
行还提供func remove(ruleWithIdentifier identifier: String)以删除规则。为了使用它,我们必须在创建规则后将ID分配给该规则。
有时,我们要在一排中使用的规则集合与我们想要在许多其他行上使用的规则相同。在这种情况下,我们可以使用验证规则集合的RuleSet集来设置所有验证规则。
 var rules = RuleSet < String > ( )
rules . add ( rule : RuleRequired ( ) )
rules . add ( rule : RuleEmail ( ) )

let row = TextRow ( ) {
            $0 . title = " Email Rule "
            $0 . add ( ruleSet : rules )
            $0 . validationOptions = . validatesOnChangeAfterBlurred
}尤里卡(Eureka)允许我们指定何时应评估验证规则。我们可以通过设置validationOptions Row的属性来做到这一点,该属性可以具有以下值:
.validatesOnChange验证每行值更改时。.validatesOnBlur (默认值)在单元辞职后立即验证。不适用于所有行。.validatesOnChangeAfterBlurred验证第一次辞职后行变化时验证。.validatesOnDemand我们应通过调用validate()方法来手动验证行或形式。如果要验证整个表单(所有行),则可以手动调用form validate()方法。
每一行都有validationErrors属性,可用于检索所有验证错误。此属性仅保留最新行验证执行的验证错误列表,这意味着它不评估行的验证规则。
正如预期的那样,规则必须使用与行对象相同的类型。要格外小心检查使用的行类型。您可能会看到一个编译器错误(“呼叫中的不正确的Arugment标签(具有'规则:'预期'规则表:')“混合类型时并未指向问题。
通过使用滑动操作,我们可以定义每行的多个leadingSwipe和trailingSwipe动作。由于滑动操作取决于iOS系统功能,因此仅在iOS 11.0+上使用leadingSwipe 。
让我们看看如何定义滑动动作。
 let row = TextRow ( ) {
            let deleteAction = SwipeAction (
                style : . destructive ,
                title : " Delete " ,
                handler : { ( action , row , completionHandler ) in
                    //add your code here.
                    //make sure you call the completionHandler once done.
                    completionHandler ? ( true )
                } )
            deleteAction . image = UIImage ( named : " icon-trash " )

            $0 . trailingSwipe . actions = [ deleteAction ]
            $0 . trailingSwipe . performsFirstActionWithFullSwipe = true

            //please be aware: `leadingSwipe` is only available on iOS 11+ only
            let infoAction = SwipeAction (
                style : . normal ,
                title : " Info " ,
                handler : { ( action , row , completionHandler ) in
                    //add your code here.
                    //make sure you call the completionHandler once done.
                    completionHandler ? ( true )
                } )
            infoAction . actionBackgroundColor = . blue
            infoAction . image = UIImage ( named : " icon-info " )

            $0 . leadingSwipe . actions = [ infoAction ]
            $0 . leadingSwipe . performsFirstActionWithFullSwipe = true
}滑动操作需要tableView.isEditing设置为false 。如果以形式(在viewWillAppear )中有多估计分节,则尤里卡(Eureka)将其设置为true 。如果您以相同形式的形式具有多相关性和滑动操作,则应根据自己的需求进行isEditing 。
非常普遍的是,您需要与尤里卡(Eureka)中包含的行不同的行。如果是这种情况,则必须创建自己的行,但这应该不难。您可以阅读有关如何创建自定义行以入门的教程。您可能还想查看Eurekacommunity,其中包括一些额外的行,准备添加到Eureka中。
要创建具有自定义行为和外观的行,您可能需要创建Row和Cell格的子类。
请记住,该Row是Eureka使用的抽象,而Cell是负责视图的实际UITableViewCell 。由于Row包含Cell ,因此必须针对相同的值类型定义Row和Cell 。
// Custom Cell with value type: Bool
// The cell is defined using a .xib, so we can set outlets :)
public class CustomCell : Cell < Bool > , CellType {
    @ IBOutlet weak var switchControl : UISwitch !
    @ IBOutlet weak var label : UILabel !

    public override func setup ( ) {
        super . setup ( )
        switchControl . addTarget ( self , action : #selector ( CustomCell . switchValueChanged ) , for : . valueChanged )
    }

    func switchValueChanged ( ) {
        row . value = switchControl . on
        row . updateCell ( ) // Re-draws the cell which calls 'update' bellow
    }

    public override func update ( ) {
        super . update ( )
        backgroundColor = ( row . value ?? false ) ? . white : . black
    }
}

// The custom Row also has the cell: CustomCell and its correspond value
public final class CustomRow : Row < CustomCell > , RowType {
    required public init ( tag : String ? ) {
        super . init ( tag : tag )
        // We set the cellProvider to load the .xib corresponding to our cell
        cellProvider = CellProvider < CustomCell > ( nibName : " CustomCell " )
    }
}
结果: 
就像回调CellSetup和Cellupdate一样,该Cell具有设置和更新方法,您可以在其中自定义它。
内联行是一种特定的行类型,它在其下方动态显示一行,通常每当挖掘行时,在扩展的模式和折叠模式之间会发生变化。
因此,要创建一个内联行,我们需要2行,这是“始终”可见的行,以及将展开/折叠的行。
另一个要求是,这2行的值类型必须相同。这意味着,如果一排具有String值,则另一个行也必须具有String值。
一旦有了这2行,我们应该使第一行类型符合InlineRowType 。该协议要求您定义InlineRow typealias和setupInlineRow函数。 InlineRow类型将是将展开/崩溃的行的类型。以此为例:
 class PickerInlineRow < T > : Row < PickerInlineCell < T > > where T : Equatable {

    public typealias InlineRow = PickerRow < T >
    open var options = [ T ] ( )

    required public init ( tag : String ? ) {
        super . init ( tag : tag )
    }

    public func setupInlineRow ( _ inlineRow : InlineRow ) {
        inlineRow . options = self . options
        inlineRow . displayValueFor = self . displayValueFor
        inlineRow . cell . height = { UITableViewAutomaticDimension }
    }
} InlineRowType还将在您的内联行中添加一些方法:
 func expandInlineRow ( )
func collapseInlineRow ( )
func toggleInlineRow ( )
这些方法应该可以正常工作,但是如果您想覆盖它们,请记住, toggleInlineRow必须调用expandInlineRow和collapseInlineRow 。
最后,当选择行时,您必须调用toggleInlineRow() ,例如customDidSelect :
 public override func customDidSelect ( ) {
    super . customDidSelect ( )
    if !isDisabled {
        toggleInlineRow ( )
    }
}注意:主持人行是一行,它介绍了新的UiviewController。
要创建一个自定义主持人行,您必须创建一个符合PresenterRowType协议的类。强烈建议您将其SelectorRow子选择,因为它确实符合该协议并添加其他有用的功能。
当前的eROWType协议定义如下:
 public protocol PresenterRowType : TypedRowType {

     associatedtype PresentedControllerType : UIViewController , TypedRowControllerType

     /// Defines how the view controller will be presented, pushed, etc.
     var presentationMode : PresentationMode < PresentedControllerType > ? { get set }

     /// Will be called before the presentation occurs.
     var onPresentCallback : ( ( FormViewController , PresentedControllerType ) -> Void ) ? { get set }
}当该行即将介绍另一个视图控制器时,将调用OnPresentCallback。这是在SelectorRow中完成的,因此,如果您不分类,则必须自己称呼它。
presentationMode定义了控制器的呈现方式以及呈现哪个控制器的方式。本演示文稿可以使用SEGUE标识符,SEGUE类,模仿控制器或推向特定的视图控制器。例如,可以这样定义自定义pushrow:
让我们看看一个例子。
/// Generic row type where a user must select a value among several options.
open class SelectorRow < Cell : CellType > : OptionsRow < Cell > , PresenterRowType where Cell : BaseCell {


    /// Defines how the view controller will be presented, pushed, etc.
    open var presentationMode : PresentationMode < SelectorViewController < SelectorRow < Cell > > > ?

    /// Will be called before the presentation occurs.
    open var onPresentCallback : ( ( FormViewController , SelectorViewController < SelectorRow < Cell > > ) -> Void ) ?

    required public init ( tag : String ? ) {
        super . init ( tag : tag )
    }

    /**
     Extends `didSelect` method
     */
    open override func customDidSelect ( ) {
        super . customDidSelect ( )
        guard let presentationMode = presentationMode , !isDisabled else { return }
        if let controller = presentationMode . makeController ( ) {
            controller . row = self
            controller . title = selectorTitle ?? controller . title
            onPresentCallback ? ( cell . formViewController ( ) ! , controller )
            presentationMode . present ( controller , row : self , presentingController : self . cell . formViewController ( ) ! )
        } else {
            presentationMode . present ( nil , row : self , presentingController : self . cell . formViewController ( ) ! )
        }
    }

    /**
     Prepares the pushed row setting its title and completion callback.
     */
    open override func prepare ( for segue : UIStoryboardSegue ) {
        super . prepare ( for : segue )
        guard let rowVC = segue . destination as Any as? SelectorViewController < SelectorRow < Cell > > else { return }
        rowVC . title = selectorTitle ?? rowVC . title
        rowVC . onDismissCallback = presentationMode ? . onDismissCallback ?? rowVC . onDismissCallback
        onPresentCallback ? ( cell . formViewController ( ) ! , rowVC )
        rowVC . row = self
    }
}


// SelectorRow conforms to PresenterRowType
public final class CustomPushRow < T : Equatable > : SelectorRow < PushSelectorCell < T > > , RowType {

    public required init ( tag : String ? ) {
        super . init ( tag : tag )
        presentationMode = . show ( controllerProvider : ControllerProvider . callback {
            return SelectorViewController < T > ( ) { _ in }
            } , onDismiss : { vc in
                _ = vc . navigationController ? . popViewController ( animated : true )
        } )
    }
}有时,我们想更改一个行之一的UI外观,但不要更改行类型和与一行相关的所有逻辑。如果您使用的是从笔尖文件实例化的单元格,目前有一种方法可以做到这一点。当前,尤里卡(Eureka)的核心行没有从笔尖文件实例化,但是尤里卡科姆(Eurekacommunity)中的某些自定义行是搬到那里的邮政编码。
您要做的是:
cellProvider变量来使用此笔尖来完成的。您应该在每种混凝土实例化或使用defaultRowInitializer中在初始评估器中执行此操作。例如: <<< PostalAddressRow ( ) {
$0 . cellProvider = CellProvider < PostalAddressCell > ( nibName : " CustomNib " , bundle : Bundle . main )
}您还可以为此创建一个新的行。在这种情况下,尝试从与您要更改以继承其逻辑的行相同的超类。
当您这样做时,有一些事情要考虑:
Unknown class <YOUR_CLASS_NAME> in Interface Builder file ,则可能是您必须在代码中的某个地方实例化该新类型以在运行时加载它。在我的情况下打电话let t = YourClass.self 。 标签行 | 按钮行 | 检查行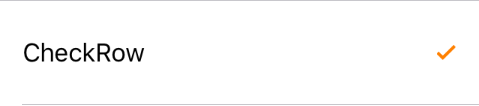 |
开关行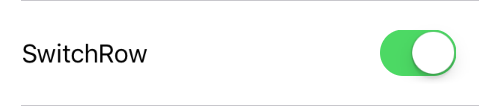 | 滑块行 | 步行行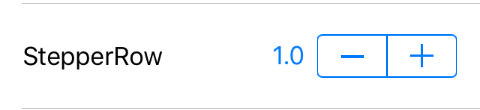 |
文本区域行 |
这些行在单元的右侧有一个文本场。它们之间的每个区别在于不同的资本化,自动更正和键盘类型配置。
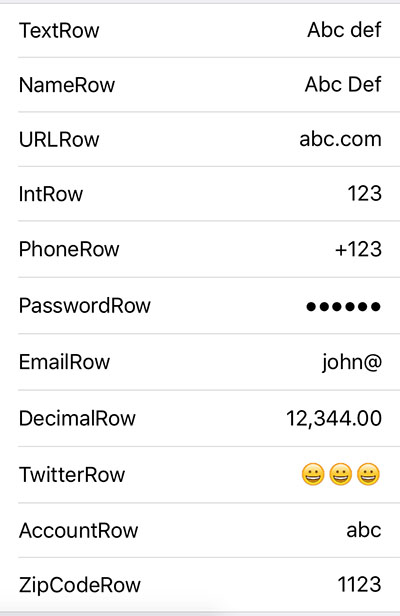 | 德文斯特 Namerow urlrow 促进 Phonerow passwordrow 电子邮件罗 十进制 Twitterrow Accountrow zipcoderow |
上面的所有FieldRow类型都具有NSFormatter类型的formatter属性,可以设置该属性以确定应如何显示该行的值。尤里卡( DecimalFormatter )包含十进制标记后,具有两个数字的数字的自定义格式化器。该示例项目还包含一个CurrencyFormatter ,该货币形式根据用户的语言环境显示数字作为货币。
默认情况下,设置行的formatter只是在不编辑时显示值的方式。要在编辑行时格式化值,请在初始化行时将useFormatterDuringInput设置为true 。格式化值为编辑时可能需要更新光标位置,而尤里卡(Eureka)提供了以下协议,该协议应符合以处理光标位置:
 public protocol FormatterProtocol {
    func getNewPosition ( forPosition forPosition : UITextPosition , inTextInput textInput : UITextInput , oldValue : String ? , newValue : String ? ) -> UITextPosition
}
此外, FieldRow类型具有useFormatterOnDidBeginEditing属性。当使用允许小数值并符合用户语言环境(例如DecimalFormatter )的格式化器的DecimalRow ,如果使用useFormatterDuringInput false是false ,则必须将useFormatterOnDidBeginEditing设置为true ,以使其在键盘上编辑的小数符号匹配。
日期行保留一个日期,并允许我们通过UIDESPICKER控件设置新值。 UIDESPICKER的模式以及显示日期选择器视图的方式是它们之间的变化。
日期行 键盘中显示的选择器。 | 日期行(内联)  该行扩展。 | 日期行(Picker)  选择器总是可见的。 |
尤里卡(Eureka
这些行带有用户必须选择的相关选项列表。
 <<< ActionSheetRow < String > ( ) {
                $0 . title = " ActionSheetRow "
                $0 . selectorTitle = " Pick a number "
                $0 . options = [ " One " , " Two " , " Three " ]
                $0 . value = " Two "    // initially selected
            }
警报行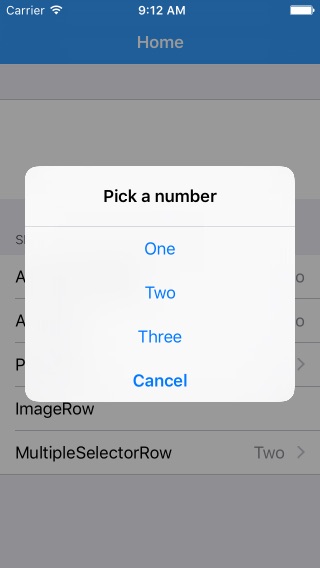 将显示一个警报,其中有选项可供选择。 | ActionSheet行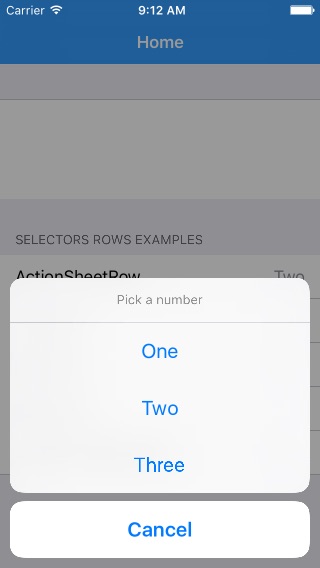 将显示一个动作表,其中包括可供选择的选项。 | 推行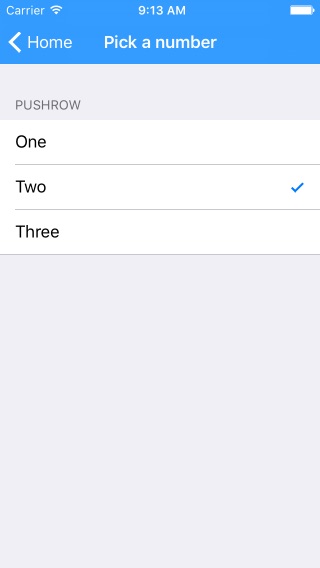 将推向新的控制器,从哪里选择使用检查行列出的选项。 | 多个选择器行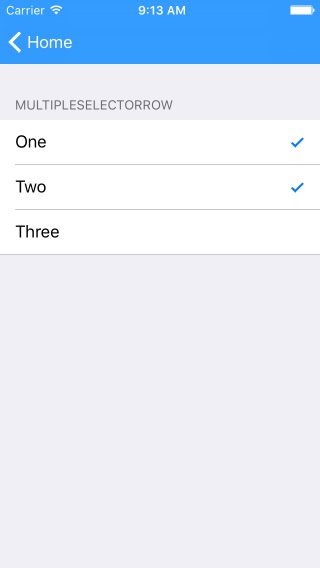 像推杆一样,但允许选择多个选项。 |
分段行 | 分段行(w/title) | 选择器行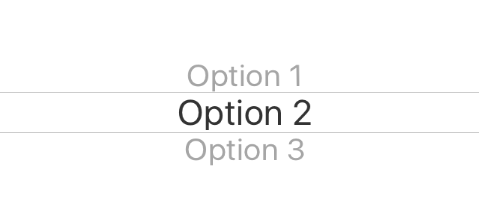 通过选择器视图提供通用类型的选项 (也有选择器内联行) |
让我们知道,我们很高兴在这里提到它。 :)
Cocoapods是可可项目的依赖性经理。
将尤里卡(Eureka)指定到您的项目的Podfile中:
 source 'https://github.com/CocoaPods/Specs.git'
platform :ios , '9.0'
use_frameworks!

pod 'Eureka'
然后运行以下命令:
$ pod installSwift软件包管理器是管理Swift代码分布的工具。
设置Package.swift后,Swift清单文件后,您可以将Eureka添加为依赖性,通过将其添加到Package.swift的依赖项值中。
依赖项:[.package(url:“ https://github.com/xmartlabs/eureka.git”,来自:“ 5.5.0”)]
迦太基是可可的简单,分散的依赖性经理。
将尤里卡(Eureka)指定到您的项目的Cartfile :
github "xmartlabs/Eureka" ~> 5.5
$ git submodule add https://github.com/xmartlabs/Eureka.git打开由以前的git子模块命令创建的Eureka文件夹,然后将eureka.xcodeproj拖到应用程序Xcode项目的项目导航器中。
在项目导航器中选择eureka.xcodeproj,并通过应用程序部署目标验证部署目标匹配。
在XCode导航中选择您的项目,然后从侧边栏中选择您的应用程序目标。接下来,选择“常规”选项卡,然后单击“嵌入式二进制文件”部分下的 +按钮。
选择Eureka.framework ,我们完成了!
eureka-forms )。贡献之前,请检查贡献文件以获取更多信息。
如果您在应用程序中使用Eureka ,我们很想听听它!在Twitter上给我们一条线。
每个行都有以下属性:
/// Block variable used to get the String that should be displayed for the value of this row.
public var displayValueFor : ( ( T ? ) -> String ? ) ? = {
    return $0 . map { String ( describing : $0 ) }
}您可以根据要显示的字符串值设置displayValueFor 。
我们可以通过调用Form类展示的以下任何功能来获得特定的行:
 public func rowBy < T : Equatable > ( tag : String ) -> RowOf < T > ?
public func rowBy < Row : RowType > ( tag : String ) -> Row ?
public func rowBy ( tag : String ) -> BaseRow ?
例如:
 let dateRow : DateRow ? = form . rowBy ( tag : " dateRowTag " )
let labelRow : LabelRow ? = form . rowBy ( tag : " labelRowTag " )

let dateRow2 : Row < DateCell > ? = form . rowBy ( tag : " dateRowTag " )

let labelRow2 : BaseRow ? = form . rowBy ( tag : " labelRowTag " ) let section : Section ? = form . sectionBy ( tag : " sectionTag " ) 调用setValues(values: [String: Any?])哪个通过Form类公开。
例如:
form . setValues ( [ " IntRowTag " : 8 , " TextRowTag " : " Hello world! " , " PushRowTag " : Company ( name : " Xmartlabs " ) ] )其中"IntRowTag" , "TextRowTag" , "PushRowTag"是行标签(每个标签都唯一地标识了一行)和8 , "Hello world!" , Company(name:"Xmartlabs")是要分配的相应行值。
行的值类型必须与相应字典值的值类型匹配,否则将分配零。
如果已经显示了表单,则必须通过重新加载表view tableView.reloadData()或调用updateCell()为每个可见行来重新加载可见行。
设置条件后,未自动评估此条件。如果您想立即进行操作,则可以致电.evaluateHidden()或.evaluateDisabled() 。
当一行添加到表单中,而行取决于更改时,此功能只是调用。如果显示行时的条件已更改,则必须手动对其进行重新评估。
看看这个问题。
section . header = HeaderFooterView ( title : " Header title ( variable ) " ) // use String interpolation
//or
var header = HeaderFooterView < UIView > ( . class ) // most flexible way to set up a header using any view type
header . height = { 60 }  // height can be calculated
header . onSetupView = { view , section in  // each time the view is about to be displayed onSetupView is invoked.
    view . backgroundColor = . orange
}
section . header = headersection . reload ( ) 提供了selectableRowSetup , selectableRowCellUpdate和selectableRowCellSetup属性,以便能够自定义SelectorViewController和MultipleselectorViewController选择单元格。
 let row = PushRow < Emoji > ( ) {
              $0 . title = " PushRow "
              $0 . options = [ ?? , ? , ?? , ? , ? , ? ]
              $0 . value = ??
              $0 . selectorTitle = " Choose an Emoji! "
          } . onPresent { from , to in
              to . dismissOnSelection = false
              to . dismissOnChange = false
              to . selectableRowSetup = { row in
                  row . cellProvider = CellProvider < ListCheckCell < Emoji > > ( nibName : " EmojiCell " , bundle : Bundle . main )
              }
              to . selectableRowCellUpdate = { cell , row in
                  cell . textLabel ? . text = " Text " + row . selectableValue!  // customization
                  cell . detailTextLabel ? . text = " Detail " +  row . selectableValue!
              }
} 正如我们所说的, Form和Section类型符合MutableCollection和RangeReplaceableCollection 。形式是一组部分,部分是一组行。
RangeReplaceableCollection协议扩展提供了许多有用的方法来修改收集。
 extension RangeReplaceableCollection {
    public mutating func append ( _ newElement : Self . Element )
    public mutating func append < S > ( contentsOf newElements : S ) where S : Sequence , Self . Element == S . Element
    public mutating func insert ( _ newElement : Self . Element , at i : Self . Index )
    public mutating func insert < S > ( contentsOf newElements : S , at i : Self . Index ) where S : Collection , Self . Element == S . Element
    public mutating func remove ( at i : Self . Index ) -> Self . Element
    public mutating func removeSubrange ( _ bounds : Range < Self . Index > )
    public mutating func removeFirst ( _ n : Int )
    public mutating func removeFirst ( ) -> Self . Element
    public mutating func removeAll ( keepingCapacity keepCapacity : Bool )
    public mutating func reserveCapacity ( _ n : Self . IndexDistance )
}
这些方法在内部用于实现自定义运算符,如显示的Bellow所示:
 public func +++ ( left : Form , right : Section ) -> Form {
    left . append ( right )
    return left
}

public func += < C : Collection > ( inout lhs : Form , rhs : C ) where C . Element == Section {
    lhs . append ( contentsOf : rhs )
}

public func << < ( left : Section , right : BaseRow ) -> Section {
    left . append ( right )
    return left
}

public func += < C : Collection > ( inout lhs : Section , rhs : C ) where C . Element == BaseRow {
    lhs . append ( contentsOf : rhs )
}
您可以在此处查看其余的自定义操作员。
由您决定是否要使用Eureka自定义操作员。
该表格始终显示在UITableView中。您可以在故事板上设置视图控制器,并在希望它的位置添加UitableView,然后将插座连接到FormViewController的tableView变量。这使您可以为表格定义自定义框架(可能具有约束)。
所有这些也可以通过编程更改的框架,边距等来完成您的FormViewController的tableView 。
这样我们就可以使尤里卡变得更好! 
可以在changelog.md文件中找到。


